| Jul 13, 2011 - 1:15 PM | Forum: Exterior Styling · Post Preview: #924384 · Replies: 23 · Views: 6,738 |
|
Enthusiast  Joined Aug 15, '10 From UK Currently Offline |
Try this one out...the wiper base is still there but hopefully it gives you an idea. I was tempted to remove it totally after I re-sprayed it but thought better of it. I did remove the radio hole which I wrote a how to guide. 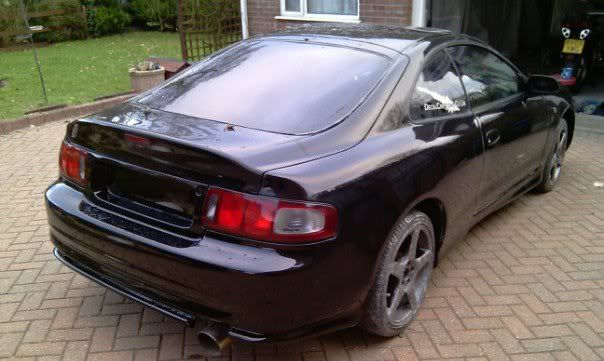 |
| Jun 7, 2011 - 4:28 AM | Forum: Exterior Styling · Post Preview: #919848 · Replies: 20 · Views: 3,480 |
|
Enthusiast  Joined Aug 15, '10 From UK Currently Offline |
i have the same compressor, but the sander keeps spitting water, how did u solve it? Usually you should have an air regulator/air filter unit which helps collects moisture in the airline. Plus you could also get an inline moisture trap that fits at the end of your pipeline...just before your air tool to collect the last bit of moisture. If you look at the picture of the spray gun hanging up in his booth...the green unit the last bit of moisture control. |
| Jun 2, 2011 - 9:20 AM | Forum: Exterior Styling · Post Preview: #919096 · Replies: 115 · Views: 29,593 |
|
Enthusiast  Joined Aug 15, '10 From UK Currently Offline |
Something for a bit of inspiration...photo-chopped but looking sweet:  |
| Jun 2, 2011 - 7:42 AM | Forum: Exterior Styling · Post Preview: #919080 · Replies: 21 · Views: 11,898 |
|
Enthusiast  Joined Aug 15, '10 From UK Currently Offline |
It is slightly more fiddly for the rear washer jet as I didn't have too much slack in the rubber tubing, but it fits nicely. |
| Jun 1, 2011 - 6:16 PM | Forum: Exterior Styling · Post Preview: #918996 · Replies: 21 · Views: 11,898 |
|
Enthusiast  Joined Aug 15, '10 From UK Currently Offline |
So the Camry ones don't lock in or the Volvo ones don't lock in? I'll try find some newer Toyotas and play around with their windscreen washer then find some Toyota P/N's I have the Volvo ones on the front and the rear and they all click into place nicely like an OEM fit. |
| May 30, 2011 - 7:01 AM | Forum: Exterior Styling · Post Preview: #918626 · Replies: 21 · Views: 11,898 |
|
Enthusiast  Joined Aug 15, '10 From UK Currently Offline |
One of the mods I did when I re-sprayed the Celica...nice lower profile jet and finer spray. |
| May 27, 2011 - 2:28 PM | Forum: Exterior Styling · Post Preview: #918225 · Replies: 20 · Views: 3,480 |
|
Enthusiast  Joined Aug 15, '10 From UK Currently Offline |
Looks like you are getting on nicely...for some tips and ideas on how to blend the paint and show others what is involved, can I recommend looking for videos by a guy called JIMMO4LIFE on Youtube. He has got some good videos on there with text subtitles to explain as he goes. |
| Apr 19, 2011 - 2:23 PM | Forum: Exterior Styling · Post Preview: #912184 · Replies: 5 · Views: 1,135 |
|
Enthusiast  Joined Aug 15, '10 From UK Currently Offline |
This is the rear of the Emblem I took off the car when I taking a molding of the Horny Logos I created: 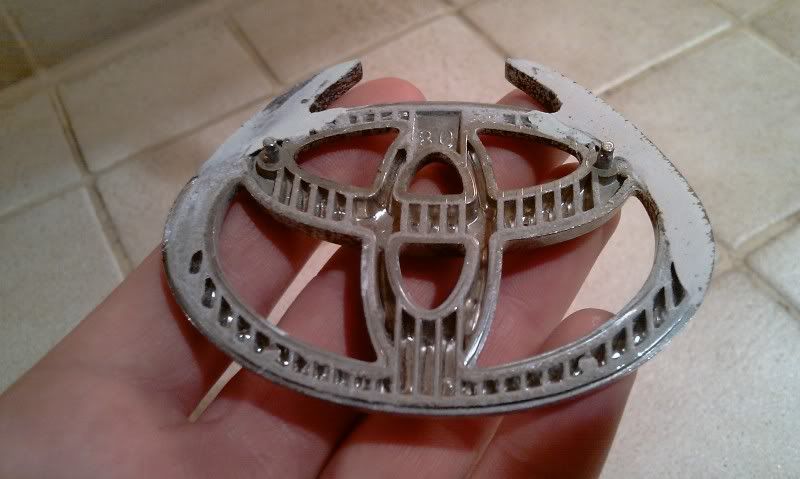 |
| Apr 19, 2011 - 2:10 PM | Forum: Exterior Styling · Post Preview: #912180 · Replies: 5 · Views: 1,135 |
|
Enthusiast  Joined Aug 15, '10 From UK Currently Offline |
I believe it has two pins on it...lateral and opposite to the Front Logo. |
| Mar 7, 2011 - 6:23 PM | Forum: General Discussion · Post Preview: #905190 · Replies: 12 · Views: 2,825 |
|
Enthusiast  Joined Aug 15, '10 From UK Currently Offline |
Try using a Claybar if normal cleaning solutions and rags don't remove it. I used one on my Windscreen when I accidentaly got primer overspray on it. |
| Feb 20, 2011 - 6:58 AM | Forum: Exterior Styling · Post Preview: #902244 · Replies: 3 · Views: 1,568 |
|
Enthusiast  Joined Aug 15, '10 From UK Currently Offline |
Hi there...when I re-sprayed my Celica you can remove it from the door. Best way I found to remove it is wind your window down all the way, shine a torch down the window channel. You should see some blue clips that hold the weather strip in place. It may need a little persuasion to unclip but once the first one it down, the rest will follow. |
| Jan 22, 2011 - 7:38 PM | Forum: Exterior Styling · Post Preview: #896568 · Replies: 4 · Views: 1,515 |
|
Enthusiast  Joined Aug 15, '10 From UK Currently Offline |
If it has been painted with a single stage black with no clear coat over it...you could try some paint thinner on a rag and see if it wipes off. If there is the original clear coat under the black, it may need buffing back to a shine. Usually the original paint or clear coat gets a surface keyed up (sanded) to create a rough surface for the new paint to stick to. |
| Jan 18, 2011 - 3:18 PM | Forum: Exterior Styling · Post Preview: #895703 · Replies: 6 · Views: 1,924 |
|
Enthusiast  Joined Aug 15, '10 From UK Currently Offline |
Go for it don't be shy... |
| Jan 18, 2011 - 12:50 PM | Forum: Exterior Styling · Post Preview: #895679 · Replies: 6 · Views: 1,924 |
|
Enthusiast  Joined Aug 15, '10 From UK Currently Offline |
Next step is the painting and blending process...excuse using different car but the process is the same: 1. Mask off panel and surrounding area of car...otherwise the rest of the car will fell like sandpaper if overspray lands on paint. 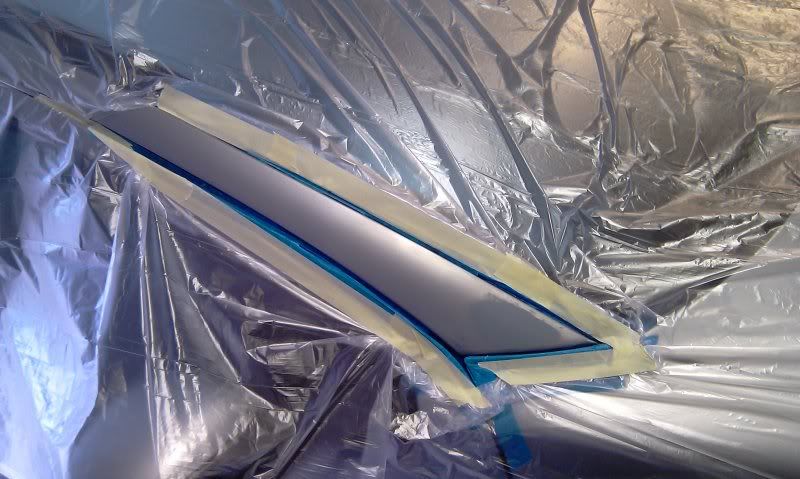 2. After 3 light coats of light metallic silver...each one blended further up the panel than the previous. 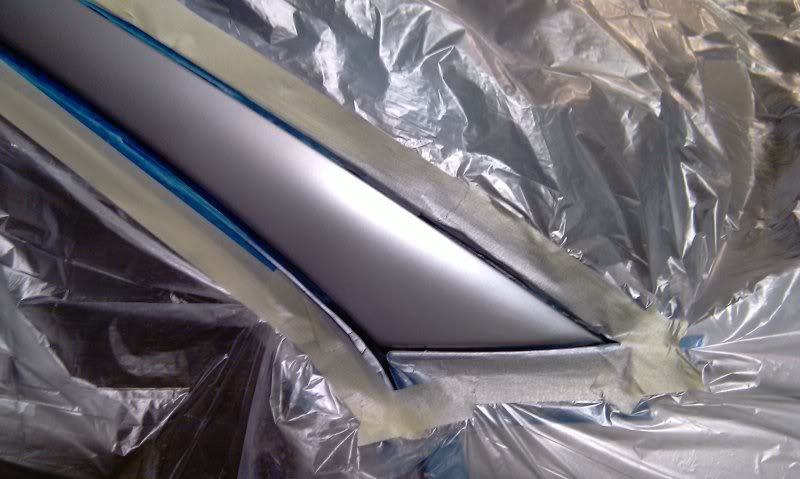 3. After base layer has flashed off...so all solvents have evaporated...1st layer of clear coat just at base of repair. 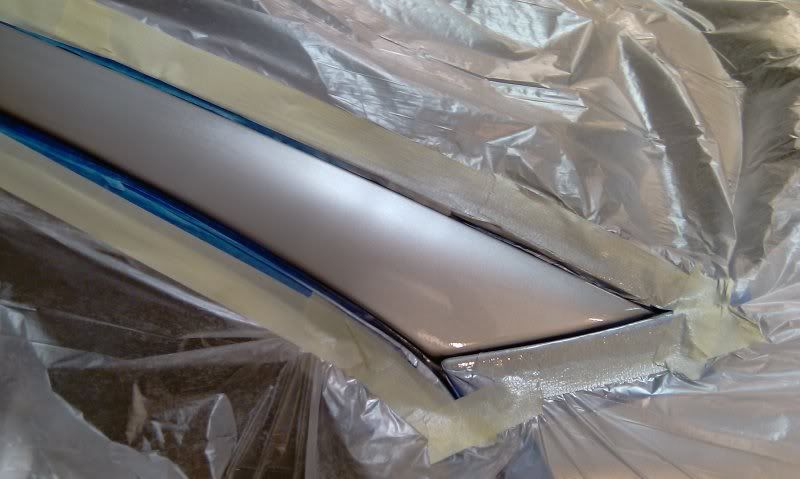 4. 2nd layer of clear coat...starting from bottom but slightly further up panel than the 1st layer. 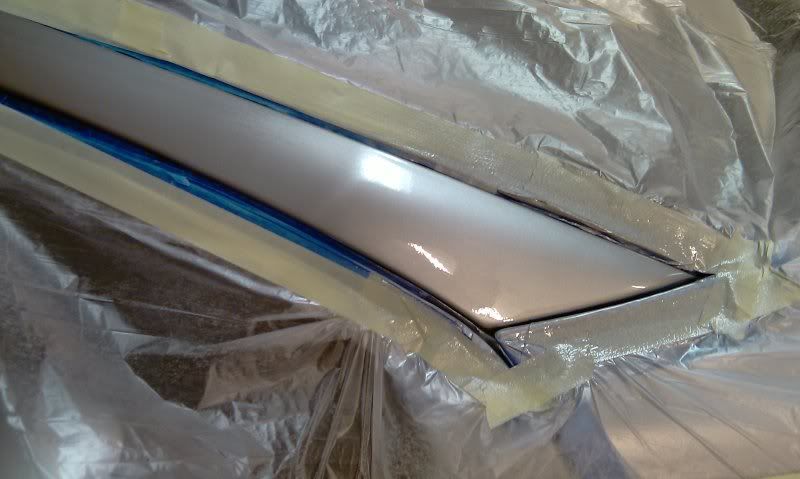 5. 3rd layer of clear coat...again slightly further up panel than the 2nd...but still within the prapared area. 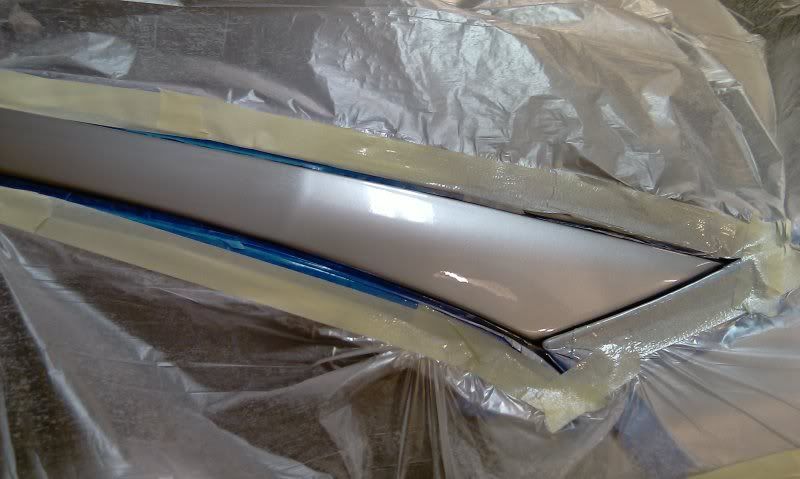 6. Now you can either just use another clear coat layer and cover the whole panel or use a blending clear coat as shown below to blend the new clear into the old clear. 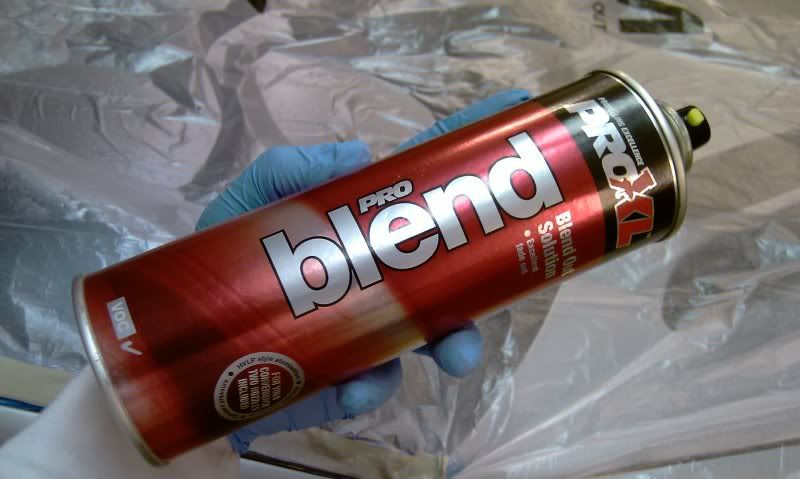 7. Clear coat blending agent used at edge of new clear and blending into old clear coat area. After clear coat hardens for 24 hours...compound and polish to complete the job 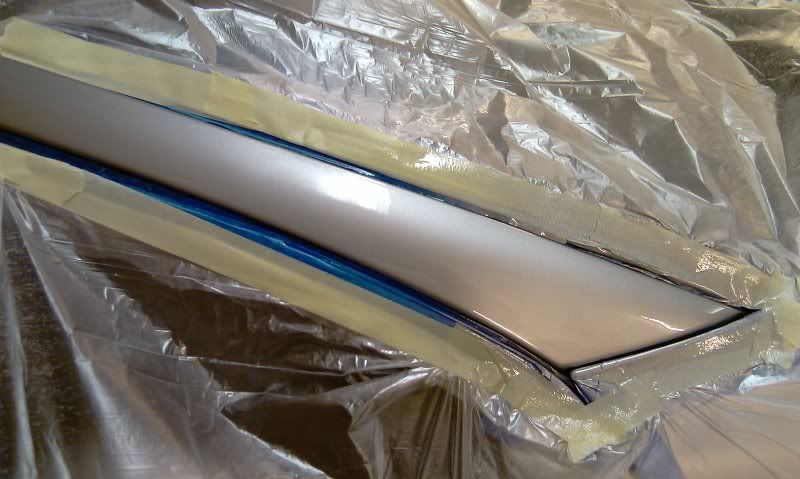 |
| Jan 18, 2011 - 12:35 PM | Forum: Exterior Styling · Post Preview: #895673 · Replies: 6 · Views: 1,924 |
|
Enthusiast  Joined Aug 15, '10 From UK Currently Offline |
It's usually best to leave it a couple of days for the primer to cure fully...plus any shrinking etc has completed. Onto Primer sanding Stage: 1. Apply guide coat over primer. 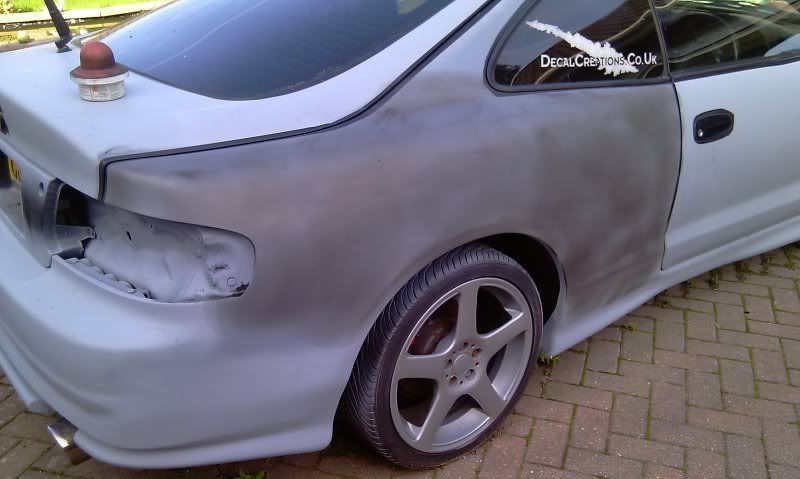 2. Using 320grit sand in an x-pattern...this will help you follow body contours and shows up any low spots. 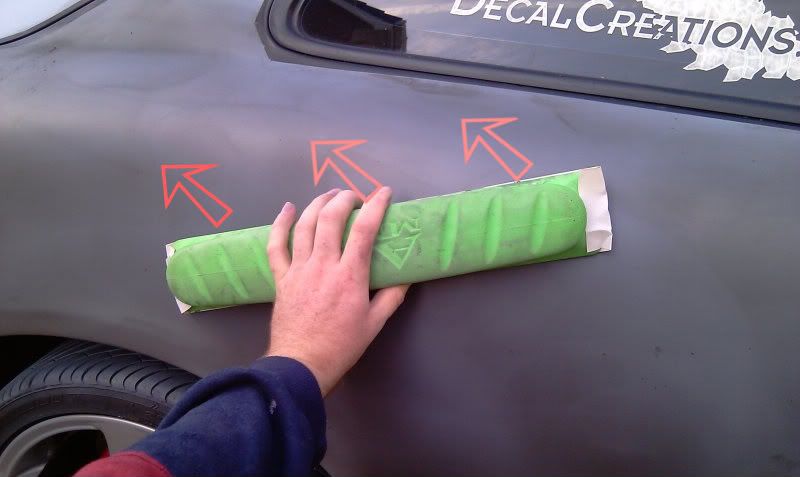 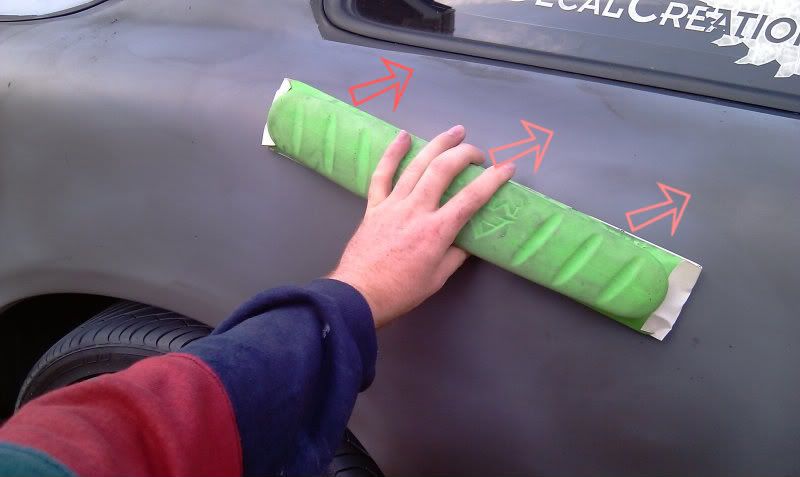 3. Here you can see the use of guide coat has highlighted a low spot which would have ruined the final paint. If this happens, you may need to put another layer of fine filler or stopper and re-prime the spot. 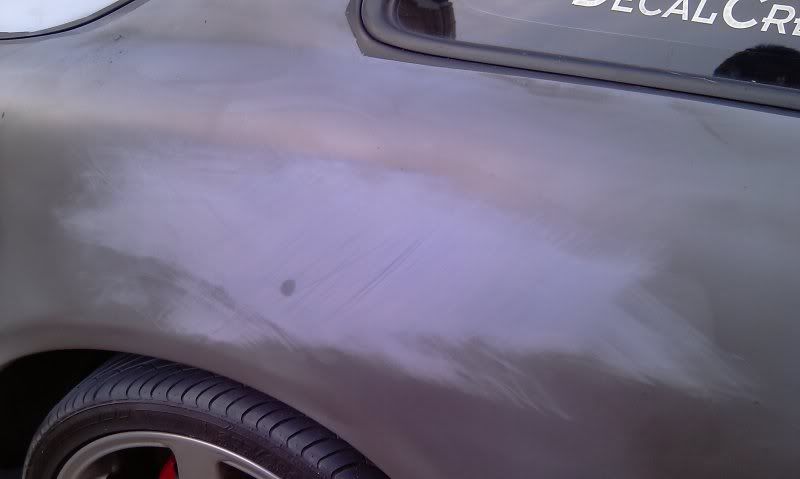 |
| Jan 18, 2011 - 12:23 PM | Forum: Exterior Styling · Post Preview: #895670 · Replies: 6 · Views: 1,924 |
|
Enthusiast  Joined Aug 15, '10 From UK Currently Offline |
1. Using 80 Grit sandpaper and feather surrounding area ready for body filler. 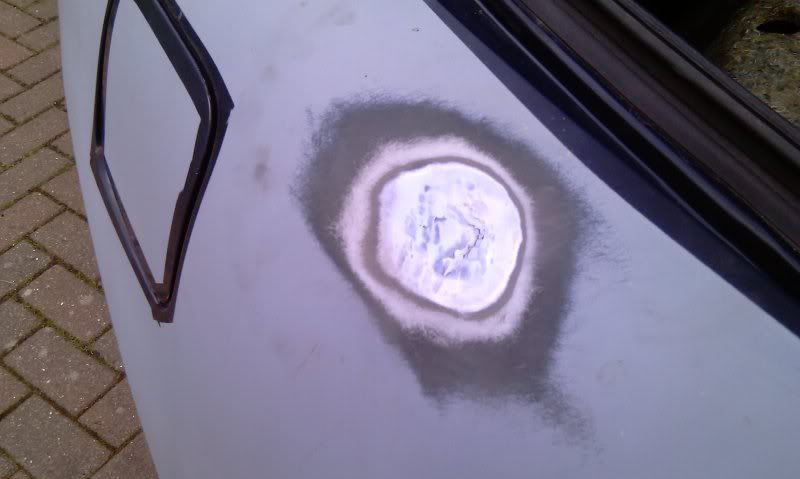 2. Body filler applied over total repair area, following body contour, ready to be sanded smooth. 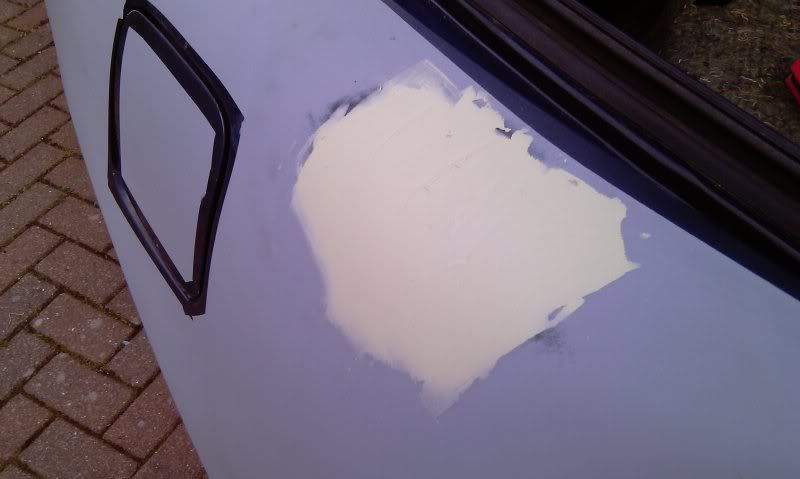 3. Starting with 80 Grit sandpaper then 120 Grit sandpaper...start shaping the body filler. 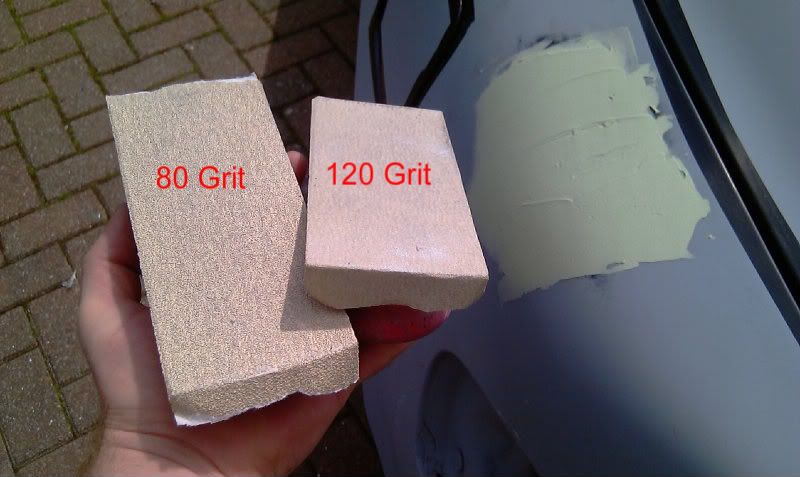 4. Once the edges of body filler start to go milky...stop. Another layer of body filler required to fill in area in centre. 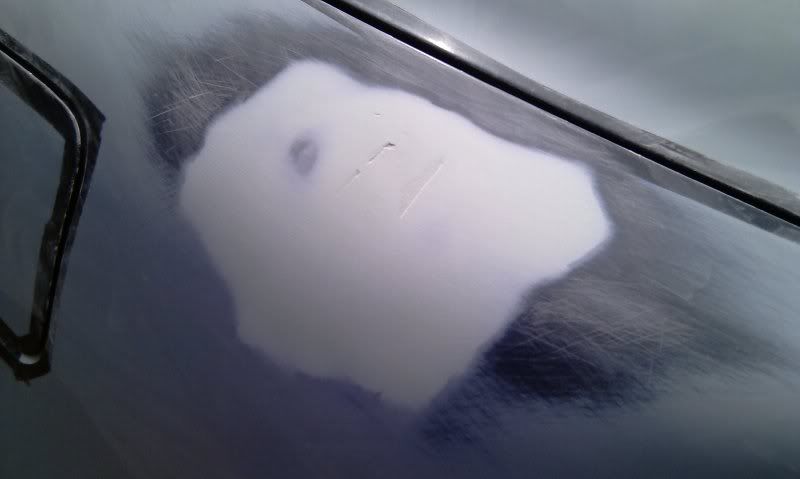 5. The second layer of body filler to fill in lower areas in original repair area. 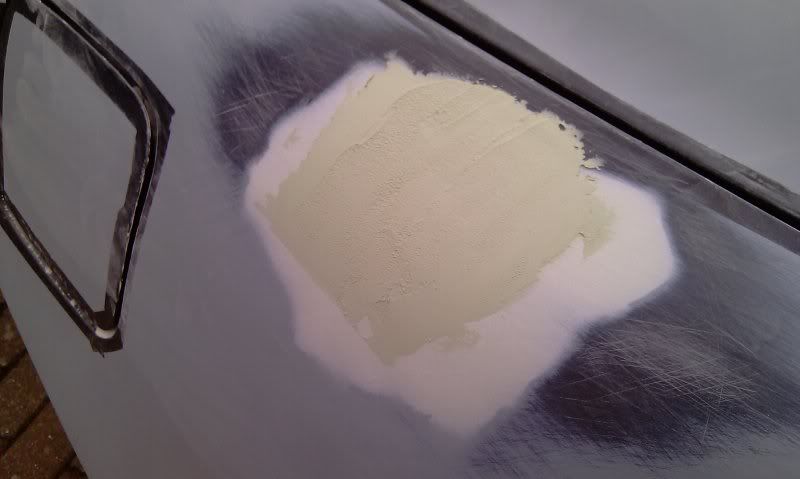 6. Sanded down with 80 Grit then 120 Grit sandpaper until edges start turning milky. 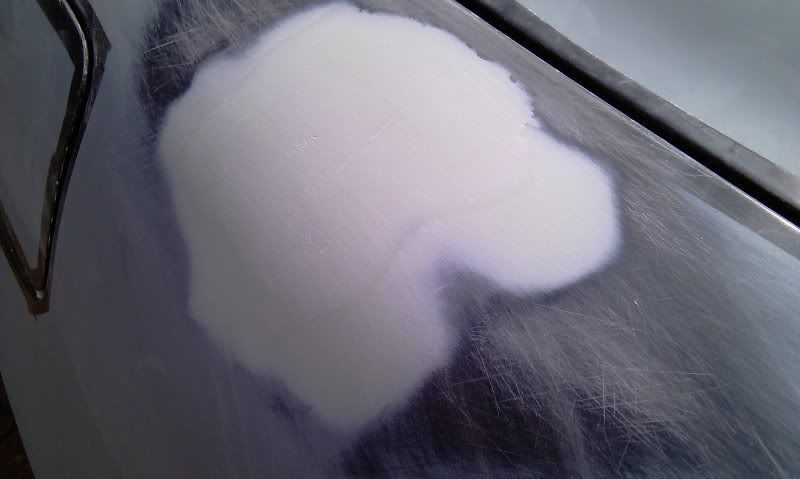 7. Stopper filler apllied over pin hole area. 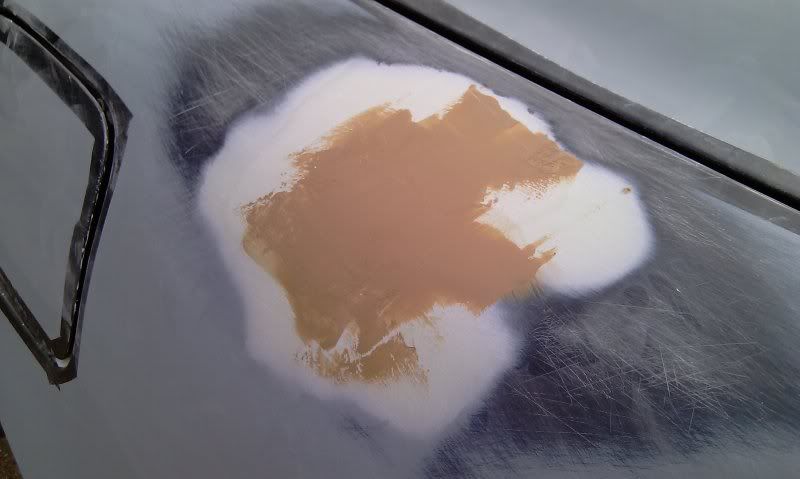 8. Sanded with 220 Grit sandpaper for perfect pin hole finish. 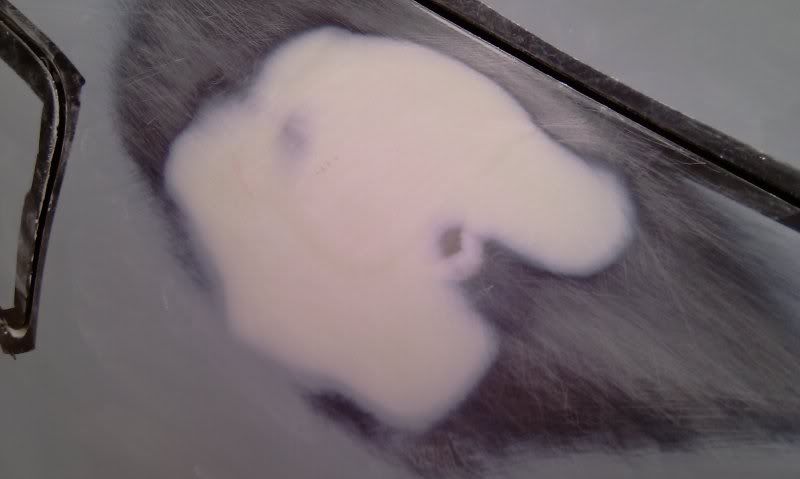 9. Using 320 Grit sandpaper to feather out the edges of the repair area into surrounding. 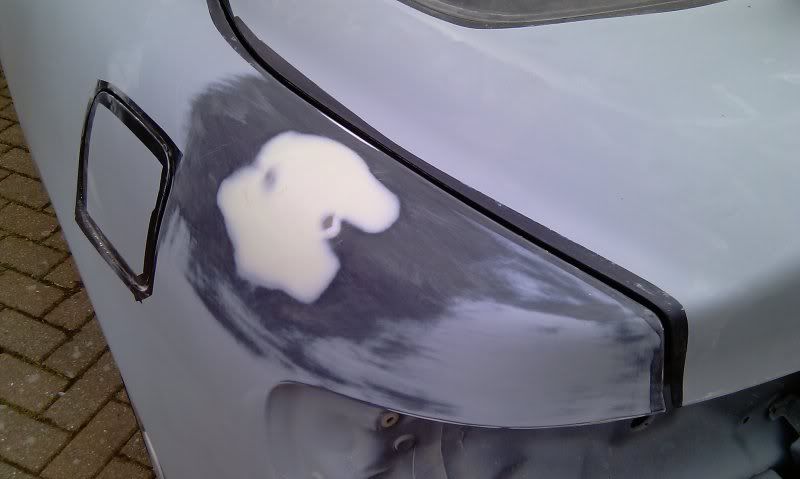 10. Various masking technique used to reduce overspray of primer. 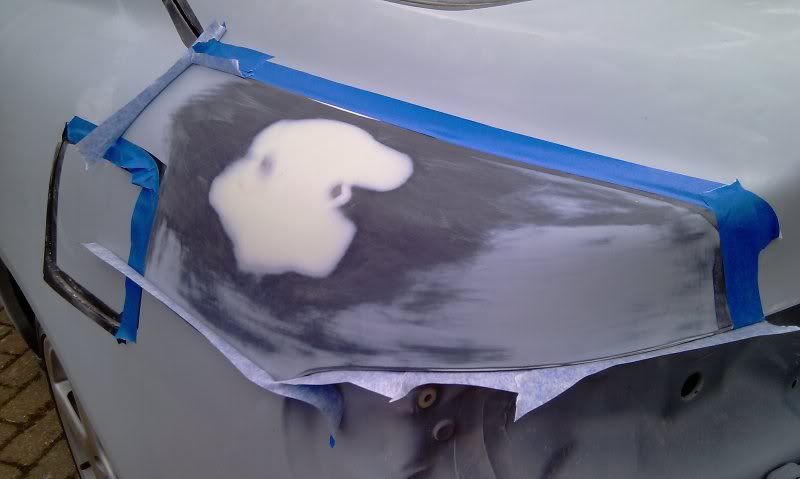 11. After 1st coat of primer...you can just about see the repair...allow 10 mins inbetween coats for solvents to flash off. 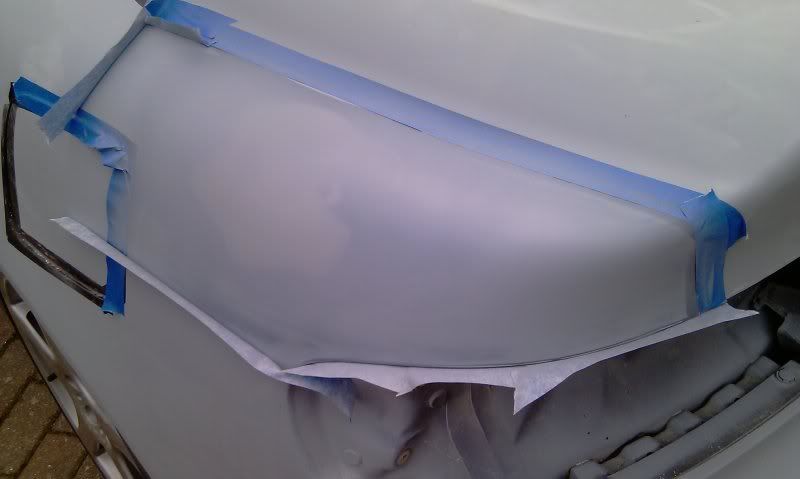 12. After 3 coats of primer...the repair area is finished. 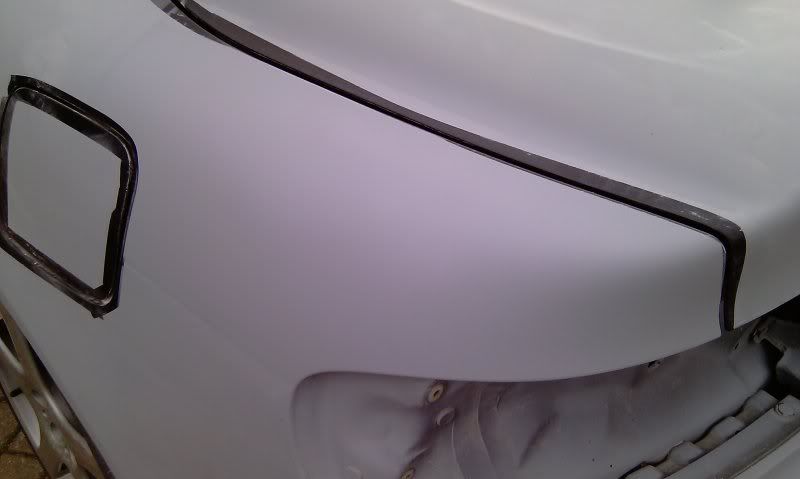 |
| Jan 18, 2011 - 11:50 AM | Forum: Exterior Styling · Post Preview: #895664 · Replies: 6 · Views: 1,924 |
|
Enthusiast  Joined Aug 15, '10 From UK Currently Offline |
To give you an idea visually...search on YouTube for a guy called "Jimmo4life...he has done a great video with info subtitles of doing such a repair. You can use rattle cans for small jobs like this...the secret to paint colour matching is blending the new paint into the existing old paint. This will help hide the repair edges. For the filler (bondo)...after applied start sanding with 80grit, then 120grit up to 240grit. Don't go much finer otherwise the primer will not have a "key" to grip onto. Sand primer using a "guide coat"...this will ensure your primer doesn't have any pin holes you may have missed. Start using 320grit and work up to 500grit. Apply paint...do not sand between layers otherwise you will see the scratches after clear coating. You can use a "tack rag" to help remove any bits. Apply clear coat...wet sand with 2000grit, 2500grit and buff out. Don't press too hard here otherwise you will put deep scratches into clear. Just make sure you use a quality clear coat otherwise you will have future shrinking, delamination, etc. Give me a few mins and I will put up some pics of the process I went through when fixing a scratch on my Wifeys car. |
| Dec 9, 2010 - 2:35 AM | Forum: Exterior Styling · Post Preview: #889339 · Replies: 3 · Views: 1,244 |
|
Enthusiast  Joined Aug 15, '10 From UK Currently Offline |
Cheers for the help guys...I misplaced the bolts when I stripped the car down for a re-paint. |
| Dec 8, 2010 - 4:24 PM | Forum: Exterior Styling · Post Preview: #889263 · Replies: 3 · Views: 1,244 |
|
Enthusiast  Joined Aug 15, '10 From UK Currently Offline |
Hey guys...just wondering if someone could be nice and tell me the size and thread type needed for the engine bay strut brace? The ones I need are the two that bolt into the firewall. Cheers. |
| Dec 5, 2010 - 1:52 PM | Forum: Exterior Styling · Post Preview: #888783 · Replies: 4 · Views: 1,357 |
|
Enthusiast  Joined Aug 15, '10 From UK Currently Offline |
Try a Clay Bar...even if that doesn't work, it will remove all residue and particles in your paint ready to try the second option of a Professional Buffing. Use of a Rotary Buffer is perfect for this situation...but unless you have a Rotary Buffer, Cutting Compound, Final Compound, Polishing Compound plus pads, it may work out cheaper to get it buffered for you by someone at a shop. If that works for you, try using a Sealant on your paint, then apply a Wax over the sealant for the best protection. |
| Nov 7, 2010 - 7:20 PM | Forum: Multimedia · Post Preview: #884854 · Replies: 22 · Views: 5,663 |
|
Enthusiast  Joined Aug 15, '10 From UK Currently Offline |
You can actually but VEHICLE OUTLINES similar to that...I use them as templates for my Vinyl Graphics business. The cars range from A to Z and start from decades ago...all in a perfect VECTOR form. That way you can zoom in or enlarge the image perfectly without losing any quality. The car colour, shading, alloys, extra vents, etc can be added to create a perfect replica of your car if it is different from standard. Once you get the correct shading and features added...you can then re-create the design in many deifferent colours at the click of a button to suit. |
| Nov 7, 2010 - 7:04 AM | Forum: Interior/Audio/Electrical/Wiring · Post Preview: #884763 · Replies: 3 · Views: 1,426 |
|
Enthusiast  Joined Aug 15, '10 From UK Currently Offline |
This is something I would really love to add as well...I have found this info page...it explains how to wire up to your headlight about half way down. http://www.caraudio-caralarms.com/dei-528t.html |
| Oct 21, 2010 - 6:31 PM | Forum: Exterior Styling · Post Preview: #881958 · Replies: 40 · Views: 8,011 |
|
Enthusiast  Joined Aug 15, '10 From UK Currently Offline |
Sorry but I couldn't find any photos of the process I used to blend the side skirts in...the following link is similar: http://www.mx6.com/forums/2g-faq-appearanc...mpiliation.html Here is the outline of what I did: 1. Totally degrease the area where the side skirts hit the body. 2. Mount the side skirts underneath the car. 3. Where the side skirts hit the body...you need to sand the body with 80 Grit sandpaper...only to scuff the area...not to bare metal. 4. Degrease and sand the edges of the sideskirt that hit the body. 5. Apply some automotive adhesive to both the side skirts edges and the body...in the UK I use Tiger Body Sealant...it stays slightly flexible to prevent cracking in furture. 6. Press side skirt onto body...try to maintain pressure on the sideskirt and leave to set up for 24 hours. 7. Prepare the blending area on car body with 80 Grit sandpaper...again not to bare metal. 8. Using Fibreglass Bodyfiller, apply a layer starting from the top edge of sideskirt directly upwards until it hits the horizontal bodyline on the Celica. Hopefully you can see the bodylines I have blended the sideskirts onto. 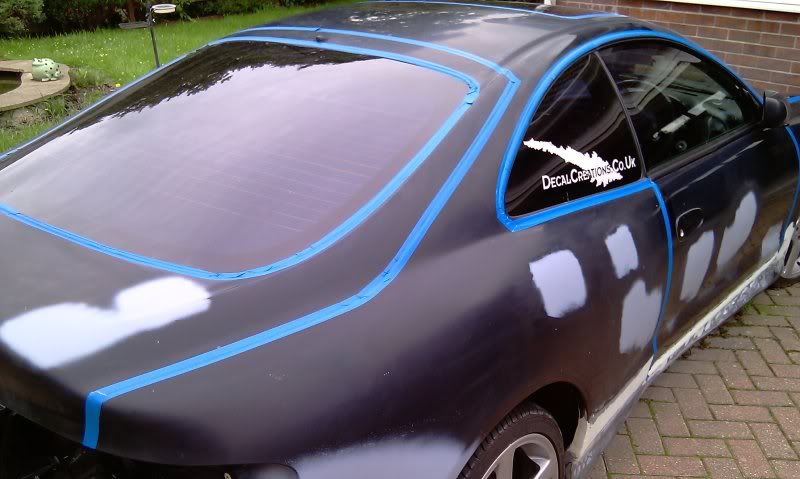 9. Once dry...sand using 80 Grit sandpaper....then apply normal bodyfiller over the whole blend area. 10. Once dry...sand using 80 Grit then 120 Grit sandpaper...you can follow the same process as above for spraying primer and sanding smooth.  11. Here are a couple of photos after spraying of primer. 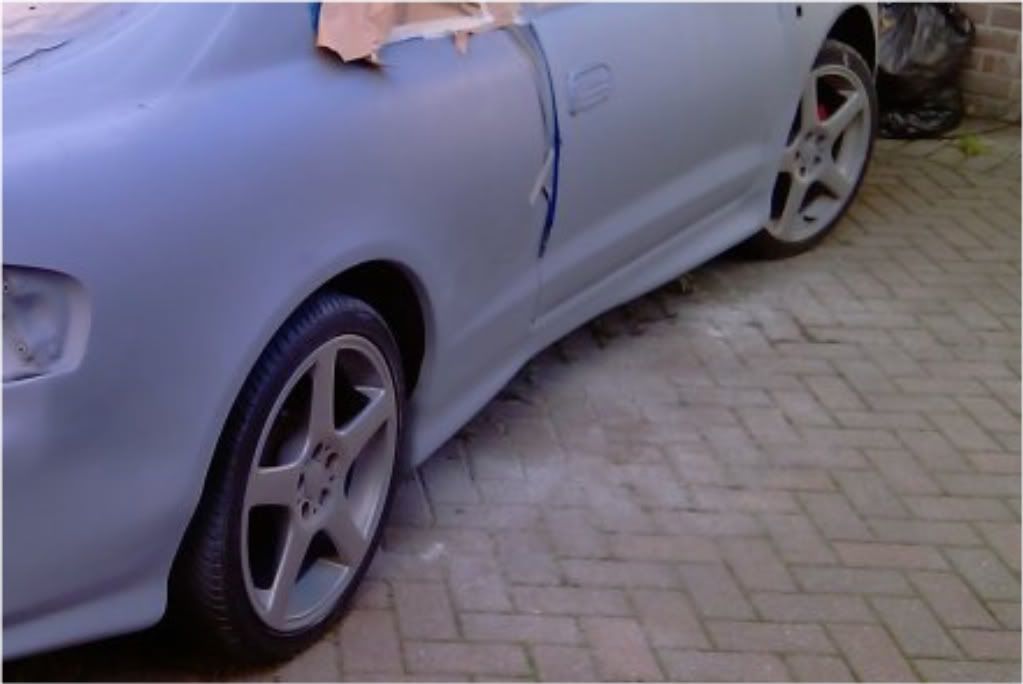 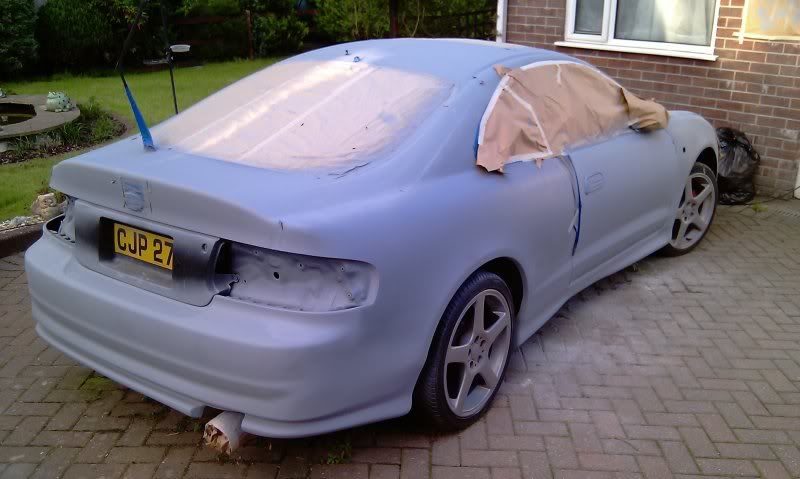 |
| Oct 21, 2010 - 5:46 PM | Forum: Exterior Styling · Post Preview: #881954 · Replies: 40 · Views: 8,011 |
|
Enthusiast  Joined Aug 15, '10 From UK Currently Offline |
Additional photos for antenna hole smoothing.... 1. Remove Antenna from boot interior side...cut out piece of sheet metal to fit JUST inside the antenna hole. 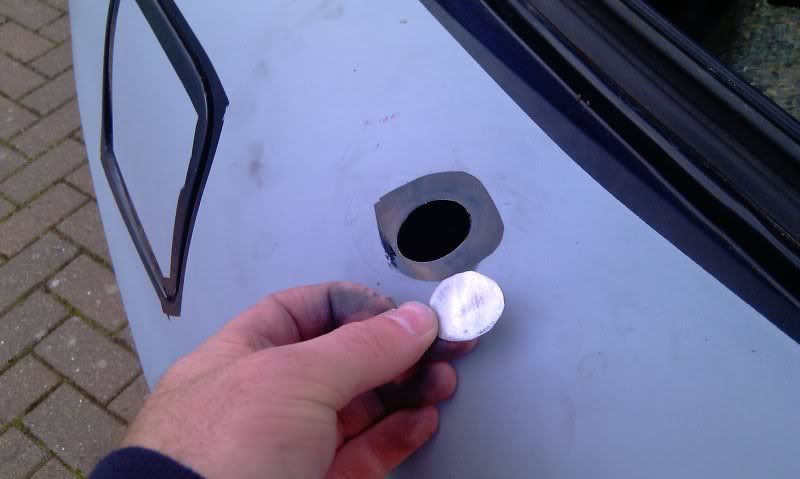 2. Prepare the antenna hole for welding by sanding edges with 80 Grit sandpaper. 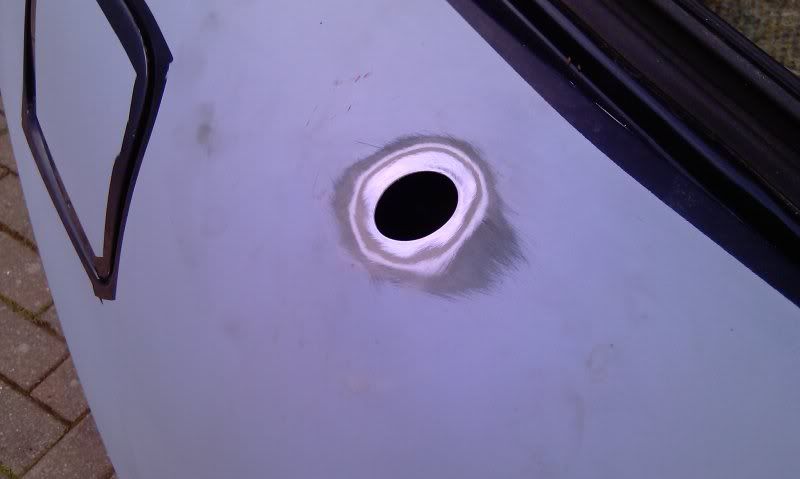 3. Using a Welding Magnet (or normal magent)...hold sheet metal into place ready to weld. 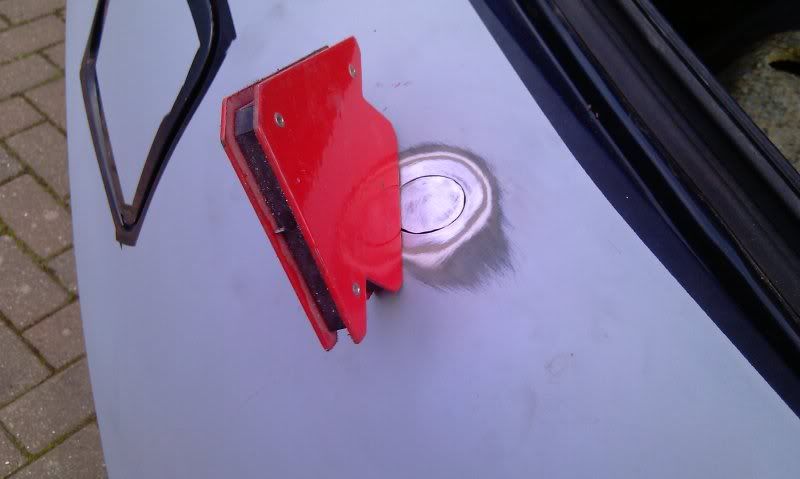 Then proceed to the bodywork procedure as above. |
| Oct 21, 2010 - 5:18 PM | Forum: Exterior Styling · Post Preview: #881944 · Replies: 40 · Views: 8,011 |
|
Enthusiast  Joined Aug 15, '10 From UK Currently Offline |
would you be able to make a writeup on molding the Skirts on by chance? Also, that is a great writeup on the dings and the antenna hole removal! Thanks and you are welcome...I will have a look into my photos and see what I can find for the sideskirt blending. Just a note on the antenna hole removal...I welded a round piece of sheet metal to fit the hole perfectly. The first pic in the above write up shows my welding ground down to sit flush with the existing body. |
 New Replies New Replies No New Replies No New Replies Hot Topic (New) Hot Topic (New) Hot Topic (No New) Hot Topic (No New) |
 Poll (New) Poll (New) Poll (No New) Poll (No New) Locked Topic Locked Topic Moved Topic Moved Topic |
| Lo-Fi Version | Time is now: November 22nd, 2024 - 11:55 PM |


