| Dec 1, 2012 - 9:05 PM | Forum: My Project · Post Preview: #995703 · Replies: 23 · Views: 7,945 |
|
Enthusiast  Joined Jan 25, '06 From Marlton, NJ Currently Offline |
Truly disgusting!! I LOVE IT. Do you have a current shot of the interior as it sits now? Im not gonna post em on here but you can check the FB page, http://www.facebook.com/JMExclusive i have all the up to date stuff |
| Dec 1, 2012 - 8:36 PM | Forum: My Project · Post Preview: #995699 · Replies: 23 · Views: 7,945 |
|
Enthusiast  Joined Jan 25, '06 From Marlton, NJ Currently Offline |
I thought long and hard and thought it would be more beneficial if I went “simple”. I decided to hide the second amp as well and make a small ramp. The floor of the trunk would be two pieces. The rear piece that ramped down would be stationary and the front piece, because of chance, fell right over the tire well, so that piece can be unscrewed and removed for QUICK ACCESS to Kicker AMP, fuseboxes and all the other wiring. I was in love. Customized and functions great for daily driver, doing it this way gave me a trunk, something I haven’t had in years since I purchased my hugeee box from Kicker.     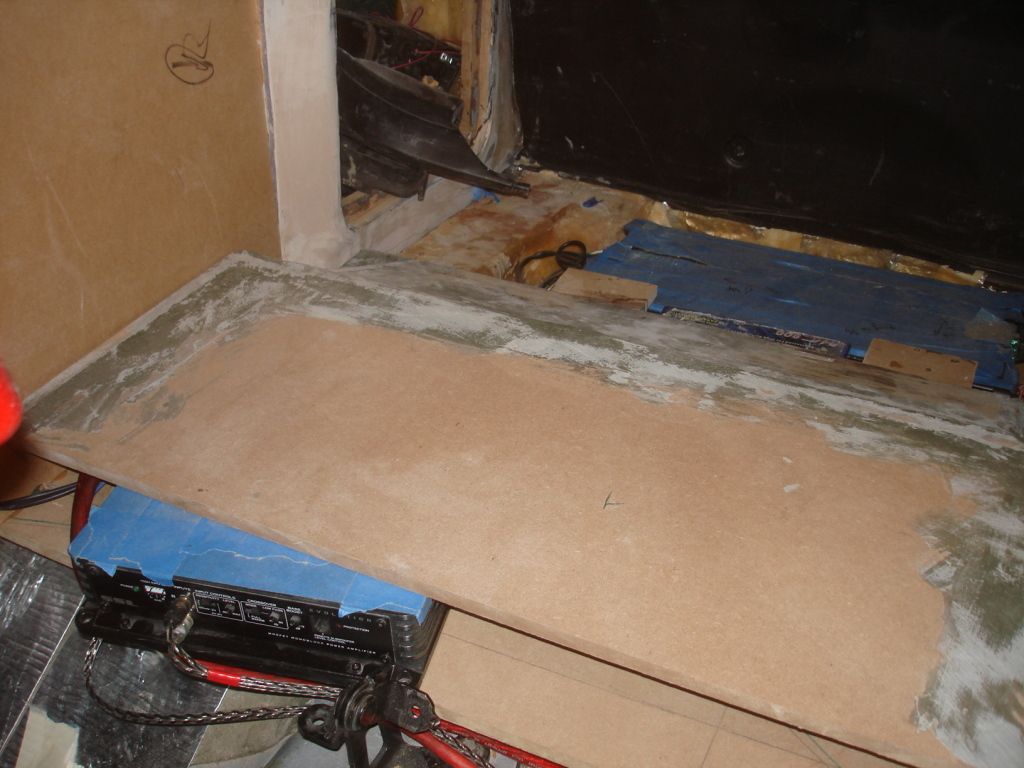 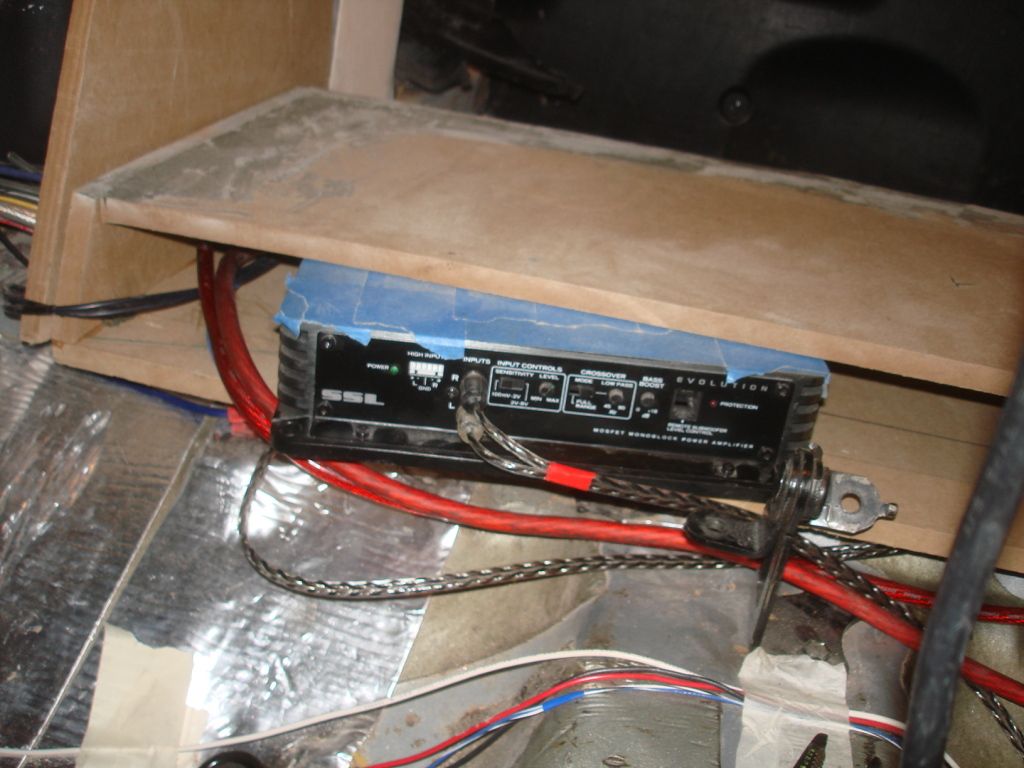 |
| Dec 1, 2012 - 7:36 PM | Forum: My Project · Post Preview: #995694 · Replies: 23 · Views: 7,945 |
|
Enthusiast  Joined Jan 25, '06 From Marlton, NJ Currently Offline |
Now as for the trunk I had to remaining issues to handle. Originally I made this weird looking amp rack that would sit on the floor of the trunk and hold my remaining Evolution amp and a headrest LCD I had sitting in the attic. After building and mounting everything, I felt it looked stupid and confusing. So I SCRAPPED it (more fiberglass sacrificed for the sake of learning). 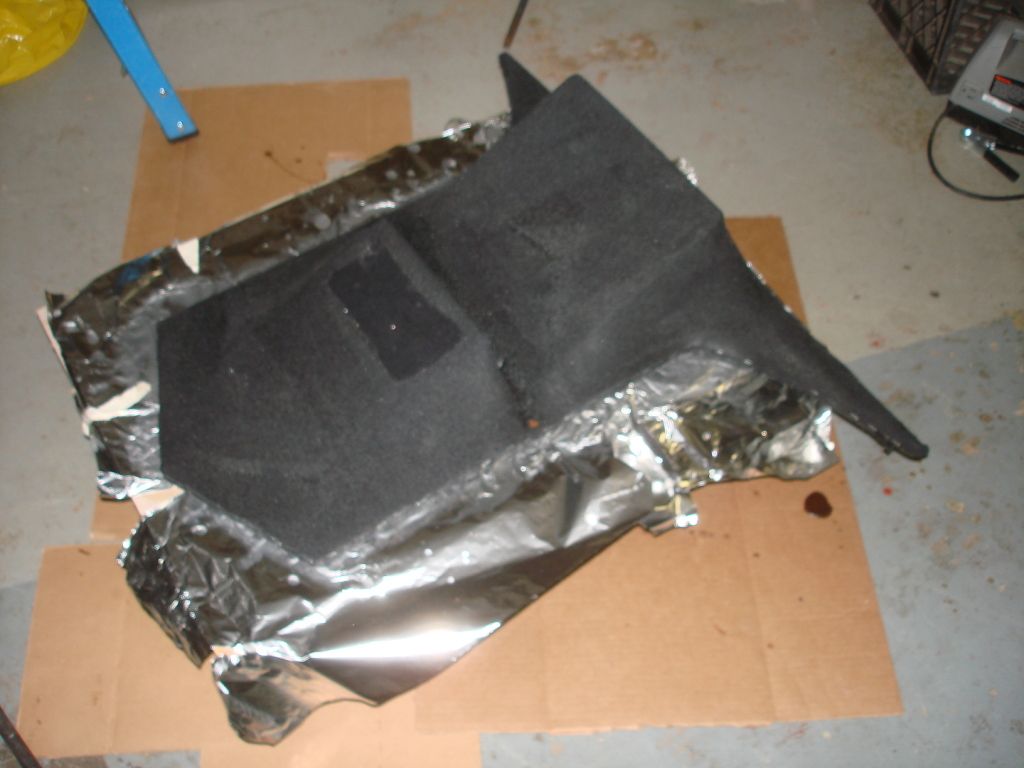 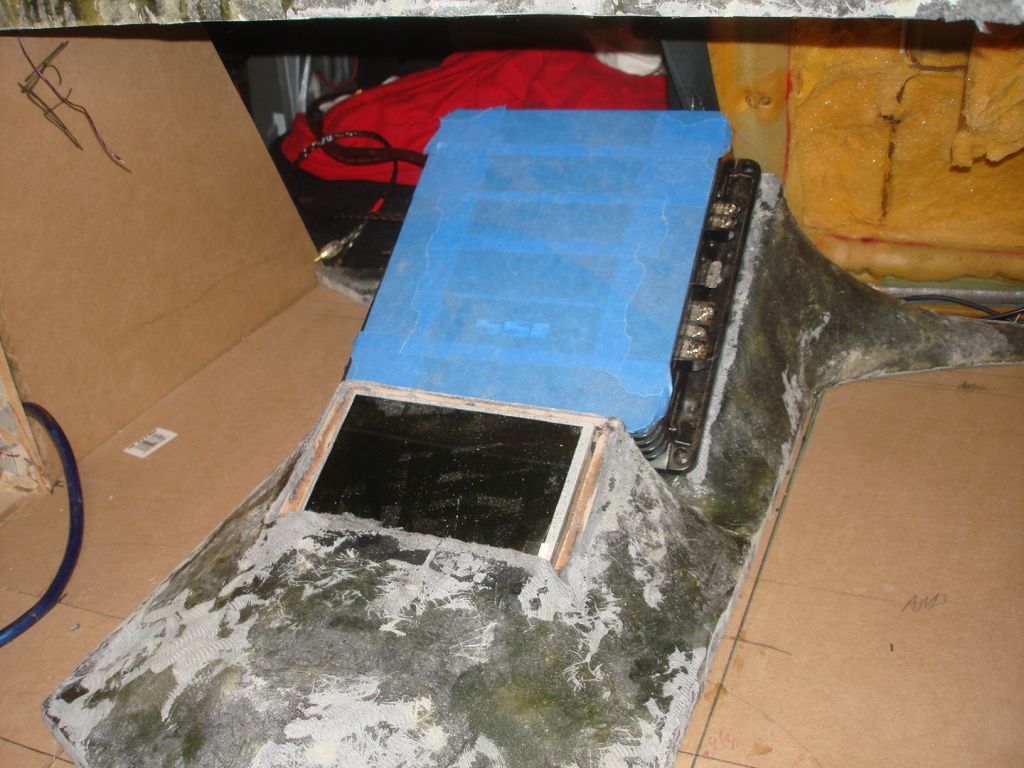 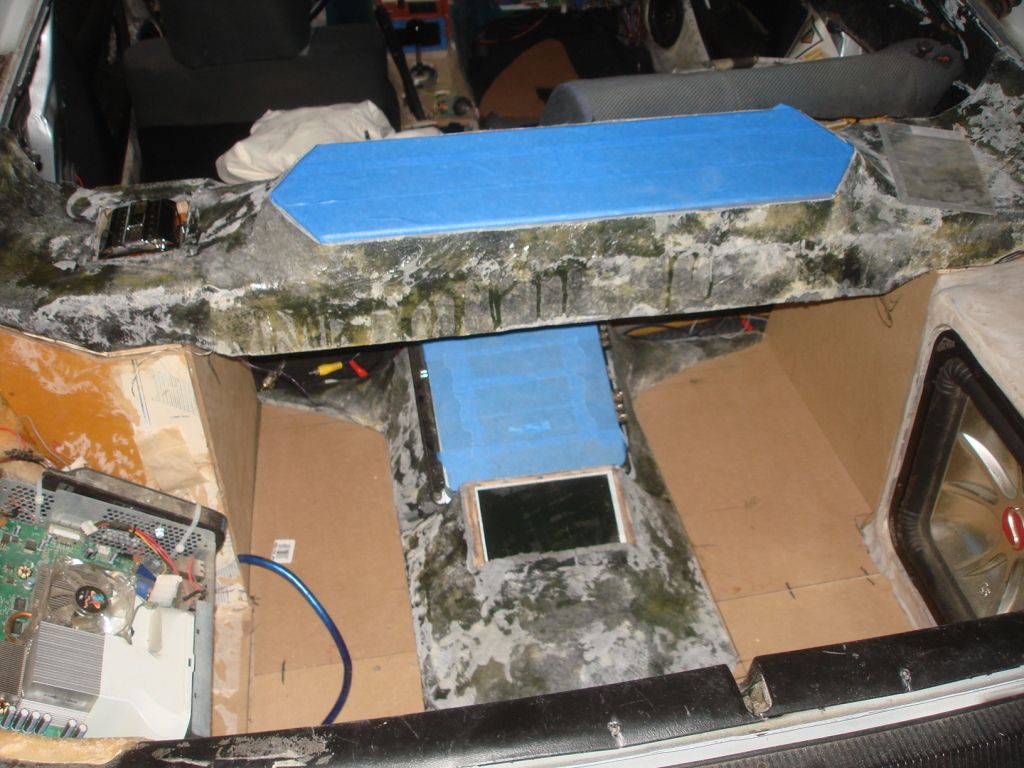 EWWWWWWWWW |
| Nov 16, 2012 - 9:34 PM | Forum: My Project · Post Preview: #994267 · Replies: 23 · Views: 7,945 |
|
Enthusiast  Joined Jan 25, '06 From Marlton, NJ Currently Offline |
Ok so now on to the new stuff..... now before i did say that i wanted to save some old of the features i did like.... For one, I made the fiberglass foundation for it right next to the rollover vent, I glued a LARGE 4-5” PC Fan that points directly to the vent and out the car through the rear bumper (didn’t want to lose that, worked amazing for keeping the XBOX ventilated and cool even in hot summers). 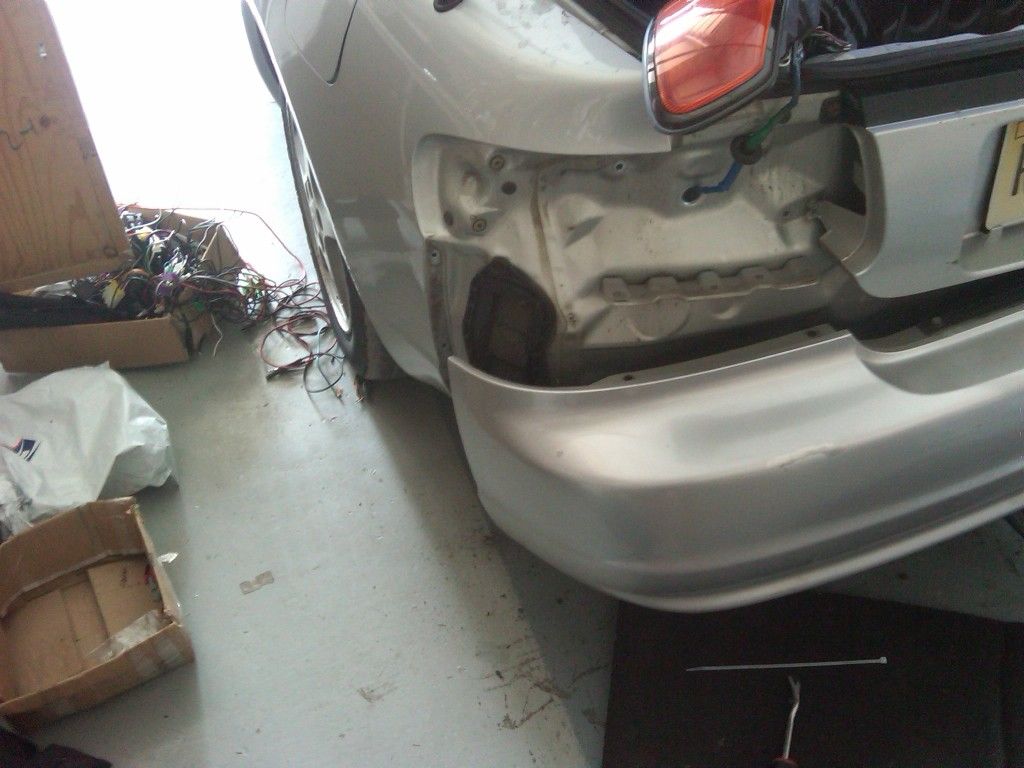 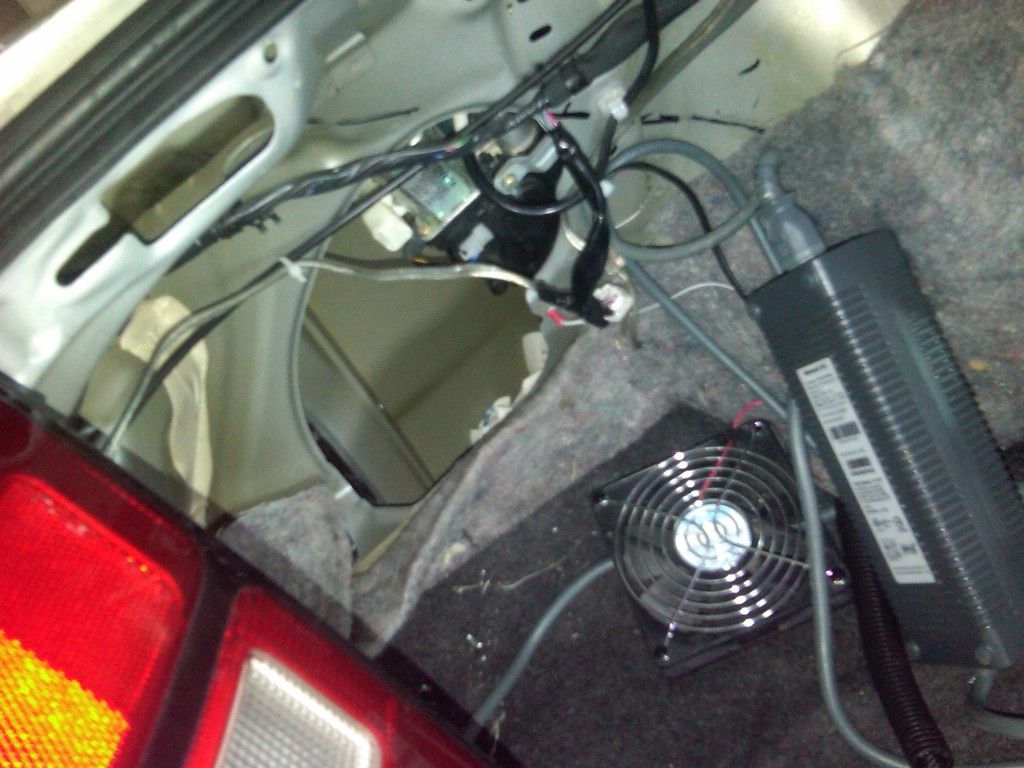 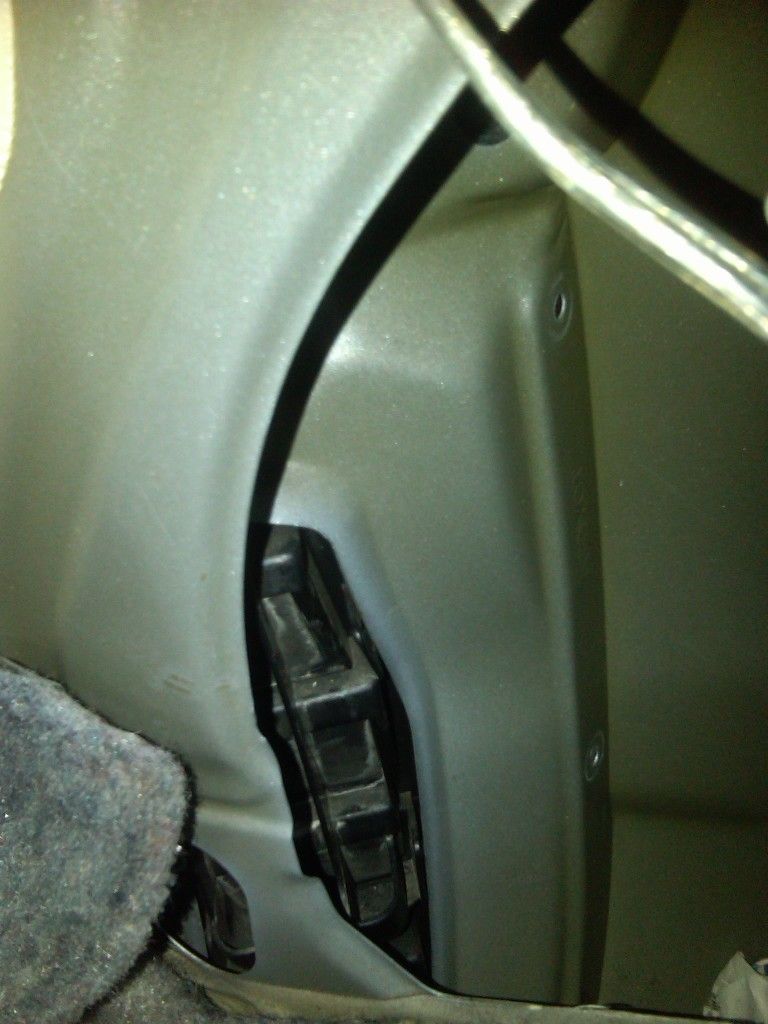 I also had a see thru DVD drive that I made myself out of plexiglass, that was hard as hell to get right the first time so I didnt want to lose that. 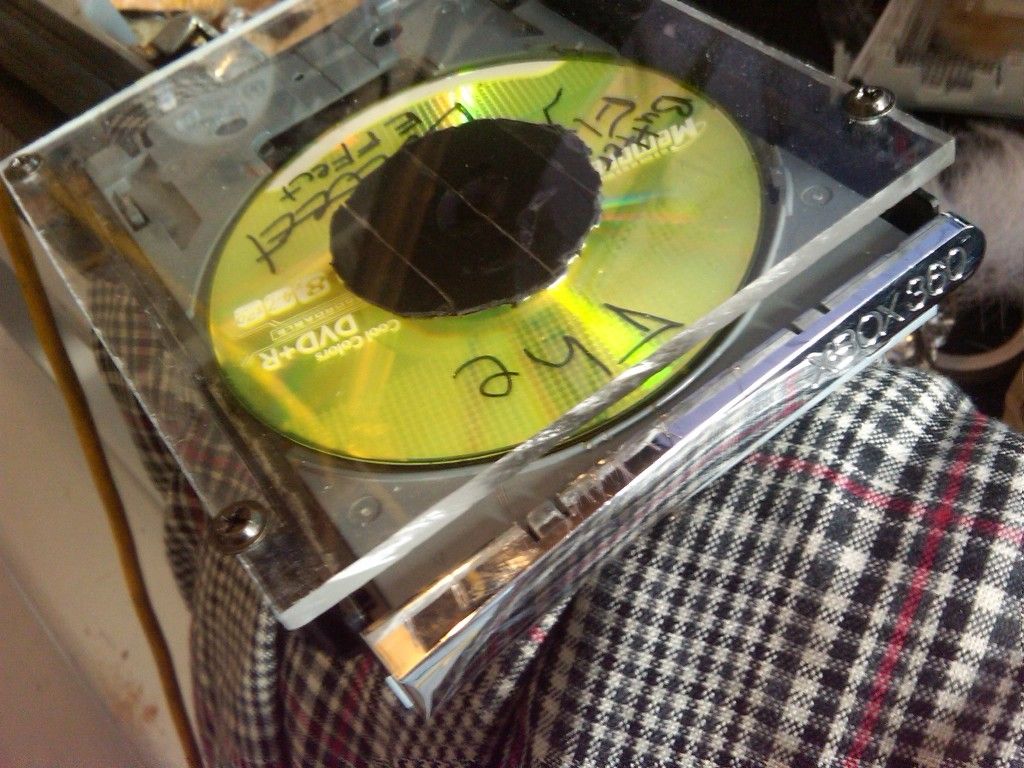 The idea of modding my xbox for disc-less play also came to mind, but thought it would be a lot of work/testing. If I wanted to do that, I can choose to mod it later after the car is done. I probably changed ideas on the enclosure 4-5 times so im not even gonna bore you with the ones that didn’t make the cut. Definitely wanted the guts shown, wanted to keep the PC Fan and had to be easily removable. So I came up with this enclosure and the plexiglass window can slide out for easy unscrewing, then a cover piece to install/remove the whole thing. 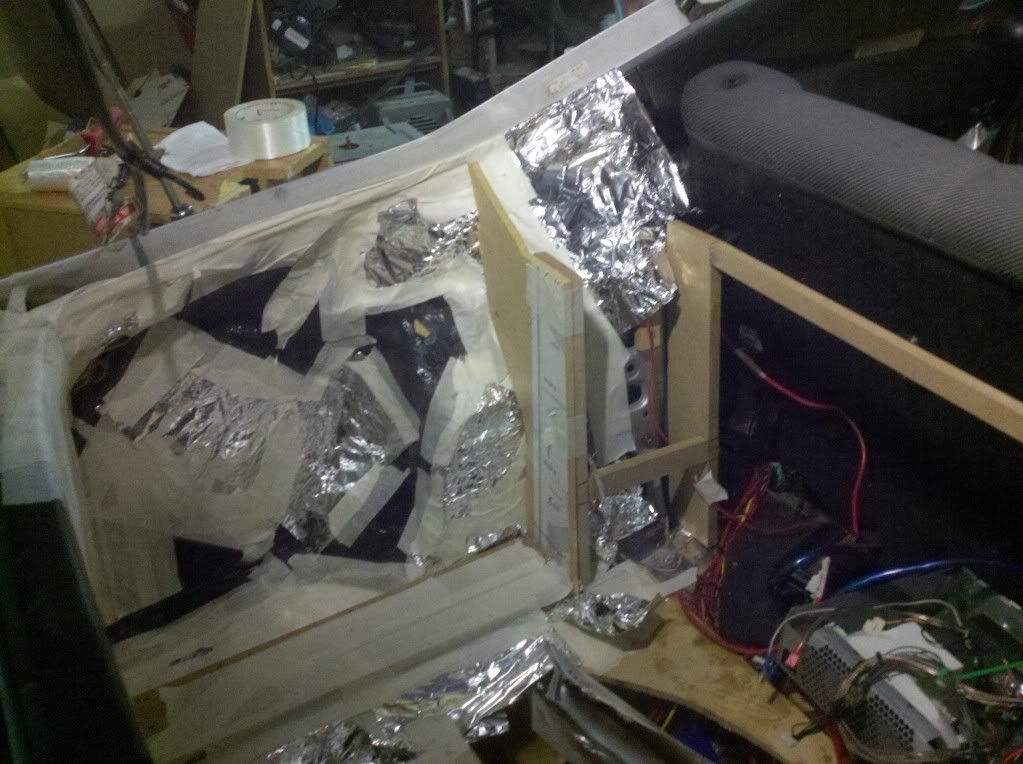 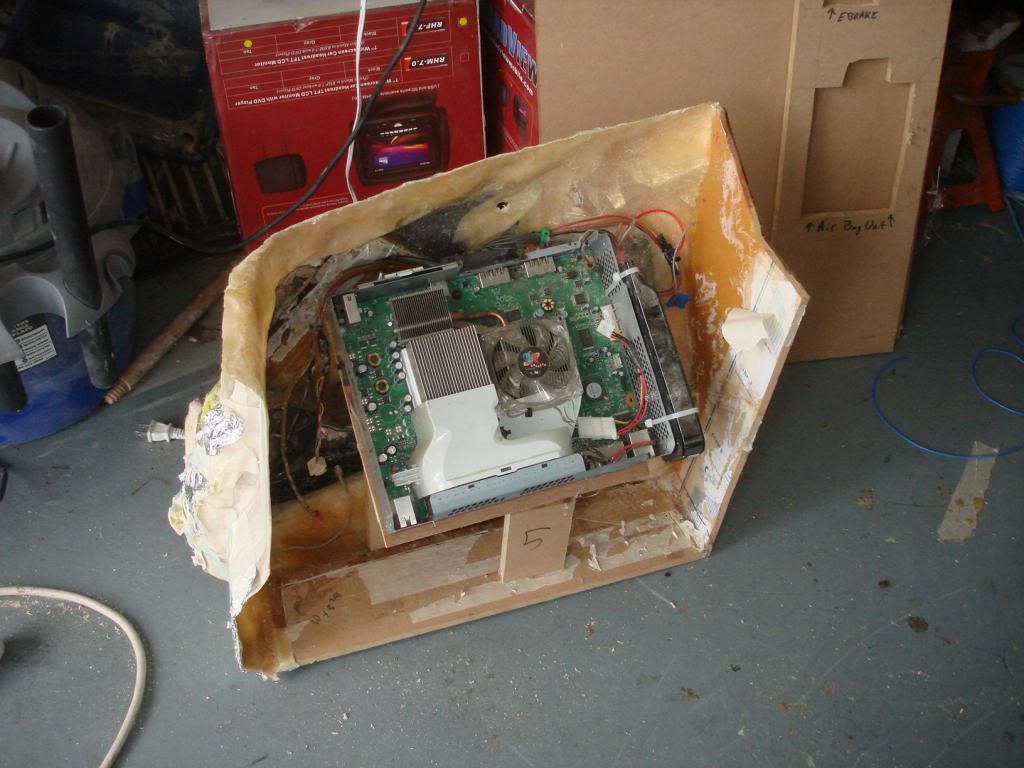 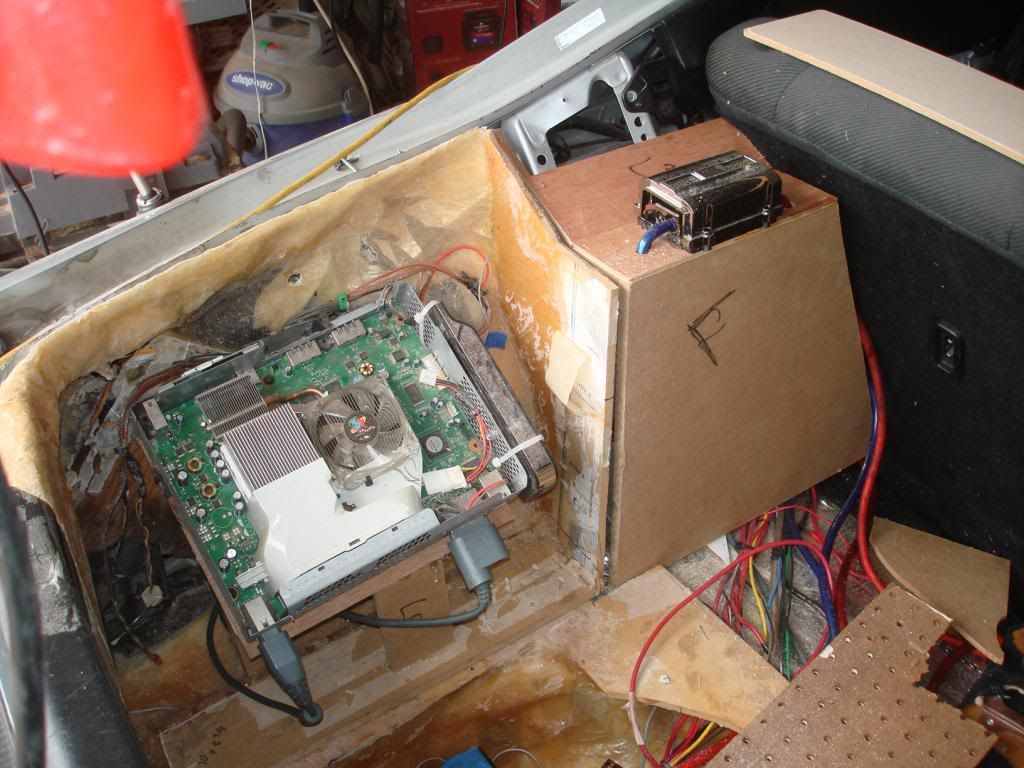 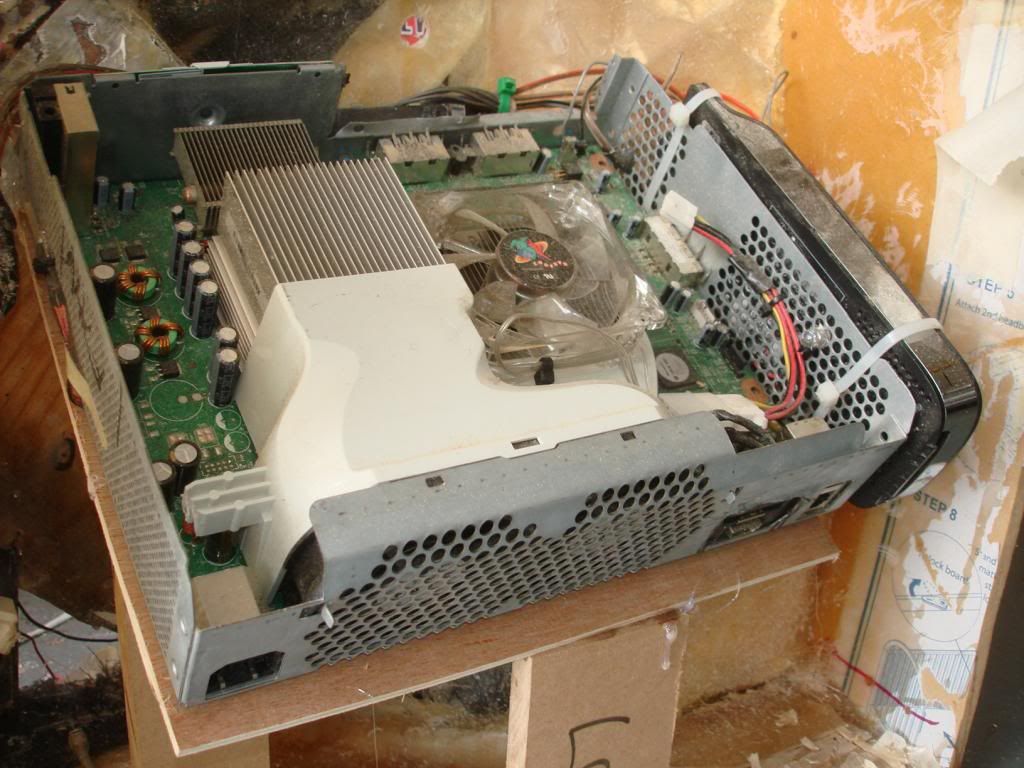     The xbox itself is a Regular xbox motherboard with Elite heatsinks on the CPU and GPU. I added a purple LED fan to the top of the heatsinks to aid the stock exhaust fans with cooling and air flow direction towards the Rollover vent fan. I soldered wires to extend for a pushbutton switch to turn on/eject the XBOX discs and extended both cables to the disc drive to put the disc drive up front where I can actually reach it. |
| Nov 16, 2012 - 9:17 PM | Forum: My Project · Post Preview: #994266 · Replies: 23 · Views: 7,945 |
|
Enthusiast  Joined Jan 25, '06 From Marlton, NJ Currently Offline |
Now to turn my attention to the xbox enclosure……(sigh) well looking at the original outrageous NOOB fiberglass setup I had before, well it was time to trash the entire thing and start fresh. It had no frame and the shape of it was ridiculous looking. But it worked and had some elements that I really did want to save. Old Install XBOX Pics years ago (Dont laugh i was learning, just not afraid to show my progess): 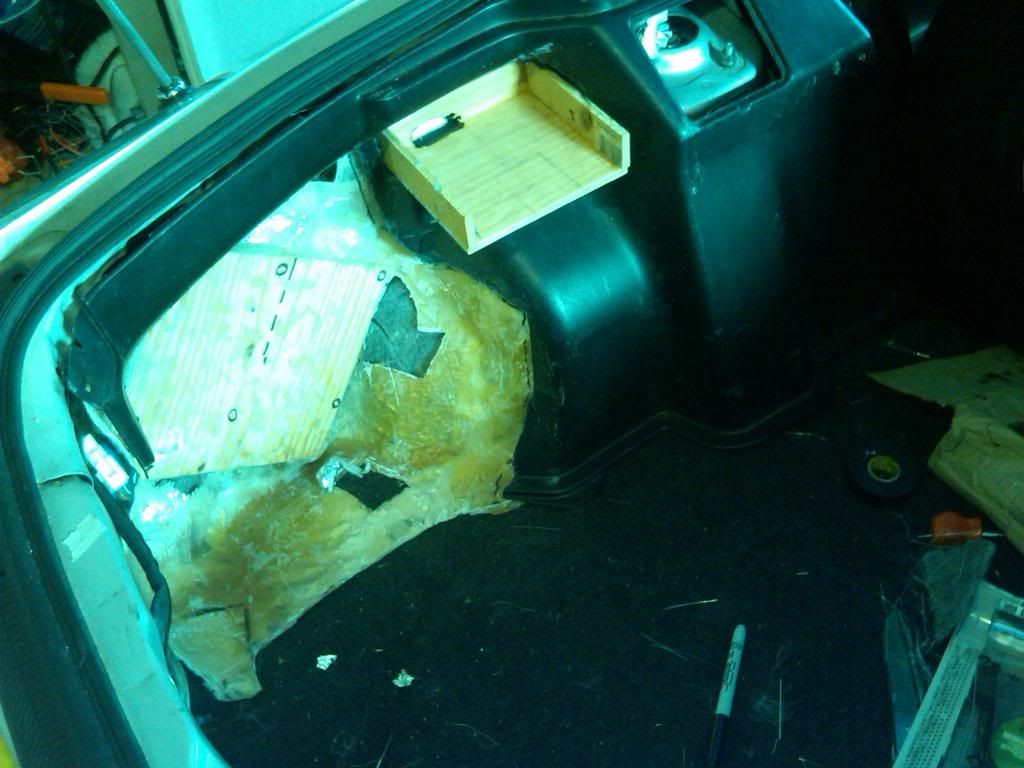 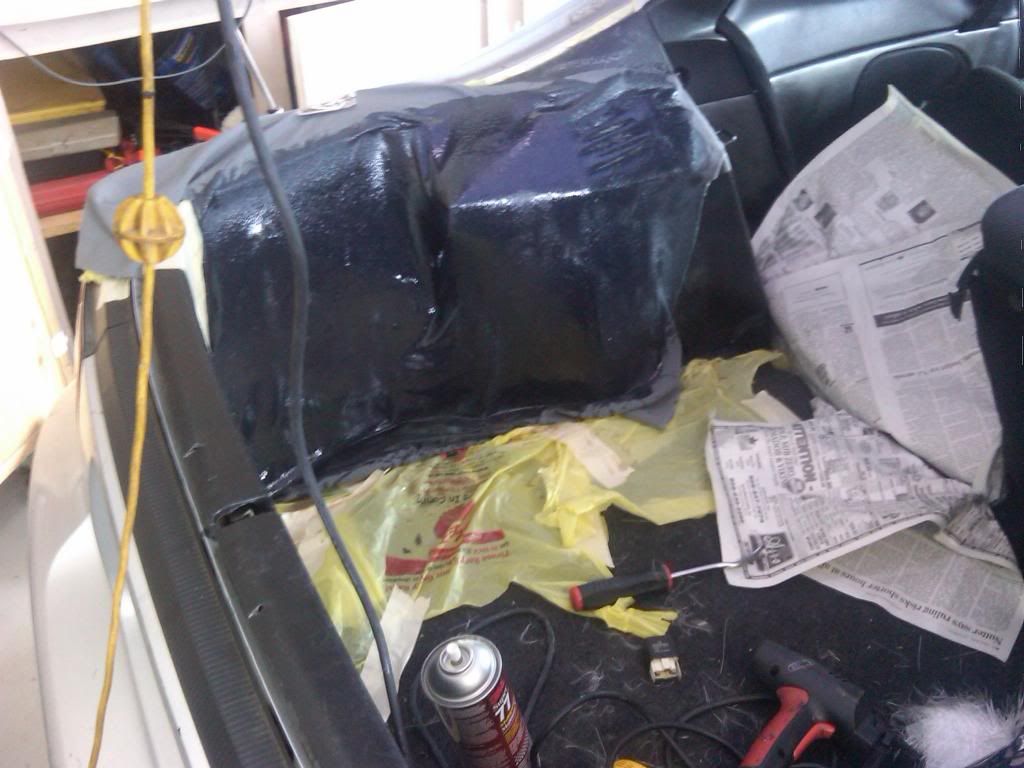 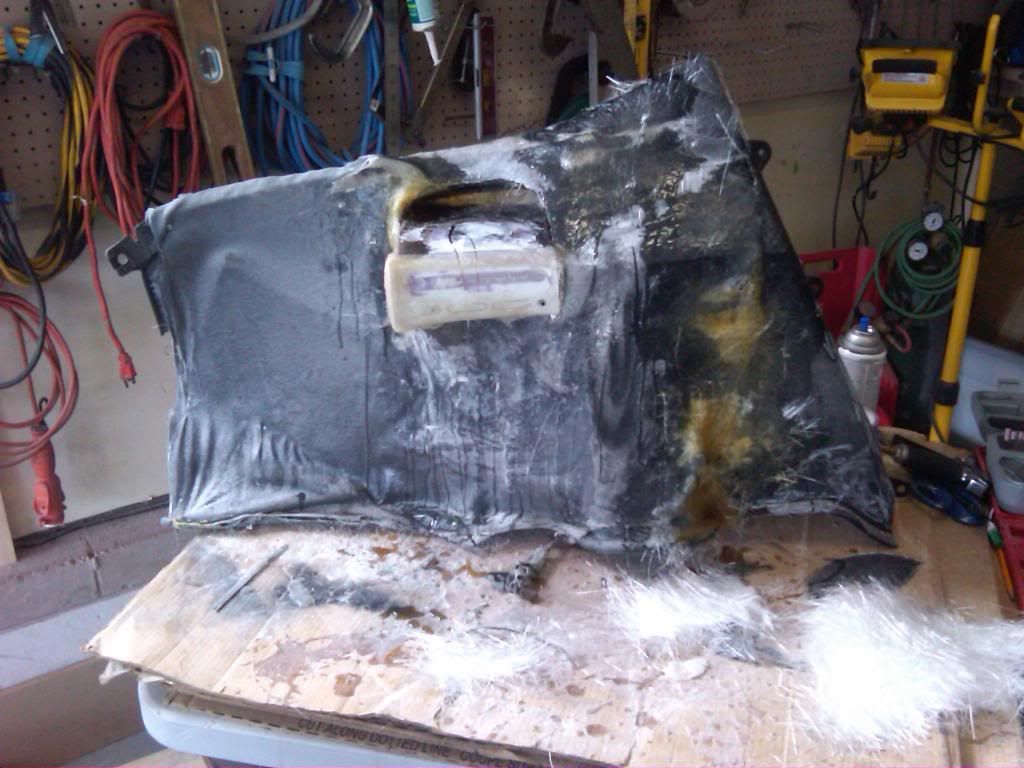 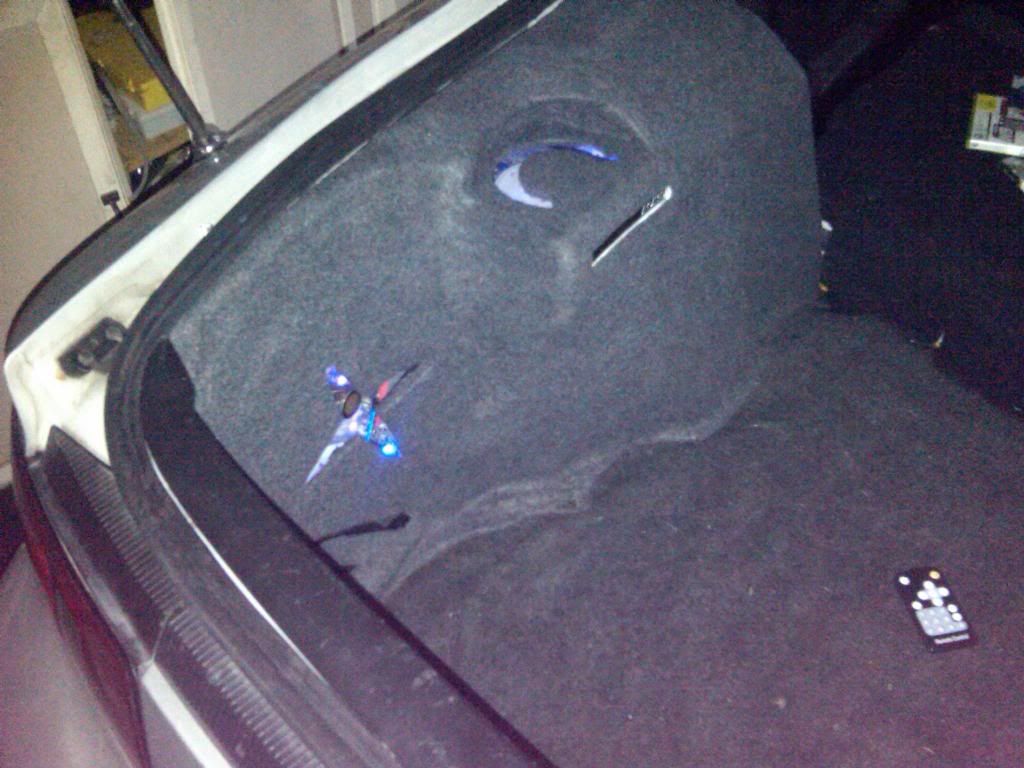 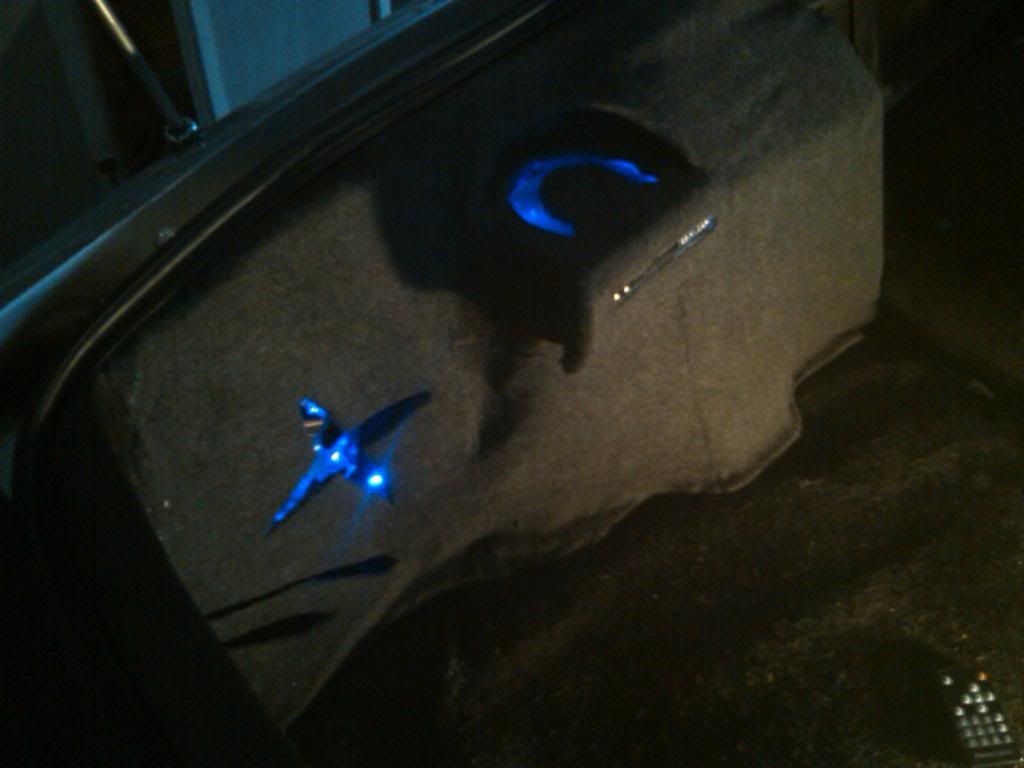 |
| Nov 15, 2012 - 5:21 AM | Forum: Multimedia · Post Preview: #994068 · Replies: 12 · Views: 4,524 |
|
Enthusiast  Joined Jan 25, '06 From Marlton, NJ Currently Offline |
| Nov 15, 2012 - 5:19 AM | Forum: Multimedia · Post Preview: #994065 · Replies: 15 · Views: 6,562 |
|
Enthusiast  Joined Jan 25, '06 From Marlton, NJ Currently Offline |
maybe you might like to have it wrapped in 3m cf vinyl to hide the imperfections in the bondo work? awesome stuff man keep it coming Ill look into that any links? Like a boss, bro. Looks very nice. Thats a mini piezo from my RFID module nice work. i'm specially impressed on that on board diagnostic!!! now if you can do something about that "N" in the middle it would be awesome!!! i'm guessing that's suppose to be the gear indicator? Yeah but of course i dont have that option since its a manual. I could change the skin but i have biggest fish to fry than hassle with that. I started to but its complicated |
| Nov 15, 2012 - 5:08 AM | Forum: My Project · Post Preview: #994064 · Replies: 23 · Views: 7,945 |
|
Enthusiast  Joined Jan 25, '06 From Marlton, NJ Currently Offline |
Now I def wanted to get rid of the box that the Kicker L5 sub came in and do my own fiberglass box (save more room). I already had a previously installed Xbox 360 on the left side so it was only natural to take up the opposite corner. Masked that corner off and laid down my resin/fiberglass to make the mold. From the mold I built the frame for my kicker. Took me awhile to figure the best position but I chose it to face the xbox enclosure to keep a solid flow between all the pieces. 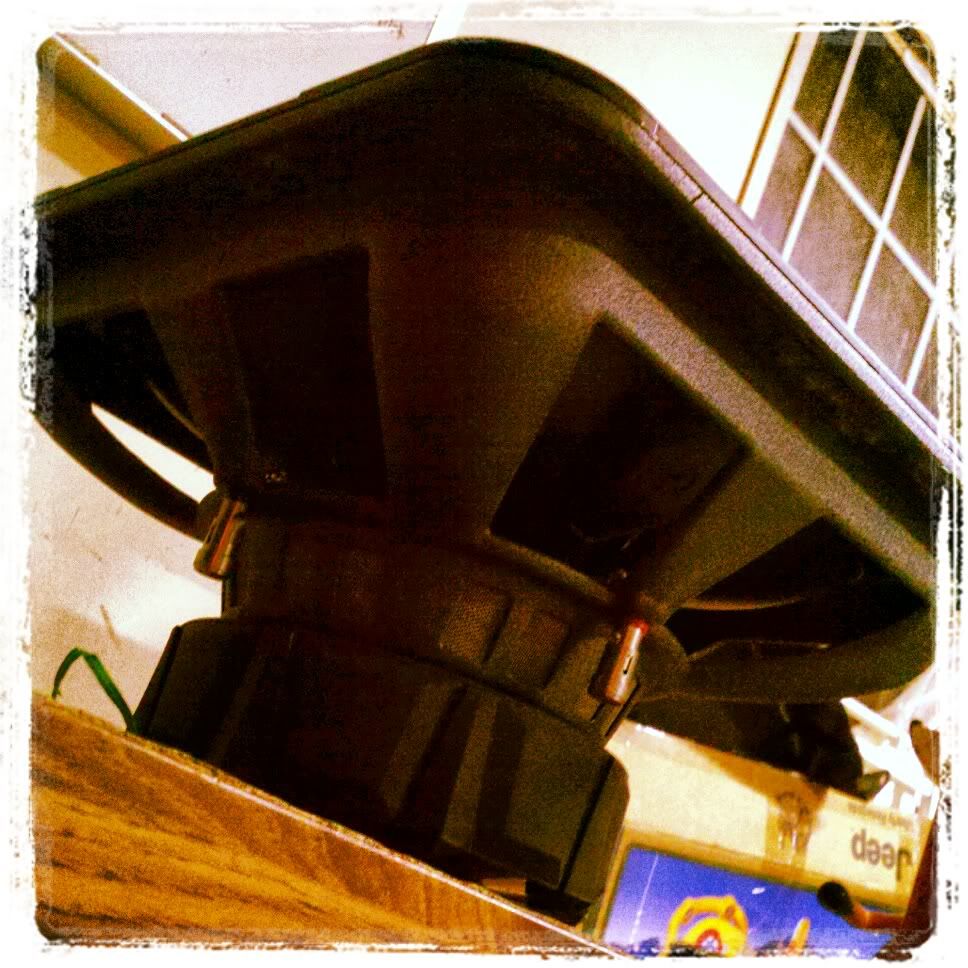 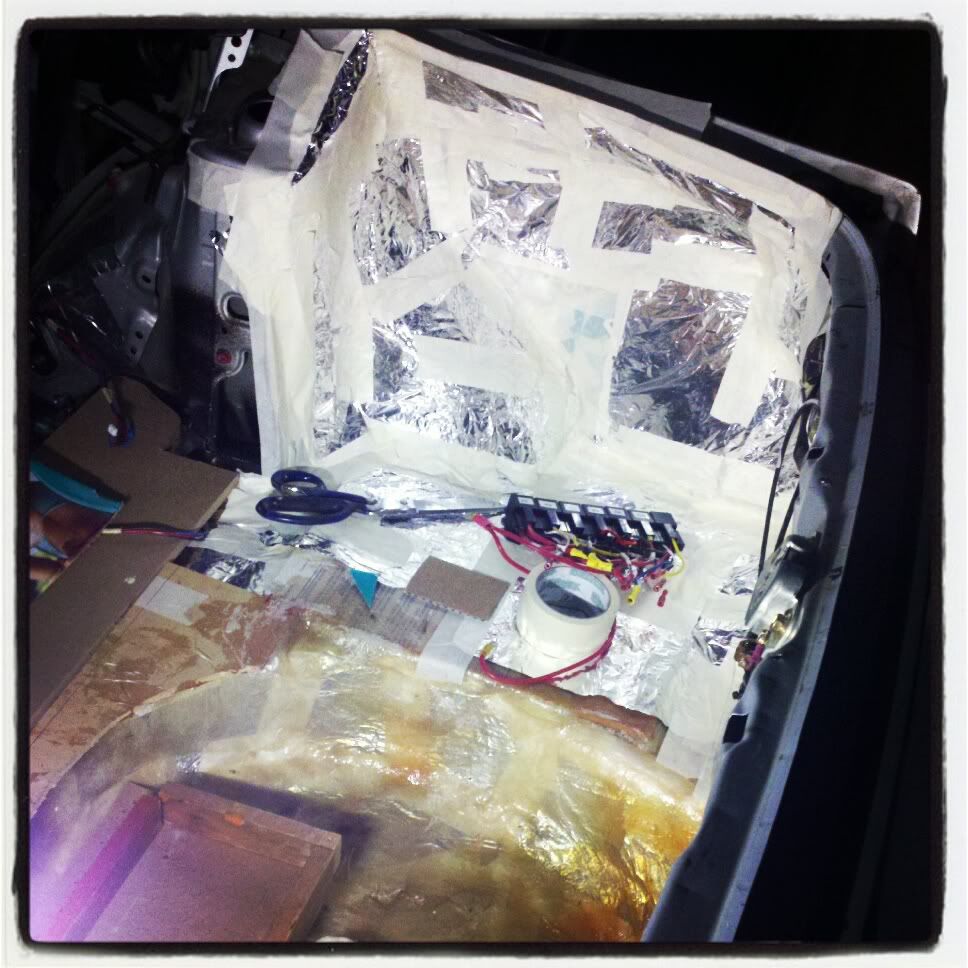 Wrapped the frame with fleece and soaked in resin and applied a couple of layers of fiberglass 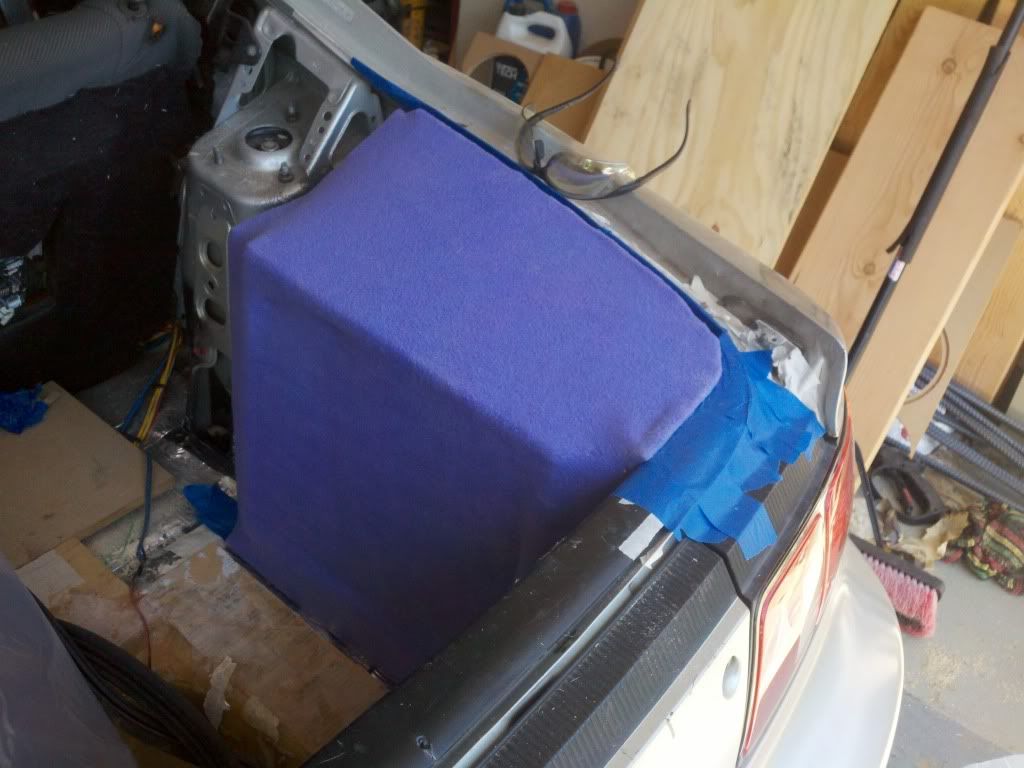 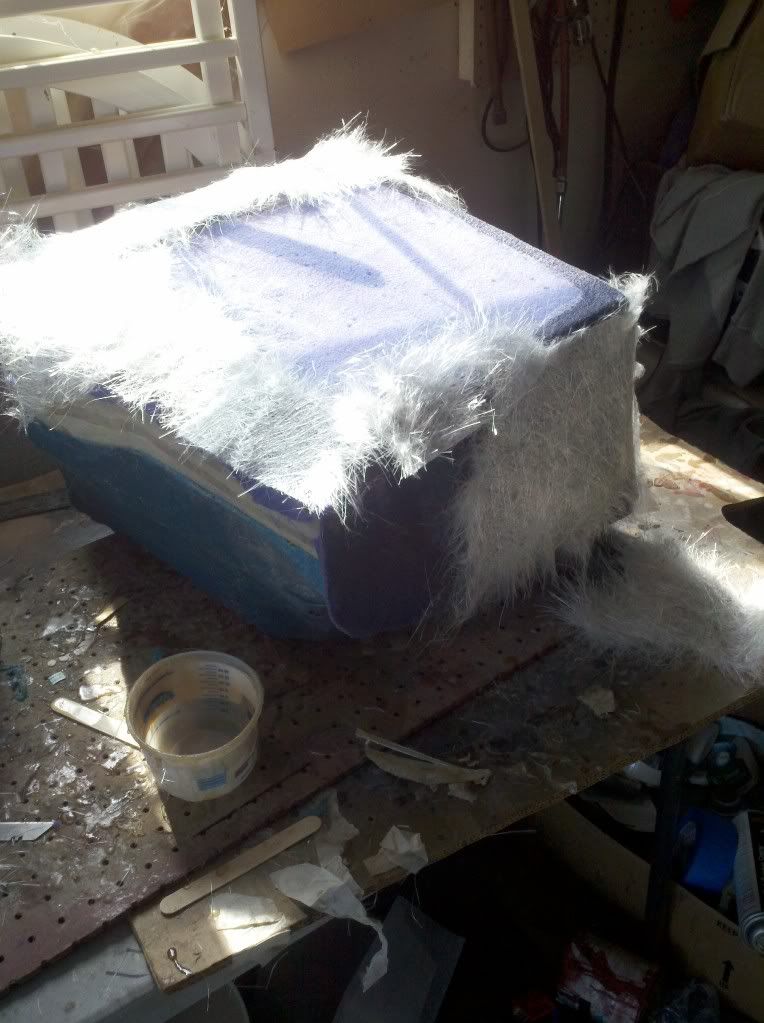 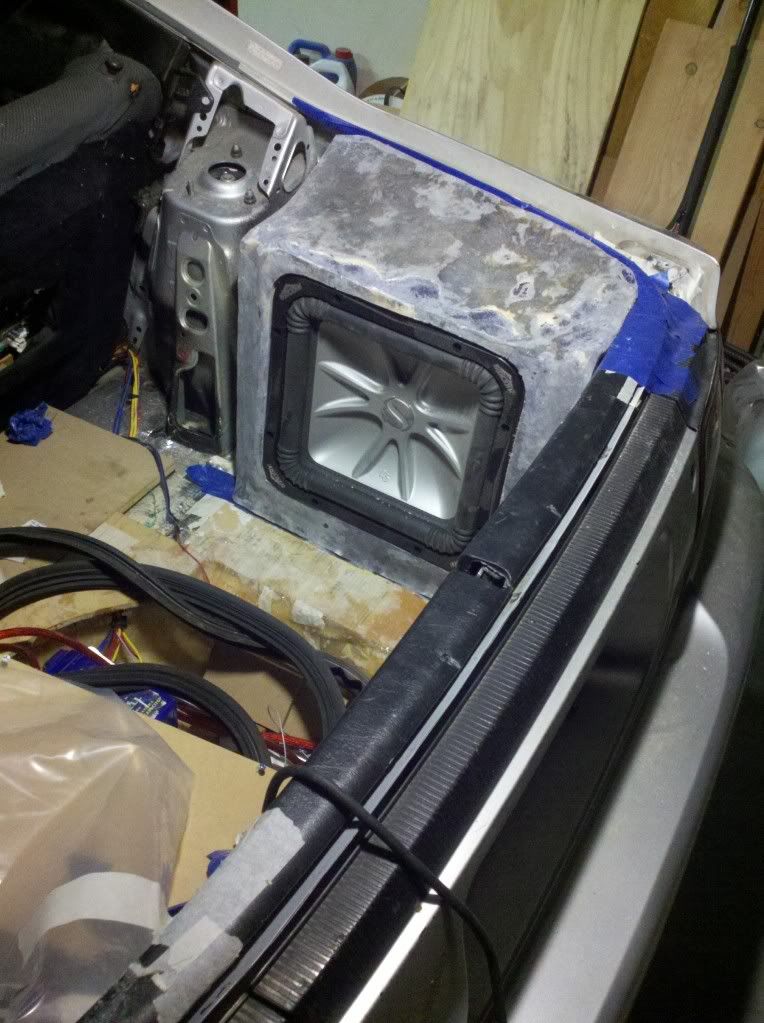 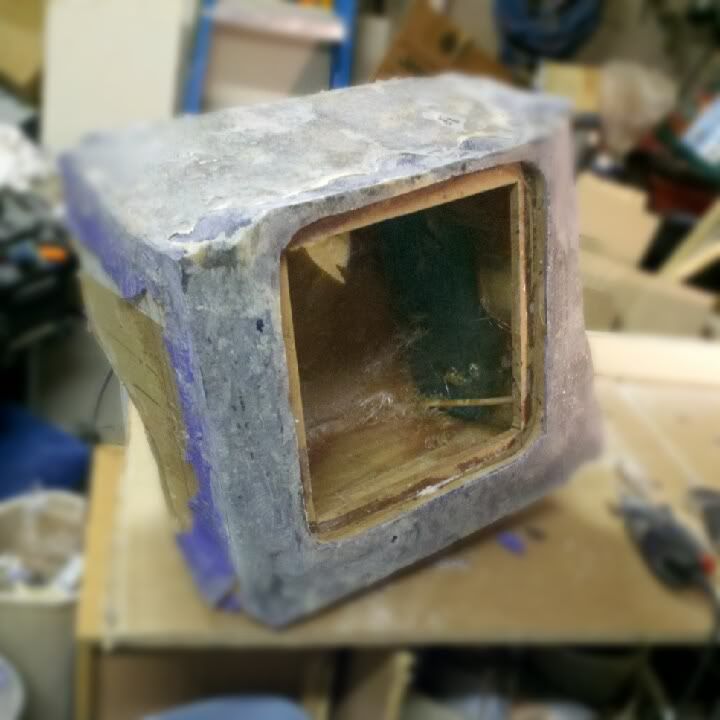 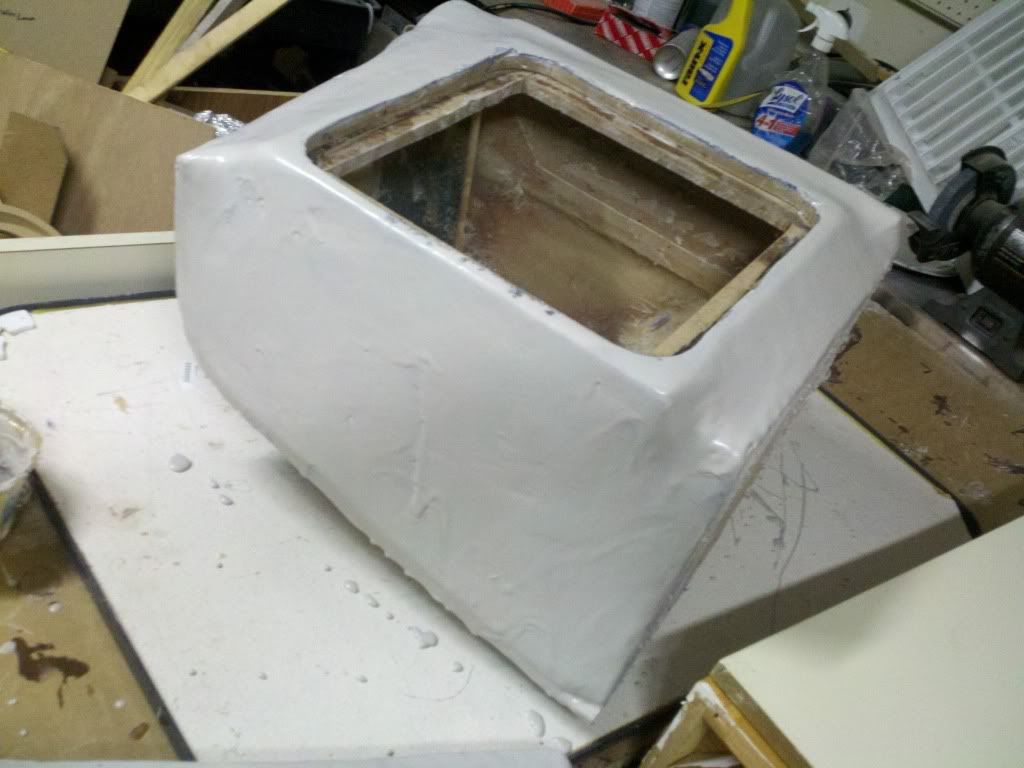 |
| Nov 15, 2012 - 1:53 AM | Forum: My Project · Post Preview: #994056 · Replies: 23 · Views: 7,945 |
|
Enthusiast  Joined Jan 25, '06 From Marlton, NJ Currently Offline |
Nice work. Question, Do you have access to the power supply on that screen? They often blow caps on the power board, so just making sure you are able to get in there to solder on a new one. That Dymo labler...I have at work..I hate it! Are you using vinyl carts? They purchased a bunch of the clear plastic type here, and they just fall off the wires unless you do flag wraps. Yeah if that were to happen i could still swap the board. And the Labeler does blow!! But I wrap it and use clear heatshrink over it (shouldnt have to tho) |
| Nov 14, 2012 - 8:28 AM | Forum: My Project · Post Preview: #993982 · Replies: 23 · Views: 7,945 |
|
Enthusiast  Joined Jan 25, '06 From Marlton, NJ Currently Offline |
Trunk/Wiring: No as i said before, mycar has been a labrat for me learning to install. So opening it up completely the wiring looked Spidermans home. (HAVE A LOOK) 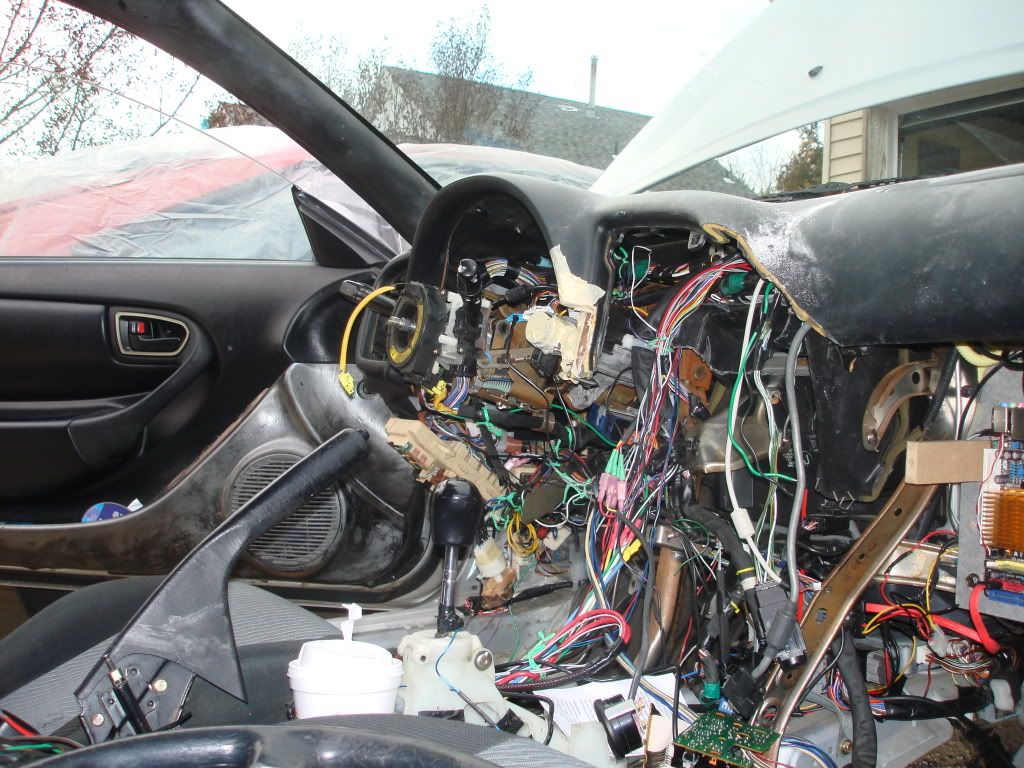 Starting the build on the trunk involved having to rewire the car beforehand since I was going to hide a large majority in the spare tire well. Every line that I planned to modify on relocated had to be done at this ground stage. I have main junction points throughout the car. This makes it easier to troubleshoot lines without tearing everything apart or guessing what’s what if something were to happen. My RFID Keyless Ignition relay bank and fuse box are all located in this area along with my Kinetik Battery. Since Im trying to save max trunk space I planned to put one of my amps in here as well (oh not to mention the crossovers for my front speakers) 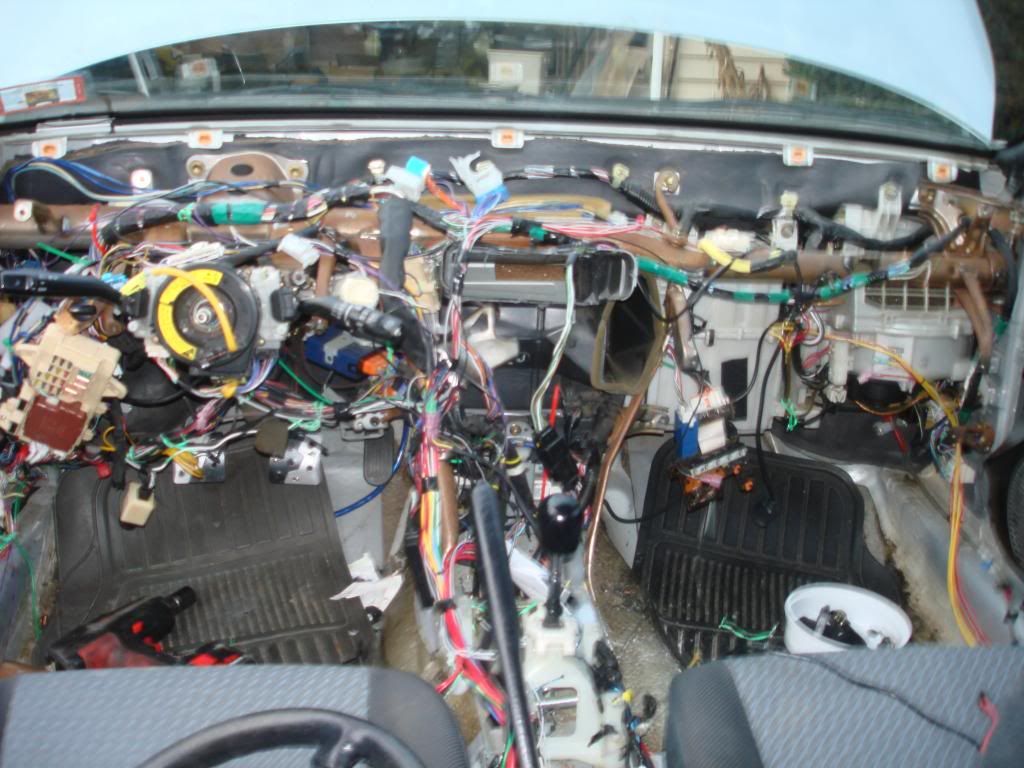 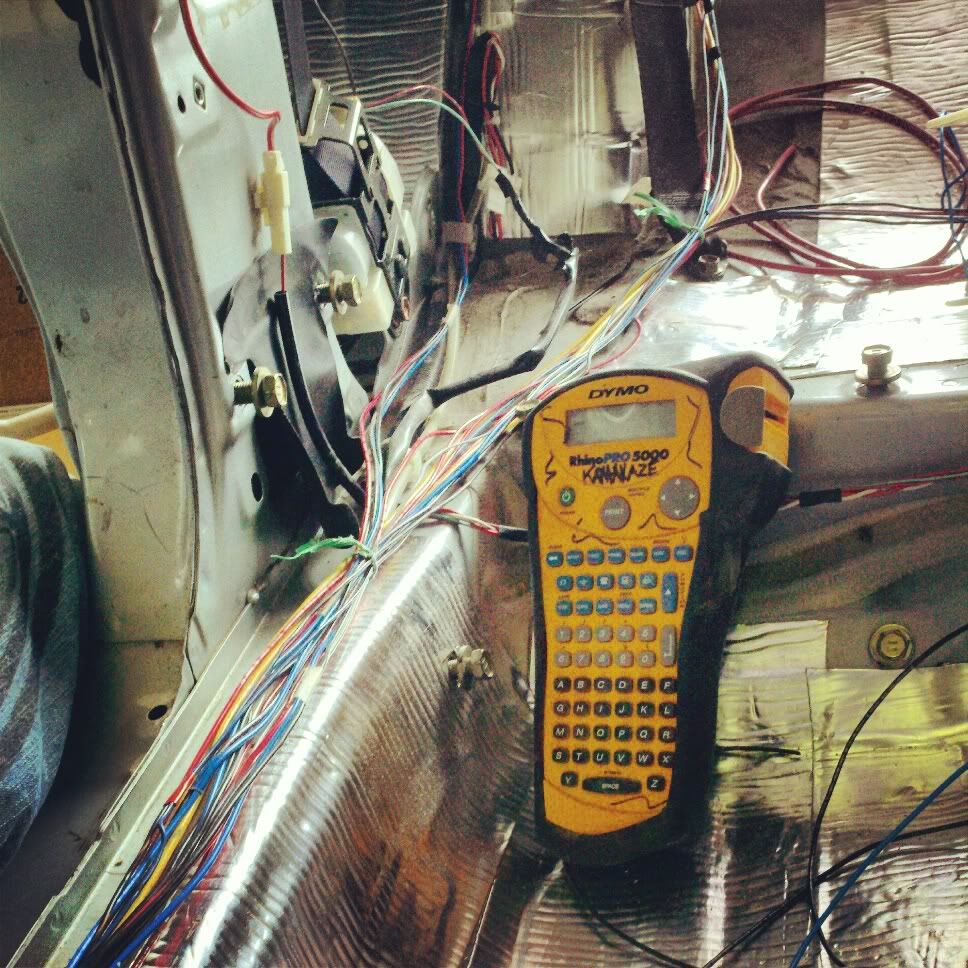 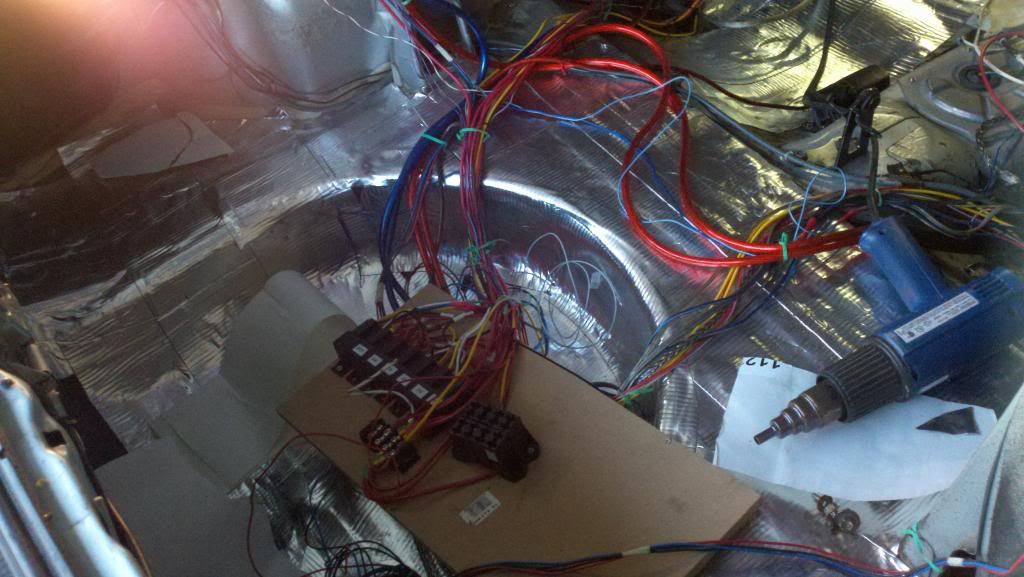 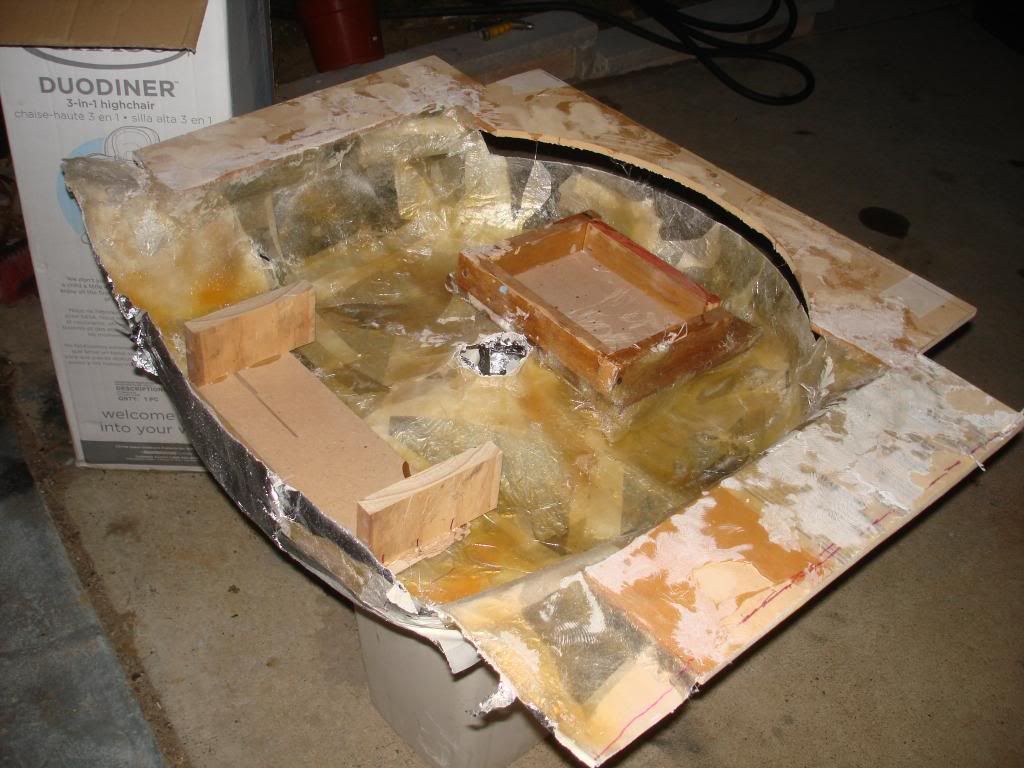 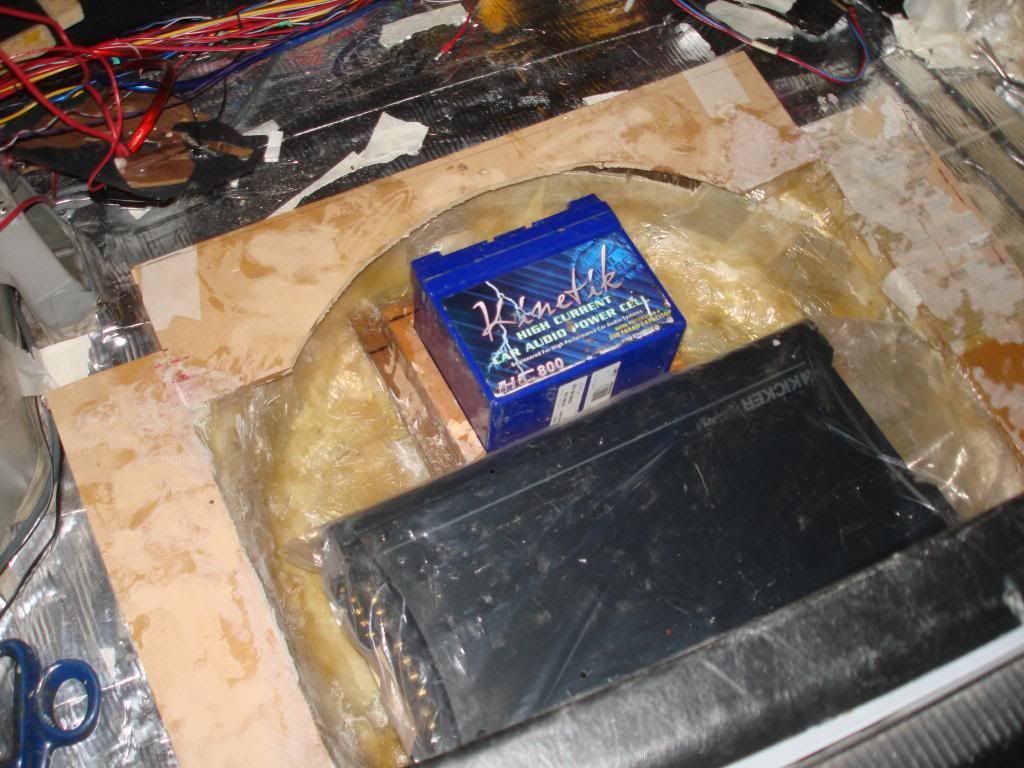 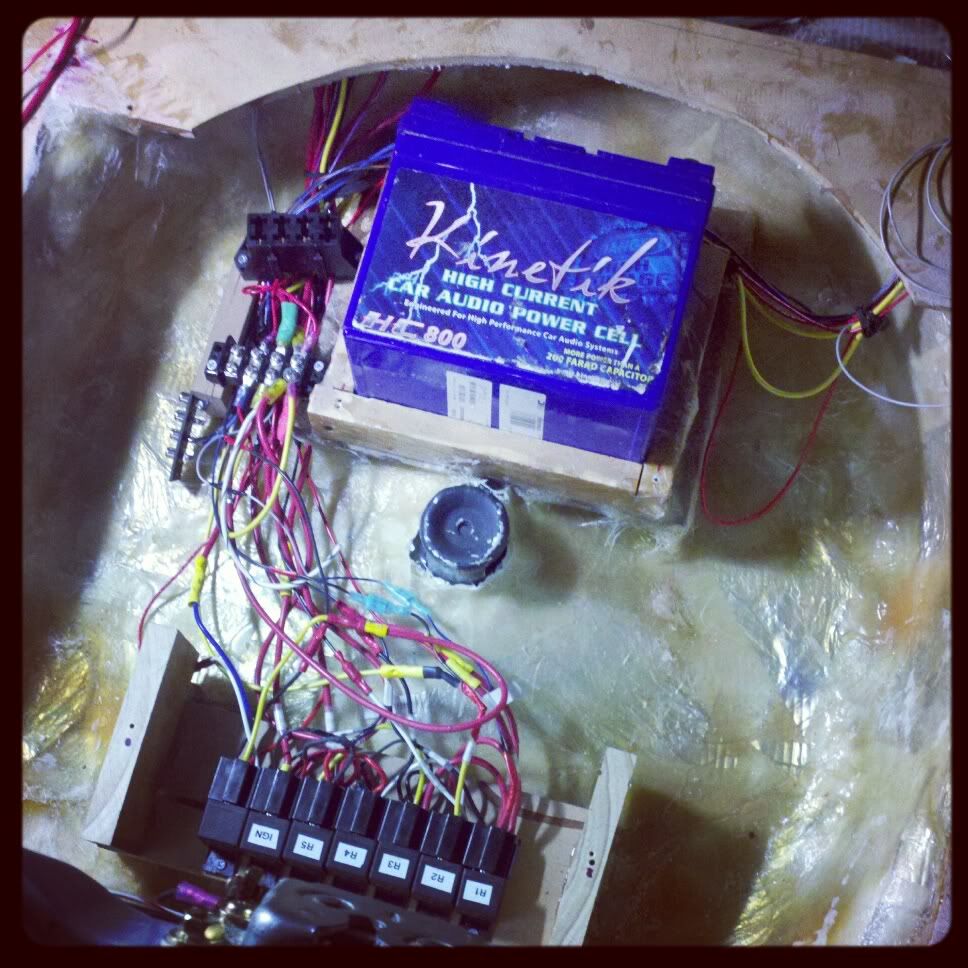 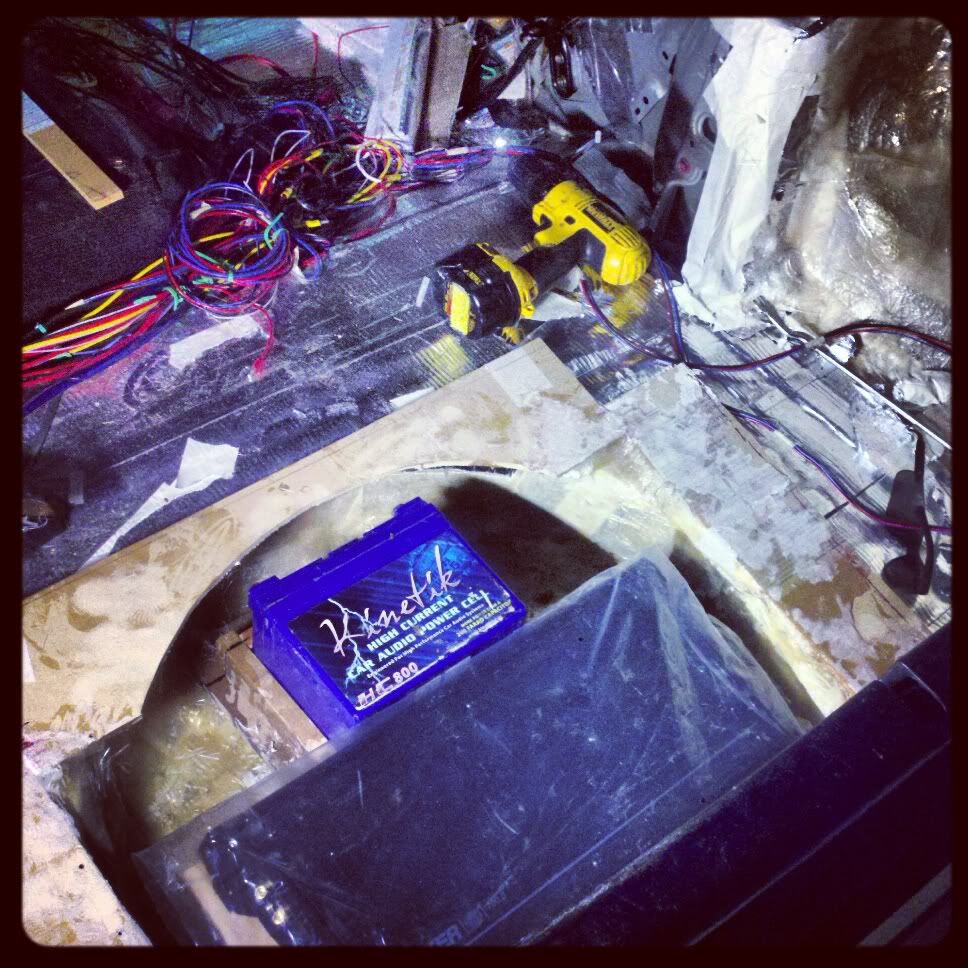 |
| Nov 14, 2012 - 8:01 AM | Forum: My Project · Post Preview: #993979 · Replies: 23 · Views: 7,945 |
|
Enthusiast  Joined Jan 25, '06 From Marlton, NJ Currently Offline |
Everything fit good so its sand sand sand sand sand time! Prepping for later upholstery, I still have to finish all the other pieces and fit them correctly before I go and get that done. I will get back to the under dash part because theres alotttt that goes into fitting these pieces and Im still working on it 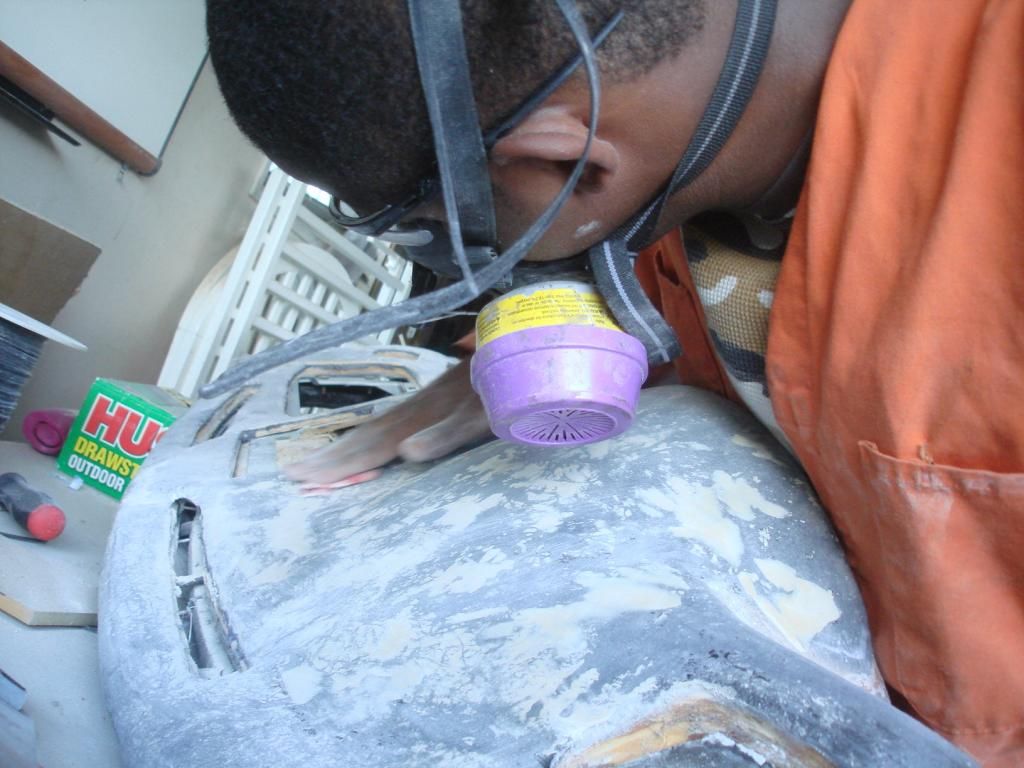 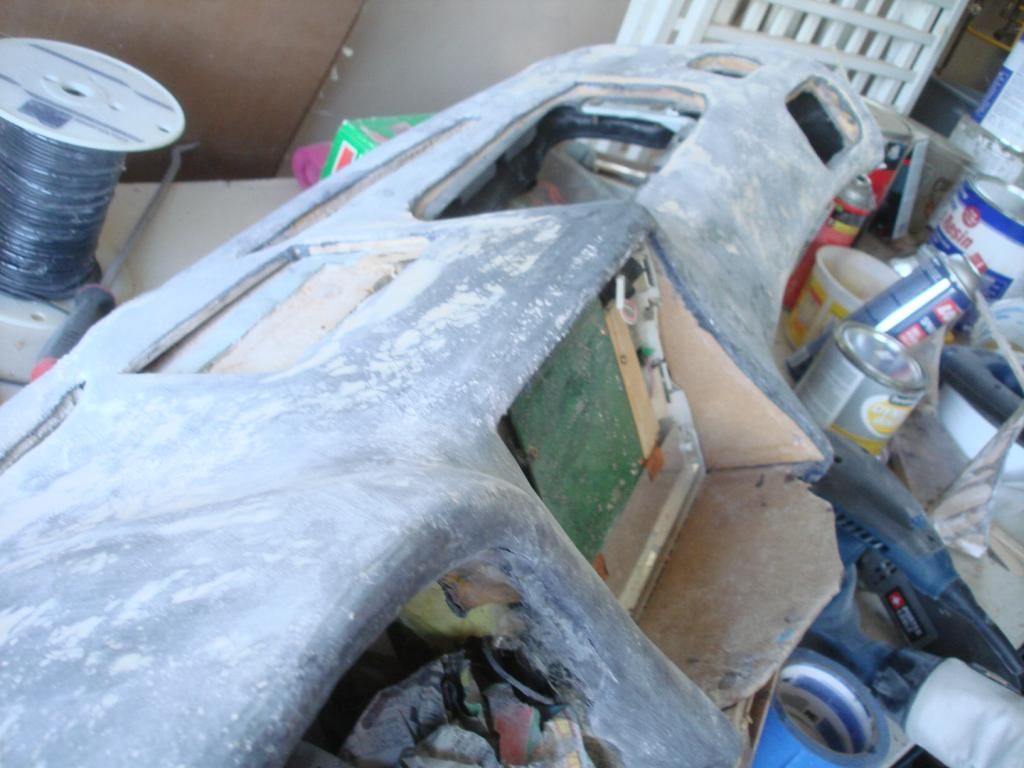 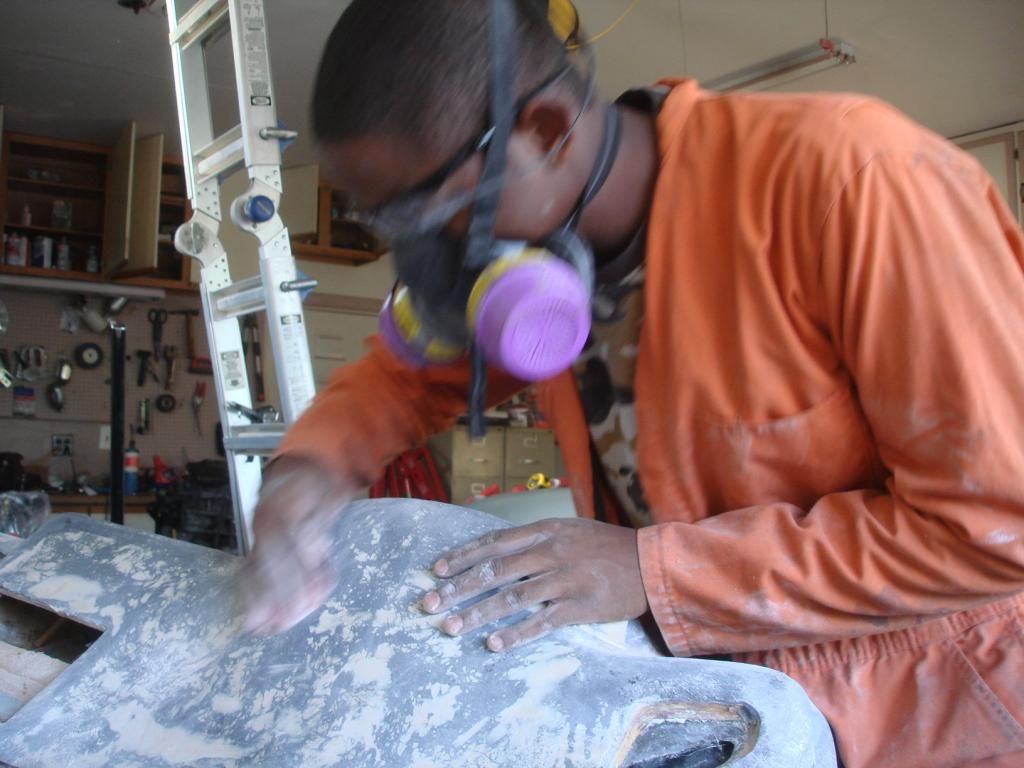 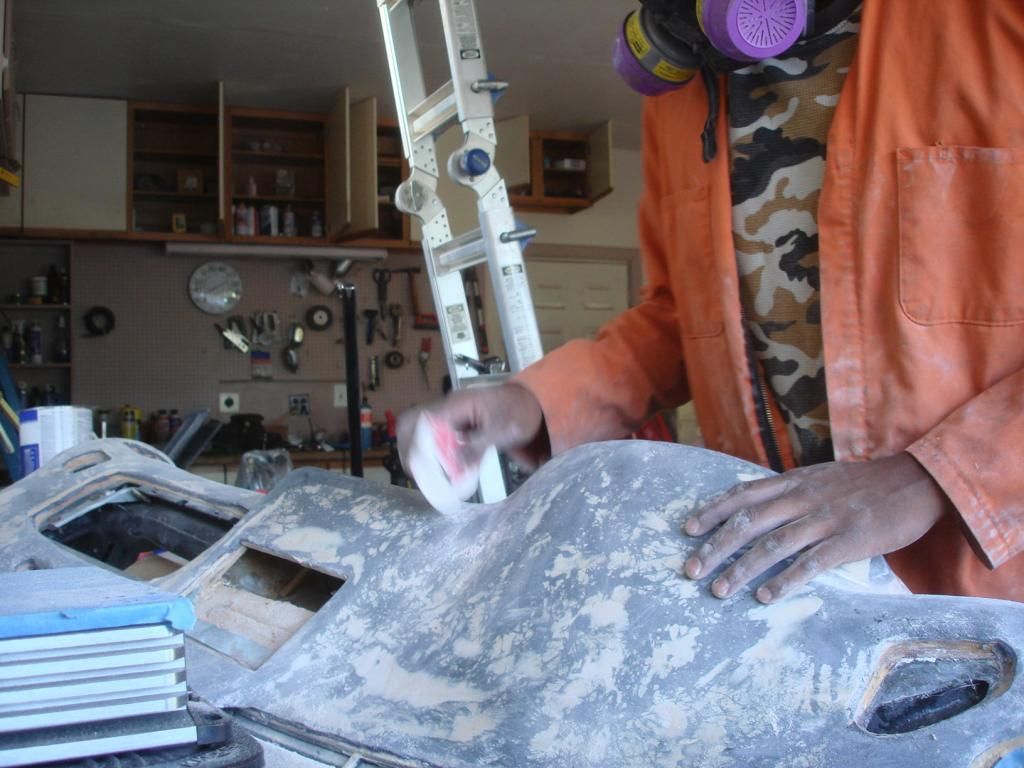 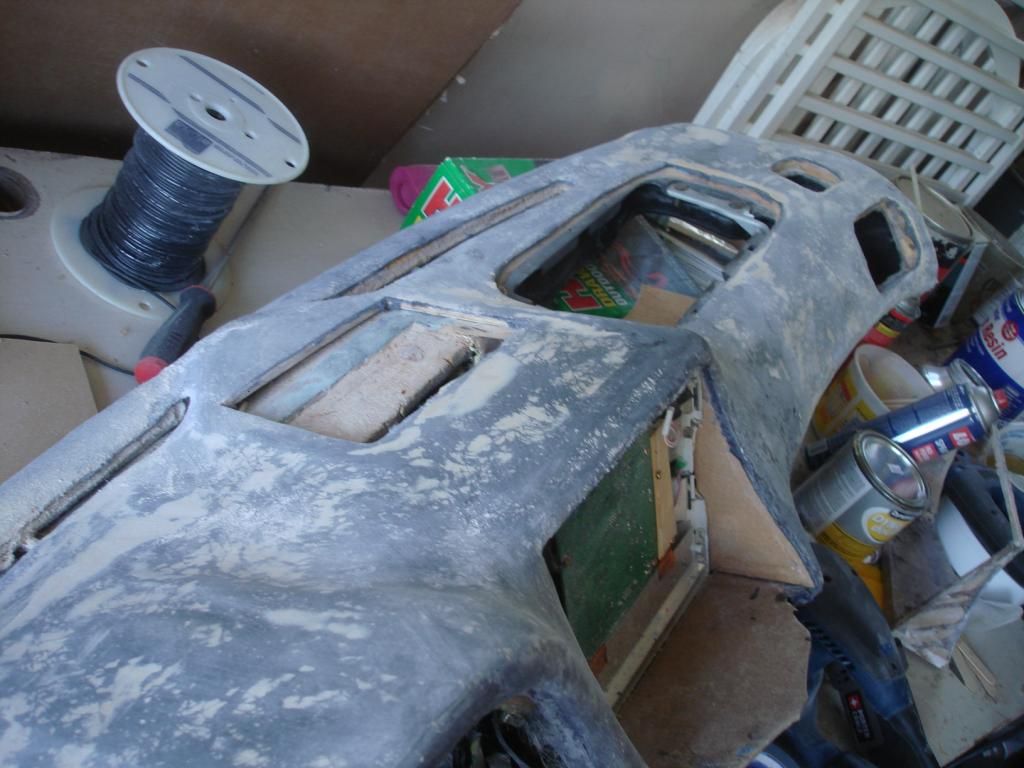 |
| Nov 11, 2012 - 8:33 AM | Forum: My Project · Post Preview: #993631 · Replies: 23 · Views: 7,945 |
|
Enthusiast  Joined Jan 25, '06 From Marlton, NJ Currently Offline |
Sorry guys the Video Playlist link I posted was bad ----UPDATED--- |
| Nov 10, 2012 - 10:37 PM | Forum: My Project · Post Preview: #993609 · Replies: 23 · Views: 7,945 |
|
Enthusiast  Joined Jan 25, '06 From Marlton, NJ Currently Offline |
Seems like it's gonna look pretty good as long as you spend the time getting the glass work nice and smooth. What's the monitor on top of the dash for, HUD? And it looks like that center monitor is pretty recessed for a touch screen. That's lots of leaning and not paying attention to the road No lean at all. Its recessed exactly 2.5inches, if i remember ill post a pic when i put it back in the car and yeah the monitor on top will be for HUD |
| Nov 10, 2012 - 5:59 AM | Forum: My Project · Post Preview: #993556 · Replies: 23 · Views: 7,945 |
|
Enthusiast  Joined Jan 25, '06 From Marlton, NJ Currently Offline |
Once that dried I could put the hood on over the monitor housing which replaced the contour I was trying to get rid of and also hold the H.U.D. monitor. 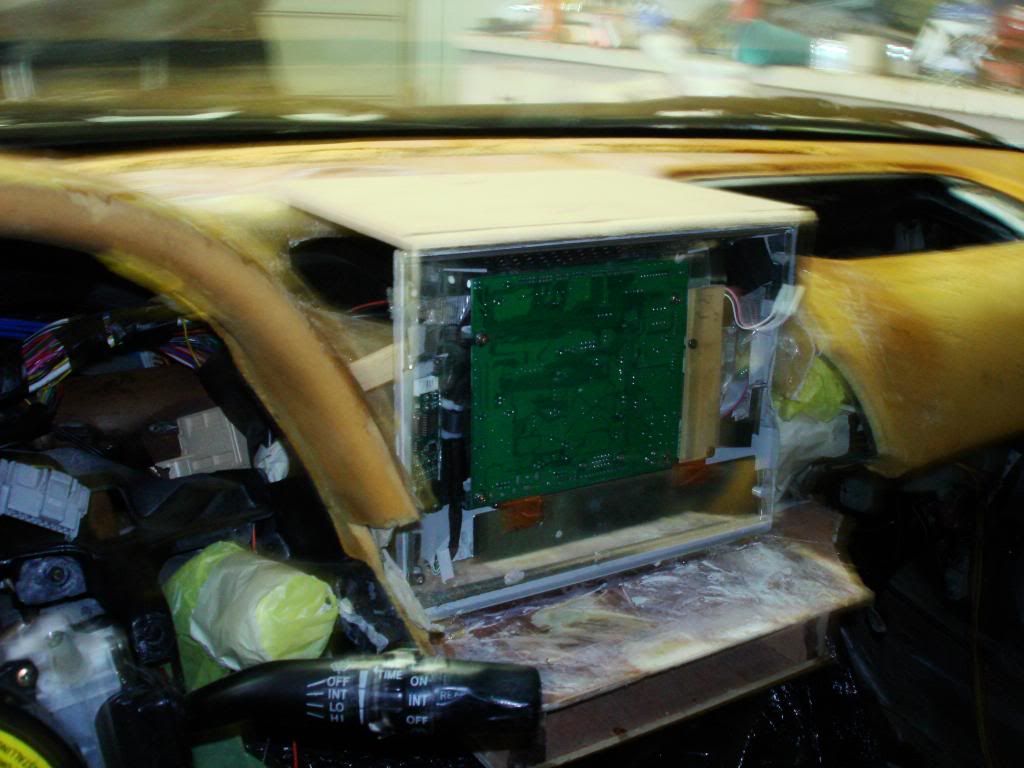 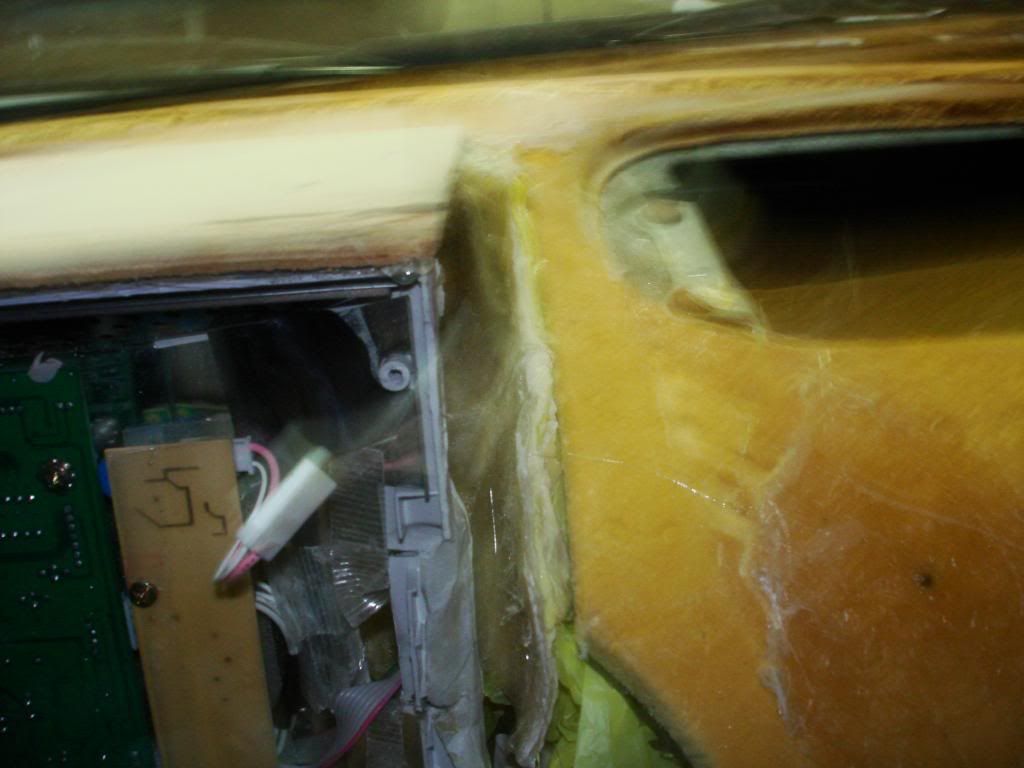 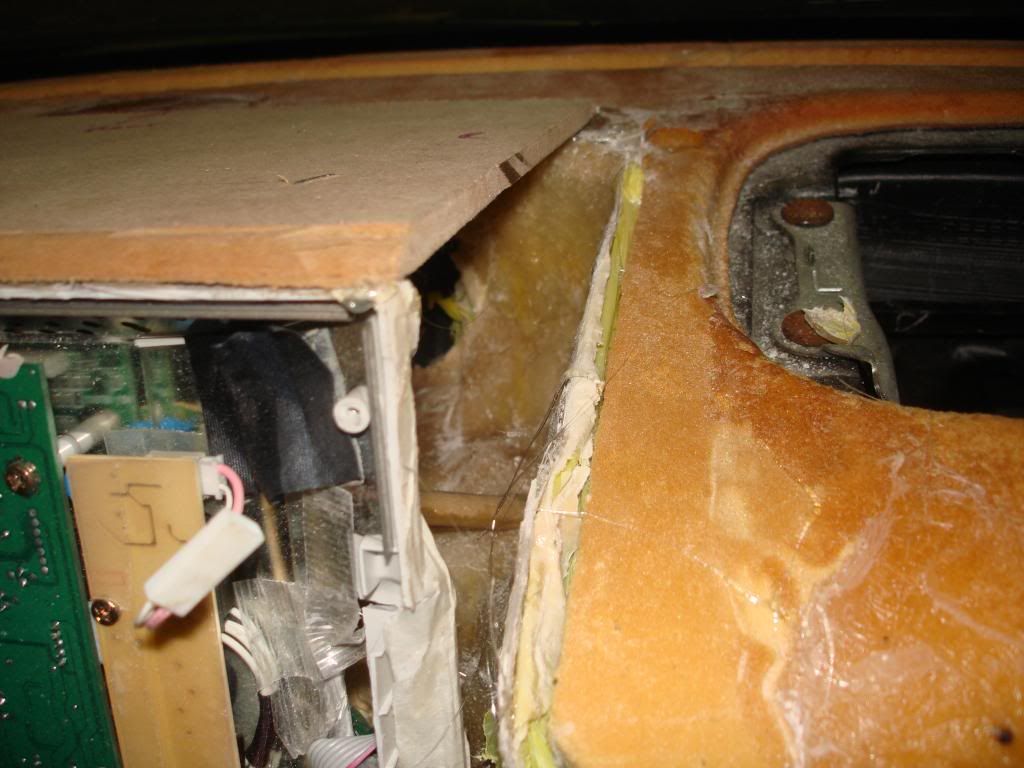 I stretched fleece from the hood to the dash to cover any more gaps and create more shape. 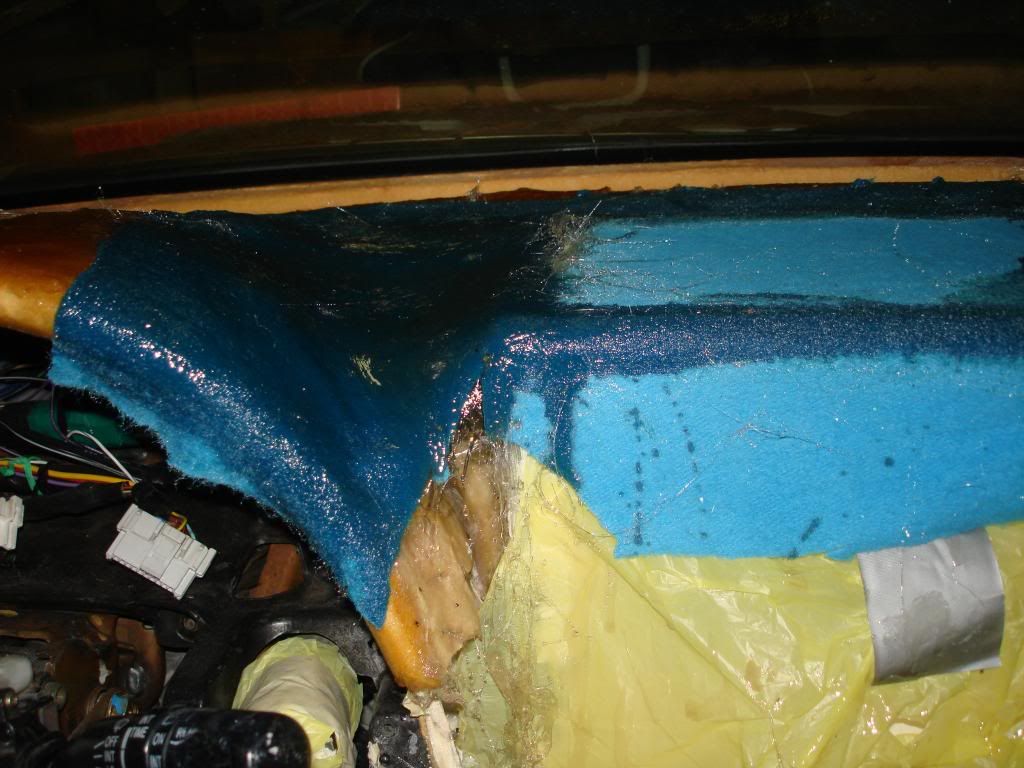 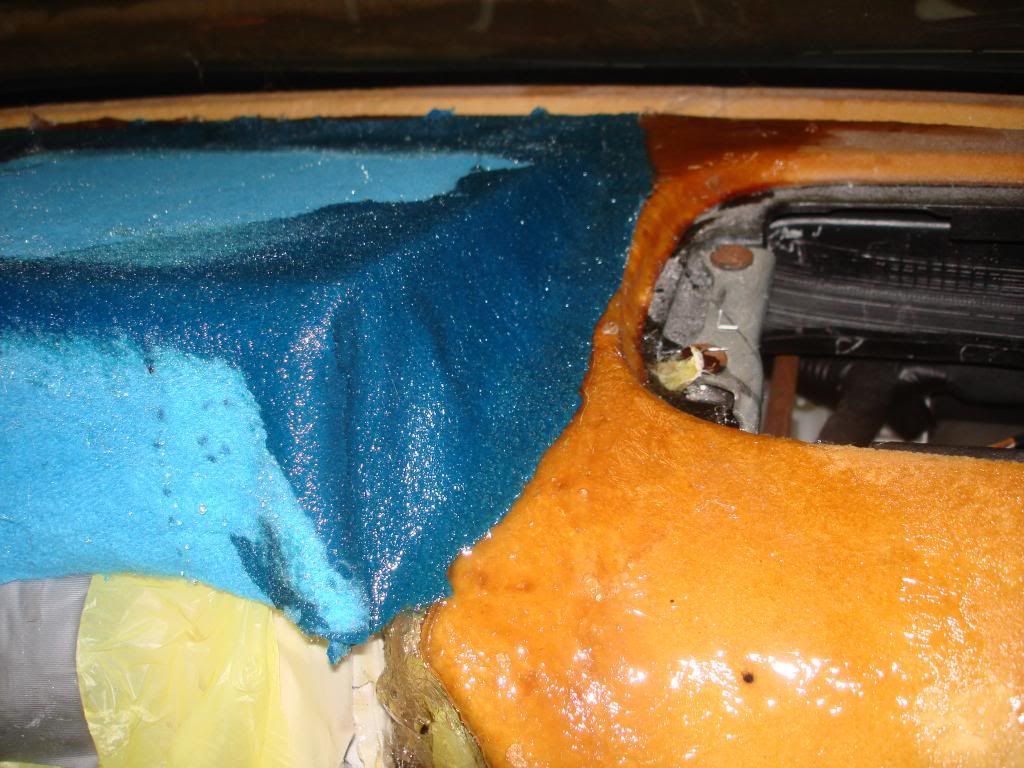 Planning from my drawings I figured this was probably the best time to try and mount my DVD drive real quick. 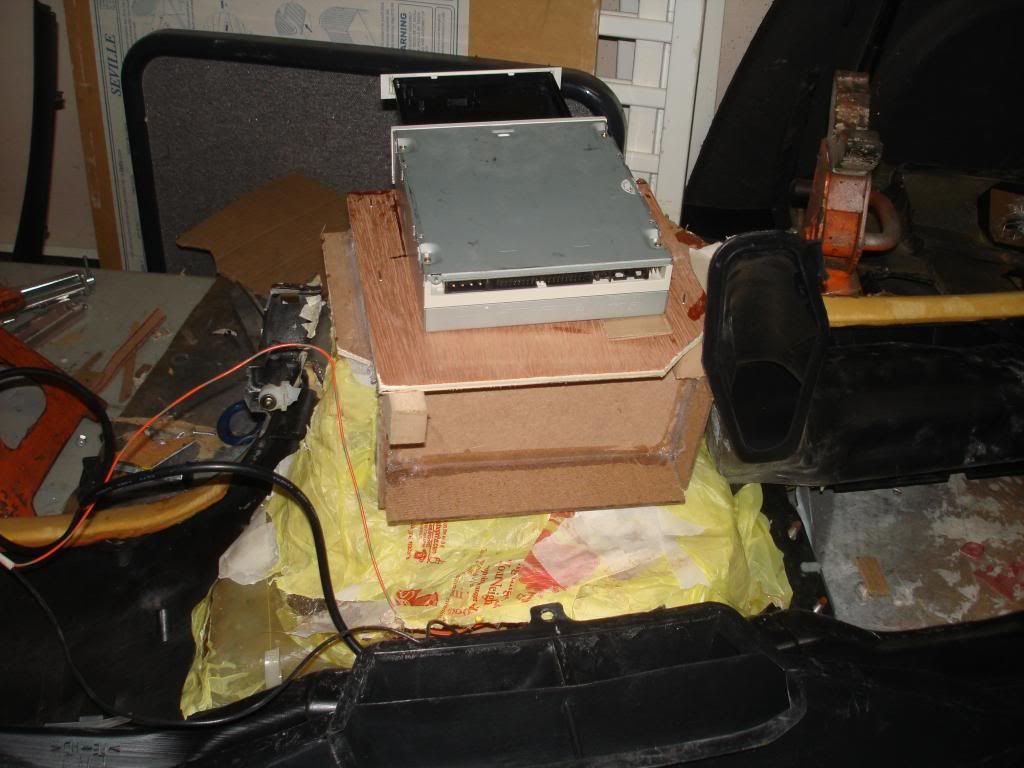 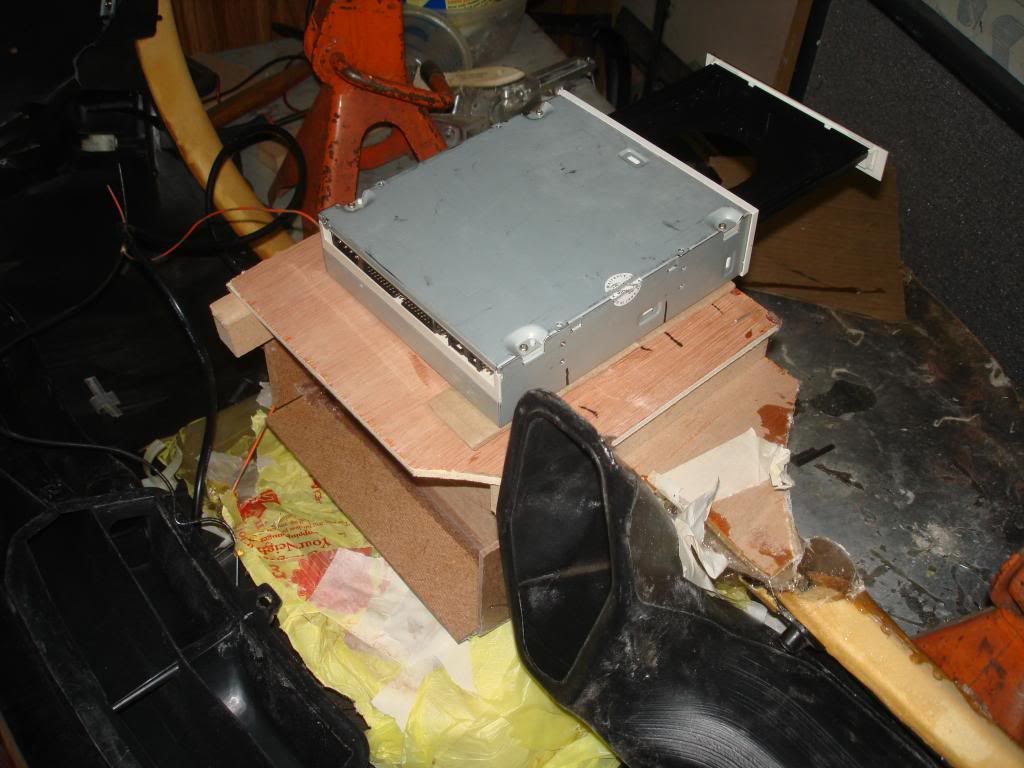 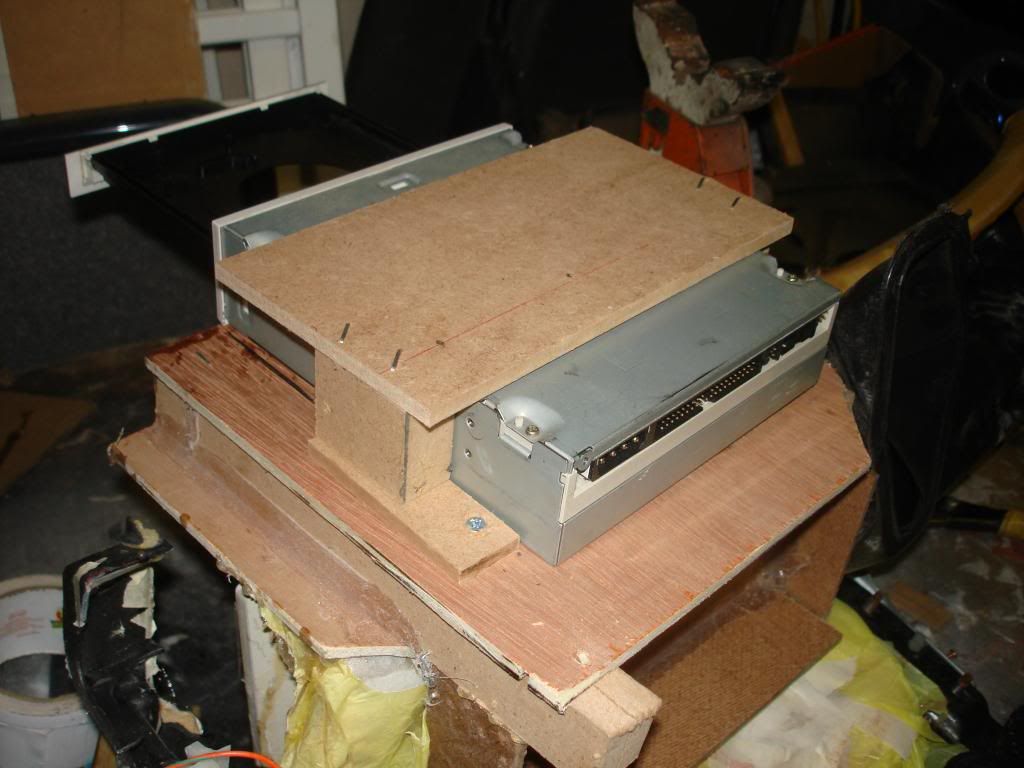 Now all that is left on the dash board was to wrap entire thing in fleece, I did this so it gives entire dash a uniform flow, rather than trying to fill in massive dips trying to get everything even. Also prevents factory foam from soaking up too much resin. (dont have a pics of the fleece wrap) 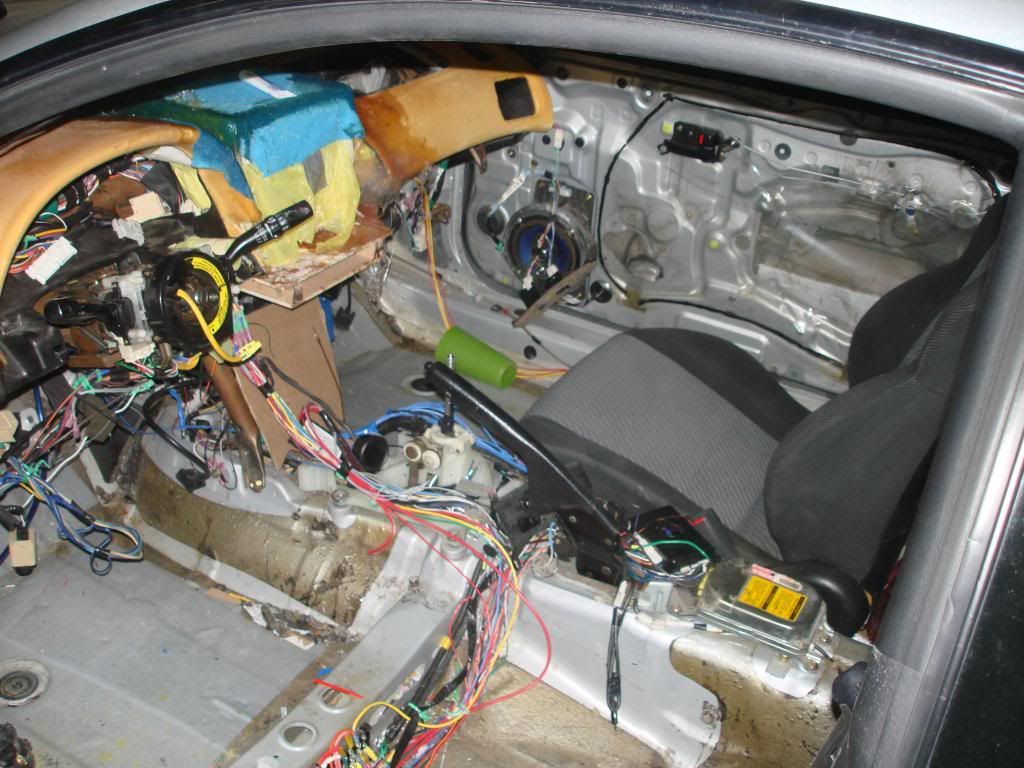 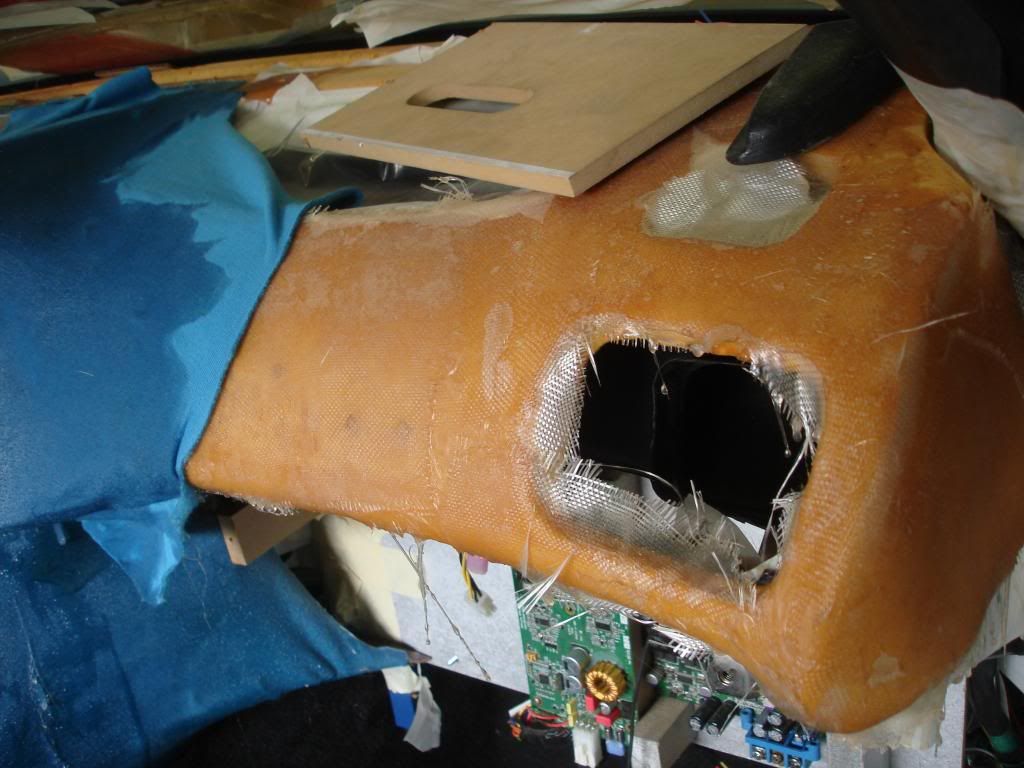 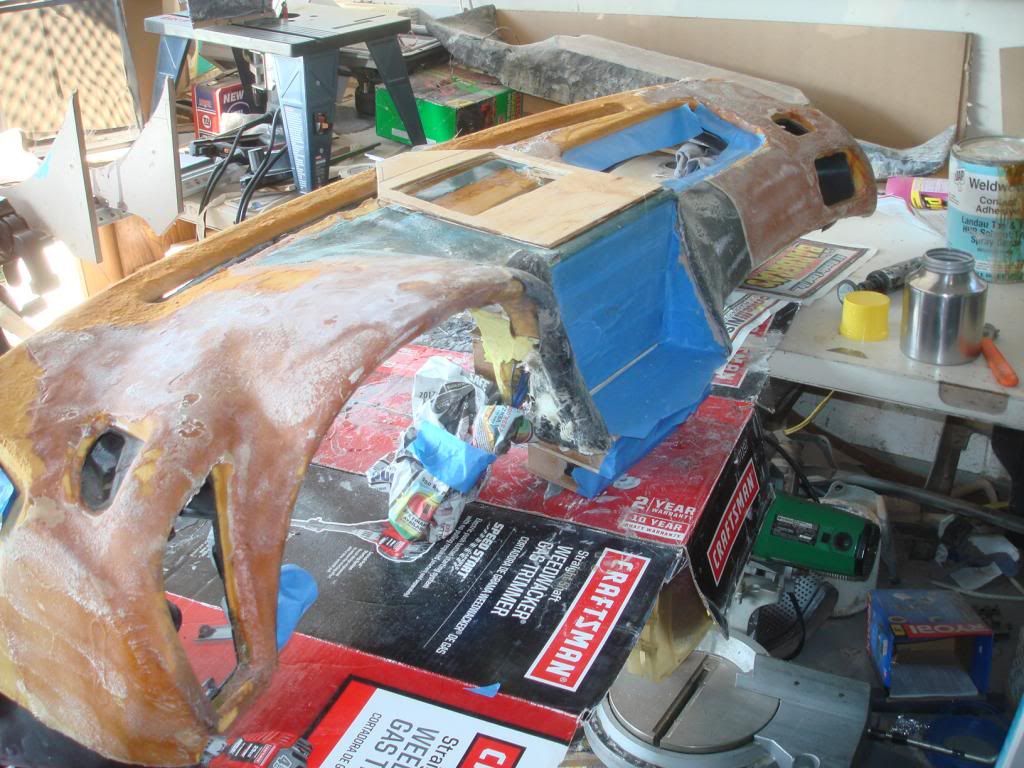 I broke the original bezel i had for the monitor so i was forced to make a new one 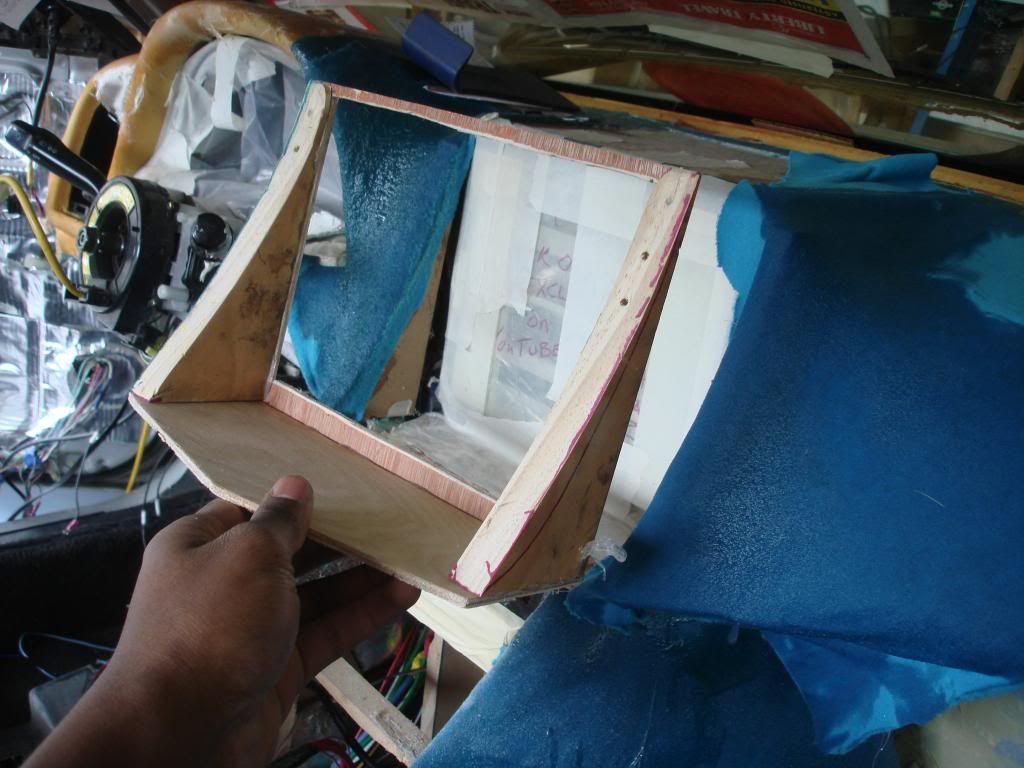  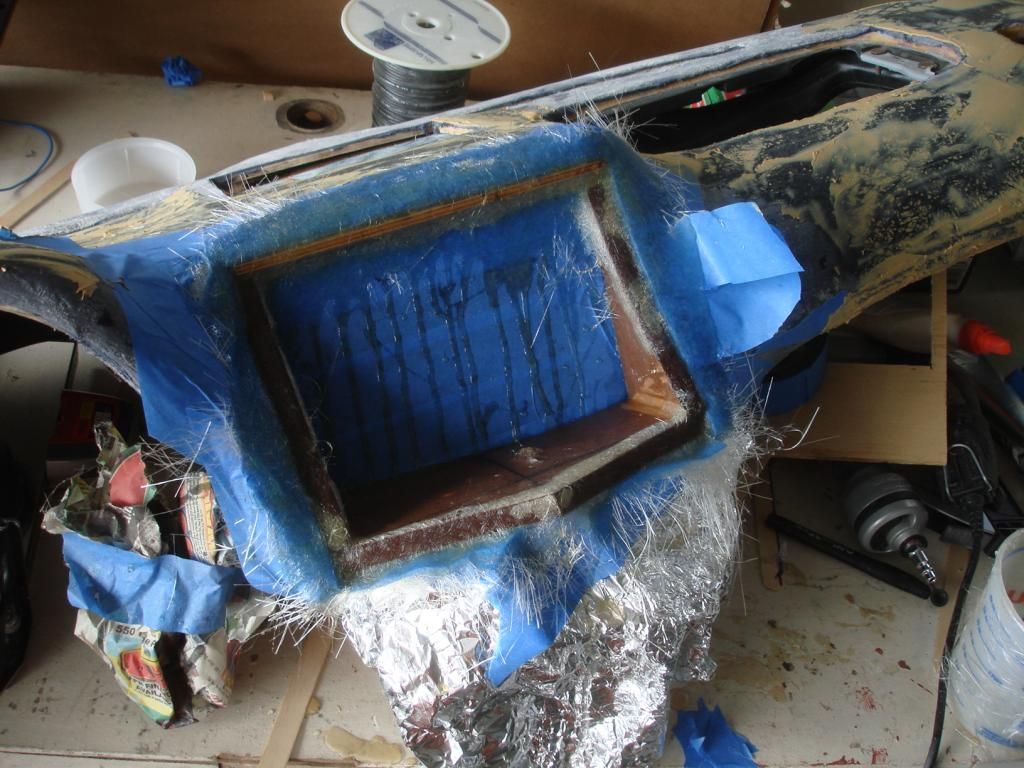 After everything hardened I could cut and trim as needed to fit all my insert pieces (monitor, & vents) 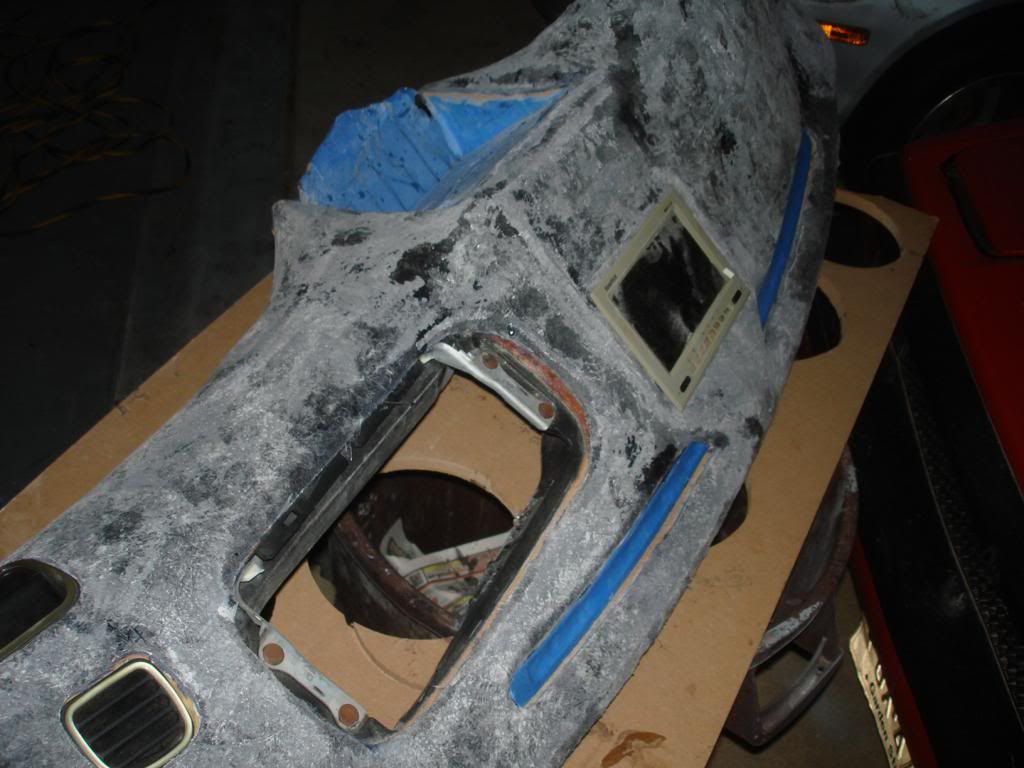 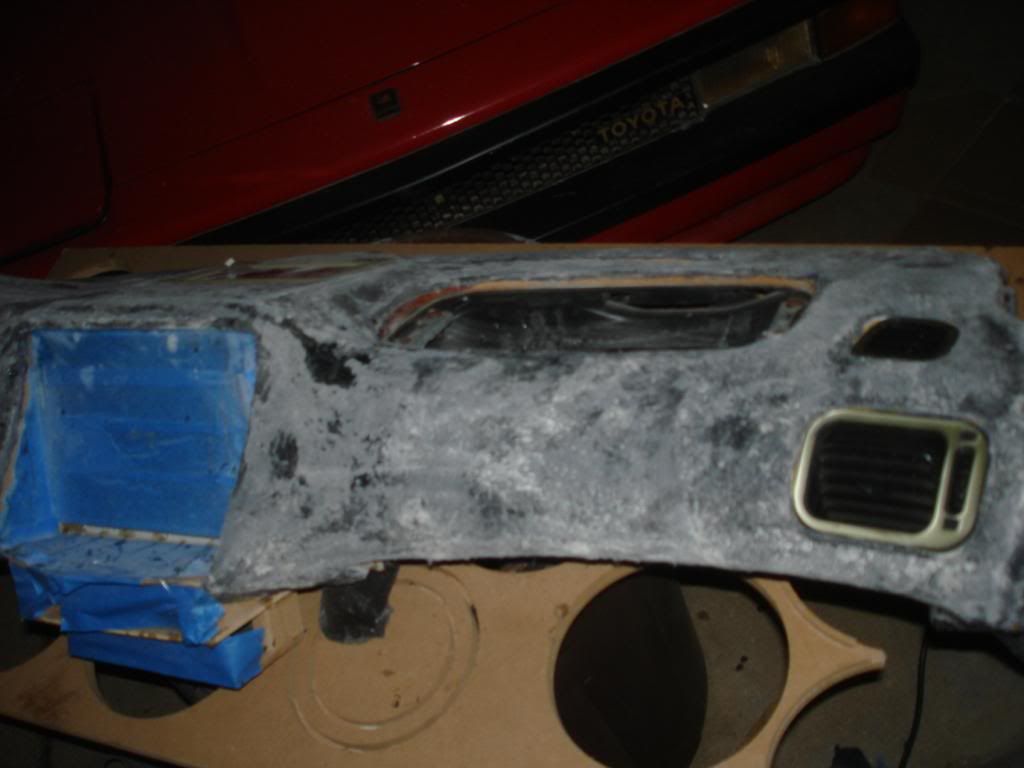 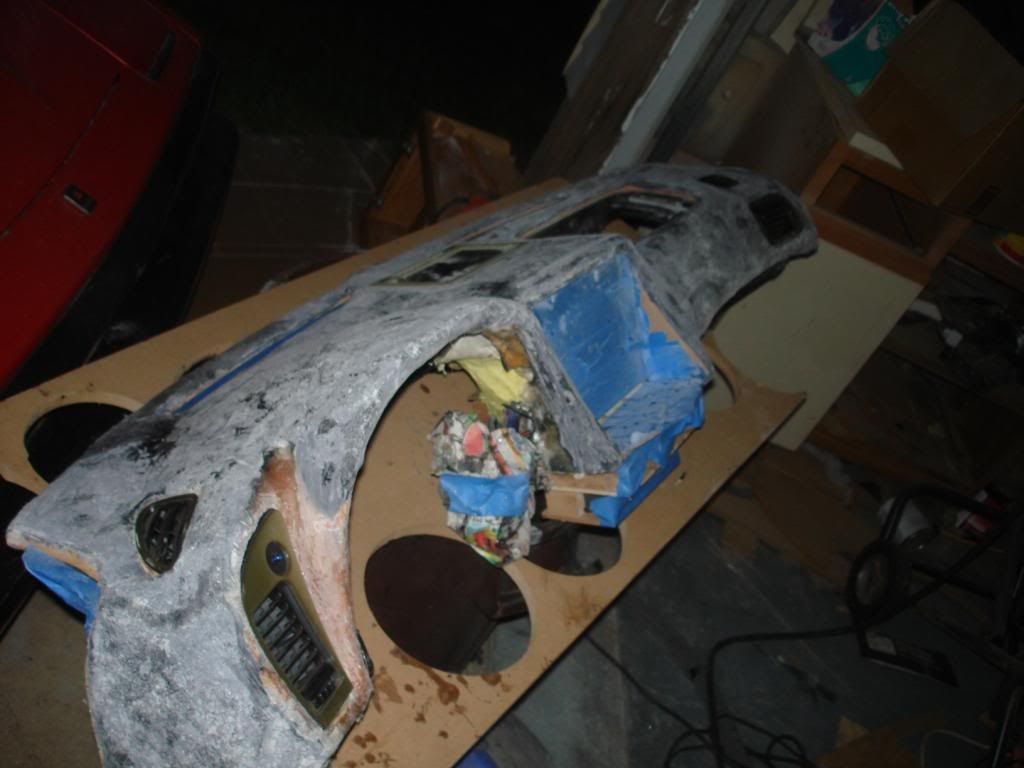 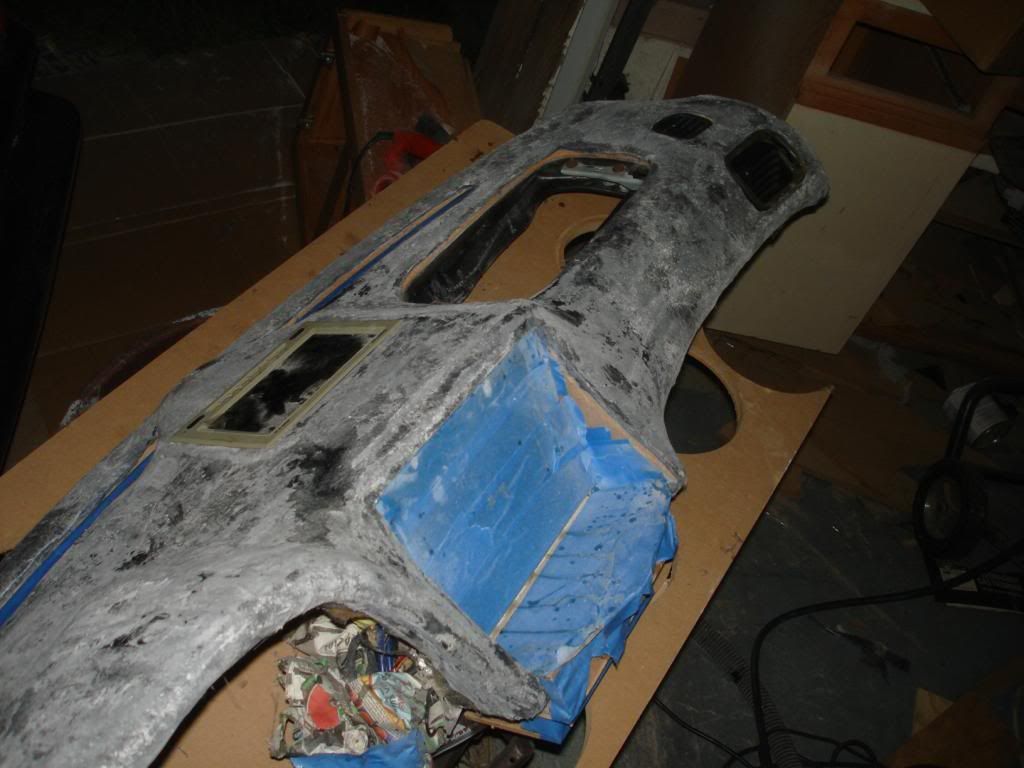 |
| Nov 7, 2012 - 10:44 PM | Forum: My Project · Post Preview: #993345 · Replies: 23 · Views: 7,945 |
|
Enthusiast  Joined Jan 25, '06 From Marlton, NJ Currently Offline |
Dashboard: I cut the dash out to remove the awkward contour and was left with a largeeee gap to fill. If was going to position the screen where I wanted the ac vents would have to be moved. I made a rerouted pathway that the monitor could mount on. 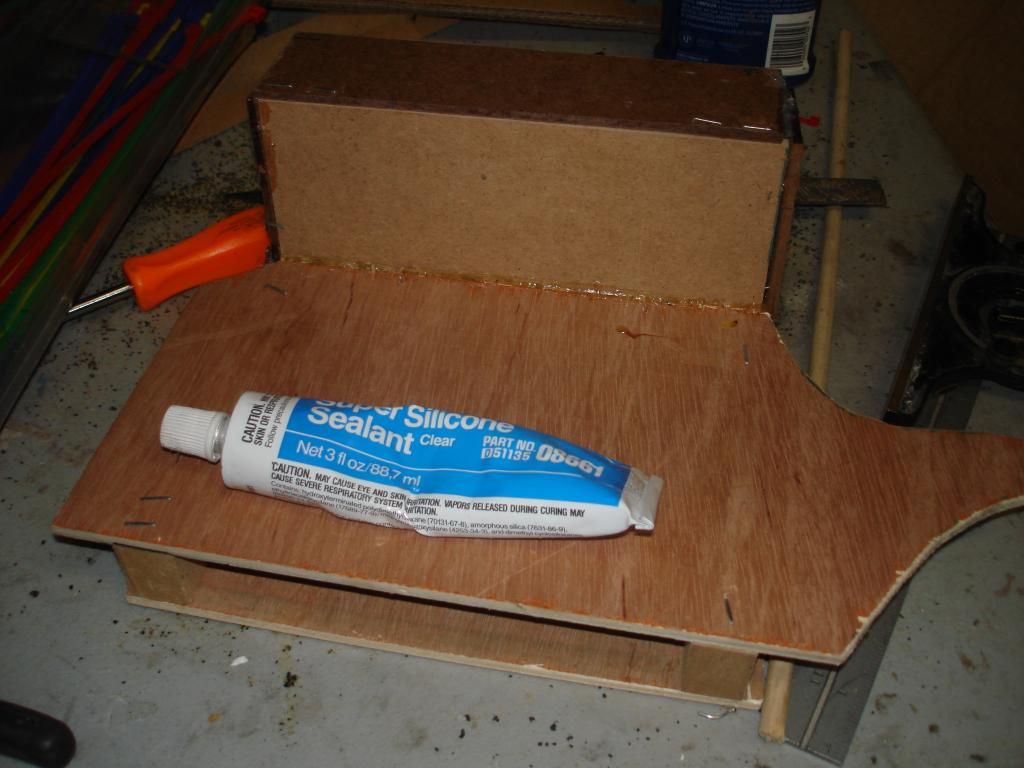 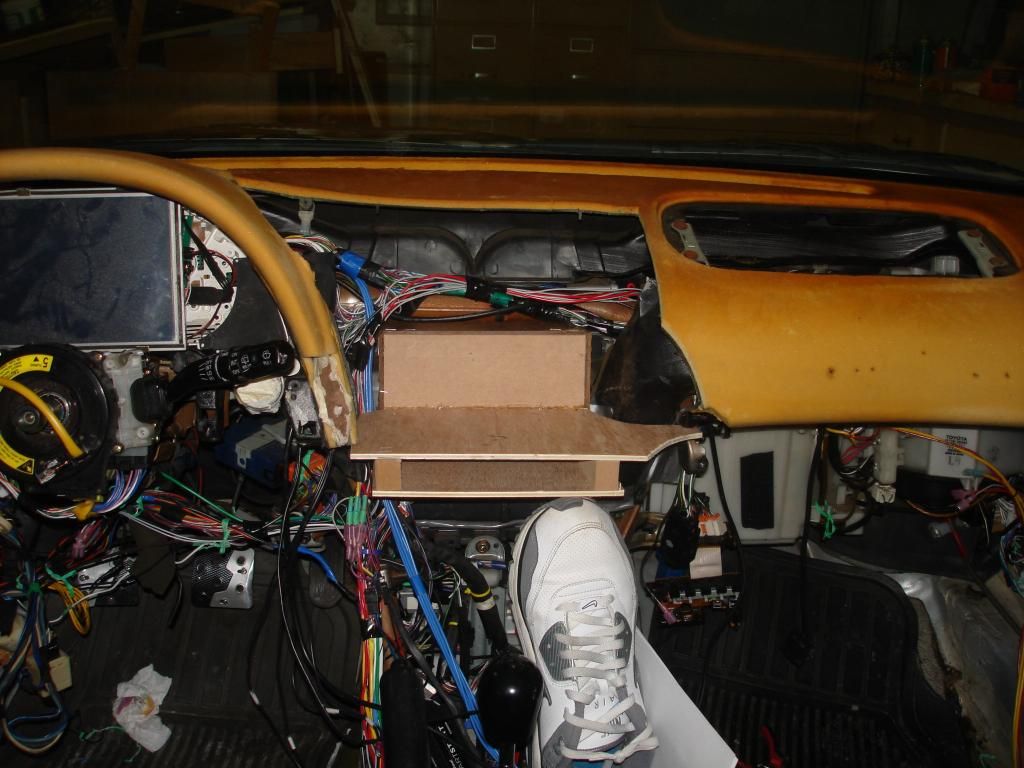 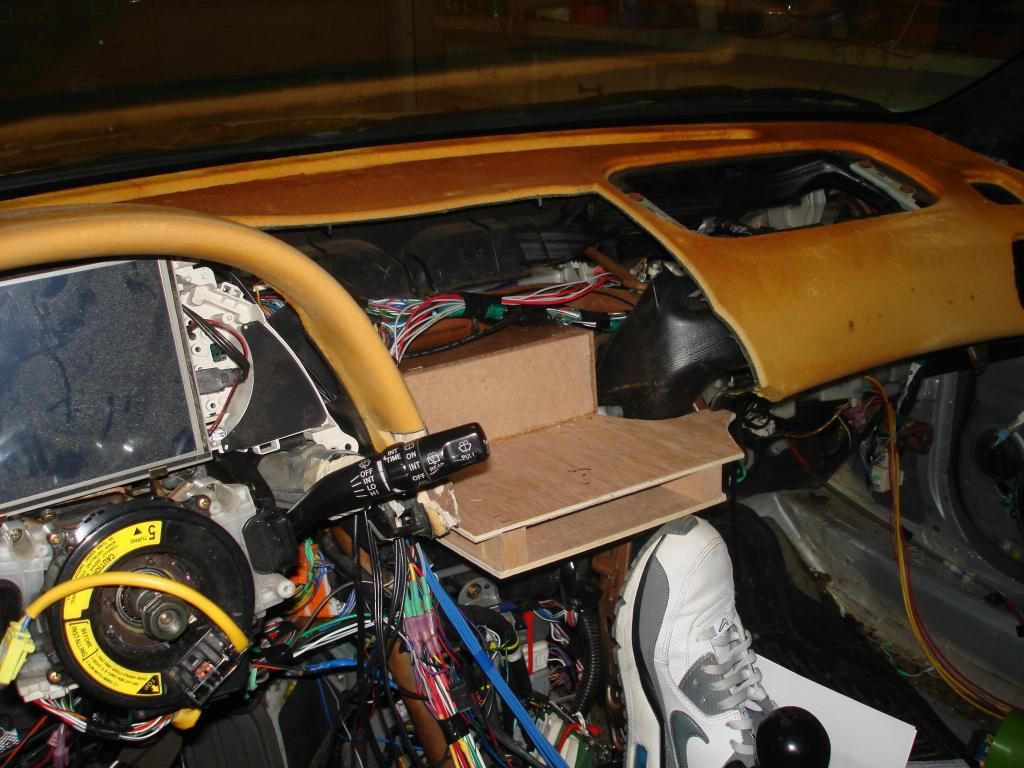 I removed all the factory vinyl off the dashboard, 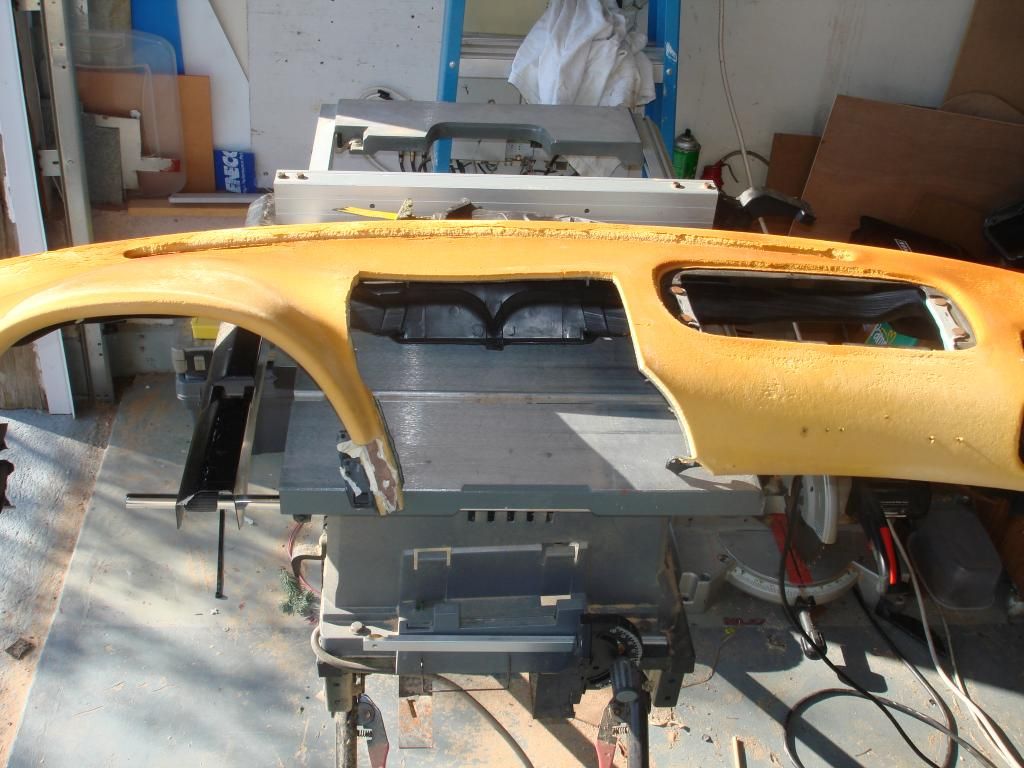 then put the dash back in the car. Using plastics bags and realllllyy cheap masking tape I masked the gap, made a mold of the gap, then use resin and dowels to hold the rear of the monitor on. 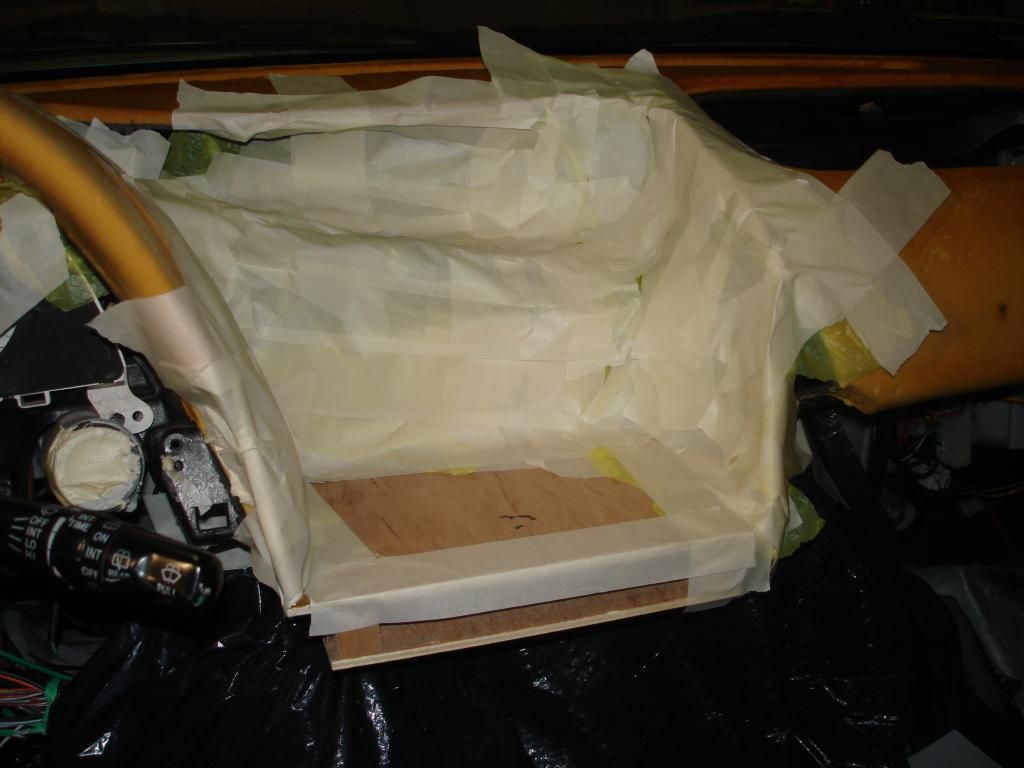 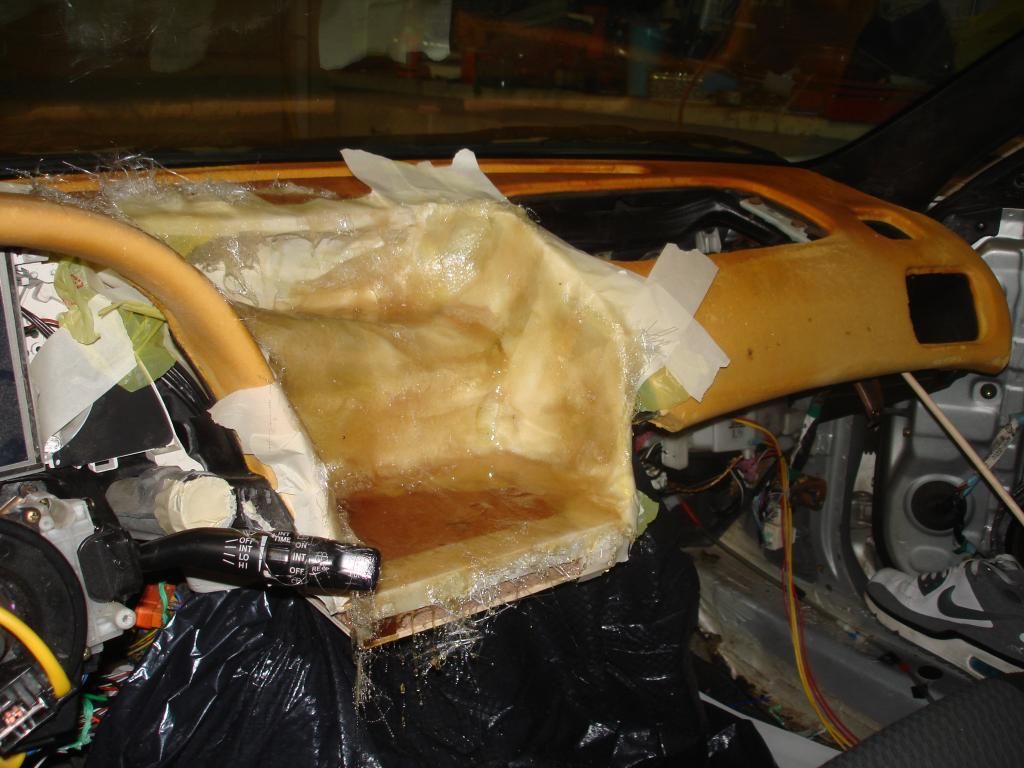 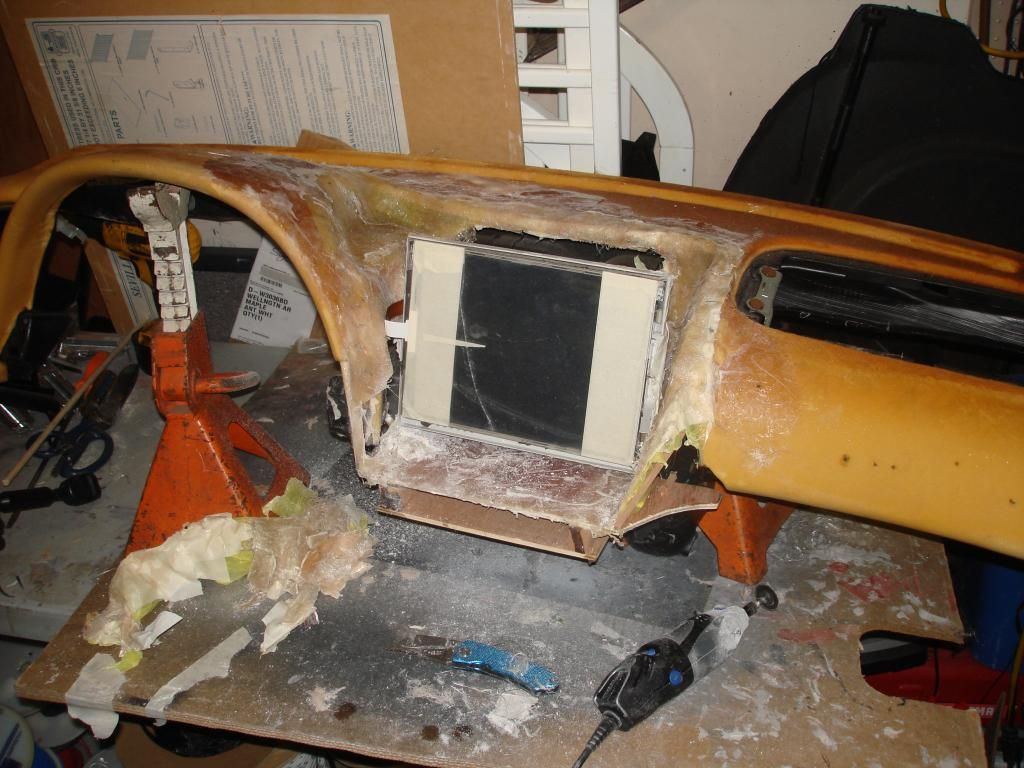 |
| Nov 7, 2012 - 10:17 PM | Forum: My Project · Post Preview: #993342 · Replies: 23 · Views: 7,945 |
|
Enthusiast  Joined Jan 25, '06 From Marlton, NJ Currently Offline |
Figure I show you where i started so you can appreciate where Im going with this build. ((My original NEWBBBBB setup when i was first interested in customizing lol smh)) 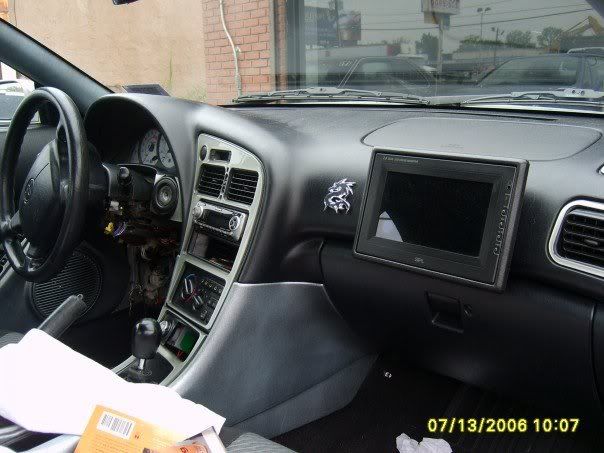 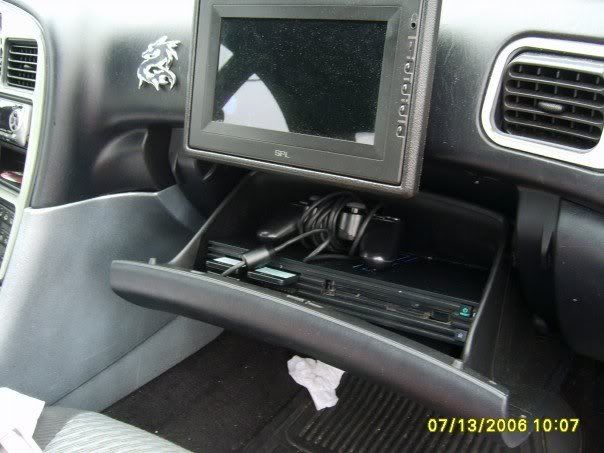 ((Then as I got a little better i upgraded and did my first Car PC/XBOX Install)) 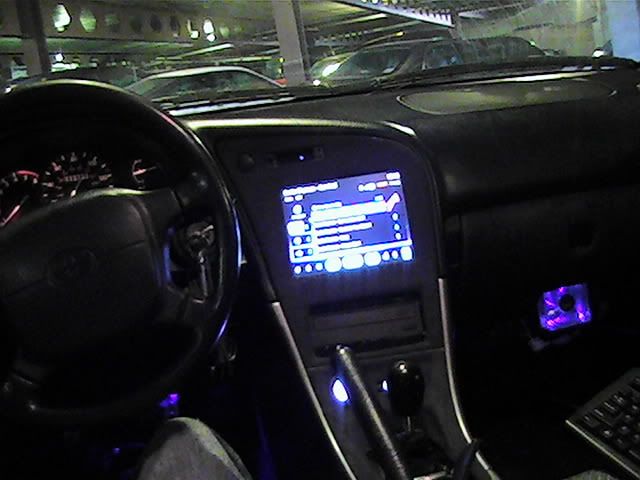 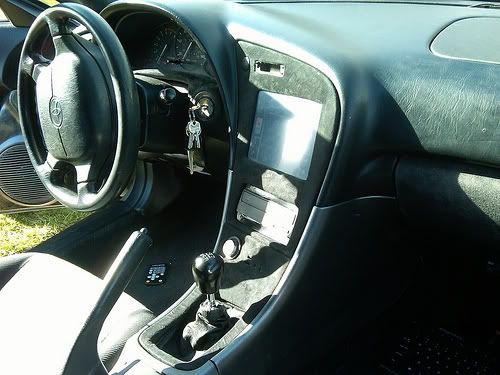 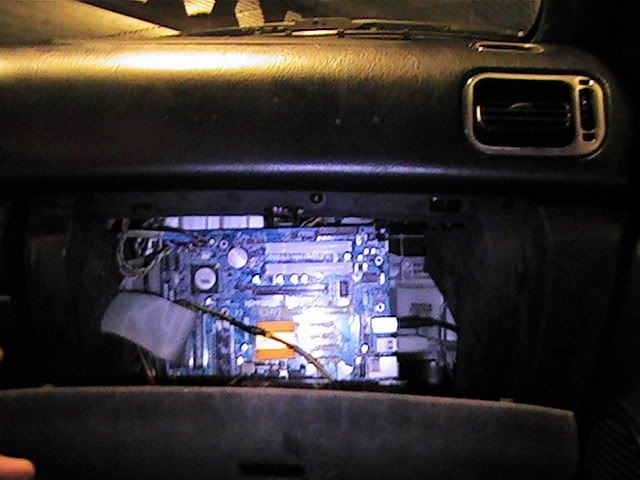 So first things first…I needed a plan. I could probably estimate about 13913042040 hours in just staring at the already customized dash, thinking to myself how I could step this up a notch. I was already set on learning to fiberglass door panels and building a center console, but the dash need to go from Toyota to Exclusive. Now originally I was only going revamp the touchscreen I already had installed with some type of enclosure and fix it to the dashboard. When I went to order the touchscreen glass, I guessed the size and thought it was a 10in, only to get it in the mail from China, put it against my monitor and realize it was an 8in screen. No sense in going backward now. 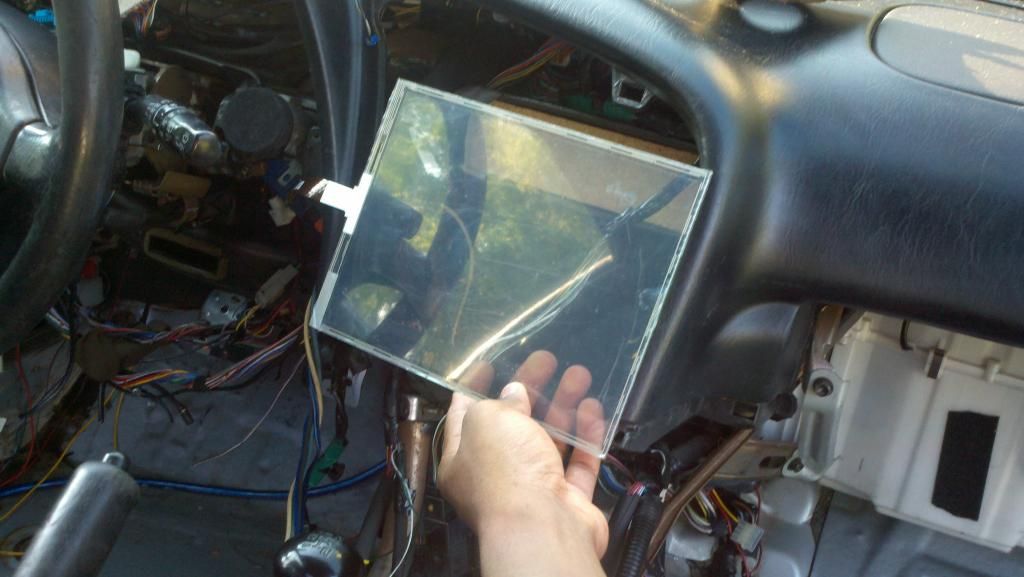 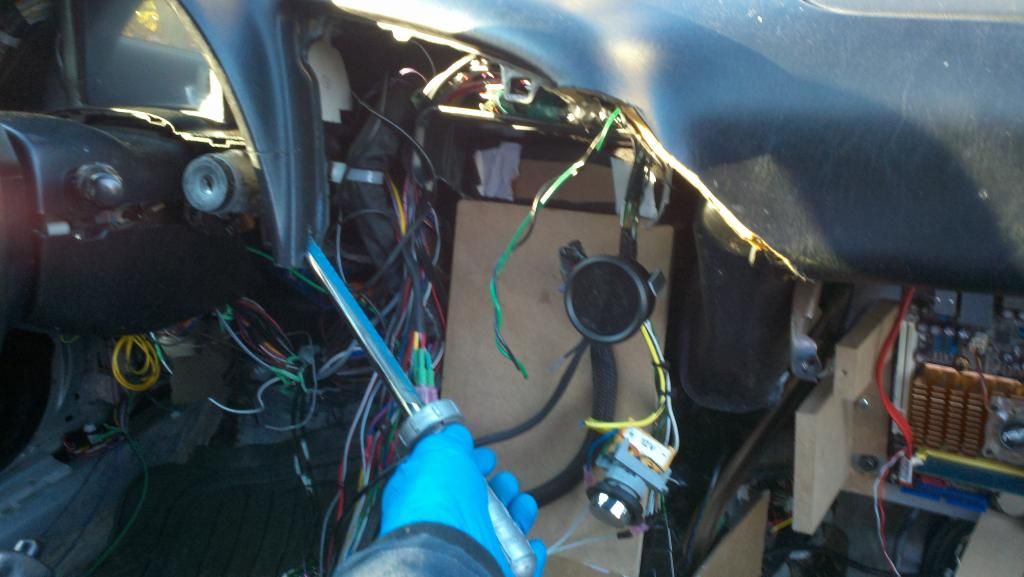 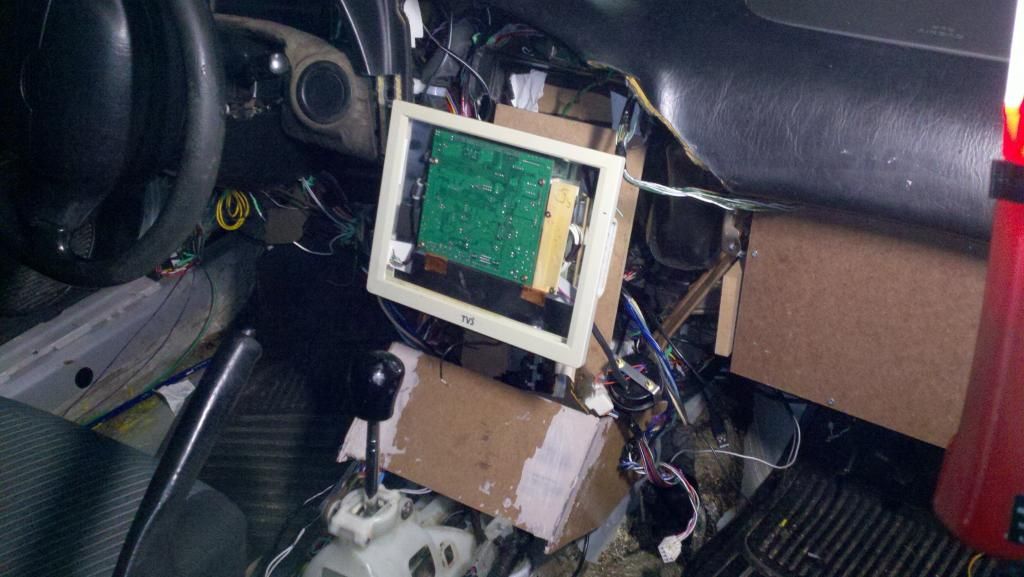 |
| Oct 31, 2012 - 6:03 AM | Forum: My Project · Post Preview: #992550 · Replies: 23 · Views: 7,945 |
|
Enthusiast  Joined Jan 25, '06 From Marlton, NJ Currently Offline |
Here's a total list of what all the gizmos i got in Audio: Kicker ZX700.5 Amp Evolution 1500W Amp 2-Kicker 6.5CVT Subs 1-Kicker 12L5 Sub 2-Kicker KS650 Components 2-Pioneer 4ways Video: 4-Pyle 7" inch Monitors 1-10in Touchscreen Monitor 1-7in touchscreen Monitor Custom Video Switching 2-Video Secu. VGA to RCA Car PC (Hardware): MSI E350IA-E45 Mini ATX Motherboard Gigabyte X79-UD3 Motherboard 32GB Solid State Drive 160GB HHD 100GB HHD 2-Video Secu. VGA to RCA WIFI Adaoter USB GPS NZXT LCD Fan Controller Elmscan5 OBDII Controller MJS USB LED Controller Car PC (Software): Centrafuse Frontend Playstation Emulator SNES Emulator DashCommand MJS LED Control Other: RFID PushStart Ignition (JM Exclusive Design) Modded XBOX360 Multicolor LEDs Fitzall 220 Alternator Kinetic 800 Battery Stinger Battery Isolator Smoked Tailights/Corners Relocated Everything Fiberglassed Everything Previous Forum Posts (So I dont have to completely repeat myself)- Touchscreen Speedometer - http://www.6gc.net/forums/index.php?showtopic=81736&hl= RFID Keyless Ignition Conversion - http://www.6gc.net/forums/index.php?showtopic=80937&hl= You can check out the whole video playlist of the build also : Musashi Video Playlist |
| Oct 31, 2012 - 5:21 AM | Forum: My Project · Post Preview: #992549 · Replies: 23 · Views: 7,945 |
|
Enthusiast  Joined Jan 25, '06 From Marlton, NJ Currently Offline |
Hey everyone. Im known as Jay Kamakaze I started JM Exclusive tricking out cars and my lab rat of a 97 Celica ST has taken so much beating from me with tons of installs ive done to learn fabrication and custom installs. Ive installed, removed, installed, removed. Ive even posted previous installs on this site. Now Ive reached as place where Im comfortable with my fabrication and my skills to do one complete build. The car is near finished already but i chose 6GC to start my build log of everything i did and how i got there. This log includes sooo much custom (even down to the wiring), I guarantee this is a one of a kind Celica. Some highlights I will get to: -Dual CarPCs -RFID Keyless Ignition (my own design, don't bother asking for diagram) -Modded XBOX360 -PC Controlled Lighting -Touchscreen Speedo -Centerconsole Build -Dashboard Build -Trunk build |
| Dec 6, 2011 - 8:44 PM | Forum: Multimedia · Post Preview: #943140 · Replies: 15 · Views: 6,562 |
|
Enthusiast  Joined Jan 25, '06 From Marlton, NJ Currently Offline |
what software are you going to be using/creating to convert the signals from the ecu? I have a OBDII to USB Adapter that converts the signals. I can read/clear engine codes I have a closer look vid here http://www.youtube.com/watch?v=OIcaeMfN6w0 |
| Dec 6, 2011 - 4:05 AM | Forum: Multimedia · Post Preview: #943049 · Replies: 15 · Views: 6,562 |
|
Enthusiast  Joined Jan 25, '06 From Marlton, NJ Currently Offline |
Okay, so Im back again to tear up my Celica and try out some more ideas. This time i wanted to convert my speedometer gauge to more of a digital look. Check My build vids on this project: Part 1(obvious where I start the idea process)- http://www.youtube.com/watch?v=6L9cUbWXAyI Part 2(this is where i tear down the gauge cluster to fit the screen and build the frame) - http://www.youtube.com/watch?v=ym3MRFHDOhw Part 3(i have built the frame not its time to test it out) - http://www.youtube.com/watch?v=a0xc3zCLycg Part 4(FINALE) - http://www.youtube.com/watch?v=O50S1x6aioc So initial of course i had to break down my gauge cluster 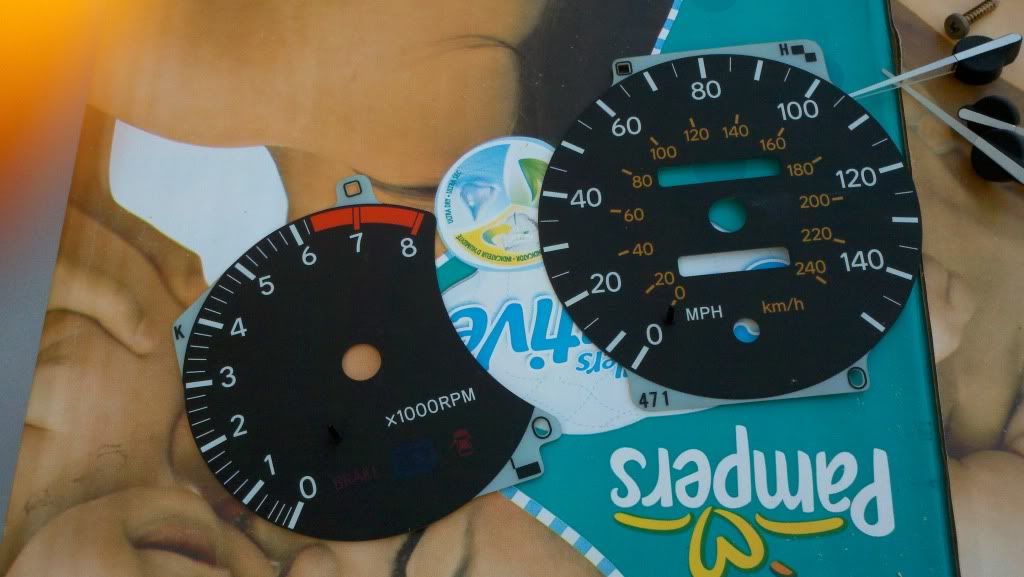 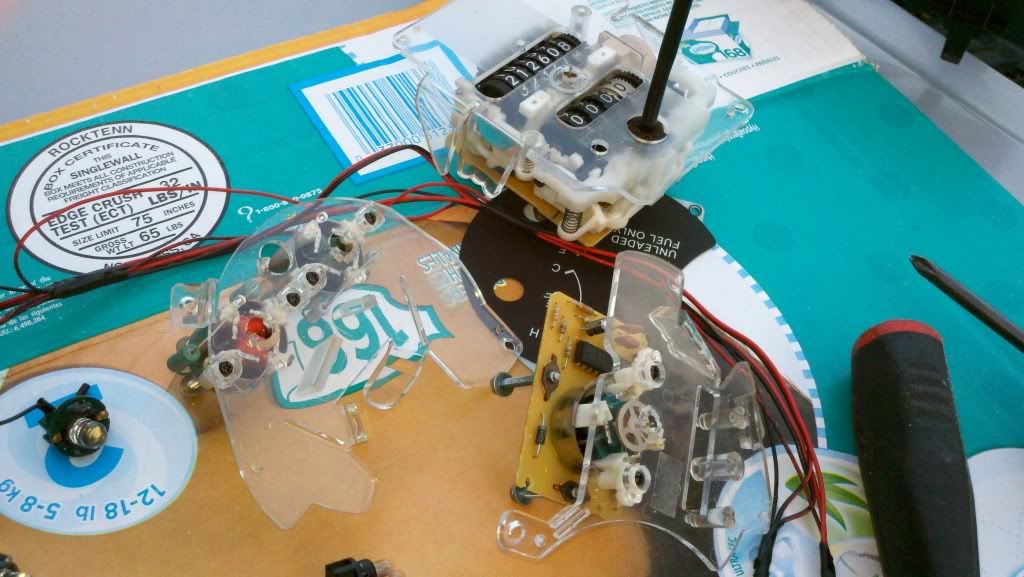 The only part i had to save was the actual odometer piece, because i need to save the mileage and the speed sensor is built in there. Fitting in was obviously a challenge solved by Mr.Dremel  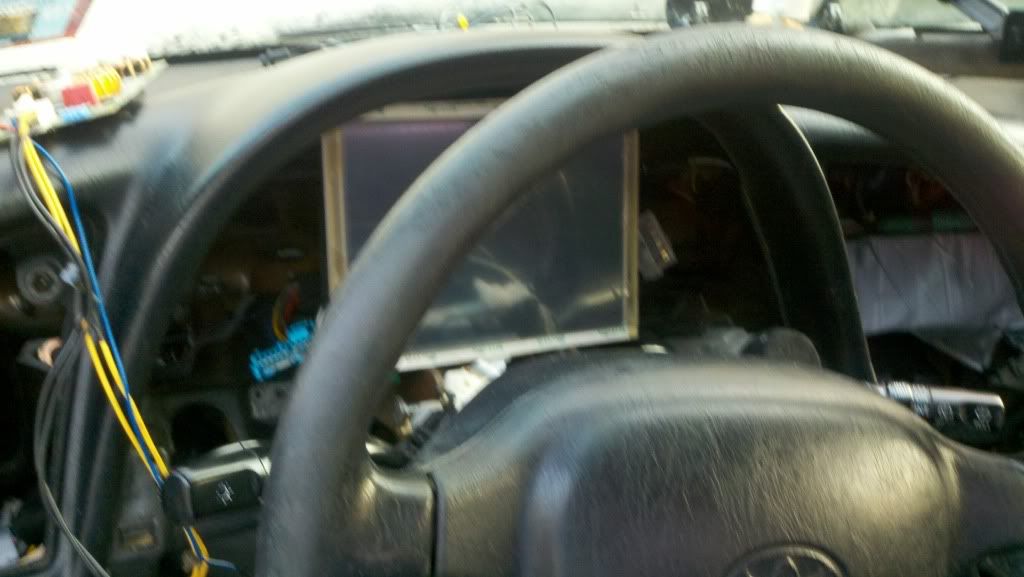 Once i got that in there, i could start taking the monitor apart. The circuit board of the monitor and the controller for the touchscreen fit beautifully inside my cluster and since I was making my own turn signals i drilled in some LEDS as well 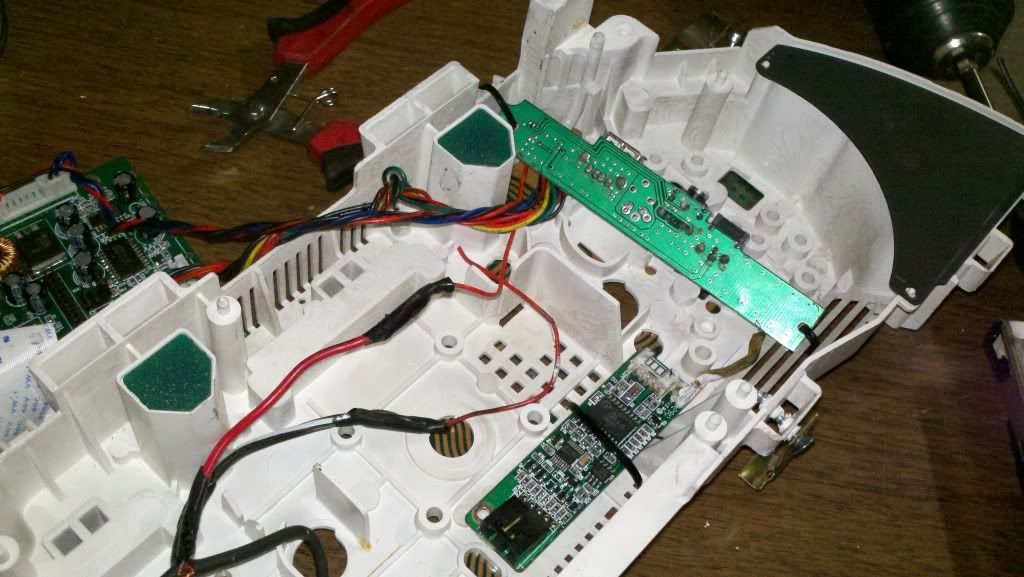 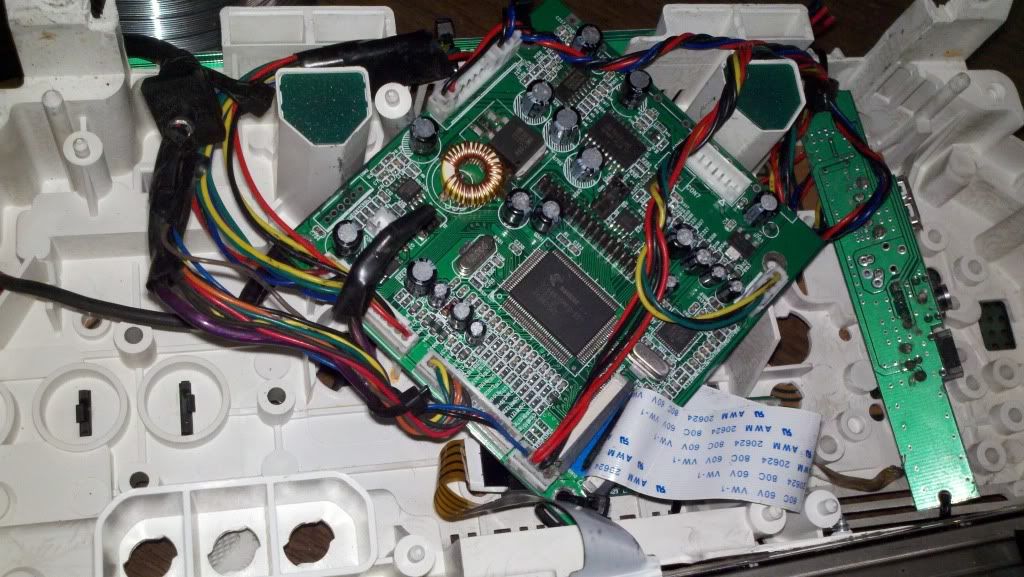 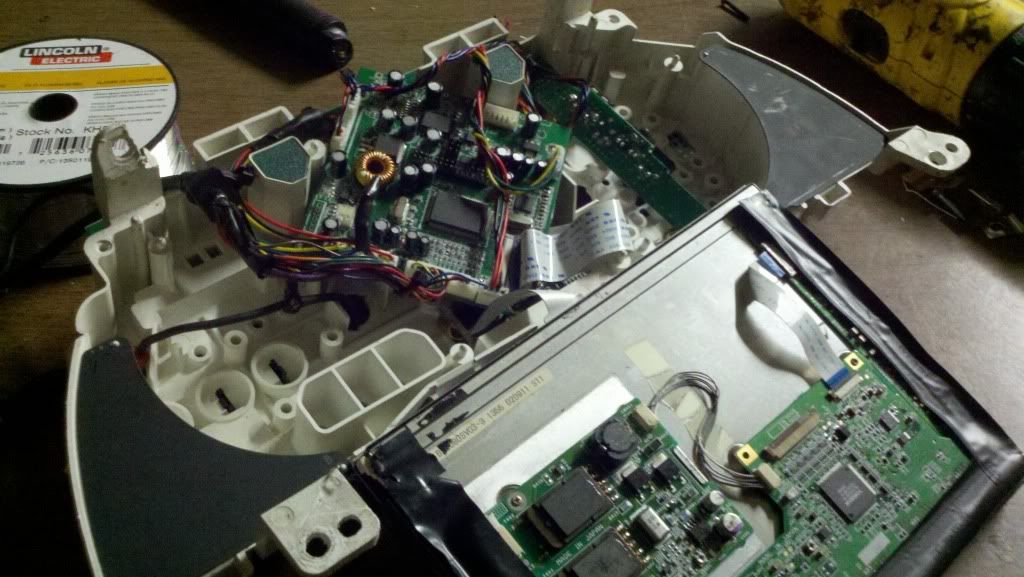 Everything fits niceeee 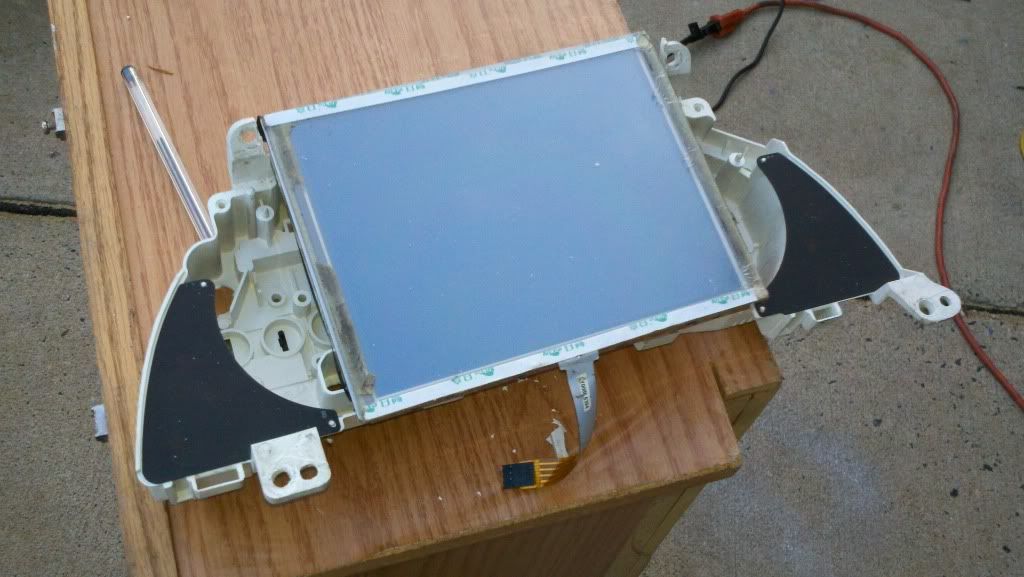 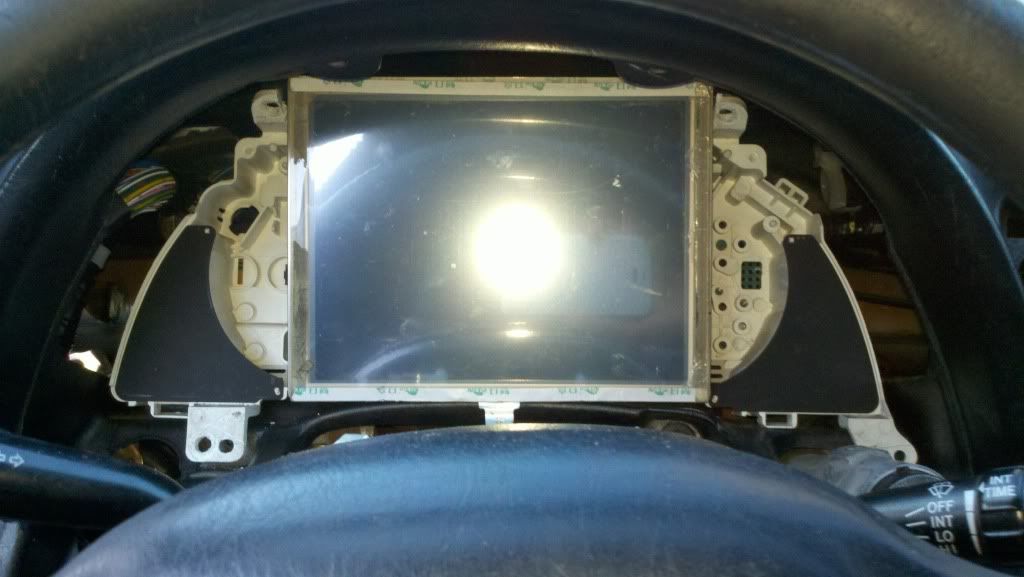 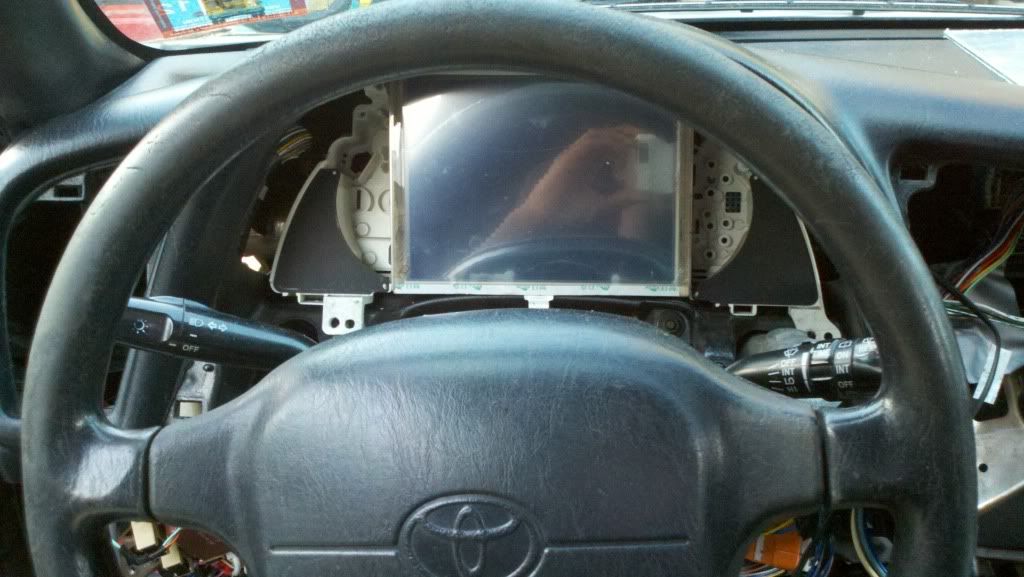 So now i just need to build the frame using the bezel of the monitor into the bezel for the gauges 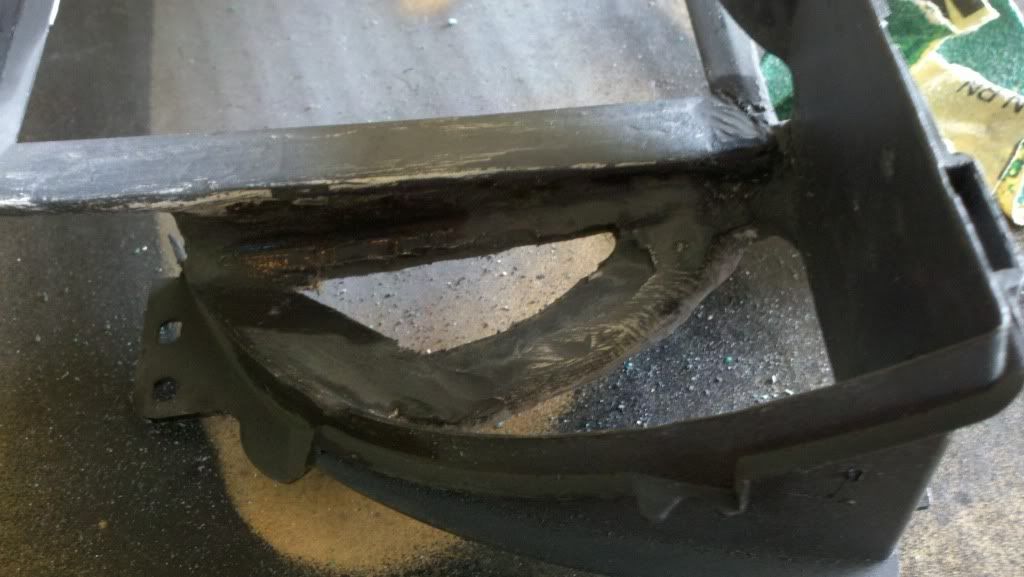 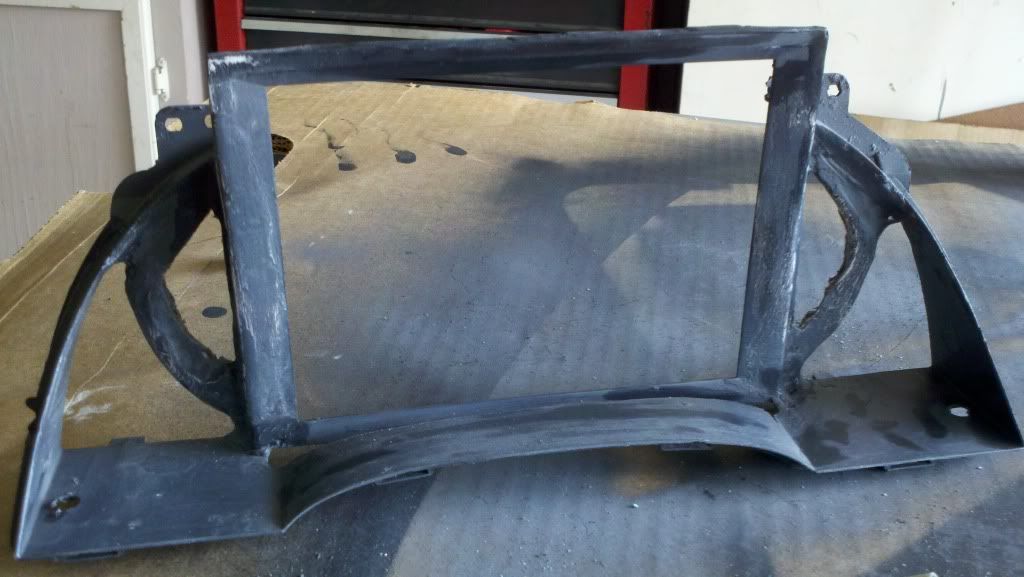 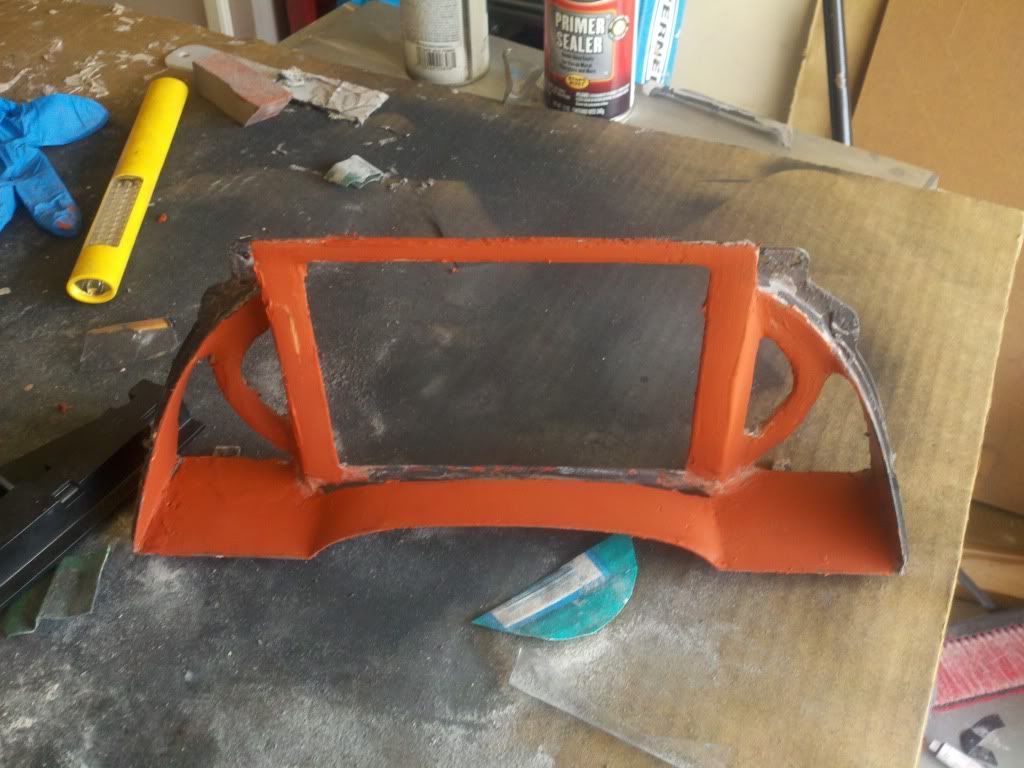 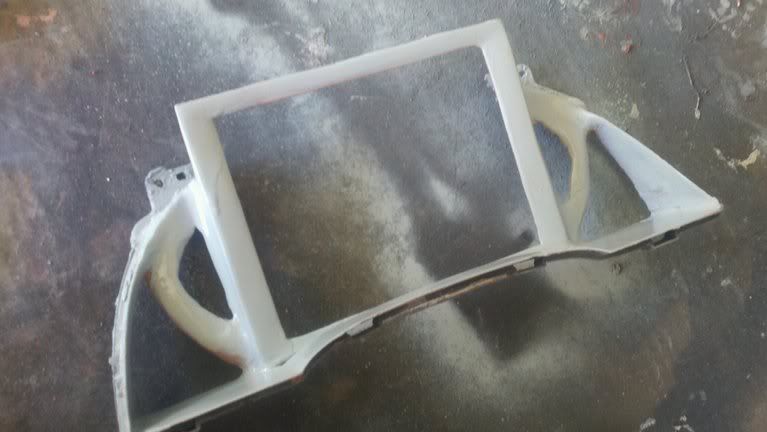 put em all together and what do you have? 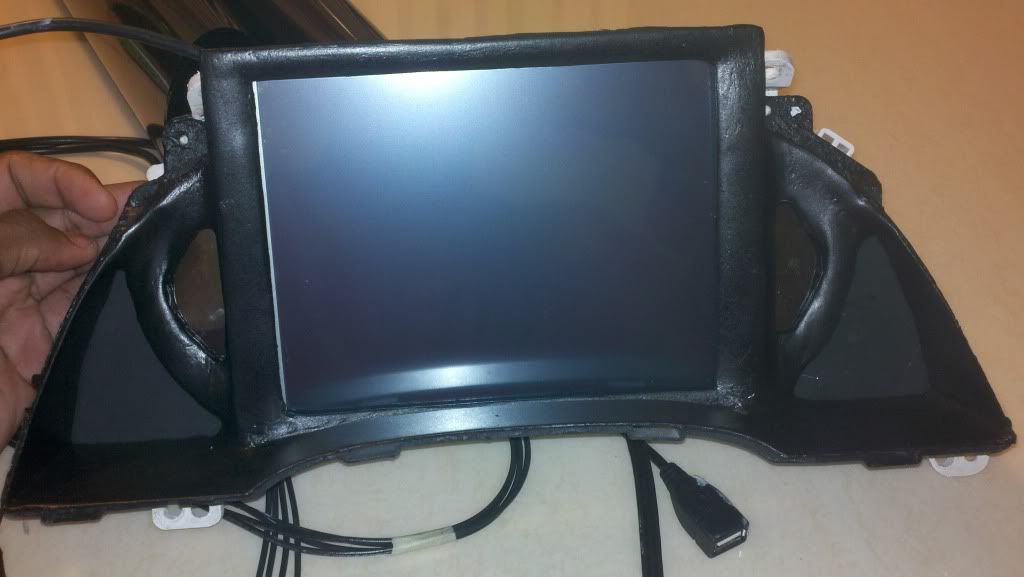  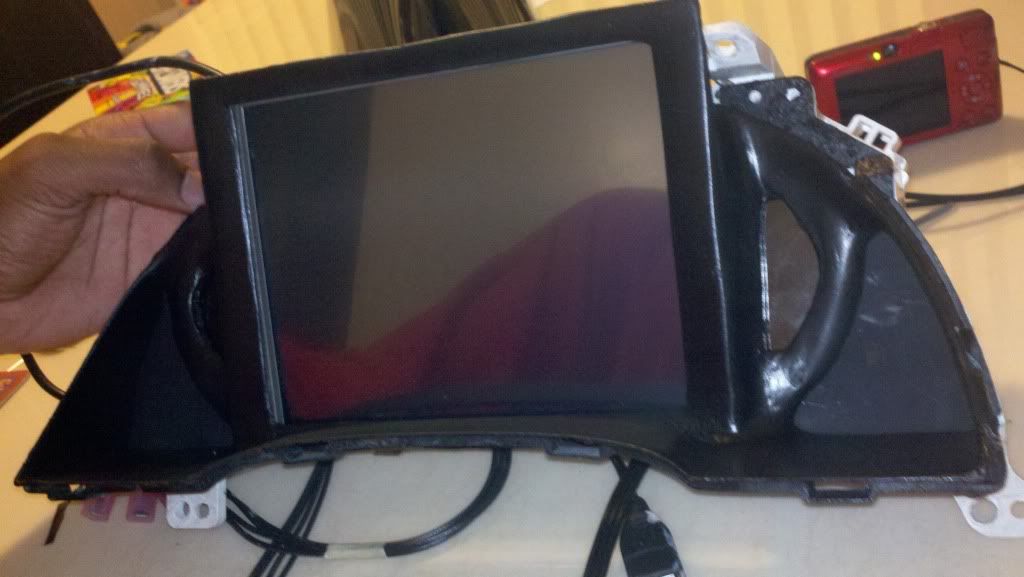 |
| Sep 20, 2011 - 6:24 AM | Forum: Multimedia · Post Preview: #933741 · Replies: 12 · Views: 4,524 |
|
Enthusiast  Joined Jan 25, '06 From Marlton, NJ Currently Offline |
| Sep 19, 2011 - 11:12 PM | Forum: Multimedia · Post Preview: #933719 · Replies: 12 · Views: 4,524 |
|
Enthusiast  Joined Jan 25, '06 From Marlton, NJ Currently Offline |
| Sep 19, 2011 - 1:11 PM | Forum: Multimedia · Post Preview: #933624 · Replies: 12 · Views: 4,524 |
|
Enthusiast  Joined Jan 25, '06 From Marlton, NJ Currently Offline |
Hey everyone. Its beeen a lonnngggg time since i posted any vids or pics on this site. But since i started tearing down my Celica and starting some insane new porjects i figured i would share what i have Heres the Vid link for the RFID install. http://www.youtube.com/watch?v=-cWtfitPLTs I dont really have any pics available, cause i really just used the this RFID module n reciever kit and matched it wit my own designed pushbutton system which i used 5 relays to pull off. The goal of this project was to try and get a JUST LIKE FACTORY push button system achieved. Edit*** oh btw to add i did disable the steering lock in th car so theres no reason for key whatsoever |
| Dec 17, 2009 - 10:16 AM | Forum: Multimedia · Post Preview: #821243 · Replies: 14 · Views: 4,798 |
|
Enthusiast  Joined Jan 25, '06 From Marlton, NJ Currently Offline |
Here's the new vid link for the whole car.. All my installs. 20in monitor. Xbox360. Car PC. Playstation. Black Suede Interior http://www.youtube.com/watch?v=rx_qBRjd0Jo |
| Sep 3, 2009 - 12:15 PM | Forum: Multimedia · Post Preview: #795270 · Replies: 14 · Views: 4,798 |
|
Enthusiast  Joined Jan 25, '06 From Marlton, NJ Currently Offline |
your car is fuzzy, i like the idea but the placing of it seems kinda of odd, i would rather mod it under my seat somehow and have it to where i can put the disk in under me. Yeah but i wanted it more for show, to be able to show the guts and whatnot u know?, #1 i cant really do that under the seat #2 i dont want people kicking or damgin anything #3 it would be a real challenge keepin it cool underneath the seats. The trunk allowed me to build an air intake fan and exhaust fan that sucks the hot air outside of the car inside of circulating air inside the car your car is fuzzy, i like the idea but the placing of it seems kinda of odd, i would rather mod it under my seat somehow and have it to where i can put the disk in under me. A good spot, but there is little air movement under the seats, which would lead to the xbox overheating. I think the spare tire well would work best for something like that. I agree, i still use my car alot, so for a 100% show car id have the damn xbox in the ceiling but i tried to keep it reasonable, oh and freddy the car is wrapped in black suede |
 New Replies New Replies No New Replies No New Replies Hot Topic (New) Hot Topic (New) Hot Topic (No New) Hot Topic (No New) |
 Poll (New) Poll (New) Poll (No New) Poll (No New) Locked Topic Locked Topic Moved Topic Moved Topic |
| Lo-Fi Version | Time is now: April 23rd, 2025 - 3:58 AM |


