| Oct 10, 2022 - 9:34 AM | Forum: My Project · Post Preview: #1107124 · Replies: 36 · Views: 50,420 |
|
Enthusiast Joined Jul 9, '20 From Ohio Currently Offline |
Wrapped up the front suspension and brakes next. Installed Avalon 2 pot calipers ( they fit on stock rotors and brackets, nice easy upgrade). ST sway bars, undercoated wheel wells etc. 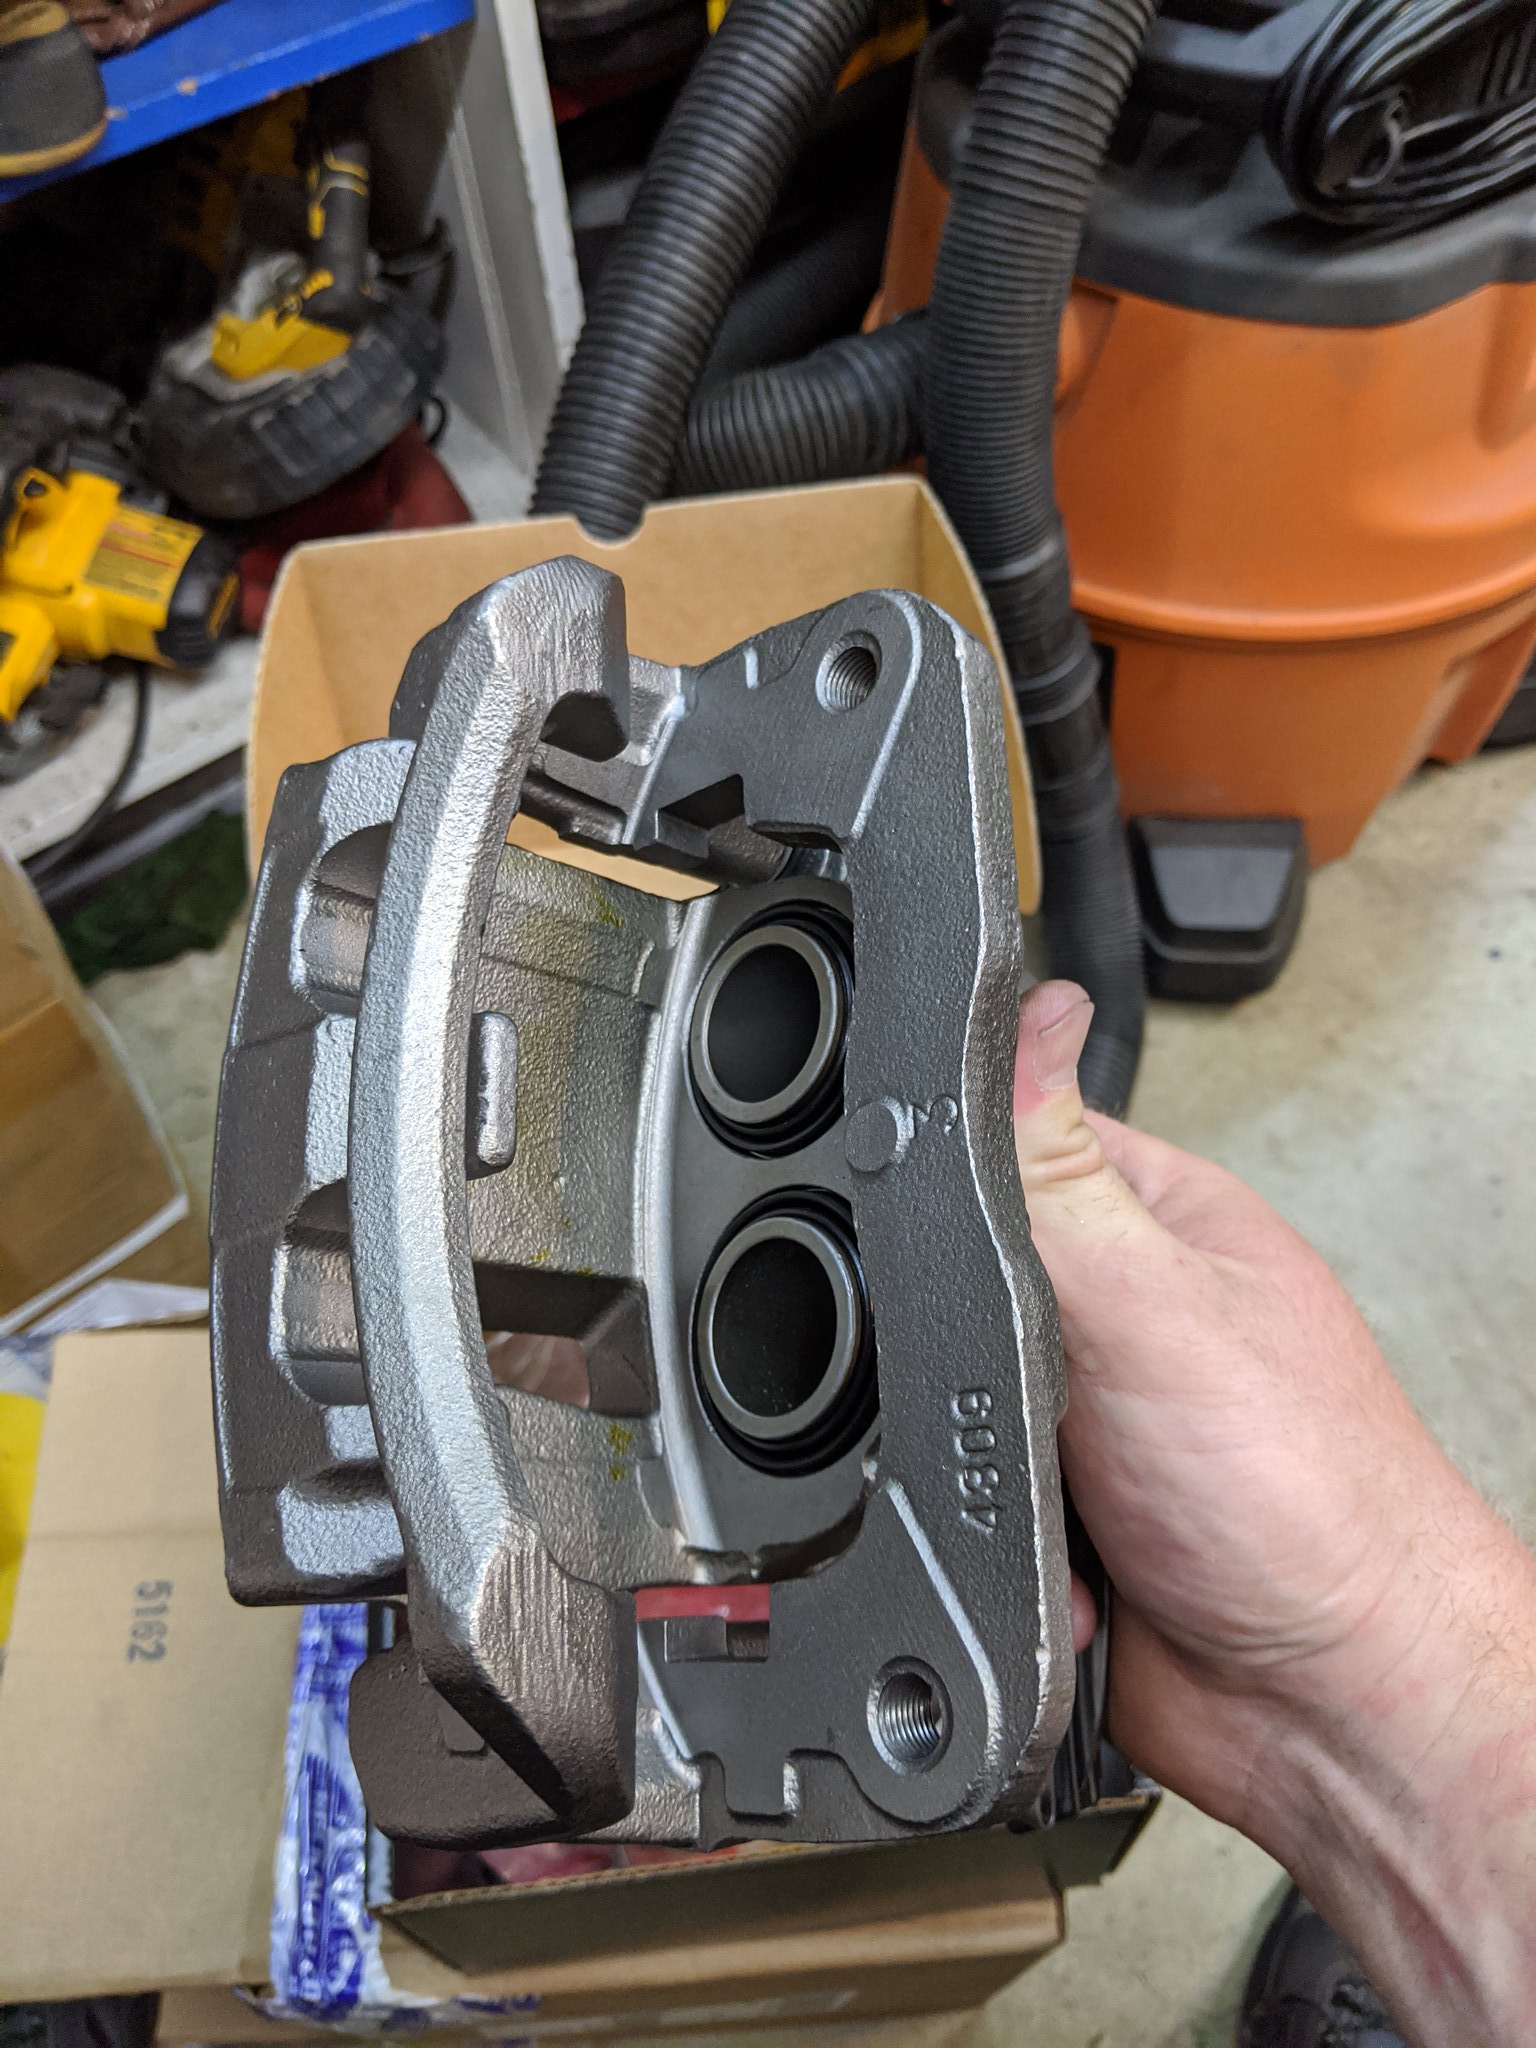 IMG_20200725_153643 by zac savage, on Flickr IMG_20200725_153643 by zac savage, on Flickr IMG_20200725_175935 by zac savage, on Flickr IMG_20200725_175935 by zac savage, on Flickr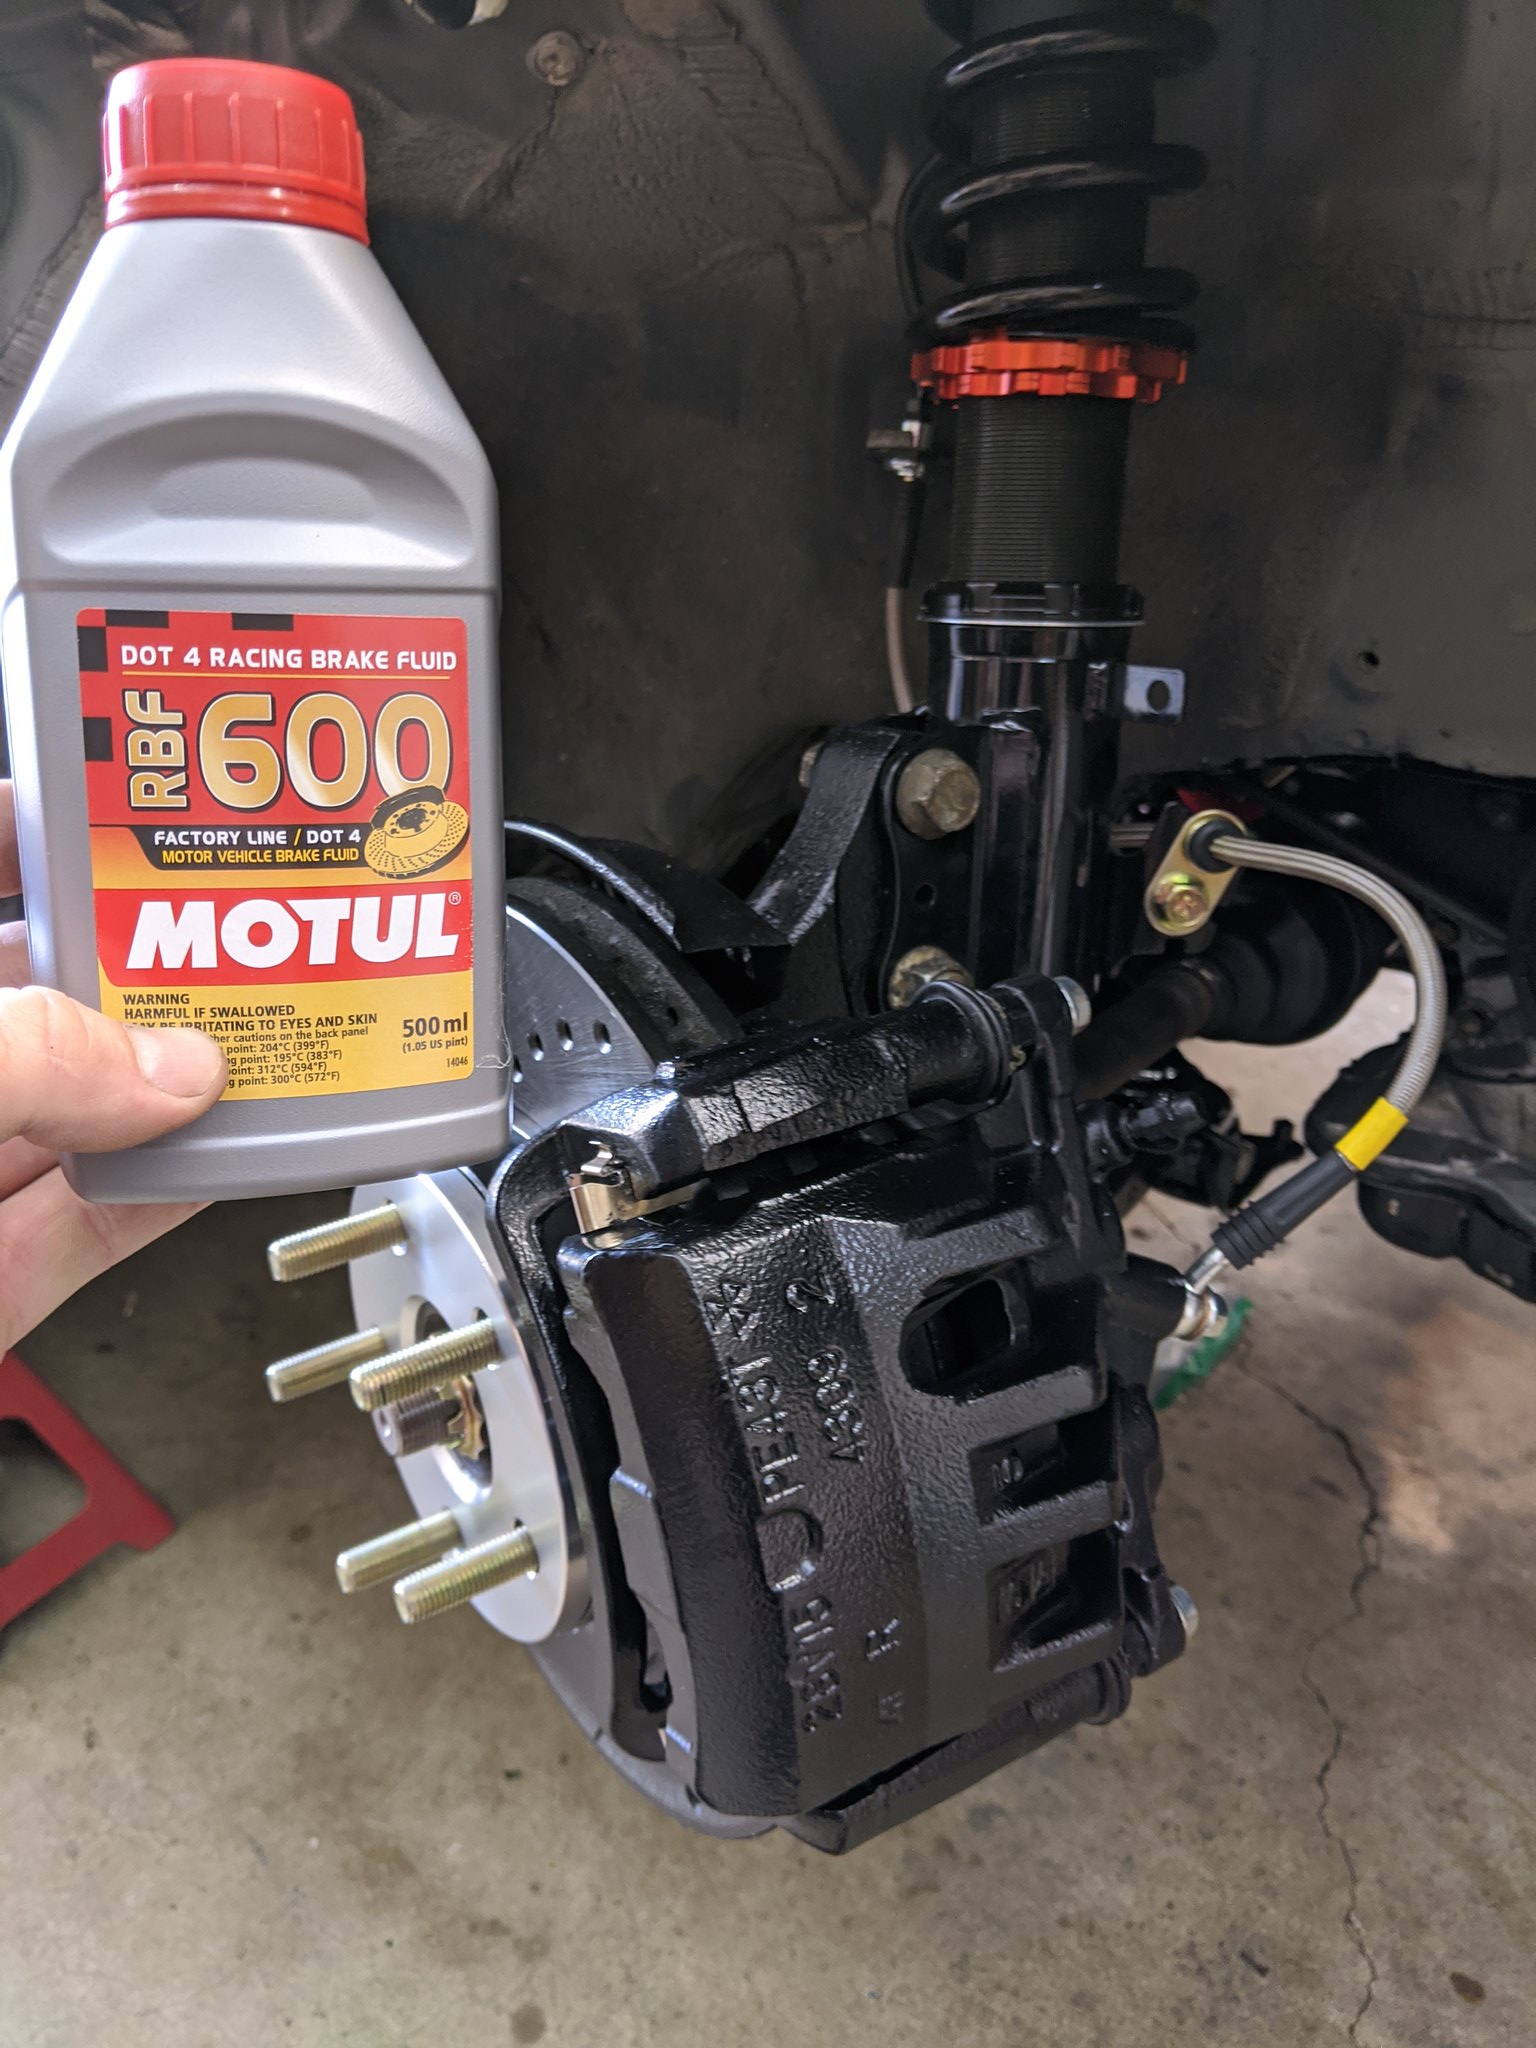 IMG_20200726_101402 by zac savage, on Flickr IMG_20200726_101402 by zac savage, on Flickr |
| Oct 10, 2022 - 8:44 AM | Forum: My Project · Post Preview: #1107123 · Replies: 36 · Views: 50,420 |
|
Enthusiast Joined Jul 9, '20 From Ohio Currently Offline |
So... it's been awhile... a long while. I've let this project sit for too long and now I'm finally back at it. I've got some catching up to do on the build thread, so I'm going to try and make a concerted effort to get this thread updated and wrap things up with the car.. I know it's been 2 years.. I've got no real excuse but to say that I moved on to other things.. until now. |
| Aug 5, 2020 - 12:22 PM | Forum: General Discussion · Post Preview: #1105436 · Replies: 8 · Views: 17,298 |
|
Enthusiast Joined Jul 9, '20 From Ohio Currently Offline |
Yes. The nickel and dimey crap ends up costing more than people realize. Especially when you go restoring parts as you remove them. Scope creep is a b!tch. Ain't that the truth. I'm scared to go back and count up the money I have put into my project. But hey, if you want something pretty unique and something you're proud of... it's allll good. |
| Aug 4, 2020 - 8:35 PM | Forum: General Discussion · Post Preview: #1105426 · Replies: 8 · Views: 17,298 |
|
Enthusiast Joined Jul 9, '20 From Ohio Currently Offline |
I've nearly completed a gen4 swap and I've got to say $2,000 is pretty light to complete the swap the way it should be done. I'd save at least another $1,000 before taking this project on... Maybe another $2,000. Your $2k budget will basically get the motor and harness conversion... Things you either need or should do are.... fluids, intercooler and piping, exhaust, timing belt, water pump, new seals/gaskets, clutch kit, flywheel, tune up kit, probably a boost controller, boost gauge.. etc etc. $4k is a good budget to do it and do it right. |
| Aug 4, 2020 - 11:40 AM | Forum: My Project · Post Preview: #1105419 · Replies: 36 · Views: 50,420 |
|
Enthusiast Joined Jul 9, '20 From Ohio Currently Offline |
ANDDD the build continues. got some more goodies, Aluminum radiator, shroud and low profile fans installed, all new moog suspension components, front coilovers installed, braided brake lines, new brake rotors and pads, front spindles installed, etc.  IMG_20200707_182545 by zac savage, on Flickr IMG_20200707_182545 by zac savage, on Flickr IMG_20200715_194012 by zac savage, on Flickr IMG_20200715_194012 by zac savage, on Flickr IMG_20200719_170716 by zac savage, on Flickr IMG_20200719_170716 by zac savage, on Flickr IMG_20200719_184729 by zac savage, on Flickr IMG_20200719_184729 by zac savage, on FlickrNext was to figure out the battery relocation power cable... I decided to run it with the engine bay harness, easy enough. I may end up changing this up, but for now it seems to be my best option.  IMG_20200719_155924 by zac savage, on Flickr IMG_20200719_155924 by zac savage, on Flickr IMG_20200719_155933 by zac savage, on Flickr IMG_20200719_155933 by zac savage, on Flickr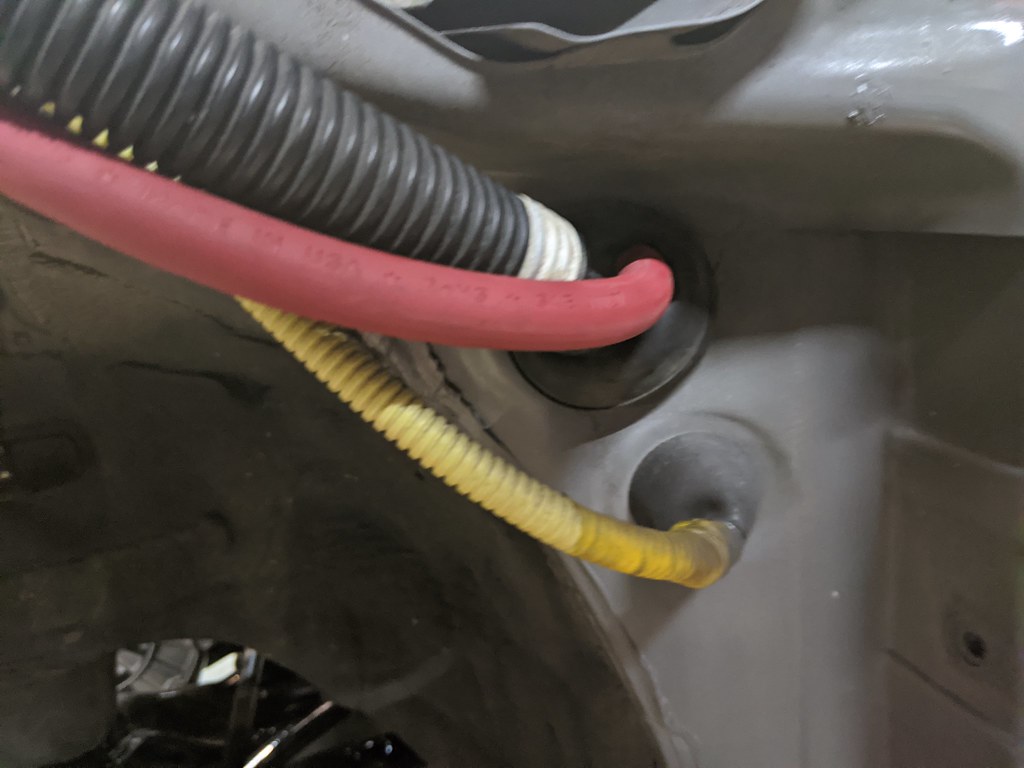 IMG_20200719_155937 by zac savage, on Flickr IMG_20200719_155937 by zac savage, on FlickrNo, those stupid cheap spacers are not on there permanently. They're just there to hold the rotors on while installing the calipers... Things are looking good at this point! time to torque everything down to spec and potentially put the front end of this car on the ground for the first time in a long time!  IMG_20200720_183309 by zac savage, on Flickr IMG_20200720_183309 by zac savage, on FlickrWhile torquing everything down, disaster struck. I had finished the subframe, power steering rack.... then while torquing the motor mount bolts..... SNAP. I broke a damn stud off the rear motor mount. At this point, I threw my piece of **** harbor freight torque wrench in the trash and decided I'd fork out some $ for something nice. Ordered a Proto half inch torque wrench and waited for the mailman to bring it to me. In the meantime, I tore everything down to get the motor mount out and have a mulligan. The key, I found, was to pop the steering rack off the subframe to squeeze the mount out.  IMG_20200720_204344 by zac savage, on Flickr IMG_20200720_204344 by zac savage, on Flickr IMG_20200720_204401 by zac savage, on Flickr IMG_20200720_204401 by zac savage, on Flickr IMG_20200720_204413 by zac savage, on Flickr IMG_20200720_204413 by zac savage, on FlickrI love doing things twice, don't you? haha what can ya do. |
| Aug 4, 2020 - 11:03 AM | Forum: My Project · Post Preview: #1105417 · Replies: 36 · Views: 50,420 |
|
Enthusiast Joined Jul 9, '20 From Ohio Currently Offline |
Fantastic job so far! Reminds me of my old build. Attention to detail is spot on nicely done! Color looks great, did you wet sand and buff too? That really makes a great paint job! Keep it up man! Thank you Ted, nope it's not wet sanded and buffed yet. The paint looks great straight off the gun, but it'll go in for a wet sand and buff after it's all assembled again! I didn't paint the car myself, I have a buddy who builds and paints show bikes. He took on the paint job for me, he's good for sure! |
| Aug 2, 2020 - 8:52 PM | Forum: My Project · Post Preview: #1105399 · Replies: 36 · Views: 50,420 |
|
Enthusiast Joined Jul 9, '20 From Ohio Currently Offline |
I need a lift at home, ****. That's amazing work you're doing because you have the time to do it with a lift available like that. I'm super jealous. I need a setup like this so I can do the same thing to my car some day. Haha brother I don't have a lift. Jack and Jack stands... That's me laying on the ground taking that last picture. You just gotta make the time my friend! I've worked 60 hours every week for the last 3 months... BUT, while I do have a wife at home, we don't have any kids yet... Which definitely helps with being able to spend time In the garage. Thanks everyone for the support and kind comments! I'm having a blast working on this thing, can't wait to take old Cecil for his first drive. |
| Jul 31, 2020 - 8:52 AM | Forum: My Project · Post Preview: #1105375 · Replies: 36 · Views: 50,420 |
|
Enthusiast Joined Jul 9, '20 From Ohio Currently Offline |
Alrightttt the motor and trans are in and it runs, that's a big step for sure. The rest of the hook ups were easy peasy except for the power steering pump. I wanted to use the Gen4 power steering pump with the celica rack, which proved to be a tad difficult. the feed line worked out fine, but the return was a little rough. I thought that if I swapped the inlet on the power steering pump itself, it would work.. but no luck. I had to gently bend the nipple on the return line to allow clearance for the line to fit without running into the feed line.. after that, it wall worked out fine.  IMG_20200719_130003 by zac savage, on Flickr IMG_20200719_130003 by zac savage, on Flickr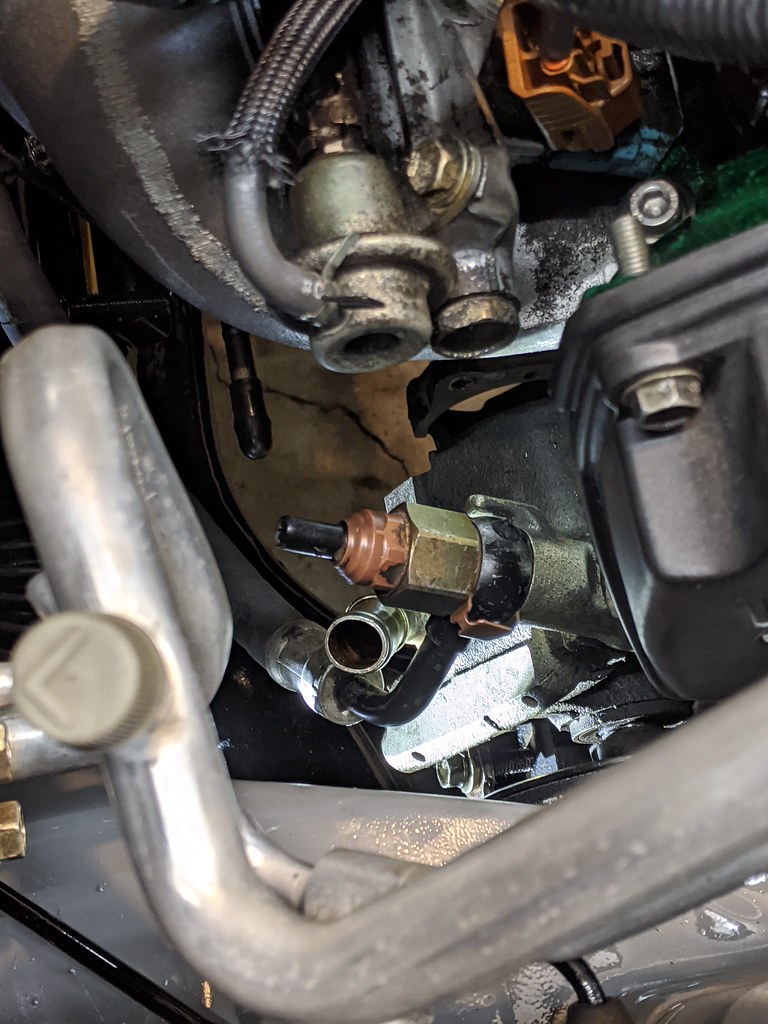 IMG_20200719_133730 by zac savage, on Flickr IMG_20200719_133730 by zac savage, on FlickrWith the inlet and outlets figured out, I was set for a pretty easy assembly... rebuilt the steering rack and replaced everything in the front, new bushings in the control arms, inner and outer tie rods, end links, ball joints, motor mounts, wheel bearings and COILOVERS YAYYYYY. I went with ksport, just because I've had good luck with them in the past. I think they'll work out pretty sweet.  IMG_20200710_185008 by zac savage, on Flickr IMG_20200710_185008 by zac savage, on Flickr IMG_20200716_085159 by zac savage, on Flickr IMG_20200716_085159 by zac savage, on Flickr IMG_20200718_143337 by zac savage, on Flickr IMG_20200718_143337 by zac savage, on Flickr IMG_20200718_143331 by zac savage, on Flickr IMG_20200718_143331 by zac savage, on Flickr IMG_20200717_214046 by zac savage, on Flickr IMG_20200717_214046 by zac savage, on FlickrFront subframe assembly was pretty easy... All moog everything.  IMG_20200712_212531 by zac savage, on Flickr IMG_20200712_212531 by zac savage, on Flickr IMG_20200715_192907 by zac savage, on Flickr IMG_20200715_192907 by zac savage, on FlickrI threw some kirkosaurus front and rear motor mount urethane inserts in there too. They seem to be good quality and the customer service is top notch. kudos to him!  IMG_20200427_190319 by zac savage, on Flickr IMG_20200427_190319 by zac savage, on FlickrBINGO, got everything installed loosely and ready to torque things down to spec. I'm pretty damn pumped that the underside is as clean as everything else... definitely never had a car quite like this.  IMG_20200719_142819 by zac savage, on Flickr IMG_20200719_142819 by zac savage, on Flickr |
| Jul 30, 2020 - 2:45 PM | Forum: Forced Induction · Post Preview: #1105370 · Replies: 5 · Views: 17,064 |
|
Enthusiast Joined Jul 9, '20 From Ohio Currently Offline |
I'm originally an mr2 guy, and s54's will hold up just fine with a 3sgte and the hp numbers you're looking at.... I've done it 10 times without any trouble. Original or not, you shouldn't have any problems if your trans is in good shape. Also, you can contact southbend for that hybrid clutch disc you're talking about, or what I've done is just get an 5s disc and TOB and run it with a 3s flywheel and pressure plate. I'm not sure if there is anything different with the st202 swaps, I'm assuming they come with an s54 from the factory, same as st204's. |
| Jul 30, 2020 - 12:29 PM | Forum: My Project · Post Preview: #1105369 · Replies: 36 · Views: 50,420 |
|
Enthusiast Joined Jul 9, '20 From Ohio Currently Offline |
| Jul 29, 2020 - 10:44 AM | Forum: My Project · Post Preview: #1105361 · Replies: 36 · Views: 50,420 |
|
Enthusiast Joined Jul 9, '20 From Ohio Currently Offline |
YUSS! IMO, there's nothing more satisfying than watching the engine slip in and out of the bay, knowing there's less than an inch on the right side to the frame rail. Congrats! Thanks man! Yeah I agree.. This was a super satisfying step of the project. I can't wait to have this thing on the road. |
| Jul 28, 2020 - 9:58 AM | Forum: My Project · Post Preview: #1105352 · Replies: 36 · Views: 50,420 |
|
Enthusiast Joined Jul 9, '20 From Ohio Currently Offline |
Alrightttt time for the motor and trans to go in, This was actually really easy.. put the car pretty high up on jack stands, drop the subframe and steering rack out of the car (the damn steering rack was the biggest pain in the ass of the whole things, but it finally popped loose).... Then put the motor and trans on a dolly and wheel it under the engine bay... then took my cherry picker and slowly lowered the car down over top of the engine until the car was sitting on stands at their lowest setting.... thennn hook the cherry picker up to the engine and lift it the rest of the way up into the engine bay. Just make sure you take your time and have a friend watching to make sure you're not scratching up the other side of the engine bay. This thing fit like a glove, not one scratch or blemish on the new paint, got the two side mounts hooked up then began connecting the dots. shifter cables, wiring, heater hoses, fuel lines etc etc. WOOHOO! the motor and trans are in.  IMG_20200627_215026 by zac savage, on Flickr IMG_20200627_215026 by zac savage, on Flickr IMG_20200627_215004 by zac savage, on Flickr IMG_20200627_215004 by zac savage, on FlickrAfter spending some time checking and double checking that I had everything necessary to run the car hooked up... I retrofitted some grounds and decided I was ready for a test start. No dice, wouldn't turn over or anything... Luckily I had a good buddy over who recommended it was a grounding problem to the starter... DUH. I painted the face of the trans and the face of the starter that supply the ground. I removed the starter, sanded down the grounding face on the trans and starter and bingo. Old Cecil fired up and sounded sweet. Hopefully the video link works.. but click the image below for the video!  VID_20200627_231417 by zac savage, on Flickr VID_20200627_231417 by zac savage, on Flickr^^ click for start up video! |
| Jul 27, 2020 - 8:08 PM | Forum: My Project · Post Preview: #1105343 · Replies: 36 · Views: 50,420 |
|
Enthusiast Joined Jul 9, '20 From Ohio Currently Offline |
man that looks so nice and clean! part of me wishes I would've spent the time to clean up my engine that well when it was out, other part of me realizes OCD will never let me finish cleaning it so just let it be. Yeah man I totally get it. It's hard to know when to stop... So basically I just haven't stopped.... I literally brush coated the underside of the engine bay and front of the unibody with por15 this week... This is some majorly tedious stuff, but eye on the prize. |
| Jul 27, 2020 - 11:27 AM | Forum: My Project · Post Preview: #1105336 · Replies: 36 · Views: 50,420 |
|
Enthusiast Joined Jul 9, '20 From Ohio Currently Offline |
| Jul 24, 2020 - 2:53 PM | Forum: My Project · Post Preview: #1105307 · Replies: 10 · Views: 17,989 |
|
Enthusiast Joined Jul 9, '20 From Ohio Currently Offline |
Score man! $500 is a steal. 5 speed, rust free and premium sound to boot. This should be a fun project... if you give up and want to make a couple hundred bucks let me know... I'll come pick it up for $700 |
| Jul 24, 2020 - 2:47 PM | Forum: My Project · Post Preview: #1105306 · Replies: 36 · Views: 50,420 |
|
Enthusiast Joined Jul 9, '20 From Ohio Currently Offline |
We're getting to the good stuff soon, but here's another update on what I've done so far... I decided to put at least a little bit of love in to the interior of this car. It came with tan leather, but the seats were really rough and I'm not a big fan of the tan anyways. I want all black. Almost unbelievably, I found a mint black cloth interior at a junk yard and pulled it on half price day... that'll never happen again, most things are trashed at the junk yards around here. Anyways, i managed to get the front and rear seats out, and the 98 convertible parts car I've got had some really nice black leather door panels and steering wheel. After I cleaned the grime off the door panels and painted the speaker mesh, they came out pretty slick. The last piece to the puzzle is the headliner... tan headliner wasn't going to fly, so I decided to try my hand at upholstering. I ordered some foam-backed black and gray camo fabric and went to down. It was actually pretty easy to do. The headliner may be a little weird for some people... but it works for me and beats the crap out of tan with an all black interior. I also ordered all new Rockford fosgate speakers for the car, a nice benefit to the new door panels is that I can upgrade to the premium sound option.  IMG_20200524_132012 by zac savage, on Flickr IMG_20200524_132012 by zac savage, on Flickr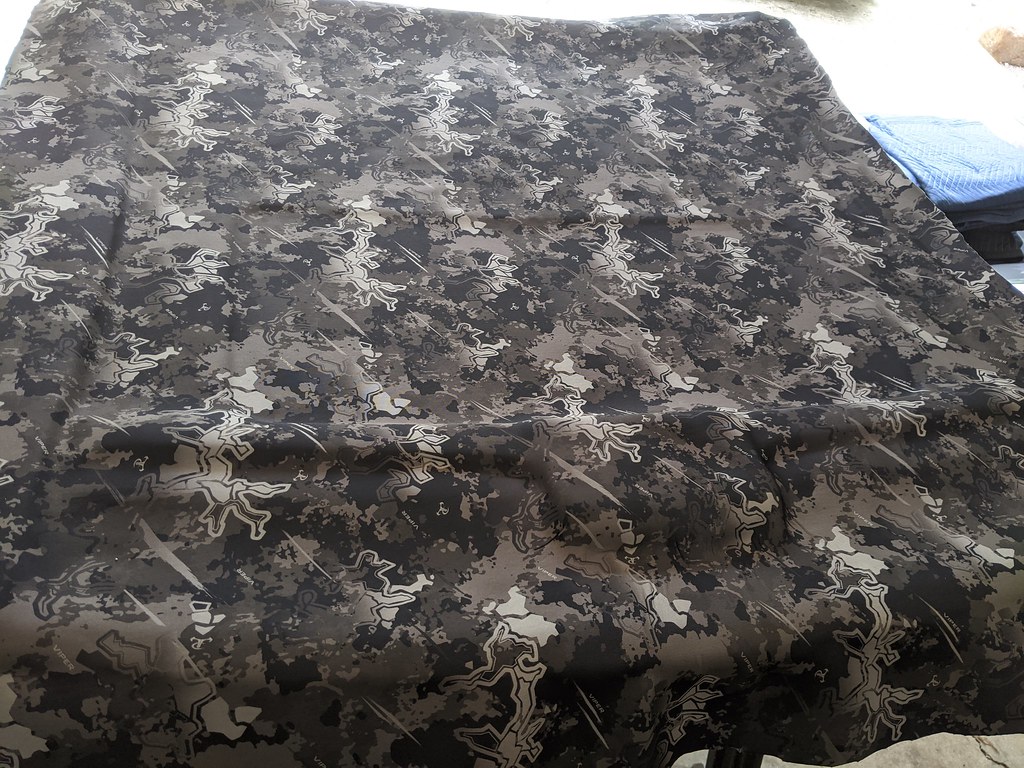 IMG_20200524_135000 by zac savage, on Flickr IMG_20200524_135000 by zac savage, on Flickr IMG_20200524_141043 by zac savage, on Flickr IMG_20200524_141043 by zac savage, on Flickr IMG_20200524_145247 by zac savage, on Flickr IMG_20200524_145247 by zac savage, on Flickr IMG_20200524_165228 by zac savage, on Flickr IMG_20200524_165228 by zac savage, on Flickr IMG_20200524_165837 by zac savage, on Flickr IMG_20200524_165837 by zac savage, on Flickr IMG_20200524_173552 by zac savage, on Flickr IMG_20200524_173552 by zac savage, on Flickr IMG_20200524_165442 by zac savage, on Flickr IMG_20200524_165442 by zac savage, on Flickr IMG_20200524_173639 by zac savage, on Flickr IMG_20200524_173639 by zac savage, on Flickr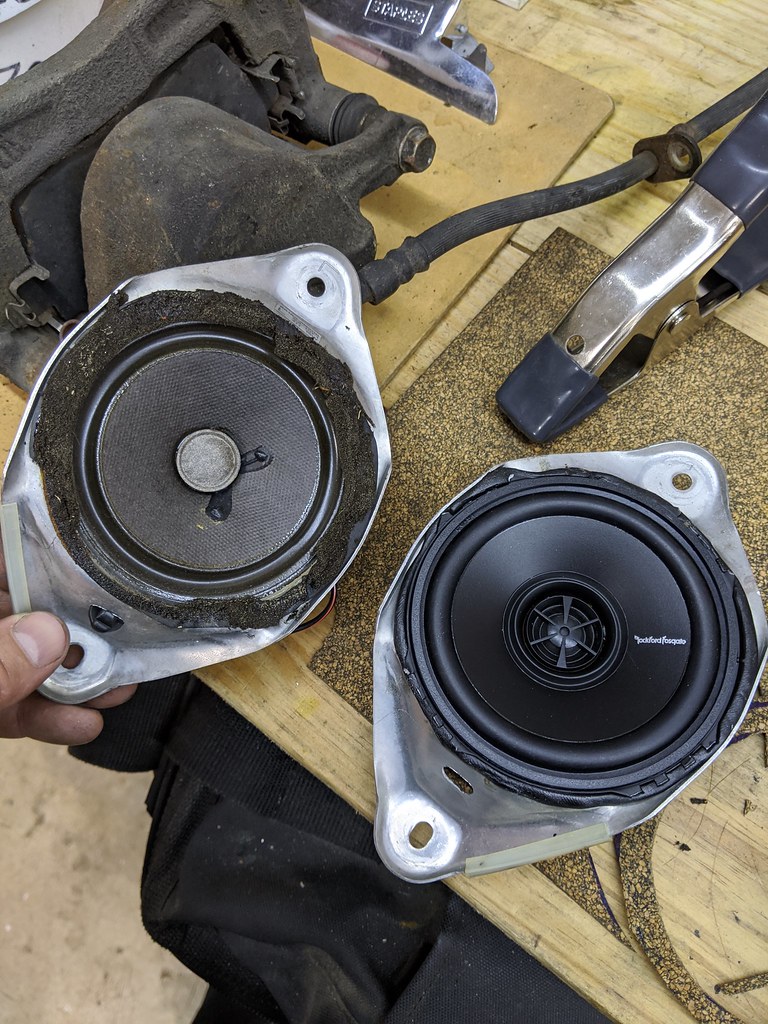 IMG_20200528_195606 by zac savage, on Flickr IMG_20200528_195606 by zac savage, on FlickrThe next step before beginning the long, arduous process of reassembly was to mate the motor and trans. I put on a new rear main seal and got some arp flywheel bolts and a lightweight flywheel and an exedy clutch. went ahead and put the wiring harness on and a few other little odds and ends... and bingo, next post should get me to the powerplant install! 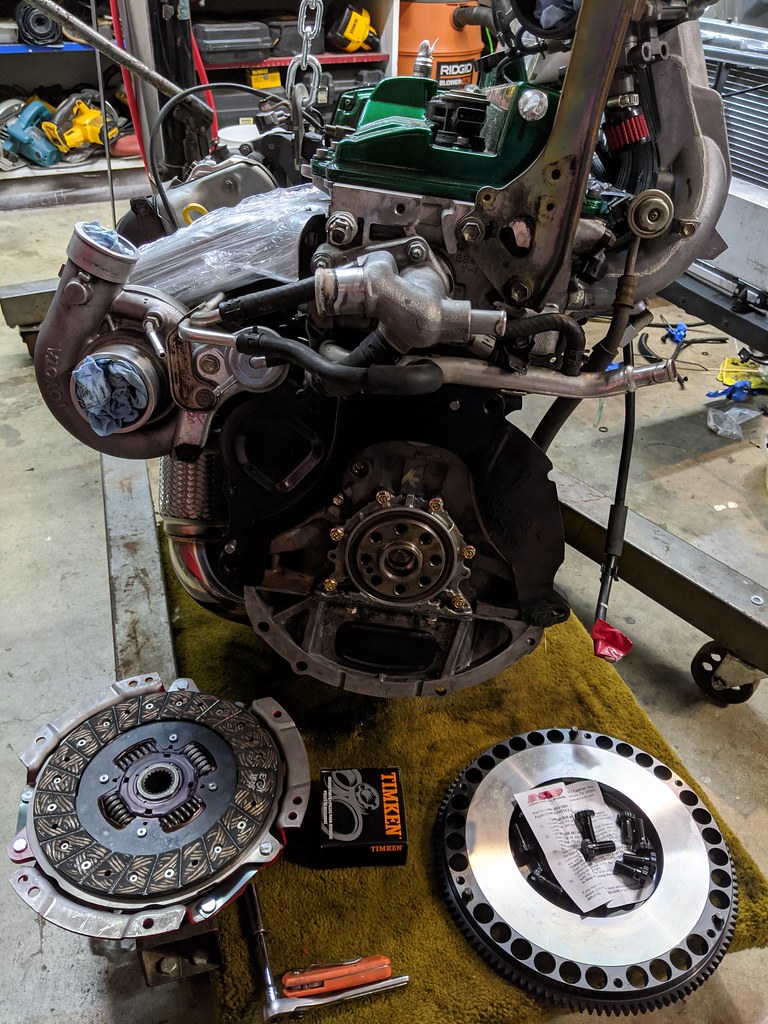 IMG_20200621_115443 by zac savage, on Flickr IMG_20200621_115443 by zac savage, on Flickr IMG_20200621_122309 by zac savage, on Flickr IMG_20200621_122309 by zac savage, on Flickr IMG_20200621_124544 by zac savage, on Flickr IMG_20200621_124544 by zac savage, on Flickr IMG_20200621_211311 by zac savage, on Flickr IMG_20200621_211311 by zac savage, on FlickrThis is the point where it really started getting exciting for me... can finally start putting things together instead of taking things apart, cleaning, painting, prepping etc. All the hours of part restoration and **** can finally begin to pay off. |
| Jul 23, 2020 - 9:16 AM | Forum: My Project · Post Preview: #1105294 · Replies: 36 · Views: 50,420 |
|
Enthusiast Joined Jul 9, '20 From Ohio Currently Offline |
LOL just read up on this thread. Seems like the celica bug bit you pretty hard again. We all end up with a parts car or two or three at some point. The build looks amazing. can't wait to see it finished! definitely got bit hard.. but hey if you're gonna do something... |
| Jul 23, 2020 - 9:13 AM | Forum: My Project · Post Preview: #1105293 · Replies: 36 · Views: 50,420 |
|
Enthusiast Joined Jul 9, '20 From Ohio Currently Offline |
haha good luck getting engine in from top without scratching your nice paint in the bay. haha Those were my thoughts exactly... which is why I put it in from the bottom. I've made a lot more progress than what is shown so far.. I'm still catching this thread up to speed. For some reason, after I post a reply to this thread, it takes anywhere from 1 to 3 days to actually show up.. but I'll keep on chugging and update the thread as I can. |
| Jul 22, 2020 - 11:06 AM | Forum: My Project · Post Preview: #1105284 · Replies: 36 · Views: 50,420 |
|
Enthusiast Joined Jul 9, '20 From Ohio Currently Offline |
So while the car was at paint, I spent some time cleaning and prepping more parts to go back on the car. Pretty much went through everything. I cleaned up and put a new o-ring kit on the a/c system.. got a new condenser and expansion tank, took off all the brake lines and flushed them out and painted them, rebuilt a spare steering rack, put new wheel bearings in and put a coat of hi temp caliper paint on dust guards, spindles, coated the sub frame and control arms in por-15, got new bushings for the control arms.. I even got new horns for God's sake. I also sent the wiring harnesses out to WireGap. That $540 is worth every penny if you ask me. I see on this forum that a lot of guys are building their own harnesses.... You guys are the real crazy ones.  IMG_20200614_220236 by zac savage, on Flickr IMG_20200614_220236 by zac savage, on Flickr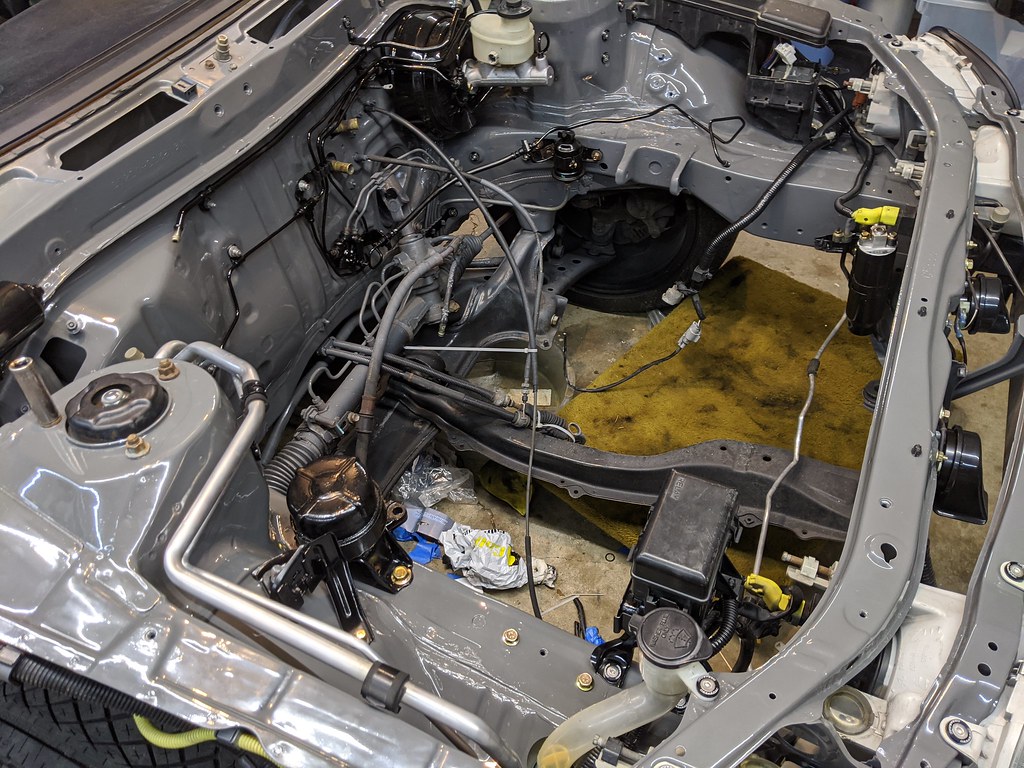 IMG_20200625_210456 by zac savage, on Flickr IMG_20200625_210456 by zac savage, on Flickr IMG_20200504_194427 by zac savage, on Flickr IMG_20200504_194427 by zac savage, on Flickr IMG_20200502_190637 by zac savage, on Flickr IMG_20200502_190637 by zac savage, on Flickr IMG_20200502_190630 by zac savage, on Flickr IMG_20200502_190630 by zac savage, on Flickr IMG_20200528_181403 by zac savage, on Flickr IMG_20200528_181403 by zac savage, on Flickr |
| Jul 22, 2020 - 6:45 AM | Forum: My Project · Post Preview: #1105281 · Replies: 247 · Views: 150,481 |
|
Enthusiast Joined Jul 9, '20 From Ohio Currently Offline |
Very cool car man, if the clunking isn't a product of the inner or outer tie rods being no bueno... then it's almost got to be the rack and pinion I guess. I just rebuilt my rack and pinion which wasn't a bad job really. hardest part is getting it out of the car. This is all assuming it's the same system as a FWD GT... Thanks! The tie rods feel fine, there's no excess movement in the tires. I'm hoping that it's a case of the steering shaft joint into the rack that needs tightening. Is it a big boy clunk or is it a little Honda clink? Used to see work steering racks and steering ujoints on Camries (Camrys?) that made some god awful clunking when turning. It's a medium clunk Jordan. Not suspecting the Super Strut, but more substancial than say endlink chatter. Like I said above, I'm hoping that it's a joint in the steering shaft. That'd be an easy fix, hopefully that's it. |
| Jul 17, 2020 - 9:35 AM | Forum: My Project · Post Preview: #1105264 · Replies: 36 · Views: 50,420 |
|
Enthusiast Joined Jul 9, '20 From Ohio Currently Offline |
At this point, I'm going deep enough down the rabbit hole that I might as well get to the bottom..... So I get online and start looking for parts cars.. I figure if I can find a couple cheap ones, any inadequate part that I come across on my car I can replace with something better.. any broken clips, bent brackets etc. I end up buying two other cars for cheap... (if anyone needs any parts please let me know... I have a ton.)  IMG_20200513_080059 by zac savage, on Flickr IMG_20200513_080059 by zac savage, on FlickrThen I went ahead and got to the bottom of that rabbit hole I'm talking about.... stripped out the interior, all the glass, every panel, tore the doors down, cleaned the engine bay... basically just starting from the ground up... ordered some new nut and bolt kits so I didn't even have to use the old hardware.... I've done this sort of thing with quads and tractors and stuff.. but never a car. It can be pretty intimidating after the tear down.. it's a lot of parts and pieces to remember how to put back together, but it's a learning process... and I'll be able to say I truly built this car when it's all said and done. 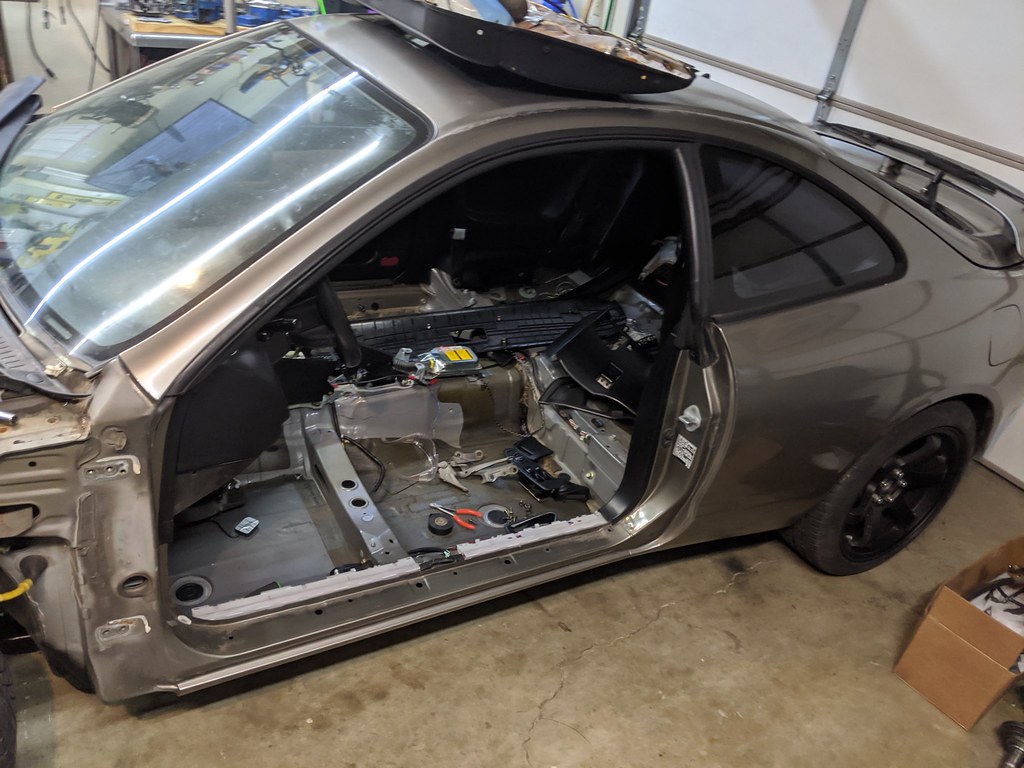 IMG_20200503_185428 by zac savage, on Flickr IMG_20200503_185428 by zac savage, on Flickr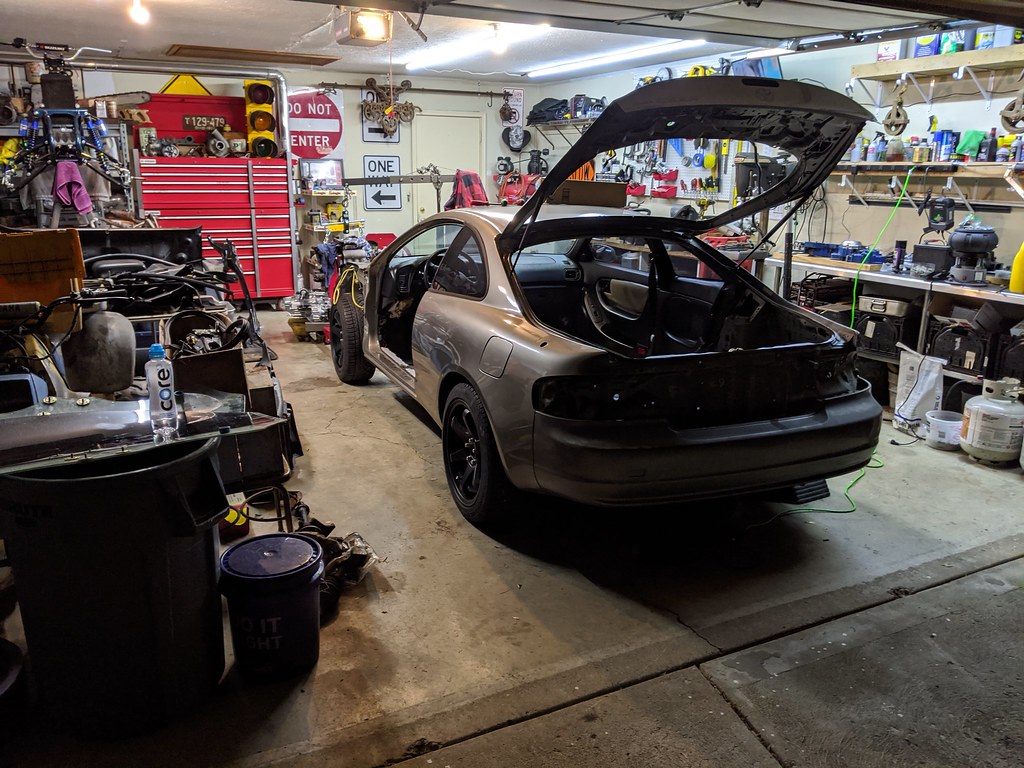 IMG_20200505_220806 by zac savage, on Flickr IMG_20200505_220806 by zac savage, on Flickr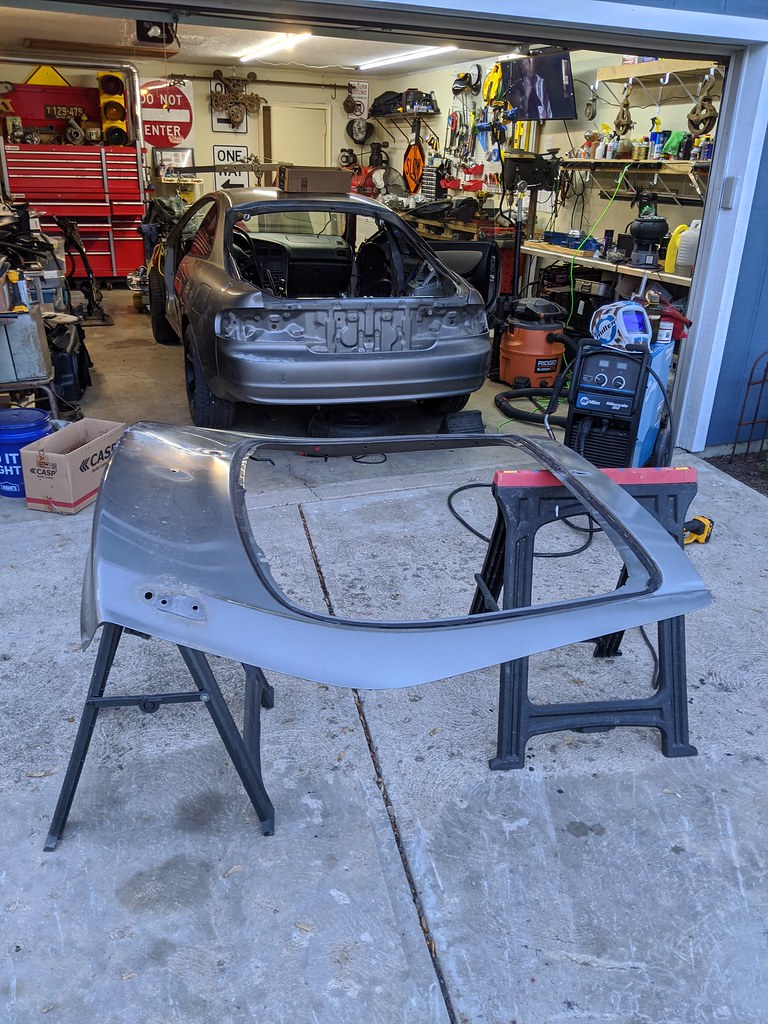 IMG_20200506_203331 by zac savage, on Flickr IMG_20200506_203331 by zac savage, on Flickr IMG_20200512_204315 by zac savage, on Flickr IMG_20200512_204315 by zac savage, on Flickr IMG_20200513_184300 by zac savage, on Flickr IMG_20200513_184300 by zac savage, on FlickrMy family and neighbors would stop by in the evenings to see what the hell I was working on at midnight every night and every one of them decided I was crazy.. there were nights I couldn't disagree, but at this point you just have to keep your eye on the prize... Finally the car was stripped to my satisfaction and I threw it on the trailer for paint... I decided to go with a factory dodge color called destroyer grey. I think the color will turn out pretty good.. it will still need cut and buffed after it's all assembled, but my initial impression is that I love it.. pretty cool color, and having stripped the car down like I did, I think it'll call come together quite nicely. I made some subtle changes to the body just to clean it up. I welded up the side marker lights on the fenders, welded shut the rear antenna, rear wiper and sprayer, and debadged the whole thing.... small changes, but I think it'll end up being a cleaner look.  IMG_20200507_122215 by zac savage, on Flickr IMG_20200507_122215 by zac savage, on Flickr IMG_20200507_122224 by zac savage, on Flickr IMG_20200507_122224 by zac savage, on Flickr IMG_20200510_141059 by zac savage, on Flickr IMG_20200510_141059 by zac savage, on Flickr IMG_20200609_115927 by zac savage, on Flickr IMG_20200609_115927 by zac savage, on Flickr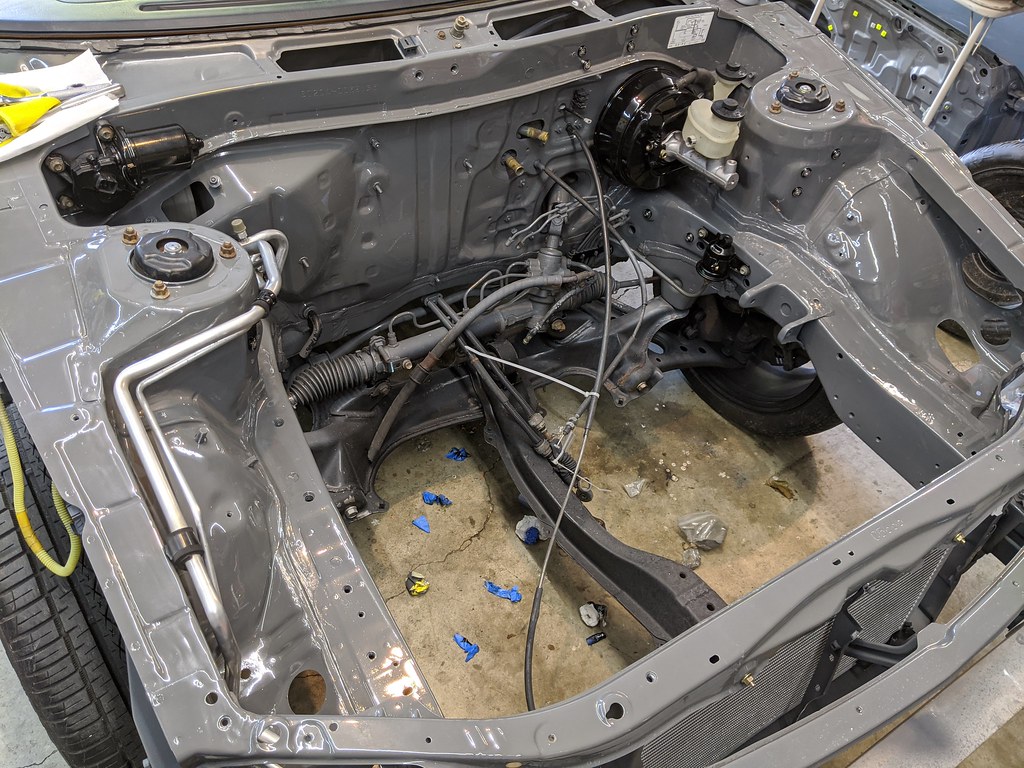 IMG_20200614_191235 by zac savage, on Flickr IMG_20200614_191235 by zac savage, on FlickrMore soon! |
| Jul 16, 2020 - 1:08 PM | Forum: My Project · Post Preview: #1105255 · Replies: 36 · Views: 50,420 |
|
Enthusiast Joined Jul 9, '20 From Ohio Currently Offline |
So the next step for me was definitely to freshen up the motor.... new timing belt, tensioner, water pump, cam seals, front and rear main seals, vc gasket, plugs, idler pulley etc.... I decided to do a little cleaning in the top end (mostly because my OCD kicked in)... and of course i drop a Q-tip down an oil passage..... which leads to popping off the two piece oil pan and cleaning what I can get to in the bottom end... I felt like such a dumb ass for dropping that.. but is what it is.. 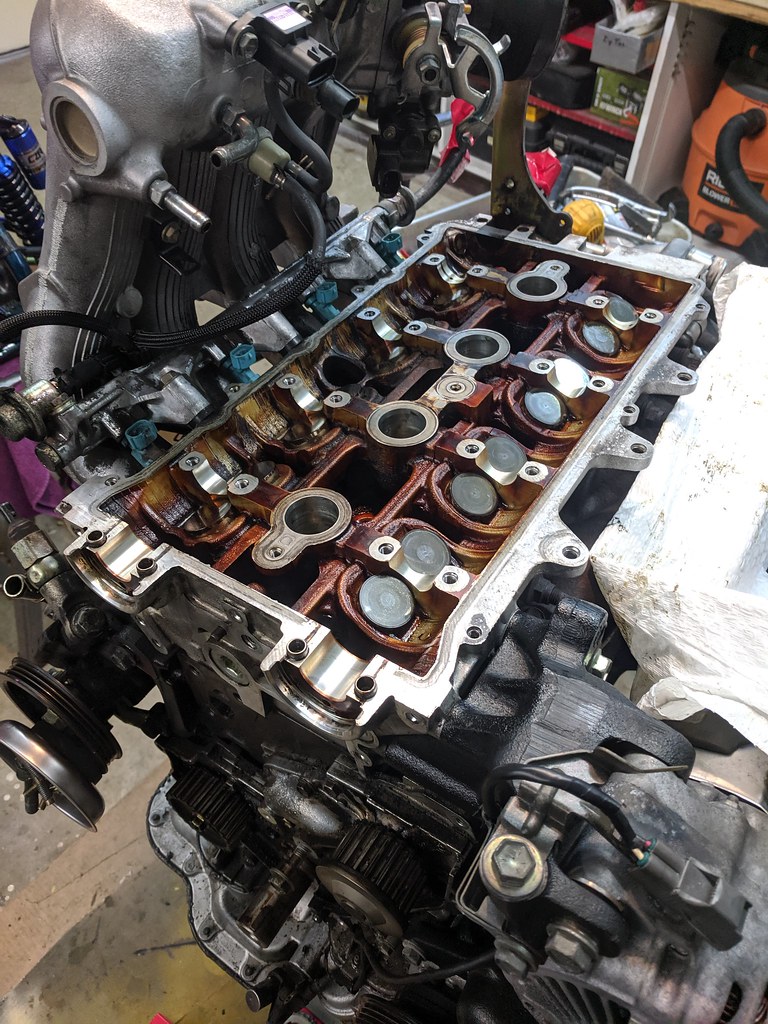 IMG_20191106_224547 by zac savage, on Flickr IMG_20191106_224547 by zac savage, on Flickr IMG_20191026_121036 by zac savage, on Flickr IMG_20191026_121036 by zac savage, on Flickr IMG_20191026_121025 by zac savage, on Flickr IMG_20191026_121025 by zac savage, on Flickr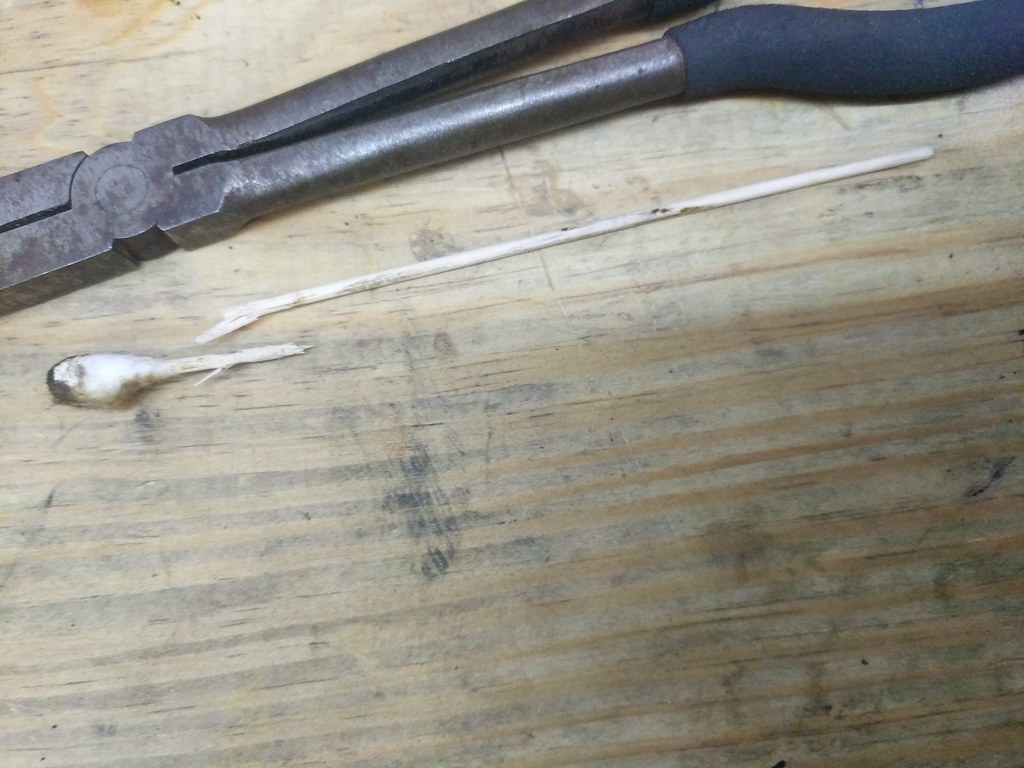 IMG_20191026_121441_01 by zac savage, on Flickr IMG_20191026_121441_01 by zac savage, on Flickranddddd the cleaning took forever and was pretty unnecessary more than likely, but I did manage to get a good bit of gunk out of the engine... 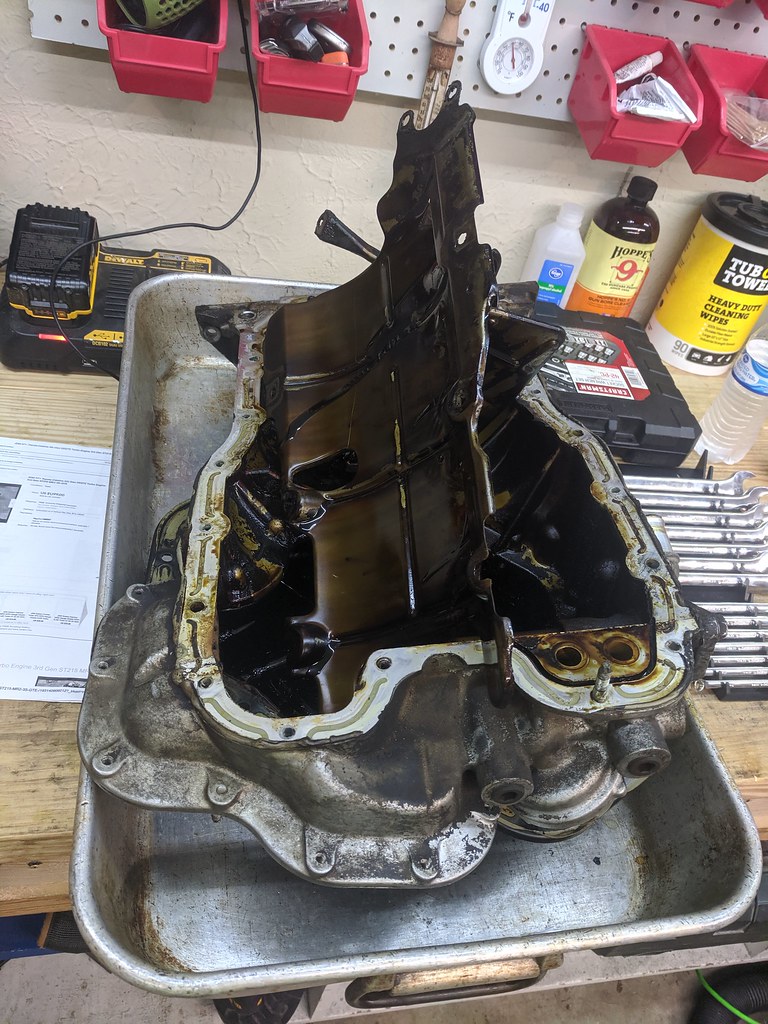 IMG_20191026_120100 by zac savage, on Flickr IMG_20191026_120100 by zac savage, on Flickr IMG_20191026_153952 by zac savage, on Flickr IMG_20191026_153952 by zac savage, on FlickrThis is where I realized I had a problem and needed to quit with the cleaning nonsense.... i pulled the camshafts and soaked them in degreaser... Then almosttttt split the short block.... but reeled it in and decided that was far enough...  IMG_20191106_234130 by zac savage, on Flickr IMG_20191106_234130 by zac savage, on Flickr IMG_20191106_224812 by zac savage, on Flickr IMG_20191106_224812 by zac savage, on FlickrNext up was to do something with the disgusting old s54 trans..... this thing shifted great and never gave me any issues.. I had to decide whether to do an e153 swap or just go with the s54... Since I don't really expect to make more power than the s54 should be able to reasonably handle... that's what I went with.. I do have an LSD e153 and the mounts necessary laying around to do that... but I decided to save that trans for the next project... 77k mile california mr2 sitting in my other garage... Anyways... the s54 needed some major cleaning..  IMG_20200419_093244 by zac savage, on Flickr IMG_20200419_093244 by zac savage, on Flickr IMG_20200419_115610 by zac savage, on Flickr IMG_20200419_115610 by zac savage, on Flickr IMG_20200419_130337 by zac savage, on Flickr IMG_20200419_130337 by zac savage, on Flickr IMG_20200419_162237 by zac savage, on Flickr IMG_20200419_162237 by zac savage, on Flickrmore coming soon! |
| Jul 15, 2020 - 2:17 PM | Forum: My Project · Post Preview: #1105248 · Replies: 247 · Views: 150,481 |
|
Enthusiast Joined Jul 9, '20 From Ohio Currently Offline |
Very cool car man, if the clunking isn't a product of the inner or outer tie rods being no bueno... then it's almost got to be the rack and pinion I guess. I just rebuilt my rack and pinion which wasn't a bad job really. hardest part is getting it out of the car. This is all assuming it's the same system as a FWD GT... |
| Jul 15, 2020 - 1:56 PM | Forum: My Project · Post Preview: #1105246 · Replies: 36 · Views: 50,420 |
|
Enthusiast Joined Jul 9, '20 From Ohio Currently Offline |
wow great work so far. you went all out on the paint like i did. engine bay and removed all windows. honestly kinda of a let down for me. the car just looks so naked without sideskirts a lip and rear spats. Yeah I'm a little nervous about how it's all going to come together without the ground effects... I think it'll look alright, but I may regret being so conservative on the body add-ons.. we'll see! |
| Jul 15, 2020 - 1:53 PM | Forum: My Project · Post Preview: #1105245 · Replies: 36 · Views: 50,420 |
|
Enthusiast Joined Jul 9, '20 From Ohio Currently Offline |
It's been a fun project so far, I'm hoping to be wrapped up in a couple months... I've made more progress than what's posted so far... will get caught up in the next couple days on this thread. |
 New Replies New Replies No New Replies No New Replies Hot Topic (New) Hot Topic (New) Hot Topic (No New) Hot Topic (No New) |
 Poll (New) Poll (New) Poll (No New) Poll (No New) Locked Topic Locked Topic Moved Topic Moved Topic |
| Lo-Fi Version | Time is now: November 22nd, 2024 - 7:25 AM |


