| Apr 26, 2011 - 4:25 AM | Forum: Suspension/Handling/Braking · Post Preview: #913378 · Replies: 2 · Views: 1,443 |
|
Enthusiast   Joined Jul 15, '08 From Norway Currently Offline |
Hello fellow riders, I'll got some really open 18" rims, which makes our stock ST brakes look sad. I have repainted them to make it look better, but still, this is not looking as I want. And the brake stopping power isn't that great either. I want improvements! I know there is some alternatives out there to make this better: - 7th gen brakes on ST. This will bolt directly on the ST hubs. - st185 brakes. A bit uncertain on this, but I think this is bolt on too. - GT4 brakes. This is not bolt on, but still possible. I think you have to tap the hubs etc, and get a custom disk. Well, I will try to look up some 7th gen brakes, but in the meantime I am drooling about this kit:  D2 Racing Sport Front Big Brake Kit 286mm Toyota Celica ST202 97-99 Specs: QUOTE Toyota Celica ST202 97-99 5X100 286X26mm Contains: 2x Braking pads 2x Calipers 2x Rotors + Adapters etc Introduction: D2 6 Piston Front Brake Kit has 286 X 26mm brake rotor and is suitable for 15" wheels or above. All discs are designed by 2-piece disc and the materials of the bells are made by aluminum. When the components of the kit are worn, such as the brake discs or brake pads, AP parts can be fitted onto our brake kit. Also, the brake pad from the following well-known brands: AP, FERODO, MINTEX, EBC, PAGID, CARBON METALLIC AND HAWK can be fitted onto our kit. Allright then, this looks like a beast to me, and will be a GREAT improvement both look and performance. The price tag for this is USD 2000, but from a Norwegian supplier, which means no big custom fees etc. If I buy a kit off Ebay for around 1500, it will be close to 2000 at my door. Well, the question is, will this fit bolt-on on a ST? (I hope ST is the same as AT200) |
| Apr 26, 2011 - 2:58 AM | Forum: Suspension/Handling/Braking · Post Preview: #913375 · Replies: 2 · Views: 1,266 |
|
Enthusiast   Joined Jul 15, '08 From Norway Currently Offline |
I recently had this problem. It came when I changed struts and springs in the front. I did the following: - Aligned the top mount and the rest of the spring and dampener perfectly. Did apply som grease on the top mount to be 100% sure Then I still got som strange sounds. Suddenly I saw that the caliper was a bit loose, so it was just to tighten the bolts. The sound 100% gone. After a while, I got a new sound from the same place, but this is the CV joints. Good luck! Check these things first, and you may find the problem! |
| Apr 23, 2011 - 3:29 PM | Forum: Interior/Audio/Electrical/Wiring · Post Preview: #912872 · Replies: 4 · Views: 1,716 |
|
Enthusiast   Joined Jul 15, '08 From Norway Currently Offline |
Hi folks! I am looking for something special. I want to monitor my cars sensors (Air/fuel, temperatures, etc), but instead of adding gauges in my A pillar, I was thinking of a more software based system? Perhaps able to connect via a video cable to an existing navigation unit. (Which I have). Do someone know of something like this? |
| Sep 16, 2010 - 11:32 AM | Forum: Interior/Audio/Electrical/Wiring · Post Preview: #875672 · Replies: 9 · Views: 2,810 |
|
Enthusiast   Joined Jul 15, '08 From Norway Currently Offline |
Finally... ..after some hours of testing leads, I figured out how to make the lock actuators to work. 6. BLUE/RED 7. BLUE/WHITE The cables mentioned above are used to make it work. So it works with my aftermarket central locking now, but I really want it to work with the panel too. (The panel where you can lock/unlock the doors with a button close to the power window control) |
| Sep 16, 2010 - 11:27 AM | Forum: Interior/Audio/Electrical/Wiring · Post Preview: #875671 · Replies: 11 · Views: 3,846 |
|
Enthusiast   Joined Jul 15, '08 From Norway Currently Offline |
The door panels are in two parts: 1. part, cover 2. part, plastic panel with controls etc. The 1. part is possible to disassemble from the plastic panel, so you could get a door panel with JUST the cover, not the plastic part. You see? And, the plastic panels are also same whatever the car is LHD or RHD. Did recently a swap to electric windows on my LHD ST. And the donor doors and panels came from a JDM RHD. I just needed to switch the controls. Bottomline, unmount the door covers from the plastic and send them to a upholstery shop. I'll payed around 400USD for upholstery of two doors, and thats a Norwegian price. (Which is know as a expensive country) The upholstery work were top notch quality, and Im 100% satisfied. |
| Sep 14, 2010 - 3:45 AM | Forum: Interior/Audio/Electrical/Wiring · Post Preview: #875150 · Replies: 11 · Views: 3,846 |
|
Enthusiast   Joined Jul 15, '08 From Norway Currently Offline |
There must be a upholstery shop within the range of you. Its much better than buy new door panels, and much cheaper. |
| Sep 13, 2010 - 1:52 PM | Forum: Interior/Audio/Electrical/Wiring · Post Preview: #875001 · Replies: 11 · Views: 3,846 |
|
Enthusiast   Joined Jul 15, '08 From Norway Currently Offline |
The best thing to do, is to reupholster your door panels. Such big damage as wrinkles is impossible to "quickfix". |
| Sep 12, 2010 - 3:21 PM | Forum: Interior/Audio/Electrical/Wiring · Post Preview: #874774 · Replies: 9 · Views: 2,810 |
|
Enthusiast   Joined Jul 15, '08 From Norway Currently Offline |
One door 95% finished! So, time to do some more work on this project. My doors have been to repaint, and I had to wait till yesterday to pick them up. 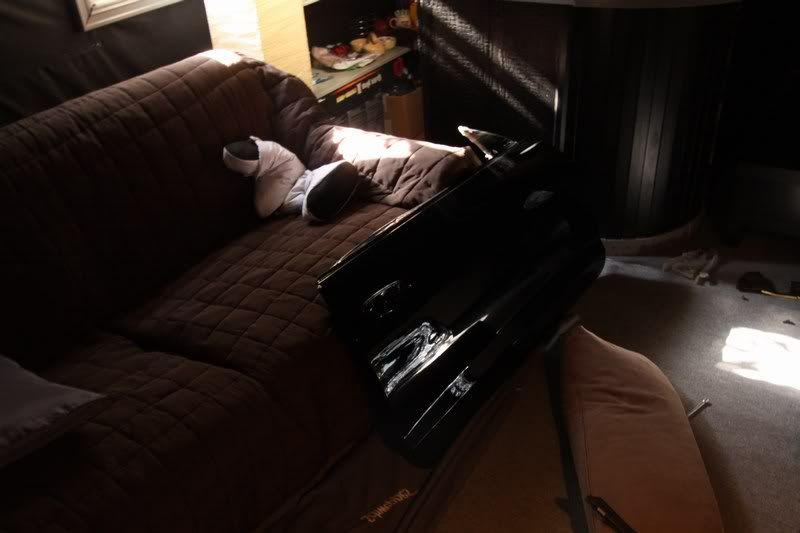 Here is one of the newly painted doors. Repainted surfaces is sexy! The things I had to do with one door were:
And this is about 12 hours of work. The work is mainly to figure out the electricial work. The door remount is really easy. 4 bolts, and some cables that need to be pulled away. - - - The power folding mirror work 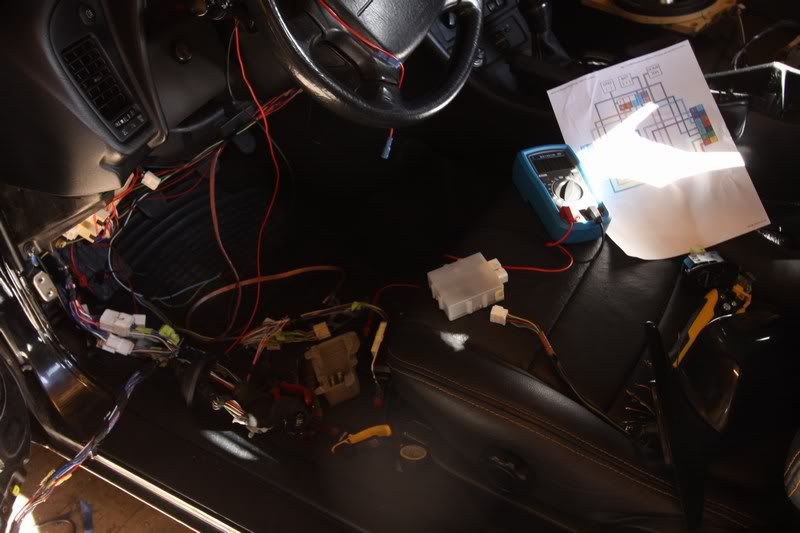 This harness work have to be done in the car. Its so much easier to plug in the harness, and work out the problems from there, since it works a bit unmodified. http://www.youtube.com/watch?v=SvBQwsEBxt8 Testing the power folding 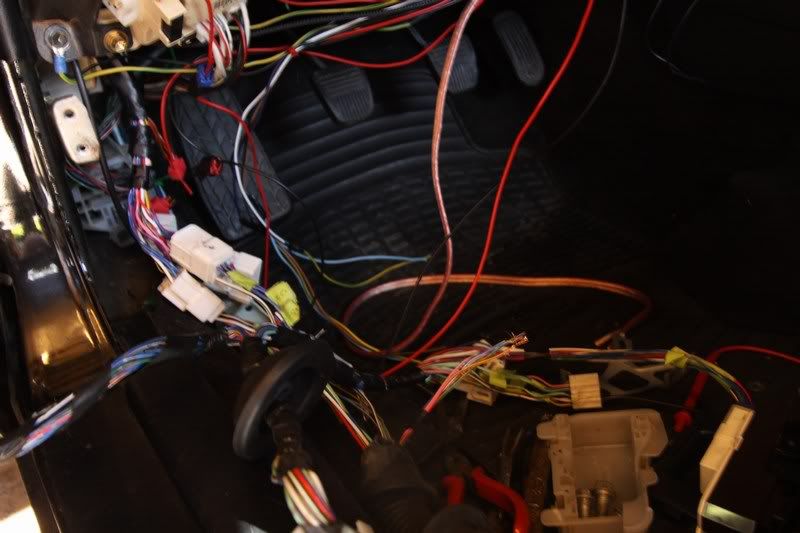 Cables makes a real mess in the car. So the thing we need to do, is to get these parts: - WHITE boxed relay to power folding mirrors. The text "Mirror Control" are printed on it. - The plug that fits to this relay - And of course the harness and mirrors. If you want do use a harness without power folding mirrors on it, you should check for cables of these colors: - red/yellow - green/yellow - blue/red - blue/white This is for the left side harness (JDM) - I am using this harness on my left side. It is different colors on the other side harness. I cut the cables mentioned above in the list from the plug, and made my own harness from there. My stock car harness (sits under the dash etc) didnt have enough cables in, so this is why I had to do this. Then we need to extend the harness: 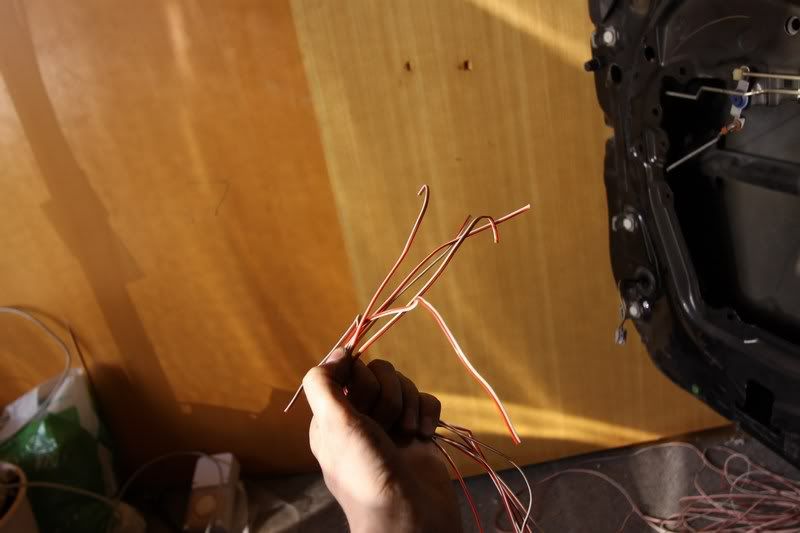 So we start out with some fresh unused cables. This are speaker cables, and will be great. 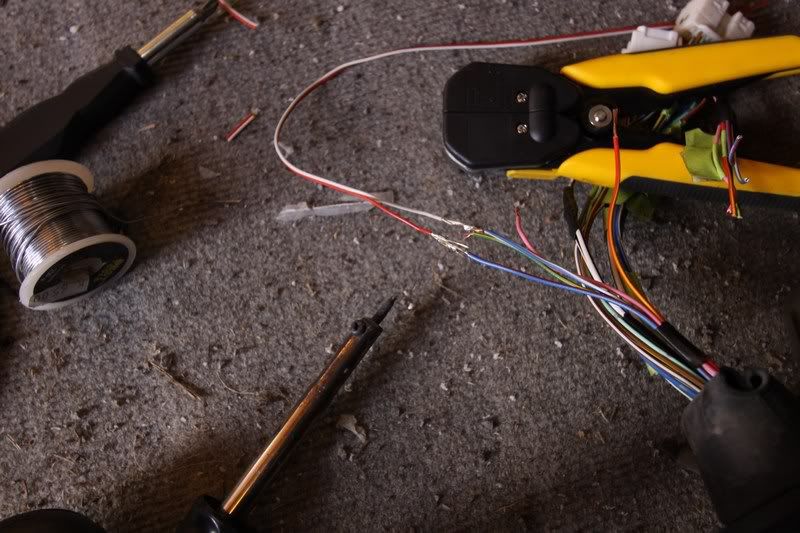 First we need to solder the unused cables to the door harness. 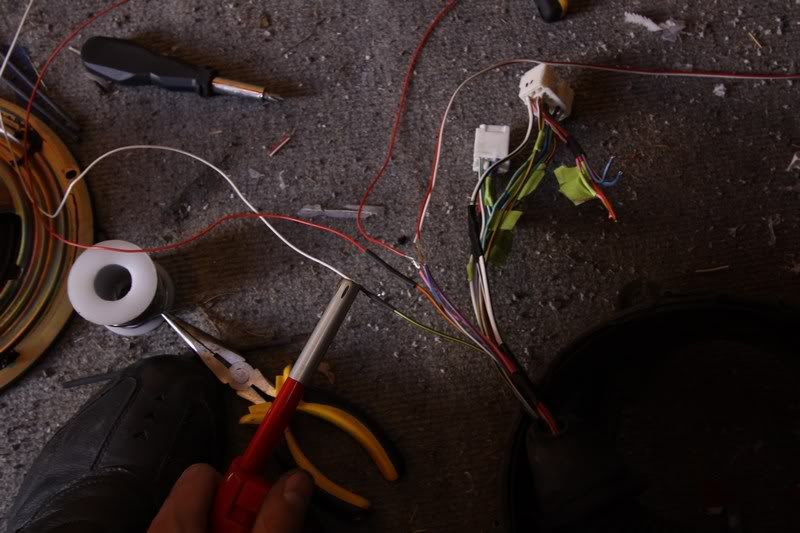 >>>REALLY<<< imporant to be carefully here, and use shrink tubes. You dont want loose positive cables around in the door. 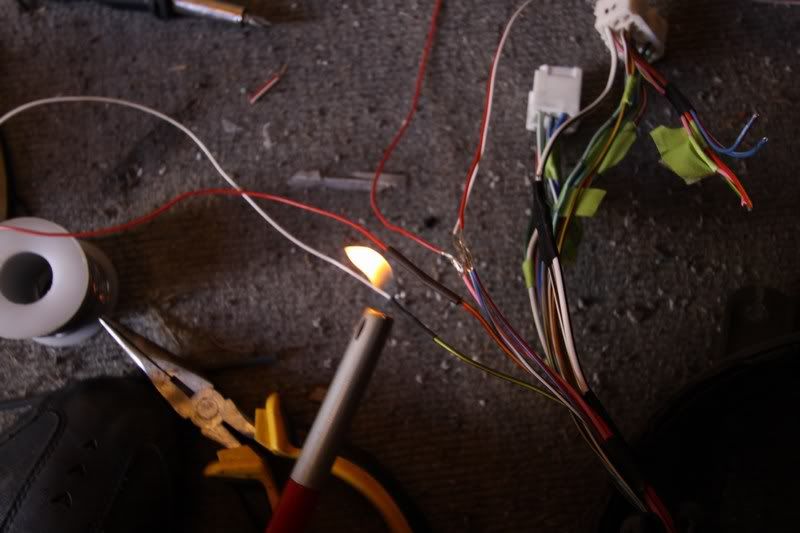 Flame on! 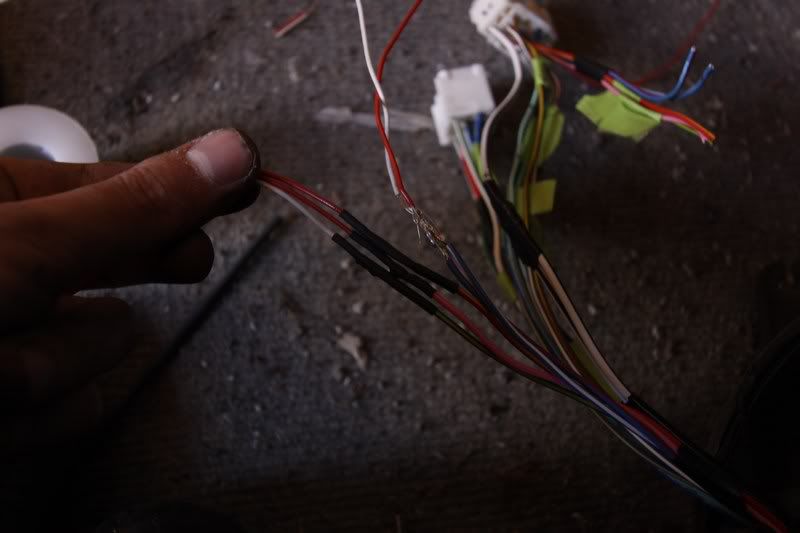 Some cables done 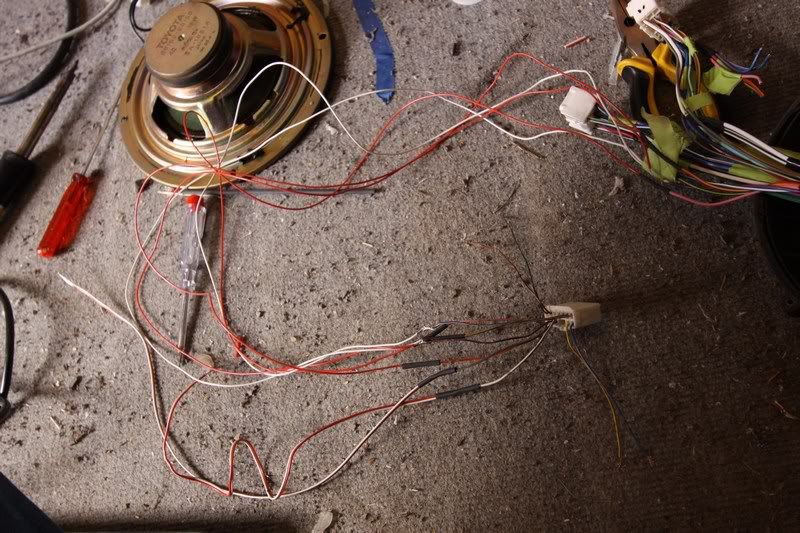 The harness almost done. The plug at the bottom is the plug which fits in the power folding mirror relay. To be informative, I am soldering the relay plug onto the door harness. 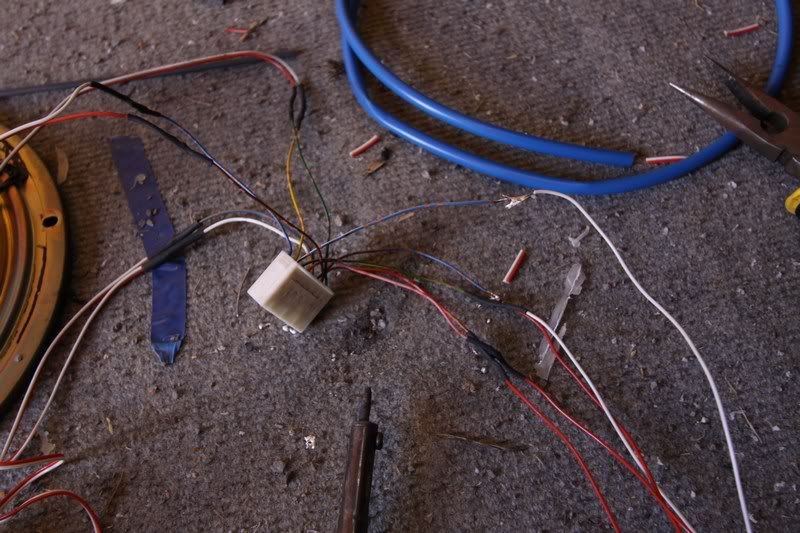 More pictures. Blue/yellow cable is positive, which should be connected to a dome fuse or something. And there is a White/black cable there too, which is ground. Pink is the signal from the power folding button, and all the others are the power to the folding mirror motor. http://www.youtube.com/watch?v=VaYPZJIHp80 Testing my new harness 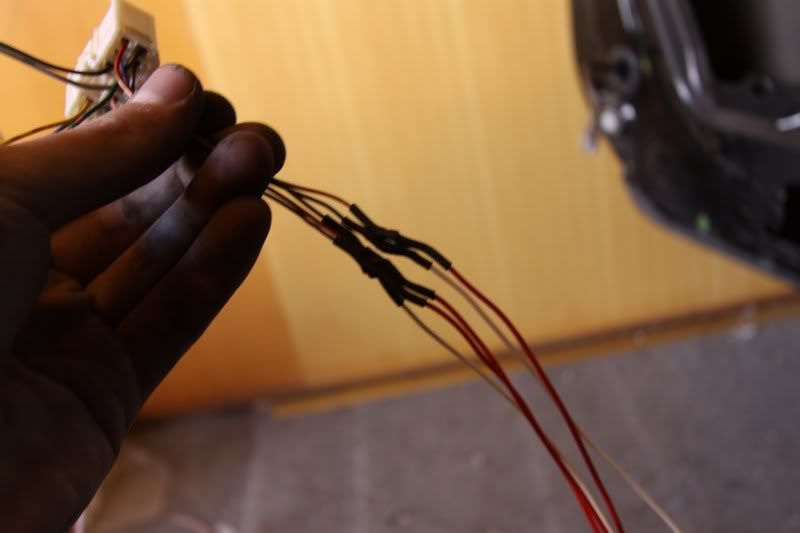 Almost done 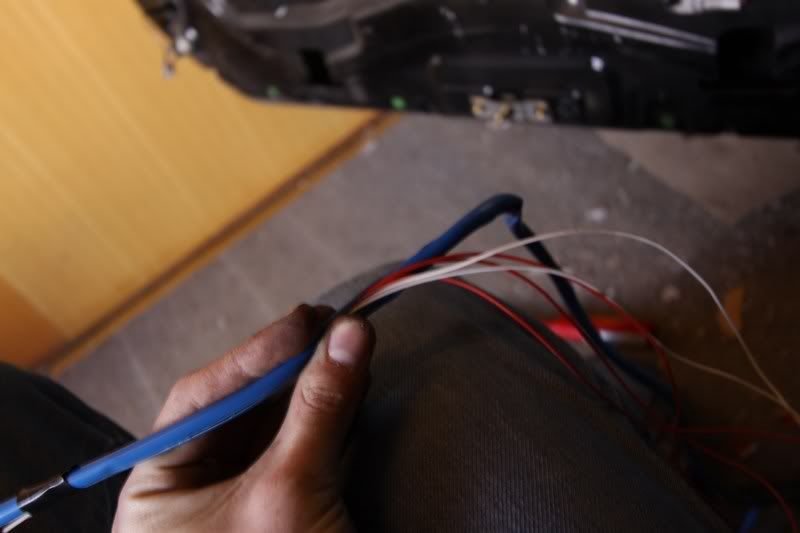 So, I used a plastic tube to protect the harness. 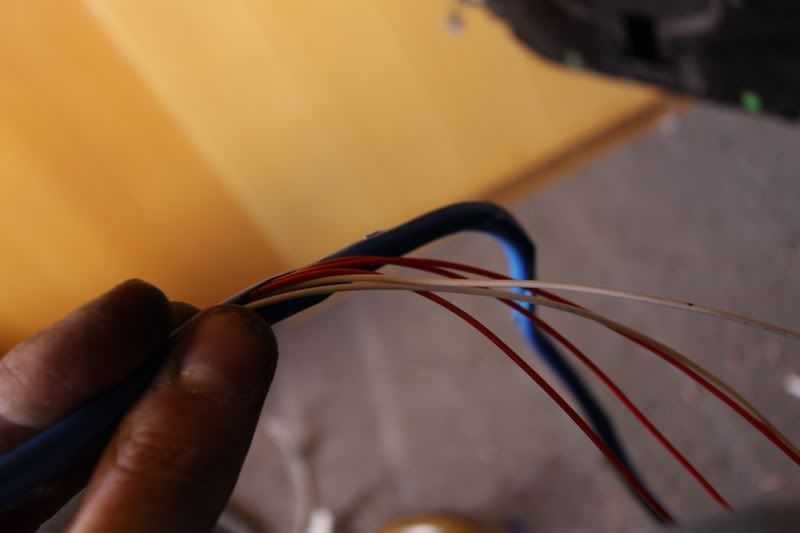 Push the cables inside 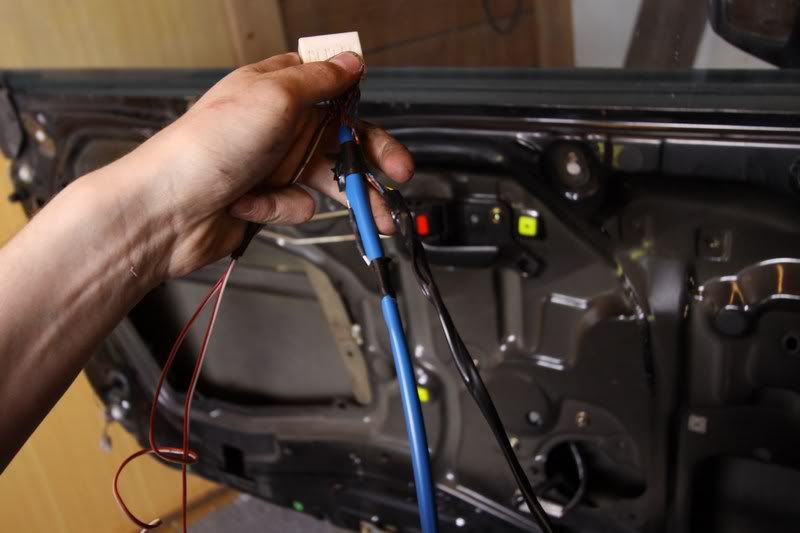 99% finished. This is from the relay. The cables at the left side are positive and negative, and the black taped cables at the right are to the passenger side. We want both of the mirrors work, right? So mainly, it was quite easy work, but time consuming. The cables are color labeled, and I soldered f.ex green/yellow from the door harness to green/yellow at the plug. The things that you need to figure out, is that the blue/yellow cable at the plug are from a positive source, like dome. I mentioned this above, but make sure to make that right. Other door work 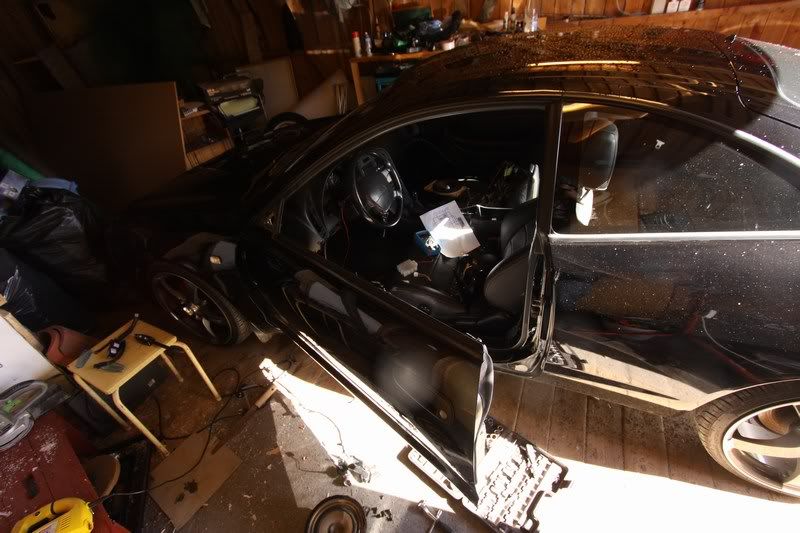 The JDM door mounted and confirmed fitting. Perfect! 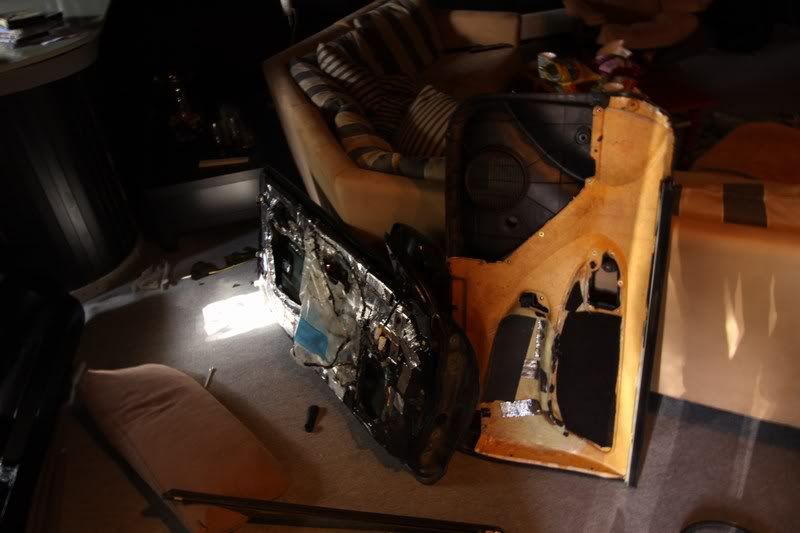 The old door. 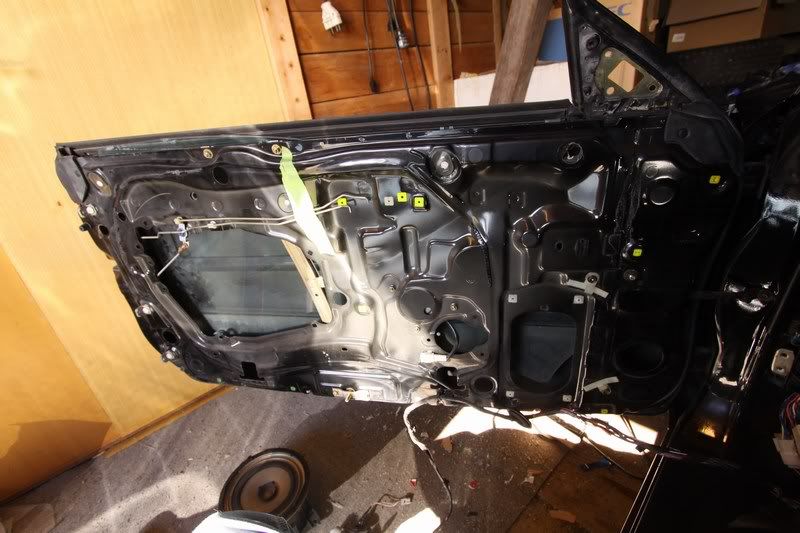 New door at inside. Need to buy some insulating to this door too! 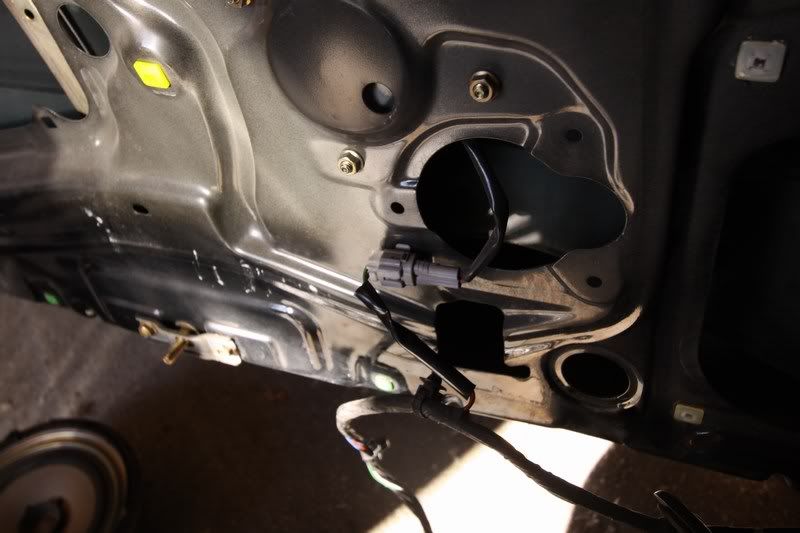 Testing the power windows 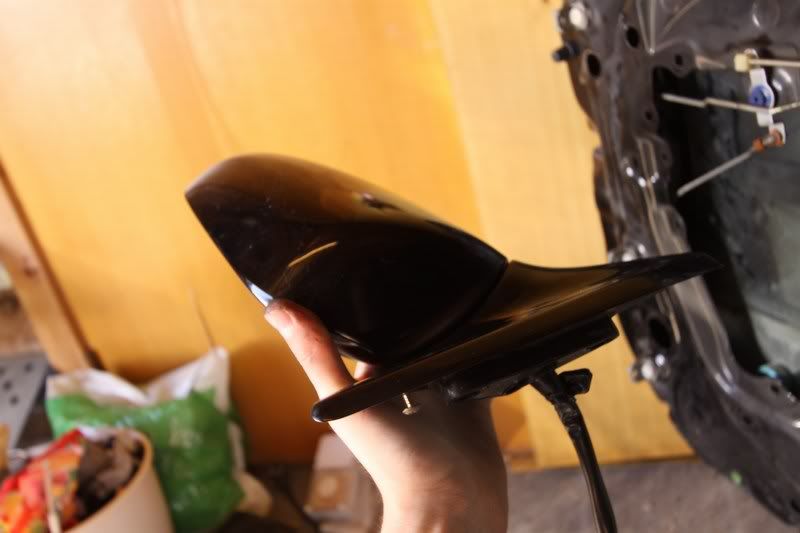 Mounting the power mirrors 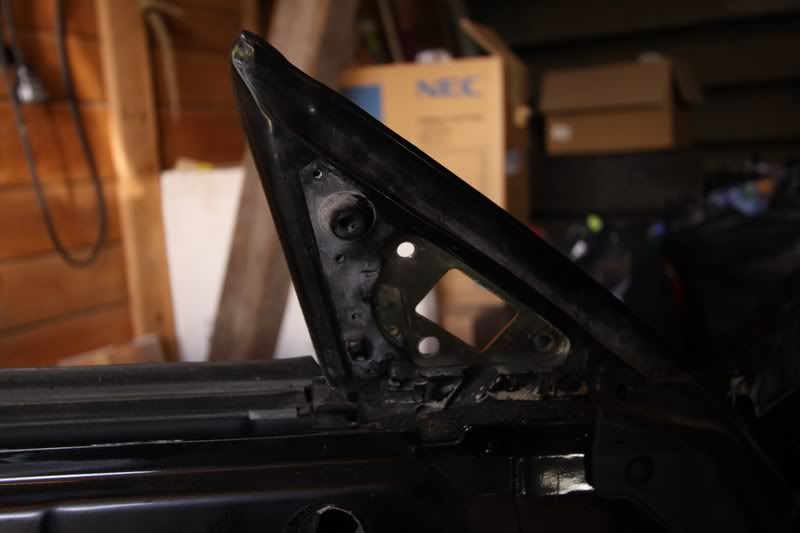 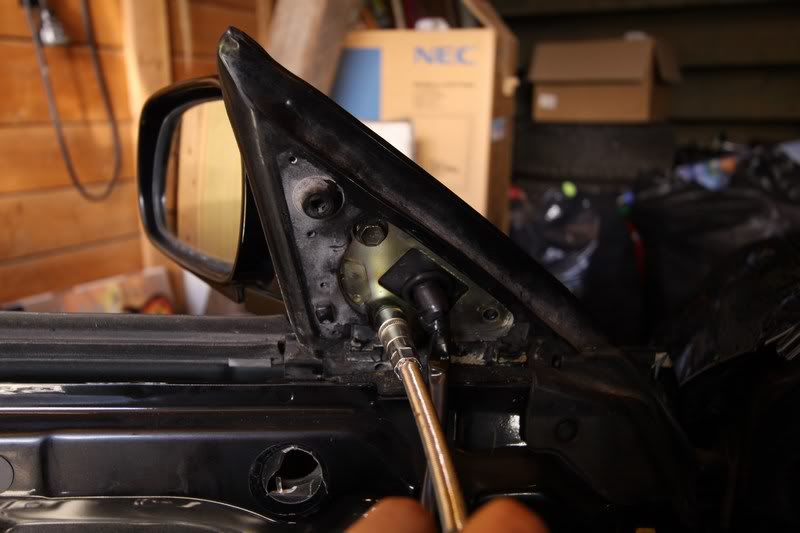 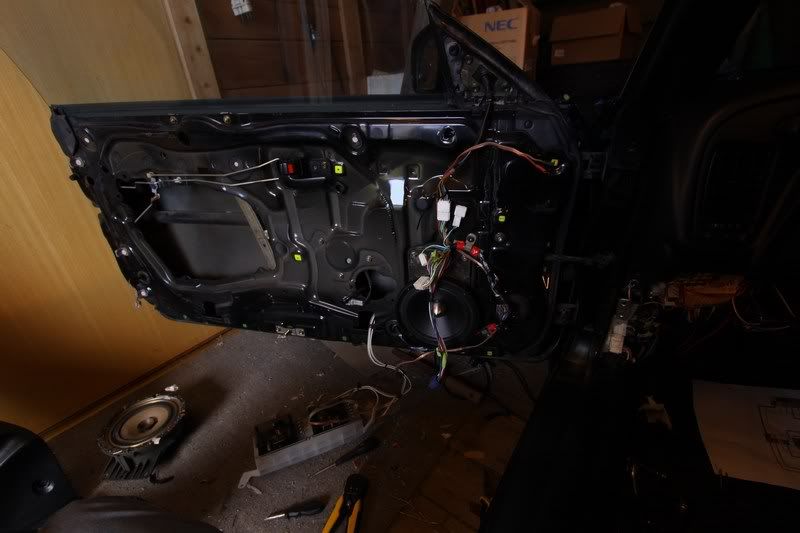 Still a mess, but getting closer! 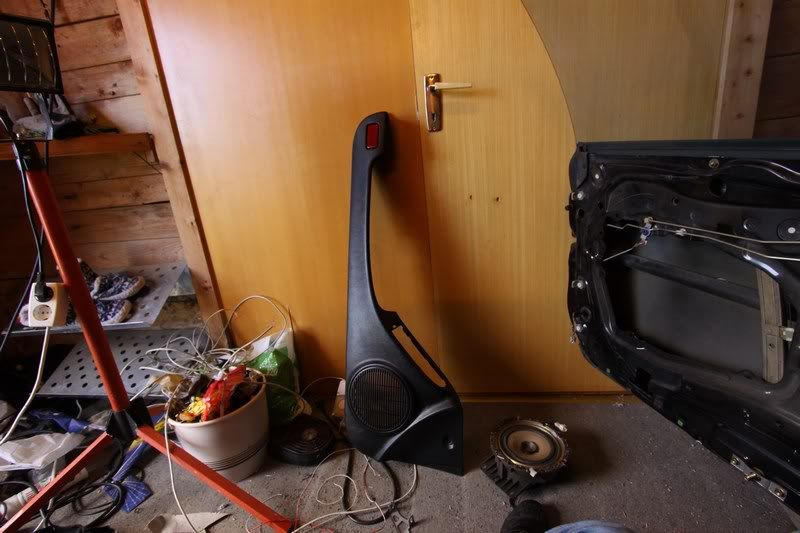 The new plastic piece waiting. 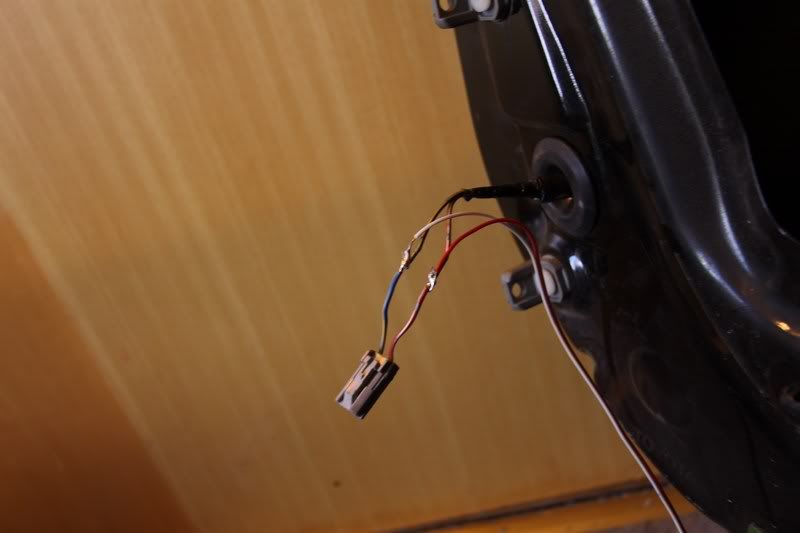 Solder to the dome light. I want som additional lights, so this is perfect to use! 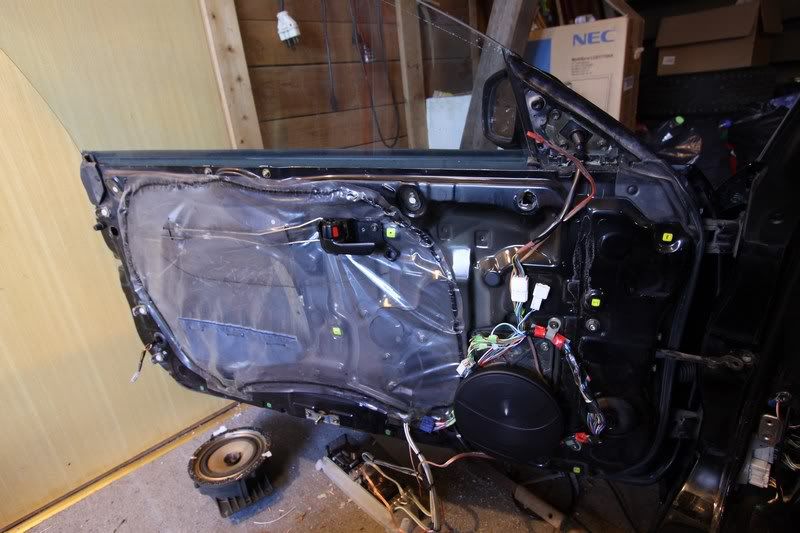 The door almost finished. The door panel are the last step. 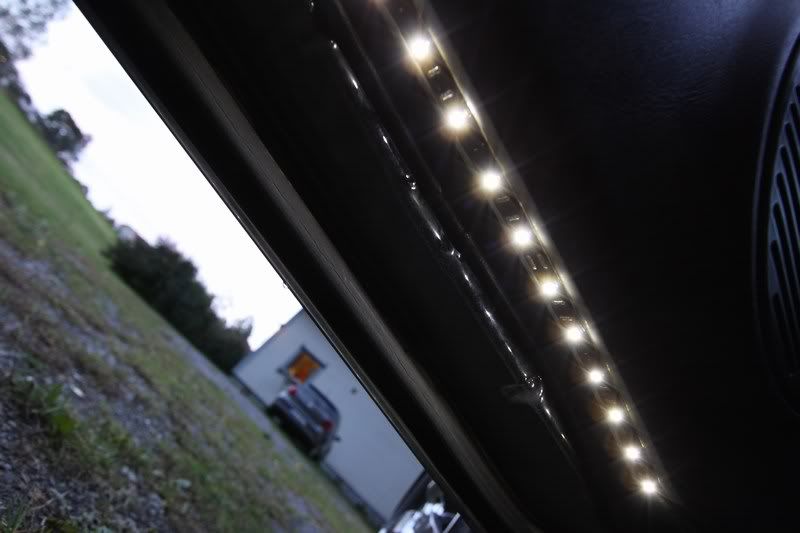 This was the additional lights. Nice in the dark, and works when you open the door without the key in! 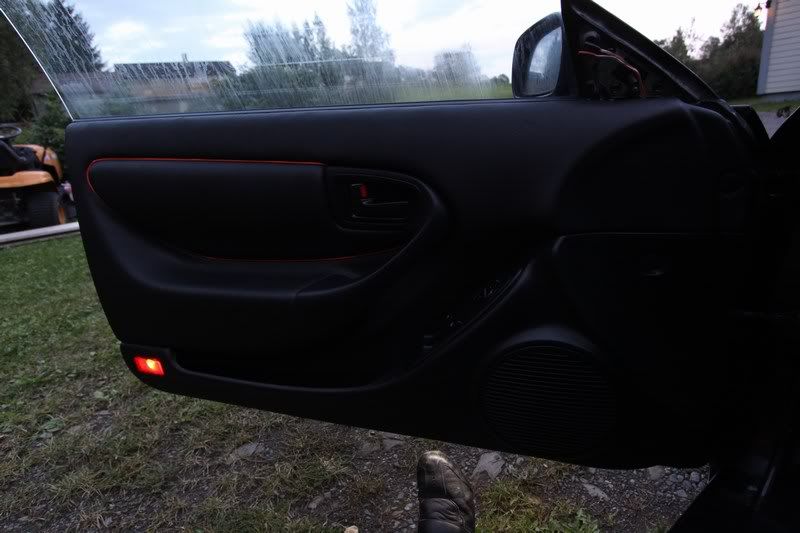 The door finished. http://www.youtube.com/watch?v=rXluUdGrCfo 95% final product (How do I make youtube videos show in my post?) One door closer to... satisfaction? So, that was one door. Now I know exactly what to do to the other door, so that will be simple. Some problems will always show up, but they will be figured out. STILL, I havent figured out the central locking. Its impossible for me to just try the cables, because its like 7 cables that goes only to the central locking module in the door. So please, if someone can help me out here! I need to know what each of the cables do: 1. WHITE/BLACK - This is ground 2. WHITE/BLACK - This is also ground 3. BLUE/BLACK 4. BLUE 5. GREEN 6. BLUE/RED 7. BLUE/WHITE |
| Aug 24, 2010 - 1:08 PM | Forum: Interior/Audio/Electrical/Wiring · Post Preview: #871993 · Replies: 9 · Views: 2,810 |
|
Enthusiast   Joined Jul 15, '08 From Norway Currently Offline |
Thank you! I will try to post up everything, to make it easier for other people to do the same mod. The platic foils is a nasty work indeed. But Im kinda used to them now, so I think I'll got the right technique now. But its really hard to not damage them, since the plastic strech alot when you pull it off. Okay, the tweeter thing is problably nothing if others have the same problem. The thing that worried me though, was the "reset" on the fuel gauge. Maybe I pulled a plug which was to it, I dont know. But I thought that those fuel cables were in the middle of the car? (Through the middle console and so on) I have now marked every cable with numbers, and I think the harness is ready to be plugged in to the doors and the car. I must wait for the doors to be repaired (ETA 1 week), so in the meantime I need help with the power locks. Do someone know what each of the cables to the power locks do? 1. WHITE/BLACK - This is ground 2. WHT/BLACK - This is also ground 3. BLUE/BLACK 4. BLUE 5. GREEN 6. BLUE/RED 7. BLUE/WHITE |
| Aug 21, 2010 - 5:13 PM | Forum: Interior/Audio/Electrical/Wiring · Post Preview: #871554 · Replies: 313 · Views: 269,416 |
|
Enthusiast   Joined Jul 15, '08 From Norway Currently Offline |
Some people say that we dont need the relay box? Got these mirrors off from a 94 JDM, and I'll got the white relay box with me. Tried to make it work without, but I cant see a way without using the relay box. When you press the fold button, it sends a activation signal, and thats not strong enough to fold the mirrors? And IF you wire it like that, you need to keep the button down until they are completely folded? And what about unfolding them? |
| Aug 21, 2010 - 3:00 AM | Forum: Interior/Audio/Electrical/Wiring · Post Preview: #871497 · Replies: 4 · Views: 2,035 |
|
Enthusiast   Joined Jul 15, '08 From Norway Currently Offline |
Thank you so much! |
| Aug 21, 2010 - 1:58 AM | Forum: Interior/Audio/Electrical/Wiring · Post Preview: #871494 · Replies: 9 · Views: 2,810 |
|
Enthusiast   Joined Jul 15, '08 From Norway Currently Offline |
Update! - Checking JDM harness vs original harness Since updates with pictures is a lot more interesting, I have taken some this time! Its not too great, and not alot of taking pictures of.. 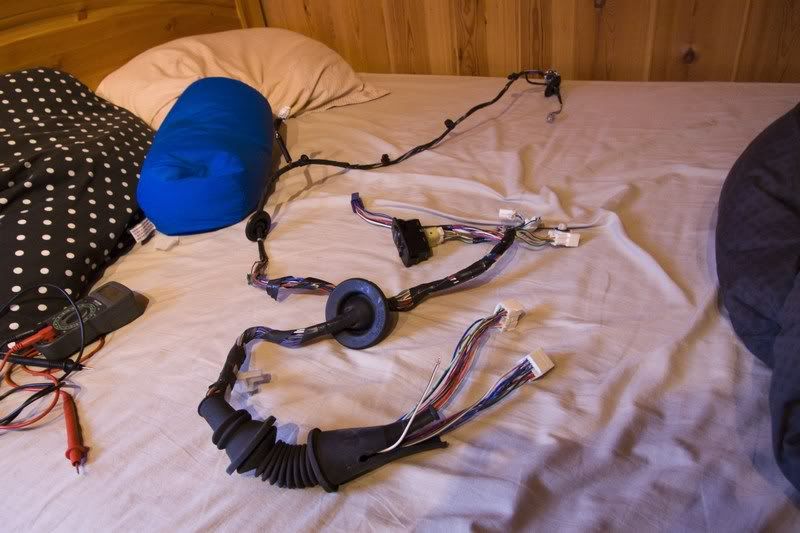 The right side harness unhooked from the door. This will be placed in the left door after testing. 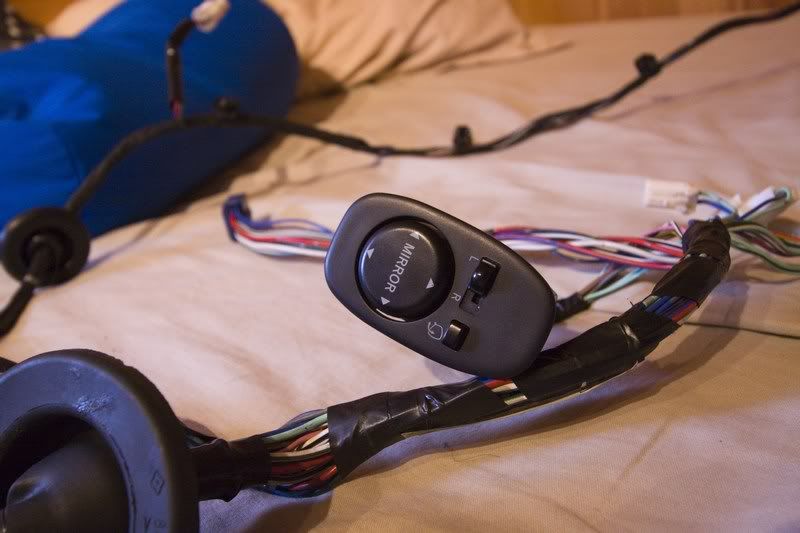 Closer shot on the power mirror control. 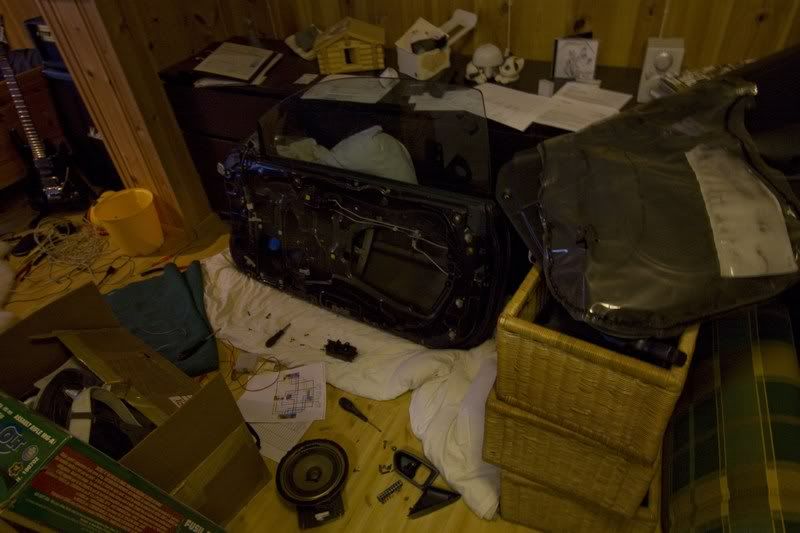 Here is my workspace. Since the doors needs to be handled carefully, I use my restroom as a workplace now 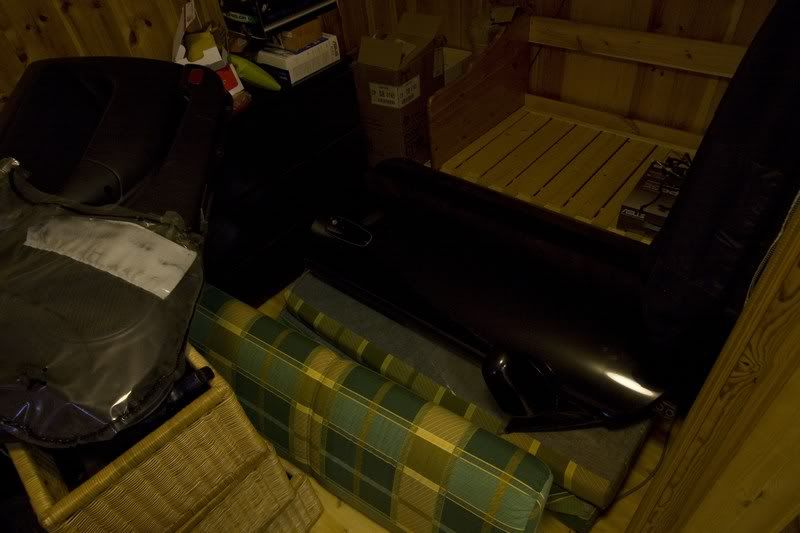 The other door. 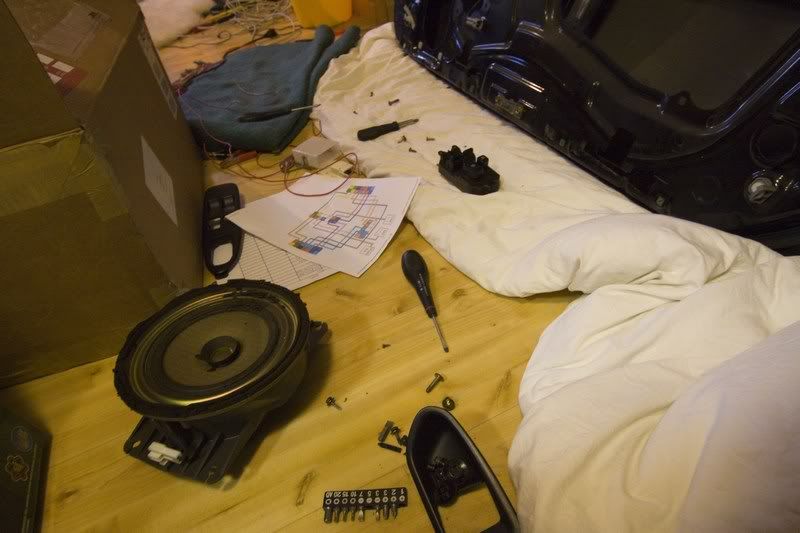 More pictures. 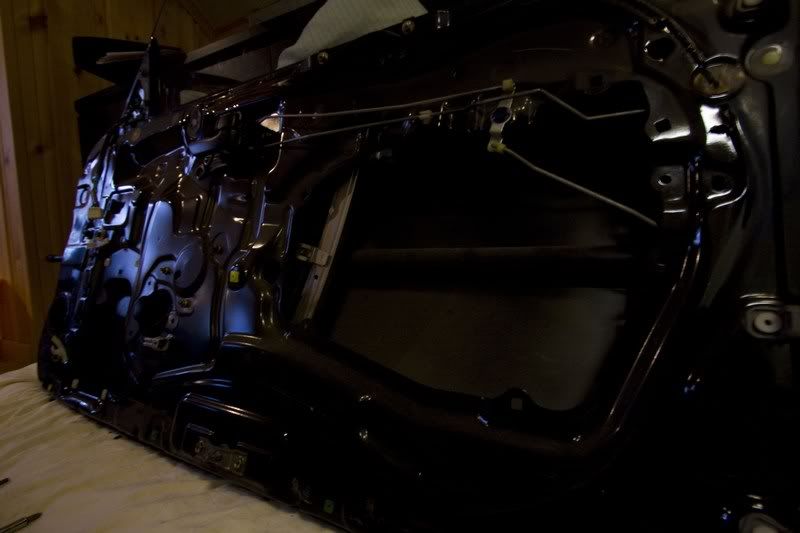 A shot of the inside of the door 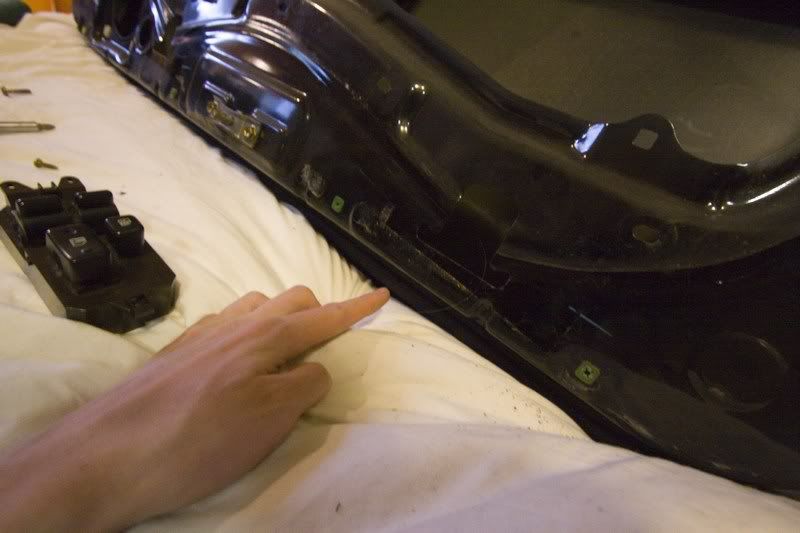 Where I am pointing, is a typical place for rust. The inside of the door, at the bottom is a really exposed place. It is sort of a fabrication failure, since everyone got rust here after some 100.000 km. So this must be fixed. 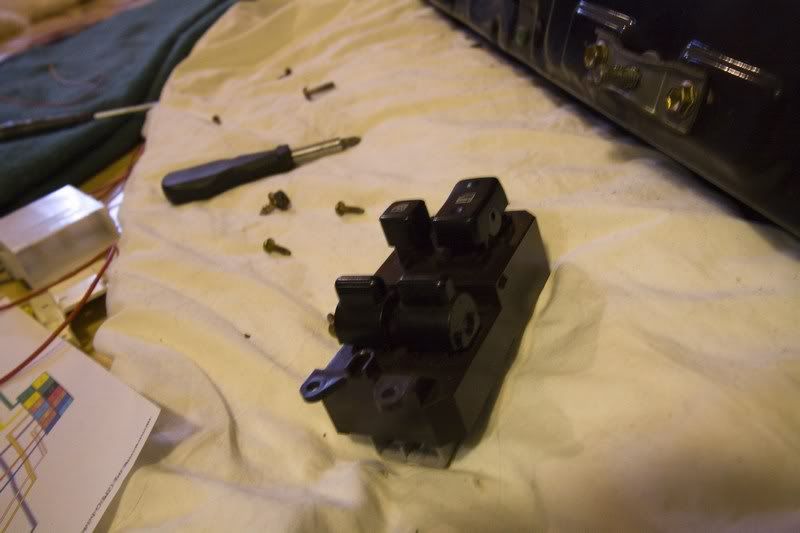 The power window control. 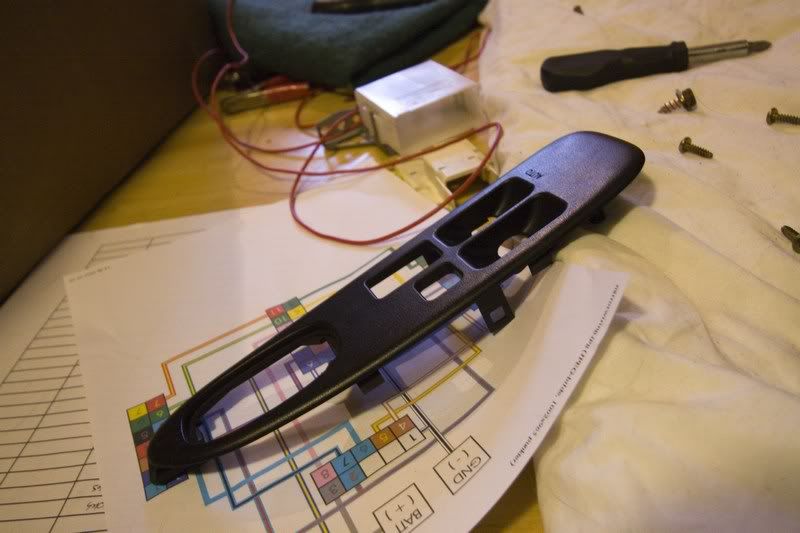 The plastic panel 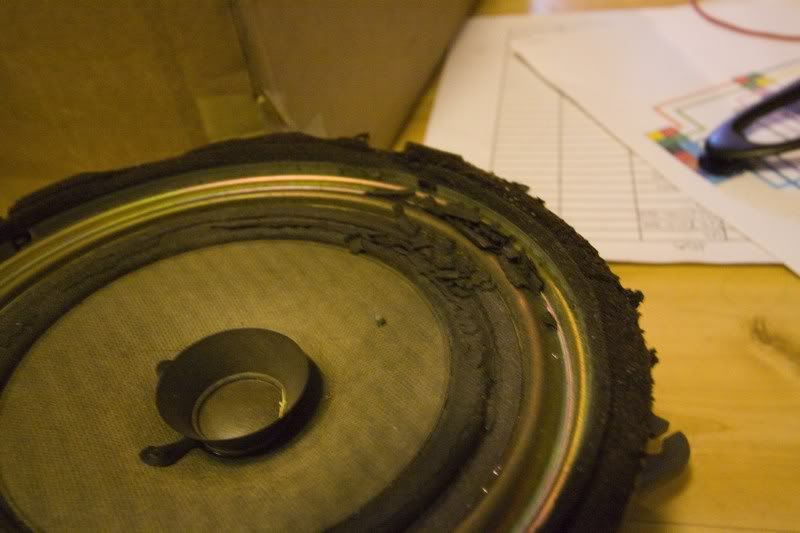 And a really used speaker. Look at the membrane! 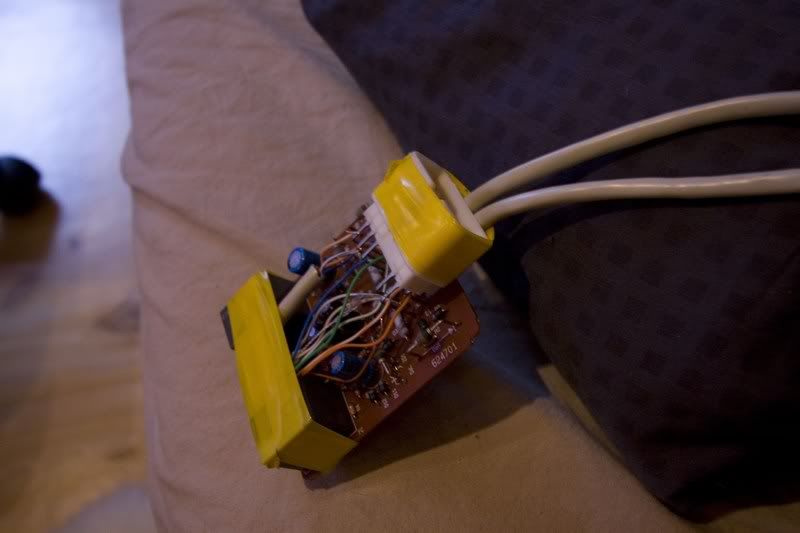 The mirror control relays, which make the power mirrors work. I didnt get the plug which fits here, so I did a fast custom work here. 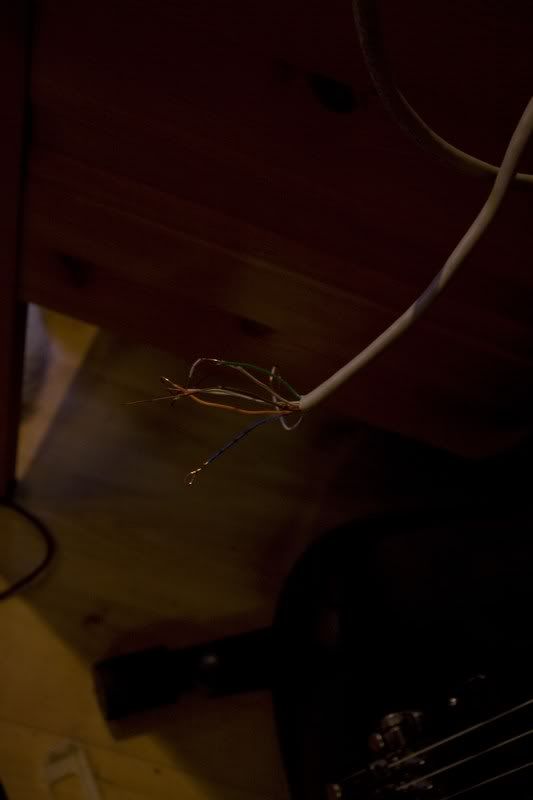 It works, until I get the right plug. 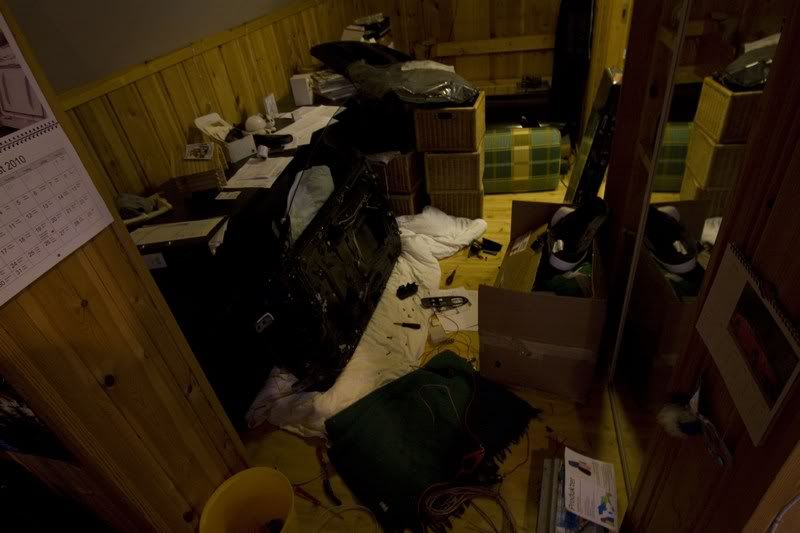 Overview. 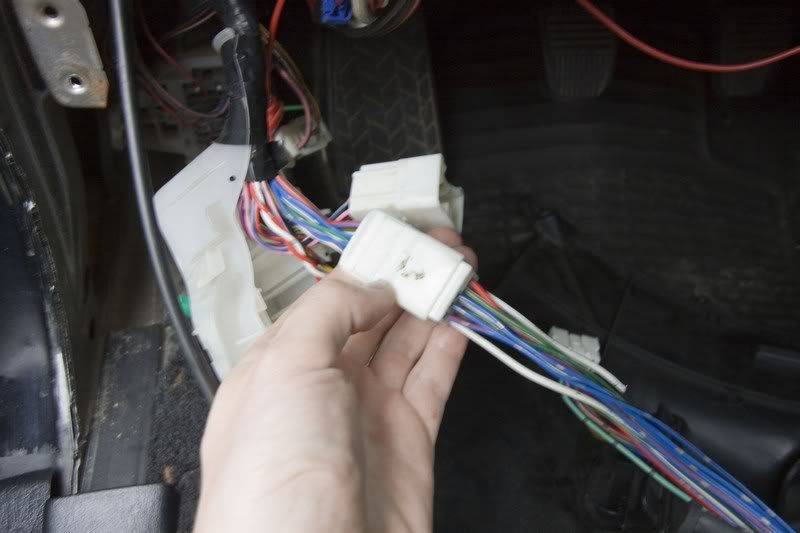 So, got outside and testet the doors with my car. Plugged in the JDM harness, and one of the plugs were 100% identical. 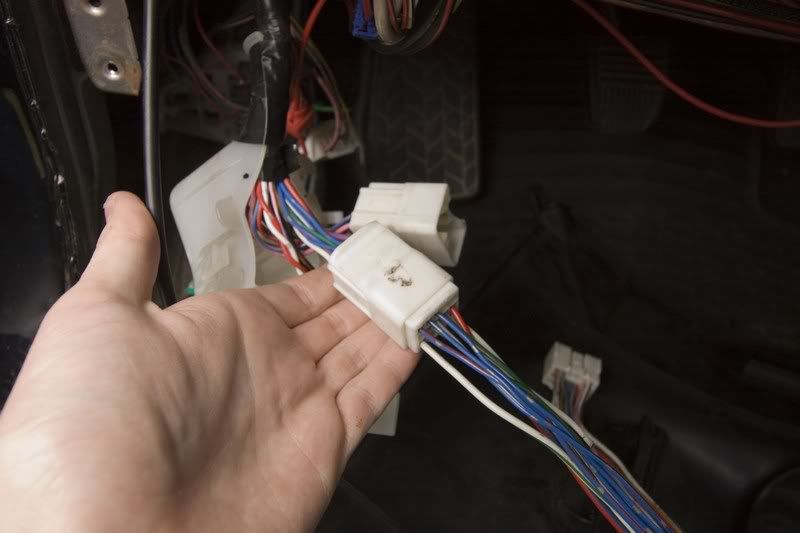 And yes, the power windows worked 100%! 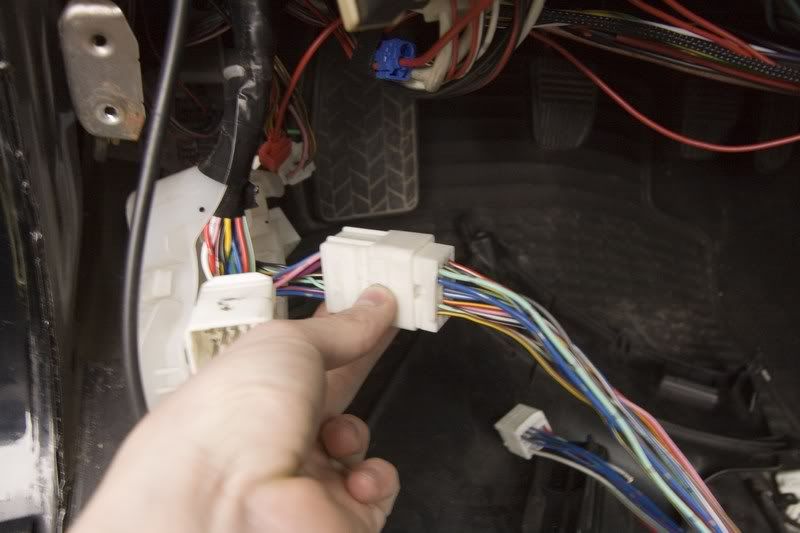 This another plug, needs a bit of modification, though. This is mostly the mirrors, and maybe a bit of the central locking. Havent figured everything out yet. Problems: Tried the mirror control too, and it worked 100%. Even at the other side! So some wires must be right at the plug at the last picture. But I noticed a bit of distortion or buzzing in my tweeters when I controlled the mirror at the other side. And the fuel gauge in my gauge cluster were resetted after I tried the harness? So, yesterday I delivered the doors to reperation and painting, so it will be 100% when I put them on my car! So I need to figure out the central locking. I'll got a central locking aftermarket kit, so its just plug and play basicly, but I need to know what each of the wires to the central locking do. Looked at the wiring diagram, but I dont understand them 100%, since Im not a electrician. I also need to swap the mirror control wires. Since I swap the harnesses the R on the mirror control will be L. Its not a big deal, but I want it to be 100%. |
| Aug 14, 2010 - 6:34 AM | Forum: Interior/Audio/Electrical/Wiring · Post Preview: #870236 · Replies: 9 · Views: 2,810 |
|
Enthusiast   Joined Jul 15, '08 From Norway Currently Offline |
So, the first day I made progress came! Unhooked the harness from the JDM doors, and tried to plug it into my car. Both of the plugs fitted, and one of them(the smallest one) had a perfect match to the car! The colors of the wires matched perfectly. I have checked all the wires, and know that this plug that matched perfectly, is mostly to the power windows. I tried to connect the master switch, and measured the voltage on the connector to the power windows. And YEAH! It came voltage when I used the right button! So, strange enough, no modification seems to be needed at the power windows point. Then I need to sort out the power folding mirrors, mirror control and the power lock. Any help will of course be appreciated! |
| Aug 14, 2010 - 6:28 AM | Forum: Interior/Audio/Electrical/Wiring · Post Preview: #870235 · Replies: 9 · Views: 2,810 |
|
Enthusiast   Joined Jul 15, '08 From Norway Currently Offline |
Hey there! Got a ST without power windows, and yeah, its really lame at these days. Its really embarassing to manually slide the windows down, so I have always been thinking of a conversion! So this is the time, finally. I got my hands on some really nice JDM 93/94 celica doors, with everything. Power windows, power locks, power folding mirrors etc. So I'll got everything I need now, so its basicly to just swap the old ones into these! But I'll got a European ST, which is LHD. The doors came from a RHD JDM. So its some tweaking with wires. Basicly I have to do this:
And this is without ANY problems or trouble. I dont expect it to be as easy as the list, though. Great resource for JDM Power folding mirrors: http://www.6gc.net/forums/index.php?showtopic=17207 and another one for the power windows: http://www.6gc.net/forums/index.php?showtopic=59251 And another one for wiring diagrams: http://www.6gc.net/forums/index.php?showtopic=75461 |
| Aug 13, 2010 - 1:44 PM | Forum: Interior/Audio/Electrical/Wiring · Post Preview: #870101 · Replies: 4 · Views: 2,035 |
|
Enthusiast   Joined Jul 15, '08 From Norway Currently Offline |
For power windows and power mirrors. Basicly for the both doors. Going to install JDM doors with power windows and power mirrors now! (On my european car, though) |
| Aug 13, 2010 - 1:07 PM | Forum: Interior/Audio/Electrical/Wiring · Post Preview: #870086 · Replies: 4 · Views: 2,035 |
|
Enthusiast   Joined Jul 15, '08 From Norway Currently Offline |
Hey! I am looking for some wiring diagrams to a 1996 model Celica. Searched the whole Google, but found only the Celicatech's diagrams, which looks like they are not existing anymore. Do someone know of some good sources? |
| Aug 12, 2010 - 6:28 AM | Forum: Interior/Audio/Electrical/Wiring · Post Preview: #869873 · Replies: 149 · Views: 36,812 |
|
Enthusiast   Joined Jul 15, '08 From Norway Currently Offline |
Any plans of writing a How-to on this one? |
| Aug 12, 2010 - 3:26 AM | Forum: Interior/Audio/Electrical/Wiring · Post Preview: #869861 · Replies: 10 · Views: 2,871 |
|
Enthusiast   Joined Jul 15, '08 From Norway Currently Offline |
Go with 5000k HIDS, its very good looking color, and really strong light! |
| Aug 11, 2010 - 6:14 PM | Forum: Interior/Audio/Electrical/Wiring · Post Preview: #869753 · Replies: 14 · Views: 3,470 |
|
Enthusiast   Joined Jul 15, '08 From Norway Currently Offline |
Okay, the JDM doors are now at my hand, and I will now try to figure out what to do with the harness. My plan is this simple: - Just give the JDM harness current, and rewire it without plugging into the box beneath the dash. Do someone got a wiring scheme of these doors? It will be alot easier to work when I know what each of the cable are to. |
| Jul 27, 2010 - 12:17 PM | Forum: Interior/Audio/Electrical/Wiring · Post Preview: #866909 · Replies: 14 · Views: 3,470 |
|
Enthusiast   Joined Jul 15, '08 From Norway Currently Offline |
Okay, so there is not a free place behind the dash to plug in the harness from the doors? Its a lot of free places to plug in some harnesses there, but it may be not the power windows. A friend of mine, did the RHD door -> LHD car conversion at a specialist. Also, the exact same conversion as I am planning to do. He said it would be perfectly possible, with some modification to the harnesses. This friend though, live far away from me, so its kinda hard to meet him and watch the harness work. I would request some pictures from him, and maybe I'll sort out what do to. Its fantastic that you made the power windows work! Great job! Is there a relay to the power mirrors that I need to have? I think I have seen some pictures that it is mounted behind the dash a place with a special bracket. |
| Jul 8, 2010 - 9:43 AM | Forum: Interior/Audio/Electrical/Wiring · Post Preview: #863815 · Replies: 14 · Views: 3,470 |
|
Enthusiast   Joined Jul 15, '08 From Norway Currently Offline |
Someone? |
| Jun 30, 2010 - 4:55 PM | Forum: Buying/Selling · Post Preview: #862527 · Replies: 37 · Views: 9,555 |
|
Enthusiast   Joined Jul 15, '08 From Norway Currently Offline |
I'll buy both the trunk tabs! U got PM. |
| Jun 30, 2010 - 4:45 PM | Forum: Interior/Audio/Electrical/Wiring · Post Preview: #862525 · Replies: 16 · Views: 6,303 |
|
Enthusiast   Joined Jul 15, '08 From Norway Currently Offline |
You can replace the spare wheel with a bottle of quick wheel fix and a small compressor. This is enough to bring you to the closest repair shop and get the tire fixed. My stereo replaced the spare wheel, and I just get that fix and a compressor instead. Much better. |
| Jun 30, 2010 - 2:54 PM | Forum: Interior/Audio/Electrical/Wiring · Post Preview: #862505 · Replies: 14 · Views: 3,470 |
|
Enthusiast   Joined Jul 15, '08 From Norway Currently Offline |
Got my hands on some JDM doors now, with everything: power folding mirrors, electric windows and so on. It is from a part car that I will visit next week, but I need to know what harness parts to remember to include! Do you have any suggestions? |
| May 20, 2010 - 1:19 PM | Forum: Exterior Styling · Post Preview: #854617 · Replies: 8 · Views: 2,495 |
|
Enthusiast   Joined Jul 15, '08 From Norway Currently Offline |
If you go 18's, I think the ABSOLUTELY most is 40. I got 18's with 35 now, and they are almost rubbing when turning over at max. I think its place for a little more. But I dont think you will feel any difference from 35-40. If you want it more comfortable, you have to go down to 17's, with 50 or something. 18's are NOT comfortable on our cars without modifications. |
 New Replies New Replies No New Replies No New Replies Hot Topic (New) Hot Topic (New) Hot Topic (No New) Hot Topic (No New) |
 Poll (New) Poll (New) Poll (No New) Poll (No New) Locked Topic Locked Topic Moved Topic Moved Topic |
| Lo-Fi Version | Time is now: November 29th, 2024 - 10:23 AM |


