Printable Version of Topic
Click here to view this topic in its original format
6G Celicas Forums _ My Project _ Edsers 1996 GT Project
Posted by: Edser Jul 8, 2012 - 4:07 PM
My names Ed, and I live in Barcelona, Spain. I am from the Republic of Ireland. I've been living here for 13 years. In that time I've had a number of cars.
First one I got a year after arrival was a '93 Prelude 2.2 vtec. After that I got a '00 BMW 318ci. I sold that to get back into university.
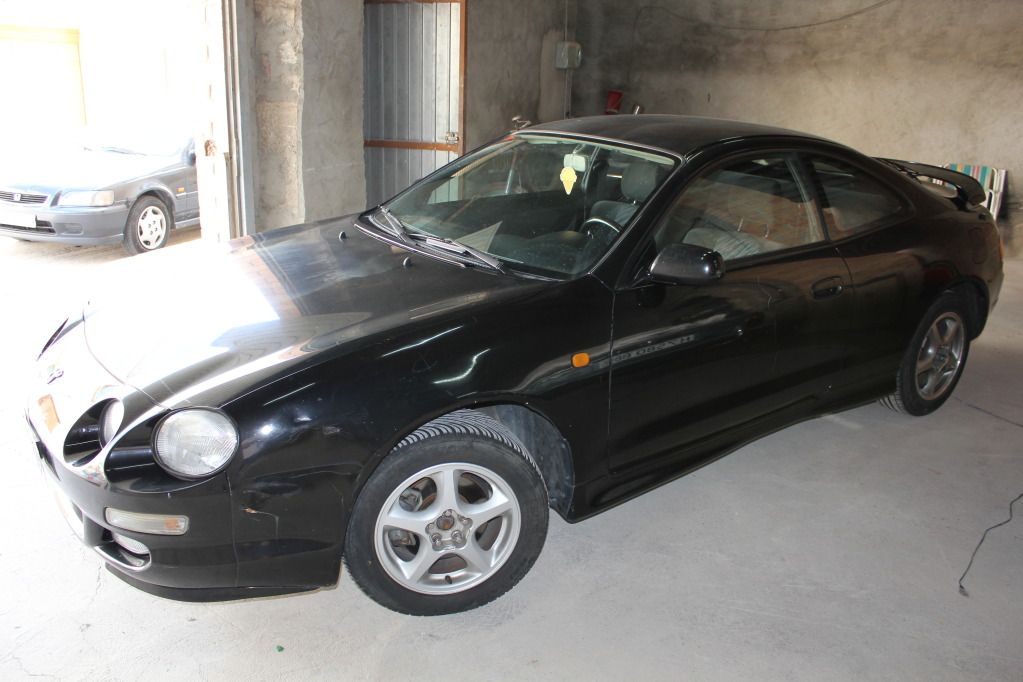
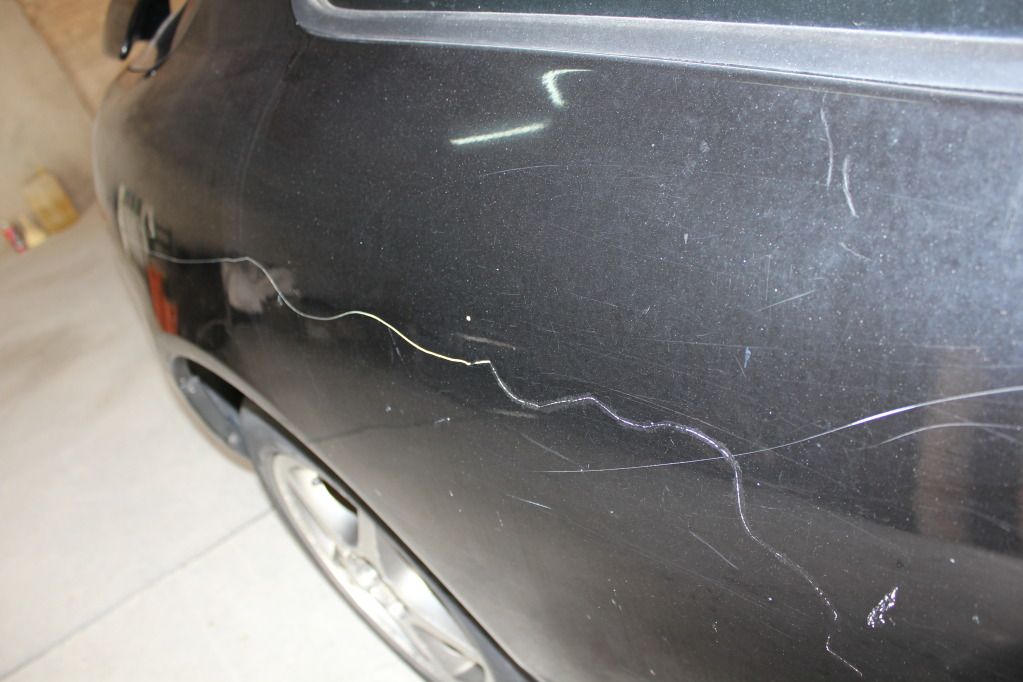
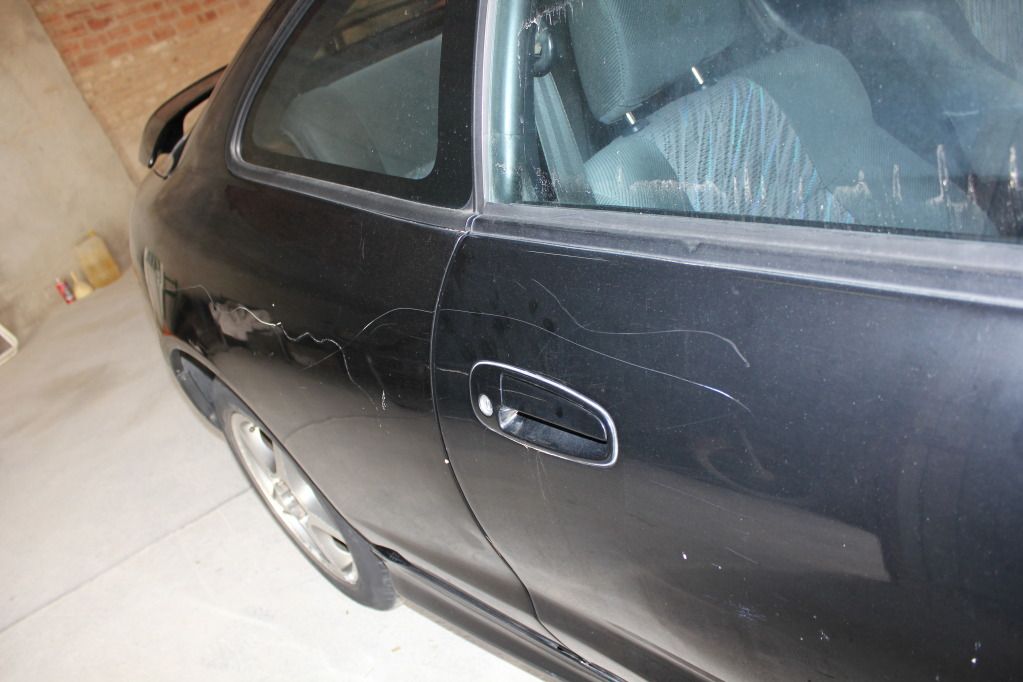
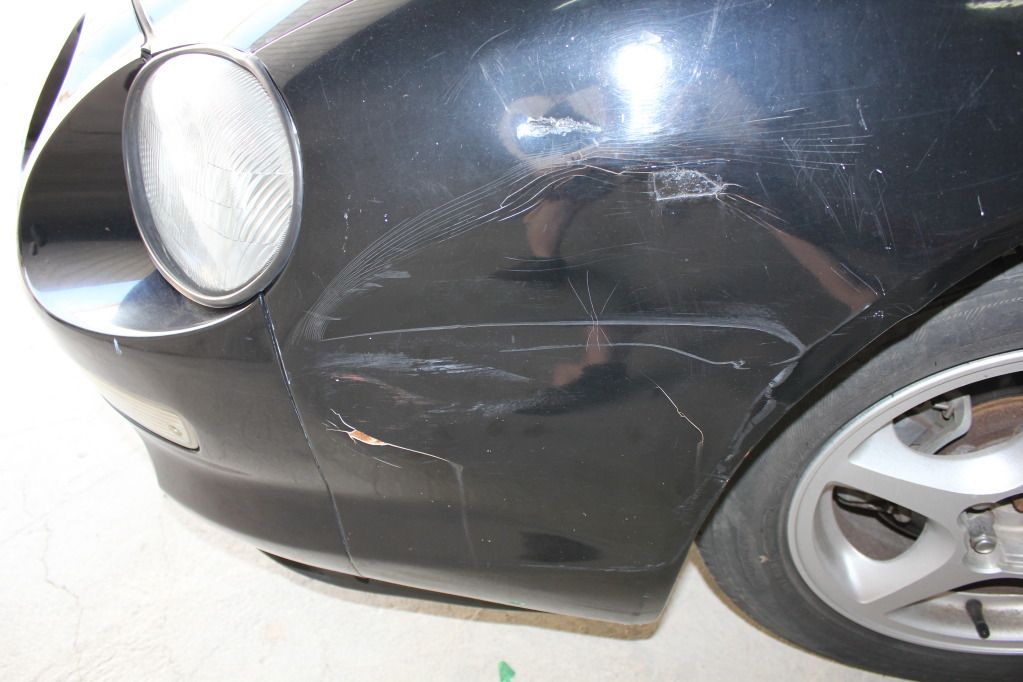
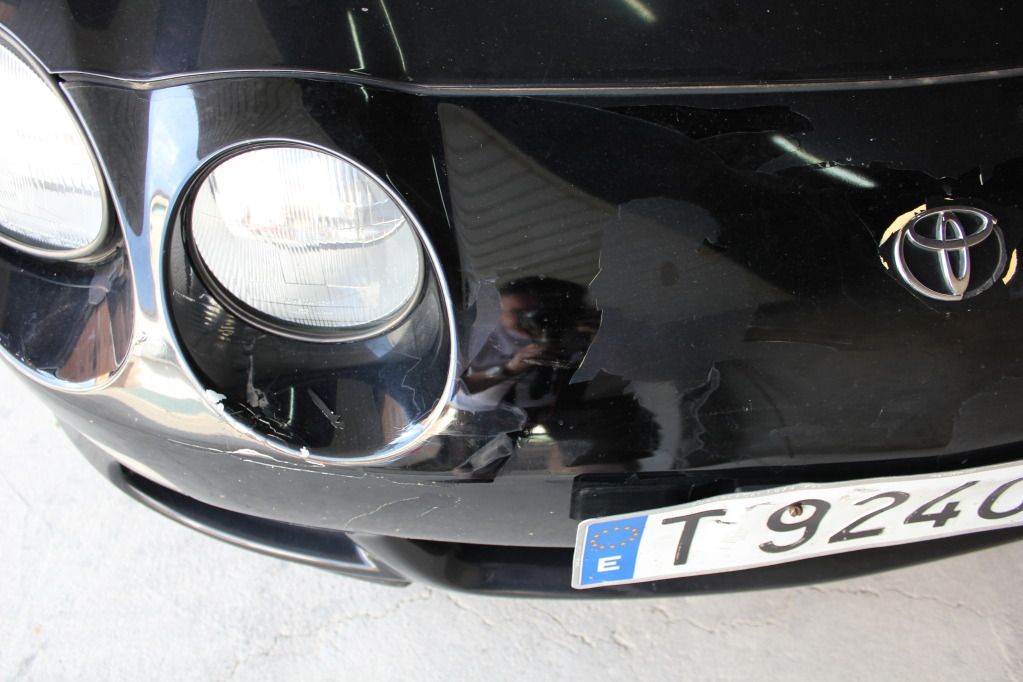
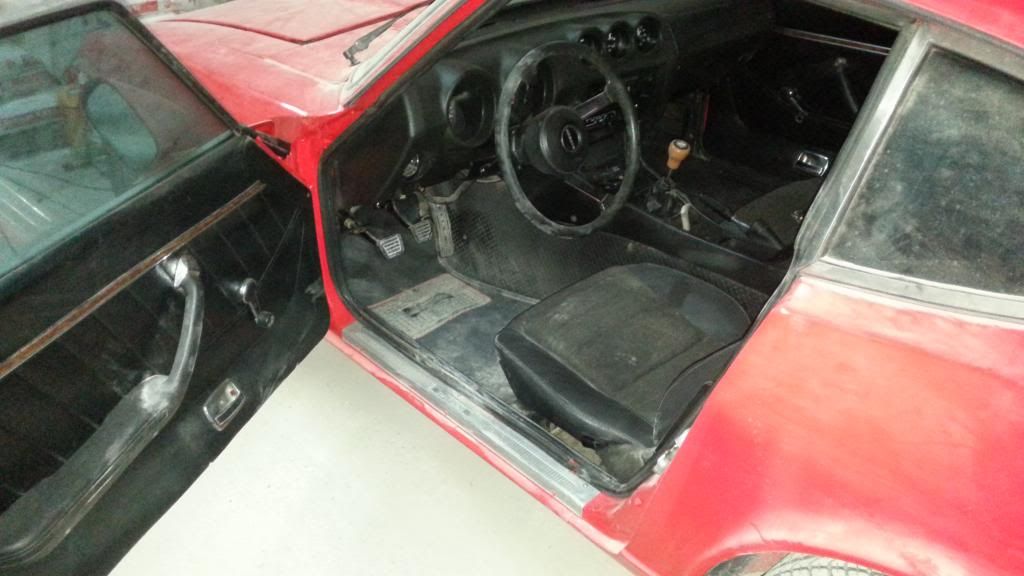
So now I've got this 1996 GT. Its covered in dents and scrapes. Pretty tired looking. I want to make it look like new, improve it where I can and try to keep it as standard as possible. I'll be painting it black, and keeping the wheels as they are, just tarting them up a bit.
All of this depends on my finances of course, so it'll be a slow process. Patience will be required. Lots of patience.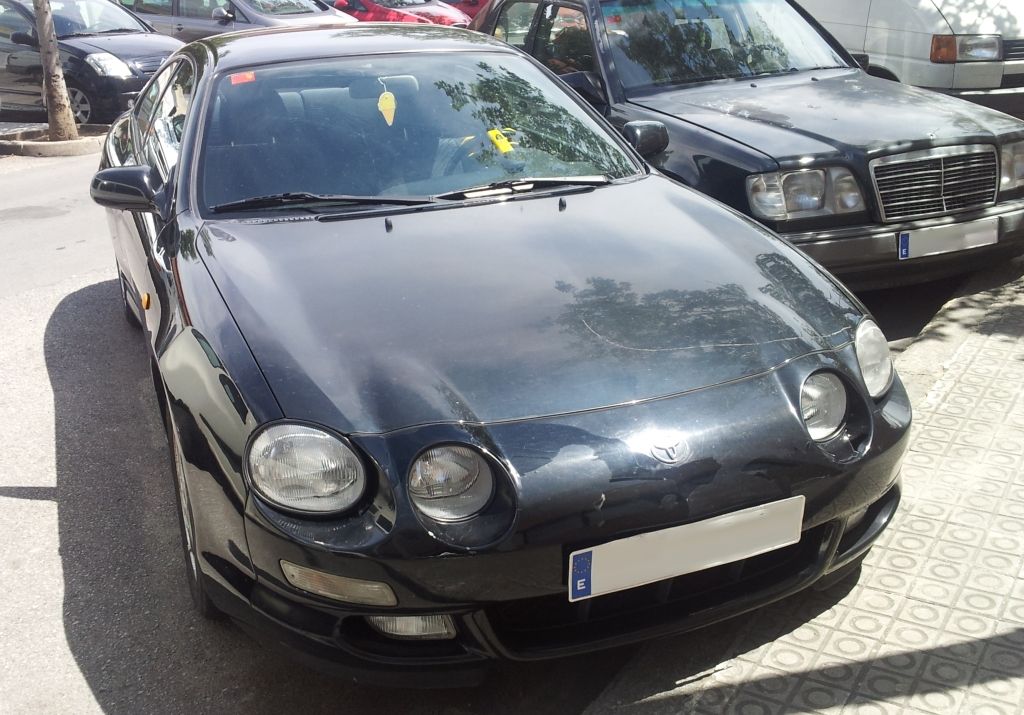

Posted by: Edser Jul 8, 2012 - 5:28 PM
Here's some photos during the first days work. Sanding and filling etc. 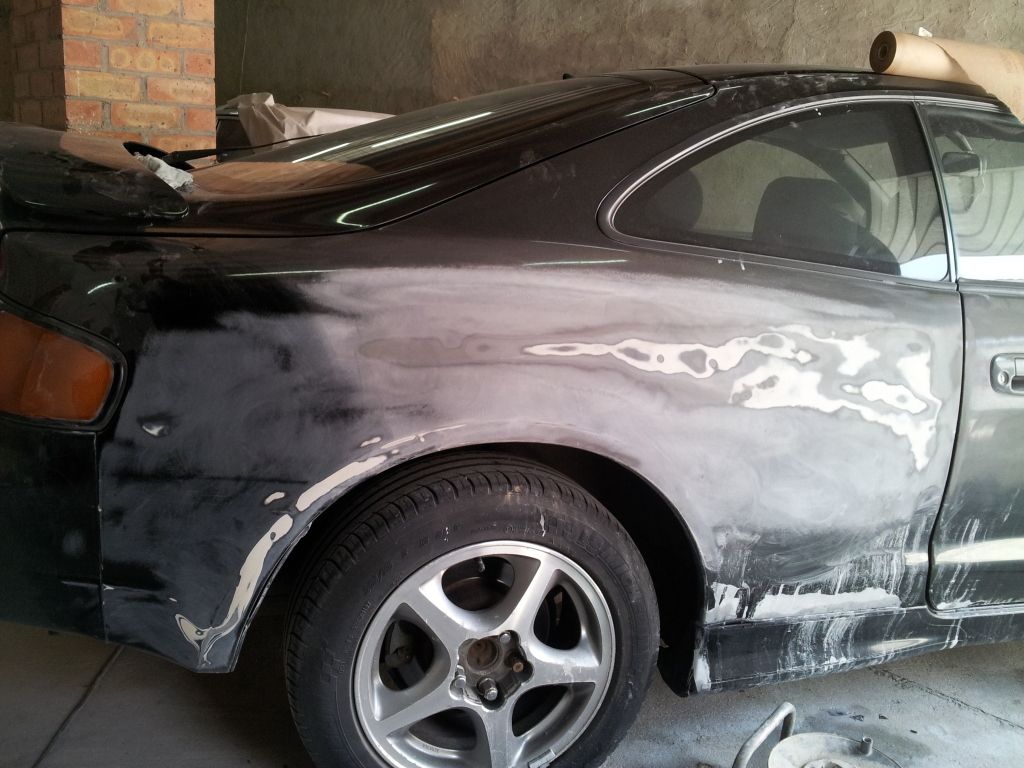
Posted by: enderswift Jul 8, 2012 - 7:56 PM
keep it up dude, we all want to see a celi brought back to like-new shape
Posted by: Edser Jul 9, 2012 - 6:22 AM

Thanks enderswift! I hope I can get it looking as good as yours!
Posted by: Edser Jul 9, 2012 - 7:19 AM
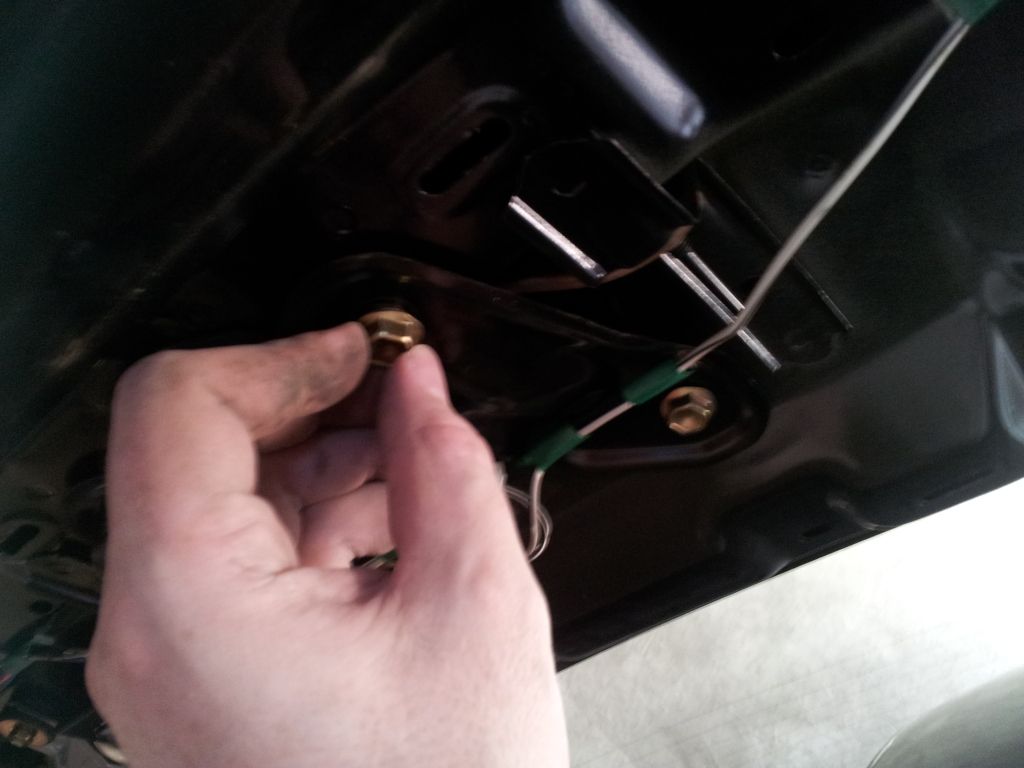
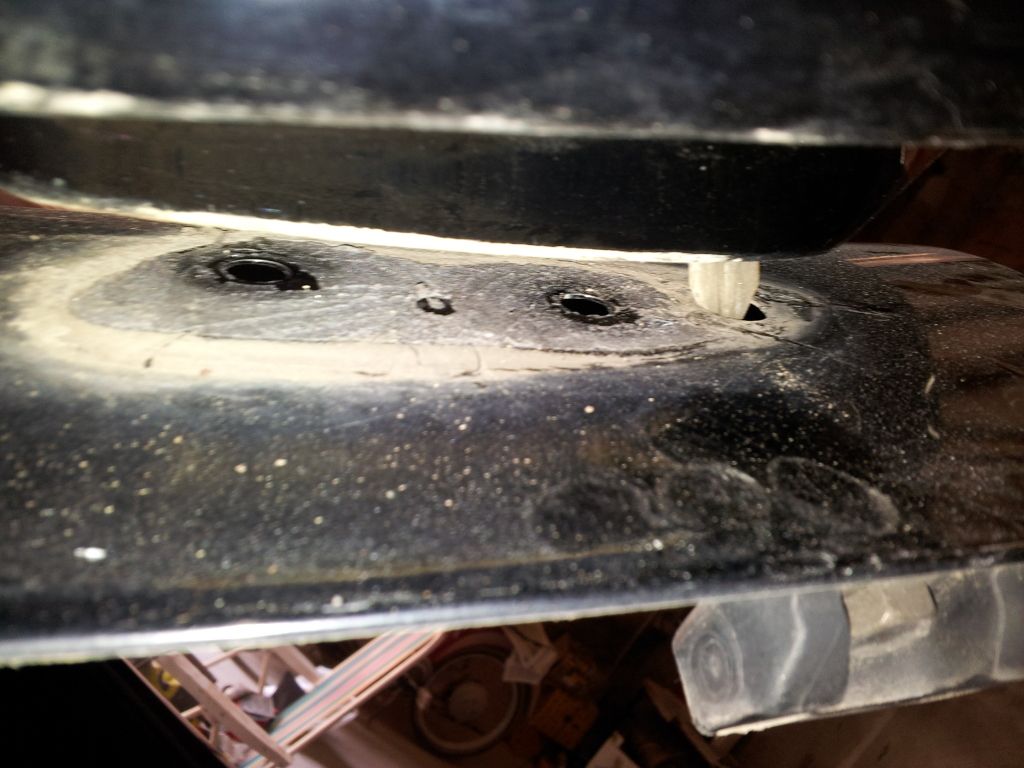
Here's some more photos of progress.
I took off the side skirts - it was very easy.
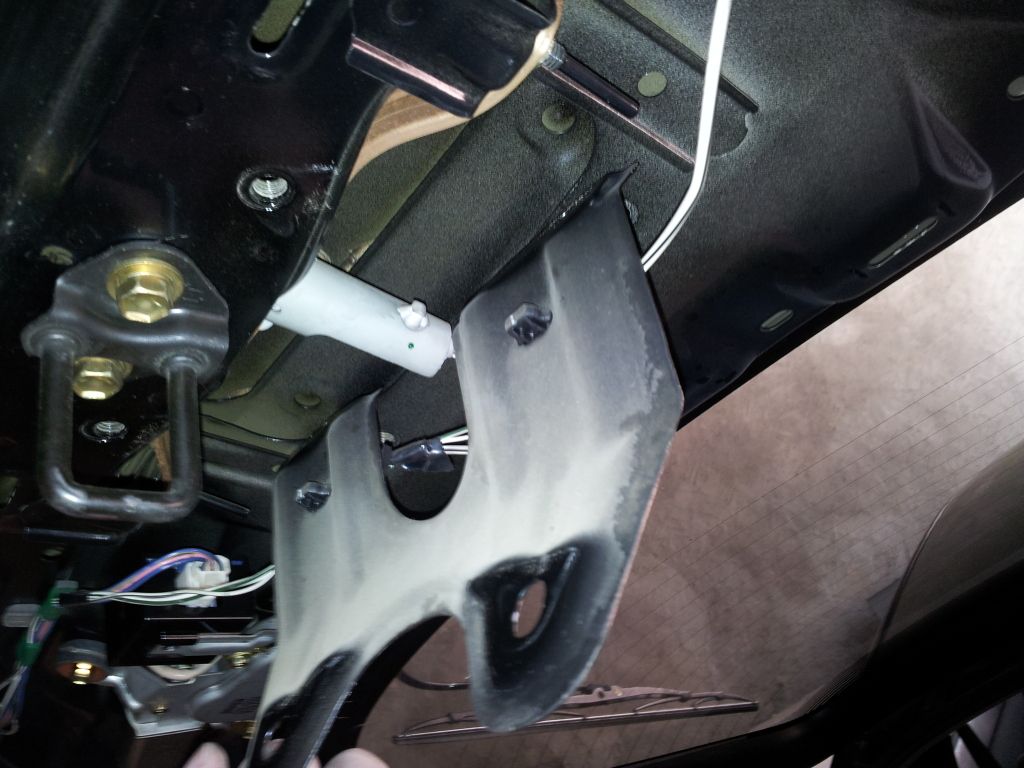
The rear wing was a bit more complex, had to remove a small plate that was covering the central bolt. The I discovered the wing was glued on as well, so I had to cut away at the glue. That was so difficult to clean off afterwards.
Quick 2 min walk around of Celica, showing some of the many flaws. I've seen cars in scrapyards that look better.
https://www.youtube.com/watch?v=ZmNqihypO-4&feature=relmfu
This me sanding away to get rid the lumps and only leave the sexy humps. Good tip when filming, don't leave a glass of water on the ground where it can get kicked.
https://www.youtube.com/watch?v=WvBQr49PEs8&feature=plcp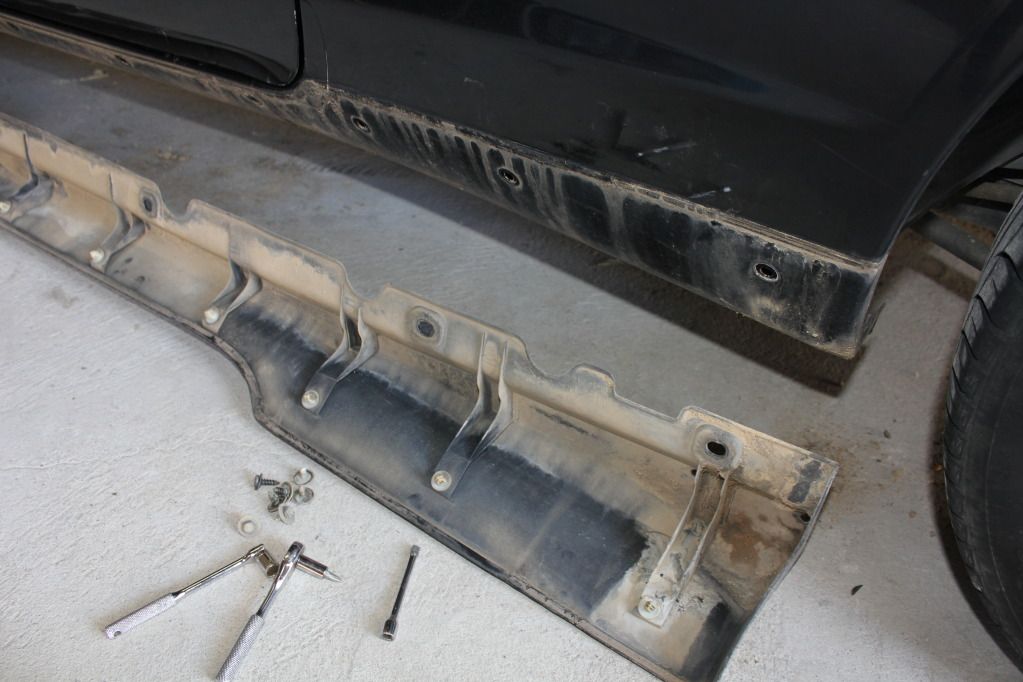
I got some good and bad news today too. I went to talk to the owner of a garage here in this small town, and he said I could paint the car using his spray room.
Bad news is that the paints he uses are expensive, and could cost over 500 euros. Still, if I can get a top quality finish it'll be worth it.
There's rust on the rear boot lid (Trunk in American!) so I'll get him to take the glass out of the rear lid and weld in some fresh metal.
I'm not sure if I should take out the front wind shield for painting as well.
My Sleeeka also has the usual clack clack clack when turning left with the foot on the pedal. So I think that's one of those drive shafts jumping. So I'll get the mechanic to put in a reconditioned one. Apparently it's a lot cheaper.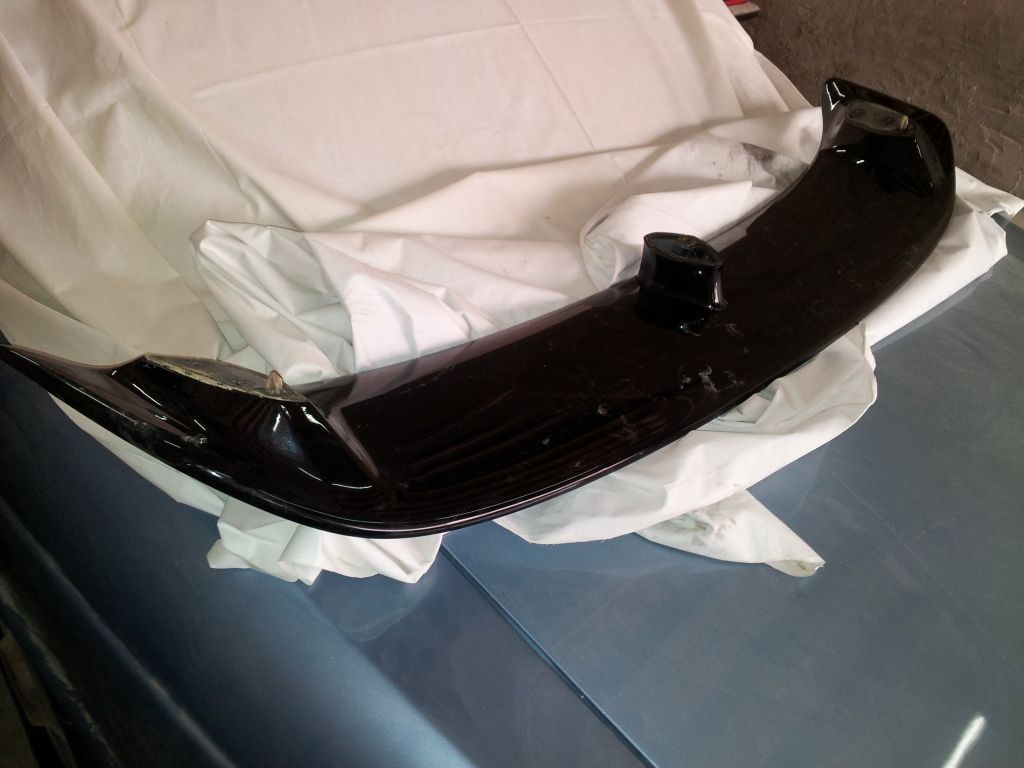
Posted by: Edser Jul 11, 2012 - 7:42 AM
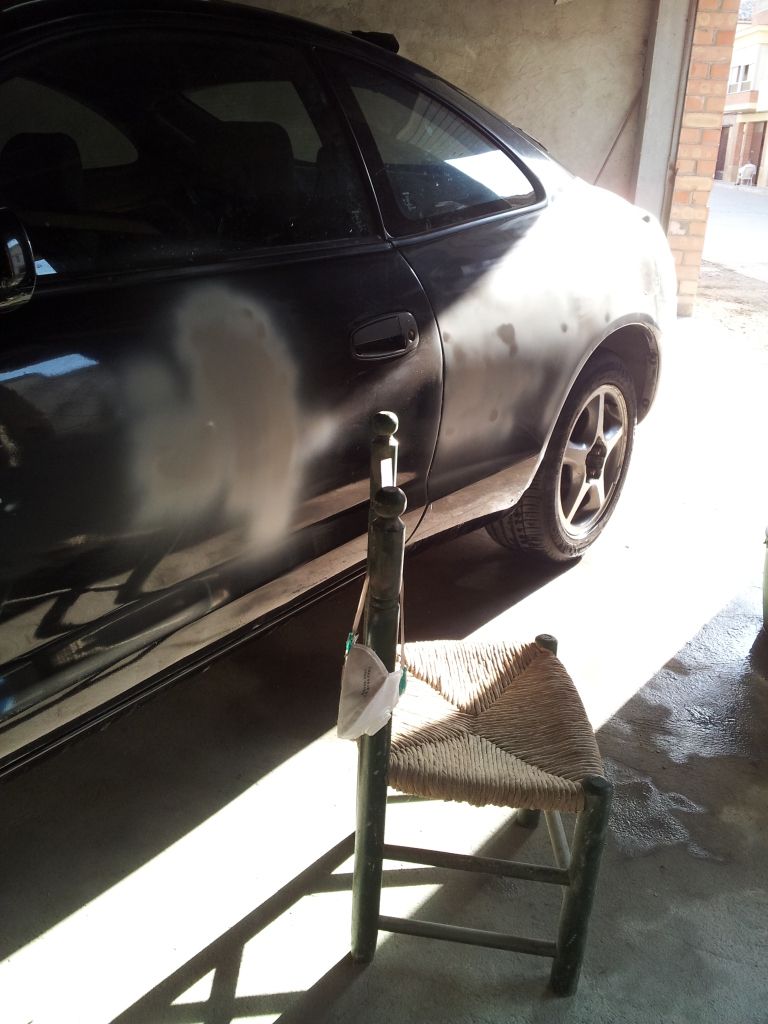
It's been a difficult few days, my arm feels like it's going to fall off and my back screams at me whenever I bend over. Nonetheless I am encouraged the results so far.
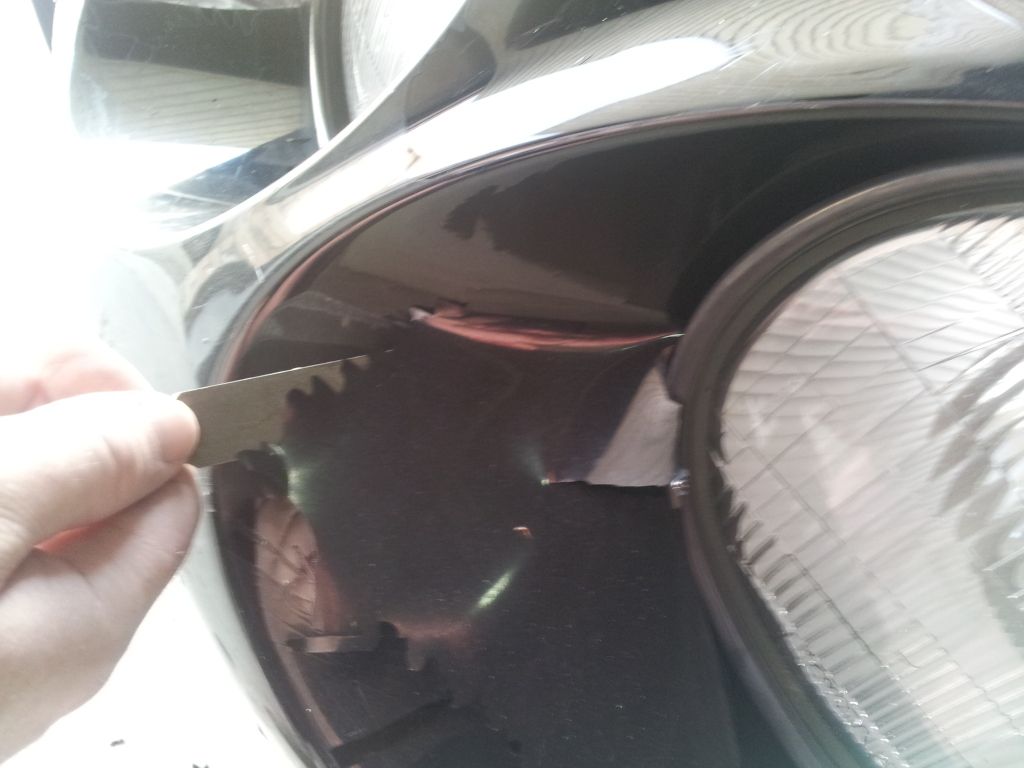
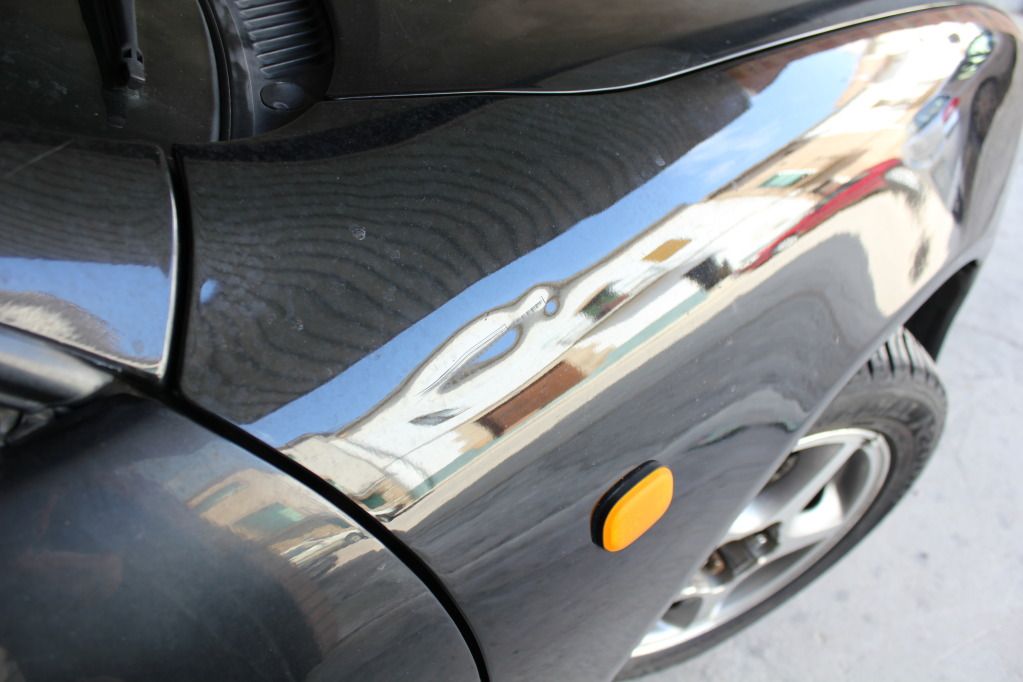
I was filling the more noticeable dents all over the car, but I realized I should probably go carefully panel by panel so as no to miss any defects. The longer I stared at a panel, the more dents I could see. It was like as if I had someone following me with a battery in a sock. 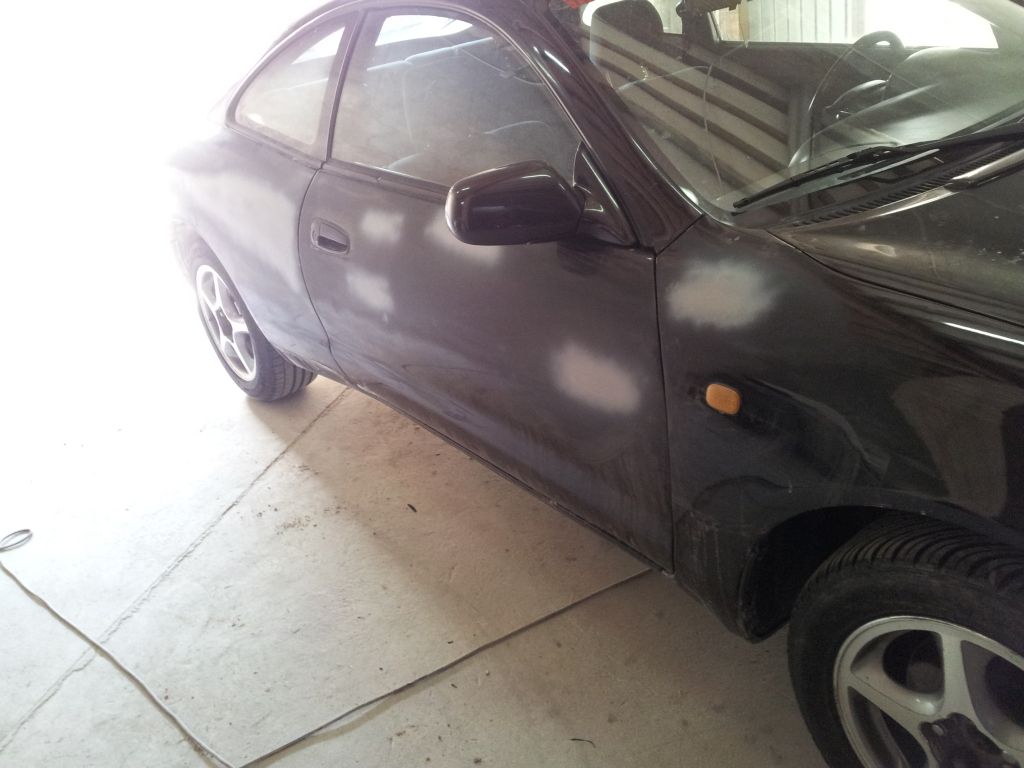
I think the tiredness and the heat took their toll on me.
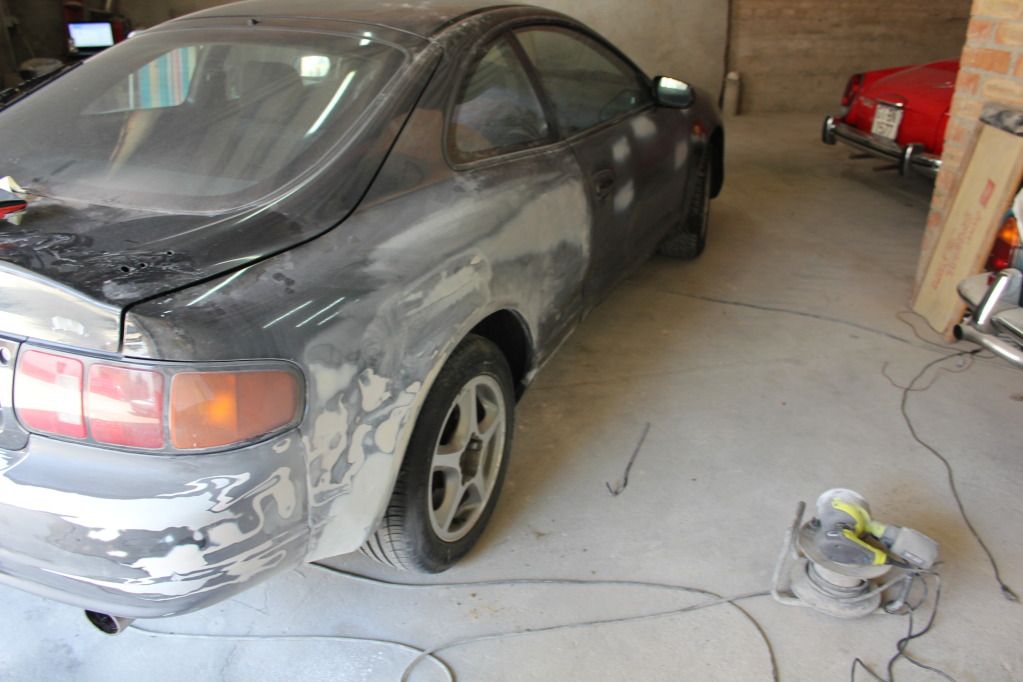
I took the car outside into the 36 degree heat in order to check for odd reflections and strange shadows. I nearly passed out in the heat. I'm just a pale skinned Irish guy, not designed for this weather.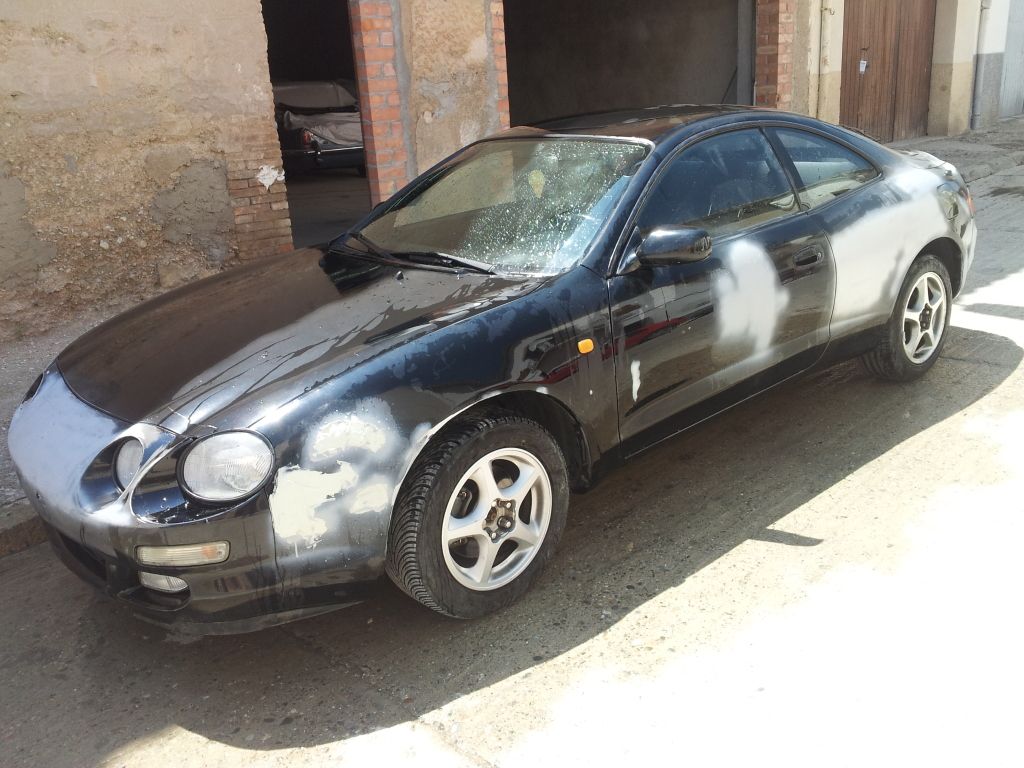
I think I may just buy a second hand front wing as they seem easy to swap. Better that than try and fill and re-shape the old one. It's also lost it's strength due to the inside edge of the wheel arch being folded inwards. 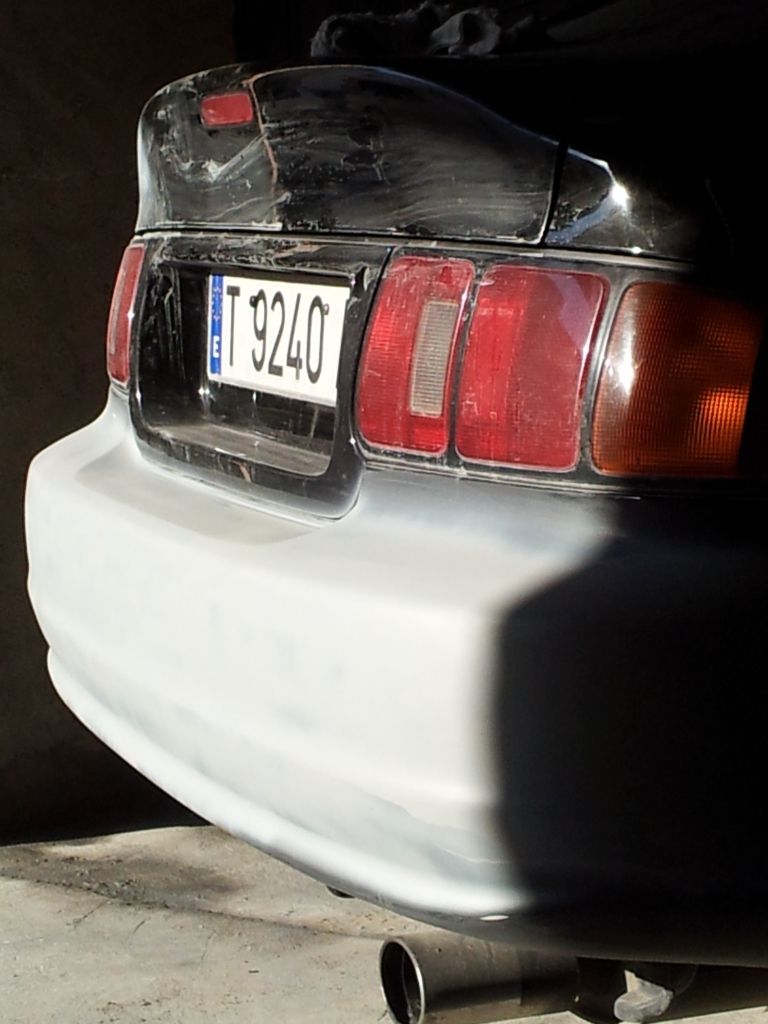
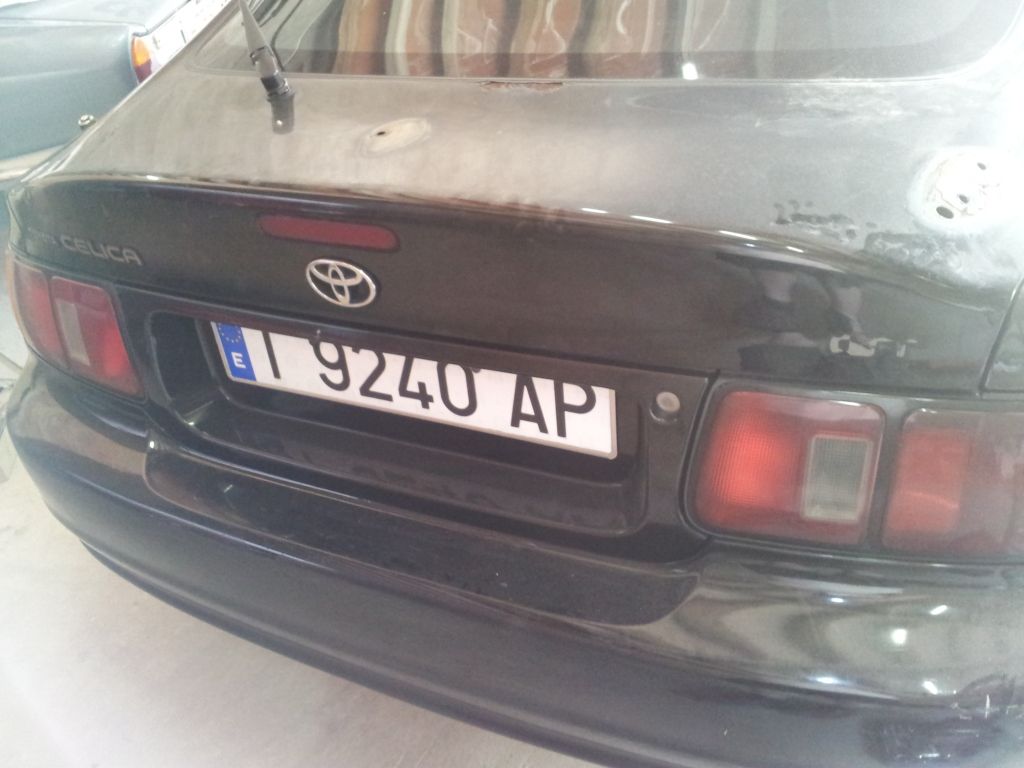
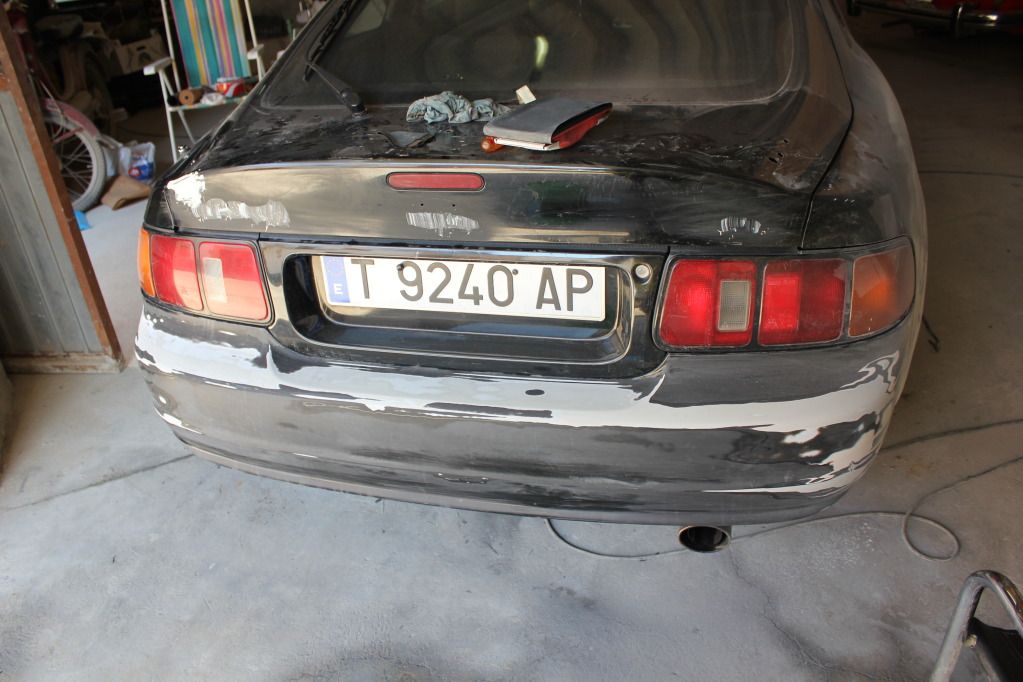
I think the rear looks good. Still needs a lot of work though.
I'll have to wait a few weeks before I can continue as I'm going to England for some holidays.
I'm tired but itching to do more!
Posted by: Edser Jul 30, 2012 - 4:07 PM
Just discovered my university fees have nearly trebled this year, so it looks like my Celeeeca will have to wait a year longer for its paint job. Still, this gives me the opportunity to ensure the bodywork is as close to perfect as I can get it. I'll keep at it, taking my time til its awesome.
This is how it looks at the mo, looking a bit pimpley.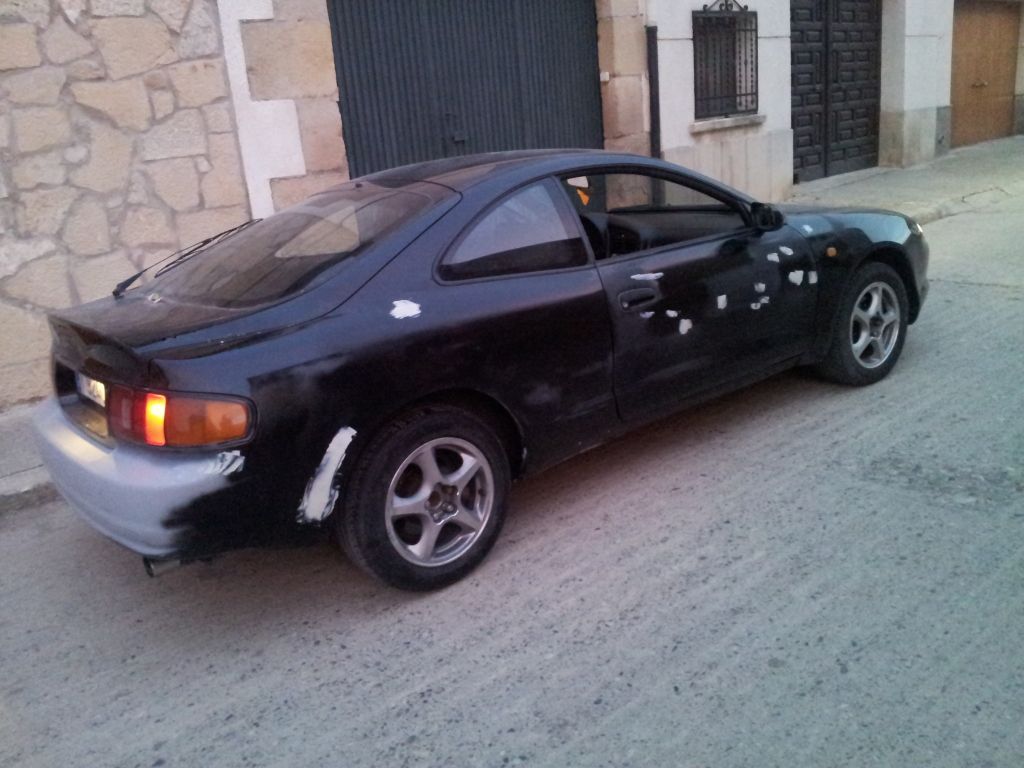
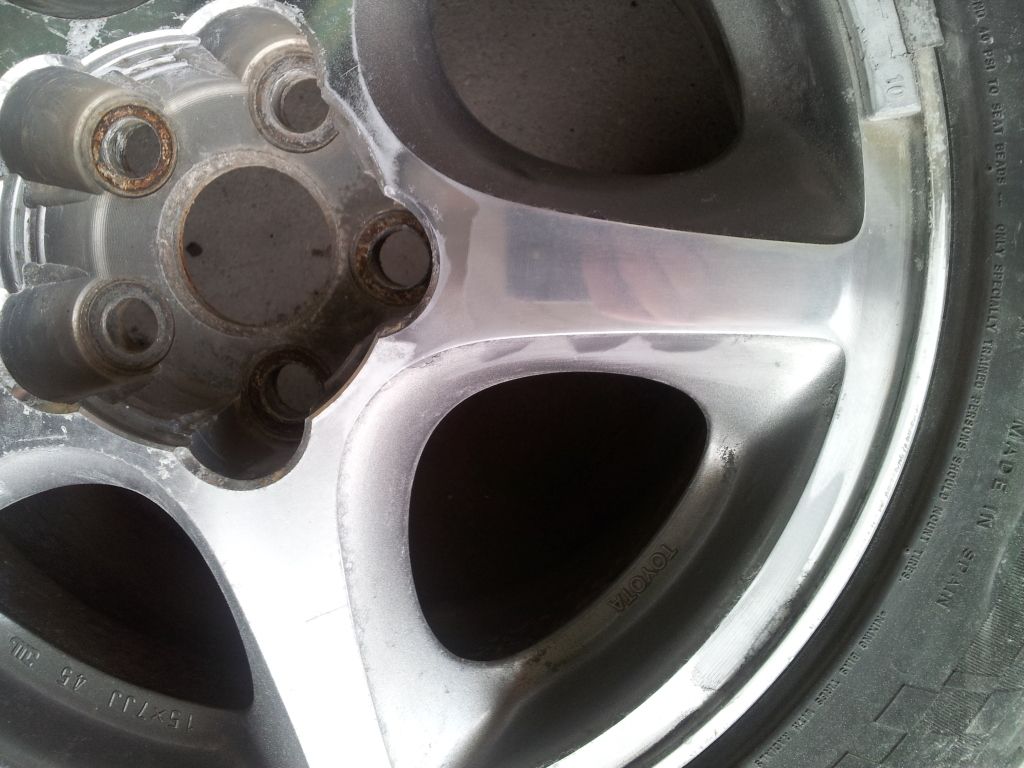
I took a wheel off to see what could be done to make it nicer. Really it seems it had polished fronts to its spokes, machined grain that probably shone in the sunlight. Unfortunately the years have been hard on the finish, and there is a fair bit of oxidation on the edges and in many small scratches. So I took the decision to sand the whole lot back with my rotary sander, and then 400, and 600 and then polishing to a chrome-like finish with a polishing disk.
I think I'll paint the edges with a a titanium coloured paint, or maybe darker, and then clearcoat the lot. Should be nice 15's.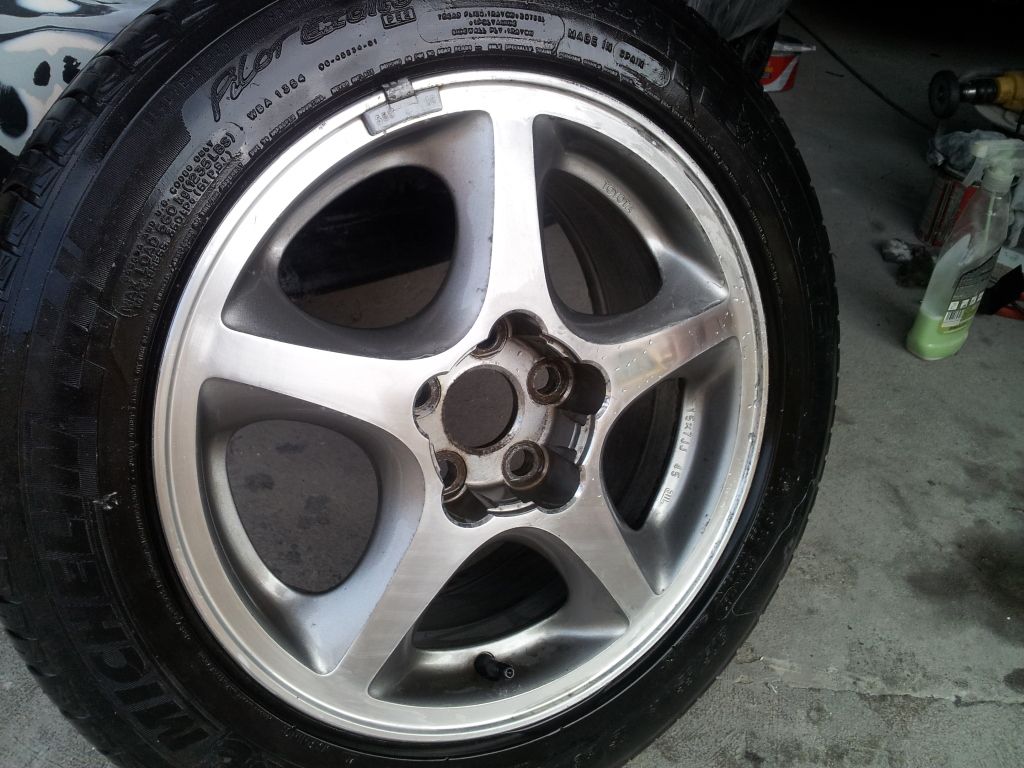
Posted by: Edser Aug 16, 2012 - 5:15 PM
I did a bit more work on the wheels this week, sanding and polishing. I'm quite happy with the results. Gives the car that bit of "bling" like those American imports we sometimes see. I'm thinking of painting the sides of the spokes a gun metal grey colour. I already put a bit paint on the hub, to see what it'd be like. It looks good I think? I may paint it with the darker gun metal grey colour later.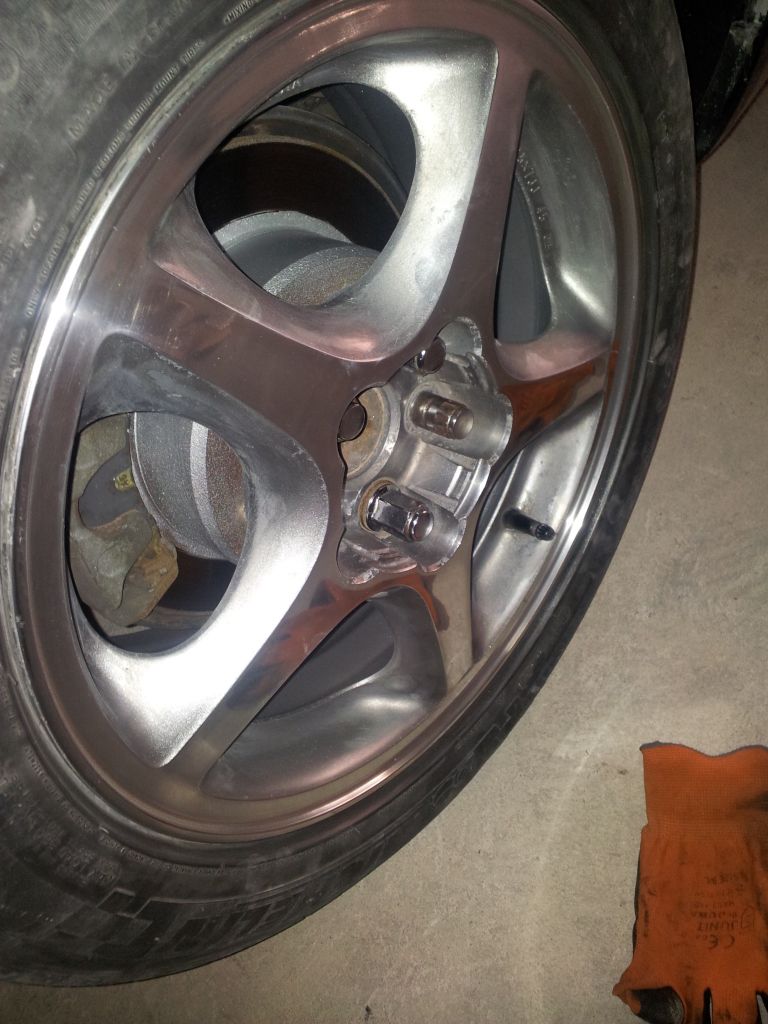
I also did a bit more sanding of the bodywork. I'm still at the 400 grade stage as there are still some noticable imperfections. I'd like to just swap out the driver side wing completely as it's a bit too damaged, to much filler etc, but I don't have any money to buy another. I found a car in a scrapyard here in Barcelona, but its wing was more mangled than my own... Guy said he'd sell me the whole hatch with spoiler and all for 100euros (mines got a bad patch of rust right in the join between the glass). I haven't got a 100euros!!! Arrrrgh! The agony!!! I'll have to wait. I'm not good at patience.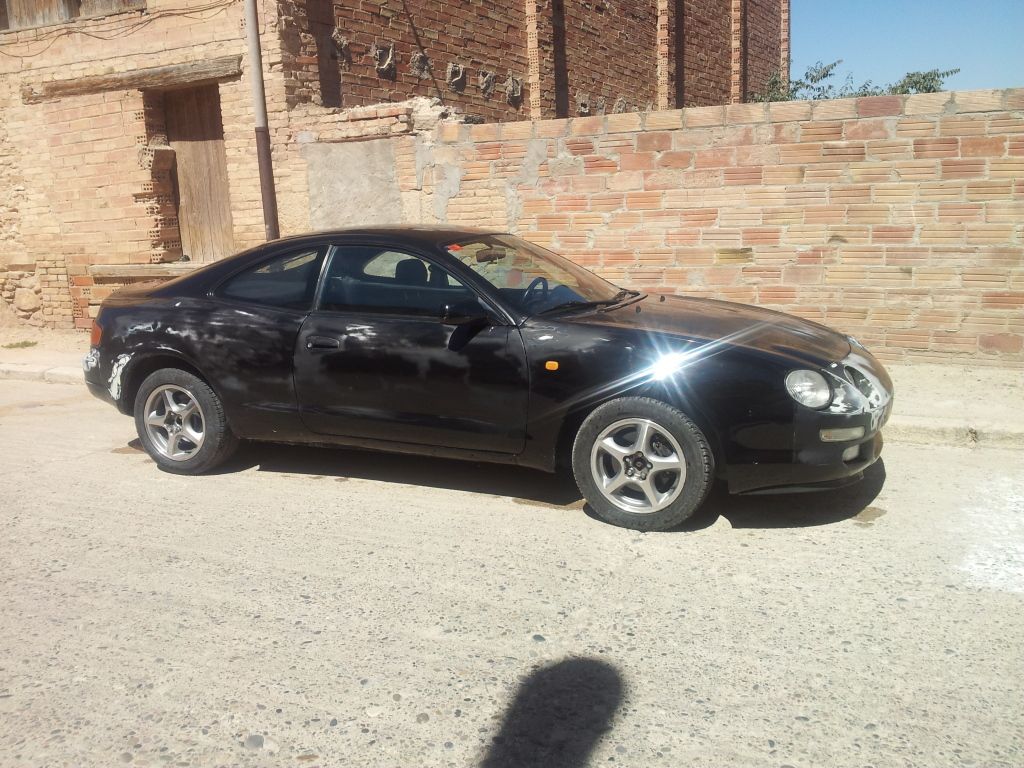
BTW I never did swap out that damaged wing, and it's still on my list.
Posted by: enderswift Aug 26, 2012 - 9:59 AM
good work bud,
the car has already come a long way and you're only getting started. Any plans for performance upgrades in the future?
Posted by: SwissFerdi Aug 26, 2012 - 10:45 AM
I can make you some money if you're willing to part with those Euro splitters. 
Otherwise, best o' luck.
Posted by: Edser Aug 28, 2012 - 3:24 PM
the car has already come a long way and you're only getting started. Any plans for performance upgrades in the future?
I'd like to do an SSIII BEAMS swap, but I need some money to do that.
Posted by: Edser Aug 28, 2012 - 3:29 PM
Otherwise, best o' luck.
Thanks for the offer but I'm not gonna part with them until I have some SSIII splitters. Watch this space (although there's no hurry).
Posted by: Edser Aug 28, 2012 - 3:45 PM
Another photo of a polished wheel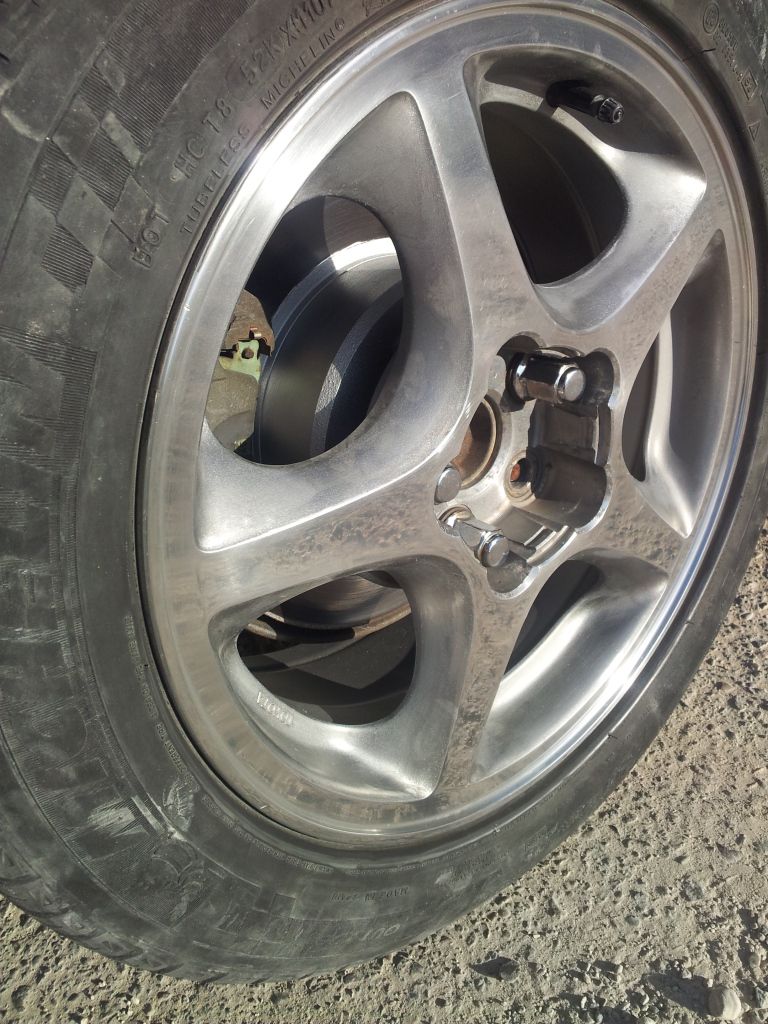
One of the wheel bolts is broken. I hope it's not to difficult to change. Seems the last owner broke it off. I have no idea how!
Posted by: Edser Sep 10, 2012 - 7:46 PM
This weekend I'm going to polish the last two wheels and paint the painted bits with a gun metal grey and a coat or two of clearcoat.
Posted by: yagamius Sep 11, 2012 - 2:30 AM
Parles Català.
Que hi ha, que bé veure com un Celica torna amb força, segueix amb la bona feina. saluts
Posted by: Edser Sep 11, 2012 - 7:09 AM
Sí que puc parlar una mica, però jo parlo millor espanyol, ja que era la primera idioma que vaig aprendre quan vaig anar a barcelona. Ara estic estudiant enginyeria en català. És bastant fàcil d'entendre ara.
Posted by: Edser Sep 13, 2012 - 1:18 PM
Here's the wheel inserts all painted. I went for a dark gunmetal grey. This is the colour I'm going to paint the sides of the wheel spokes with this weekend. Should look banging. More photos soon.
Posted by: Edser Sep 15, 2012 - 4:34 PM
I finished one of the front wheels today. I sanded it with an orbital sander then with finer grades by hand, polished it with a drill and polishing disk, masked the outside, and painted the inside silver and parts of the outside dark grey.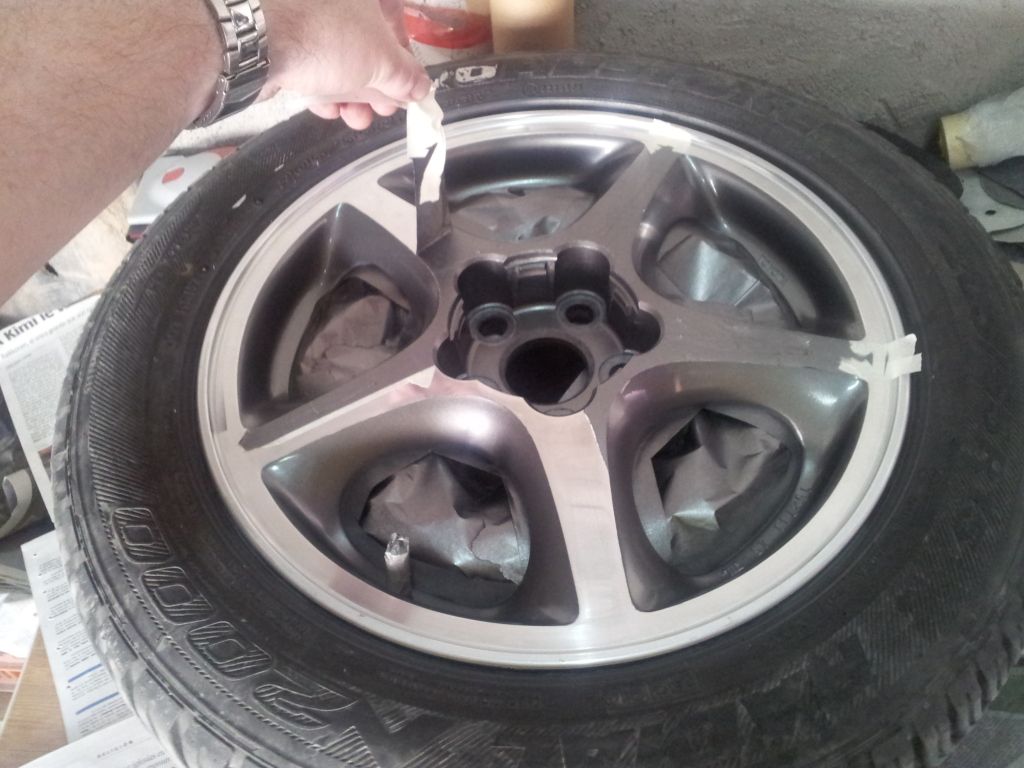
The grey looks lighter than I imagined, until you compare it to the plastic inserts (which are painted the same colour).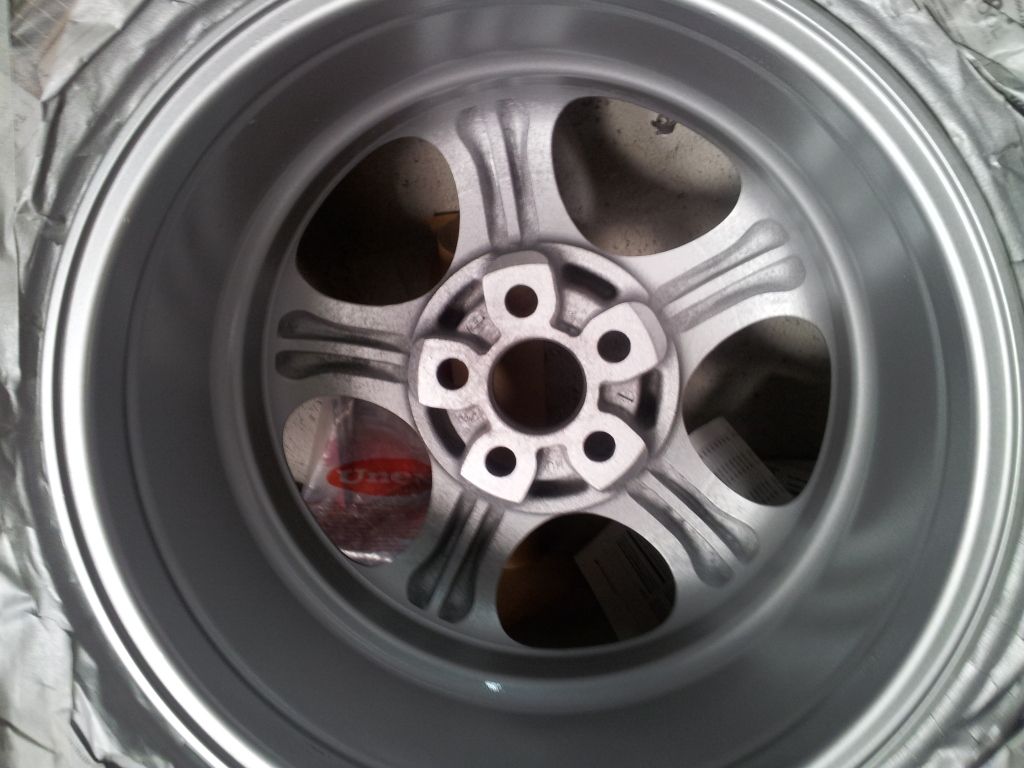
While I was waiting for the paint to dry, I painted the front hub dark metallic grey and the brake caliper red. I think it looks nice.
The silver splash on the tyre is because I moved the wheel while painting it. The newspapers underneath had become silver and wet, and I put the wheel on them. Dumb I know!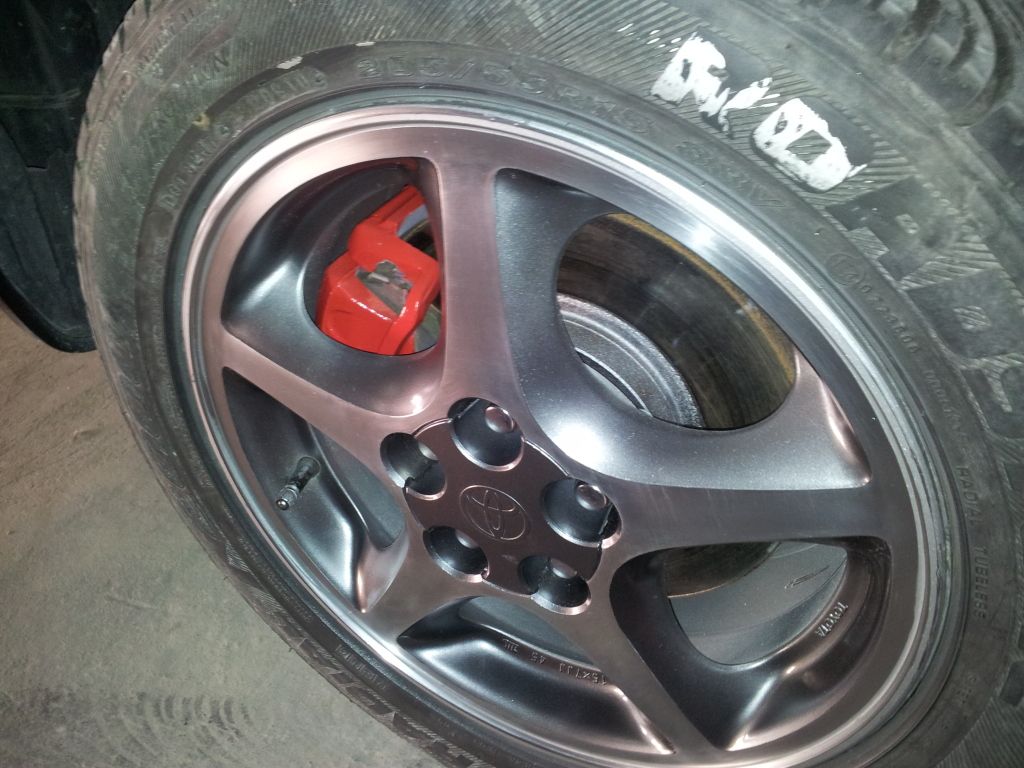
Tomorrow I'll finish the rear wheel and the other side (which are already polished).
I gave the whole wheel two coats of clear varnish. I hope that'll protect it a bit. 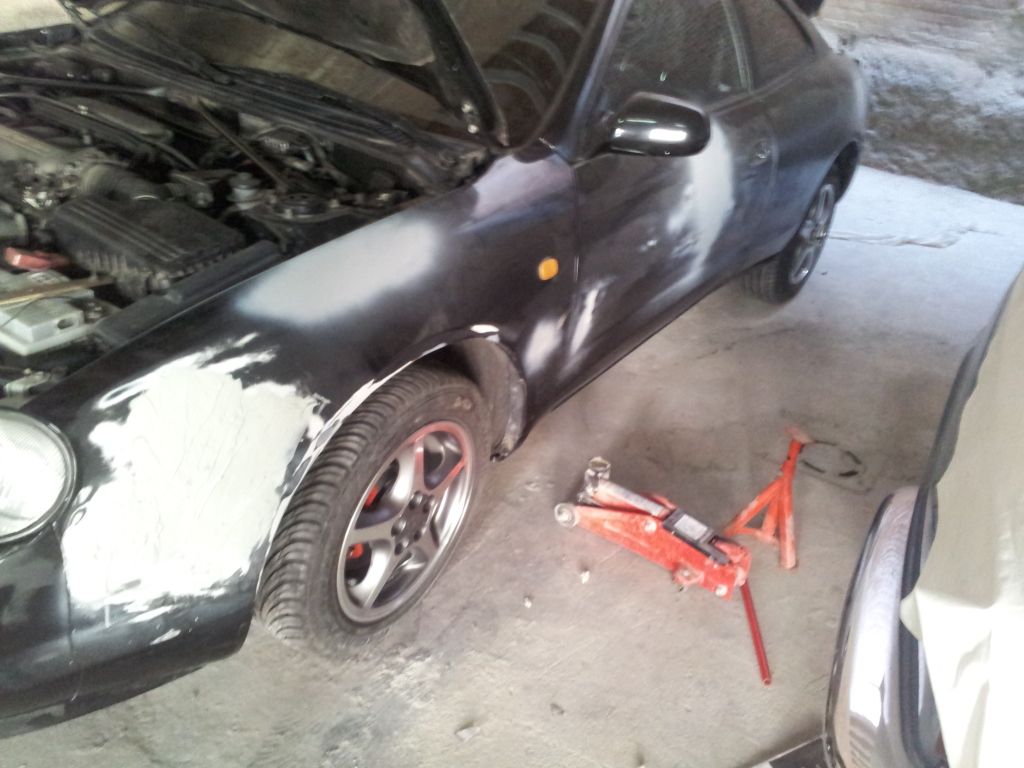
Posted by: rivs Sep 15, 2012 - 4:42 PM
Looking good man! I'm thinking about painting the rims like you did. I wouldn't worry about the paint on the tire, I did that once and with a stiff brush it came right off.
Posted by: Edser Sep 17, 2012 - 4:39 AM
Here's a better pic of what the completed side looks like. It would look a lot better if I lowered it slightly of course, but that'll happen later.
It took me about four hours to do each wheel, and I masked and painted the hubs and calipers in situ (I had previously scrubbed the calipers clean) while I was waiting for the wheel paint to dry.
I didn't get the passenger side front wheel sanded and polished, so it's the only one left to finish. I'll do that next week. I'll also scrub those tyres to get rid of paint marks and to generally improve their appearance.
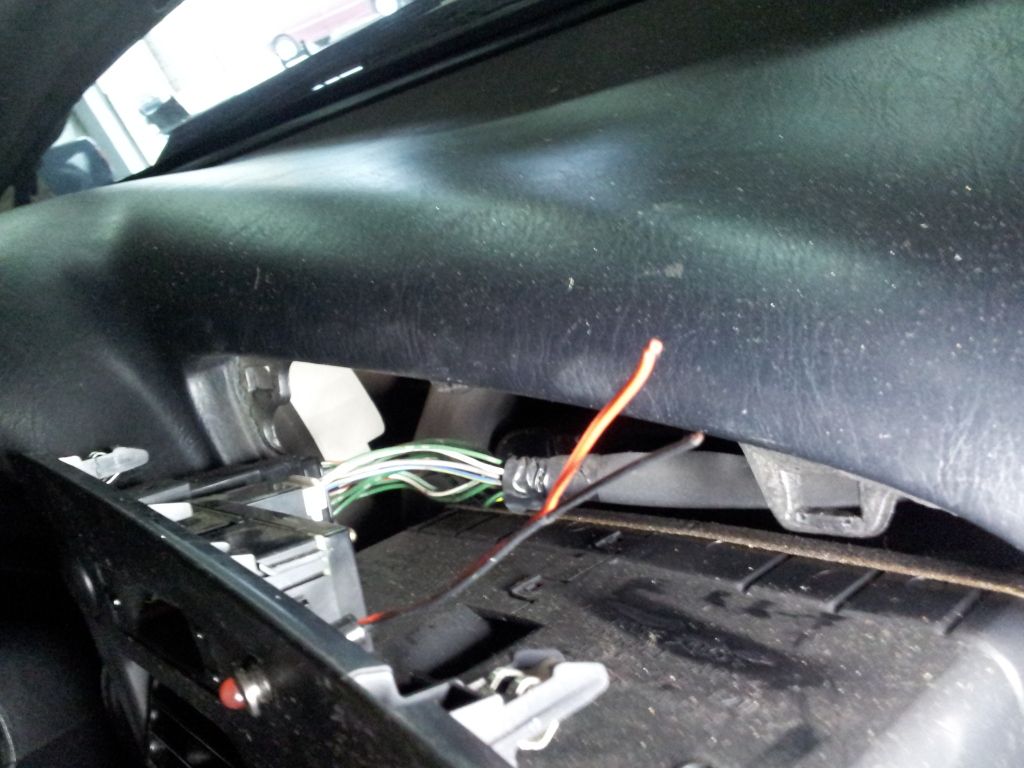
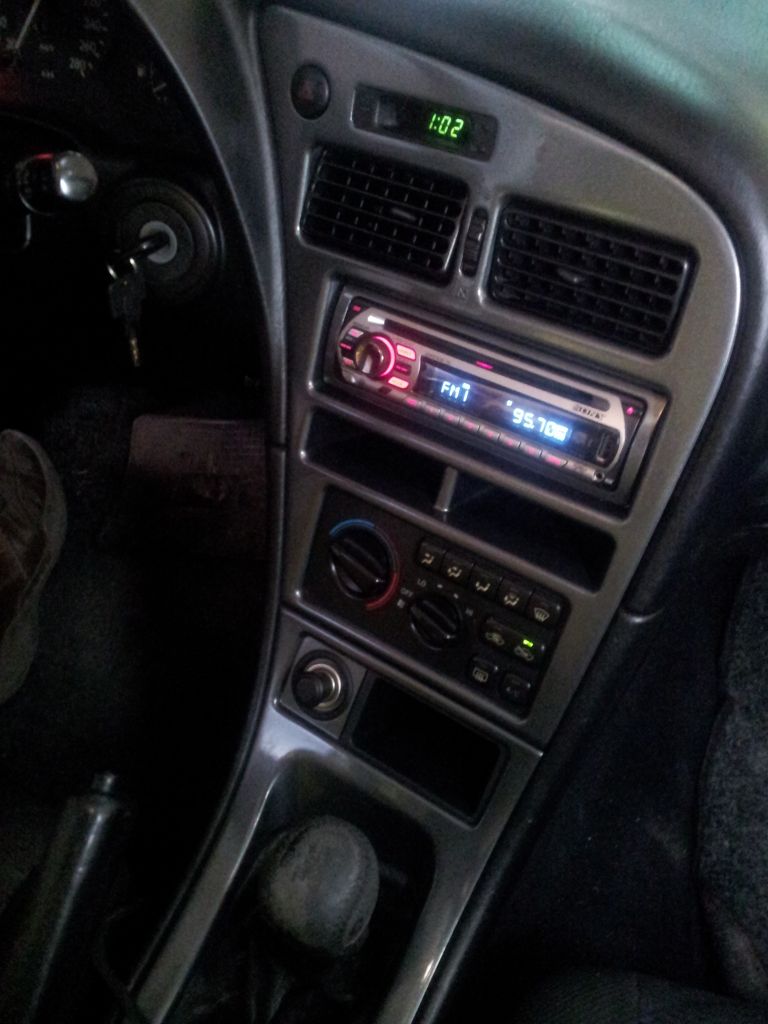
While I was waiting for paint to dry I also whipped off the stereo/aircon surround and the gaiter surround. I've been thinking about painting these with the same dark grey as the wheels, as the lower piece has a melt from a cigarette burn and the top has a LED in a hole (I think from an alarm - the wires aren't connected).
These pieces came off surprisingly easily. The gear stick surround just jumped off when I pulled at it! They are all held on with simple clips, and two screws on the lower edge of the upper piece. I'm not surprised that when driving, the interior squeaked like party of mice on cocaine.
Has anyone stopped the squeaking? How? I was thinking of smearing a tiny amount of silicone on all the edges in that are in contact. 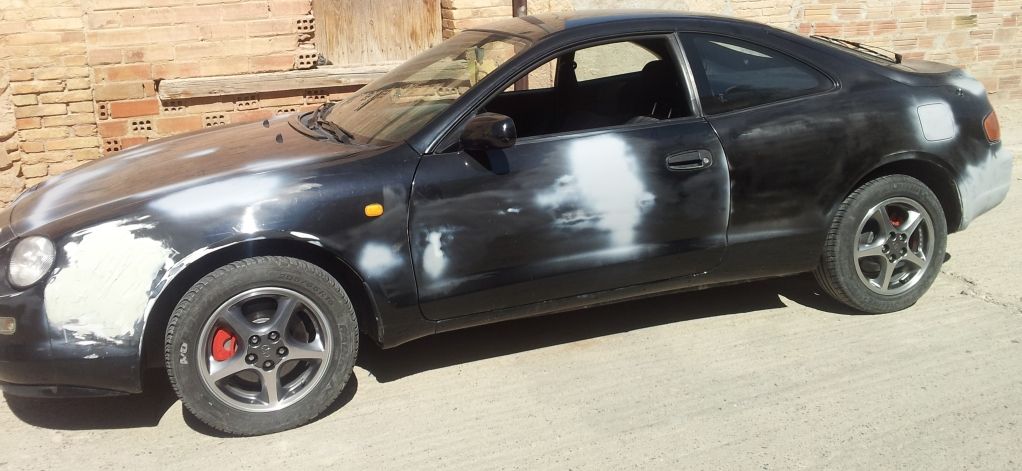
Posted by: Edser Sep 17, 2012 - 4:47 AM
Right then, I'll be scrubbing the tyres next week! I may apply some product to make the tyres a bit blacker and shinier. More photos to follow.
Posted by: Edser Sep 17, 2012 - 4:55 AM
Front wheel - before and after!
Posted by: Anoroc Sep 18, 2012 - 5:39 AM
Looks excellent!
Posted by: Edser Sep 29, 2012 - 1:18 PM
I finally got around to working on the front wing. It still needs a lot of work, but it is encouraging to see it nearly ready.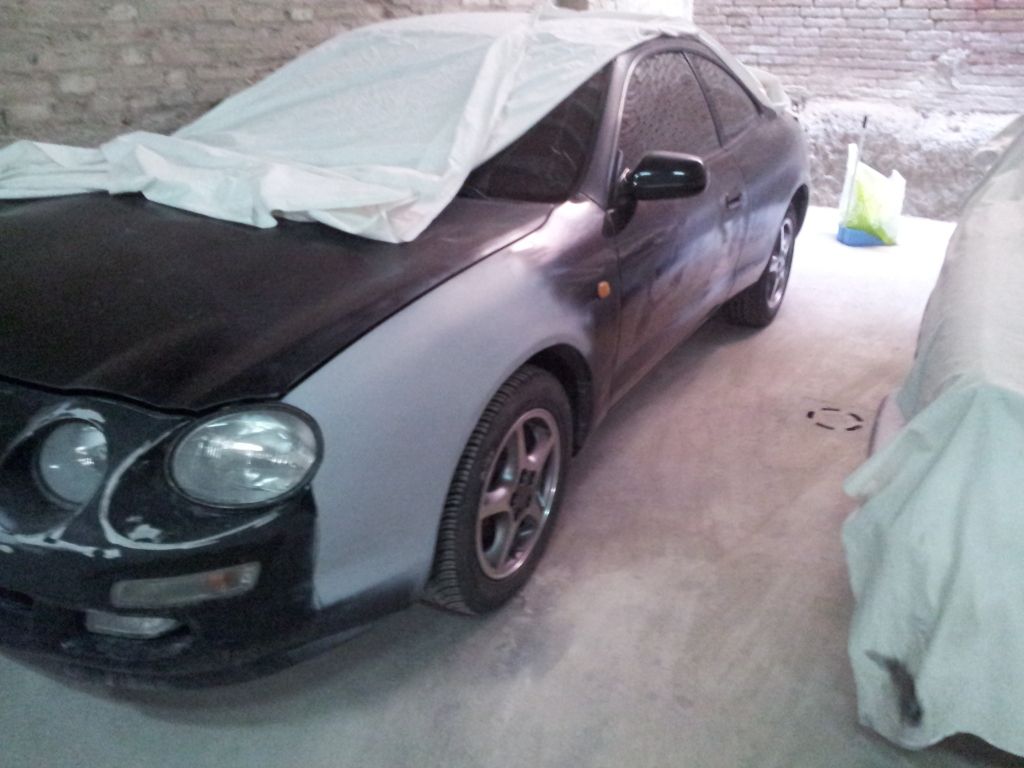
I took apart my console, took the cd player out etc
I sanded the pieces down to eliminate the cigarette melts, and filled the hole that had been made for the old alarm. A number of coats of paint and clearcoat and hey presto! Finished! The metallic grey was meant to be the the same as used on the wheels, but I ran out and had to use a darker colour. Actually I think it looks better! More subtle. What do you think? 
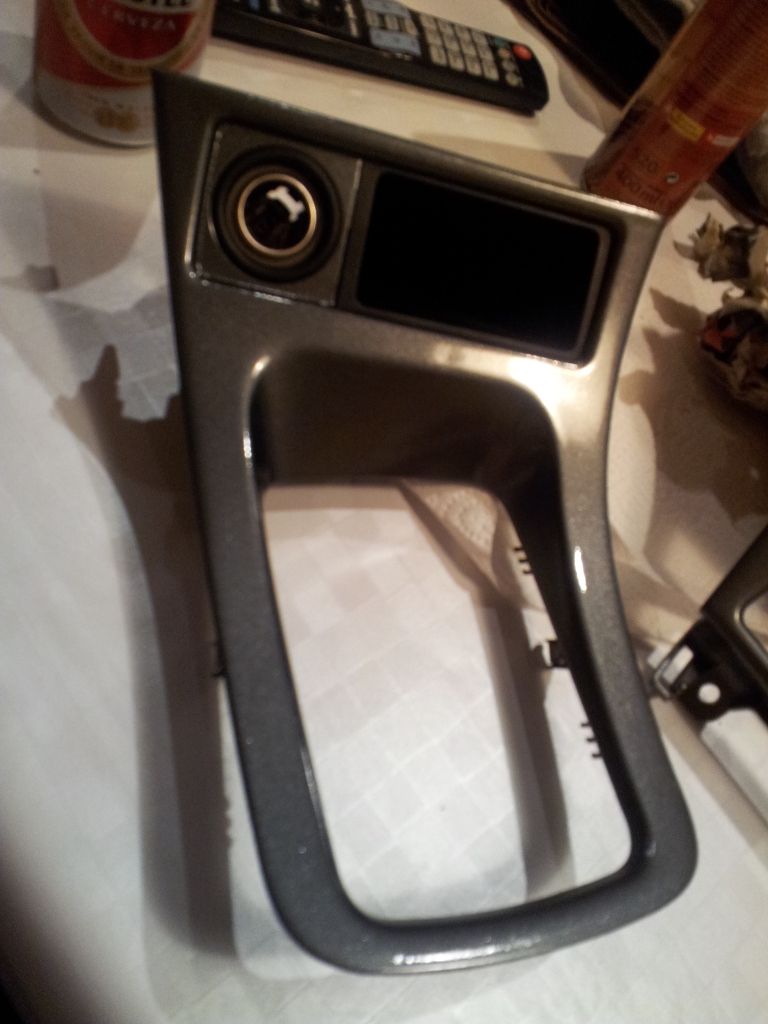
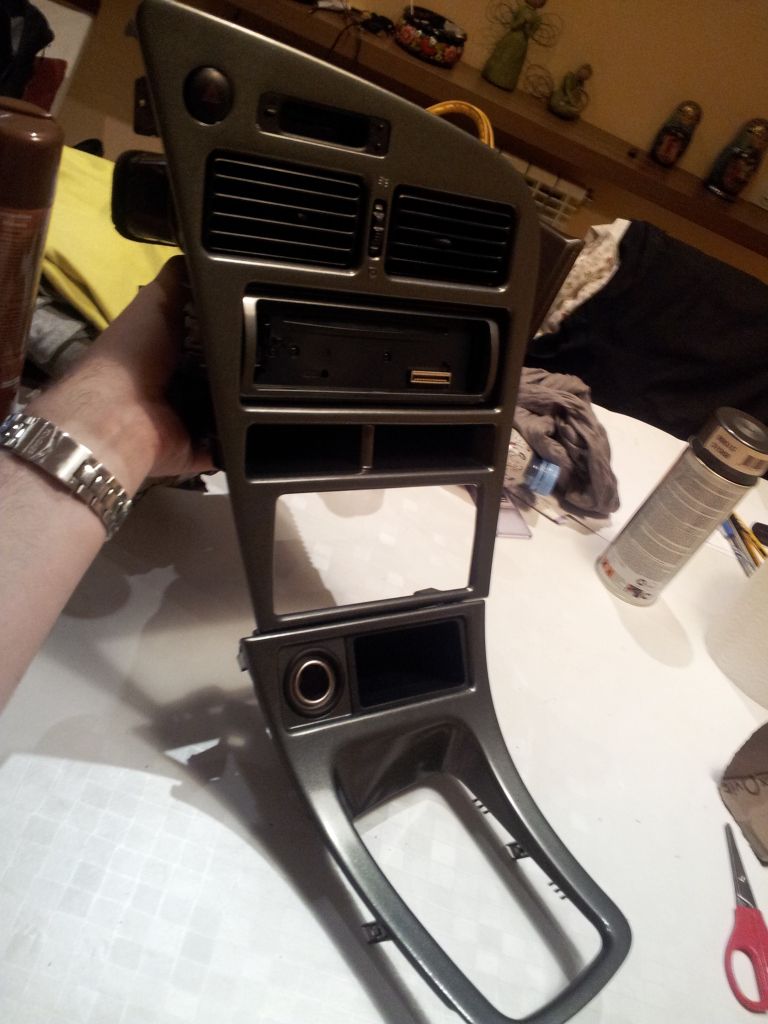
I even painted the thin rectangular cd player surround with the same paint. Hopefully I'll be able to refit these parts into the car in the next few weeks.
Posted by: Edser Sep 29, 2012 - 1:27 PM
Thanks Anoroc! I think it looks even better in the flesh. Shines and sparkles in the sun. I highly recommend doing it if you have time.
Posted by: enderswift Oct 6, 2012 - 6:42 PM
I've seen many, many horribly painted interiors. This is not one of them. Looks awesome and great job
Posted by: Edser Oct 9, 2012 - 3:07 AM
Thanks Enders!
Yeah, I'm going for a subtle look. The sort of thing you might look at and imagine Toyota sent the car out of the factory like that.
There will be no bright red painted bits, nor shall I be painting the side air vents or door bits. (Finally, I decided to paint the drivers vent, like in the SSIII)
I could be persuaded to paint the lower half of the interior that yellowy cream colour (like a Ferrari) if I had the money to get matching leather seats.
But as I don't, I won't.- It's on the wish list.
Posted by: Ted95 Oct 9, 2012 - 7:14 AM
i really like how those wheels came out, i havent seen anyone polish the gt wheels yet nice job!
Posted by: Edser Oct 10, 2012 - 10:42 AM
Thanks Ted!
Yeh I'm surprised that polishing them isn't done more often. I guess maybe it's because the finish is never going to be as shiney as the original finish. Also, the grained texture of the wheel needs to be sanded off to get rid of all the oxidation and stone chips and curbing, and well, it's a lot of hours... Approx. 4 each wheel for me. Taking into account labour and paints, it'd be cheaper to buy brand new 15s. I guess I'm poor now so my labour isn't worth anything.
Also keeps a certain amount of originality to the Celica. I like that.
This weekend is a long weekend, so I'm going to the car. I shall be installing the painted console. I'll take photos.
Also plan to keep shaping that front wing till its right. Then I don't know what to do.
Posted by: Edser Oct 12, 2012 - 5:54 PM
So I fitted my center console this weekend. I think it looks pretty good, though I did notice a slight blemish where the alarm LED had been. But then I always notice the small details. I'll learn to live with it.
I think it looks quite like on the Japanese import beams celicas, but glossy.
I was unsure what to do next, so I took the rear lights off. It was pretty easy. One of them has a bit of damage on the lower edge, and the others a bit grazed. I guess I can polish out the graze but I'll need to buy a second hand one to replace that damaged one.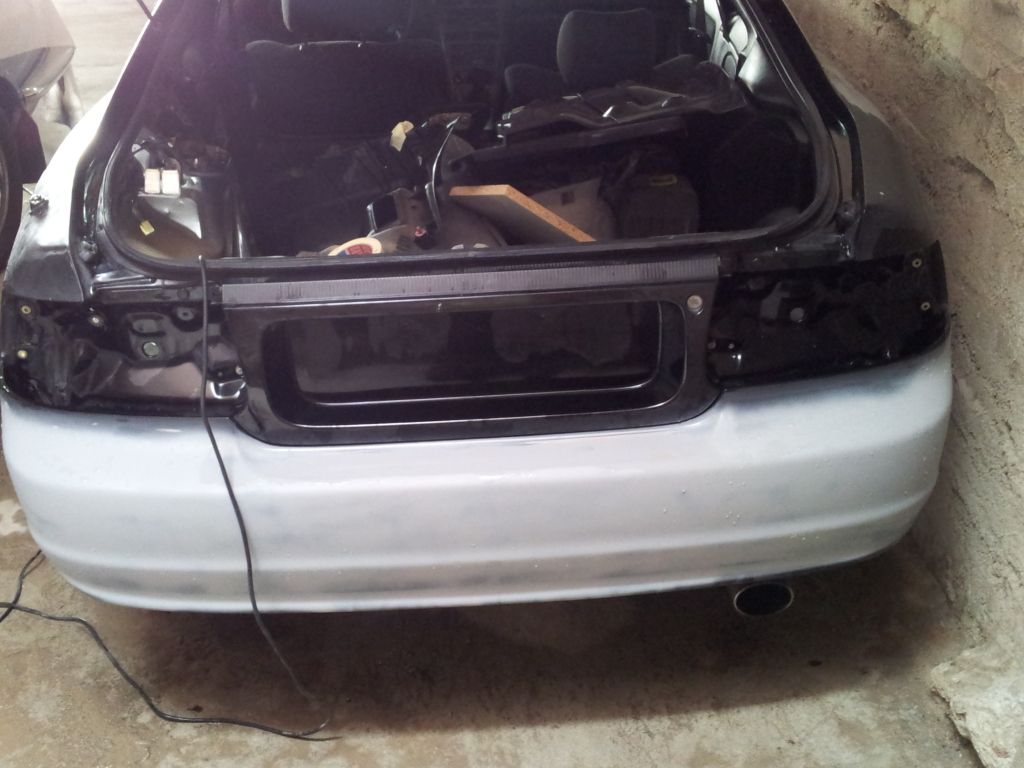
I took the front bumper of too. I kinda had to, for painting purposes, but also the grill on the front had fallen inside the bumper and the clips with the nuts (inside the bumper) for the number plate support weren't well attached, and one was about to fall off. Seems the bumper is damaged there, the ABS is split. I'll need to fix that. The foam internal of the bumper is good, no crushed or broken bits except a small split in the area of the indicator.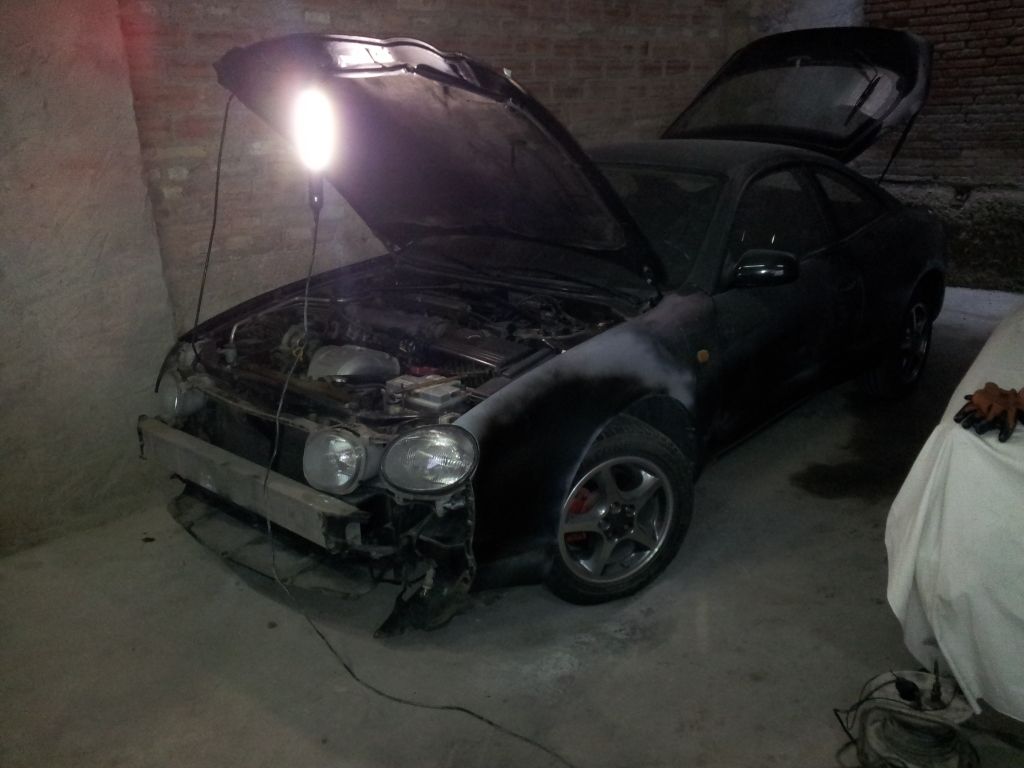
I took lots of bits home with me, the front splitters, the grill and the rear lights.
I think I'll repair the splitters and paint them black. I may paint the grill in the dark metallic grey, as well.
Watch this space.
Posted by: Edser Oct 14, 2012 - 8:23 PM
I fear it will be next year before I can paint her. But it'll be glorious!
Posted by: Edser Oct 31, 2012 - 4:05 PM
Right! I'm heading back to work on the car this weekend, but it will be a secondary thing, as I'm taking my Yamaha Thundercat's wheels with me. I'm gonna clean 'em sand 'em and paint 'em silver!
Posted by: Edser Nov 6, 2012 - 5:15 PM
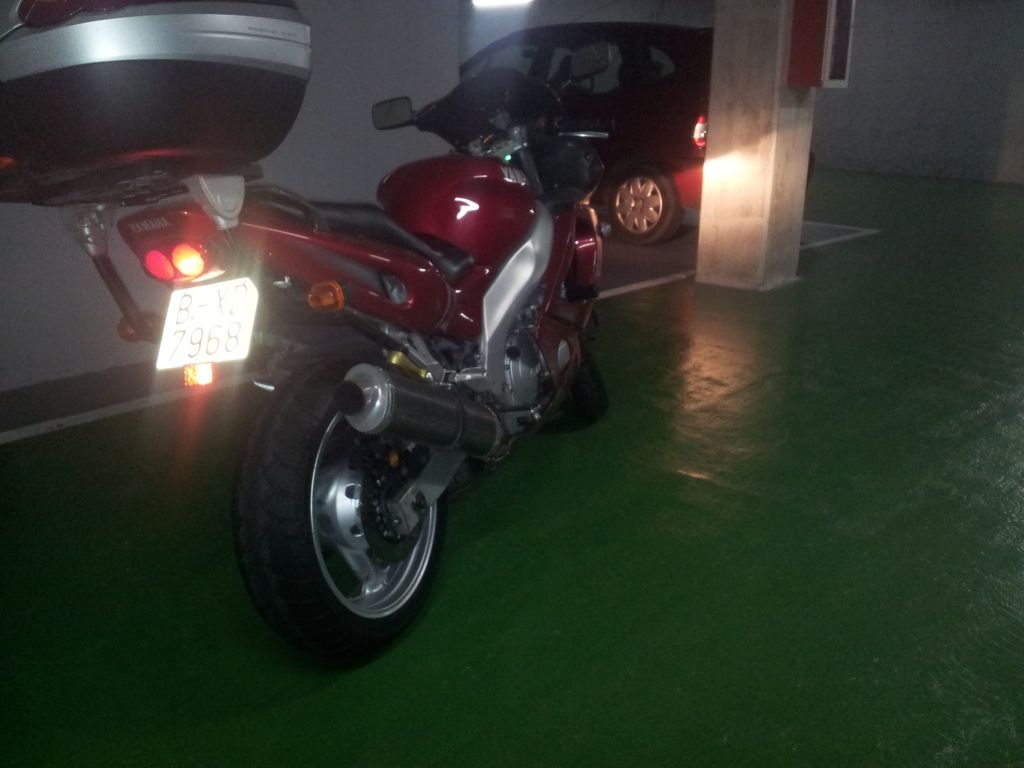
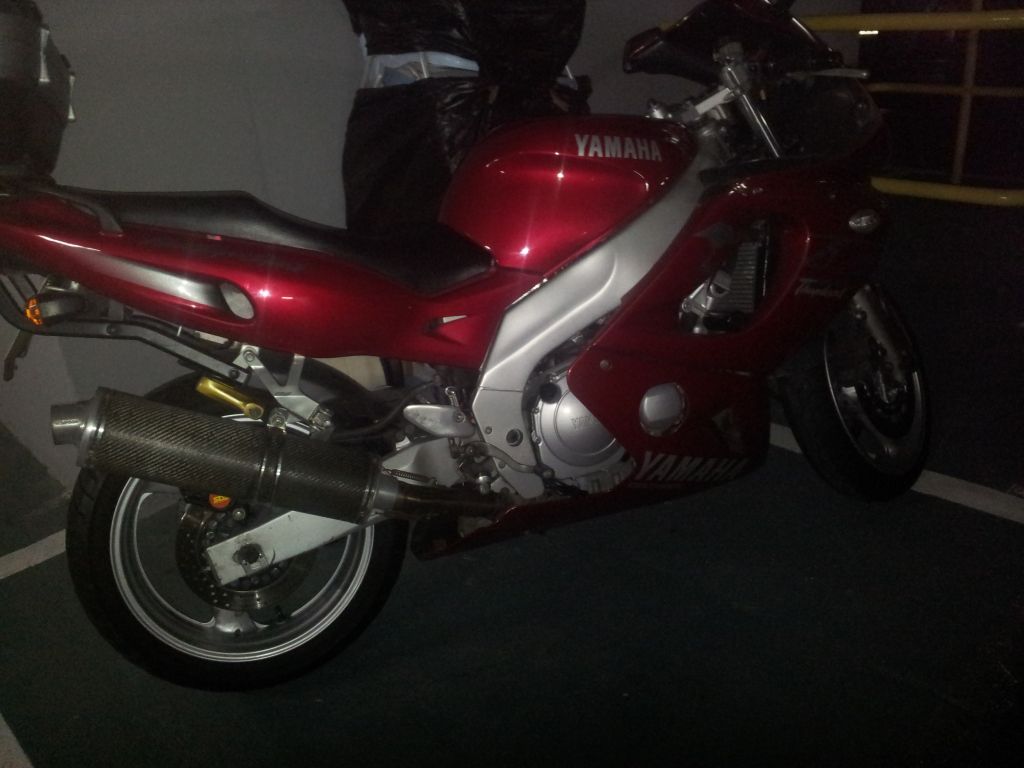
I painted my Thundercats wheels this weekend. I think it's a big improvement, looks so clean. Here's the before pic:
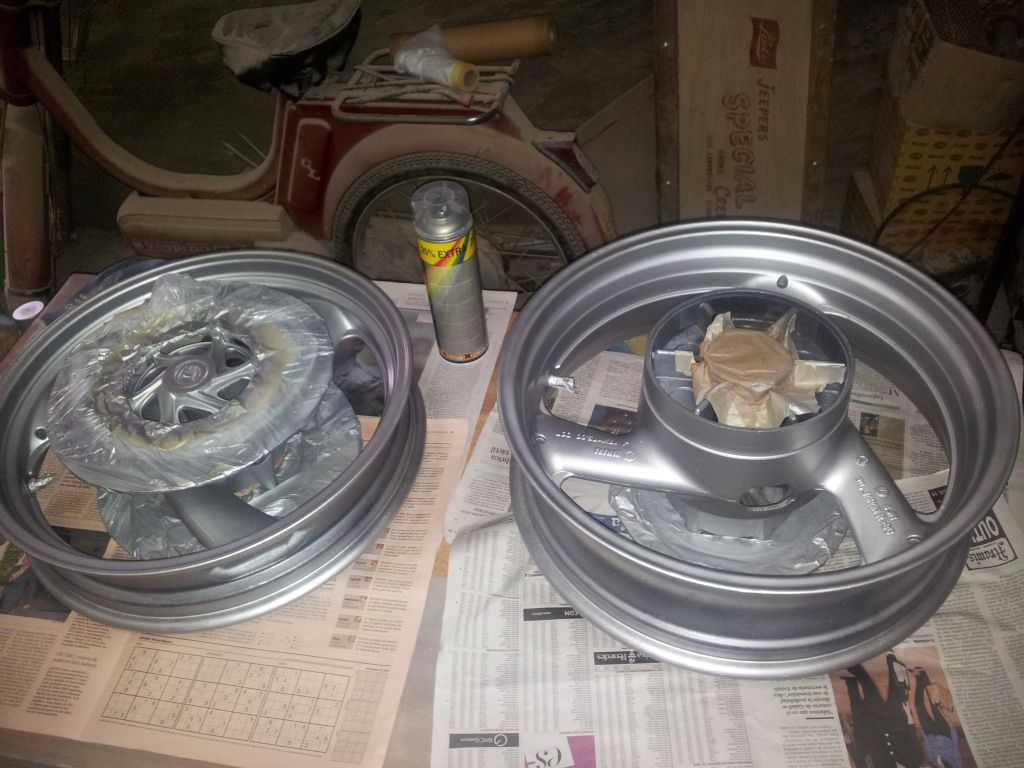
Here's the after pic: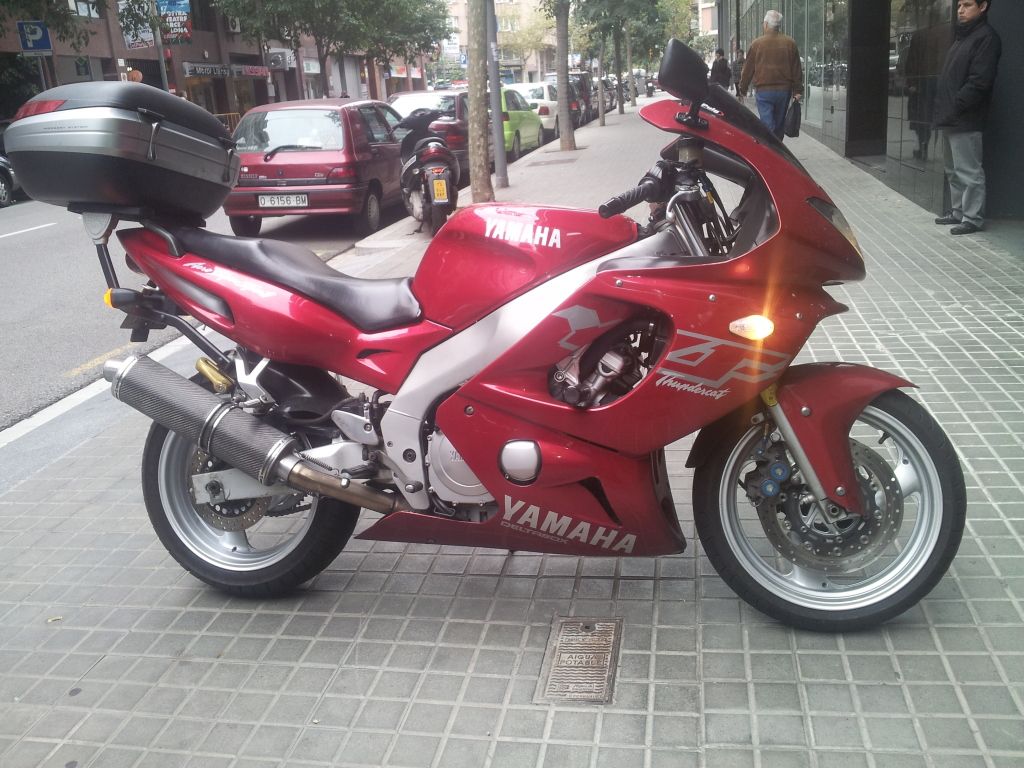
Posted by: Edser Nov 27, 2012 - 5:52 PM
Since I have no money at the mo, I thought I'd get to work on my lights - see if I could make 'em look a bit better. This one is the rear right tail light. It seems to have had a close bump/scrape. It's all a bit broken. I pulled this broken bit out with tweezers.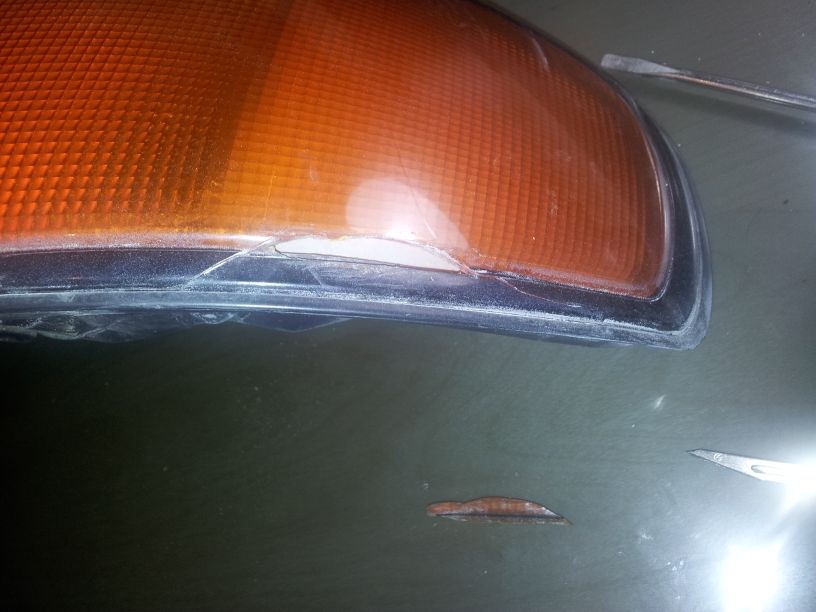
So I glued the piece back in with superglue...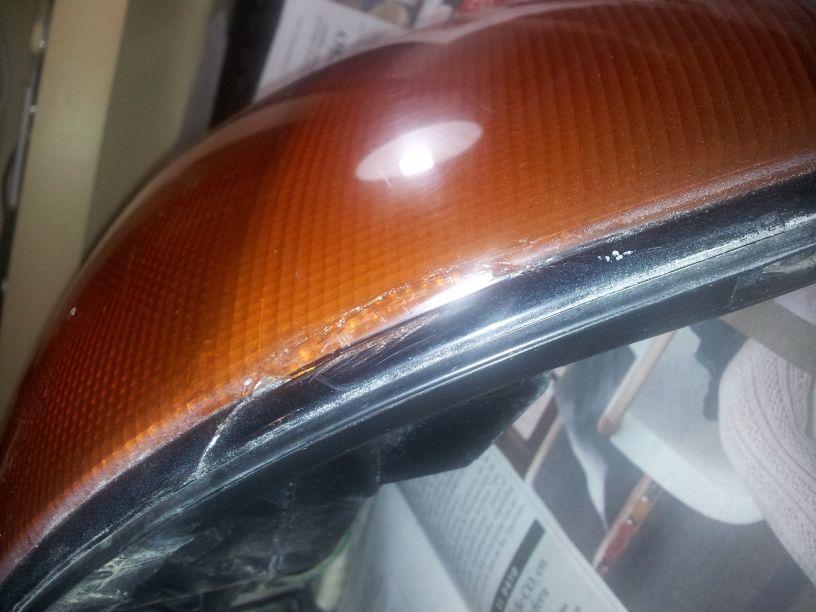
Bit of sanding...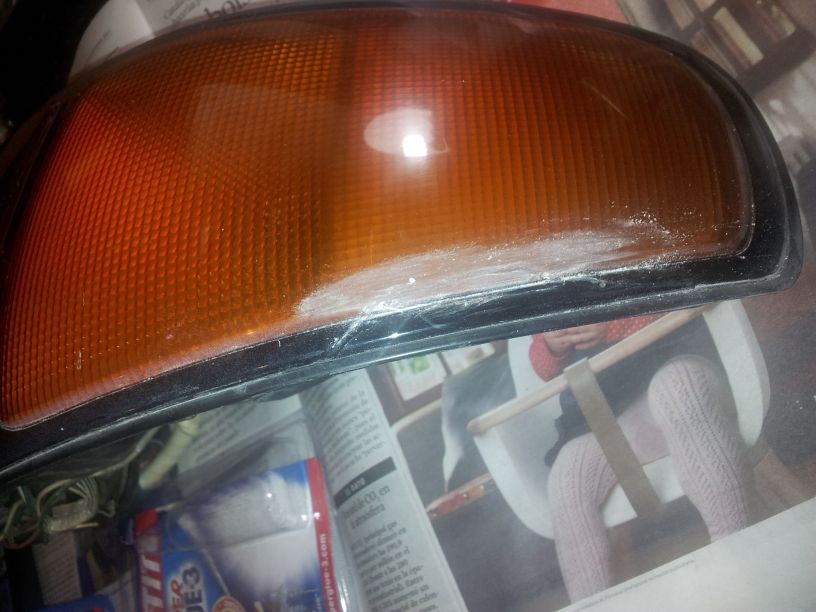
Then a bit of polishing...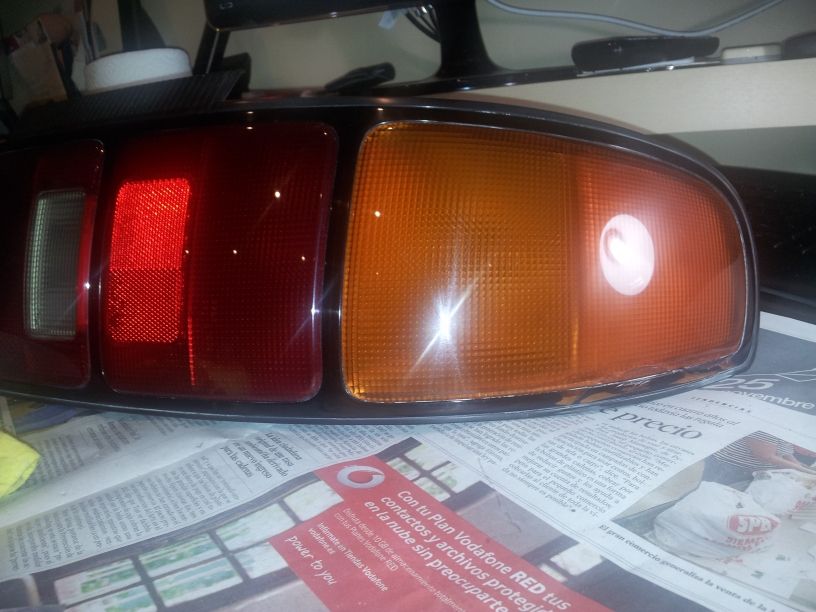
Bit of black paint...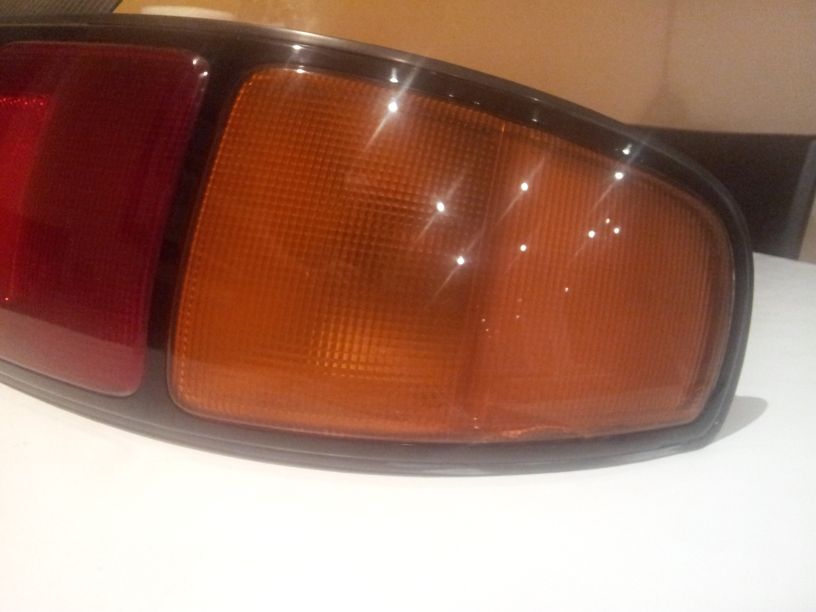
The crack is still visible, but its a huge improvement. Then I got to work on the scrape on the left tail light.
This is the scrape: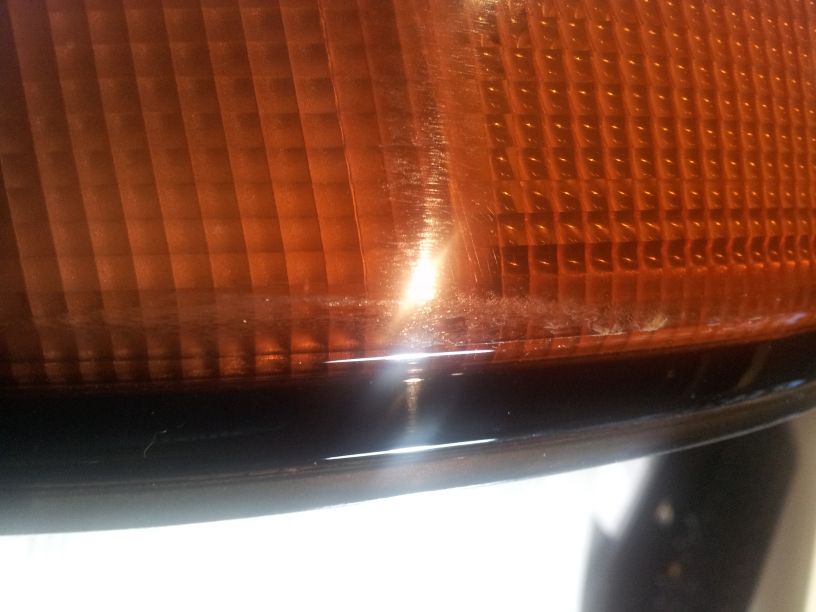
After some polishing: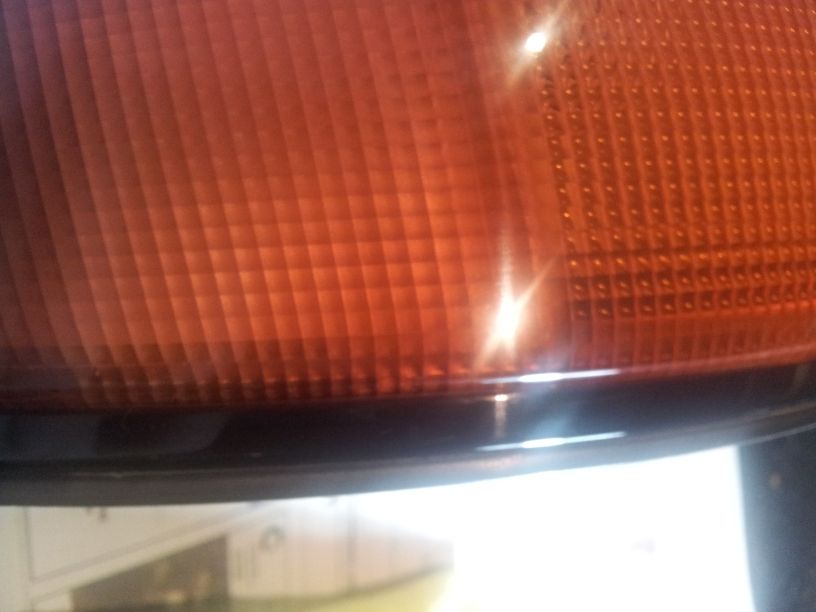
Voila!! Scrape gone!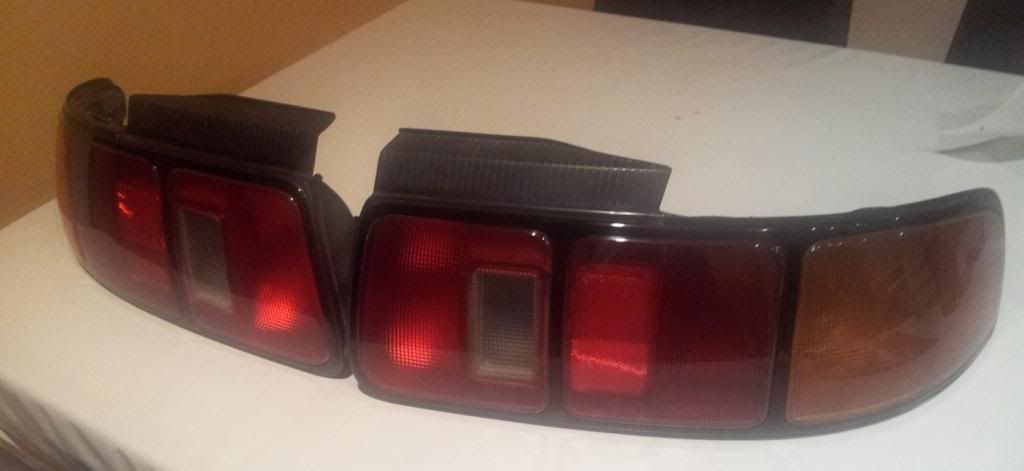
I also sanded off all the numbers and things on the red areas, and polished the whole surface until really shiney. Looks like new!
Posted by: Syaoran Nov 28, 2012 - 3:06 AM
Very good with paint and restoration I see... keep up the good work!
Posted by: Edser Dec 1, 2012 - 11:38 AM
Cheers!
After the rears turned out so well, I got to work on the front indicators (turn signals).
This is a pic of a polished one on top of a untreated one just off the car.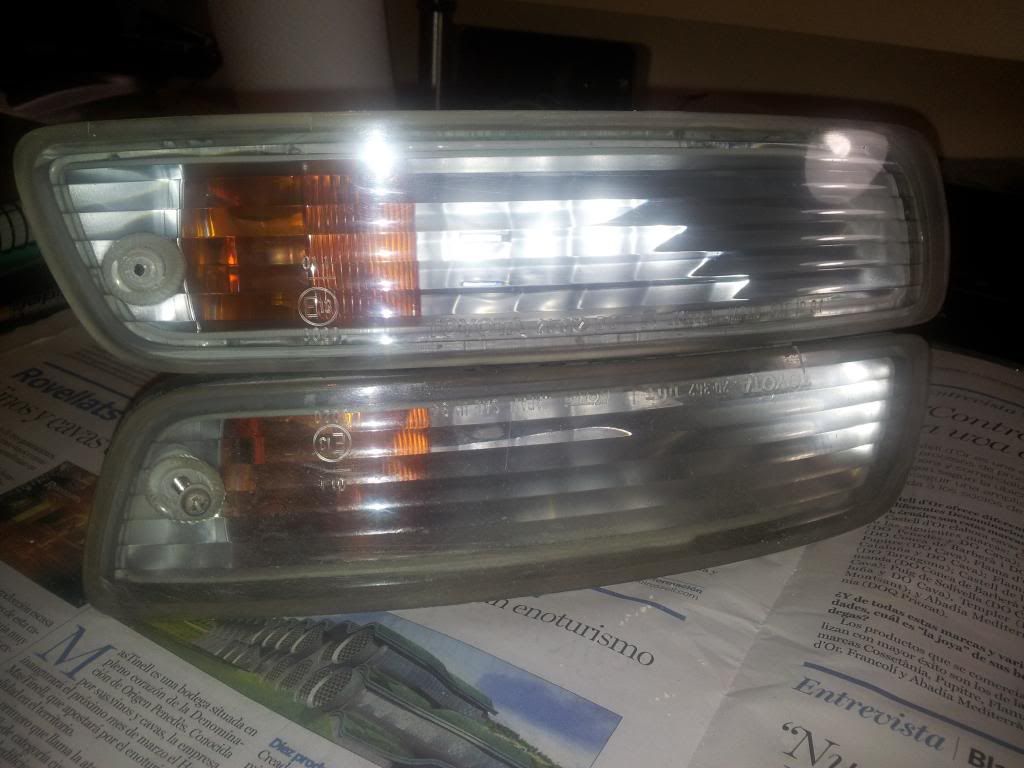
I sanded it back with some 400 grade then 600 and finally with some 800, then polishing with some random polish I found.
Did the whole job while drinking a mix of red wine and Pepsi light while watching tv on my pc last Saturday night.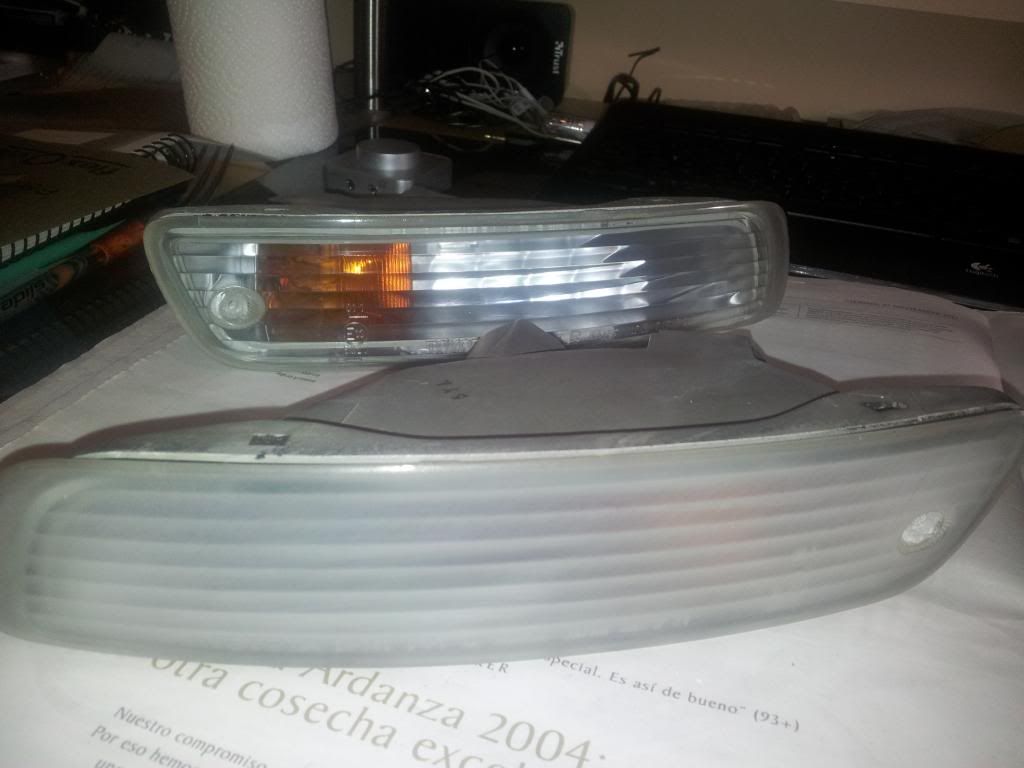
This is the end result: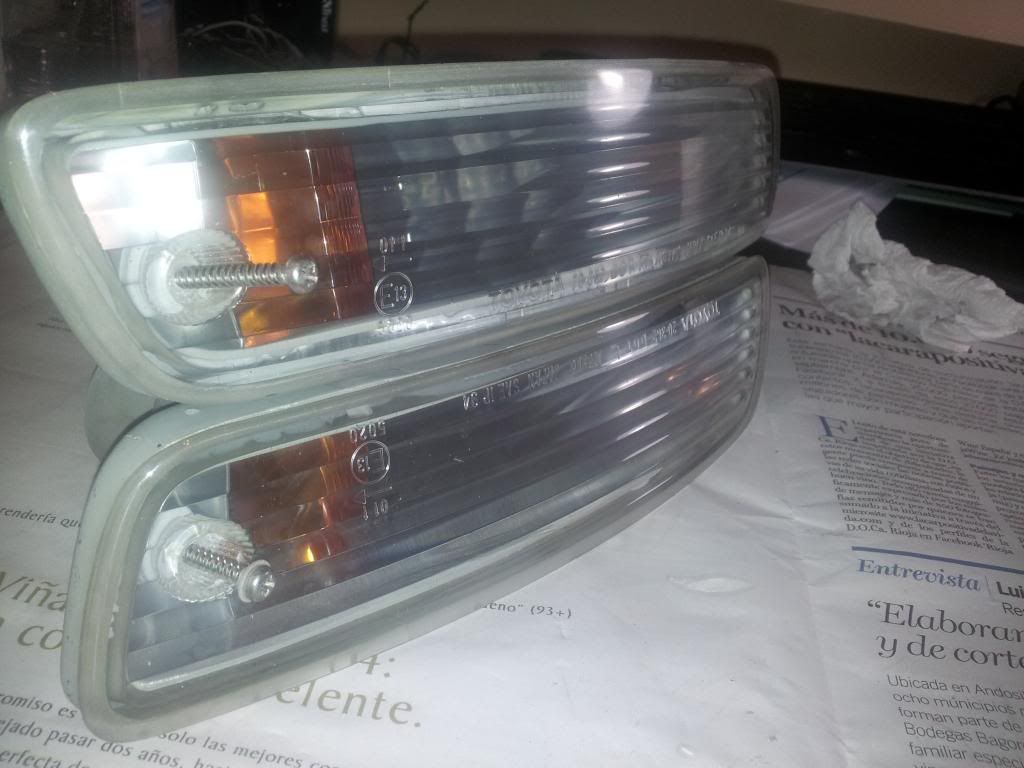
Its not bad I think, there was some very bad pitting (stone chips or really tough insects), and I couldn't smooth it all away without spending a long time sanding, and I was already quite drunk, so I'm pretty happy with the results, although not with the hangover.
Posted by: Edser Dec 2, 2012 - 10:45 AM
I noticed that my reversing light looked sort of dirty, so I popped out the bulb to see, and low and behold I found this: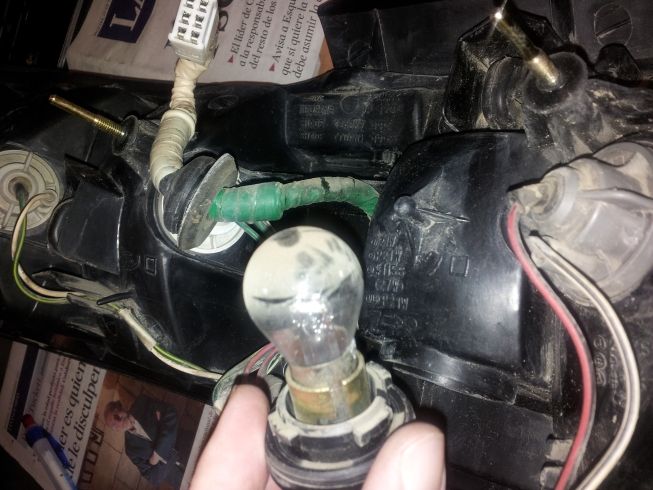
So cleaned the bulb and got to work cleaning the inside of the light with Q-tips and window cleaning liquid.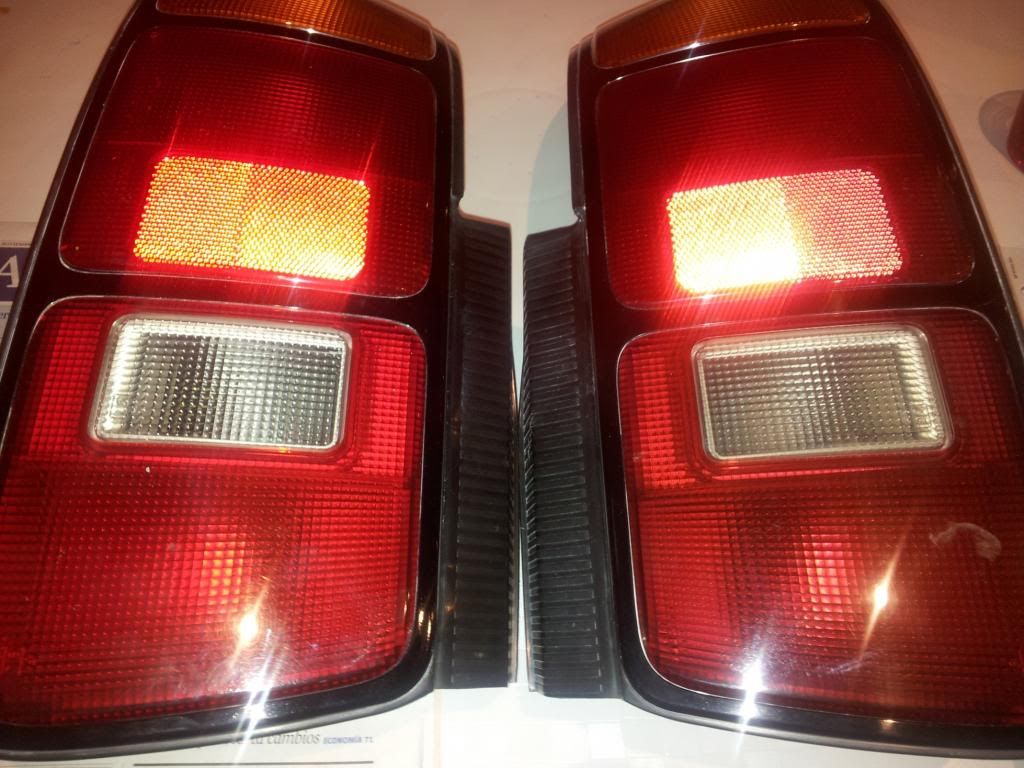
The one on the left has been cleaned. It really makes a big difference, tho you can't really tell in the photos.
Posted by: Edser Mar 16, 2013 - 10:16 AM
Its been a long cold winter, and I finally got back to visit my car. There has been a lot of construction work going on in the garage where I keep it, everything's covered in a thick layer of dust. It is covered with an old bed sheet, but the dust gets in everywhere, all around the engine bay and on the wheels.
So I popped the lid and started scrubbing the engine bay. Can't really tell in the photo.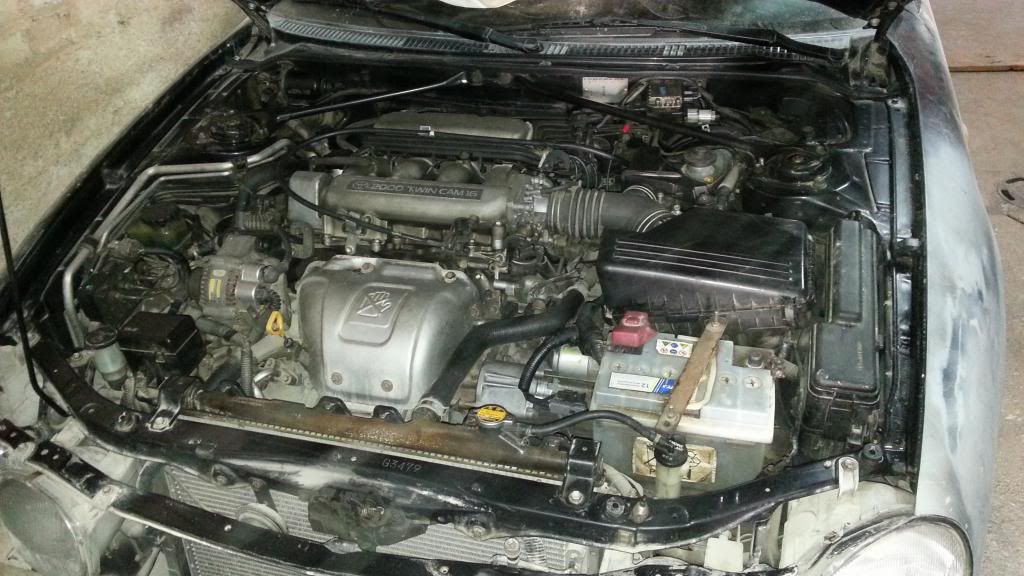
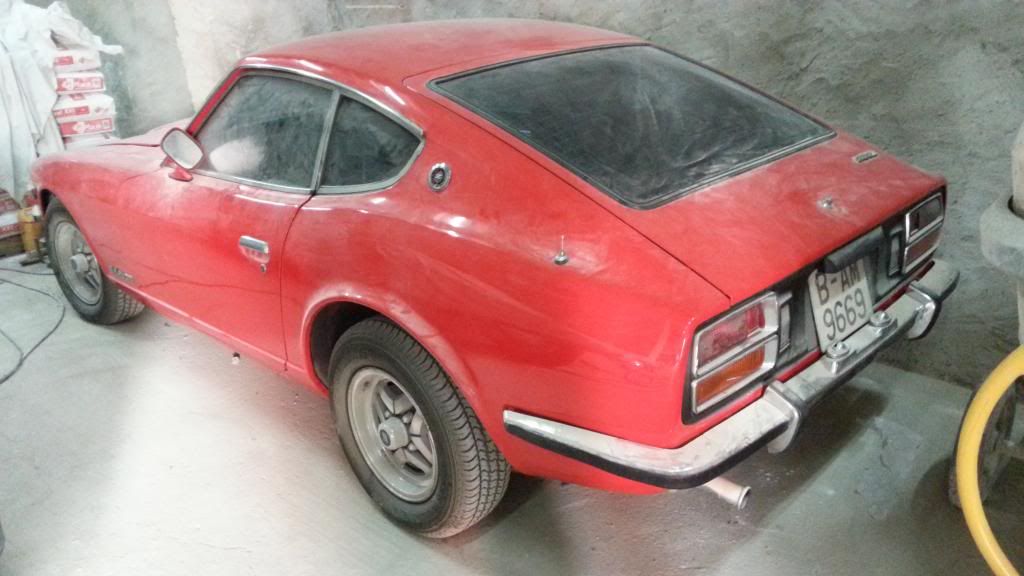
While I was there I uncovered the Datsun (yes it had a dust cover - not that you can tell - it was sooo dusty). It looks so good, such car-porn. It's just sick. So I stood there and looked at it for a while, in a kind of wierd pervy way. I took some photos for later.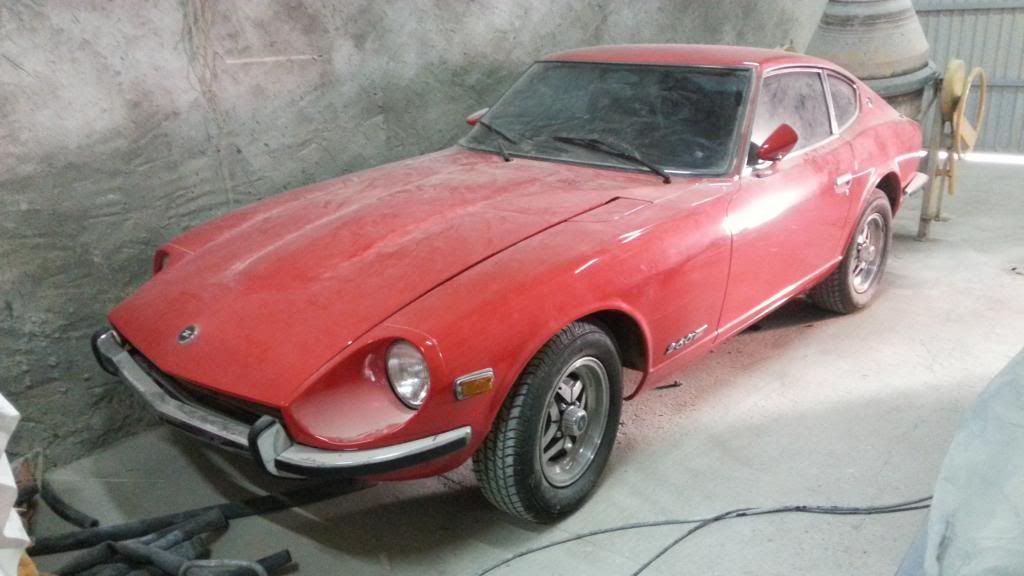
Later I also took out the Celicas interior plastic panels (they are just dumped in the boot) and cleaned their insides, as they were kinda brown and dusty. I'll be clipping those back in when the cars painted.
Roll on summer!
Posted by: Edser Sep 13, 2014 - 2:28 PM
It has been two years, and I have finally got around to getting some paint on the car. I was determined to paint it a get it on the road this summer as I finally got a job. Still, the job means I have very little free time so its going to be painted in my local paint shop at a cost of 1100 euros.
http://s1093.photobucket.com/user/edserb/media/20140831_100632.jpg.html
This is the car before being sent off for paint. I replaced the boot lid as there was rust around the window. I found another black Celica in a scrapyard 30 mins away and he sold me the whole lid with spoiler and badges and brake light complete for 60 euros. He even gave me the fuel filler flap for free when I asked. So nice. In the photo below you can see the old boot lid in the background. It was so easy to fit, plug and play, although it was quite heavy and my girlfriend and I struggled to line it up. Used a wooden board to prop it open while she held it steady, and I tightened the bolts.
http://s1093.photobucket.com/user/edserb/media/20140831_100558.jpg.html
I finally pulled off the window trim and side repeaters. I have cleaned them up and they are waiting to be refitted.
I won't get to see the new paint until nearly October as I am going on holidays. I can't wait!
Posted by: Edser Oct 2, 2014 - 6:44 PM
Yippee! Car has been painted! I just went to see it and this is what I found:
http://s1093.photobucket.com/user/edserb/media/20141002_131254.jpg.html
http://s1093.photobucket.com/user/edserb/media/20141002_131301.jpg.html
http://s1093.photobucket.com/user/edserb/media/20141002_1313220.jpg.html
I left the car with all the parts to be painted in the boot. The painter didn't believe me. These Celicas are quite roomy you know?
So I set to work on the back of the car for some quick results. Stuck the lights back on, the Toyota badge and the brake light. That's my dog in the background.
http://s1093.photobucket.com/user/edserb/media/20141002_132950.jpg.html
http://s1093.photobucket.com/user/edserb/media/20141002_133003.jpg.html
Then I got to work on the nightmare front end. A design horror for sure. Putting on those 3 side nuts of the bumper was an hour long challenge.
http://s1093.photobucket.com/user/edserb/media/20141002_160338.jpg.html
http://s1093.photobucket.com/user/edserb/media/20141002_185234.jpg.html
Finally, I screwed on the indicators, clicked in the side repeaters and attached the fog lights.
http://s1093.photobucket.com/user/edserb/media/20141002_190154.jpg.html
I also changed to numberplate for a cleaner plastic one. The ABS plates are something of a novelty in Spain, and have only fairly recently become legal.
http://s1093.photobucket.com/user/edserb/media/20141002_190220.jpg.html
http://s1093.photobucket.com/user/edserb/media/20141002_192150.jpg.html
http://s1093.photobucket.com/user/edserb/media/20141002_192217.jpg.html
I still have lots to do. I need to screw all the under plastics together, and bolt on the freshly painted front splitters. Then attach the electric aerial, put all the interior plastics back into place and stick on the Celica and small Toyota badges.
Posted by: JoshuaM Oct 2, 2014 - 10:15 PM
A long time coming... but worth it! Hope you get some great use out of it this summer!
Posted by: Nial Oct 3, 2014 - 12:39 AM
That looks great. I particularly like the work on the rear lights, I might have to have a go at polishing off all those marks from mine......hope I don't balls it up.
Nice job.
Posted by: cheela Oct 3, 2014 - 9:23 AM
looks great! now drive it!!! 
Posted by: Edser Oct 11, 2014 - 10:58 AM
Its great to nearly have it going again, and this time looking goooood. Still, there's some work to be done. This arrived in the post the other day:
http://s1093.photobucket.com/user/edserb/media/20141011_173700.jpg.html
A CV joint and the boot kit for the other side too. They aren't the same but I suppose it doesn't matter, they are from different manufacturers. I got them on www.recambioscoches.es which is all in spanish but is located in Germany. The box took about a week to get here to Barcelona, although I ordered it on Thursday and it was only sent on Tuesday arriving 2 days later by UPS Standard. The cv joint cost 50.37 euros and the boot kit for the other side 8.22 euros, including postage giving a total of 80.85euros. I just hope they fit!
Posted by: Edser Oct 18, 2014 - 12:02 PM
Wow! I think I've struck gold here. I went on to Milanuncios.com and saw an ad for breaking a Celica. I saw it appeared to have leather seats, although this was not stated in the ad, and so I mailed the guy about the seats. He said the seats and door cards were 550euros. I went to see them today and lo and behold, not only were the seats real leather and stunning, but the door cards front AND REAR were covered in stitched leather. We settled at 400euros for the lot, and I went home a happy man with a boot load of leather goodies.
The leather is very good, only one tear in the drivers side, but they need softening and a new colour as there is a lot of sun fading especially on the top of the rear seats. I'm thinking of a BMW red colour would look good in my black car.
What do you guys think about the change of colour?
http://s1093.photobucket.com/user/edserb/media/20141018_1436001.jpg.html
Posted by: Rusty Oct 18, 2014 - 3:56 PM
Left boot is inner & right is outer. Make sure when you're replacing them you put the metal ties on at the right moment so you don't have to remove it all again.
Posted by: Edser Oct 18, 2014 - 5:04 PM
Um, actually I bought them online and they are both supposed to be outer boots. The CV joint came with one, and so I got a separate boot as well. I think the inner boots are in ok condition.I didn't order the inner ones, though I probably should have.
Posted by: Edser Oct 21, 2014 - 3:19 AM
I started cleaning the leather interior. Its pretty filthy. I don't think the previous owner cleaned them often - or at all!
http://s1093.photobucket.com/user/edserb/media/20141020_224846.jpg.html
These are the back seats, not so dirty really.
The door cards were very clean too, not much to do there.
The upper part of the door card is covered in leather with only the pocket and the handles not covered.
http://s1093.photobucket.com/user/edserb/media/20141021_101058.jpg.html
The front seats are very dirty. I'll upload pics of those later. I need to get the drivers side bolster repaired. I haven't found and unwelcome surprises, so I'm still feeling pretty good about the whole thing.
I'm still thinking about the new colour for the seats. I'm pretty sure deep red is the way to go. I don't think I can stomach this orangey tan colour. If it were a bit browner and paler, maybe.
Posted by: njccmd2002 Oct 21, 2014 - 3:38 AM
that is some custom leather, pricy, but well worth it. looks comfy...
Posted by: Edser Oct 21, 2014 - 3:43 AM
Yeh I thought it looked a little too fancy to be stock. Someone must have been feeling very flush... I do hope it's comfy, I won't get a chance to try it out for a few weeks, maybe a month.
Posted by: Edser Oct 22, 2014 - 2:55 PM
Some goodies have arrived!!!
I picked these up off Ebay or Amazon or something. I think they'll look pretty sweet.
More goodies will be arriving over the next week or two. I can't wait!!
http://s1093.photobucket.com/user/edserb/media/20141021_114150.jpg.html
Posted by: msk59 Oct 24, 2014 - 7:59 AM
Nice work. Love the seats
Posted by: Edser Oct 24, 2014 - 12:48 PM
Cheers thanks Msk59! Its been a long wait, so close to being back on the road now.
More goodies have arrived! I'm a shocked at the speed, I only ordered them two days ago. I guess they came from Valencia, and that's not too far away. A 5 hour drive from Barcelona.
So this is the Leatherique Restoration kit. It comes with everything I need to make my skin look dark red (Marroon 242) and make it supple and newish again.
http://s1093.photobucket.com/user/edserb/media/20141024_163830.jpg.html
I dropped off my drivers seat off at the leather shop Tapicería Meridiana to get the leather on the side of the seat replaced. The colour doesn't matter too much as I am changing the colour anyhoo. I'll get it back next Saturday.
Posted by: Edser Oct 26, 2014 - 4:16 PM
The last few days I've been cleaning and preparing the leather for a colour change. So I finally started with the door cards.
The colour is pretty much what I was looking for. I think it looks good.
http://s1093.photobucket.com/user/edserb/media/20141026_221027.jpg.html
Posted by: njccmd2002 Oct 26, 2014 - 5:21 PM
wow, what an improvement, i am amazed. does that thing wear off?
Posted by: Edser Oct 27, 2014 - 3:30 AM
It's supposed to last a lifetime, but I've got a friend how changed his seats from grey to black and he says that it can wear in some places.
I'll keep the bottle in case I ever have to touch up a worn area.
Posted by: Edser Oct 27, 2014 - 4:06 PM
Just found a fiver when taking my seats apart. It was jammed into the back of the swivel mechanism. WooHOo! 5 euros discount! Just got to do some money laundering (Harr Harr!)
http://s1093.photobucket.com/user/edserb/media/20141027_215719.jpg.html
Posted by: Edser Oct 28, 2014 - 5:37 AM
This just arrived! Looks really good, very classy.
http://s1093.photobucket.com/user/edserb/media/20141028_113319.jpg.html
It goes quite well with the new leather colour.
http://s1093.photobucket.com/user/edserb/media/20141028_113442.jpg.html
Posted by: Edser Oct 28, 2014 - 2:47 PM
This just arrived!!
http://s1093.photobucket.com/user/edserb/media/20141028_204824.jpg.html
Posted by: Edser Nov 2, 2014 - 10:43 AM
Finally the time has come to move the car from its place of hibernation in Lleida to its new home in Barcelona. I couldn't get the cv joint fixed in time so that'll have to be done here. I also need to prep the car for its car test.
I took the car out for a wash.
http://s1093.photobucket.com/user/edserb/media/20141101_1949350.jpg.html
http://s1093.photobucket.com/user/edserb/media/20141101_194912.jpg.html
Here it looks nice and clean.
http://s1093.photobucket.com/user/edserb/media/20141101_220316.jpg.html
The dog seemed to like it, although who knows.
http://s1093.photobucket.com/user/edserb/media/20141102_130416.jpg.html
I haven't put the interior back in as I am still working on the leather seats. I drove home with no way of opening the windows or adjusting the mirrors. A/C worked great though, if anything it was a bit too icey, and I had to turn the heat up a little. The front seats in the car are the same as the leather ones but look to be in better condition (bases are all scratched and rusty) so I may just swap over the new leather parts to the original seat bases. should be easy, as there are only 4 bolts holding the base and 4 attaching the seat back. I'm not sure how they are attached to the floor, but I bet they will be easy to take out.
While I was out Lleida way, I picked up a 2001 steering wheel in Tarrega for 70 euros. I'll be re-trimming this in leather with red stitching when I can. The badge is a bit worn, maybe I can paint it or replace it, I don't know. I have been unable to find a badge for the front bumper, but I'll keep looking as it looks naked without one.
http://s1093.photobucket.com/user/edserb/media/20141102_152020.jpg.html
Posted by: Edser Nov 3, 2014 - 3:03 PM
Just a small update. I took my door cards out of the boot and bought them up to the flat to compare them and swap over any parts.
http://s1093.photobucket.com/user/edserb/media/20141103_190010.jpg.html
I had previously noticed that the top rubber strip on the leather door cards was damaged , so I hoped to swap it for the strip that had been originally on my car. You can see how there top strip is missing, looks like it was torn off in the left hand one.
http://s1093.photobucket.com/user/edserb/media/20141103_190352.jpg.html
So I prized open all the little tabs and removed each strip.
http://s1093.photobucket.com/user/edserb/media/20141103_190017.jpg.html
Then I swapped them, bending all the little tabs closed again. Easy.
http://s1093.photobucket.com/user/edserb/media/20141103_190815.jpg.html
While I was doing this I had a look at the switches and noticed that the ones in my new cards looked very worn and faded. My car has more than 230k km and the parts look new in comparison the the newly purchased cards. So I swapped them. Easy too. Ah, if only all the jobs were this easy.
http://s1093.photobucket.com/user/edserb/media/20141103_191831.jpg.html
Posted by: Edser Nov 6, 2014 - 2:31 PM
Been doing some work on the car on Monday and Tuesday. I fitted my tinted repeaters. I removed the rear seats and fitted the side panels. Meanwhile, I have been working on the rear leather seats. They are nearly finished, I think I'll give then one more coat just to ensure that the colour is even.
http://s1093.photobucket.com/user/edserb/media/20141105_171649.jpg.html
http://s1093.photobucket.com/user/edserb/media/20141106_200308.jpg.html
http://s1093.photobucket.com/user/edserb/media/20141106_200314.jpg.html
http://s1093.photobucket.com/user/edserb/media/20141102_125502.jpg.html
http://s1093.photobucket.com/user/edserb/media/20141102_130731.jpg.html
http://s1093.photobucket.com/user/edserb/media/20141102_125428.jpg.html
Posted by: Edser Nov 9, 2014 - 7:01 PM
This week I stuck on some TRD badges on the wheels...
http://s1093.photobucket.com/user/edserb/media/20141107_180620.jpg.html
and on the back... (sorry, terrible photo!)
http://s1093.photobucket.com/user/edserb/media/20141107_180726.jpg.html
Then I fitted the newly re-coloured rear seats...
http://s1093.photobucket.com/user/edserb/media/20141108_133056.jpg.html
http://s1093.photobucket.com/user/edserb/media/20141108_133031.jpg.html
Duff likes them. No paws on the new seats please!
Posted by: CrossCudi Nov 11, 2014 - 1:31 AM
great job ! 
very unique in color !!
Posted by: cheela Nov 11, 2014 - 8:44 AM
Seats looks great. let us know how that dye works. very interesting indeed.
Posted by: SwissFerdi Nov 11, 2014 - 9:29 AM
Those seats look seriously good. Very nice work.
Posted by: Edser Nov 11, 2014 - 9:29 AM
Thanks guys! I'll be doing the front seats soon, but it'll be a while before I can test them in real world conditions and see how they withstand wear and tear.
Meanwhile my new badge, a window moulding clip, and a wheel bolt arrived at the dealers. The window clip cost a huge 5.67euros per clip! For a tiny plastic clip! I probably should have got them in a breakers yard. The badge was 25.74 euros, and the wheel bolt was 2.12euros. All including tax. I got a new wheel nut last week it was 6.14euros.
http://s1093.photobucket.com/user/edserb/media/20141111_125651.jpg.html
So I stuck it on. Looks great!
http://s1093.photobucket.com/user/edserb/media/20141111_130006.jpg.html
Posted by: Edser Nov 13, 2014 - 4:03 PM
A box arrived in the post today.
What is it?
What's in there?
http://s1093.photobucket.com/user/edserb/media/20141113_202902.jpg.html
There's stuff inside!
Lots of bubble wrap!
How exciting!
I tear it all open
http://s1093.photobucket.com/user/edserb/media/20141113_203110.jpg.html
I practically burst with excitement, this is all too much for me.
It's some
some
some
ooooh Kouki!!! (jumping around the room, nearly falling over)
http://s1093.photobucket.com/user/edserb/media/20141113_203920.jpg.html
Posted by: njccmd2002 Nov 14, 2014 - 6:21 PM
funny,
congratz, i can imagine you jumping...

Posted by: Edser Nov 14, 2014 - 6:50 PM
So I fitted the lights. Here's half the job done.
http://s1093.photobucket.com/user/edserb/media/20141114_202650.jpg.html
http://s1093.photobucket.com/user/edserb/media/20141114_203816.jpg.html
Only problem is there's no rear fog light. I'll need that for the ITV, the Spanish car test. I may take them off for the test until I can get the fog problem solved. There's supposed to be a 10cm gap between brake light and fog light so I may replace one of the reverse lights with a red fog and disconnect the brake light closest, or maybe add a stand alone fog light low on the rear bumper. I'll have to ask around and find out what is best.
http://s1093.photobucket.com/user/edserb/media/20141114_205257.jpg.html
http://s1093.photobucket.com/user/edserb/media/20141114_205327.jpg.html
Posted by: Edser Nov 21, 2014 - 11:04 AM
This is after one coat of Leatherique.
http://s1093.photobucket.com/user/edserb/media/20141116_030634.jpg.html
http://s1093.photobucket.com/user/edserb/media/20141116_030707.jpg.html
http://s1093.photobucket.com/user/edserb/media/20141116_183529.jpg.html
http://s1093.photobucket.com/user/edserb/media/20141116_183814.jpg.html
http://s1093.photobucket.com/user/edserb/media/20141116_185913.jpg.html
The dog always stands there and watches me when I take photos. It's like as if he has nothing better to do.
After 3/4 coats the colour looks a lot more uniform.
http://s1093.photobucket.com/user/edserb/media/20141121_171541.jpg.html
http://s1093.photobucket.com/user/edserb/media/20141121_171630.jpg.html
This is where there was a hole in the side bolster and the leather was very badly worn.
http://s1093.photobucket.com/user/edserb/media/20141121_171620.jpg.html
Posted by: Edser Nov 24, 2014 - 3:25 PM
My USDM double DIN console arrived today straight in from the US via the UK. Guess it took the touristic route.
Looks great. Just need some electronics to fill that gap.
http://s1093.photobucket.com/user/edserb/media/20141124_190034.jpg.html
Posted by: JDUB Nov 24, 2014 - 4:41 PM
seats look fantastic!
Posted by: enderswift Nov 24, 2014 - 11:27 PM
Great work, those seats look oem!
Posted by: Edser Dec 2, 2014 - 4:11 PM
Thanks guys!
More stuff arrived today.
http://s1093.photobucket.com/user/edserb/media/new2din.jpg.html
I got this double DIN from China. I hope it doesn't break immediately. It has a reversing camera included. nice.
I also got these SSIII splitters and power mirrors from Hong Kong from New Stars.
http://s1093.photobucket.com/user/edserb/media/10836386_10204592747711481_151120430_n.jpg.html
The other day I got to work on repairing the tab on one of the rear splitters. I haven't read up on how people repair these things, but I think that a flexible ABS repair product like Ceys would do it. I drilled some deep holes in the end of the damaged area and screwed in some screws. The idea is that the screws will hold the end of the tab on.
http://s1093.photobucket.com/user/edserb/media/10806894_10204544771632109_2025200508_n.jpg.html
http://s1093.photobucket.com/user/edserb/media/10811537_10204544774352177_770168117_n.jpg.html
The stuff is easy to use, its two components mixed together in your hands and then can be applied to the damaged area, covering the screws.
http://s1093.photobucket.com/user/edserb/media/10815086_10204544790032569_1942538575_o.jpg.html
Later when it hardens it can be sanded into shape.
http://s1093.photobucket.com/user/edserb/media/10754821_10204544774752187_1862971013_n.jpg.html
http://s1093.photobucket.com/user/edserb/media/10819902_10204544942236374_948340119_o.jpg.html
http://s1093.photobucket.com/user/edserb/media/10816090_10204567943331387_1711402402_n.jpg.html
I attacked it with my Dremel and a sanding bit, and finished the sanding by hand. The result is quite flexible, though I'm not sure how strong it is as I didn't want to pull at it. I'll paint it and it should look ok.
http://s1093.photobucket.com/user/edserb/media/10822425_10204568167456990_1639554062_n.jpg.html
Posted by: Edser Dec 11, 2014 - 4:02 PM
Some pressies arrived today... Guess which one is for the car? 
http://s1093.photobucket.com/user/edserb/media/10855898_10204652829853497_755721380_o.jpg.html
Meanwhile I painted the SSIII splitters in work. Here's a pic of them painted black but without the clear topcoat.
http://s1093.photobucket.com/user/edserb/media/10839623_10204641614853129_1541673797_o.jpg.html
I also took some car pics
http://s1093.photobucket.com/user/edserb/media/10853756_10204641612093060_1045707467_o.jpg.html
http://s1093.photobucket.com/user/edserb/media/10860785_10204652748011451_759604914_o.jpg.html
http://s1093.photobucket.com/user/edserb/media/10854016_10204652747691443_767787773_o.jpg.html
http://s1093.photobucket.com/user/edserb/media/10864355_10204652742971325_1418488256_o.jpg.html
http://s1093.photobucket.com/user/edserb/media/10834569_10204652740091253_1471668938_o.jpg.html
http://s1093.photobucket.com/user/edserb/media/10854119_10204652736931174_1470428045_o.jpg.html
http://s1093.photobucket.com/user/edserb/media/10860426_10204652738051202_286808702_o.jpg.html
Posted by: Edser Dec 11, 2014 - 4:14 PM
Here's a pic of the fronts all nicely painted. They really attract fingerprints 
http://s1093.photobucket.com/user/edserb/media/10863480_10204653572352059_509717179_n.jpg.html
Posted by: Edser Dec 18, 2014 - 5:07 PM
I put on my rear JDM splitters, I hope to put the fronts on this weekend.
http://s1093.photobucket.com/user/edserb/media/10860699_10204664398822714_780282622_o.jpg.html
Posted by: 4-eyed-freek Dec 19, 2014 - 9:44 AM
Car looks great! Good progress so far!
Posted by: Edser Dec 21, 2014 - 9:56 AM
Thanks, it's been fun!
This week I have mostly been working on my Batman logo and my front SSIII splitters.
First up, the Batman logo:
http://s1093.photobucket.com/user/edserb/media/10853773_10204714135146091_1784231044_o.jpg.html
I drew this on the computer and cut it out of a piece of Solarcheck window film. I used the CO2 laser cutter in work.
http://s1093.photobucket.com/user/edserb/media/10876773_10204714147826408_857899277_o.jpg.html
These are the application tools I used. I didn't have a plastic spatula easy to hand so I used this soft flexible ruler. I cleaned the glass.
http://s1093.photobucket.com/user/edserb/media/10849635_10204714411753006_1647204085_o.jpg.html
I first positioned the Solarcheck using some tape, and then removed the plastic backing and liberally wet the Solarcheck and glass with some soapy water. (It looks like the logo is upside down because the boot was open).
Then I rubbed the Solarcheck with the ruler and removed all the water. The glass was a bit curved, so I had to cut the logo to make it fit as I had no way of plugging in a hairdryer in the street. There was a bit of wind that day which didn't help either.
http://s1093.photobucket.com/user/edserb/media/10878791_10204715902790281_504753582_o.jpg.html
http://s1093.photobucket.com/user/edserb/media/10377708_10204715902190266_1729710733_o.jpg.html
The logo is nice and transparent, but reflects the sun nicely. It can only be seen from certain angles.
http://s1093.photobucket.com/user/edserb/media/10878483_10204715903350295_1459981963_o.jpg.html
So then I put on the front SSIII splitters. They fit in nicely, I think they look great. This is a pic showing the GT splitters on the ground.
http://s1093.photobucket.com/user/edserb/media/10876778_10204715898230167_1840792544_o.jpg.html
There was much better light in this supermarket.
http://s1093.photobucket.com/user/edserb/media/10874020_10204715897230142_1370854685_o.jpg.html
http://s1093.photobucket.com/user/edserb/media/10853835_10204715896390121_1811730597_o.jpg.html
Posted by: Edser Dec 21, 2014 - 10:07 AM
This is my new car, well it's my girlfriends, but I'll get to drive it around at weekends. I can't wait!
http://s1093.photobucket.com/user/edserb/media/10834624_10204579301415332_1565939502_o.jpg.html
Posted by: Edser Dec 31, 2014 - 5:46 AM
Greetings! Some holiday pics!
http://s1093.photobucket.com/user/edserb/media/10856101_10204759745926332_358766248_o.jpg.html
http://s1093.photobucket.com/user/edserb/media/10860595_10204726740541218_1284463210_o.jpg.html
http://s1093.photobucket.com/user/edserb/media/10840150_10204726730660971_1419071304_o.jpg.html
http://s1093.photobucket.com/user/edserb/media/10884091_10204749798357649_60156275_o.jpg.html
http://s1093.photobucket.com/user/edserb/media/10878596_10204747396097594_1922347246_o.jpg.html
Posted by: enderswift Dec 31, 2014 - 8:31 AM
Interior shot please
Posted by: Edser Dec 31, 2014 - 12:36 PM
I'm afraid there's not much to see yet as the drivers seat I bought is broken and so I'm looking to get a '94 or '95 GT seat to replace it. The 1996 seats are different and so the leather can't be swapped over to my original seat. Also the seat belt fixings are different. I fitted the passenger seat and swapped over the seat belt parts, which don't fit very well, as they don't rotate slightly as they should.
I can't understand why Toyota would so completely change the seats while leaving them looking exactly the same. Every bolt and part on the '94 is different to the '96. At least the floor mounting positions are identical.
Also, I put a rear seat doggy cover on for the dog, so the rear seats can't be seen.
Posted by: Edser Jan 7, 2015 - 4:08 PM
The new subwoofer has arrived. Doesn't pack much of a punch but will give the system a more quality sound as the stock speakers make very little bass, mostly buzz. I'll uprate the speakers later.
http://s1093.photobucket.com/user/edserb/media/10918567_10204924899295063_1078180596_o.jpg.html
Posted by: Edser Jan 10, 2015 - 7:34 PM
Today I fitted the new subwoofer.
It's the Pioneer TS WX610A.
It's designed to fit into the spare wheel so as not to take up boot space.
It took me about 3 hours to install, however I didn't install the volume/gain control thingymebob as I haven't decided exactly where to put it. I just fed the wire under the backseat temporarily.
First I trial fitted the sub into the cavity in the spare wheel. The main problem here is that the wheel is facing upwards and when you face it downwards the wheel doesn't fully sit down on the floor, but sits a centimeter or 2 above due to the hump in the middle of the floor fixture. So I'll need to make some spacers. Temporarily I put the cars emergency triangles under the wheel to support it. I guess I'll make some blocks out of thick packing foam, but for the moment it'll do.The wheel does sit slightly higher now, but it is not noticable, especially since the carpet never fitted well before, so now it looks the same as always. I used the various adapters that came with the kit as the original attachment bar was a little short once the wheel was flipped.
http://s1093.photobucket.com/user/edserb/media/10923113_10204947884189671_1076529897_o.jpg.html
The wooden cover locks tightly over the wheel as before. I think I'll replace this with something better at a later stage.
http://s1093.photobucket.com/user/edserb/media/10913625_10204947882749635_685976341_n.jpg.html
Then I passed the yellow power cable through a hole in the bulkhead and under the skuff plates on the drivers side. Here I discovered a handy channel alongside all of the other cables. I then passed it under the edge of the rear door cards by the door pillar, and then under the rear seat and into the boot. In this way I didn't have to remove the interior panels. A big time saver.
I tied the yellow cable with cable ties in the engine bay, trying to keep it hidden as much as possible. This cable comes with a fuse already so its a very simple install. Just connect everything else and then this to the positive terminal at the end.
http://s1093.photobucket.com/user/edserb/media/10904316_10204947875629457_222470214_n.jpg.html
http://s1093.photobucket.com/user/edserb/media/10928020_10204947874429427_1446893784_n.jpg.html
Then I ran the RCA and blue ON/OFF wire along the passenger side, hiding it under the skuff plate in the existing channel. As on the other side, I removed the same corner panels under the dash and ran the wires under the glovebox.
http://s1093.photobucket.com/user/edserb/media/10927756_10204947873629407_433405820_o.jpg.html
http://s1093.photobucket.com/user/edserb/media/10899645_10204947871989366_1896487486_n.jpg.html
Then I whipped out the main console, and passed the RCAs through the dash and plugged them into the back of the cd player in the slots marked sub out. The blue control cable wasn't clear initially, but then I spotted it with a connector just like the one from the subwoofer. Easy!
So I popped the console back in and focused on the earth cable in the boot. I found two holes in the floor of the boot that had once held something... I dunno. So I cleaned up one and screwed the earth cable to it. All left to do was run the Volume /gain cable back under the rear seat. The Volume/gain controller is a nice piece of kit, with a little blue LED to tell you its on, and two nobs to adjust the bass to your preference.
http://s1093.photobucket.com/user/edserb/media/10923091_10204947871229347_1358916145_o.jpg.html
Then I finally connected the power cable to the positive terminal of the battery, and hey presto! A thumping loud stereo and totally hidden!
Looks like a normal boot, no big boxes, nothing, and the bass is really surprisingly loud! I think it's made me a bit more deaf. Still worth it though.
http://s1093.photobucket.com/user/edserb/media/10907200_10204947870349325_1201940984_o.jpg.html
Car is a really filthy inside. I have never cleaned it since I bought it 3 years ago. I may clean it one of these days. Maybe in the summer. 
Here's a video showing the system in action. The video quality sucks a bit as my memory card is very bad and causes errors, but the sound is pretty awesome I think. I'll be changing the head unit for a double DIN later and uprating the speakers and adding some tweeters too.
https://www.youtube.com/watch?v=8uiKbIVjnEo
I fixed the video. For some reason it was set to private. no clue why.
Posted by: Edser Jan 17, 2015 - 6:03 AM
Some more parts arrived this week. I'll put on the tweeters but I'm not sure as to whether I can connect them up to the cars system or not. If not then no problem as I'll get some new front speakers, tweeters and crossovers later.
Some rolls of sound dampening material too.
http://s1093.photobucket.com/user/edserb/media/10877677_10204995369536775_490985529_n.jpg.html
Also my LED dash lights arrived. Them only light the dash though, I wanna change the light of the console too.
http://s1093.photobucket.com/user/edserb/media/10934643_10204995369216767_1540022136_n.jpg.html
Posted by: Edser Jan 17, 2015 - 2:37 PM
I fitted the Dash LEDs. They are a little pink I think.They look pink in the photos but are redder in real life. I dunno. I like the effect though, and its a bit brighter than stock.
http://s1093.photobucket.com/user/edserb/media/10573756_10204996923615626_532417862_o.jpg.html
http://s1093.photobucket.com/user/edserb/media/10927410_10204996923975635_1362384693_o.jpg.html
http://s1093.photobucket.com/user/edserb/media/10936406_10204996924695653_2128267274_o.jpg.html
Posted by: Edser Jan 25, 2015 - 4:18 PM
Today I started fitting strip LEDs under the doors. Its a bit bright. Maybe too bright.
http://s1093.photobucket.com/user/edserb/media/10948082_10205049628493215_1599571489_o.jpg.html
http://s1093.photobucket.com/user/edserb/media/10876949_10205049626213158_1351844551_o.jpg.html
http://s1093.photobucket.com/user/edserb/media/10943581_10205049628933226_546029006_o.jpg.html
http://s1093.photobucket.com/user/edserb/media/10943491_10205049633333336_216602861_o.jpg.html
http://s1093.photobucket.com/user/edserb/media/10946163_10205049629653244_1259193086_o.jpg.html
This is what it looks like from the inside when a door is open somewhere. You can't actually see the strip, what you see in the photo is a reflection on the scuff panel.
http://s1093.photobucket.com/user/edserb/media/20141124_190034a.jpg.html
I'll be fitting some more red light in the footwells, and also I have been playing with the double Din radio and seeing how it fits. It's a very tight fit and theres no mounting brackets, so I'll have to fabricate something. I plugged in the 2DIN and played with the radio and the settings, connected the Bluetooth and was pleased to see that music on my phone comes out through the 2 DIN via Bluetooth. More on that later.
Posted by: Edser Jan 27, 2015 - 1:51 PM
I got my new re-upholstered leather steering wheel back from Tapicerias Meridiana today. I'm quite pleased with it. The finish looks pretty good, and the red stitching will look nice against the dark red interior. The only thing that annoys me is that now the airbag looks very shiny in comparison. Maybe the airbag can be treated in some way the make it more dull.
Anyone tried anything to make it less shiny?
I'll try and fit it one of these evenings.
I'll also make a vinyl badge for the center, or maybe buy one of those aftermarket TRD horns. I understand the badge on them fits mine.
http://s1093.photobucket.com/user/edserb/media/10955616_10205064003212574_1959228847_o.jpg.html
http://s1093.photobucket.com/user/edserb/media/10901676_10205064002572558_544265957_o.jpg.html
http://s1093.photobucket.com/user/edserb/media/10955610_10205064004452605_1663762601_o.jpg.html
http://s1093.photobucket.com/user/edserb/media/10944697_10205064000652510_848143586_o.jpg.html
Posted by: enderswift Jan 27, 2015 - 3:40 PM
Wow they did a great joB
Posted by: richee3 Jan 27, 2015 - 3:49 PM
The badge from the TRD horn button fits the 7gc wheel, but leaves a small gap around the edge of the TRD badge. I have a picture of it in the thread for my Supra.
Posted by: Edser Jan 27, 2015 - 4:53 PM
Cool thanks I'll have a look. I can make vinyl stickers in work as we have a sign cutting machine so I may do that. Not sure yet. Or I could make it out of Perspex as we have a CO2 laser machine too. Engraved and painted from behind with a polished front would look good. I only worry that a piece of 1mm perspex might be dangerous in a crash. I'd prefer a soft rubbery badge.
Posted by: Noahwhite2014 Jan 28, 2015 - 2:57 AM
To make the center of your steering wheel less shiny, hit it with dishwashing soap and water in a spray bottle about 5 times and dry with a paper towel between each wash, it'll dry it out the leather a lot (if it is leather... I'm not too sure, but its worked on other leather products I've done before. I did it to dull out leather of different ages and wear, and then you condition afterward at one time so the finish color, texture, and sheen is all the same  If the center isn't leather, I'm not sure if it'll work
Posted by: SwissFerdi Jan 28, 2015 - 10:39 AM
The tweeters can be spliced into your door speakers.
Posted by: Edser Jan 30, 2015 - 6:32 PM
If the center isn't leather, I'm not sure if it'll work No it's plastic, thanks anyway. I'm not sure if they cover those things with leather. I may try sanding the airbag with some micro fine sand paper sponge stuff, I think it's like a 1200 grade or so. That should make the plastic more matt. I'll test it on the old wheel as that's going in the bin anyway.
Hurrah!! This is great news!!! Thanks for that! Do you connect them directly into the + and - of the door speaker right? This will be very easy to do. I will be changing the speakers too at some stage. I discovered that one has been replaced already. Some time ago by the look of it too (its cheap looking and filthy).
Some more stuff arrived by post today. A nice chromed keyring and some carpet logos. The logos seem to be an aluminium alloy, so and quite soft and prone to scratches, so I dunno how long they'll last. I guess a careful sanding with make them look new again when they become old and tarnished. I don't have any carpets yet, so that's a future problem. My girlfriend refused to drive the car with the old ones in, so I had to remove them.
http://s1093.photobucket.com/user/edserb/media/20150130_163741.jpg.html
So today the news is that I fitted the 7th gen wheel.
http://s1093.photobucket.com/user/edserb/media/20150130_204806.jpg.html
I had a few problems installing it, amateurish stuff really. Couldn't get one of the airbag screws out of the old wheel. One came out fine with a flat screwdriver, the other bent the head of the screw driver. So I "borrowed" some heads from work. Those odd star shaped ones. Yeh, the medium sized one fitted and with a bit of elbow grease that stubborn screw came out. Then the airbag still didn't want to come off, until I completely removed the screws from the wheel.
The wheel came off easily using a tire iron and then a wheel puller I got from Ebay. I knew the size was a metric 19 or something (and there was no way a spanner could get the angle to get purchase on the nut) so I got a tire iron and it fitted the wheel nut. JOY! Off came the nut. The puller I had got was good too, it got tight and then just went "glock" and the wheel popped off. Nice.
The colour of the wires on the new airbag and the column matched (yellow and blue) so I soldered in the new connector to the old column wires and insulated the wires carefully. I then hooked up the horn connector too.
Once the battery was re-connected there was no explosion (I started the engine too) or SRS light (fortunately).
http://s1093.photobucket.com/user/edserb/media/20150130_204734.jpg.html
The photos are a bit crap to be honest, 'cos my car is underground and they don't believe in electricity there. So I tried different ways of lighting to get some photos. I'll try and get some in daylight, 'cos who doesn't enjoy a good photo right? The cars a mess inside I know, I'll be doing a bit of a tidy tomorrow as I still have to install the 2DIN. I have already made some brackets, just gotta make them fit right.
http://s1093.photobucket.com/user/edserb/media/20150130_205132.jpg.html
Posted by: Edser Feb 10, 2015 - 3:24 PM
Just a quick update. I made some mounting brackets and fitted a universal 2DIN cage. It took quite some time as I wanted it set in quite far so that I could have the face of the 2DIN behind the console and not protruding from it. The lining up and fitting of the brackets and the cage was very time consuming and annoying, but finally I got it more or less where I want it. So I plugged in the harness and connected the subwoofer. I didn't connect all the random wires (camera, lights, reversing light etc) as I had no time.
http://s1093.photobucket.com/user/edserb/media/10968785_10205159176551848_518261937_o.jpg.html
Later I discovered that the clock is defective, so I'll swap it for my original one. I'll also swap over the airvents as these ones are filthy and the ones I had before were clean.
I may wrap the console in a stainless steel vinyl wrap also.
Next up, connect the tweeters.
Posted by: mkernz22 Feb 10, 2015 - 3:32 PM
Looks nice!
How is the clock defective? If you unplug it, it resets.
Posted by: Edser Feb 10, 2015 - 4:42 PM
How is the clock defective? If you unplug it, it resets.
A few hours later it started showing 16:00 but with a backward 6, like a mirror image of a 6. Very odd, and some of the other parts of the numbers were slightly illuminated too - getting 8s all the time, so I'll just swap my old one in.
The Head unit is a very cheap Chinese one, and froze on me a few times. I'll get a better one at some stage. Meanwhile, I'm planning to make a fake double din front, so thieves don't try and steal my 90 euro DVD player. The worse the fake front looks the better, I'll try and find an old broken cassette player and use that as a cover.
Posted by: Edser Apr 19, 2015 - 3:49 PM
Just a quick update on m y new head head unit. I got an Android one now. It works great, unlike the last new one I got.
https://youtu.be/rZv-V7nLt4Y
Posted by: Edser May 18, 2015 - 6:14 PM
Just a quick update: I connected up the Celica Tweeters. As SwissFerdi said, well kind of.
http://s1093.photobucket.com/user/edserb/media/11116122_10205740159116049_1317469451_n.jpg.html
The connectors for the tweeters were already installed in the door! So all I had to do was unscrew the mirror screws, put on the the tweeters and plug the connectors in! No splicing needed! wooohoo! Sounds good too. Joy Joy!
http://s1093.photobucket.com/user/edserb/media/11165960_10205740156675988_445461538_n.jpg.html
http://s1093.photobucket.com/user/edserb/media/11178510_10205740154635937_966242176_n.jpg.html
This evening I also drew up some stuff with Autocad as I will be making some Horn badges, engraving some vent symbols on to my freshly painted dash parts, and I also drew the rear wing SSIII logo even though I don't have one...
If anyone wants these drawings send me a message and I'll email them to you. I have them in Autocad, and they can be opened by most programs like Corel Draw (which is what we use in work).
I have no clue what size the SSIII logo should be. Anyone know? I traced them all using photos (including a ruler for the vent symbols), but have no clue of the SSIII size and I think the horn badge for a 7th gen is 30mm or so. I'll check my horn.
I hope to make some snazzy new badges for my horn with the CO2 laser soon.
By the way in the vent symbol I drew a Celica shape instead of a generic car shape. Line thicknesses will need to be changed, a bit of trial and error before any engraving, but for vinyl cutting no mods needed. If you can find a sign cutter or a company with a laser cutter and someone with experience with engraving, then there should be no problem in making some nice stuff.
http://s1093.photobucket.com/user/edserb/media/SSIIIa.jpg.html
http://s1093.photobucket.com/user/edserb/media/vent%20symbols.jpg.html
http://s1093.photobucket.com/user/edserb/media/horn%20badge.jpg.html
Posted by: Edser May 18, 2015 - 7:40 PM
Otherwise, best o' luck.
Thanks for the offer but I'm not gonna part with them until I have some SSIII splitters. Watch this space (although there's no hurry).
I now have the SSIII splitters fitted, and have the Euro splitters lying wrapped up in a box waiting. I won't part with them until the SSIIIs pass the car test next year.
Posted by: Edser May 26, 2015 - 7:22 AM
I finally got around to painting my console again. I put a thick coat of 2 component primer on and sanded it smooth, and then some silver paint. Well, its more of a grey silver as I didn't want anything too bright. I may put a 2 component clear varnish on top, but I'm not sure. It will make it more durable and shiny, but it might start to have fine cracks as the previous varnish had. I'm going to engrave the symbols on the airvents using the laser machine.
http://s1093.photobucket.com/user/edserb/media/11347488_10205931883429037_233772643_o.jpg.html
http://s1093.photobucket.com/user/edserb/media/11333246_10205931973711294_1343395343_o.jpg.html
Posted by: malpaso May 26, 2015 - 7:48 AM
three years I ignored this thread... What a mistake. Now I see real enthusiasts are still around . Great progress and perfect taste
Posted by: Edser Jun 6, 2015 - 12:23 PM
This week some goodies arrived. Got some leather For the handbrake and the central armrest. I got them on Ebay from Topgaiters, a UK base firm that does some nice stuff for 6gens. Theres no import charges to Spain and fast delivery so its great.
http://s1093.photobucket.com/user/edserb/media/11328097_10206031864288496_2057388458_o.jpg.html
http://s1093.photobucket.com/user/edserb/media/11332591_10206031863728482_155795065_o.jpg.html
http://s1093.photobucket.com/user/edserb/media/11335713_10206031627362573_1079628440_o.jpg.html
http://s1093.photobucket.com/user/edserb/media/11422355_10206031625402524_943930145_o.jpg.html
I decided to cover the original armrest with the new leather and keep the dark red one.
http://s1093.photobucket.com/user/edserb/media/11422406_10206031961650930_1063777245_o.jpg.html
I got a Sony RM-X4S to hook up to my Android head unit too. I'll do that next week.
http://s1093.photobucket.com/user/edserb/media/11304473_10206031626602554_1132576579_n.jpg.html
I prized off the 7gen airbag badge. It is very flimsy. Its just like a pin badge but without any rear support and so bends super easy. No prob as I'm making my own badge shortly. It's 40mm in diameter.
http://s1093.photobucket.com/user/edserb/media/11426126_10206031657523327_390601076_o.jpg.html
http://s1093.photobucket.com/user/edserb/media/11420108_10206031648523102_878930276_o.jpg.html
Posted by: Edser Jun 9, 2015 - 2:31 PM
I finally engraved my console icons with the laser. I think it looks good but the central console has one of the icons slightly off center. I guess I must have drawn it that way. I didn't have time to change it. A shame really.
http://s1093.photobucket.com/user/edserb/media/11416758_10206057693854219_1859950199_o.jpg.html
http://s1093.photobucket.com/user/edserb/media/11262831_10206057694374232_172211805_o.jpg.html
Posted by: Tigawoods Jun 9, 2015 - 2:34 PM
NIIIIIICCCEE!!
the engravings look great
Posted by: cheela Jun 10, 2015 - 7:46 AM
that's a great idea. nice!
Posted by: Liam_c Jun 11, 2015 - 9:35 PM
[quote name='Edser' date='Jul 8, 2012 - 5:07 PM' post='974312']
^ Mine has dents exactly identical to this.... Same guard too... Weird
Posted by: Edser Jun 23, 2015 - 1:15 PM
Thanks for the comments guys!
Some more goodies arrived this week. 2 LED boards for the dome light, and a USB and audio input for the cigarette lighter.
I won't start smoking and my head unit has a GPS built in, so no need for that lighter socket. USB much more useful.
http://s1093.photobucket.com/user/edserb/media/11638883_10206178935405182_1491374445_o.jpg.html
Posted by: Edser Jun 26, 2015 - 4:01 PM
Today I put my console back together. I also wired up my Sony RMx4s and was disappointed as it wouldn't control the head unit properly. Only the seek up and down switches worked. I programed them as volume up and down, but it was disappointing that no other button would work with the Android head unit. I looked around online and it may need an extra resistor.
I also plugged in the USB in the cigarette lighter socket place, and was disappointed when the USB thumb drive I was using had a bad connection and the music would skip or the drive would disconnect completely. Just not my day.
http://s1093.photobucket.com/user/edserb/media/11642002_10206206527134958_1312597262_o.jpg.html
Posted by: Edser Sep 8, 2016 - 5:07 PM
Well good news, after 8 months off the road I finally sent her for the Spanish ITV (national car test). She failed of course, emisions and whatnot, blah blah, but I hadn't driven her for 8 months, so the battery died a death and was not recoverable despite being new 2 years ago. Well, the good news is that my TRD splitters passed the test no problem, despite the fact that the rears weren't really glued on well. So my 2 original EURO GT splitters are sitting in a box in the spare room doing nothing. Gathering dust I suppose. If anyone wants them, I'll find out how much postage cost to werever you are is and post them to you. I don't want profit. I love these vehicles. First come first serve....
I've found that sending them to the US is horrifically expensive - about 120euros. Kinda ridiculous really. I'd reccomend Europe only.
http://s1093.photobucket.com/user/edserb/media/20160915_222558.jpg.html
http://s1093.photobucket.com/user/edserb/media/20160915_222545.jpg.html
http://s1093.photobucket.com/user/edserb/media/20160915_222540.jpg.html
http://s1093.photobucket.com/user/edserb/media/20160915_222532.jpg.html
http://s1093.photobucket.com/user/edserb/media/20160915_222459.jpg.html
http://s1093.photobucket.com/user/edserb/media/20160915_222434.jpg.html
Posted by: Edser Jan 5, 2019 - 1:09 PM
Update: I got a job driving for Cabify (which is like Uber) so I needed a parking space so I could go home for lunch and have a place to park the KIA Optima. So I parked my Celica in my in-laws house 200 miles away. They haven't complained yet, so all is good. One day I'll get Celi back on the road. I miss it.
Posted by: SwissFerdi Jan 5, 2019 - 9:13 PM
You did a lot of nice mods that I never saw. Good stuff.
Posted by: Edser Jul 21, 2022 - 5:51 PM
Its been a few years, but the Celica is still Hibernating. One of these years I'll get her out, put some new tires on her and get her road worthy.
Maybe next year? Here's hoping.
Powered by Invision Power Board (http://www.invisionboard.com)
© Invision Power Services (http://www.invisionpower.com)