Printable Version of Topic
Click here to view this topic in its original format
6G Celicas Forums _ My Project _ Rave's Next Progression Thread
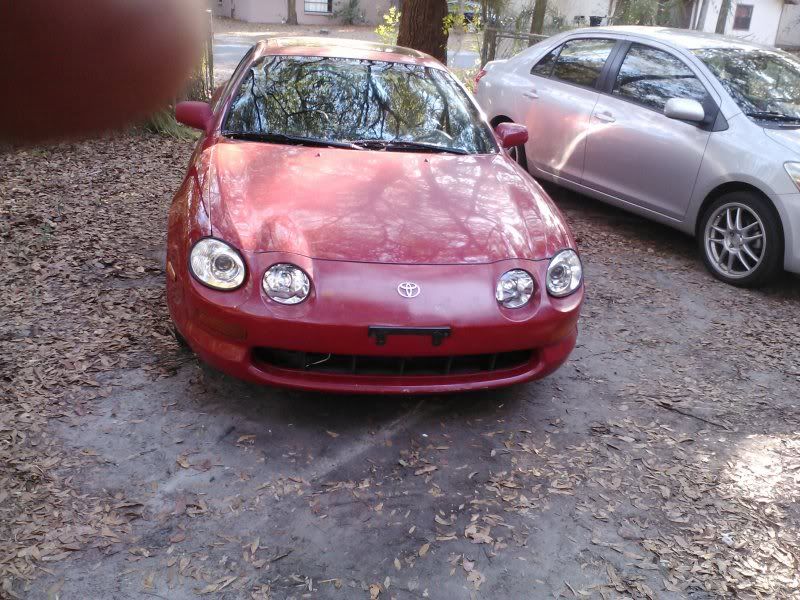
Posted by: rave2n Jan 12, 2012 - 2:24 PM
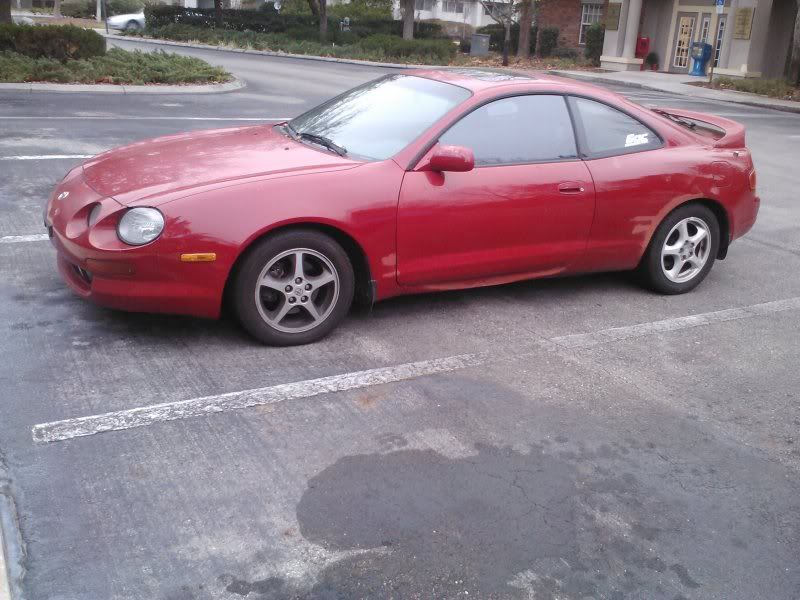
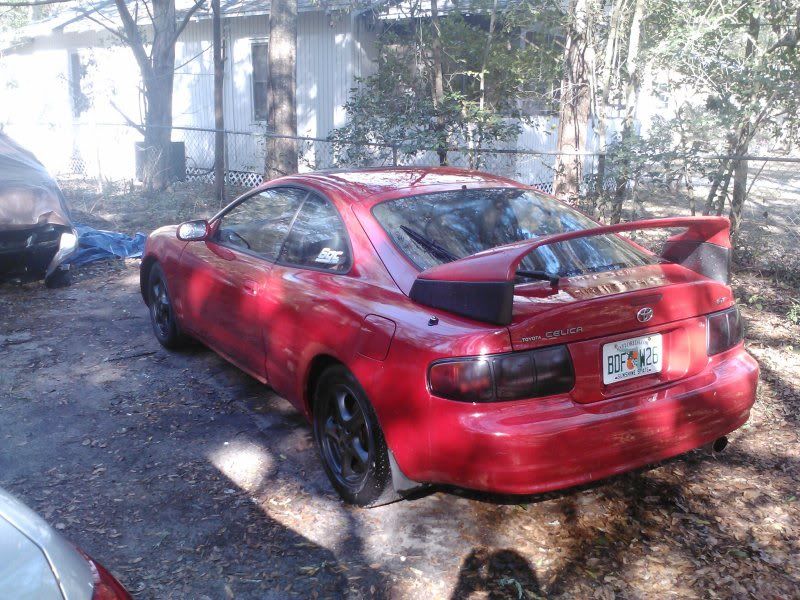
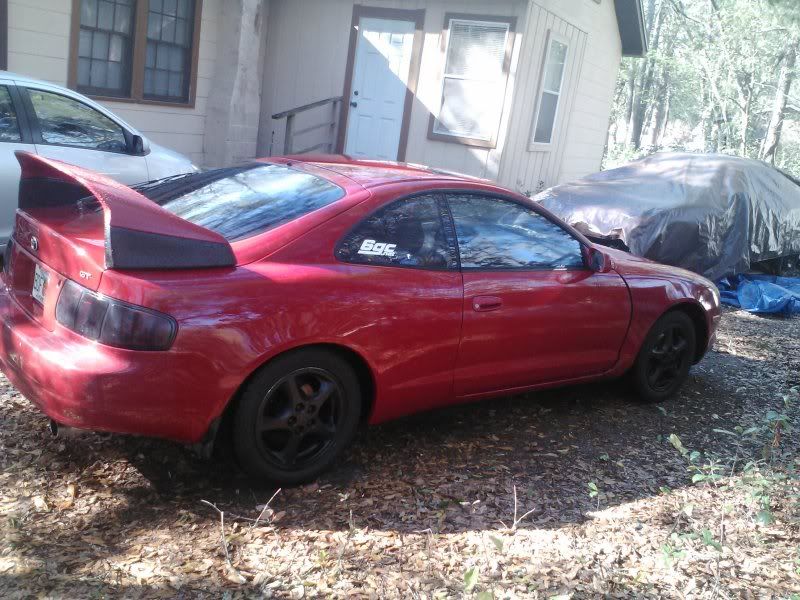
To properly start a new progress thread, the new vehicle must be shown. So here we go.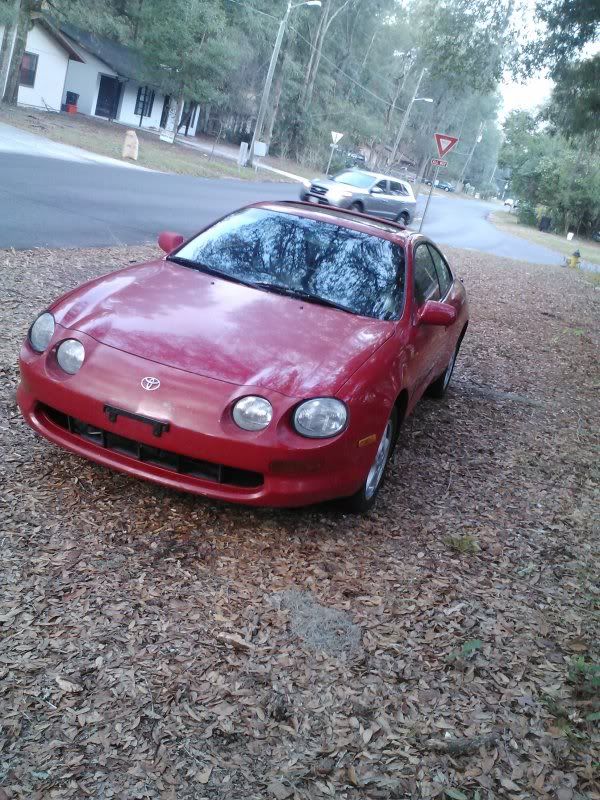
Now that is complete, we move on to this weekends fun.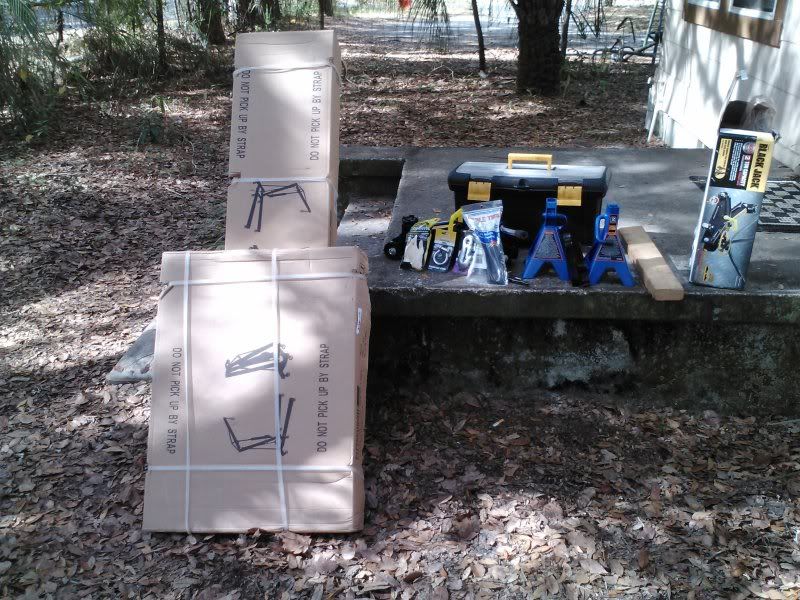
Majority of items needed to accomplish the clutch change.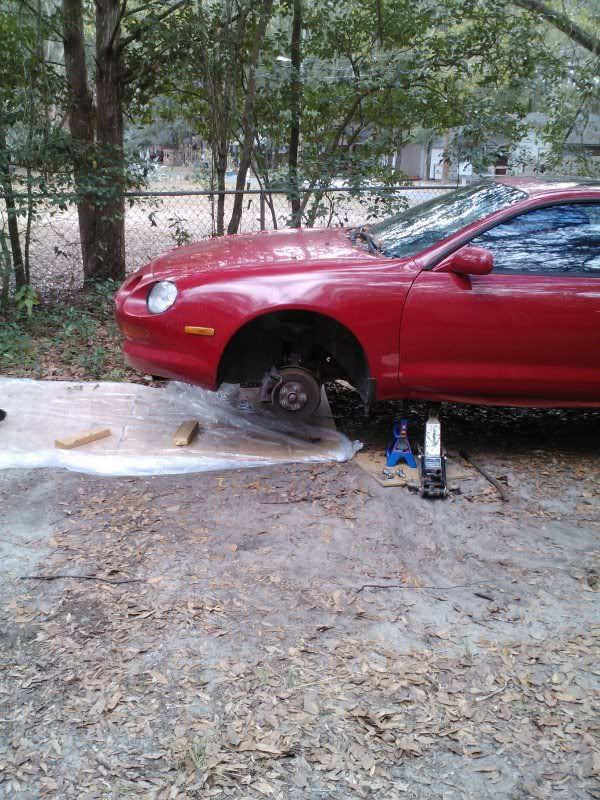
Prepped work area.
Should be an eventful weekend.
Plans for this weekend: (Let see how many I actully complete)
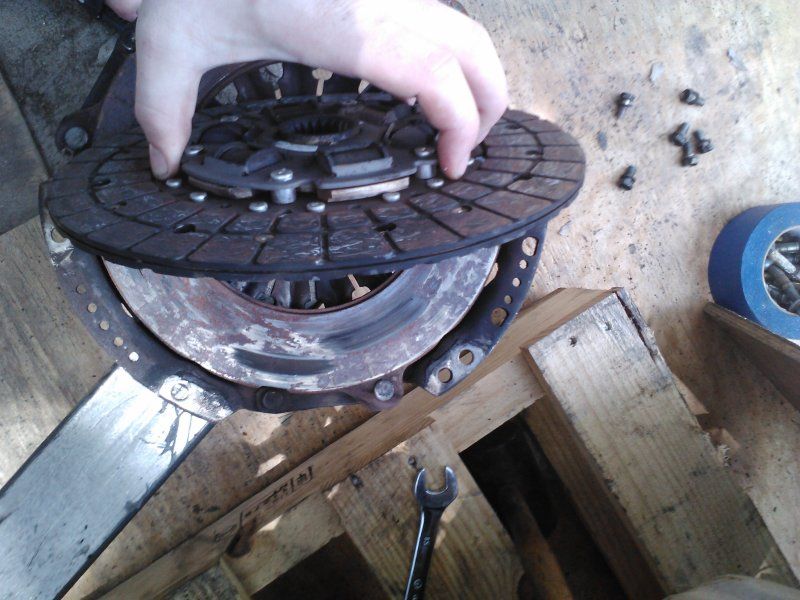
Clutch
swap over riser blocks
swap over rear ssIII splitters
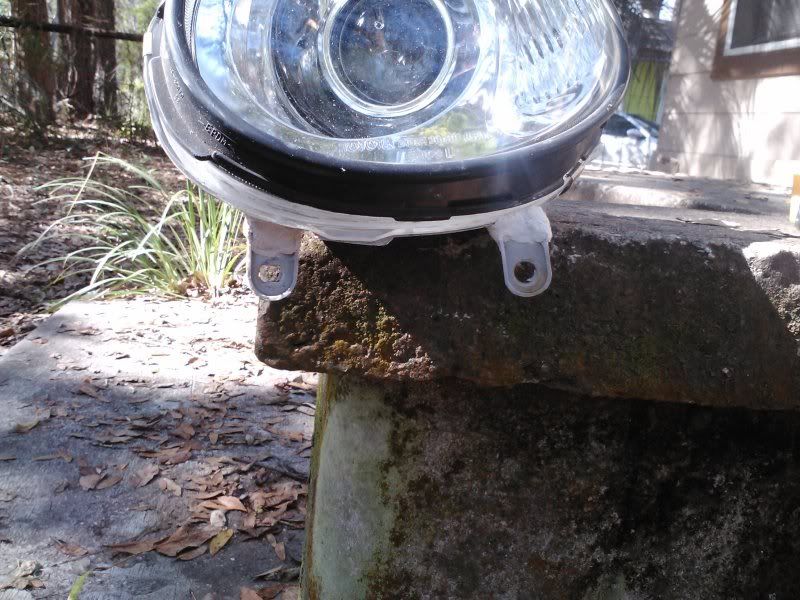
swap over highs and projectors ( Remove OEM casing from light, and apply to projector broken casing) Covert connectors.
install headunit with proper facekit
wire in amp, and subs.
remove rear seats
Thats a hefty list, but I think I can do it. I'll damn well try. Hoping the locals have their earplugs ready.
Any of you Floridians want to come to Gainesville? I'll supply beer, pizza, and California type headache relief 
Posted by: kurt95gt Jan 12, 2012 - 2:45 PM
Only if i lived in fl
Posted by: enderswift Jan 12, 2012 - 3:40 PM
I look forward to this thread
Posted by: Keiri Jan 12, 2012 - 4:08 PM

Nice pickup Rave and I'm with ender - I look forward to this thread's progress.
PS: Welcome to Club 3L2!
Posted by: rave2n Jan 12, 2012 - 4:33 PM

Nice pickup Rave and I'm with ender - I look forward to this thread's progress.
PS: Welcome to Club 3L2!
Thanks guys!
I'm going to do the best I can to take a bunch of pics during. I tend to forget as I get consumed at the job(s) at hand.
Going to start tearing her down tomorrow afternoon, today was just prep, and getting everything to get the job started. The box with all the ordered items should arrive Saturday. So with luck, I should be able to start putting on new parts Saturday, and button her up Sunday.
Posted by: mak5603 Jan 13, 2012 - 2:28 PM
Good luck on the new project! I think you could finish it all this weekend, at least the major stuff, will be a nice bonding time for you and the new car.
If i was in florida all 3 of those sound nice, id be down to help.
Posted by: SwissFerdi Jan 13, 2012 - 5:15 PM
Seeing as you're actually not very far from me, I may take up you up on that. You had me at Cali relief.
I won't have time this weekend, but if you're still wrenching next week I won't mind popping over to help out.
Posted by: rave2n Jan 13, 2012 - 5:50 PM
I won't have time this weekend, but if you're still wrenching next week I won't mind popping over to help out.
Hah sounds good! Clutch is the major this weekend, but I have plenty of suspension to do next weekend!
Posted by: SwissFerdi Jan 13, 2012 - 6:08 PM
Oh yes. I'm down. Tuesdays and thursdays are reserved for school, but otherwise my schedule is open.
Posted by: rave2n Jan 14, 2012 - 5:37 PM
So a day of progress, but per usual I can't get to the final step because the rear mount is being a pain in my ass. Can't get the engine to rotate the direction I need, not sure why, nor can I find my deepwell 14mm to remove the trannie mount. Doesn't appear you can remove the mount from the block as simple with the ST. So, after a good 10 hours today...I'm done til tomorrow.
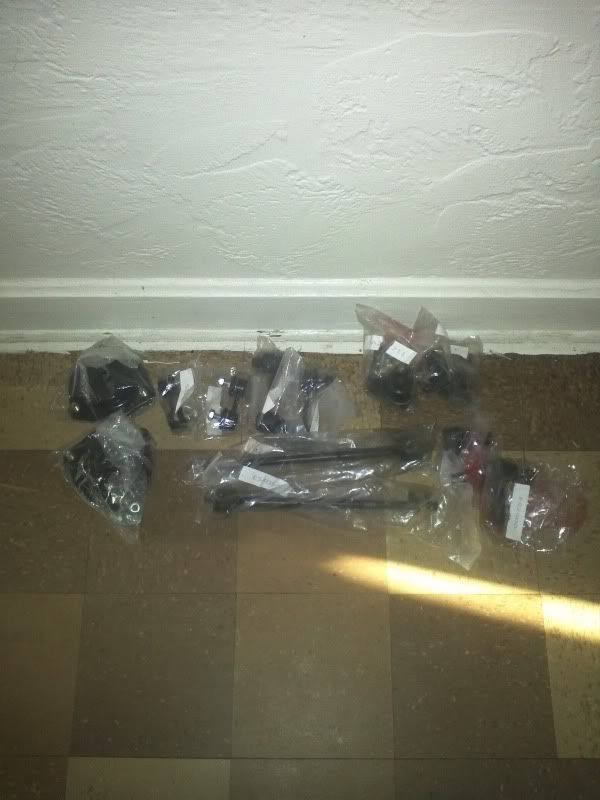
I did manage to pick up some goodies. All for 115 bucks. Was a gent that had children and had to rid of his Celica. Go Go craigslist for an amazing deal.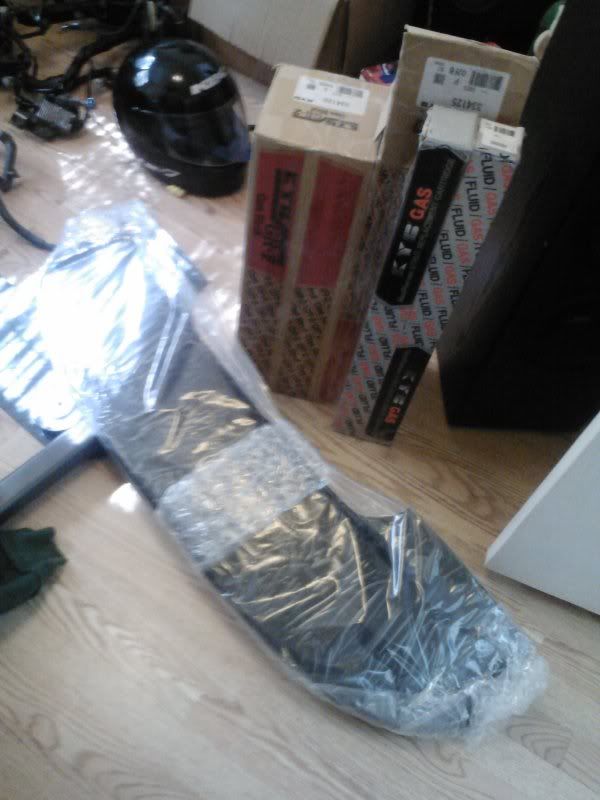
Posted by: cheela Jan 14, 2012 - 5:42 PM
WOW, that's like the price of ONE of those items you have there. very nice deal! 
glad to see you back in the game too.
Posted by: rave2n Jan 14, 2012 - 5:46 PM
glad to see you back in the game too.
Yea I was surprised when he took my offer. I originally thought he was just giving me the 2 front inserts, but when he pulled out all four I quickly handed him the funds =)
Glad to be back!
Posted by: dakotahwyatt Jan 14, 2012 - 9:05 PM
I'll giveya 120 and a six pack and 2 pizza and call it a deal?
Posted by: rave2n Jan 15, 2012 - 4:10 PM
Aw man has it been a busy day. 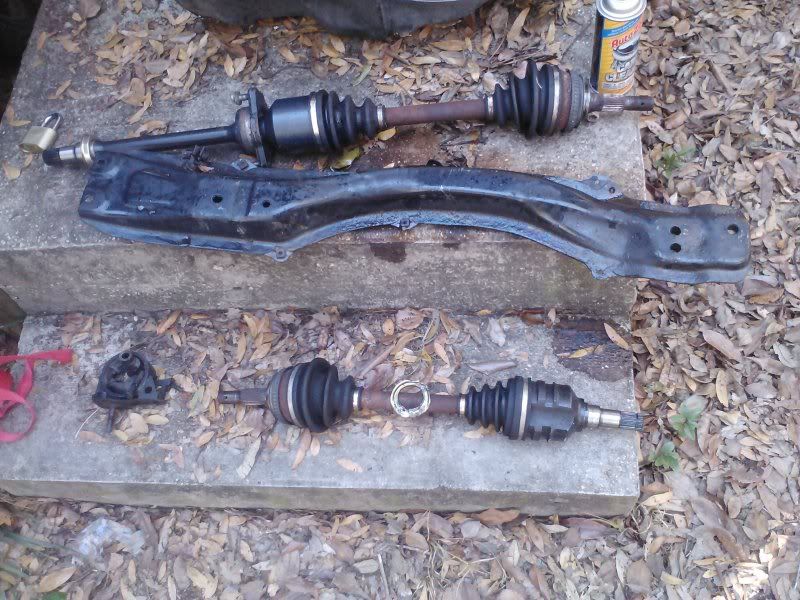
All right, I need to say something here to. There are million ways I've read to get that rear mount, most circulate around "rotate the engine." I'd like the give the trophy to if I recall correctly to TRDproven for coming up with the idea to just lower the suspension crossmember. Simply loosen up the 8 or so large bolts that hold the frame, and bam you can unbolt the mount from the member, as well the bolt through the mount itself, lift it up. take member out, then simply turn the mount right out. I had a epic battle with this thing til I quit yesterday. 20 mins of "rotating" , I tried that and it was out in 5 mins.
I'm even guilty in a recent thread informing someone to remove the bracket from the block whoops.
As another thing I've learned today. DO NOT TENSION THE AXLE if you are trying to pop it out. See that dust shield, thats from me getting frustrated using the "tension" method I read as well. I even tried from the other side to tap the shaft, stupid I know. Didn't do it but a few and said to myself bad idea.
In the end, I just tied the axle up with some metal wire, got a proper pry bar after a trip to the store, and one simple push with the prybar and my foot, with no tension. Was out so easy. 3 hours today on that...what a waste, but its out now! Now I have to determine if I can find a replacement dustshield, the axle itself is fine.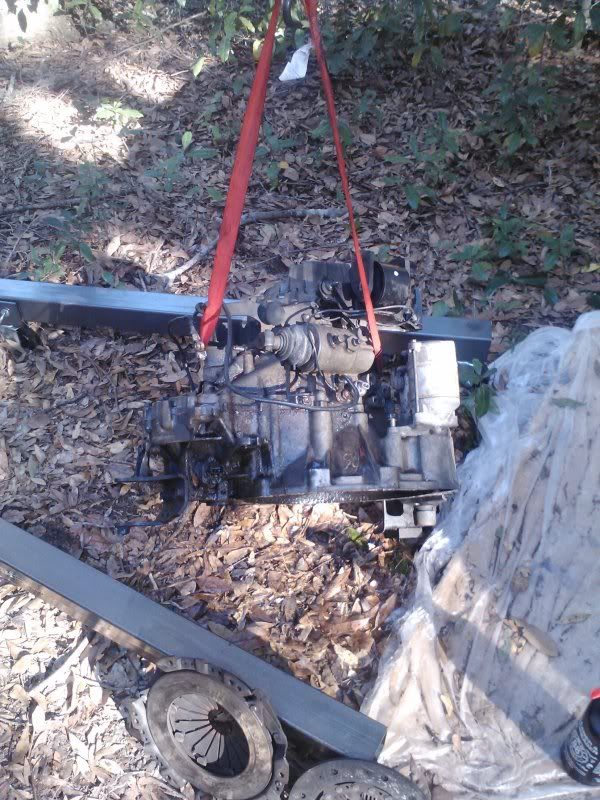
Took me some time to find all the hidden bolts and angles to remove, but she is finally out.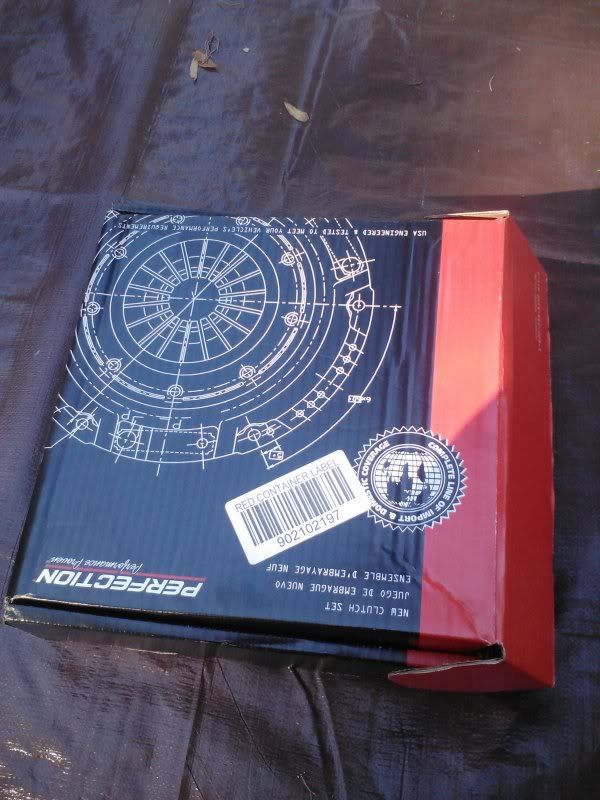
Cheapie to get me to the 3sgte.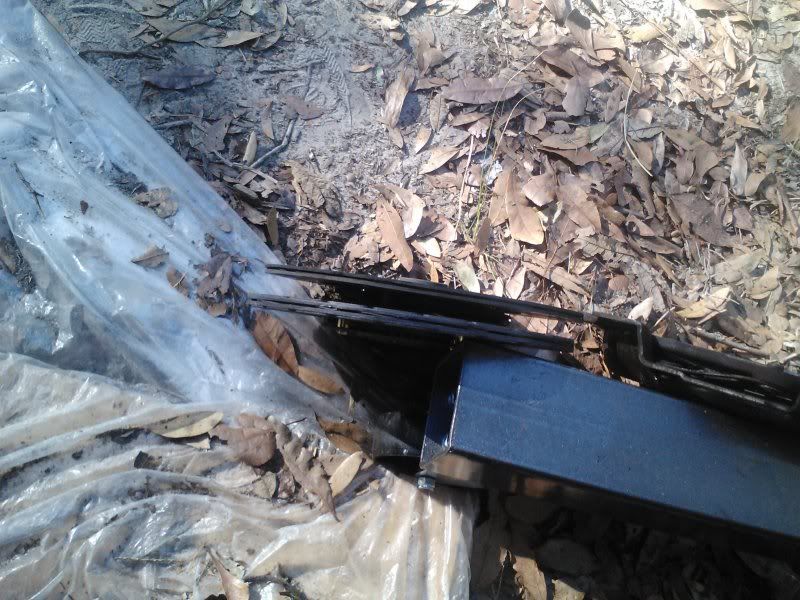
Old vs. new - Studs didn't grind into the flywheel, just a slight sand, and clean up. Another "it'll do" til the swap.
The didn't grind the flywheel mainly because the clutch fluid was horribly low, and air in the line when I got her. So it might have been a small blessing.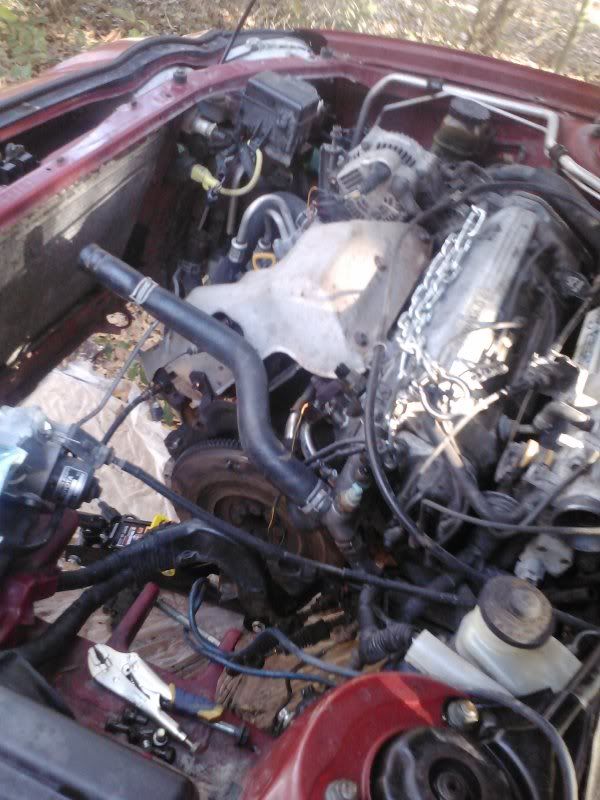
The hole! - Just a tip for any concerned, don't skip anything. Nor think this is a quick easy job because you've seen a howto with 8 steps....like my dumbass.
Remove everything in the way! Its alot, i've taken alot of pictures and may use them to create a howto later on, in some detail.
Oh yea, broke my slave cylinder rubber line. Was old and cracked when I zipped tied it to the harness...lol it was meant to save it from harm, not destroy it!.
Well now i'm sore as hell, but semi-content on progress, put it all back together tomorrow, and wait on further parts.
Posted by: rave2n Jan 16, 2012 - 6:47 PM
Well, a total of 30 hours and it pulls good. The clutch pedal feels really weak though, I don't know if that is an issue, being the clutch works fine, though I didn't drop it or anything being brand new. Not sure if I'm used to how the ST was, which my leg get tired in traffic, but this one just slams down. I might need to bleed the line some more maybe. I patched the crack in the line with some tegflex, or whatever its called. Rubber wrap, great stuff! New line on order. Thinking of stealing the STs
Either or, I didn't get half my list done, but I'm happy with the progress. No power tools, had to assemble a hoist, and first time with running solo, like someone with some mechanical skills =P
Still got alot to do. Idles bad when cold, and has a vacuum leak I need to find out. Alot of hoses look bad, and cracked. Got some grinding, sounds like dust shields hitting the rotors, or just horrible breaks...hopefully not my ghetto rigged dust shield, but thats a easy fix nowadays! Those to be done next weekend with the suspension overhaul of Eibach Sportlines transferred and the new GR2's to slap on..so it'll be some tinkering time soon enough. Hopefully get some of the other list items done during the week. Cosmetics, and getting her registered and insured for the road.
Ibprohen time!
Posted by: enderswift Jan 18, 2012 - 11:18 PM
good job dude. Glad to see members sticking with celi's instead of moving on.
Its amazing how the smallest stuff will consume all your time right? I basically double my time estimates these days because everything always takes longer than planned haha
Posted by: bsamps4 Jan 18, 2012 - 11:48 PM
What are you plans for this car?
Posted by: rave2n Jan 19, 2012 - 11:07 AM
Its amazing how the smallest stuff will consume all your time right? I basically double my time estimates these days because everything always takes longer than planned haha
Lol, I'm sticking with the Celica until I can't get simple parts for it at an auto store. Hopefully by that point my wrecking days will be over, and I finally got one completed to my standard and can garage it.
Definately, I swore the clutch wouldn't take me that long, but it sure did! - i'll have to start doing that with my time frames as well =P
Already have 3sgte for it, once I get it stable in driving sense..breaks, suspension, tires etc etc. My focus will shift back to the 3s and getting all the seals and such done. Cleaning up the whole bay and dropping her in.
Exterior going to stick with the ssIII splitters front and back, as well the gt-four raiser blocks. Still looking for skirts, but funds are not in the right place right now to pick some up. Projectors will also be swapped over from the wrecked ST.
I got a lot of work ahead, and hit one hell of a bump in the road. Thanks to the wonderful state of Florida. Went to get everything legal today, and I had no idea, but because I don't have an existing FL plate, there are some extra fees in the excess of 300 dollars. On top of the already insured 550 premium insurance that was paid, and DL fees rounding up to 150. Lets throw the clutch and others items this past week, excluding the car price, I've spent 1200+ and they still want more.
Basically as it looks right now, I won't be driving her til the next 15th paycheck...which really sucks some ass considering everything I went through to get her road ready today. So...now i just nit pick at items, and transfer what I can from the old one while I stick my middle finger in the air to responsiblity, but humbly wait until its all legal.
Edit: Funding solution solved for the time being, hope to have her legal tomorrow.
Posted by: rave2n Jan 20, 2012 - 5:48 PM
Little progress today, but it surely needed it.
New front pads, old ones were shot and making some mean noise. Still have to do backs, but all in good time.
Some bad connections to be fixed, and replaced.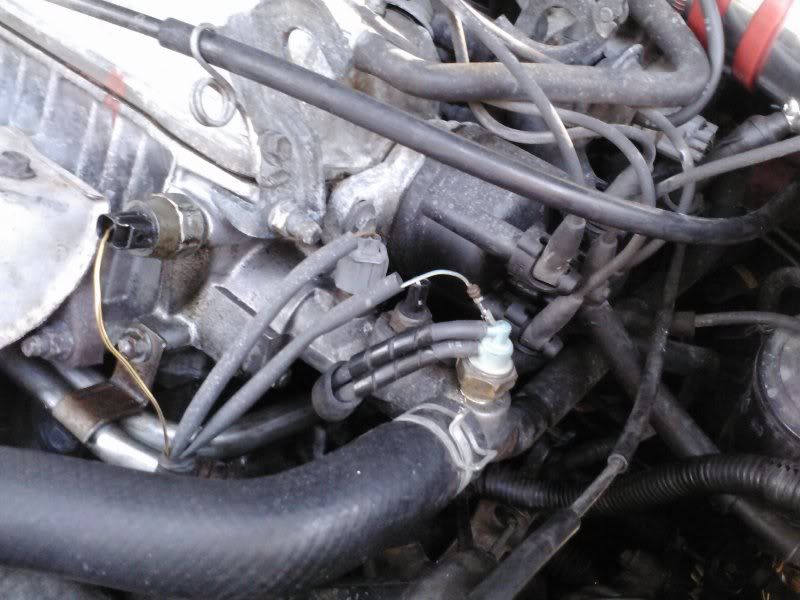

And of course, removal of such ugly decals, and apply the proper one.

Replaced the slave cynlinder as well, just waiting on the lady to get home to help me bleed it.
Possibly take her for a spin this evening, suspension tomorrow if time permits.
Posted by: njccmd2002 Jan 20, 2012 - 10:37 PM
glad to see someone loving to work on the car
Posted by: rave2n Jan 23, 2012 - 8:13 AM
Well she did fine on her first day to work. Though only a short drive, it gives me plenty of insight on what needs attention.
After the new struts and springs, going to need a good front end alignment. Came apparent after the steering wheel being way off.
Got a grind in 3rd at high RPMs, so granny shifting for right now. Not sure of the cause, be it trans or just the fluid I used. I did not go all out with the synchromesh being I wasn't sure if the tranny itself would be leaking from my tamperings. Its not leaking, but now I'm not sure if the 90w-140 or whatever it was generic jazz is causing that grind. Don't really like the feel of the s54 either, when you shift into the gear it doesn't feel solid like the ST's trannie did. When you hit the gas, the shifter moves back about 1 inch aggressivly, almost like its going to pop out of gear, but doesn't . Stays in just fine. Possibly streched cables?
Tried to repair the clutch rubber line from the firewall to the trannie hardline. Couldn't get the wallside connection off. felt like I was going to break the hard like. So I applied further patch to the rubber line, but that was no dice. Still leaking, but the cluch is working still. So I'm pondering on that one.
AC compressor is sqeaking like crazy, going to be in the market for one of those soon. Some good work done this weekend, much more to go, but I'm determined to get her up to par.
Edit: Oh yea, new brakes all round =P damn did it need'em.
Posted by: JasonTX Jan 23, 2012 - 12:53 PM
Replaced the slave cynlinder as well, just waiting on the lady to get home to help me bleed it.
Possibly take her for a spin this evening, suspension tomorrow if time permits.
glad to see em on. cars comming along good congrats on getting it on the road
peace
-jec
Posted by: rave2n Jan 25, 2012 - 7:43 AM
Day 3 on the road has yielded some insight on further issues. Thankfully I never got to hooking up my audio system, so I get to hear all the little noises this car is making.
The sqeeking for one is making it difficult to hear other things, but that I'm even questioning if it is the AC compressor, but being that is not working a replacement is otw. I'm thinking it is more the power steering pump, or something in that area. Hopefully not anything under the timing cover. Would not like to pull the engine so soon after a clutch job, but must be done will be done.
The clutch is still weak as can be, but the fork moves a good 2-3 inches and the clutch engages fine. Even have good slip/grip ratio. Not sure hwo to explain that further....either or, I hear a whurrrring noise when I would let go of the clutch. It would appear to be coming from the master cylinder. IIRC, the ST and GT master are the same, so I'll be looking to swap that out shortly. The line is still not replaced, but its holding enough. Been blasting that connection with PB blaster each day, hopefully by this weekend it'll come off like butter and I can move forward.
Also have a...clunk might be a good way to describe it. Basically whenever the engine moves a good bit, hard shifts and such. It sounds to be more like a loose mount, then something in the trannie, or engine. Another item to investigate. I probally didn't tighten one up all the way...happens.
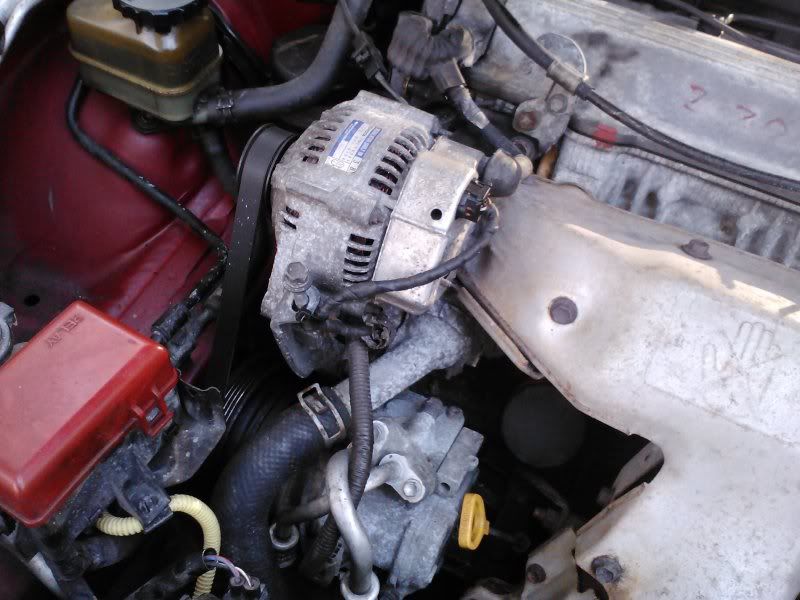
battery light won't shut off, even after swapping a new battery in, but the wires attached to teh alt are quite damaged. Will have to replace those soon, and test the alt out.
All in all, she is holding power well...some more tinkering and she'll be fine.
Anyone else feel odd in a replacement Celica? Just doesn't feel like the old one...comfort wise. Happy with the purchase, just feels weird 
Posted by: kurt95gt Jan 25, 2012 - 11:34 AM
It is an odd feeling
I felt kinda wierd at first when i got my coupe but i just thought tgat was because i hadnt had a celi 4 years
But i get a really funny feeling being in the hatch i just bought for the swap an it looks just like my first 94 st
Posted by: rave2n Jan 27, 2012 - 8:38 AM
I felt kinda wierd at first when i got my coupe but i just thought tgat was because i hadnt had a celi 4 years
But i get a really funny feeling being in the hatch i just bought for the swap an it looks just like my first 94 st
Lol you got your hands full thats for sure! =)
--
Did some more tinkering. Finally got the clutch rubber line replaced. Took 3 days of soaking PB blaster and one really hard crank to get it off, but finally did.
Clutch still feels to weak, but atleast thats one less thing to add to the mix. Just a FYI, the ST clutch cable will work, its just slightly longer. About 1 inch.
Going to replace the master cylinder tomorrow, and see if it'll stiffing up the pedal. I've bled it 8 times now, and new slave, so only the master is left.
Well I decided something was wrong with the s54, no reason for the grind into 3rd or the whurring noise when clutch disengaged. I go back to the auto store and ask the guy to look up the trannie gear oil again. He instantly says "oh man, I think I told you the wrong stuff" - He sold me 90w-140...I said thats high, and he went into a story about his car, and never got around to looking again. Technically I should have known better, but was a waste of dough.
Drained the syhcromesh out the ST and put it in the GT, its only a year old, and looked quite new. No need to waste IMO. No more grind in 3rd, and shifts like butter. So one thing situated, few more to go.
Posted by: rave2n Jan 29, 2012 - 5:08 PM
Well, had a little fun today.
Changed out the clutch master cylinder with the from the ST, feels so much better. Feels like control, instead of slamming down. Guess it was leaking inside.
Changed a few hoses out but continue to have a vacuum leak type idle. Starting to think the intake manifold is the culprit. I hear hissing in such direction.
Well to the picture worthy items.
Projector tap repairs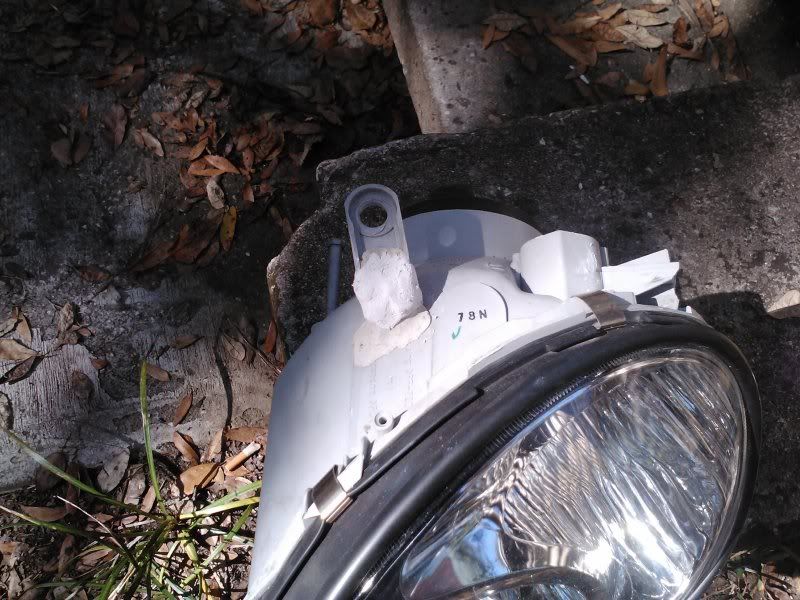
No point throwing them out, with a 5 dollar repair. Aquameld, wonderful fiberglass putty. Last patch lasted until someone hit me again =P 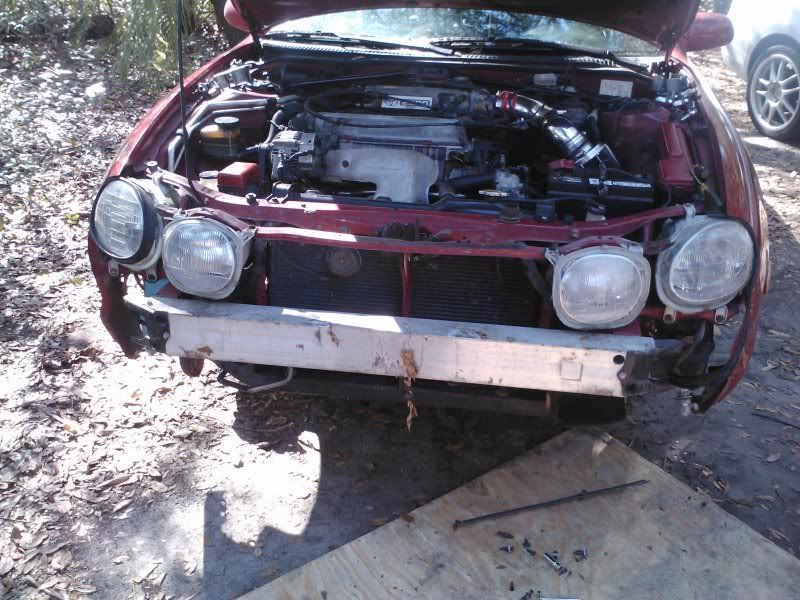
Did a little repair on the alt. connector. previous wires were frayed and casing falling off. Stole the STs, and made a new one.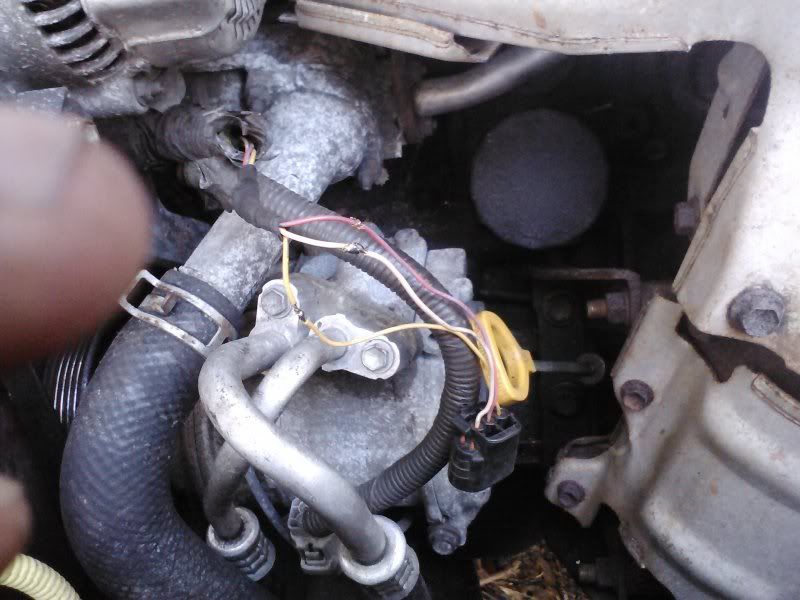
Didn't have any heat resistant shrink, or anything open on sunday with such. So simple wrapped it up nice.
Took a crack at the audio, but it looks like a 10 year with a liking for electrical tape went to town. Tore the obvious bad out, and will have to clean it all up another time.
Posted by: bsamps4 Jan 29, 2012 - 5:54 PM
Winning!
Posted by: rave2n Feb 2, 2012 - 2:40 PM
Got the audio wired up yesterday.
Was quite fun...sarcasim.
This GT has the factory amp, so per normal I had to rip out the blue connector from under the amp, and splice in my connections using the toyota default color code. Yes I'm a cheap ass that won't pay for the connector when I already have wire strippers and crimps.
Had to pull out probally 14 bad connections put together with electrical tap on stripped back wire wrapped. Stupid.....
Rears do not work, but I assume that is because, just like the fronts, someone cut the factory wires and ran home audio speaker wire. 
Even if that is not case, no biggie, as they will eventually be mid range subs...I just wanted some noise, instead of engine noise when driving.
Funny enough, the wreck blew one of my subs. Had to rip the center piece off because it was taping like crazy with the bass hitting. Will have to invest in some new ones sometime in the far future. For now, they shake my license plate, and piss off people blasting rap. All I want..for now =)
Posted by: rave2n Feb 21, 2012 - 11:20 AM
Rims painted with Plastidip, and new front calipers.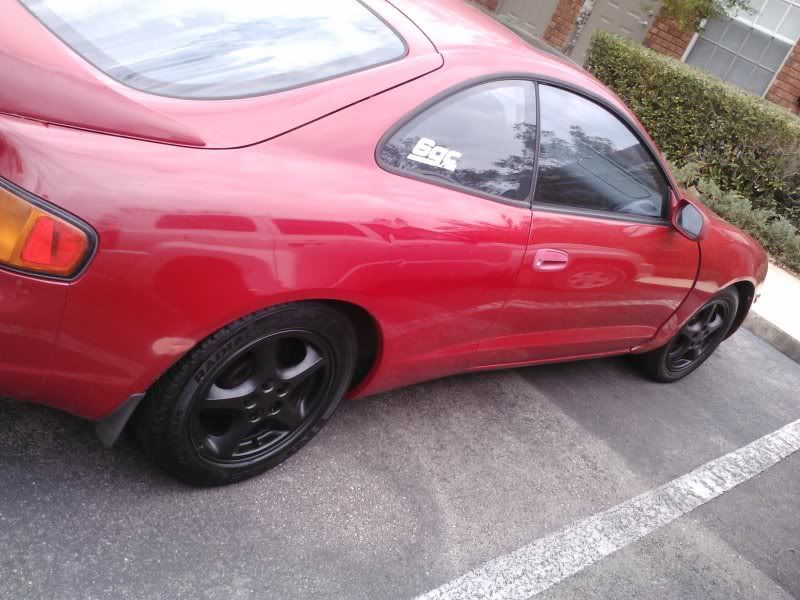
Posted by: TRD_Ian Feb 21, 2012 - 7:44 PM
dude nice work its looking good, i just went through this and am still in the process of swapping parts of my first gts to my second one i have now, the new one was in about the same shape as yours too but right now with the exception of you have projectors and black stock 15s your car and mine are twins cept iv got stock highs and lows and gold stock 15s, mine even has the same pinkish shade faded door handles, keep up the good work im subscribed to this build, you should post picks of your system i wanna see your setup, i hit 144.8DB on my system this summer and it wasn't tunned properly so with some modifications and new pieces iv added this winter im hoping to hit even higher, stooopid frame"less windows leaking like a civ under pressure  i should really update my build thread
Posted by: rave2n Feb 22, 2012 - 9:52 AM
i should really update my build threadLol appreciate it!
Yea my landlord is on me hard about the other celica in the yard, but its tarped, and hes been a pain in my rear for some time when its comes to home issues, so I'm just going to ride the lease out and take it with me. No way in hell I'm getting rid of my first celica until I'm completely ready, and that might be when its a rust pile on the ground lol.
haha those damn door handles, yea they are annoying me. I'm thinking of taking them out, and just rattle canning some clear on them or something. Tested a few spots where the clear was coming off, sanded it down, and sprayed some clear on it. Looks alot better, but waiting til I can buff it down some before I show the handy work.
Ack my audio, thats another story. My subs were damaged in the wreck, along with my amp taking a hit. So its not to pretty at the moment, nothing to be proud off being an IT audio engineer, but it functions. I have plans for it in the future, fiberglass enclosure, 2 12's in the back, sub mids over the shoulder, front tweets and 2 ways on the door....but that is in due time, I have to really get down and focus on this bad boy before it rusts up in my storage unit..
All in good time, just happy to have moving wheels again!
Posted by: rave2n Mar 4, 2012 - 4:15 PM
Been a busy weekend.
Riser blocks, applied new clear to spoiler, driver seat cover transferred, swapped tails because old ones were leaking and a new altenator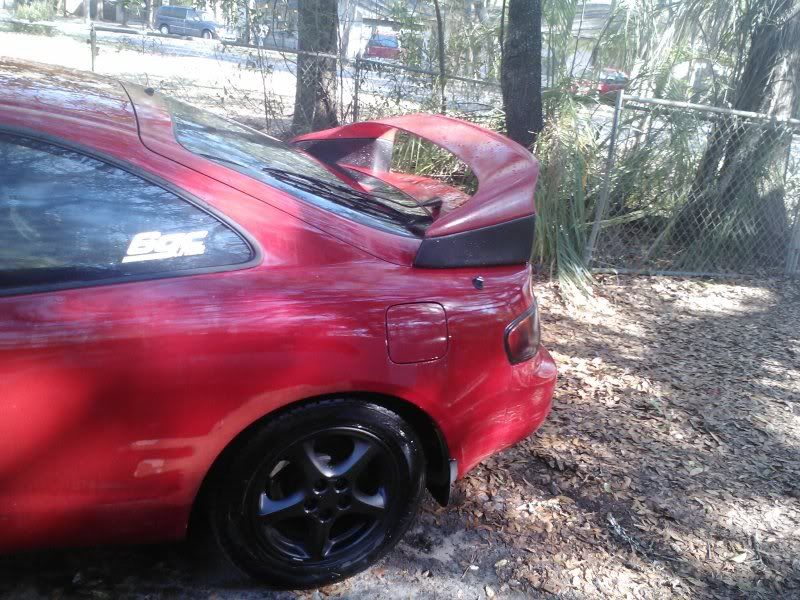
Posted by: enderswift Mar 5, 2012 - 1:14 AM
good stuff
Posted by: rave2n Apr 22, 2012 - 1:18 PM
Finally got the audio situated correctly. Just woke up this morning with the motivation, and a 20oz red bull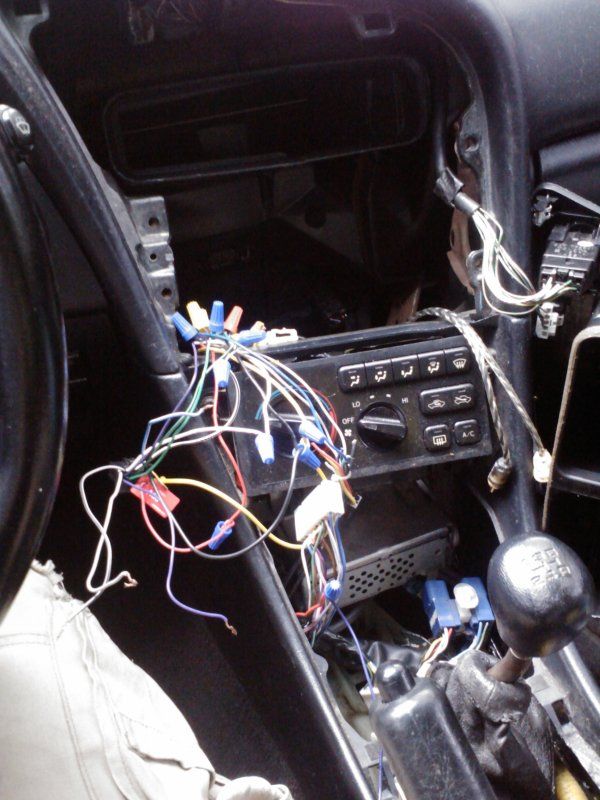
Sorting out the rear speakers...previous owner powered the other head unit with the cig lighter power wires, and ran new speaker wire to each speaker inside of the vehicle.
I already did the front 2, but had to sort out the wiring for the rears. Completely removed the factory amp harness and all un-needed wiring. Found a spare set of power wires, which have been tucked for later use.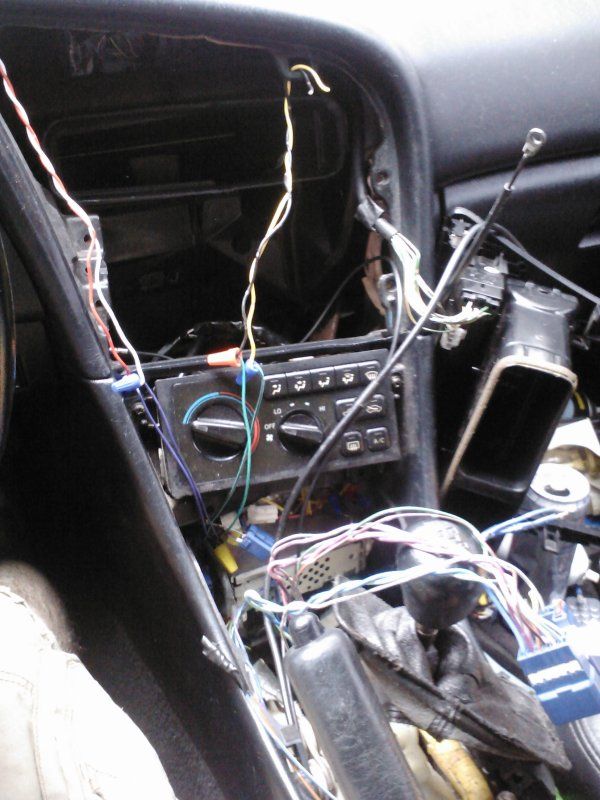
Extended all OEM wires, with OEM colored wires, then spliced on the aftermarket color wires finally to the harness. I can take the head unit out down to about the climate control with ease. No more digging for wires in horrid spots.
This is the previous owners trickery...had to go in and fix these.
He cut them so close to the connection, I would have to re-pin them. So some electrical tap and wire nuts do the trick just fine.
End result, a clean install, with all speakers working! Plenty of tweet, and plenty of boom! Much thanks to swiss for the head unit! Works perfectly
Also removed the rear seats, as they were destined for trash either way.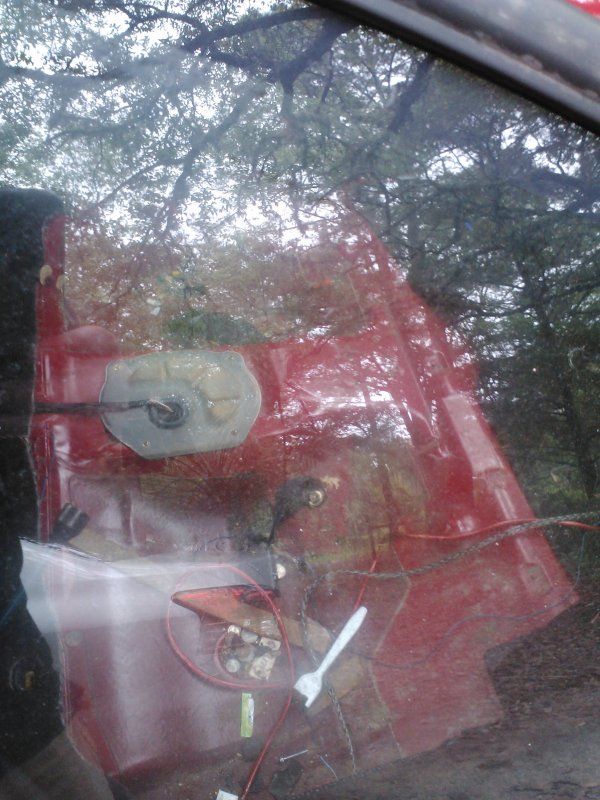
Few other tidbits like fixing the cig lighter and bulb, swapping out the center console, and swapping out broken air vents with ones from the ST.
Little repairs, but happy repairs.
Posted by: SwissFerdi Apr 22, 2012 - 6:57 PM
Bittersweet. At least it found a good home. 'Twas a good receiver.
Posted by: mak5603 Apr 22, 2012 - 7:10 PM
Damn bro, the 20 oz red bulls, you go hard, haha. Bet its nice to have the upgraded headunit! Looks good man.
Posted by: ricochet1490 Apr 22, 2012 - 7:31 PM
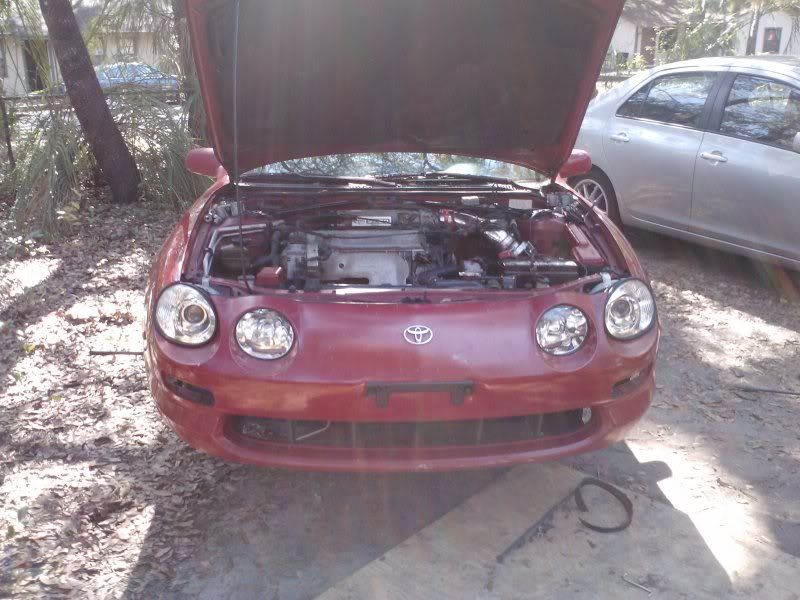
It's astounding what the projectors do for the car..... a perfect side by side comparison
Posted by: Tigawoods Apr 23, 2012 - 6:17 AM
coming along quite well!
Posted by: rave2n Apr 23, 2012 - 12:26 PM
'Twas a good receiver.Its banging good, can't complain =)
Hah, after years of drinking them daily, only the 20oz works...slowly removing my bad habits one at a time, red bull is last on the schedule =) I love it to much.
lol yea it truly is a diff, makes a beater look nice. My old boss had a saying "Your just putting a new dress on a old whore" =P
Ty sir! Can't wait to swap that failedtolift bumper out of the equation
Posted by: rave2n Jul 3, 2012 - 11:58 AM
Feeling motivated again. Took a little while with the recent moving.
Not much of an update, but getting those seat covers finished up...been driving around with just 1 of the 2 for a while now.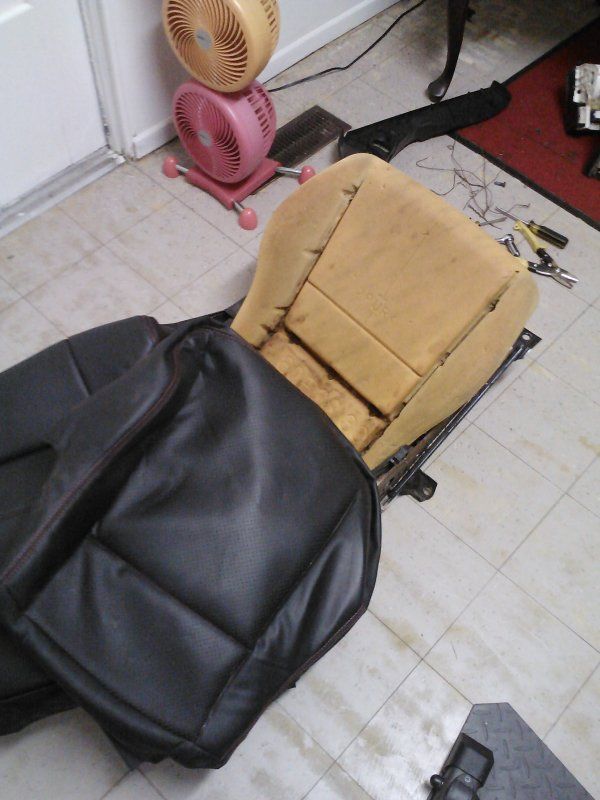
Started ordering some parts for the 3s, and going to haul the beast out of storage tomorrow and start tearing it down now that I've clean out the back covered area.
Much thanks to batman for selling me a spare ST205 MAP sensor, one less thing on the list!
Posted by: SwissFerdi Jul 3, 2012 - 2:04 PM
Posted by: rave2n Jul 4, 2012 - 1:01 PM
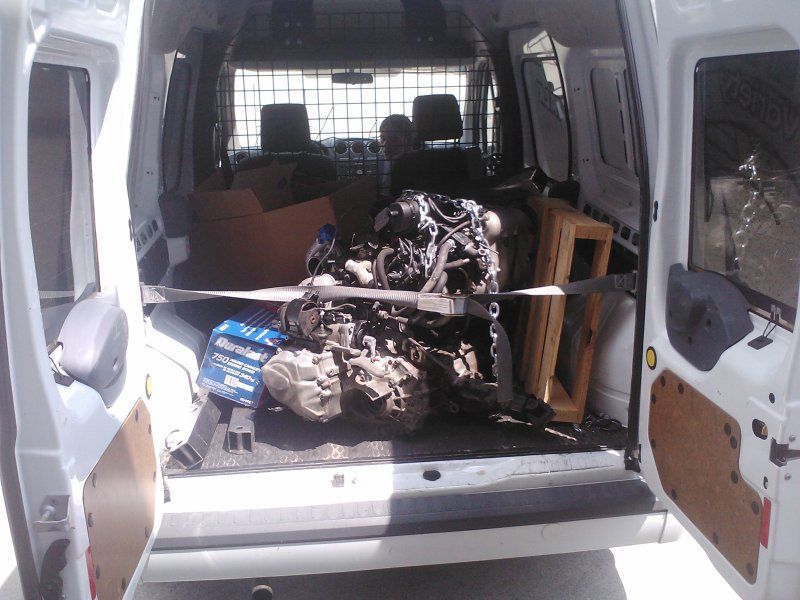
Loading up.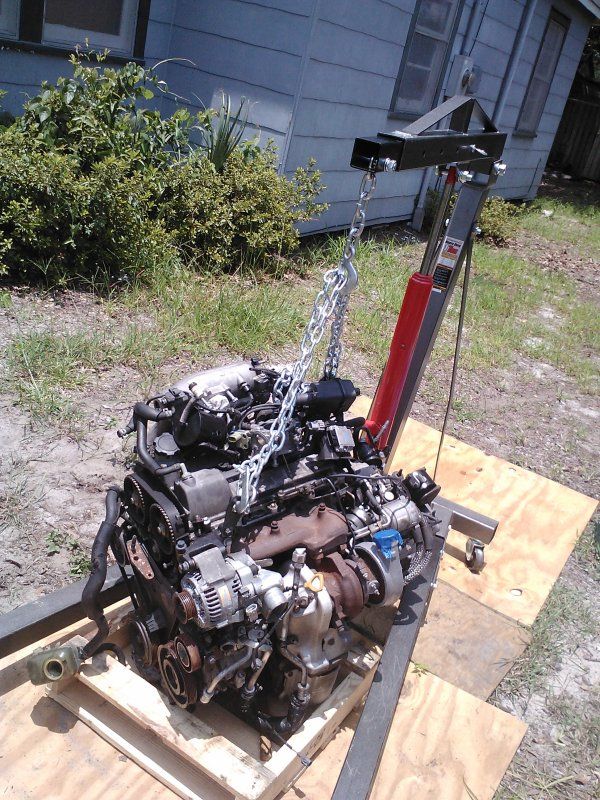
Only got it about 10 feet in the yard before nearly having a heatstroke. Need to acquire some more wood as well, or I'll never get it to the back.
Damn thing is heavier then I remember.
One step at a time. Looks like poo atm, but I see a diamond that just needs some polished.
Posted by: rave2n Jul 7, 2012 - 1:41 PM
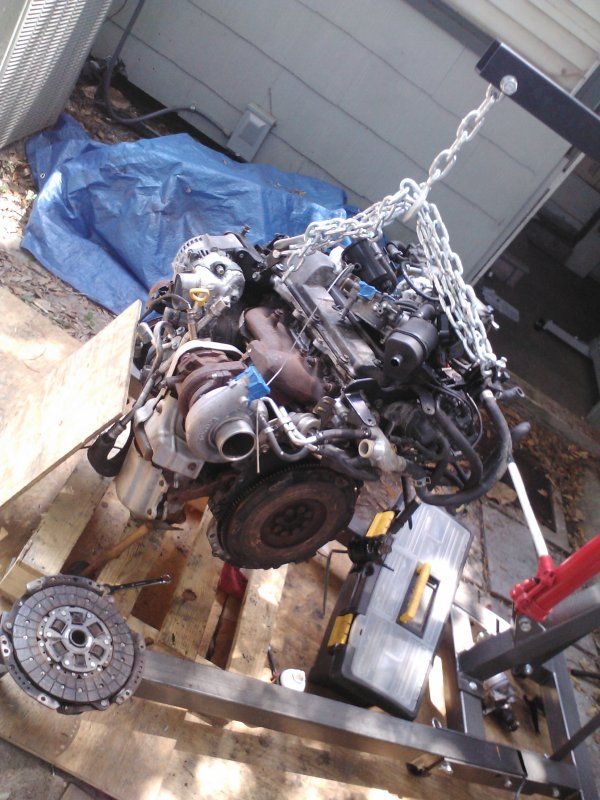
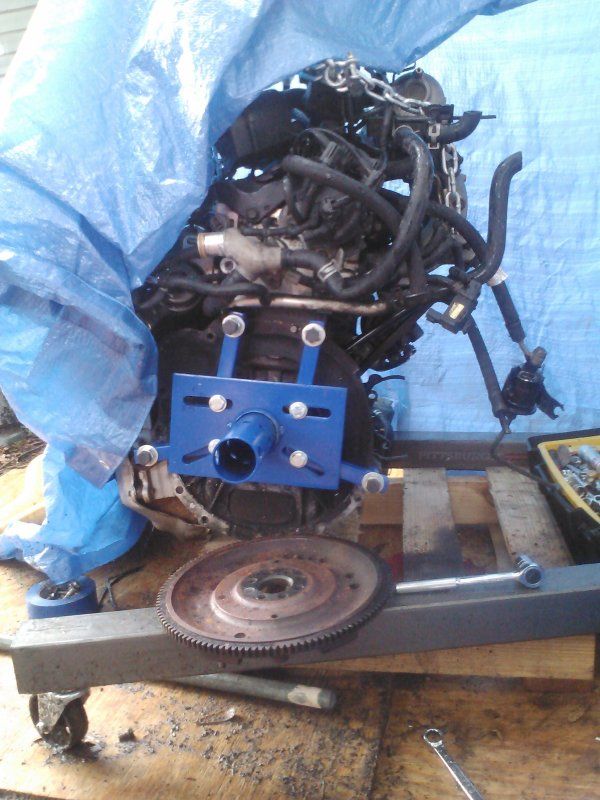
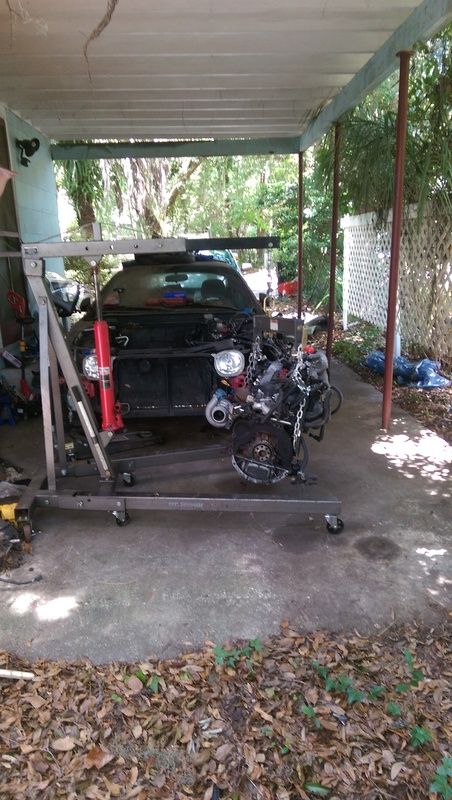
Got the engine behind the house, now to take the AWD trannie off, and start removing accessories.
Pictures later...if I get that far this evening =P
Posted by: SwissFerdi Jul 8, 2012 - 9:00 AM
And, did you?
Posted by: rave2n Jul 8, 2012 - 11:06 AM
Lol yea, I got the transmission off this morning after quitting when it got dark last night.
Just put my engine stand together, and need to run to the store to get bolts long enough to bolt it into the block because the trannie bolts are not long enough.
not really sure of the threads, so its going to be a couple different size purchases.
Posted by: SwissFerdi Jul 8, 2012 - 11:08 AM
Posted by: rave2n Jul 8, 2012 - 1:22 PM
Bah, home depot did not carry the bolts, and all the fastener stores are closed =/
So i will have to start back up next weekend once I get the right bolts this week.
Some pictures of today progress.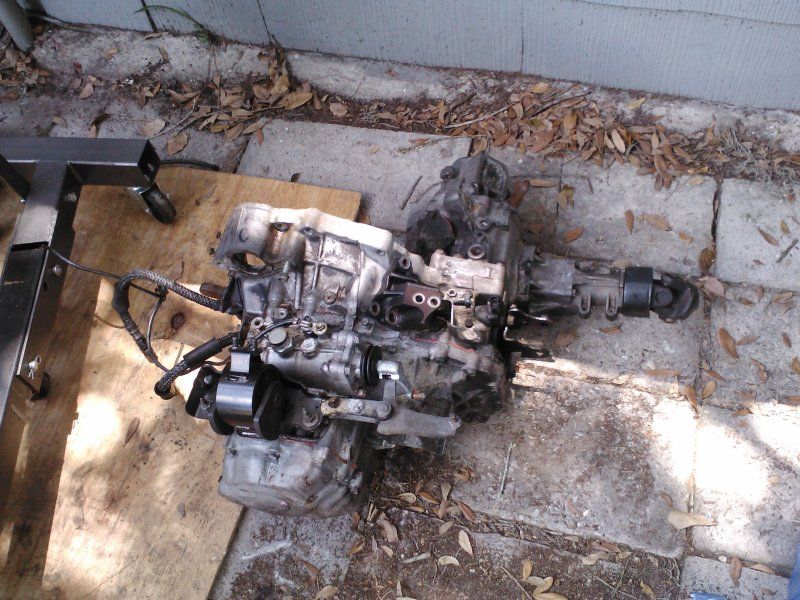
I got alot of clean up to do 
Posted by: enderswift Jul 8, 2012 - 7:54 PM
ah yes the bolts. I ran into the same problem lol. Try Ace hardware if there's one local to you, they always have everything I need. How was the transmission removal for you? Because I had a rough time due to a hidden bolt behind the center diff haha
Posted by: rave2n Jul 9, 2012 - 7:59 AM
Hmm, wondering if there is an Ace around here, havn't been to one of those since I lived in PA, and was quite some time ago. Will check though, thanks!
Yea I know exactly which bolt you are talking about, 14mm head, hidden under there. No enough clearance for a socket, so had to wrench it out, 1/2 inch turns each time in 99+ temps. People around probally heard a large percentage of my vulgarities.
It was a PITA to get her off, took me a good 1 1/2 hours once I took the rear brackets off. It was mainly because I trying not to wreck the spline, so finding the right angle and just finally muscling it off. She is heavy!
Posted by: rave2n Jul 9, 2012 - 4:00 PM
Win!
Felt a little bad for the shop owner, you could tell the big box has hurt business, as the shelves were barely stocked, and he had what I needed whereas home depot did not...I shall try to bring as much business as i can his way.
He knew his stuff too, once i said it was for an engine stand. He said "must be a Jap engine" lol.
Posted by: rave2n Jul 12, 2012 - 10:28 AM
Want to update you folks, but these flywheel bolts are going to be the end of me.
I've wedged the flywheel to stop it from moving, but it appears I'm going to need one hell of a steel pipe to add some leverage to break these loose.
Taken a flywheel off or two, but never had this much issue. They aren't reverse threaded are they? Just curious before I start cranking on them.
Posted by: enderswift Jul 12, 2012 - 3:33 PM
Buy an impact wrench and a compressor. Trust me, its gonna come in handy many times after the flywheel bolts
Posted by: rave2n Jul 13, 2012 - 3:40 PM
I bet! I have a nice compressor, but it got knocked over and busted the valve. In the process of sourcing a replacement.
This did the trick for now.
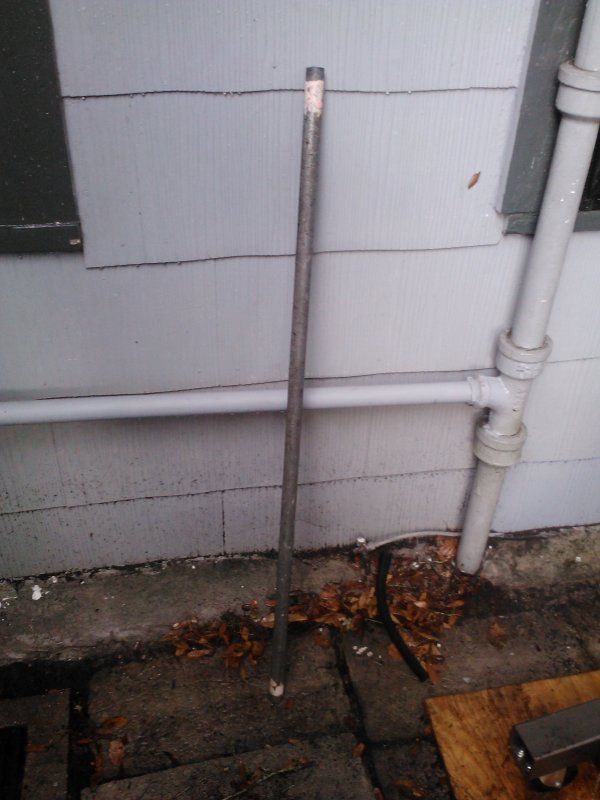
Yes that is a closet pole to hang clothing on =P
Got this far before I got tired of being soaked (Working in the rain =/ tired of excuses ) and donating blood to the flying blood suckers.
Noob question of the week, does that look like the got the angles okay for the stand mount before I tighten it up? figured best to ask, then have it fall over and be pissed I didn't take a second to make sure.
Posted by: jordisonjr Jul 13, 2012 - 3:53 PM
Nothing wrong with that, Helped me get my strut bolts off too

Posted by: rave2n Jul 13, 2012 - 6:55 PM
I know some of these updates may seem pointless and mundane, but each step for me is quite the exp. and learning as I go. So stick with me, the interesting shiz will come soon enough.
Was quite interesting getting over that step.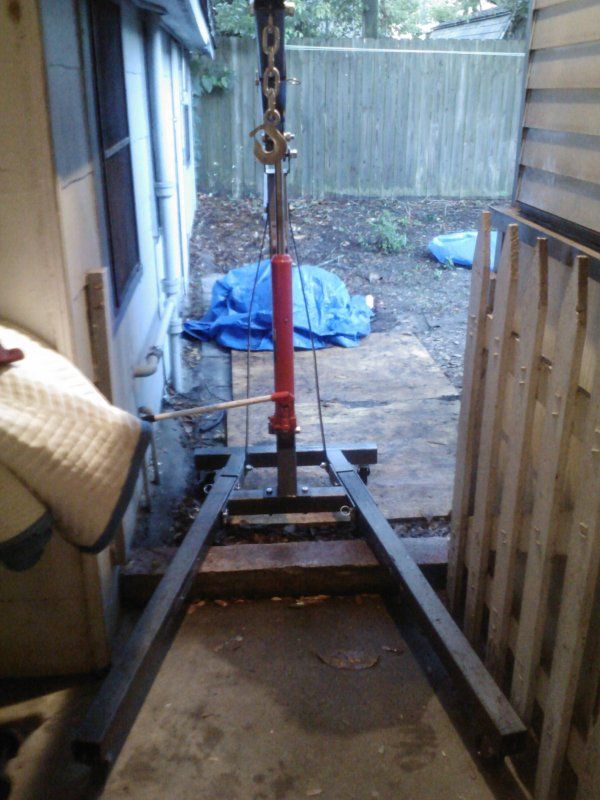
Finally got her where I needed it, so I have light to work on it, and a covered area. Time to buckle down and get it torn apart read to accept new parts..
Posted by: mak5603 Jul 15, 2012 - 12:49 PM
Yeah dude, getting the AWD tranny off while on the hoist and then getting the motor away from the tranny onto the stand is a fukking process, haha. Damn hoist legs don't "spread" enough, lol.
My buddy has a snap on battery powered impact wrench that got my flywheels bolts off in an accumulated like 30 seconds! Such a handy tool..
Looking good man, keep it up!
Posted by: rave2n Jul 15, 2012 - 3:02 PM
Got a little work done on the 3s. Just tearing things off. Not much due to camping but I'm sure I'll get a bit more done over the week.
Anyone know if the distributor cap is interchangeable from one from a MR2 3s? Mine was a bit worn and busted when I was taking the ignitor coil off. Will need the wire tool. I believe they are, just making sure before I purchase.
Posted by: jcbass7 Jul 15, 2012 - 4:47 PM
looking good, keep up the progress
ps: I think the dist cap is the same, but double check with another user before getting one
Posted by: rave2n Jul 16, 2012 - 5:37 PM
Well, got the OEM downpipe off, and a few other tidbits.
Went to the other side to take the crankpully off, so I can remove the lower cover. No dice.
have a universal pulley holder on the way to assist with its removal. Should be here Wednesday. 52 smackers.
OTC 4754 Universal Pulley Holder
Posted by: Sebby Jul 17, 2012 - 5:50 AM
U're doing very well man, nice thread.Good luck with your plans and i'll be watching.
Posted by: rave2n Jul 18, 2012 - 10:24 AM
Much thanks sir!
-------------
Some more needed items ordered today. Roughly 200 bucks...
Not sure if Koyo is a great brand, but read plenty of reviews for other vehicles and all have stated positive.
So if its a bad deal, I'll be sure to let you folks know.
http://www.ebay.co.uk/itm/190466924875?ssPageName=STRK:MEWAX:IT&_trksid=p3984.m1423.l2649
If all goes well, that'll save me a few coins, and hassle getting it all in one.
Now to find a water and oil pump, then some seals and I'll be nearly complete....O yea, spark wires, and distributor cap =/
Posted by: enderswift Jul 18, 2012 - 5:18 PM
koyo is a very good brand. They make our oem bearings
Posted by: rave2n Jul 19, 2012 - 4:57 PM
Ah some good news then!
----------
This $##@#&% crank pulley bolt!
Using the universal pulley holder, and it ending up bending the thing, and now it just pops out whenever attempting to remove the bolt.
Used a breaker bar with a 4 1/2 foot pole on the end and still nothing.
Not even sure if a impact wrench would have the same luck, unless I buy a chain wrench and find somewhere to brace it. Or buy the SST 09962-01000 kit for 80 bucks...which I'm not looking to invest that much for one damn bolt, but I may not have a choice.
I'm to the point where I don't care if a crank pulley gets damaged from a chain wrench...excuse to buy a shiny new alloy one.
Posted by: Syaoran Jul 19, 2012 - 9:12 PM
Ah some good news then!
----------
This $##@#&% crank pulley bolt!
Using the universal pulley holder, and it ending up bending the thing, and now it just pops out whenever attempting to remove the bolt.
Used a breaker bar with a 4 1/2 foot pole on the end and still nothing.
Not even sure if a impact wrench would have the same luck, unless I buy a chain wrench and find somewhere to brace it. Or buy the SST 09962-01000 kit for 80 bucks...which I'm not looking to invest that much for one damn bolt, but I may not have a choice.
I'm to the point where I don't care if a crank pulley gets damaged from a chain wrench...excuse to buy a shiny new alloy one.
You tried the starter trick yet?
Posted by: rave2n Jul 20, 2012 - 8:27 AM
Ah some good news then!
----------
This $##@#&% crank pulley bolt!
Using the universal pulley holder, and it ending up bending the thing, and now it just pops out whenever attempting to remove the bolt.
Used a breaker bar with a 4 1/2 foot pole on the end and still nothing.
Not even sure if a impact wrench would have the same luck, unless I buy a chain wrench and find somewhere to brace it. Or buy the SST 09962-01000 kit for 80 bucks...which I'm not looking to invest that much for one damn bolt, but I may not have a choice.
I'm to the point where I don't care if a crank pulley gets damaged from a chain wrench...excuse to buy a shiny new alloy one.
You tried the starter trick yet?
Would love too, but not really possible with the flywheel, trannie, and starter taken off.
The engine is on a stand pretty disassembled.
I discovered yesterday the threaded holes on the pulley, so going to acquire those bolts, and make them work with my universal puller. If I have too, i'll buy a electric impact just to get this bish off =/
Posted by: kurt95gt Jul 20, 2012 - 11:42 AM
If you go that route make sure its a big one
Mine is 160foot pounds an couldn't get the bolt out of my crank pulley
Posted by: rave2n Jul 20, 2012 - 11:56 AM
Mine is 160foot pounds an couldn't get the bolt out of my crank pulley
Hmm good to know...I was about to get a lower foot pounds one...There is this one with 220 I might try. Thats if the pole on breaker bar doesn't work method.
Going to put the flywheel back on, and see if I can take the universal holder and put the flywheel bolts through it to hold the crank, then pry the hell out of it with a the breaker and closet pole
Posted by: rave2n Jul 20, 2012 - 5:45 PM
VICTORY!
Alrighty, my solution was simple, and I'm annoyed I didn't think of this before.
I took a flywheel bolt, and my pry bar. Inserted 1 flywheel bolt nearly all the way, so it didn't damage the threads. Then stuck the prybar in between that and the engine stand mounts where it connects to the case.
Took my steel pole, and breaker bar. Popped right off...i was kind of annoyed how easily it popped off without all the special tools. Just simple thinking...atleast its off and I can move on now!
Posted by: SwissFerdi Jul 20, 2012 - 5:57 PM
Posted by: rave2n Jul 21, 2012 - 8:26 AM
Time get some shiz done today.
Bolt from hell! 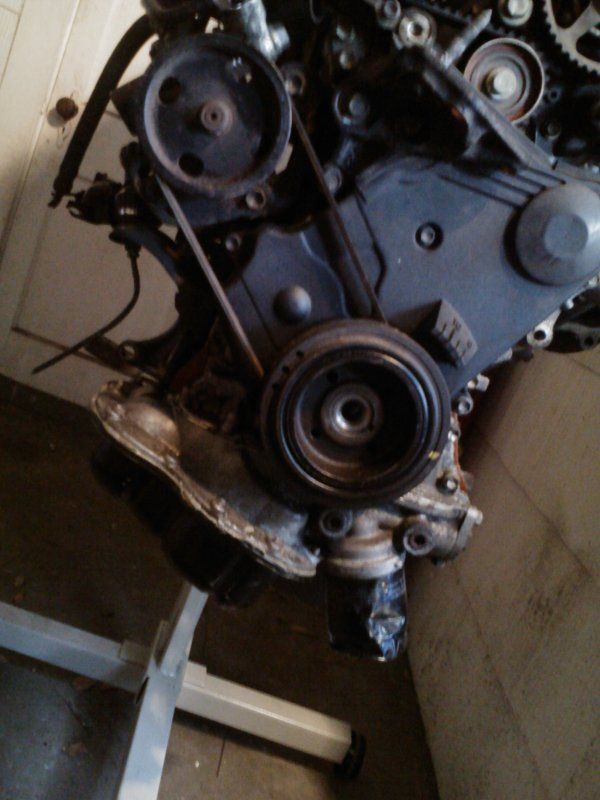
Learning the right tools for the job, make things so simple.

More to come today, as this was my morning run. Get more done once the red bull kicks in, to hot to stay out long.
Posted by: rave2n Jul 21, 2012 - 10:55 AM
Moar progress!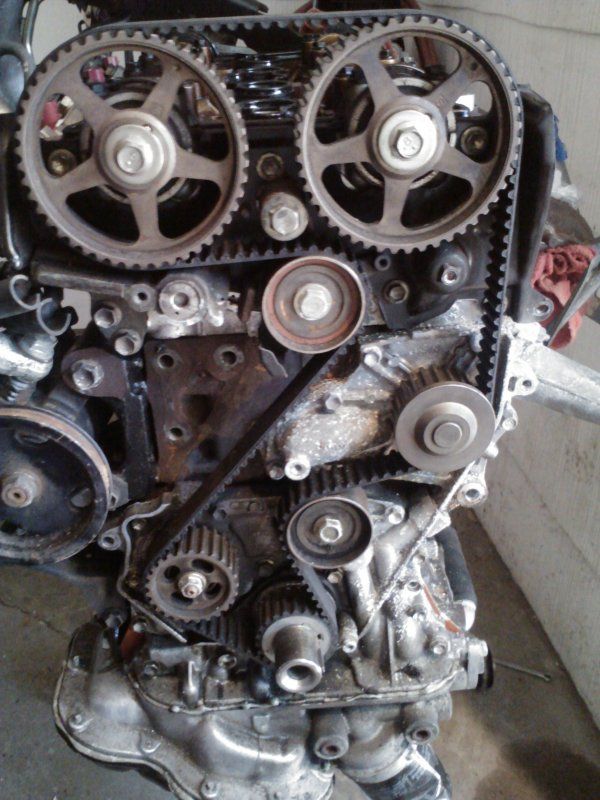
Plugs don't look fouled at all, and I would say she was ran and taken care off pretty well it seems. The oil on the top of the plugs is from the valve cover being just not tight enough, so some of that leaked, but no biggie. The seals are just fine, as well the valve cover gaskets.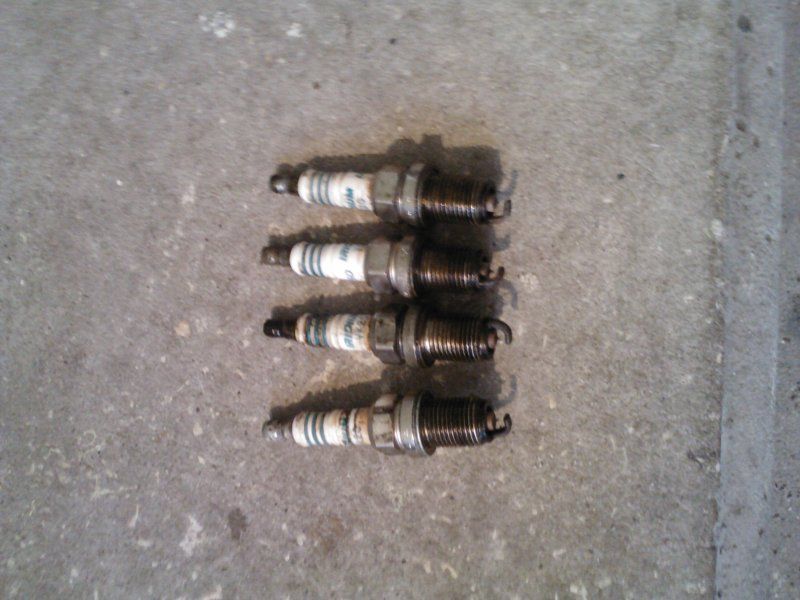
Huge sigh of relief once I got this far, everything looks good, no sludge, and no damage. I guess just the outside of the engine looked like a turd that needed some polishing!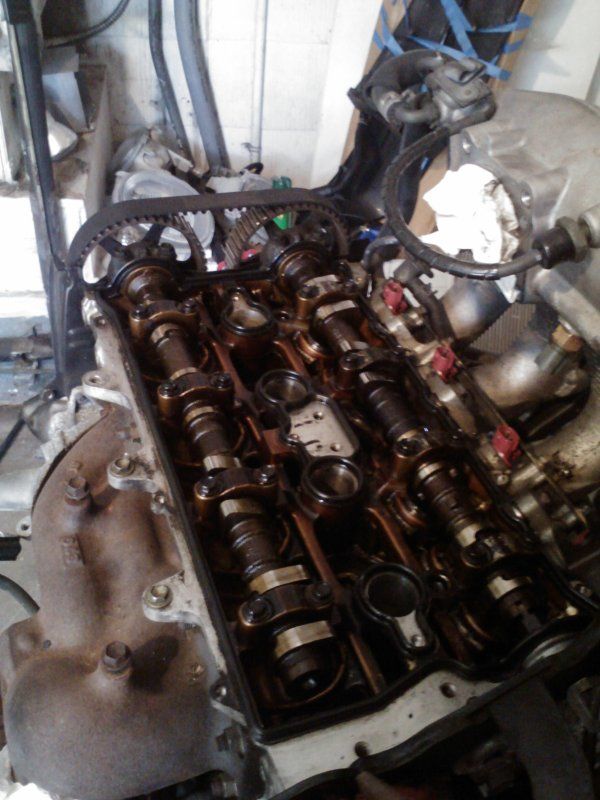
Not much I do at this point besides wait on parts to arrive from the UK. Be a couple weeks it seems, for timing belt, tensioner, and pulleys.
I may update later on with some of the petty cosmetics.
Posted by: rave2n Jul 25, 2012 - 8:01 AM
e154f sold yesterday.
Time to do a little shopping, not much, but each dollar returned is a new part.
Interesting enough, Jim asked for my address last night...so maybe I'll be getting my parts, or a restraining order..we'll see soon =P
Posted by: rave2n Jul 30, 2012 - 9:37 AM
Bearings and belt came in the other day.
tensioner pulley was not a koyo, but is a NSK. Not exactly what I thought, but it will work, and is still a good bearing. No sounds on either, and smooth spinning. Going to save the old one just incase.
And got these goodies in today as well..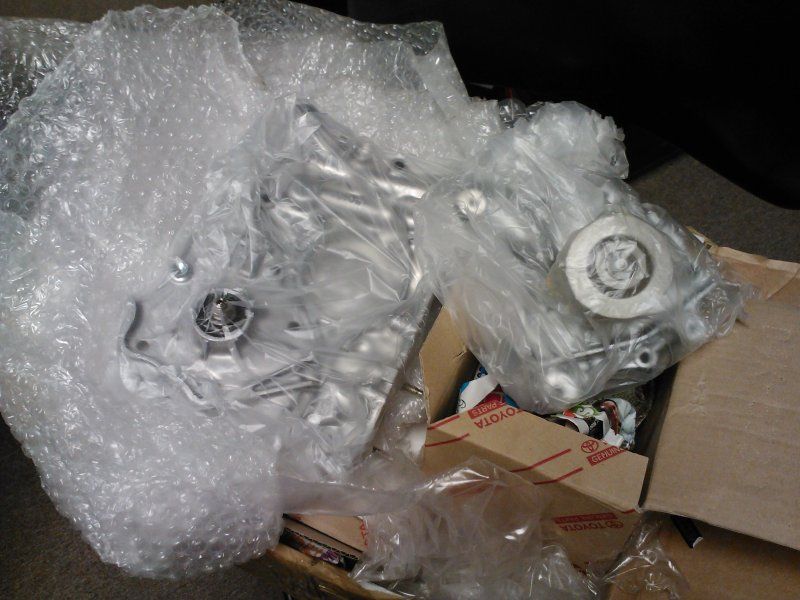
Posted by: ricochet1490 Jul 30, 2012 - 2:39 PM
outstanding work! way to keep at it for sure!
timing systems always look so daunting lol
Posted by: rave2n Aug 2, 2012 - 8:13 AM
timing systems always look so daunting lol
TY!
Yea, I'm not going to deny working on this side of the engine is a bit...out of my comfort zone. I can turn a wrench or two, but never dug this deep into an engine, much less taken it apart so much. All in all, I'm learning fast, and it doesn't appear as difficult as I first thought.
Did make some progress yesterday.
Removed the oil pan(s) and the cover that goes under the crank so I could remove the oil pickup, to simply remove the oil pump.
Forgot to order a gasket for the oil pump, so I'm on hold waiting for that to arrive from the UK. I thought about just using some flexible high temp gasket, but it just didn't seem like a good idea. I figure if Toyota had a real gasket, I should replace it with a real gasket. Going to spend some time cleaning up all these items I've taken apart so they are nice and shiny when reinstalled. Don't want any leaks after all this work. Want to drop this engine, and not have to worry about that for quite some time.
Did get all my relays in for the IC and FP, so I may start wiring those up this weekend, and do some testing.
Anyone have any tips to get the timing to default? From what I understand, the crank has to be at 0 degrees on the timing cover, and piston one at TDC, I have that all in place, or can simply return it there with 2 spins of the crank. The part i'm worried about it the cam pulleys...when removing the belt, those moved slightly. From what I'm reading, you line those up with a notch that is on the inside of the cam to the head. Basically the pulley itself has a dot on one of the spokes with simply would appear to face all the way to the top from what I'm seeing.
Just trying to avoid having the timing off a tooth or whatever. Any insight would be much appreciated, as once that gasket gets in, everything will be put back together, then it is time to focus on the items in the bay itself.
Posted by: rave2n Aug 4, 2012 - 12:43 PM
Cleaning up some items while I wait for 1 gasket!
Forgot to get a picture before the first soak in simple green...half way into the soak.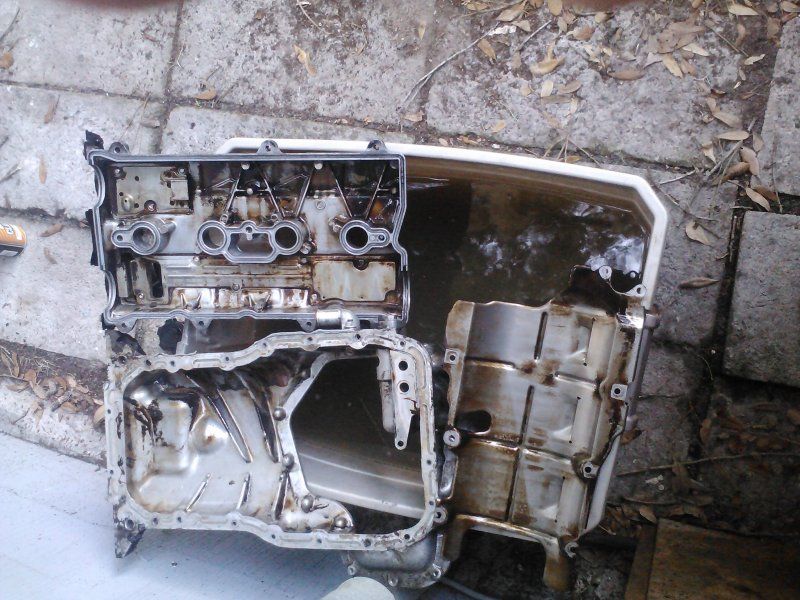
A bit cleaner today after a rinse, degreaser and some steel wool.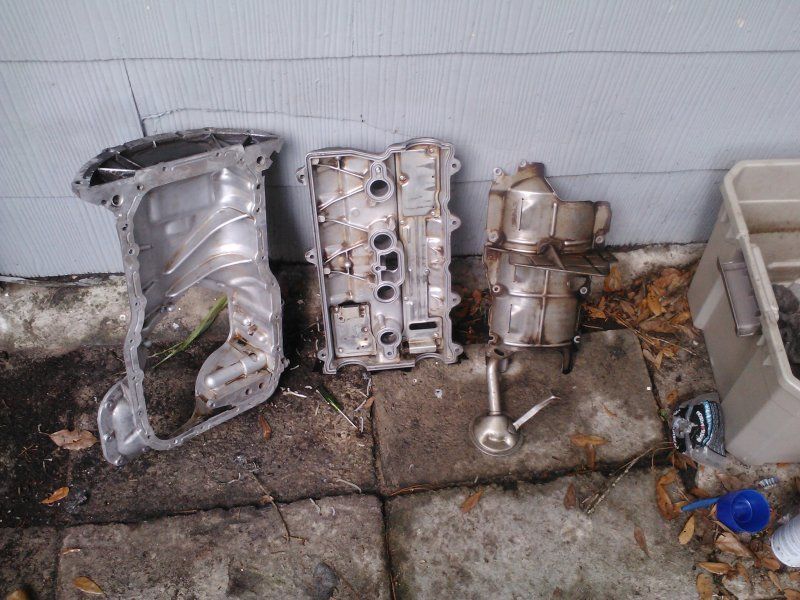
Waiting to be done!
Posted by: SwissFerdi Aug 4, 2012 - 12:54 PM
In your words, getting it done. Cool stuff, having your hands that deep in the most important bits. Glad you're gaining knowledge because that **** is about to be put down.
Posted by: rave2n Aug 4, 2012 - 3:15 PM
Lol after this, your swap will be cake =P
Posted by: SwissFerdi Aug 4, 2012 - 4:26 PM
I'm almost more excited about seeing your 3S go in...
Posted by: njccmd2002 Aug 4, 2012 - 9:00 PM
some of that gunk, can be better handled with pinesol.
http://nighthawk-forums.com/tools-and-equipment/the-pine-sol-degreaser-topic/
Posted by: rave2n Aug 7, 2012 - 3:53 PM
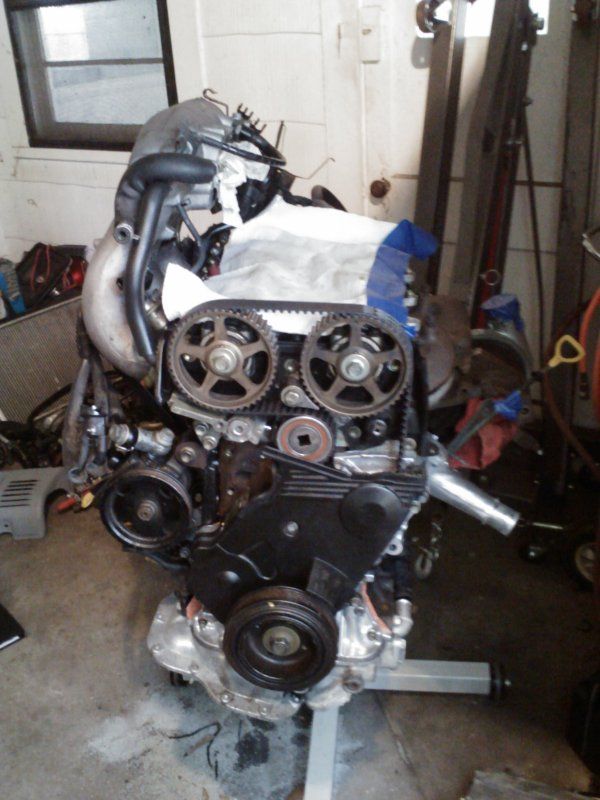
Got some more done today.
Cleaned all surfaces, and applied new ultra-BLACK rtv to oil pan #1, and of course installed the cleaned oil pickup, and crank splash guard whatever it is thingamajiger.
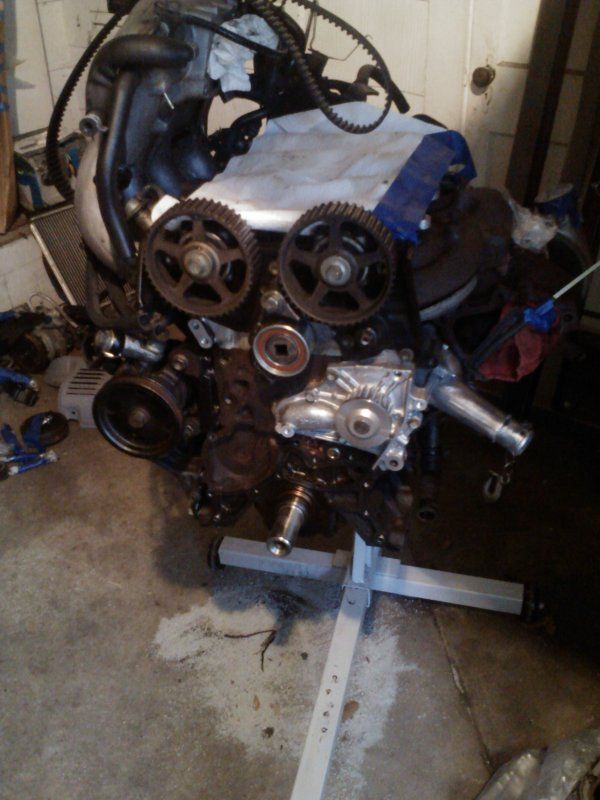
Installed pan, installed the 2nd oil pump pulley, as well the pump itself with a new fresh paper gasket. Sprayed it with some clear acyrilic because I did not have sealer, but from some web searches I heard that works just as well. Applied proper torque to bolts and got it all done. Tensioner pulley installed, as well the oil pump pulley with some locktite. Just locktited about everything tbh. Even the pain in the butt allen heat bolts found all over the place while doing this job.
Belt put on for mock purposes, tomorrow I'll make sure everything is TDC, and install the tensioner, spin it twice, and check again. Tomorrow is timing hell day =)
The pic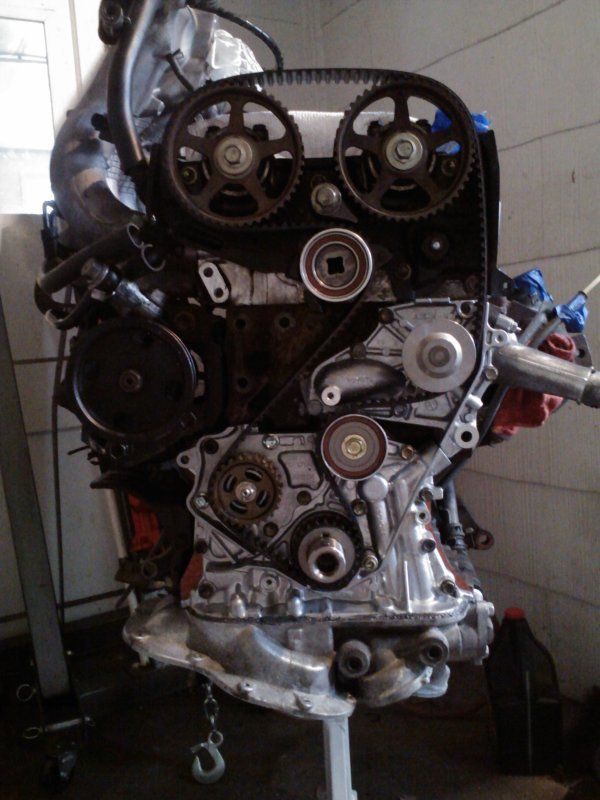
Posted by: rave2n Aug 9, 2012 - 3:57 PM
Getting there, timing slightly off, but I know well enough to do it in 5 minutes now.
had to go buy a vice to reset the tensioner, but meh, needed one anyway.
Jim says, he'll be sending me shipping info in the next 2 weeks...so maybe I'll be getting what I need..maybe I won't don't know. My legal advice says 2 weeks remaining..so we'll see.
Ready to get this done...
Posted by: rave2n Aug 11, 2012 - 3:06 PM
Finally got the timing right. Had to pull the tensioner off about 8 times, but I wasn't settling until it was right. 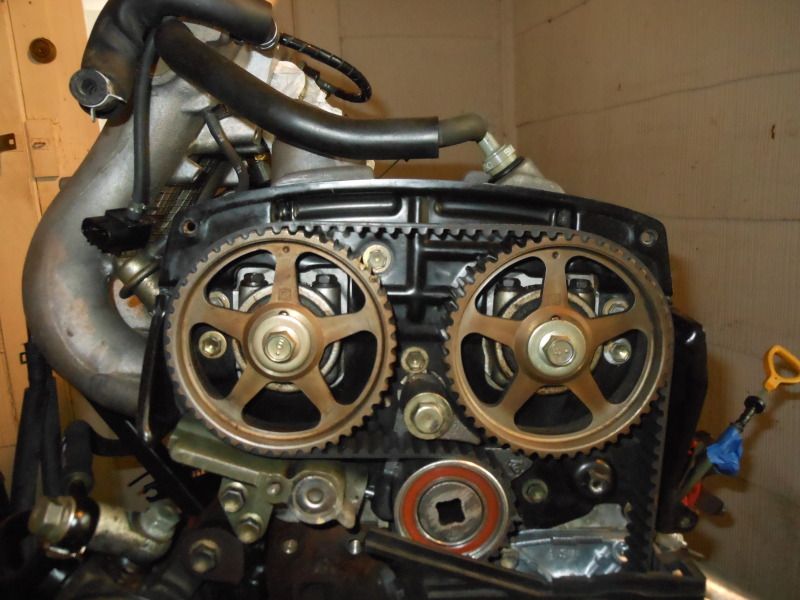
And some cleaning in the area.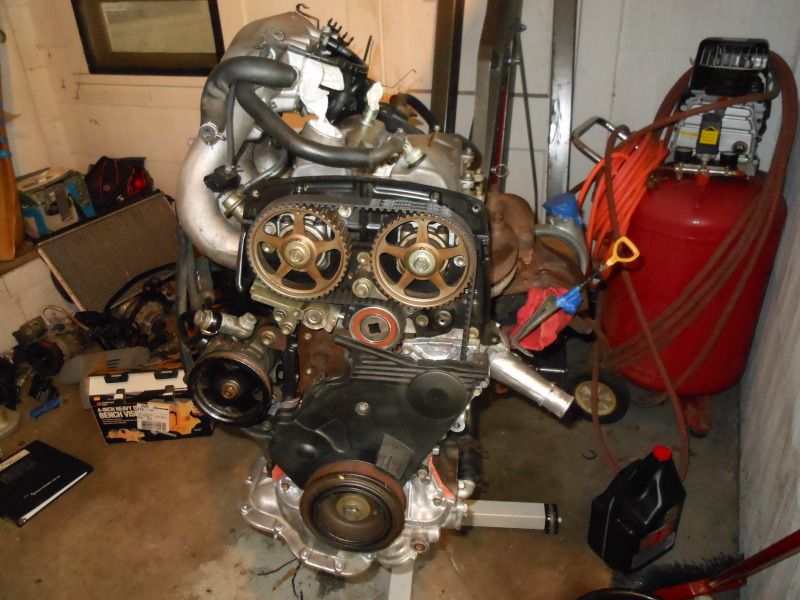
Valve cover back on, greased gaskets, and some rtv on the edges, and where the cams are. Just extra leak security I figured couldn't hurt. 
Little wire wheel action...
Patiently waiting on parts =/
Posted by: rave2n Aug 16, 2012 - 6:10 PM
A little bit of progress today...
Some more general cleaning, painting little parts such as the bracket around the turbo housing...no idea what that is called, but I know it can be seen, so I sprayed some high temp black on it. Cleaned and sprayed the alt bracket.
As well cleaned and installed the second oil pan. Should be sealed real well.
Threw a filter on, waiting for the gasket to cure. So I can put some oil in it, and rotate it a bunch. Just not comfortable having it sit there dry...may be paranoia...but meh, atleast I know it'll be good and lubed in all the places i've been working. It'll all be drained and done again soon enough. Just going to be a bit of a wait for some parts...and Jim...
Things to acquire:
Downpipe (Berk or cheapo...we'll see)
Clutch & Flywheel (Grind or new..not sure yet)
Spark Plugs
Spark Wireset
Distro Cap & Rotor
AC and Alt Belt (if anyone knows the #s for these, or any one in the US I can grab that'll work let me know please)
Power Steering Belt ("")
Paint for heatshield (havn't decided on color yet, may just go black)
Bunch of hose replacements
Water in & out hoses
Thats about it for the engine itself...bunch for the bay itself...such as rad, exchanger, IC pump, AC lines, harness conversion...list goes on, but its getting shorter day by day.
Posted by: rave2n Sep 10, 2012 - 12:01 PM
Argh so busy right now...
Can't get anything done on the engine or car...
Need more time and $$$
Posted by: enderswift Sep 10, 2012 - 12:43 PM
keep it up dude, it's all gonna be worth it in the end
Posted by: richee3 Sep 26, 2012 - 4:21 PM
Getting closer! You'll have it swapped in no time. Then we will need to see dyno runs.
Posted by: rave2n Sep 27, 2012 - 12:46 PM
Yessir! I'm thinking it'll be in the vehicle by January at the latest.
Just purchased some items for the celica yesterday..mostly maint. but some other fun items.
Axles, and seals for said axles, also going to pick up a free S54 from someone 30 minutes away. Figured couldn't hurt to have a spare, specially considering the one I have now makes some noises that do not please me.
And I got the dipyourcar kit, so she'll be matte black soon.
Most likely do the axle's and seals this weekend, and sand it down. Some bondo fill, spray the next weekend.
This is all saying my on-call job gives me a break.
On the 3s..still waiting on parts from Jim - "2 weeks" is what I keep hearing..every 2 weeks..
Posted by: rave2n Sep 28, 2012 - 10:47 AM
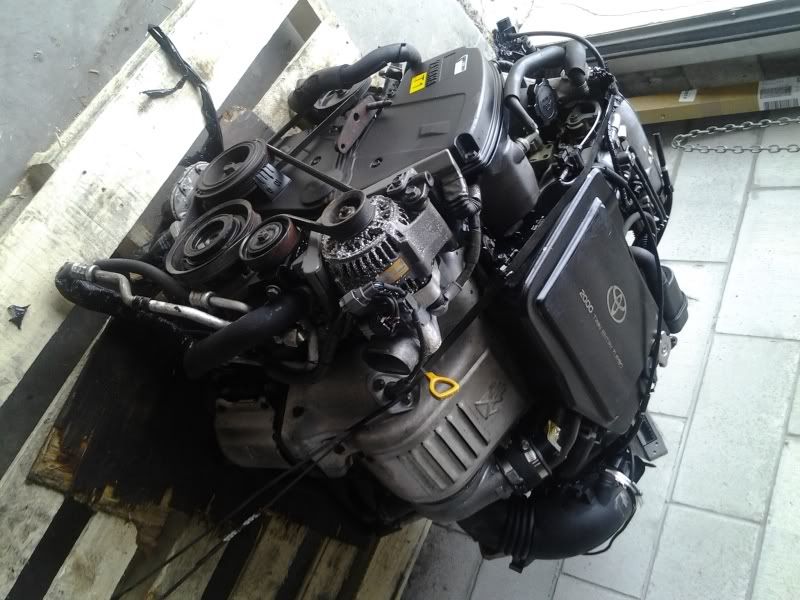
A freshly rebuilt S54 Transmission. Free of charge!
The story goes, this lady send a celica in to get repaired, they rebuilt the transmission, but found issue with the engine during the process. Since it was only a transmission shop, they sent it to somewhere to do the engine work, but was later found to be to expensive on top of the current transmission build, so they took the trannie out, and scraped the celica or sold to shop from my understanding as is.
Sat outside for a year, covered at least. They couldn't find anyone to buy it for what they paid in repairs, so they just posted it for free and I scooped it right up.
So if the story is truthful, I have a freshly rebuilt S54 for the swap. I've turned the spline a bunch and it moves like butter, no apparent damage or binds. Havn't had a chance to shift it through gears, but so far it just looks a little ugly on the outside, but no rust, and the inside differental is clean as could be. So I think i'm good.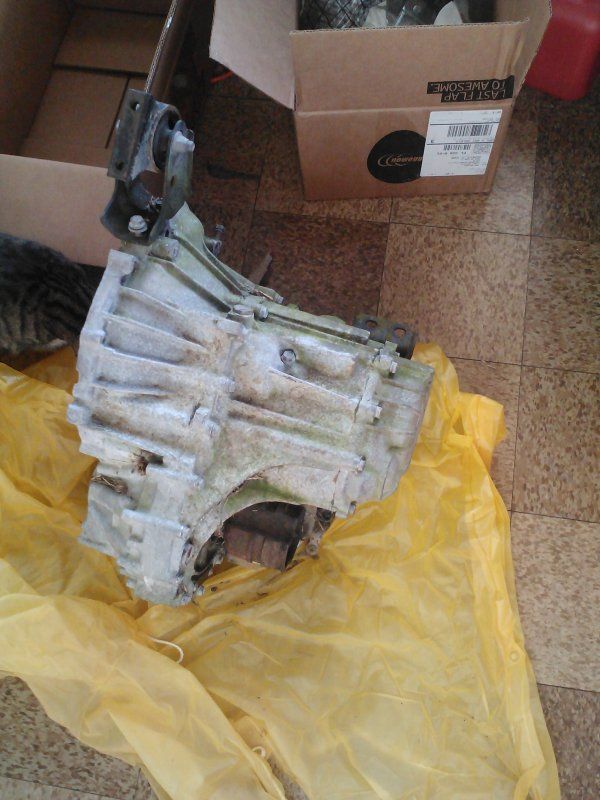
And my axles came in for dirty weekend of fun.
So if all goes well, and work isn't up my butt for once this weekend. New axles, seals, fluids. Then sand down, and bondo the dents, then paint the following weekend.
Posted by: richee3 Sep 28, 2012 - 11:12 AM
FREE S54?!?! Throw an MR-S LSD in there and call that a "transmission expense!" That's some incredible luck!
Posted by: SwissFerdi Sep 28, 2012 - 11:24 AM
^ It's deserved, he gave me an excellent deal on his tranny & associating bits. Karma in action.
Posted by: rave2n Sep 30, 2012 - 9:37 AM
Haha, I actually looked up the cost of those LSD's...its...feasible. What I may do is to get the project moving, use the new trannie for the 3s, take out the old S54 and then apply some LSD to it, and replace all the soft bits. Then when its time for a new clutch on the 3s, I'll throw the old trannie back in with its new greatness.
- Now if karma would calm down and let me get this axle bolt off we'd be straight.---------
Broke 3 breaker bars yesterday and this morning trying to get the axle nut off that I tightened by hand a few weeks ago. Guess this p90x is working...
So..I'm done for the weekend, got nothing accomplished, besides now knowing I have to go purchase an impact gun and fix my compressor....I've been dragging my feet on it for a while, so its due. No excuses!
Posted by: rave2n Nov 4, 2012 - 11:59 AM
Putting the skirts on, and rear splitters. Also filling in a huge gap. No idea where it came from, purchased it like this.
Alot of this is temp install. I'll eventually need 2 new fenders, and a few other items, but this is just to get the plastidip on it, and make it look a bit better. Basically it has been annoying me how it looks, and distracting me from working on the swap.
That and Jim still not sending parts, but said is going to send money when he can get steady service...bout tired of his ****. Lawsuit goes active on Monday.

waiting on the caulk to dry, which will be tomorrow...=/ - So no spray today, but will prime the skirts before I drive it around. Hide the blue
Posted by: rave2n Nov 14, 2012 - 8:39 AM
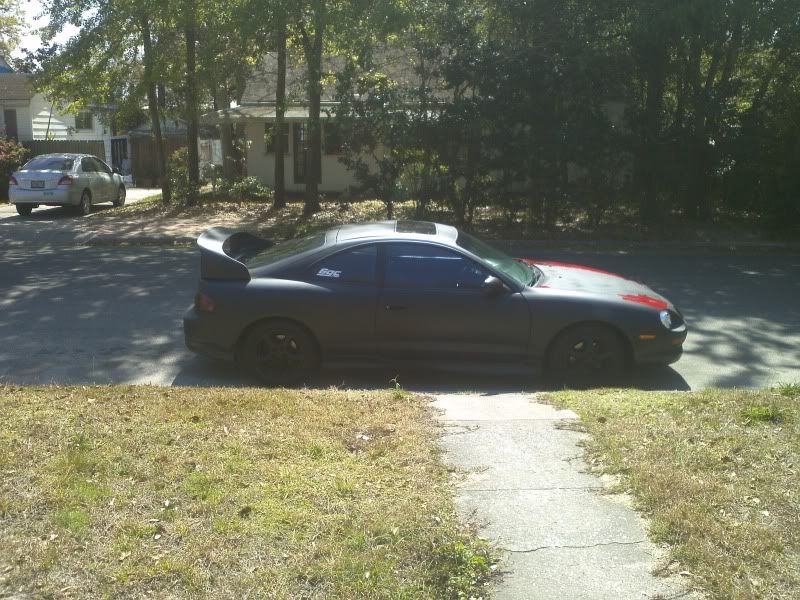
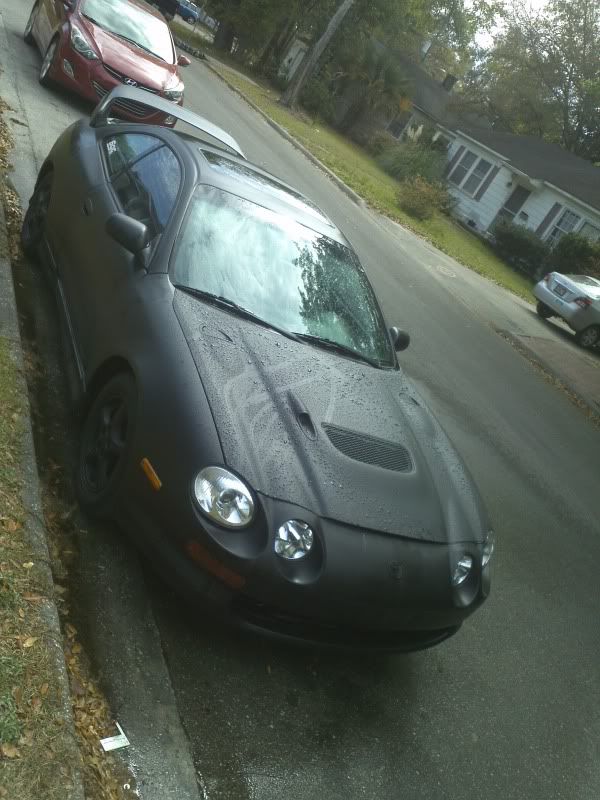
Well got the skirts and rear splitters put on. As well plastidipped the whole car.
Trying to figure out if I want to put the tail back on...opinions?
Posted by: SwissFerdi Nov 14, 2012 - 9:27 AM
I spy the ST! Color looks much better.
Posted by: kurt95gt Nov 14, 2012 - 10:54 AM
I say put it back on
Posted by: enderswift Nov 15, 2012 - 8:44 PM
x2
paint looks great
Posted by: njccmd2002 Nov 16, 2012 - 1:30 AM

Posted by: rave2n Nov 17, 2012 - 3:44 PM
Same quality of work too
Posted by: Zake Nov 23, 2012 - 11:48 AM
Trying to figure out if I want to put the tail back on...opinions?
That just looks sexy. I say leave it off. It looks clean and stealthy like this
Posted by: rave2n Feb 11, 2013 - 12:59 PM
Trying to figure out if I want to put the tail back on...opinions?
That just looks sexy. I say leave it off. It looks clean and stealthy like this
thanks! Yea I havn't decided yet on the tail. I think I'll put it on this weekend now thats its sprayed and see how it looks. They are shaved blocks so it should look "ok"
I know I havn't been around much, but I have been busy.
No pictures just picking up parts.
Recently acquired, or on the way:
IC WaterPump
IC Heat exchanger & Associated lines
GT4 Hood
So about all I need now to drop the engine in, is a clutch. I'll fight the AC later. My 5s is sounding pretty tired, so I need to get my butt in gear and get this 3s dropped in. Nearly a grand over the last month in parts, but I need them!
Posted by: richee3 Feb 11, 2013 - 2:10 PM
AC shouldn't be a big deal during the swap, but it might be a month or two before you need it anyway. I bet you're getting anxious now!
Posted by: rave2n Feb 14, 2013 - 12:05 PM
Quite anxious, had to walk away from it the end of last year to get the holiday season over with. Basically money and time in the right place.
Hood came today..quite pleased with the shipping. No damage! Will need a spray and some fixing, but nothing major, all easy.

Posted by: SwissFerdi Feb 14, 2013 - 1:16 PM
Nice hood. Shoot me a text when it's time to toss 'er in, I still owe you a hand.
Posted by: rave2n Feb 15, 2013 - 11:22 AM
Will do, has been a bit since I've seen ya! - Have to extend the latch this weekend, if I get a wild hair I might install this weekend, but we'll see. Need to paint and fill a few items first, so most likely the next one.
Posted by: Ted95 Feb 17, 2013 - 12:15 AM
Nice thread man just read the whole thing good work so far keep it up!
Posted by: rave2n Mar 10, 2013 - 3:11 PM
Much thanks!
--------------------------
Been a busy day with the celica. Bunch of pure maintenance stuff, but I was tired of the noises in the front end. So I ordered the bits...
That is tie rods, tie-rod ends, front/rear endlinks, front strut mounts & control arm/hub bushing...no idea what its called. All for 150 =)
And time to get to it... Front strut mounts


End-links and Tie-rod End

I couldn't get the arm/hub bushing out, without what appears to be taking the axle out. I'll save that for swap day, as they'll be coming out then anyway. No need to make a long day longer.
And I put the tail back on...I like it back on =)
All in all, my noises in the front end are gone finally. Didn't get everything done, but what got me under the car in the first place is fixed. Have the occasional trannie bearing snap, but I can ignore that for now.
Ignore the hood, it won't be there much longer...
Posted by: rave2n Mar 16, 2013 - 6:02 PM
Worked on the hood today.
Install it tomorrow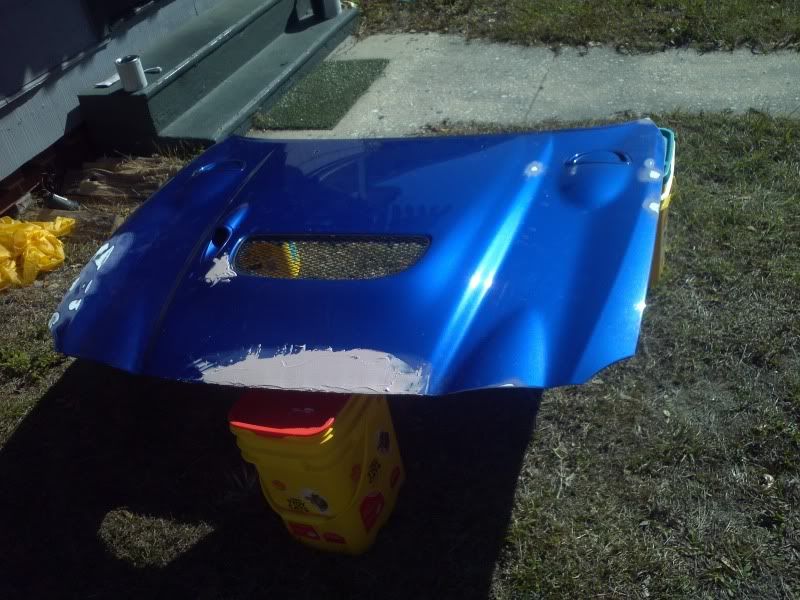


And some plastidip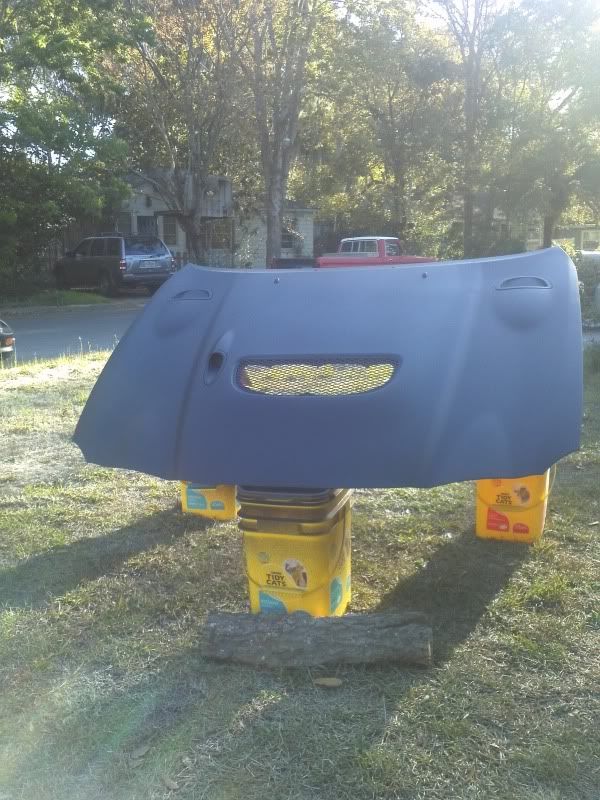
Posted by: rave2n Mar 17, 2013 - 10:54 AM
And its on!
Posted by: cheela Mar 17, 2013 - 12:25 PM
sooooooo much better than when it was red. I really don't like red cars. hahahah
Posted by: richee3 Mar 17, 2013 - 12:47 PM
Posted by: Lil-Joe101 Mar 17, 2013 - 1:43 PM
Is that so

Posted by: cheela Mar 17, 2013 - 7:29 PM
Is that so
with ONE exception of course! hahahaha.
not that I don't like them, just I don't see myself in one. I love seeing it others though hahaha
Posted by: Lil-Joe101 Mar 17, 2013 - 8:12 PM
Lol, Great job so far rave2n , keep it up. Any idea on a color when it comes time to painting her?
Posted by: rave2n Mar 18, 2013 - 8:08 AM
Much thanks!
I love black for a vehicle more then any other color, now I'm just trying to decide which black I want to permanently go with. I've always appreciated a nicely done metallic black, not pitch black, but slightly grey.
The flat style I have been enjoying alot, and may consider going a permanent route for that too, but currently with plastidip, it can never be "show" quality, but serves my purposes well for now. Not sure how I would flat it out and keep the integrity of a real 2 stage paint.
And your vehicle is very nice in red...a red car that was falling to pieces, like mine, is the worst eyesore imo =P
Posted by: cheela Mar 18, 2013 - 8:50 AM
I like the matte black look you got but yeah, a real paint job would be needed for show quality paint.
Posted by: rave2n Mar 26, 2013 - 1:27 PM
So my IC & FP relay box came in today. EDIT: actually yesterday, I was to pissed to post.
I would normally be over joyed that an item as such has arrived. Specially considering how long it took to find one.
But, because there always one...I am not over joyed by any means.
No offense to the seller, but the whole purpose of me purchasing this item was to relieve myself from extra wiring during swap time, and I receive it with 4 inches of wire cut from the box. Basically the whole engine room harness that I needed, is no where to be found, and obviously cut at this point. I informed the seller 4 times I needed the harness more then anything. I could purchase an aftermarket relay box, 2 relays, and some wire for the same price I paid for this box that I now have to create a harness for.
All in all, it was my fault because I paid via western union, before I saw the product, but I figured my reiteration on the full harness 4 times would have meant something.
I won't give the seller negative feedback, I considered neutral, but because the value of this OEM part vs. creating one is a wash, and the only gain I receive is now knowing the wiring pinout for the relays..no feedback will be placed. I received something, better then nothing.
Guess I'll have to show you guys my wiring skills now....
Posted by: rave2n Apr 8, 2013 - 5:20 PM
More parts arrived.
Posted by: rave2n Apr 10, 2013 - 7:38 PM
And some more parts....
Bet you guys are wondering when the hell I'm going to get to finishing this...I wonder too...not much left
Posted by: jcbass7 Apr 11, 2013 - 1:44 PM
I see the exhaust made it over there safely. Can't wait to see the finished car, keep the updates coming!
Posted by: Dennisthe10 Apr 17, 2013 - 7:03 AM
love the work you have done and love how far you have come, I'm pretty sure you have confirmed that matt black is the way to go with mine too, cant wait for more pics
Well done with the work so far, loving this
Posted by: rave2n Jan 12, 2014 - 4:52 PM
Its been a while, but I believe I can move forward from here. Have had to help the family 3 times in the last year financially, which each time was my car funds =/ - New year, new attitude, funds still the same, but w/e...I'll lose more, the longer I wait. Dat gotta pay to play =P
Sent funds for a re-surfaced flywheel today to get the 3sgte swap moving along, and I expect to find a down pipe to purchase within the next few days. Will patch the short section after down section until I can get it to a shop to close up, clamp style. That completes all the mechanical items besides a few odds and ends like a rubber line for the walbro, and the etc of vac lines, little local items..hopefully.
The final, and most daunting task. The wiring.
I keep seeing, its 6 wires. So, that has to wait til I actually start the swap, and since, from what I understand you do not need to extend the harness for the ECU, that leaves making the looms for the relays. Hope to begin that task in the next week.
I want to finish this swap in the next 3 months. Will be taking some time off work, do it now before it isn't capable of making it.
Today I did some work on the 3sgte, mostly going back over what I've already done, because I had some doubts.
I removed both oil pans from the bottom end, and inspected some items. The strainer and arm are in good condition, but to be honest, I hate to admit it, but I snapped a bolt head when putting the oil pump back in. I wanted to ignore it and put some fipg around it and move on, but i decided to just rip it all apart again and do it right.
So, pulling the oil pump back out later in the week, getting that bolt out, cleaning all the edges and re-sealing it again. Glad I did, I didn't obstruct the oil channels on the pump, but the little O-ring looked outa place to me. Wasn't sure, so better safe then sorry, and now I won't wonder if its right and tight.
Left over issues with the GT that have to wait til after swap:
Both Front Bearings & Wheel Hubs - Both making noise, hubs shot, bearing lasted 7 months.
Rear Pads, Rear passenger Caliper, Both Rear rotors turned.
Check Heatercore leak
Remove replace rear atenna
Replace both front quarter panels
95+ Front Bumper & New front splits.
New Tires!!
Think that its folks...Got my work cut out for me, but time to get back on task.
Excuse my book, I post to motivate myself, and information retention =)
Posted by: enderswift Jan 12, 2014 - 7:42 PM
Dude, call up the vendor that is supplying your clutch and ask them what step size they require for their kits. Then call your machine shop and make absolutely sure they machine that step. Otherwise you'll be screwed like I was
Posted by: rave2n Jan 13, 2014 - 10:16 AM
Ugh, I already got my kit from Southbend or something like that.
I didn't get anything crazy, just the OEM disc one.
Posted by: SwissFerdi Jan 13, 2014 - 12:03 PM
I lost your number but you can shoot me a PM if you find yourself in need of an extra hand. Good luck, good sir.
Posted by: rave2n Jan 16, 2014 - 10:33 AM
Will do! As always its appreciated
Looks like the fun is about to begin!
http://s77.photobucket.com/user/ice_night/media/20140116_081025_zpsvo4dfck9.jpg.html
Thankfully its going to be nice and cold in FL for a few days, so no flying blood suckers to deal with, just work work work.
Posted by: rave2n Jan 18, 2014 - 12:31 PM
Some items arrived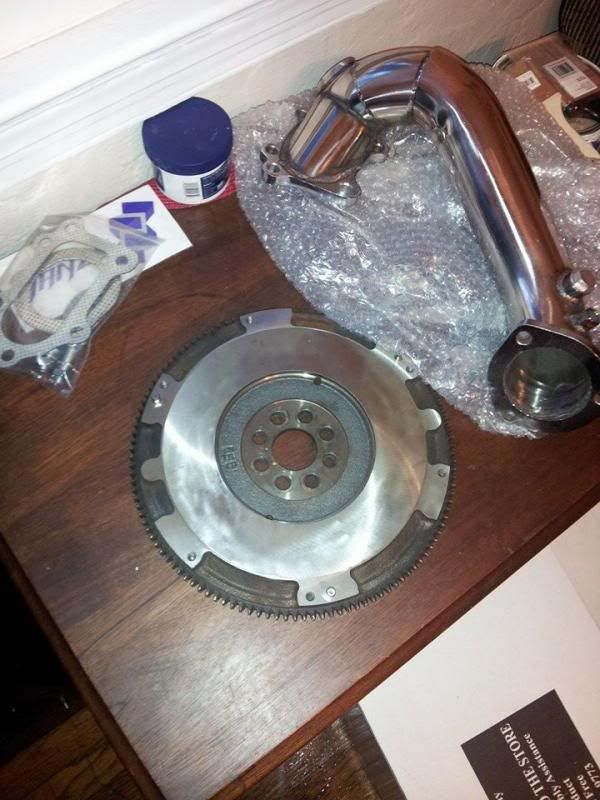
Not extremely happy with the welds on the downpipe, but you get what you pay for, so as a temp solution, it will serve the purpose.
Also began cleaning the oil pans off of the gaskets. Using some roloc, goes pretty quick, just gota dig out the runs, and general cleaning. Hope to have the bottom end put back together by Monday, and some other loose ends with it.
Posted by: SwissFerdi Jan 18, 2014 - 1:55 PM
I hope this will be running in a few months, I'd like a ride.
Posted by: rave2n Jan 19, 2014 - 7:35 PM
Getting all the pieces of the puzzle put together. Per usual, I should have got the clip 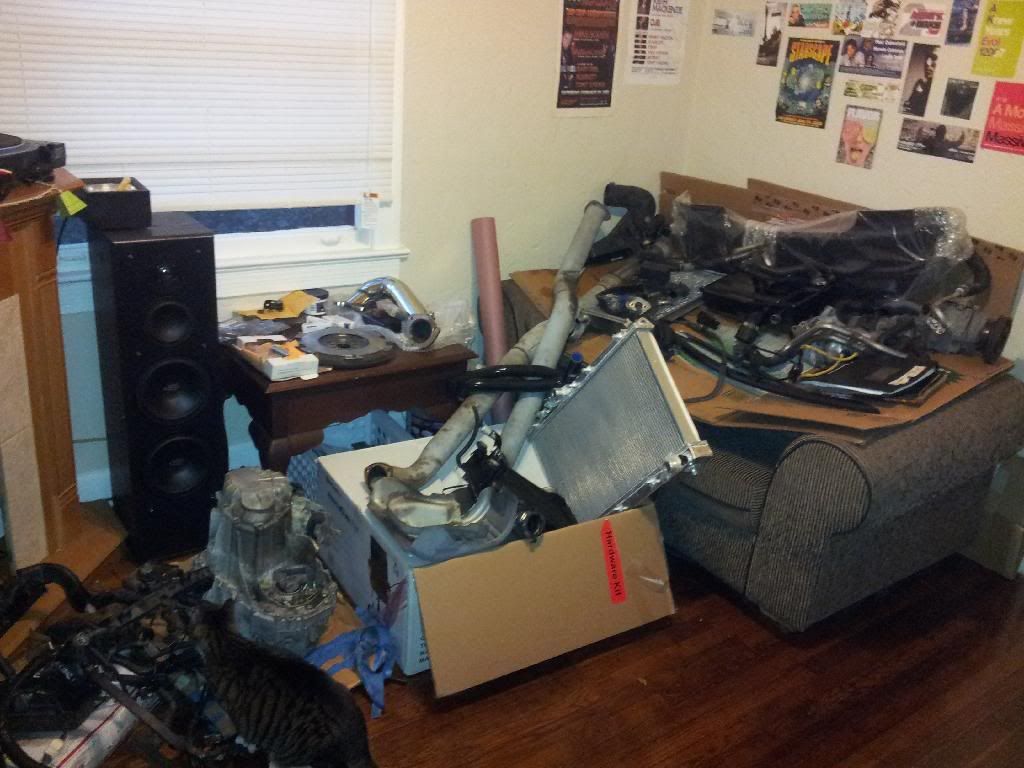
From the ECU to the Walbro is nearly everything there, except maybe some flywheel bolts, and all the home made wiring required. Inventory it all, and make a plan. Moving along.
Oh yea, and a tabby for scale.
Posted by: rave2n Jan 20, 2014 - 5:33 PM
Had to fix this....
http://s77.photobucket.com/user/ice_night/media/64308_588887074523419_102253740_n_zps8ca70a2a.jpg.html
Required all this, but I'm glad I did. I found other mistakes, and poor work of my own.
http://s77.photobucket.com/user/ice_night/media/1524727_588886911190102_1878230297_n_zps4673c262.jpg.html
http://s77.photobucket.com/user/ice_night/media/1532163_588886954523431_1047187578_n_zps8bf2e4b5.jpg.html
http://s77.photobucket.com/user/ice_night/media/1511287_588886994523427_226738884_n_zpsf484a81c.jpg.html
http://s77.photobucket.com/user/ice_night/media/541461_588887034523423_1780755939_n_zpsabe73f58.jpg.html
So what took me days before, just took me a couple hours this afternoon, which was quite nice.
Finish up the pans, slap them on, and to the pile of junk I posted prior to this one.
Posted by: rave2n Jan 27, 2014 - 8:38 AM
Some more work over the weekend
Cleaned oil pan #1 - Again..
http://s77.photobucket.com/user/ice_night/media/20140125_171542_zpsl1ctuigp.jpg.html
back on the block..
http://s77.photobucket.com/user/ice_night/media/20140126_120823_zpszl32rsir.jpg.html
I think I sealed it much better this time. Last time I just spread the FIPG all over the surface, which was very unpleasant to clean, and I was afraid I used quite to much the first time. I did...This is much better =)
http://s77.photobucket.com/user/ice_night/media/20140126_120918_zpsldaokxwc.jpg.html
In other news, I just got promoted at work, so substantial raise but with quite the increase in responsibility. So just going to keep moving forward and try to get this done, possibly easier now that funds will align better.
Posted by: cheela Jan 27, 2014 - 10:27 AM
good stuff! congrats on the promotion. more money for more racecar parts!!!
Posted by: rave2n Jan 30, 2014 - 12:27 PM
Haha thanks! Yea its good news..and it just got even sweeter.
Since my work requires me to occasionally go out to transmitter sites that lack proper roads, and me now being the primary contact for outages, work is now pre-taxing an allowance to my pay monthly to acquire a vehicle that can traverse such conditions.
So, I can finally park the Celica without being worried about time and getting to work the next day.
So in a couple weeks, buy a vehicle, and get the 5sfe out of the bay, and start the cleaning and wiring!
Posted by: rave2n Feb 2, 2014 - 6:14 PM
2nd oil pan installed today.
Nothing picture worthy.
Timing next.
Posted by: rave2n Apr 19, 2014 - 3:11 PM
Back to work!! 
Prepping for engine pull... Hood outta there...
Hour or so later..no bumper fenders, plastics. Found lots of missing hardware. Still need new fenders, will have to replace hardware then.
Progress is progress - Start pulling the accessories next weekend, then the motor the next. Heres hoping.
Annd, I had to take the boom from the Celica. The jeep is way to loud of a vehicle being lifted and all....so I need to transfer my audio.
New head unit to go with the boom.
http://www.crutchfield.com/p_130X8500BH/Pioneer-DEH-X8500BH.html?tp=5684
Which eventually will go into the Celica when its drivable and legal again.
Posted by: rave2n Apr 20, 2014 - 12:56 PM
Slowly...but its happening...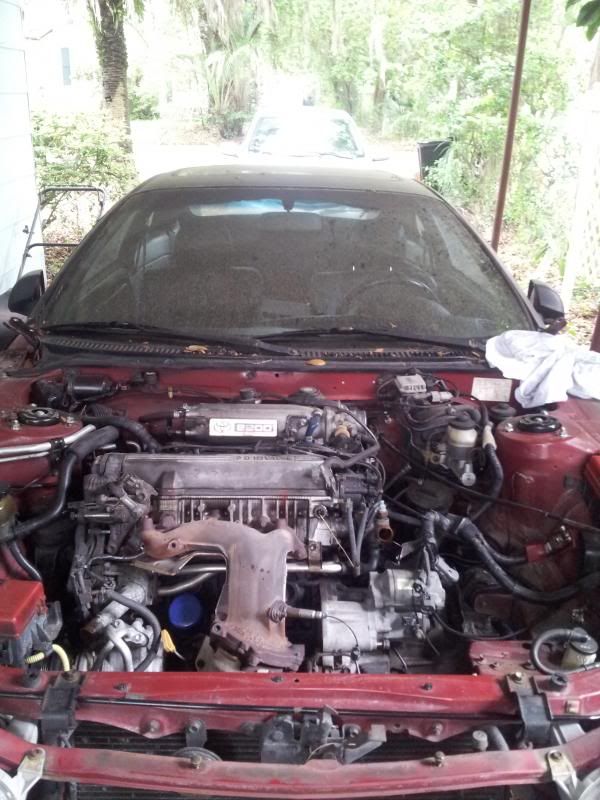
Posted by: enderswift Apr 21, 2014 - 10:02 PM
Beast it
Posted by: rave2n Apr 22, 2014 - 7:13 AM
Haha felt good ripping all that off. Alot of just nasty going on in that bay.
I want it sparkling before I drop the new engine.
Trying to dedicate an hour a day at least. Missed yesterday, but today is a new day.
Posted by: rave2n Apr 26, 2014 - 10:40 AM
And a little more today...
Posted by: PR0PH37 Apr 26, 2014 - 7:51 PM
Sweet. Love your "organized confusion"! Lol
Posted by: rave2n Apr 28, 2014 - 12:56 PM
Haha, all the important items I have bagged and labeled, but generally I just throw the junk around and figure it out later. I've gotten to a point with Celica's now that I recognize nearly every important bolt, but I hope to be throwing alot of the junk out soon.
Some more tear down...nothing really crazy, or picture worthy, but you guys get them none the less. Really getting into the messy part of it now.
http://s77.photobucket.com/user/ice_night/media/20140427_110834_zps05e7f297.jpg.html
http://s77.photobucket.com/user/ice_night/media/20140427_110844_zps6f93b1f3.jpg.html
Front crossmember loose. Screw messing with that rear mount, it'll come out with the engine =P
http://s77.photobucket.com/user/ice_night/media/20140427_110851_zpse21e5d3b.jpg.html
Need a slide hammer for that bugger.
http://s77.photobucket.com/user/ice_night/media/20140427_110917_zpsc73922de.jpg.html
Love the long easy axle
Plenty more to go!
Posted by: rave2n May 4, 2014 - 7:47 AM
Moar Progress!
http://s77.photobucket.com/user/ice_night/media/20140503_123316_zpse6476ece.jpg.html
So screw that axle. Its really not the axle's fault, its the bearing inside the trannie being all wonky, but alas the axle had to pay the ultimate price. I'll reboot the damn thing, or just buy another. They are cheap enough. Thankfully not hybrid! Took 1 minute to cut the boot vs. the 1 hour I already spent with a slide hammer and fork with no results. Not pounding at an axle again for over an hour. Never again.
http://s77.photobucket.com/user/ice_night/media/20140503_123328_zps2effae64.jpg.html
Just fuel line, ECU connections, and PS pump line. See I saved the bango fittings for last =P
http://s77.photobucket.com/user/ice_night/media/20140504_081755_zps8e0f568c.jpg.html
Then tackled the hell outa it this morning. Surprisingly all the left over items such as the ps pump and fuel line fittings came off real easy. I don't know if its because I'm better at it nowadays, instead of blindly torquing items, or just got lucky. On the ST I fought for hours getting both those lines off before, 1 wrench with another wrench on the tooth for torque and popped right out. Didn't even scrape my knuckles.
ECU was easy peasy, I was also expecting the connectors to be stuck like normal, nope. Slid right out.
Need to acquire one of those balancing bars for the hoist being I'm taking the whole assembly out as one. Going to need a little angling.
All in all, its ready to come out, just have to pop the 2 side mounts. Soon soon.
Posted by: Syaoran May 4, 2014 - 12:34 PM
Yes, get an engine hoist leveler. They are wonderful.
Posted by: SwissFerdi May 4, 2014 - 12:42 PM
My friend rigged a sling around the hub end of that axle with a ratchet strap, and then we hammered on it whilst it was under tension. Such a bitch to remove. Looks like you have aftermarket axles, no ribbing on the tulip.
Posted by: rave2n May 5, 2014 - 9:13 AM
Hah spot on what my issue was, no ribs =/
Yea I tried the tension method before on this same axle/trannie and it wouldn't pop. It just hates me, hence it going under the knife =)
Posted by: rave2n May 8, 2014 - 5:22 PM
So uh, I feel empty...
http://s77.photobucket.com/user/ice_night/media/20140508_155739_zps93181c00.jpg.html
45 bucks, handle broke off, my hands man'ed up lately, so toughed it out. I'll rig something fancy up later. Did the job, money seeminly well spent til next lift. If it pops when lifting the 3s I'll lose my bacon.
http://s77.photobucket.com/user/ice_night/media/20140508_170927_zps2d32bbc9.jpg.html
Lifted the hoist til I heard creaking I wasn't comfortable with. Went and lowered the stands, easy peasy. Safer?
http://s77.photobucket.com/user/ice_night/media/20140508_171708_zps7a4a339b.jpg.html
Feels great to have that greasy, nasty, and whiny weak implanted bastardo out!
http://s77.photobucket.com/user/ice_night/media/20140508_175403_zps1fee283d.jpg.html
Lots of work to do.
Thinking this might be the time to just frigging do it all. Pull the arms and do the bushings, have refurb'ed hubs already, check the rack.
As expected, it will be cleaned throughly, and painted to match. I think I'm going to do just some heavy duty black. I don't mind re-dipping the car. Its cheap, and I do enjoy the look. One day, do it all up, but for the next while its just make it look right. I want to invest my funds in the stability and longevity of this vehicle. The jeep is nice, have lots of fun with it, but...its not my Celica. I want back in my pilot seat..with boost. badly.
Posted by: njccmd2002 May 8, 2014 - 6:17 PM
that leveler, the same part broke on me, so dont feel bad, i use a big ass screw now.
Posted by: enderswift May 8, 2014 - 8:05 PM
Same here.
Move the engine hook near the alternator from the 5s over to the 3s when it comes time for the install. It will save you a ton of grief
Posted by: rave2n May 9, 2014 - 9:15 PM
Move the engine hook near the alternator from the 5s over to the 3s when it comes time for the install. It will save you a ton of grief
Appreciate the tips, I was noticing the angles are very tight. Time to get my butt in gear, lots of meticulous items to finish.
Posted by: Syaoran May 10, 2014 - 3:56 PM
I bought a "Big Red" brand leveler. Still working fine, no broken handles. Cost me around $50 lol
Posted by: rave2n May 15, 2014 - 10:25 AM
Well...might have to put this one on hold for a 2 months.
Just got word on another place potentially to move to.
More modern, has a lot less issues, and a real full garage. Going to have to pack up the celica, put the hubs and wheels back on, and tow it to the new place in 6 weeks.
Didn't want to move again, but this is the best place in town for the price, right near work, and has everything I wanted.
Posted by: cheela May 15, 2014 - 10:31 AM
all i read was garage.
Posted by: njccmd2002 May 15, 2014 - 11:46 AM
oh man, thats a delay, but the garage makes it worth the wait. or you can store the car in a 10x20 storage room in the mean time and work there...
Posted by: rave2n Jun 23, 2014 - 9:02 AM
Sold the 5sfe yesterday...
Well..let me correct that.
I sold a 3sfe that I thought was a 5sfe.
Guy noticed by checking the block codes, and after some exchanges in texts, we made a deal. Not all the funds I wanted, but hey its better than a heavy paper weight in my car port.
He delivers for a living and is going to use it as a spare, as his 5s is starting to knock in his 91.
Posted by: rave2n Aug 16, 2014 - 2:51 PM
Engine bay spray...first coat...
Quickie...
http://s77.photobucket.com/user/ice_night/media/IMAG0005_zps803dfea7.jpg.html
Posted by: ricochet1490 Aug 17, 2014 - 8:10 PM
Plan on cutting in all the door jams with that same color?
Posted by: rave2n Aug 21, 2014 - 1:47 PM
Yessir, matches well with the plastidip, hides that is used to be a red car
Posted by: rave2n Jan 27, 2015 - 11:03 AM
So...I'm still here.
6 years into Celicas, and I'm not spent yet.
2014 was a hard year financially, and I hit a few setbacks on the build. When family, specifically your mother, needs help. To me, there is no option, but to cut expenses and help family. For me that was the celica....Paying my mothers mortgage on top of my own expenses really broke the bank, and my motivation for some time.
2015 is looking better. The lady of the house has completed schooling, and is in works to be employed at 2 hospitals in this area. My mothers life seems to be evening out, and my work is as stable as its ever been.
So with that, I'm attempting to dive back into this. I know I've been saying it for years, but I will complete this project. I refuse to give up.
Where it stands now:
My S54 is ****. I needs to be rebuilt/refurbished. That was one of the big kinks in my chain. The spare S54 was not even a S54, my mistake. At least it was at no cost.
So my current goal is to get the S54 to a shop for new bearings, and a once over on the gears. Once that is done, I can finally drop the engine, and begin the wiring.
I'm really not far from finishing it, just this transmission snag, at the cost of roughly 1200 dollars is what got me. I'm debating sourcing another one,but frankly I don't want to put trash in what I've spent so long working on.
So with my credit cards finally dropping down to reasonable amounts, except things to start moving along in the next 2 months or so.
I have lots of prep and clean up...and rust to deal with from my laziness.
Posted by: cheela Jan 27, 2015 - 11:20 AM
family always comes first. but glad you're still around and not giving up on your celi.
Posted by: antoine64 Feb 3, 2015 - 5:24 PM
It's a complicated project. Sometimes those things can take time. I've spent many many many hours and years on car projects. You'll get it eventually. I'm just finishing up a celica with a 3SGTE swap and massive issues. It's hard to stay motivated when you fix one problem and find 3 more. It's also tough when it just sits in the yard not moving and you want so bad to drive it. So don't give up!
Posted by: rave2n Feb 26, 2015 - 3:11 PM
Got the transmission to a shop this afternoon.
Progress! Should know the results by Tuesday.
Appreciate all the words!
Posted by: rave2n Mar 5, 2015 - 3:16 PM
No word back from the shop on the transmission. Leaving them alone, as I suspect they had to order the bearings I requested replaced, making it a little longer then expected. Wait til monday, then ask what is going on.
On other news.
Fiiiinally found a place to move to. A little while back we were looking to grab another nice place with a garage, but that fell through. So we sat on the current place for a year, and finally got frustrated enough with the sewage condition and started looking again.
Found another place, fits our needs, but what you guys care about. It has a garage! Finally, I can tinker in peace. Approved today, just need to iron out the lease details.
The good thing about the move is I need to compile my whole project as its just scattered around right now. Packing it all up, and towing it with the Jeep by the end of the month.
I like where 2015 is going....
Posted by: SwissFerdi Mar 6, 2015 - 11:07 AM
Good luck. Where in Gainesville? A garage is where it's at, such nice...
Posted by: rave2n Mar 6, 2015 - 10:10 PM
Where in Gainesville? A garage is where it's at, such nice...Right off Newberry, behind this Sport's bar call ballyhoo or something.
Haha yea, we ironing out the lease right now. Looking forward to easier living.
Posted by: Zeros2 Mar 6, 2015 - 11:07 PM
Awesome project, I'm going to get started on my 97 gt here fixing up a 96 tacoma to flip for my funds! Good luck on your car ill be watching
Posted by: rave2n May 19, 2015 - 10:41 AM
Well, once again the new place fell through. This town is just..a pain when it comes to renting, and buying is not in the future for this town.
But, to the important things.
Got the old exhaust off, and working to get the new one on. Its an under rear axle 3 inch style, but its not making much sense to me on how to hang, but I'll figure that out, or just tow it to a shop and say have fun.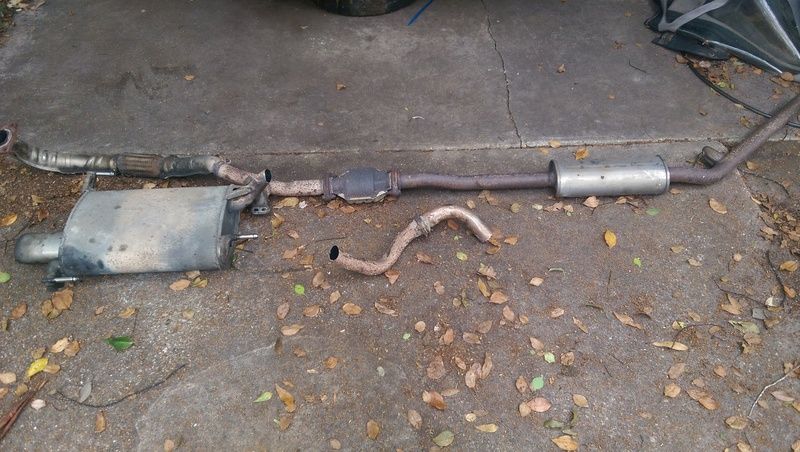
FINALLY picked up the transmission today. What started at 500 dollars, became 800 dollars. Kinda why I hate shops, but it is what it is. Bearings were expensive from the dealer, and I do not have a press large enough for the job. Gota pay to play.
Either or, they did a once over, all the gears are good, syncros are good, and everything else needed has been replaced. Seals, bearings, o-rings etc etc.
No LSD, but it will do until I have the car running, ran for a while, and invest in something else down the road.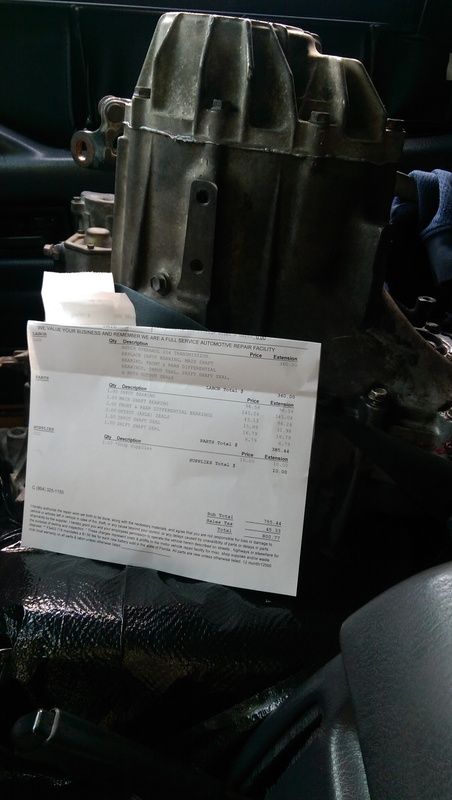
Ah, I have a new buddy. Hes keeping me busy as hell, but, hopefully I can train him to bring me tools eventually....
Lincoln is the name, English Mastiff is his game.
Posted by: rave2n May 24, 2015 - 8:52 PM
Cleaning the transmission..
Dirty dirty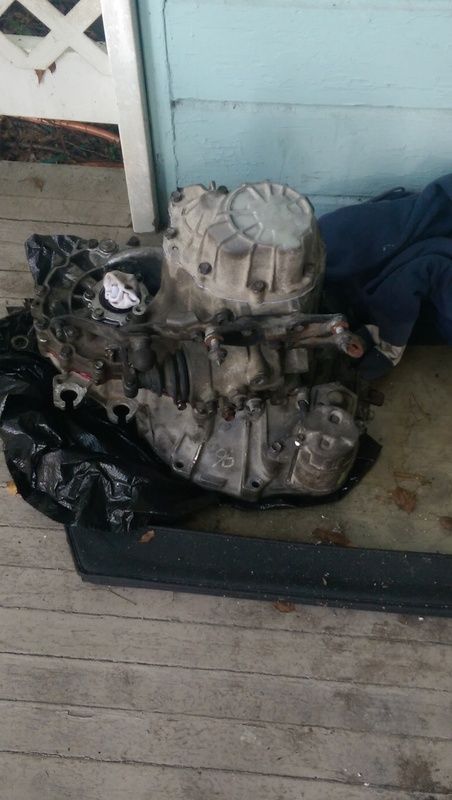
Bit better, some more nip picking cleaning to do.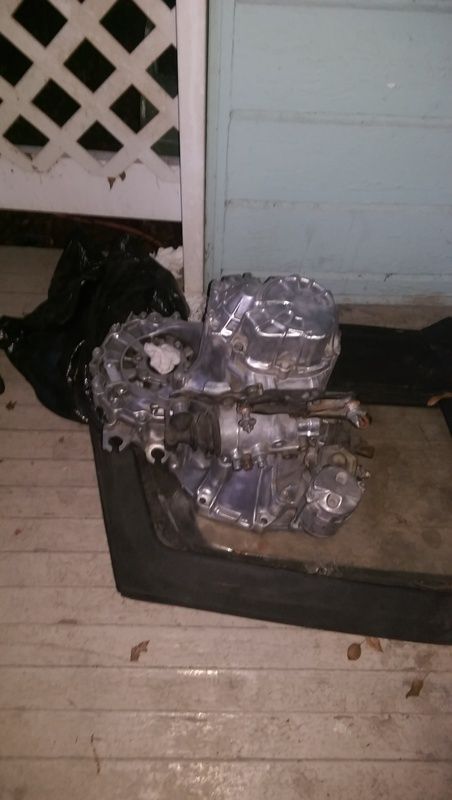
Posted by: ricochet1490 May 24, 2015 - 9:04 PM
Get that garage?
Posted by: rave2n May 24, 2015 - 10:37 PM
Given up on the garage. Just trudging forward
Posted by: antoine64 May 25, 2015 - 12:53 AM
That's a shiny transmission! I recently bought a 10x15 plastic shed at Home Depot for my Celica. It was only $200. Not as good as a garage but It saved me from working in the rain and snow a few times.
Posted by: rave2n May 25, 2015 - 3:59 PM
Oh I have a carport, I'm just being selfish =P - Lots of bugs in FL
Cleaned up the carport, lowered the Celica back to the ground, got the engine off the stand, and getting ready to install the clutch assembly. Have to acquire Flywheel bolts, hoping a place tomorrow in town has them. Once that is done, I can start throwing everything back together.
Posted by: enderswift May 25, 2015 - 10:39 PM
woooo! turbo!
Posted by: rave2n May 26, 2015 - 8:31 AM
haha, it did feel good to get it off the stand, and see that turbo!
ARP Flywheel bolts ordered, come in tomorrow from a local dealer. Almost paid 85 on Amazon for next day, but got lucky and found this shop with stock in Miami for only 60. Might be bugging them for future work being I really didn't like the last shop I went too. The only other shop work I NEED done is to get the exhaust welded and hung, but if these guys prove honest, I may find some other things for them.
Was planning on using my old ones again, since its kinda on the fence if they are re-usable or not. Seen stories where they sheered, seen stories where they last 100k miles or more. Everything install is different. Problem was I lost 1 of them, so the gota do it right..

So hopefully I can get the flywheel on tomorrow, and start lining up the clutch & plate for the transmission install this weekend when I have a bunch of time.
Posted by: rave2n May 31, 2015 - 2:09 PM
Well managed to get the flywheel on....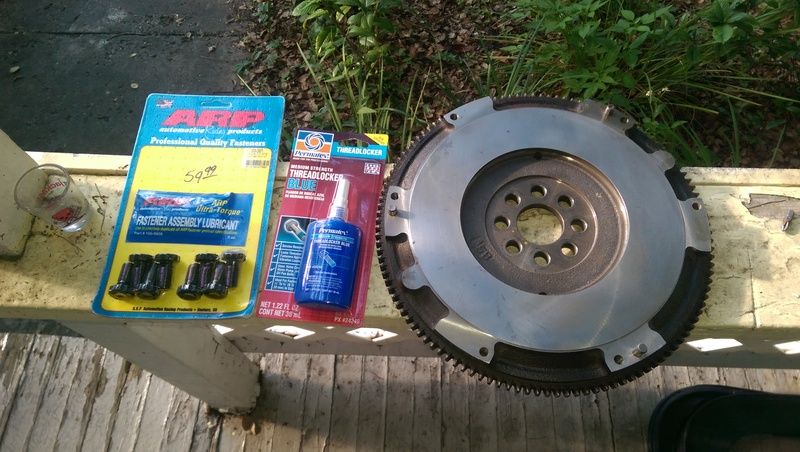
If you see that rusty bolt on the left of the case, that is what I used with a large fork tool into one of the flywheel teeth to install the bolts. 72ft-lbs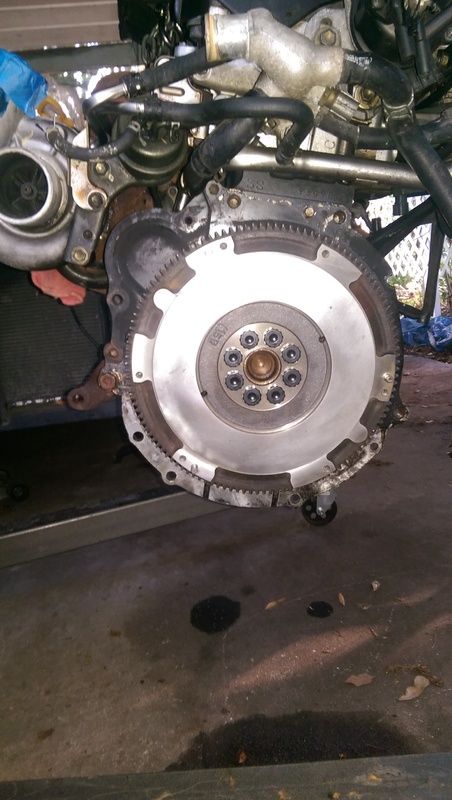
I wanted to install the clutch and pressure plate as well, but it appears I have misplaced or given away my pressure plate bolts. I figured wth, the kit I got from southbend will have some in there, but nope. Per usual, I always discover I misplaced something on a Sunday when none of the stores needed are open. Oh well, try all the fastener places in town tomorrow. Hoping I'm not having to order simple M8-1.25-12mm hard 6+ x 6. Just want to grab and get moving, I think I can get by with m8-1.25-10mm as long as they are 8+ hard. We'll see...
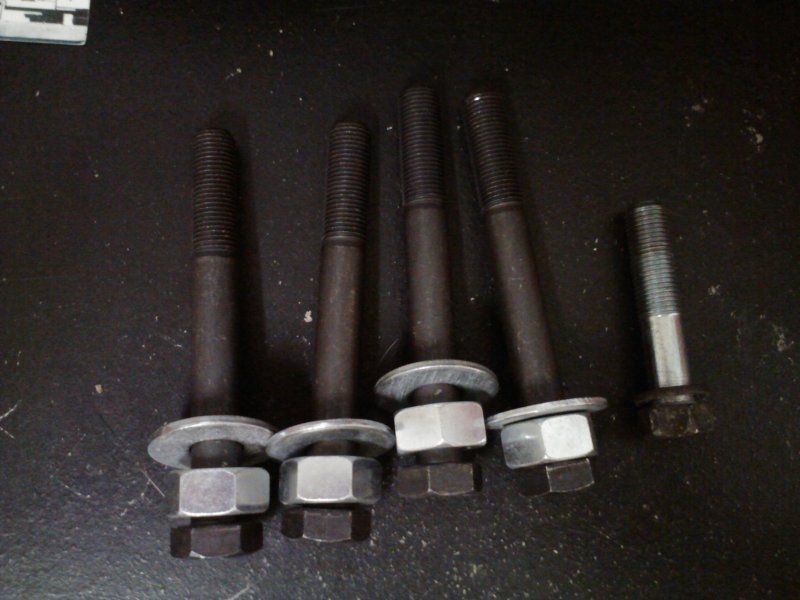
Found these laying around, I think they are pressure plate bolts but cannot confirm, plus I only have 4. If anyone can confirm they are, I'll go on the hunt for the other 2...
Finished cleaning up the transmission. Applied some clear coat to limit oxidation. Not perfect, but not bad for a 20 year old transmission either...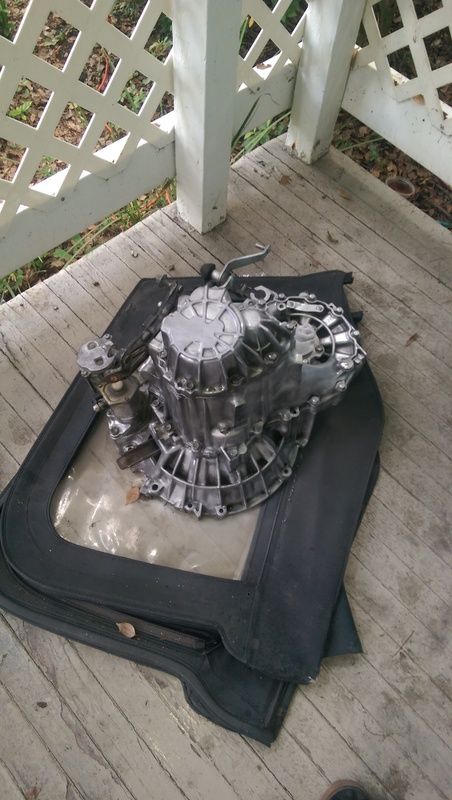
Posted by: enderswift Jun 2, 2015 - 8:12 AM
Rave. Get NEW pressure plate bolts from toyota. Use loctite and torque them to 22 ftlbs, not 14. The fsm is wrong. I reused old bolts and torqued to 14 only to have them back out on me. Ripping out a trans to fix something so small is really rea)y annoying
Posted by: rave2n Jun 2, 2015 - 8:32 AM
Roger that, appreciate the tip! Toyota was claiming they'd have to order them, 3 days. Blah. Our dealer in this area isn't overly helpful.
So I found a fastener place in town, and picked up some M8x1.25x12mm hard 10.2, so they should do the trick. I doubt I'll snap the heads off these, specially with the increase in torque.
That would drive me insane to just pull the trans again for pressure plate bolts! I'll use my blue loctite heavily =)
Posted by: bsamps4 Jun 2, 2015 - 8:57 AM
I was kind of surprised by the fsm as well. I think I torqued mine to around 22 as well. I just kind of set them to "tight" Plus. 14 ft pounds isn't even enough to get the pressure plate to sit flush on the flywheel. Those dowel pins have a bit of force to them.
Posted by: enderswift Jun 2, 2015 - 12:42 PM
Roger that, appreciate the tip! Toyota was claiming they'd have to order them, 3 days. Blah. Our dealer in this area isn't overly helpful.
So I found a fastener place in town, and picked up some M8x1.25x12mm hard 10.2, so they should do the trick. I doubt I'll snap the heads off these, specially with the increase in torque.
That would drive me insane to just pull the trans again for pressure plate bolts! I'll use my blue loctite heavily =)
I was indeed thoroughly pissed off.
Posted by: rave2n Jun 3, 2015 - 10:39 AM
Clutch and plate engaged!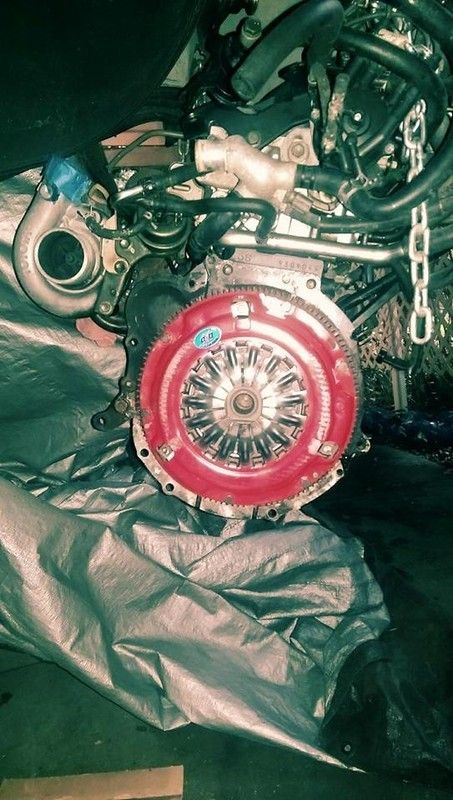
Did run into one small issue. I wanted to put some lock washers on the pressure plate bolts I just acquired, but its turns out they are not 12mm.
They are 10mm, my calipers don't lie. So either they were boxed wrong, or fastener lady mis understood me. So as you can imagine that made things a little tight, and being when installing the pressure plate the dow pins then restrict it from going flush with the flywheel until tightened down.
Had to get out a c-clamp and there is one section where you can put some pressure on the plate from the back of the flywheel. So, get a couple threads in, turn it, repeat till all 6 were in, but not tightened down. Star pattern the rest. Lots of loctite, 22ft/lbs.
It tightens down to spec, or higher, and the bolts are extra hard. I'm feeling confident I shouldn't have issue with these later on...or more so hope so =)
Posted by: mkernz22 Jun 4, 2015 - 9:59 PM
Looks good so far! Lock washers are definitely overkill as you only need some loctite on them. Never had an issue and those aren't something that'll back out if they're properly torqued.
Posted by: kurt95gt Jun 5, 2015 - 12:19 AM
Good to see your still working on this man!
Posted by: rave2n Jun 6, 2015 - 11:34 PM
Haha thanks, its slow going, but its going. Literally have no time, but have the motivation. So, as long as I get some progress I'm happy.
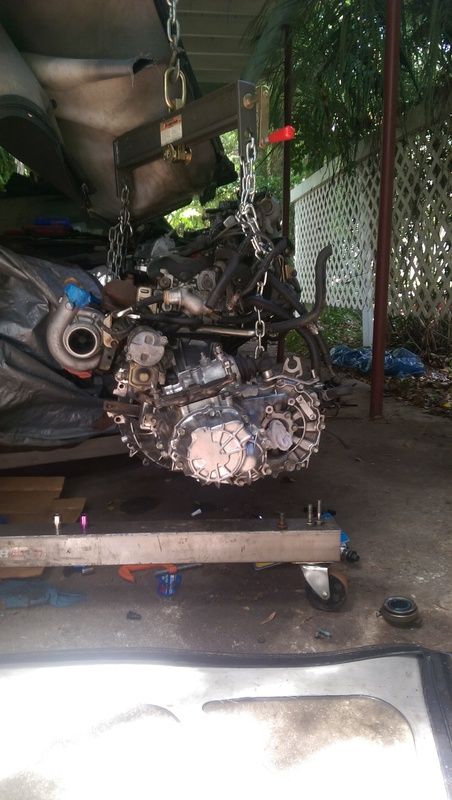
Transmission is on.
Next pictures should come a much different angle.
Posted by: rave2n Sep 1, 2015 - 8:26 AM
So, I got tired of teasing you guys about a garage, so I didn't post till it happened.
Thus, GARAGE!
Posted by: cheela Sep 1, 2015 - 8:49 AM

Posted by: SwissFerdi Sep 1, 2015 - 9:53 AM
x 2.81 gigawatts
I had a garage in the last place but not this one, I miss it. Congratulations!
Posted by: rave2n Dec 5, 2015 - 2:38 PM
Anyone know the order in which the injector wires plug in? They seem to go brown white brown white connectors, but I can't recall now.
Trying to put the harness back on, but I removed the plastic, and now I can't figure out which wire goes to which injector.
Bah, looks like I'm looking up the wire colors. Time to dust off the old diagram.
If you read my whine earlier, ignore it. Rough month.
Posted by: rave2n Dec 12, 2015 - 6:34 PM
Got some work done today.
Have much time nowadays. Lady and I of 10 years split, and been trying to fill the void. The Celica proves its worth once again.
Harness is back on, found a schematic and was able to match up the wire colors with injectors properly. Only a few dangling connectors, but I'm pretty sure they are for intercooler and relays etc.
New hub and etc put on after the tow truck stripped the bearing out the last. Had one laying around so it worked out quite well. Dust shield is pretty much rusted out, but something to replace another day. Have another laying around, but don't want to pull the spindle/bearing out.
Started cleaning up the crossmember, and trying to find all the bolts. Some things have been moved from their locations & labeling in the latest move. Its all here..just, has to be found.
So, just a few things to tidy up in the bay, get the mounts ready, and down the engine goes. TOOOOOOON more to do, but I'll be happy to get that engine out of the air.
Posted by: enderswift Dec 12, 2015 - 11:25 PM
Keep at it man. The first time you hit boost it'll be aaallll worth it
Posted by: rave2n Dec 13, 2015 - 11:55 AM
Truth!
--
So you guys like progress eh?
Well here ya go.
Out of the bay before the timing and such was completed.
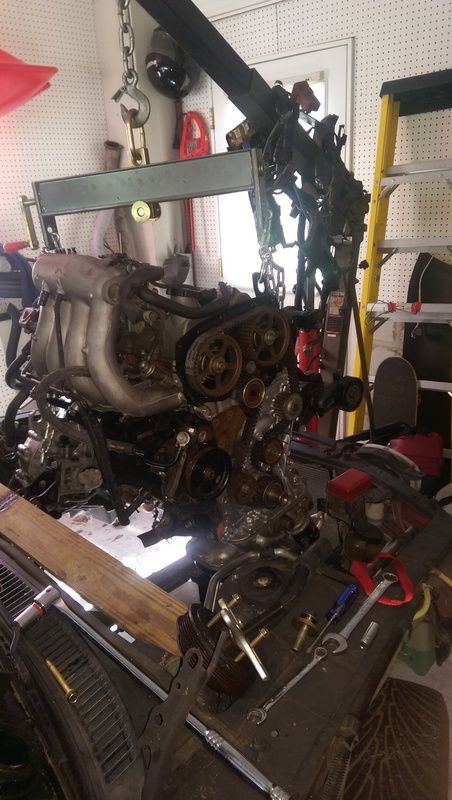
Completed getting it off the hoist, and the side mounts attached. Was a little to worn to get the crossmember and do the rear mount fight. Next weekend maybe, I'm happy with the progress for the amount of time I put in, and searching for hardware lol.
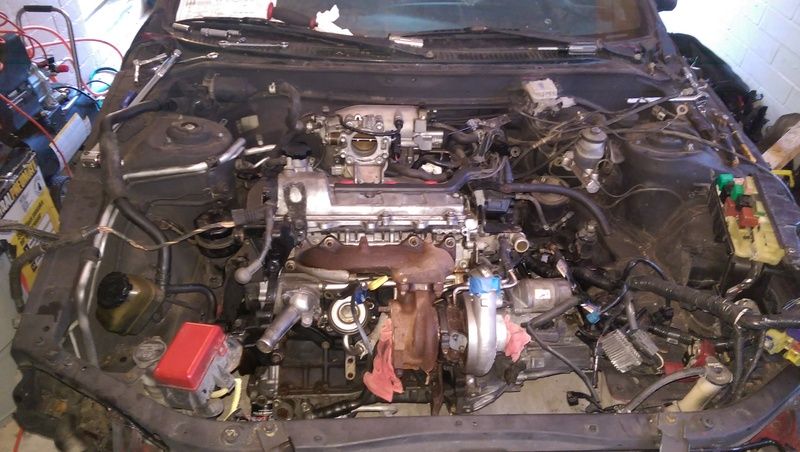
As you can see, I have PLENTY to do still. This was a huge step for me though, this bay has been empty for over a year, and hauling stuff around was quite taxing. Now it feels like a project I can complete. Lets just hope I don't have to pull the assembly any time soon!
Posted by: enderswift Dec 13, 2015 - 10:40 PM
hard part looks to be over! You should feel like you're making quick progress now
Standing by for updates
Posted by: njccmd2002 Dec 15, 2015 - 11:39 PM
at least the progress is not dead, thats what counts.
Posted by: CelicaDICE Dec 15, 2015 - 11:49 PM
Keep it up man!
Posted by: cheela Dec 16, 2015 - 9:51 AM
always nice to see more progress when I pop in here. keep it up!
Posted by: rave2n Dec 26, 2015 - 3:14 PM
Ello again folks, and thanks again for the e-motivation
Been just messing around with things, nothing really major. Finding hardware, fighting all these vacuum lines and such.
Speaking of which, can someone tell me which one to use if not both cause these 2 items aren't matching up to me. I'm almost sure you use just the right one, but after planning 2 years ago and never touching it, I kinda lost all that...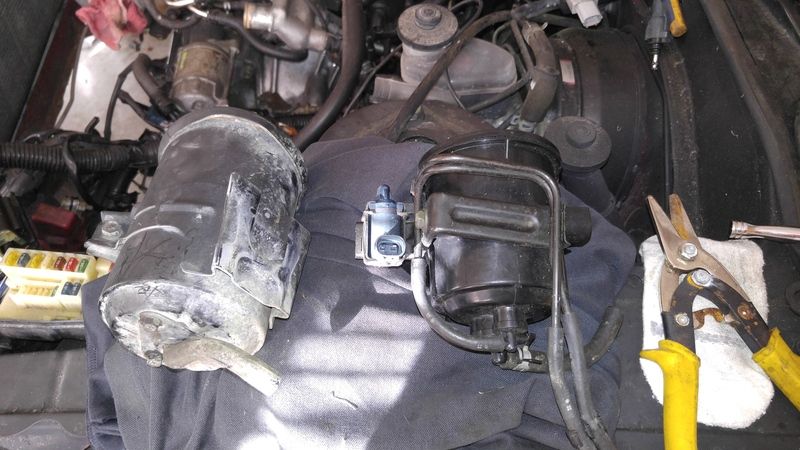
Most other things seem to be going OK.
Seems the shifter cables are oddly to short, possibly have them routed wrong in relation to the steering rack.
The fuel line doesn't quite make it to the filter..well it does, but I'm not overly content with how tight that is. May have to find another solution for that.
But once I get these few items situated, I'm going to start tearing apart the wiring. I'd appreciate any tips or links that give a through walkthrough on the wiring. I keep hearing, its just 6 wires so...maybe it is that easy =)
Posted by: antoine64 Dec 26, 2015 - 5:51 PM
I know that if you change the transmission to something other than the one that came with the 5sfe engine (s54??) that you have to use GT4 shift cables. My transmission is out of an MR2 and I needed the longer cables.
As far as the charcoal canister goes, the one on the left is what's in my car although that may be the stock US Celica version. I don't know if it really matters all that much as long as you can connect all the vacuum hoses.
By the way, don't make the mistake of plugging the idle air supply hose that runs out from under the throttle body or connecting it to vacuum. The previous owner did that to my car. The idle air supply needs to connect right after your air filter or have a separate air filter. I went through and straightened out all my vacuum/air hoses and learned a lot about how these hoses connect. When I got my car it was idling at 1500rpm from vacuum leaks and bad adjustments.
Posted by: enderswift Dec 26, 2015 - 6:54 PM
use the one on the right
Posted by: Batman722 Dec 26, 2015 - 8:52 PM
You can use either or none.
Posted by: rave2n Dec 27, 2015 - 6:24 PM
As far as the charcoal canister goes, the one on the left is what's in my car although that may be the stock US Celica version. I don't know if it really matters all that much as long as you can connect all the vacuum hoses.
By the way, don't make the mistake of plugging the idle air supply hose that runs out from under the throttle body or connecting it to vacuum. The previous owner did that to my car. The idle air supply needs to connect right after your air filter or have a separate air filter. I went through and straightened out all my vacuum/air hoses and learned a lot about how these hoses connect. When I got my car it was idling at 1500rpm from vacuum leaks and bad adjustments.
Appreciate the tips!
I am using the S54, so the cables should reach just fine, but possible I just didn't have the engine in the right position at the time. Its been a long time since I took them off. Its realllly close, 1 fits fine, the other is just like a quarter inch and it'll sit in its ring.
Did swap to the right canister, figured if I have it, might as well use it lol. Some of the lines I'm still confused on, but I'll figure those out eventually. I just need to dig through the threads and find some good pics.
Much Grass - Used that one, few lines are confusing but I'll figure it out.
Thanks!
---------------------------------------------
So went at it this morning. Swapped out those canisters, still figuring the lines, but all in due time. Couple other lines and connectors sorted out.
Did the dance with the rear mount. Typically I would be fighting it for hours, but I put 30 minutes into it, took a break and came back and get it done in 10 minutes. I cheated though, I lowered the sub-frame to get that little bit of clearance =)
Need to go pick up a new fuel line sometime next week. It fits, probably be fine, but I can grab a SS one down the street so figure why not, and maybe tuck it better.
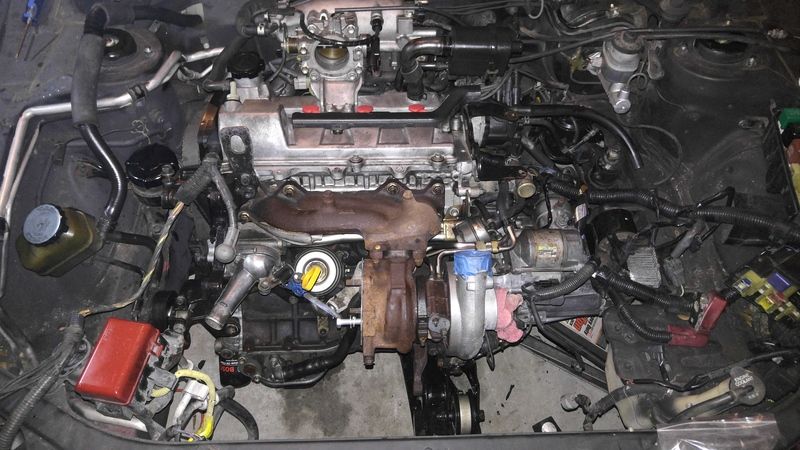
That layer of dust really makes it look worn, but I did try to clean it up some. All in all, its just dirt.
Next weekend, after vacuum lines are sorted, its allll wiring time baby =) Oh yea, need to figure out studs for the down pipe. May just have to drill it out, and put some new hardware on.
Posted by: rave2n Jan 1, 2016 - 12:49 PM
Finally figured out the shifter cable issue, which wasn't an issue. Was just me being semi-retarded...
For some reason I was trying to take them too far, whereas they just clipped in. Derp.
But, I also need some help folks. I've been searching for some good images of how people have these ran, but I just cannot find a good look.
In this image, would it be correct to place that line on the nipple next to the fuel line? - Its coming from a hardline off the wall near the charcoal canister.
Its the blue arrow in the next image.
For the right red arrow, is that line connected to the right hardline on the wall? The left red arrow, those smalls lines. I believe one goes up to the intake manifold right after the throttle body. Seems to be a few small connections up there. I'm curious to where the second one goes. I also thought there is suppose to be a line that vents to environment, but I don't see how that would happen either.
Last one...
Not sure where these buggers go. Air intake pipe?
Appreciate any tips, I get this figured out, I do wiring tomorrow
I'm also up for deleting these items like Batman mentioned, if it would be easier to re-route and cap some things off, Im up for that. Just need a little direction and any potential side effects.
Posted by: antoine64 Jan 1, 2016 - 6:26 PM
in your first picture with the white arrows, that is the fuel return line. It connects to the end of the fuel rail on that nipple you point to with the white arrow. I recently had that line leaking fuel so I had to replace it. You might want to get a new hose while you've got things apart to avoid smelling gas. your red arrows image sounds correct. I think you want this hose to go to P or E on the throttle body providing vacuum when the throttle is open but no vacuum at idle. on the last picture those look like vacuum hoses but without seeing where the other end goes, I can't tell.
Posted by: rave2n Jan 2, 2016 - 3:26 PM
On that fuel return line, I assume that goes back to the tank? I thought it would be connected to charcoal canister? Or does the line above it, the right right arrow do the canister to tank run?
I think it does, but I'm trying to mesh together how all these goes looking at 50x diagrams, and it seems most have just deleted this. Seeing I already have, I figured I'd hook it up =P
On that last picture, those small hoses connect to a hardline that ends up to another soft line on the intake manifold.
Did find my MAP sensor, so that will cover one of the inlets on the intake, and VSV which did relieve some confusion. Appears one end of the VSV goes to the intake, the other to the W2A exchanger.
Appreciate all the help!
The most pictures I could find on it, where on Pressure2's build, but he removed his canister, but it did help me figure out other lines lol.
I may have some of it figured out. Go go part numbers...
77277A - Fuel Return Tube - Indicates the return to the middle hardline
77261E - Tank to Canister - Indicates the left most line facing forward of vehicle.
----
Well just went to it, and got more done...I think I have it all right now...Had to go pick up a small line and bridge to replace what seems to be gone. Luckily they had it available =) Just the line that comes from the charcoal to those nipples on top labeled P & E
Confirmed I got the right fuel return to hardline hooked up, found my VSV, and turns out I have 2 MAP sensors.
I didn't realize it was still attached to the harness this whole time. First thing I did when I got the engine was remove the harness expecting to ship it off. Didn't work out. It would appear the bracket and the top piece of it with part number were torn off but the sensor and line itself were intake and connected to the manifold, I just removed the connection. So, I have a spare now =)
Looks dirty as hell, but meh, at least things are finally lining up.
I expect to do wiring tomorrow. Unpin, repin, fight if I want to extend just a few wires or get creative...
Oh anyone know why the coil pack is hitting the hardline on the master? I swear I have the right mounting place...
Posted by: antoine64 Jan 2, 2016 - 5:30 PM
I'm glad to hear your figuring it out. lots of hoses that need to be hooked up just right to make it work. I had fits sorting out my hoses. Still not sure if everything is right.
here's a picture of my engine. I feel like the previous owner was smok'n crack when they put the engine in but I've been sorting things out. My ignition module points out instead of to the side like yours. I don't know if that's your problem or not. the vacuum line over the top of my intake manifold plugs into the top of the charcoal canister. Mine is the older canister in your picture not the fancy one that came with your engine. they probably work similar though. the two large black hoses draped over my turbo piping go to the air intake tube. one is for the breather and the other is for the idle air and stock turbo vsv air.
Posted by: rave2n Jan 3, 2016 - 11:21 AM
here's a picture of my engine. I feel like the previous owner was smok'n crack when they put the engine in but I've been sorting things out. My ignition module points out instead of to the side like yours. I don't know if that's your problem or not. the vacuum line over the top of my intake manifold plugs into the top of the charcoal canister. Mine is the older canister in your picture not the fancy one that came with your engine. they probably work similar though. the two large black hoses draped over my turbo piping go to the air intake tube. one is for the breather and the other is for the idle air and stock turbo vsv air.
Lol, yours looks pretty damn clean man!
I got a ton of clean up to do, a lot of it looks like hell right now, but its really me mocking it all up and getting everything in order since it sat for 2 years. In all reality, it will be pulled again in a year, harness will be cleaned up and re-wrapped, and I expect to either get a e153, or find a LSD scenario for the S54 since I recently had it rebuilt. So right now, I just want it running. I can nitpick items down the road. Having 2 vehicles helps =)
------------------------
Working on the wiring today.
Doing the 6 wires on the EA1. Ran into a slight issue, as I do not have the body harness itself, been trying to source it forever, but never could find it, so it looks like I'm going to have to get some pickup wire and wire these few in themselves. Thankfully, they cut the wires with a good 6 inches on them, leaving me enough space to work with them. Finding OEM connectors should be interesting for all these items...kinda hoping they are still on the items, but I doubt it. They were hard enough to even get shipped in the first place...a year of fighting to get that damn W2A pump.
Need to get the diagrams out and make sure I'm doing this right. I think its just FP, coil, and W2A runs. Re-pinning should be easy enough, done that a million times, but I'm short a pin for the internal clutch start because my 5S harness went with the 5S when sold. No big deal on that though, that portion won't get behind the firewall until next weekend, so I may be able to remedy that.
Posted by: rave2n Jan 3, 2016 - 3:50 PM
Well, figured out my wiring issues...quite a bit more simple than I expected once I really started to focus on it.
Time to make a harness for this relay box. Got lucky, because all the wires match from the 3s EA1 plug. So all I should need to do is repin from the 3s plug into the 5s plug and call it a day. So one end is made, solder in the rest another time, then carry the pins over.
Supplies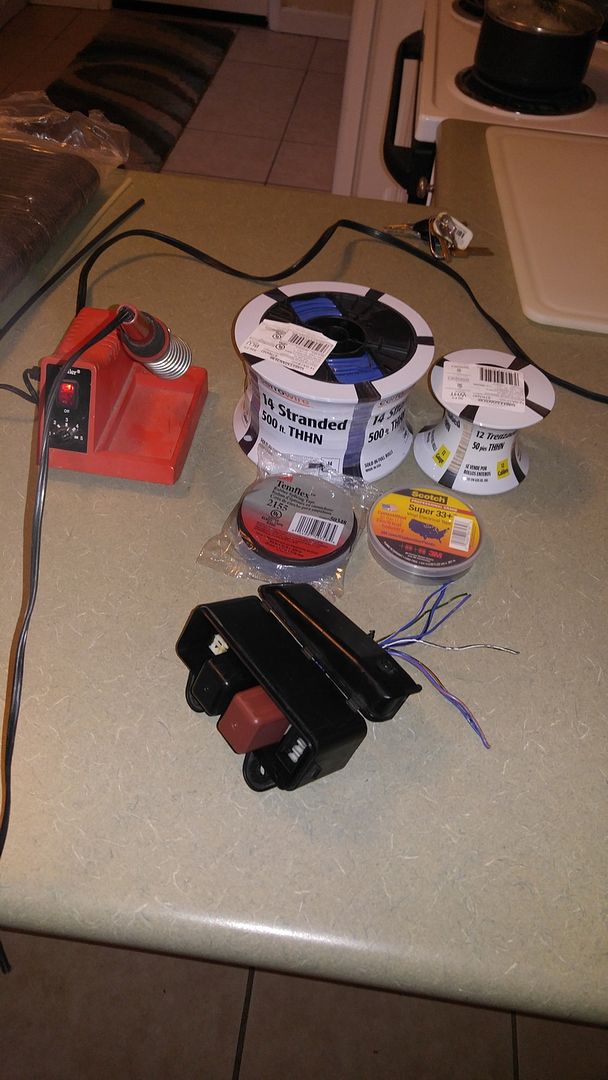
Don't forget to tin that wire 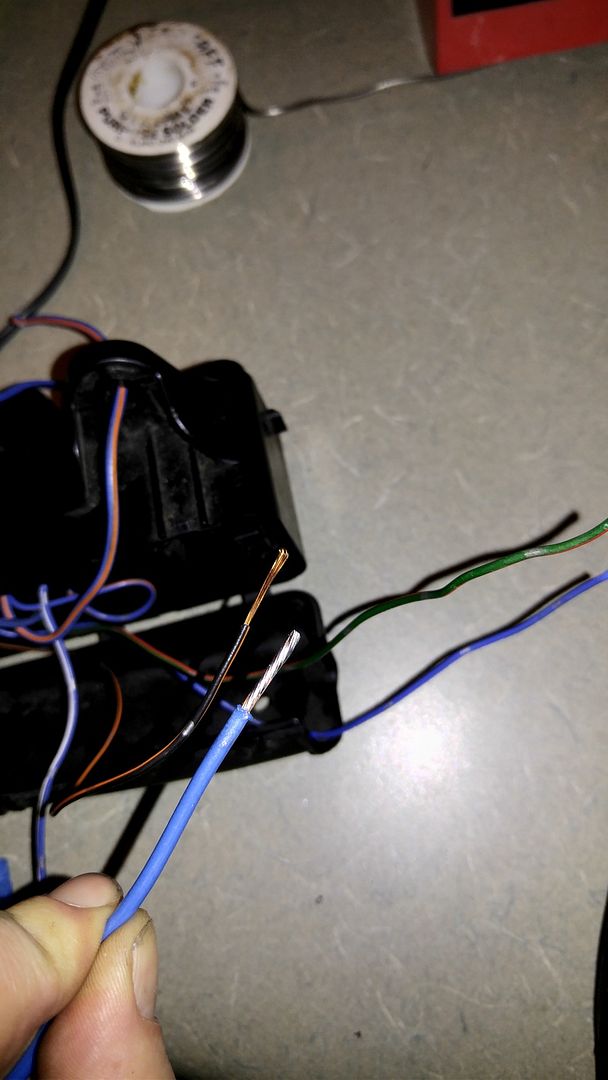
I think she'll hold...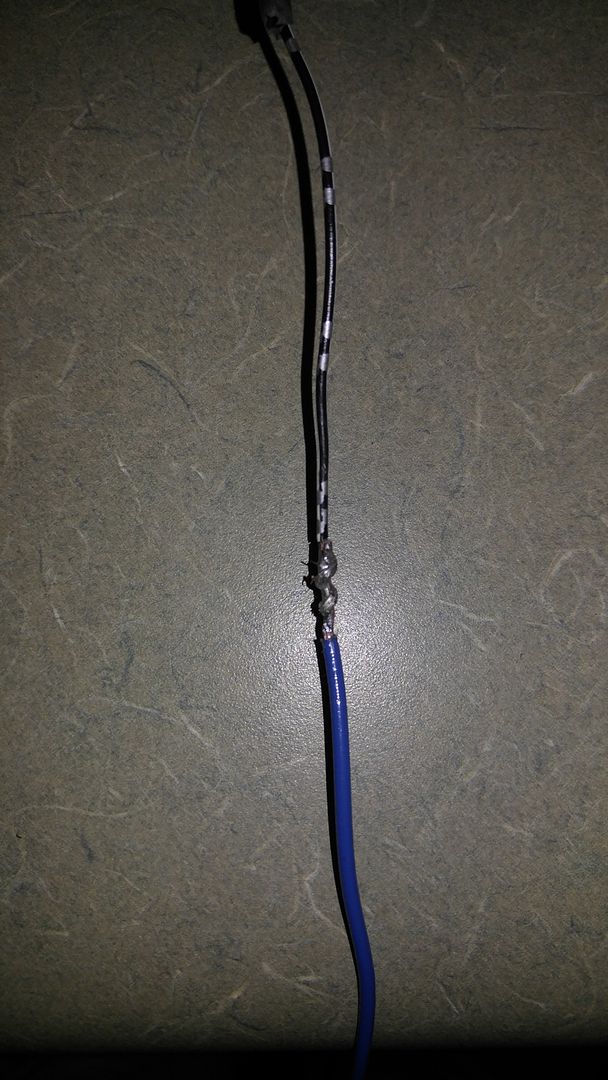
Right or not at all?
Almost done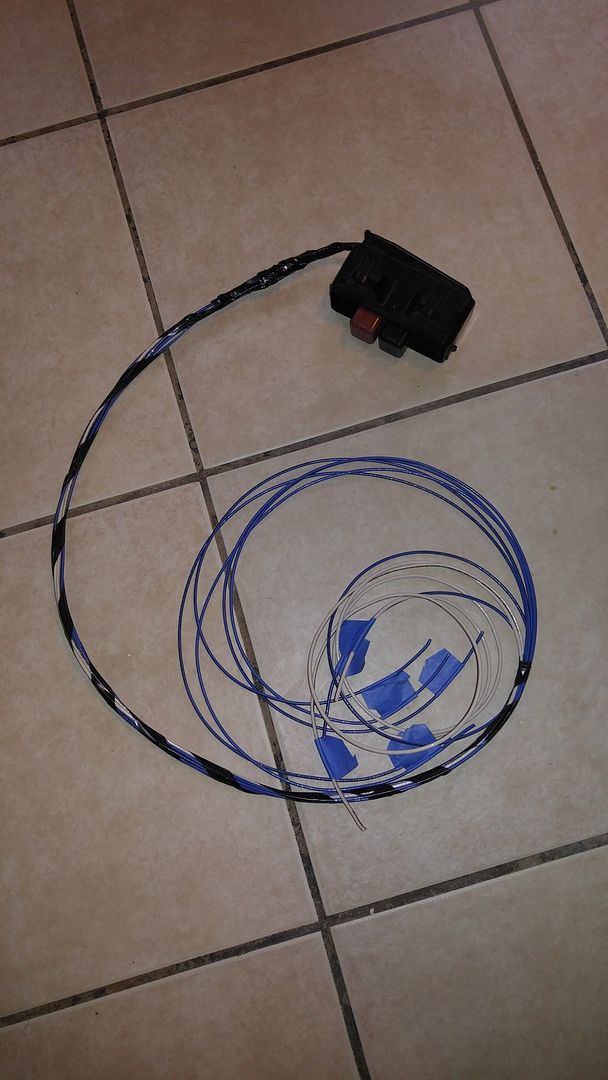
Finished product
So I should stop begging for help now. I literally sat down for 3 hours today and went over all the stuff I used to know, and refreshed myself. Once again 6gc saves the day. I followed pressure's build til I needed to pull out diagrams on the wiring since mine is a little different.
Starting to get excited, its not far from running. I do still have to do the ECU side of the harness, but I'm thinking I'm getting creative with that. I still have enough room to cut a hole and go that route into the center.
Posted by: enderswift Jan 3, 2016 - 6:05 PM
good job. People always assume wiring is harder than it really is
Posted by: antoine64 Jan 3, 2016 - 9:07 PM
Nice wire connecting! That's what I do: Solder and shrink tubing. Sometimes I'll add a little liquid electrical tape to seal it up good. It's a shame you didn't use the same wire colors but you just need to mark them so you know which is which. I suggest a label maker or to solder a small several inch stub of the original wire to the end so that end-to end is the same color.
Posted by: rave2n Jan 3, 2016 - 9:49 PM
Where I'm soldering to is the default color
after that I just move the pins. I have leads at the end of the ea1 socket for the 3s box, so these are just jumpers per say. Can always continuity test a line. I left the original colors at my solder joints just electrical wrapped for easy access to lines. =)
Posted by: rave2n Jan 8, 2016 - 1:47 PM
Wiring part 2!
My 5s EA1 plug was solid in the empty pin holes. I tried to drill it out, but doing so messed up the socket and the pins wouldn't sit right, and/or damage them when connected.
So I swapped my 3s plug over to the 5s body harness. Repinning is fairly easy, I just used a tiny flat head to release the pins after removing the white guard inside of the connector.
Splicing in the IC and FP relay box. Just matching all the wires from the 3s plug. Got a little to eager and didn't let the joint cool down before I moved the heatshrink over, and it shrunk before I could get it over..but..only you guys will see that 
Now connecting the 3 left over lines to the body harness directly due to no pin location.
Almost there for the relay box side of things. Harness just needs wrapping
And wrap it up. Mount obviously when rad is installed.
Still need to figure out where those last 4 wires go. Fairly certain they go directly to the IC and FP or something or other. I just have to look it up.
I did run into a snag when dealing with the 3 left over wires they are typically spliced in.
2 of the 3 made sense, and went directly with Bsamps guide, but I had 1 left over that wasn't on the 6 outer pins. In his guide was white/black stripe. Mine was black/white stripe, but also the only wire left. I checked the schematic and it does appear to be a relay leg to another leg, so I spliced that one in just like his white/black one. If anything, its just the IC relay, so if that doesn't work, I know where the problem is lol.
So several more wires to figure out and should be smooth sailing from here.
Edit:
And looking at my own pictures...I splice in the black\white w grey dots to a white\black, when coming out the plug itself is the black\white w grey dots. Now I have to figure out what all that is, cause I think its wrong the way I have it.
Posted by: rave2n Jan 8, 2016 - 2:34 PM
Okay yea I messed that 1 line up...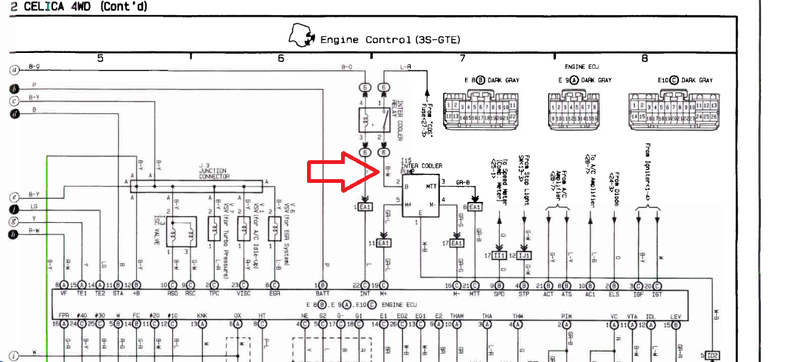
Thats the line I took, and spliced into this....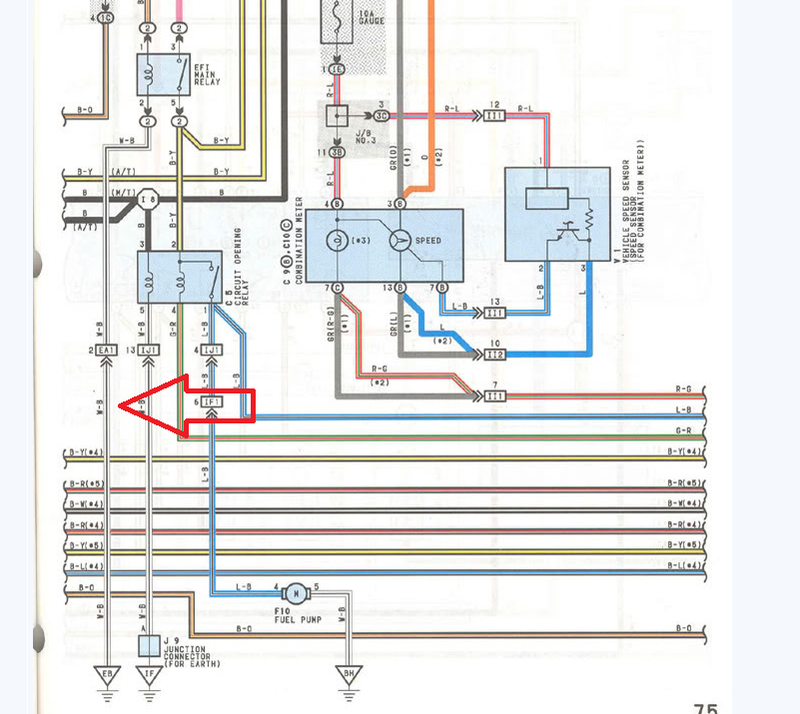
So gunna need to figure this one out..
Posted by: rave2n Jan 9, 2016 - 11:25 AM
Pretty positive I have the wiring right now. I did mess up and had to go back and fix 1 line, and create the connections for the IC water pump.
New lines for the IC pump, and fixing the black/white white/black wire that I messed up. It comes from the pump itself instead of directly from the relay box. Go Go schematics.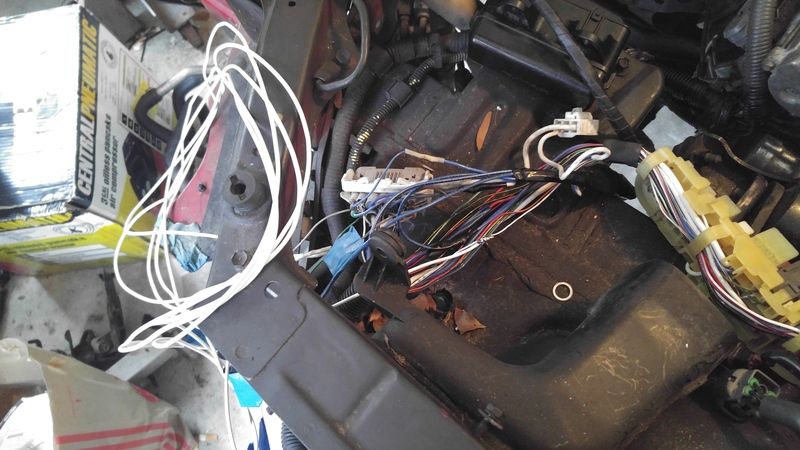
I do not have the connector for the IC pump itself, so I'm going to cut is back, and use butt splice to put it in place. Each line to be weather resistant labeled.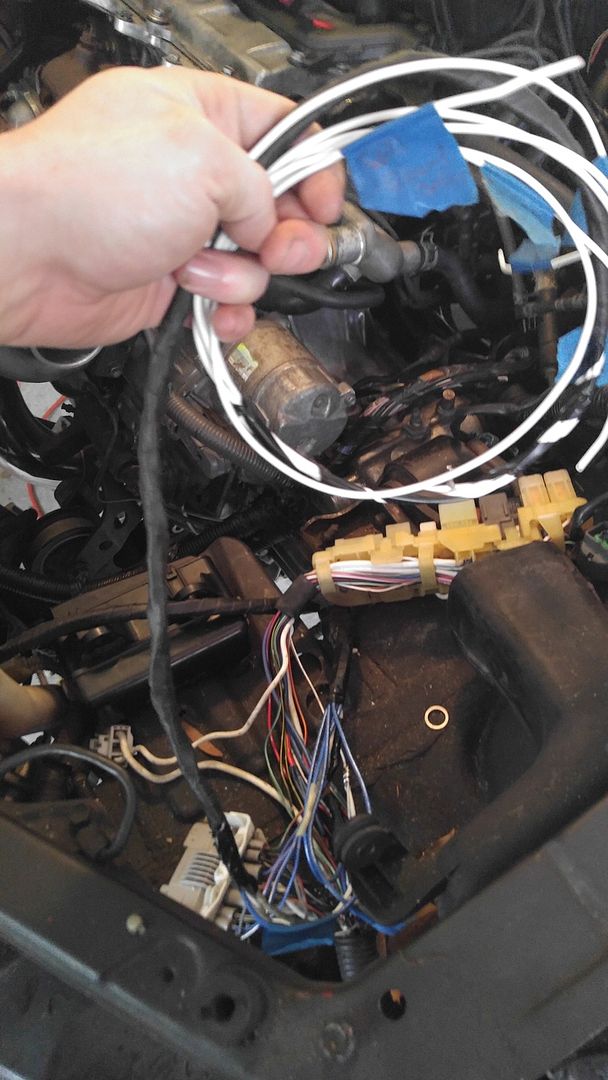
Final off the 2 harnesses I needed to make. Technically it should just be 1 with a pigtail, but I forgot about that and just made it longer coming from the EA1 instead of running it up the loom. I'll ziptie the 2 together once I figure placement.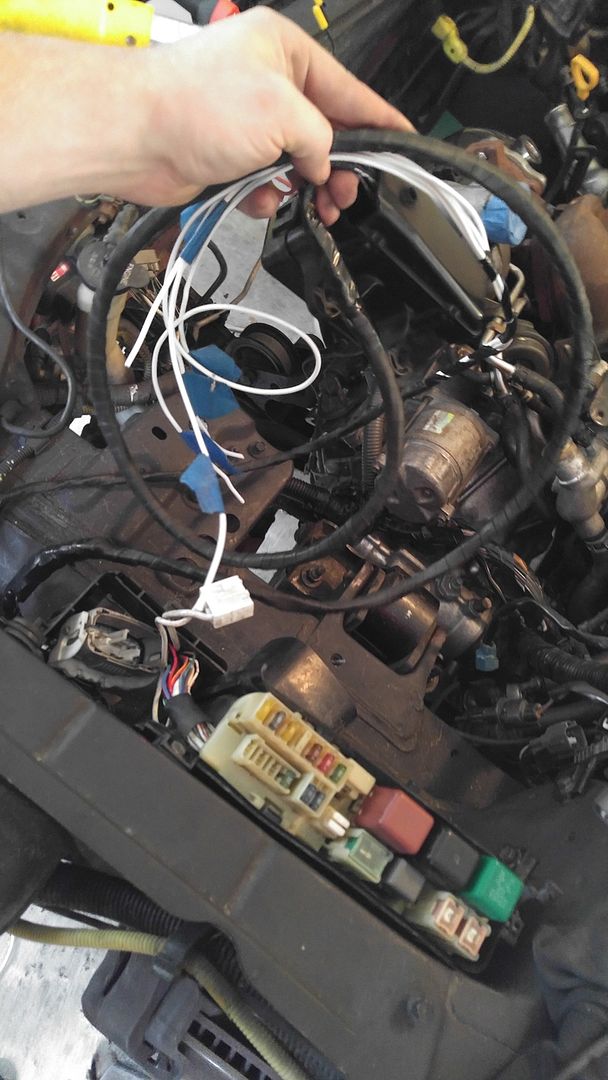
All buttoned up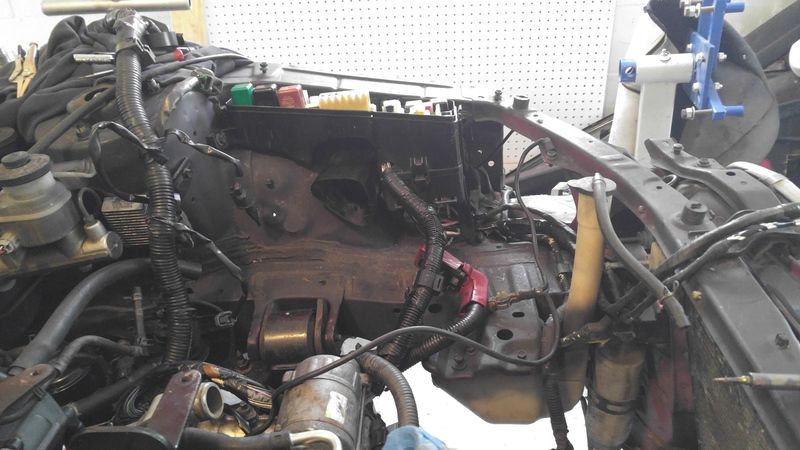
Now there were 2 lines that concerned me.
1 was pin 13 on EA1 Green - Looked it up and it turned out to be for ABS, since I do not have such, I just tied if off.
The 2nd line that bothered me is one going to the IC pump. The schematics say it should be GR-B on pin 17 of EA1 - Mine was GR-R. I looked through the schematics, and there is no other GR-R line that goes to the EA1, and I straight swapped the wires from the 3s plug, so not sure where that mix up came into play...another revision I dunno...but, its on the right pin on the connector, so I just moved forward with it.
Just checked a moment ago on that wire in question, and it does ring out at the ECU side where it should, and the color carries all the way there. So I guess its either an error in the manual, or just a later revision or something. /shrug, all should be fine.
Posted by: Batman722 Jan 9, 2016 - 5:48 PM
Different years have some different colors.
Always go by the pin #.
Posted by: rave2n Jan 9, 2016 - 7:44 PM
Always go by the pin #.
Reassuring to hear that!
That was my end result, figured in my profession colors mean nothing even on a basic cat5e cable, as long as 4 pins match it'll transfer. So I applied the same thought and lots of multi meter work. Schematics saved my life. I'm 98% Sure the wiring is right. I leave the 2% just in case I messed something up lol.
Posted by: rave2n Jan 10, 2016 - 3:15 PM
Back to work. Spent most the morning messing with odds and ends.
Heat exchanger mounted up. Its a temp hold for now, I expect to change out front bumpers to the facelift, and thats when I figure I'll do that whole area. Including the AC coil which is pretty rough.
It'll hold for now. Need to grab some hardware, just wire holding it up know, but I also know my lines reach =)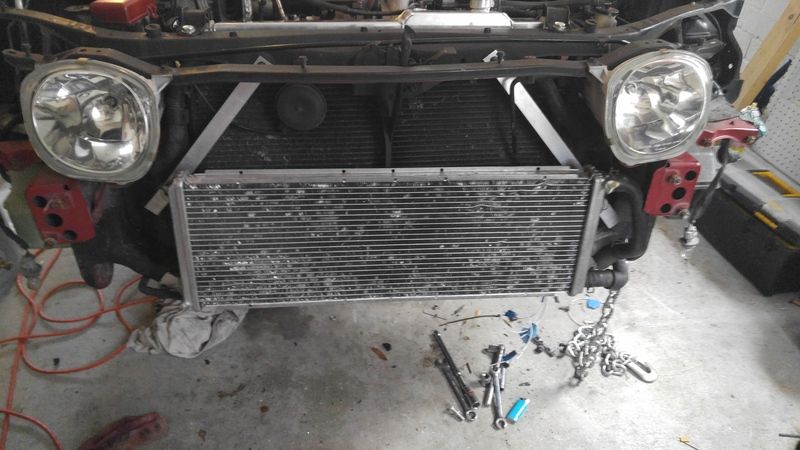
Pump hung, still need to finish wiring it, but next weekend possibly. Ready to go though. This is another item I plan to find better placement for, and more secure mounting. I also want to remove the hardlines from the setup and butt up some rubber lines. I have no place to mount those, and they just get in the way of everything really. Be a easy delete, aslong as I can butt up to the formed lines easy enough.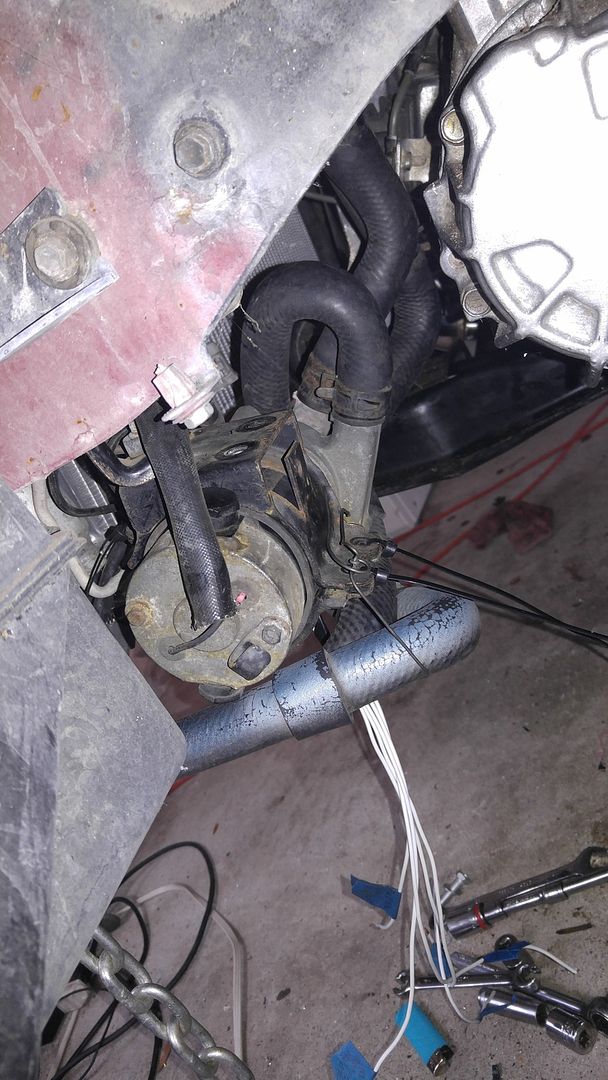
Not exactly sure if I can fit the stock fans in there. Almost certain I can't. Its a oversized rad, so going to need to grab some slim fans to put on there or its going to be cooking on the downpipe.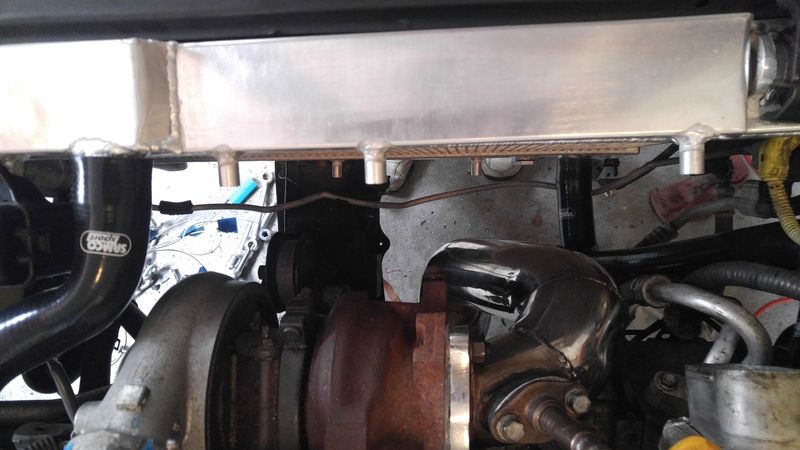
Starting to get cluttered in there. Didn't expect everything to be so tight, but its fun figuring it out. Some accessories mount, AC, alternator. Still need to find belts for those, and a PS one.
Moved the boot down on the harness, and going to clean up, and extend the others next weekend. Hands are sore lol.
Well its moving along. Whats left to do in bay...
- Replace PS vacuum valve.
- Hook up PS lines
- Delete IC hardlines
- Connect IC pump wires
- Cruise Control Module
- Belts
- Air intake Filter and lines
- Extend connections on harness - Manage loom
- Fans on rad
- Sensor for rad
- Source or fabricate throttle cable mount - I stupidity threw it away
- Connect ECU
- Fuel Line to Filter Connection
- Fluids in everrrrything
- Get AC charged
So...I think thats another weekend if I can get all the parts I need.
Then I have some exterior items to fix. I put the new hub on, but I'm unimpressed by its condition. So I'm going to take my other hub to get a new bearing since it was torn up. Its in much better condition.
Also need to get some axles, and install walbro pump. After that, prime the system, and hope for the best!
Think I'm going to do something just like this for the fans.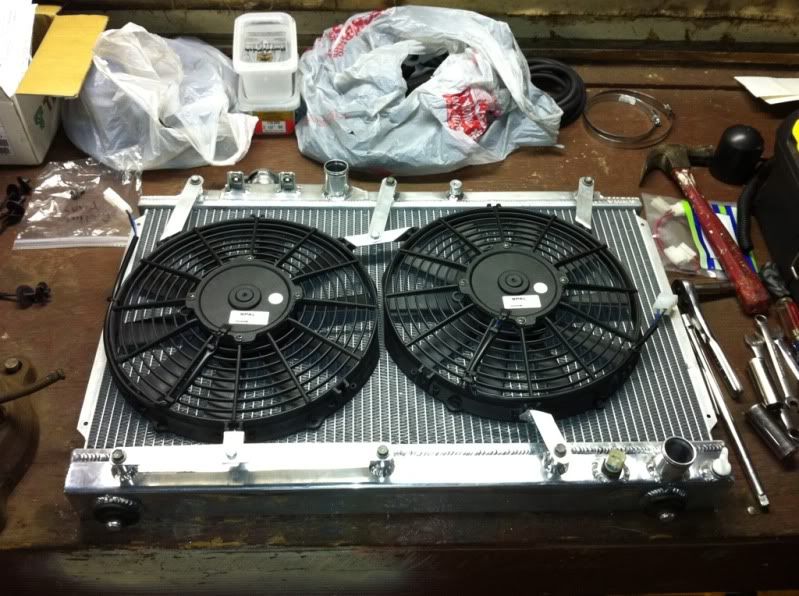
Posted by: enderswift Jan 10, 2016 - 8:12 PM
Why cant you mount the ic pump in the stock location?
Posted by: rave2n Jan 10, 2016 - 8:47 PM
I...I couldn't find that location.
I thought maybe because I didn't have the ST205 front end I was missing some pieces.
I really hope it mounts normal lol....cause my ghetto rig is not nice.
Posted by: enderswift Jan 10, 2016 - 11:58 PM
the mounting spot exists on the usdm frame. I'll try to find a photo for you
Posted by: Batman722 Jan 11, 2016 - 8:50 AM
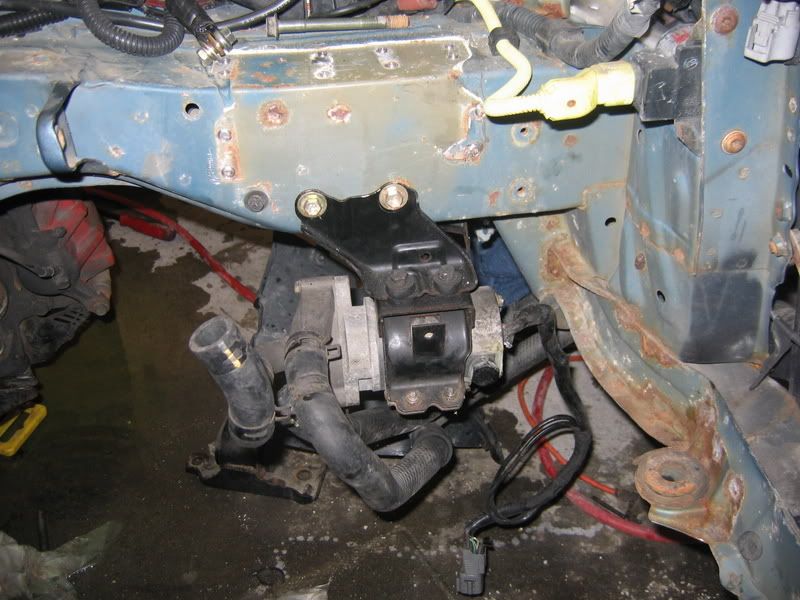
Posted by: rave2n Jan 11, 2016 - 10:10 AM
Much thanks.
Now I can see why I couldn't find where the heck it mounted. I'm missing that piece of the bracket that connects to the frame.
Guess I'll fab one up.
Posted by: rave2n Jan 11, 2016 - 10:36 AM
Fans and Brackets ordered. Got 2 Spal 30100467 12" Curved Blade Puller Fan.
Throttle Cable bracket found on Ebay and ordered.
Rad temp sensor pickup later today local.
Can't seem to find a OEM IC pump bracket, I have half of it, so going to fab up the last piece that seems to mount to the frame. Simple enough it looks like.
Debating if I want to replace the IC heat exchanger with an aftermarket one. Its not pretty, and I'm unimpressed by its mounting and condition. A good 200 bucks for another unit...I may do it.
Posted by: rave2n Jan 12, 2016 - 6:03 PM
Remounted the IC pump to the stock location.
The mount isn't pretty, metal working is not one of my favorites things to do =P - But, it functions, and I know it won't fall out the car now.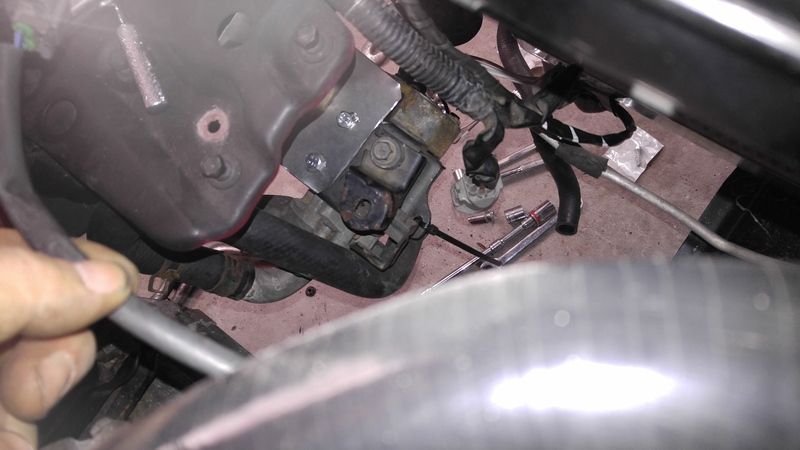
Also removed the hardlines. May need to cut these back a little, but always good to have extra.
Bout all I felt like doing today. More to come when parts arrive.
What do you guys think about replacing my heat exchanger with this one?
http://www.frozenboost.com/water-to-air-heat-exchanger/air-to-water-heat-exchanger-p-1026.html
Posted by: 4-eyed-freek Jan 13, 2016 - 12:40 PM
I know it's a bit of money, but if your concerned about the heat from the downpipe get the ceramic coated berk downpipe. The decrease in heat is unreal!
Posted by: rave2n Jan 13, 2016 - 1:08 PM
For sure! When I got that downpipe, funds were low. Seeing I have it now, I plan to run it til it cracks, which it will lol.
Just going to wrap it for now, but a Burk is def on the horizon.
Posted by: rave2n Jan 16, 2016 - 12:03 PM
Guestion for you folks.
Trying to figure out what to do about the BOV and its re-circulation. I have the OEM one, with the top of the air box, and hose, but I do not have the bottom of the box. Didn't come with swap. So that means I cannot just drop it all in there, I need to find means to make all this work.
I considered a Apexi kit that has the adapter for the OEM BOV, but I'm not seeing anywhere I can really pick that up unless I get it from Japan. Thats a long wait.
So, I have a piece of my old weapon R intake pipe that has a line for 1 hose, and 1 sensor. So I think that will work.
I feel like my only option is to get an after market BOV and latch it up to the IC.
If thats it, do you guys know of any reasonable BOVs I could purchase. Looking for less then 300$ - been searching all day, but its a bit confusing and i don't want to drop a bunch of coin on a valve that will be dead in a year.
Just looking for a reasonable path. If I have to bit the bullet I will...
Posted by: 4-eyed-freek Jan 16, 2016 - 1:41 PM
I am running an HKS induction kit with the oem bov location blocked off and a HKS SSQV bov. Both you can probably find for less than $300
Otherwise you can run the OEM air box and block off the bov section and run the bov on the intercooler. You will need an adapter to run the bov off the intercooler. ( if you need a complete air box let me know I have one I can sell)
http://www.ebay.com/itm/HKS-UNIVERSAL-BLOW-OFF-VALVE-IV-SUPER-BOV-SQV-SSQV-4-BLACK-LIMITED-EDITION-/260787521592?hash=item3cb825c838:g:fOoAAOSwu4BVwFEY&vxp=mtr
Posted by: enderswift Jan 17, 2016 - 9:25 AM
stretching my memory here, but I'm pretty sure the bottom of the airbox is the same between st205 and st204. I am personally a fan of the has ssqv iiii. I have it routed straight off of the intercooler with the adapter that 4eyed mentioned. It's worked perfectly for me.
Posted by: rave2n Jan 22, 2016 - 10:20 AM
Appreciate the tips guys on the air situation.
I have a OEM box on the way for the time being, until I decide to revise that area. To much going on right now to mess with all that, when I can just OEM it up, and tinker later.
Finally got the fans mounted up to the rad. Took some time because I forgot to order the mounts, thought they came with the kit, but nope.
Tapping the posts to 1/4 20 and sizing mount rods.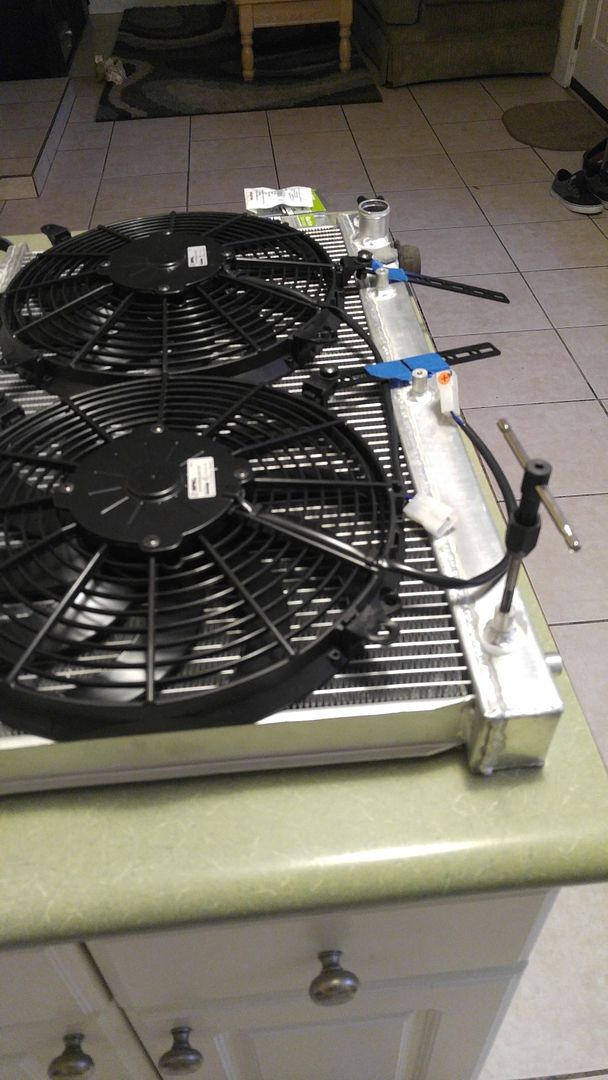
And completed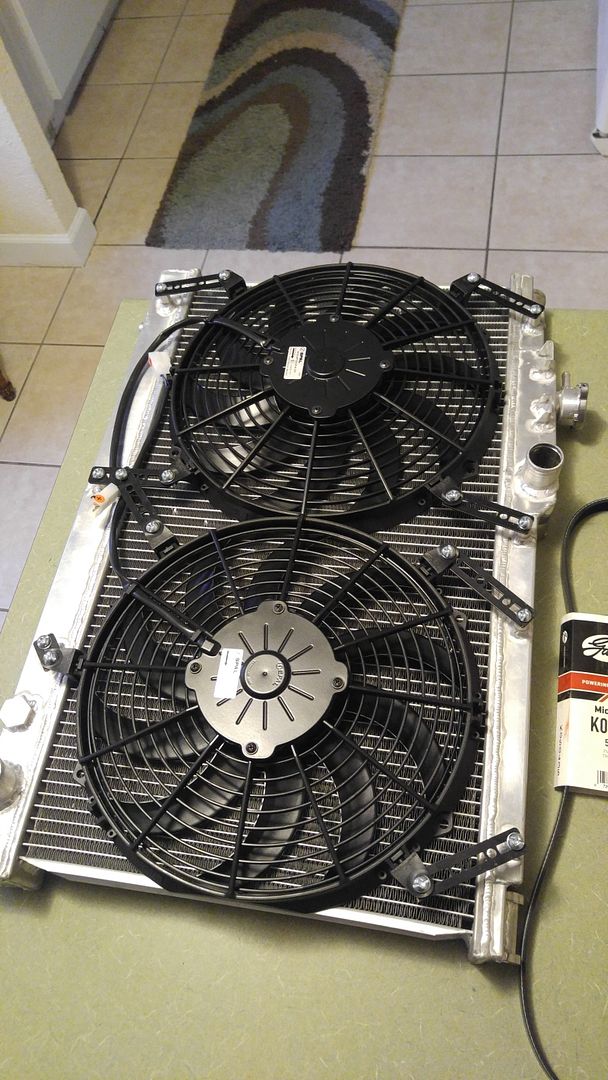
May have finally done something right here, and I feel pretty confident I shouldn't have cooling issues. Was a big concern down here in FL.
Waiting on odds and ends at the moment. Order some guages, and some temp sensors for the IC and Rad. Coming from overseas so it'll be feb before those are in. Moving along moving along.
Posted by: rave2n Jan 23, 2016 - 11:15 AM
Wrapping the down pipe.
Also can see the gauge cluster has come in. Wanted a over the vent style one, but couldn't find it. Lo-tek came through, with a pretty good fitting one, should require little work to fit.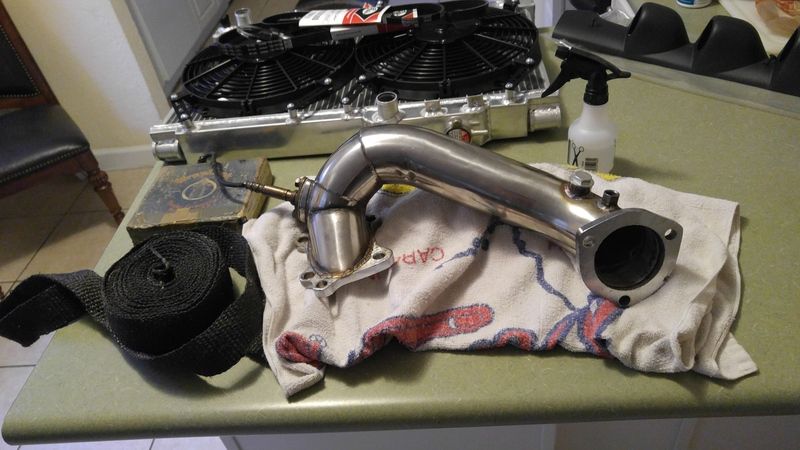
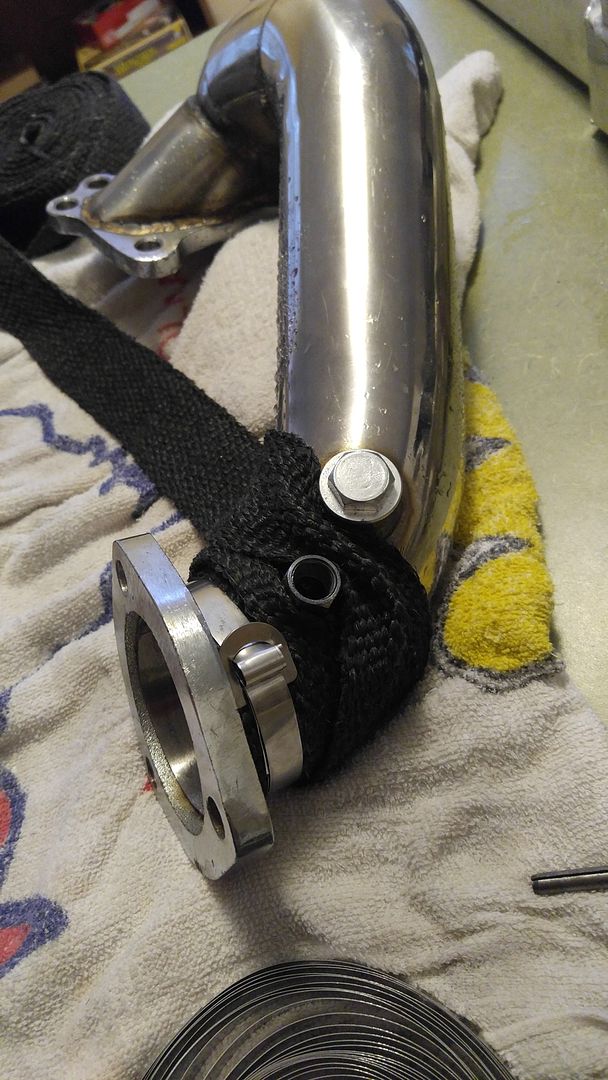
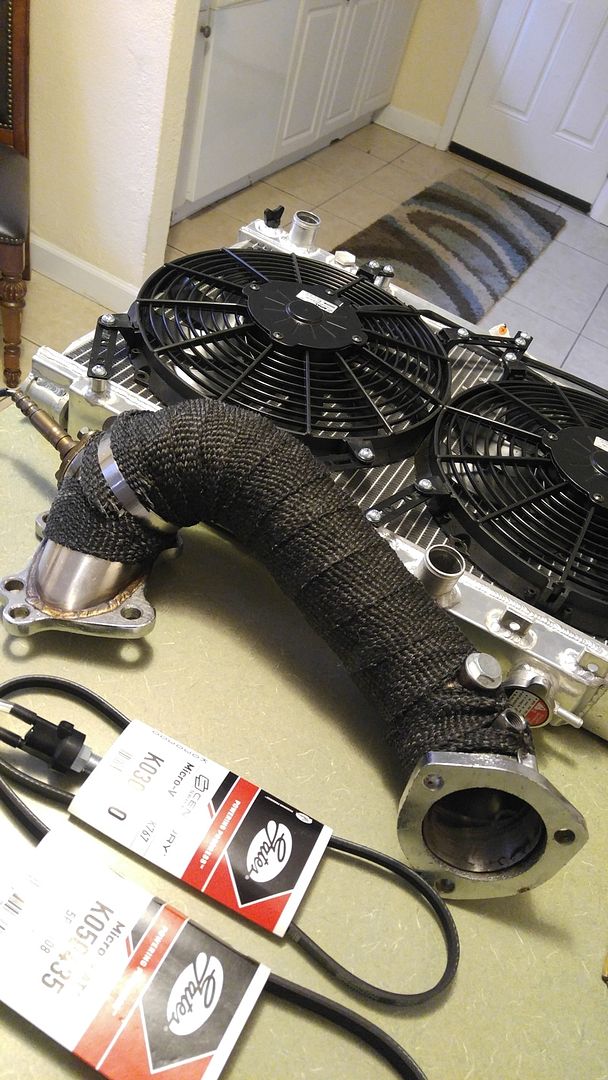
That'll do
Posted by: enderswift Jan 23, 2016 - 11:02 PM
lookin good man
Posted by: rave2n Jan 26, 2016 - 6:41 PM
Finally!
Found a facelift bumper on ebay, that was a 2 hour drive away.
So went and saw Daytona beach, and grabbed the bumper for a crisp 215 from the salvage yard.
Guy said he had 13 calls after I purchased it on Ebay, he says he sells nearly every bolt on 94-99 Celicas. lol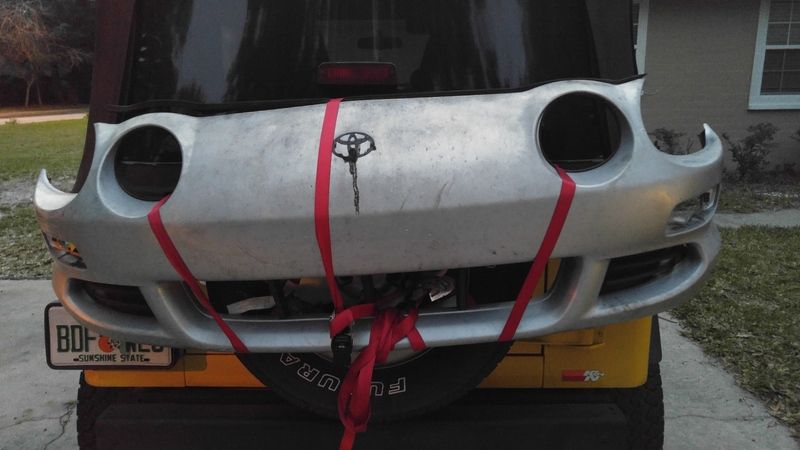
Needs some loving, but I'll fix it up.
Oh...anyone have any clear turns?
Posted by: CelicaDICE Jan 30, 2016 - 8:32 PM
I got clear turns. PM me if youre interested.
Posted by: BonzaiCelica Jan 31, 2016 - 2:58 PM
Ouch that's got to hurt. N with no fog lights?
Posted by: rave2n Jan 31, 2016 - 5:25 PM
Lol yea, wasn't cheap but I was tired of looking. I sporadically looked over the last 2 years and not finding one, or one that would ship was one of my de-motivators in this project.
Yea no fogs, but I'm okay with that, I didn't want them
Posted by: mkernz22 Jan 31, 2016 - 8:31 PM
WTF....$215? That's a rip off.
You could have bought a brand new one from the dealer for $250...
Posted by: rave2n Feb 1, 2016 - 8:31 AM
You could have bought a brand new one from the dealer for $250...
Yea it felt kinda high, but I did call 3 dealers in the area within the same amount of drive time. They all said nope =/
Posted by: rave2n Feb 1, 2016 - 1:31 PM
Well did try to do some work over the weekend.
Managed to get the pump wired up, no pictures really needed for that.
I did go to get the belts put on, and discovered I have lost my power steering pump top bolt. Pitched a fit, and tore the whole place apart, and couldn't find it, or anything like it.
I know my junk is cluttered, but I actually know where everything generally is.
Driving in this morning to work, I remembered what I did with it. I took it off the 3s and put it on the 5s, then forgot to take it back off when I sold the 5s.
So yea, new one on order from Yota, for 6 dollars. Once it gets here, I can move forward.
Posted by: rave2n Feb 11, 2016 - 4:57 PM
Hey guys, I have not quit =P
I have surgery next week, simple stuff, but can't lift 10lbs for 6 weeks. So it may be difficult for me to progress for a little bit.
So with that, I've been quite busy at work making sure everything is in order.
Waiting on some parts anyway, but I will get back to it asap.
Posted by: cheela Feb 11, 2016 - 5:14 PM
good luck with surgery. don't strain yourself.
time to plan on the little things while u heal.
Posted by: rave2n Feb 12, 2016 - 10:04 AM
time to plan on the little things while u heal.
Thanks man!
I think I might spend the time wiring the guages and such, that doesn't take much effort or lifting =)
Posted by: Tigawoods Feb 12, 2016 - 3:49 PM
Yo! What diameter are those Spal Fans?
Posted by: rave2n Feb 12, 2016 - 7:37 PM
http://streetrays.com/newstore/index.php?route=product/product&product_id=47649
Posted by: rave2n Apr 4, 2016 - 9:16 AM
3 weeks out of surgery.
2 more weeks to go, and I can start moving again.
having issue with the passenger carrier bracket. Seems I have to make up something to have it bolt properly to the block. If anyone could take a moment to send some pictures my way with what they did, it would be much appreciated.
Posted by: enderswift Apr 4, 2016 - 7:45 PM
I used washers as spacers. been years without issues
Posted by: rave2n Apr 5, 2016 - 7:48 AM
Mine just doesn't seem to line up =/ Its off by like a quarter inch on the top bolt.
Posted by: rave2n Jan 10, 2017 - 7:45 PM
So I'm still alive.
I traded in my Jeep today after 3 long years of...Jeep...Easiest way to say it.
Came home with a 2010 Tacoma Prerunner SR5 - What I originally wanted. Loving it.
So, Im back to being all yota.
I did work on the Celica this weekend, finally found the spot for the passenger side axle bracket on the block, and worked on the PS pump some more. Its been a year since I worked on it, but..it felt good.
I won't make promises that I'll ever finish this, but..it did feel nice.
Posted by: SwissFerdi Jan 10, 2017 - 10:41 PM
If you want a hand for a few hours I'm down...your trans is still running well.
Posted by: rave2n Jan 12, 2017 - 10:50 AM
That would be cool, not this weekend, as I need to organize my garage and project to even have a idea of what to do next, but the following is open =)
Posted by: rave2n Jun 2, 2017 - 7:30 AM
If anyone is interested in purchasing this project.
Let me know.
Id like 3k. Very fair considering the investment put in this far.
Posted by: ricochet1490 Jun 2, 2017 - 7:48 AM
Why not finish at this point? It's basically engine just has to make it in the car now right?
Posted by: rave2n Jun 2, 2017 - 8:10 AM
I've been mulling over it for 2 years...maybe more now. I just cannot get the fire under my ass to finish it.
Engine is already in lol.
Literally all it needs is a couple wires on the harness extended, exhaust installed, AC condon if you want AC replaced, and a better heat exchanger mounting.
I have all the pieces except the exhaust which I was just going to take to a shop to finish.
I'd says its 2 weekends of work, and 500 bucks and its a done. The rest is cosmetic cleanup from sitting so long.
Posted by: ricochet1490 Jun 2, 2017 - 10:03 AM
I drive mine on occasion. It isn't perfect, but there is nothing like Celica handling in the corners because of the feedback the car gives you. You owe it to yourself to know what that feels like again, this time with actual horsepower. Too much engine work has been done, and I guarantee that if mine wasn't RHD, I'd drive it everyday and would not have a $400 payment every month.
You're right there, Jerry rig it and cut a hole in the firewall if you have to!
Posted by: rave2n Jun 2, 2017 - 12:34 PM
You're right there, Jerry rig it and cut a hole in the firewall if you have to!
I agree, and I know in its current state its a hard sell. I know its value, down to the dollar, and I've seen better sell for less, simply to have it gone faster.
Its why I price it at what I have. 3k is enough to have me move on and not feel as bad on the loss, but also not such a steal everyone is going to jump on it. I want to see it done one day, it would be my dream, one that I will have to commit to if no one wants it.
Its a rough path either way for me.
Posted by: rave2n Jun 9, 2017 - 8:11 AM
Not much interest as expected...
So..I put some pieces together, and figured whats next..
http://s77.photobucket.com/user/ice_night/media/18891664_1396477127097739_6809062164311826363_o_zpsronusbal.jpg.html
Posted by: cheela Jun 9, 2017 - 9:15 AM
by the time you get someone interested, it'll be finished and running already and you won't want to sell it anymore.
so that just means you gotta finish it!
Posted by: rave2n Sep 3, 2017 - 1:51 PM
Yea, I'm done folks. I cannot finish it, just don't have the will. I have gone and got some things done, but after losing my temper on the driver side axle which is always my bane on this vehicle. Thats it...its got to go.
At this point, I care no further for the frame. I'll send it to the scrap yard at this point.
If anyone is interested in the motor, and all the damn work that went into it. Let me know. I have no interest in pulling it, take the frame w/engine and relieve me from this.
Done.
2.5k is the lowest I'll go for it all. Which is a steal.
latest pic
Posted by: njccmd2002 Sep 4, 2017 - 2:50 AM
damn, that is a steal.
so whats pending to be done? assuming S54 tranny. You know, I went through a lot of frustrations when I did my 2gr swap. wiring was the biggest nightmare. but I pulled trough, even after I herniated a disc and had surgery. from start to finish, lol, maybe 2 years. with other little side projects going on...
don't worry about the axle. finish everything first, then leave awful axle for last. lol. I understand if you really want to give it up. But regret is worse
dang. too bad its a 10 hour drive for me... take a deep breath step back, and relax.
BTW I bought my ra24 in 2009. its been 8 years, lol. still not done...
Posted by: rave2n Sep 4, 2017 - 9:48 AM
so whats pending to be done? assuming S54 tranny. You know, I went through a lot of frustrations when I did my 2gr swap. wiring was the biggest nightmare. but I pulled trough, even after I herniated a disc and had surgery. from start to finish, lol, maybe 2 years. with other little side projects going on...
don't worry about the axle. finish everything first, then leave awful axle for last. lol. I understand if you really want to give it up. But regret is worse
dang. too bad its a 10 hour drive for me... take a deep breath step back, and relax.
BTW I bought my ra24 in 2009. its been 8 years, lol. still not done...
Nah tranny is perfect, I think its the reman axle I got that is causing the current hell, but its always hell on the drivers side.
Yea the hard wiring is done, but I did have my excitement figuring it all out lol. Only wiring now is extending a few connections so the harness reaches the ecu.
Yea the surgery I had and some life changes really made me turn on this project. Physically I'm not what I used to be, and it hurts to get under the vehicle, I cannot imagine a messed up back! I can work on it for like an hour, max 2 before I have to walk away for a bit..typically next day. I used to work on the damn thing 10+ hrs, and it frustrates the living hell out of me when I get stuck on something simple like an axle, then to be physically beat after it as well, with nothing accomplished =/
I have a friend that has some interest, he wants to come and see it, so we'll see how that pans out. I know its a handful for anyone to pick up, but its a diamond in the rough, just needs someone more capable than I, or me to stop being a little bitch. Time will tell.
Posted by: SwissFerdi Sep 4, 2017 - 11:14 AM
Does the axle lack provisions for a pry bar around the tulip? That was my struggle, and we ended up using a rope and pulley system to tug it out.
Posted by: rave2n Sep 4, 2017 - 12:00 PM
Nah, trying to put a new one in. Just won't line up and pop in.
Posted by: njccmd2002 Sep 4, 2017 - 7:12 PM
the axle problem you have, is because when they rebuild them, they put a generic circlip, wich is crap. order the right circlip from the dealer and change it. I swear that i did that with mine. and the oem circlip goes in like butter
Posted by: SwissFerdi Sep 5, 2017 - 9:24 AM
Oh, you got the hard part done! It sounds like only a serious day's work away from drivable.
Posted by: rave2n Oct 7, 2017 - 9:58 AM
You were right, its the circlip. I simply removed it to confirm the shop didn't put in the wrong axle bearing in the transmission. Went right in with the clip off. Guess I could order one.
The circlip that came with the axle I could remove with my fingers, it was barely on there. So I think it was snagged in production and expanded it out to far.
Oh, you got the hard part done! It sounds like only a serious day's work away from drivable.
Lol, possibly, drivable as in it'll turn on and run, but there is quite a bit to accomplish after further review. Hoping for a cool night this weekend, and I'm going to try to get the walbro installed, not really a hard task or that physical. One more step to running.
Some interest has been found, but most people are a month or more out from seeing/purchasing. So, I'm cleaning it up, at a minimal, if all fall through, it'll be clean...possibly less overbearing to look at.
Posted by: njccmd2002 Oct 7, 2017 - 2:53 PM
keep going at it. aftermarket circlips suck..
dedicate 30 min every two days. stop reading facebook in the toilet, and work on the car.
hate for you to regret it. unfortunately i had a mistake on my own. see the off topic section, but im using it as a postive experience..
Posted by: rave2n Oct 15, 2017 - 8:53 AM
Taking nccmd2002's advice, I spent some time on it this weekend before the sun made it a bit to hot to be outside.
Had to clean the interior out a good bit to get to the fuel pump area. So managed to clean out the whole inside of any debris & parts over the years.
Being in FL, and humid nearly 24/7, the whole interior grew this very thin layer of mold all over. So I spend the whole hour and half I was at it wiping down everything and vacuuming out everything, including inside the pump section so nothing drops in the tank.
All in all, its a bit cleaner inside, and slightly less overbearing to look at
Posted by: SwissFerdi Oct 15, 2017 - 9:47 AM
Little by little.
Posted by: richee3 Oct 15, 2017 - 12:34 PM
Im familiar with the mold growing inside the car. Gotta love humidity and parked Celicas. Youll have this off on the road in no time!
Posted by: cheela Oct 16, 2017 - 9:17 AM
keep going at it.
you're literally almost there!
Posted by: njccmd2002 Oct 17, 2017 - 7:32 PM
Had to clean the interior out a good bit to get to the fuel pump area. So managed to clean out the whole inside of any debris & parts over the years.
Being in FL, and humid nearly 24/7, the whole interior grew this very thin layer of mold all over. So I spend the whole hour and half I was at it wiping down everything and vacuuming out everything, including inside the pump section so nothing drops in the tank.
All in all, its a bit cleaner inside, and slightly less overbearing to look at
lysol spray. is it leather or cloth. i used lysol and took them out to the sun...
Posted by: rave2n May 18, 2024 - 11:05 PM
**** I fell off.
I miss this.
Hope all are well, and thanks for being on the journey with me.
I saw a grey celica with a facelift recently and couldn't stop staring. I want to stop and talk to them...GGs all, I hope someone is still out there making the best of these dream machines.
Posted by: timdog1720 May 19, 2024 - 12:03 AM
Bro I wish people would come back and revive this site again... COVID murdered 6GC
Posted by: CoolZeen May 20, 2024 - 5:11 PM
yes we are here, people just check in and dont say nothing, since is mostly the og's , that know already almost everything and how to look in the forum. Then the others are just guest looking for only info that maybe nobody answer in fakebook
Powered by Invision Power Board (http://www.invisionboard.com)
© Invision Power Services (http://www.invisionpower.com)