  |
 Jan 22, 2015 - 4:50 PM Jan 22, 2015 - 4:50 PM
|
|
|
Enthusiast     Joined May 16, '10 From Raleigh Currently Offline Reputation: 12 (100%) |
MOOOOAAAR! Yea...you could say this **** is addicting!
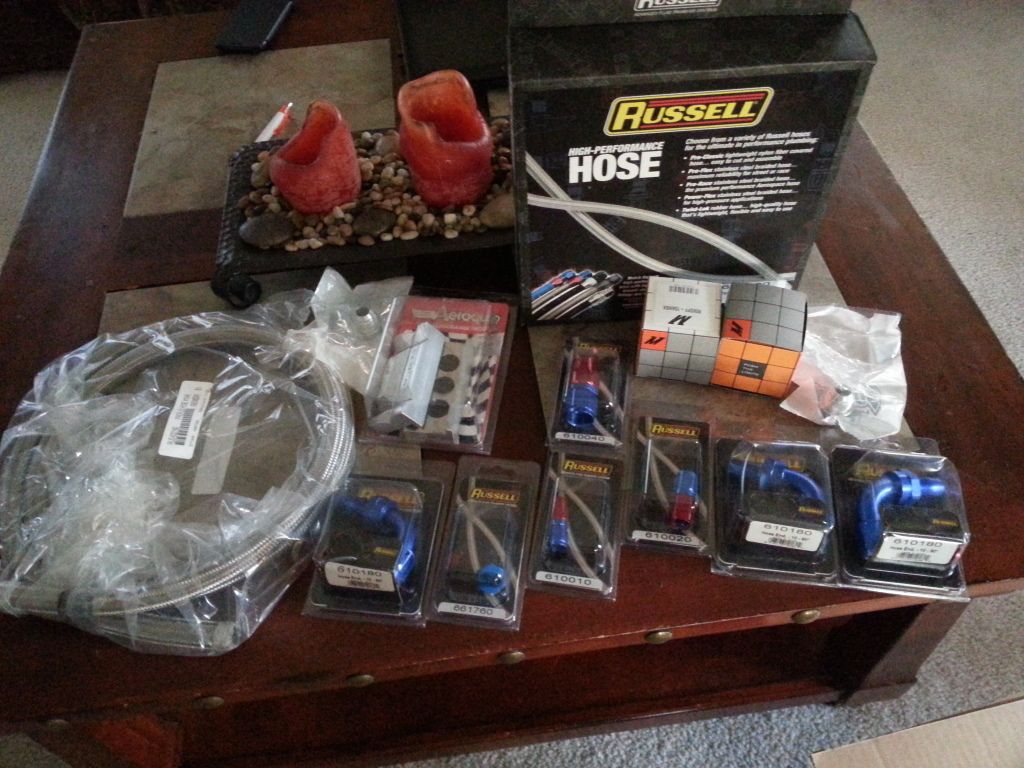  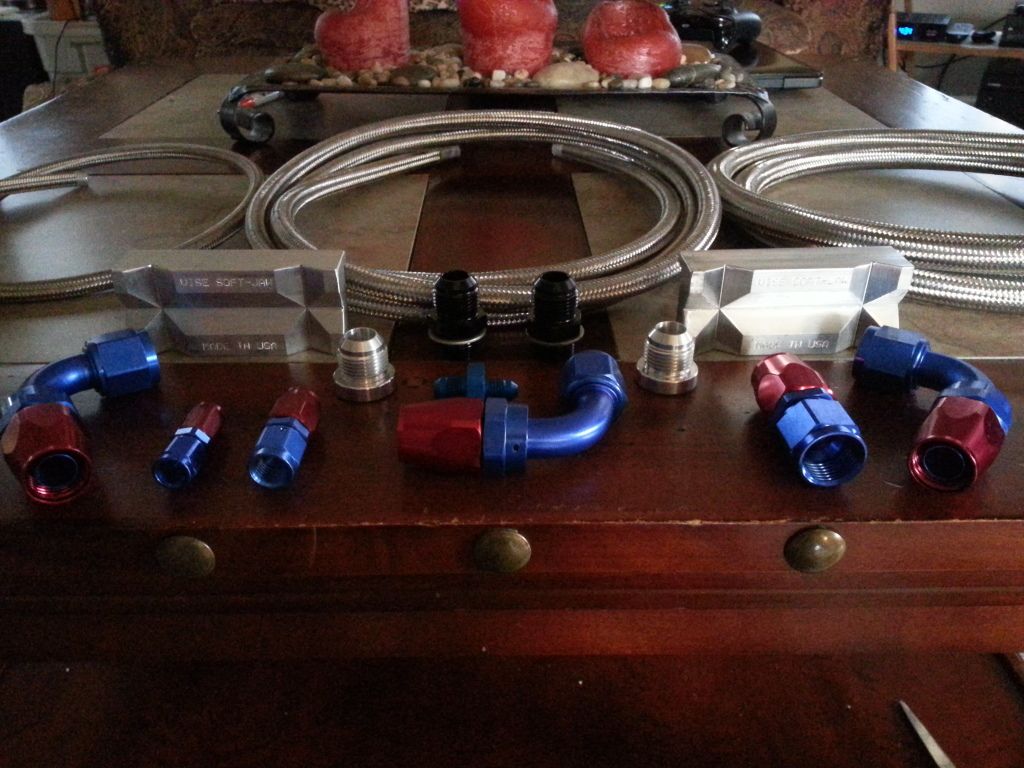
This post has been edited by bsamps4: Jan 22, 2015 - 4:51 PM --------------------  |
 Jan 25, 2015 - 3:59 PM Jan 25, 2015 - 3:59 PM
|
|
|
Enthusiast     Joined May 16, '10 From Raleigh Currently Offline Reputation: 12 (100%) |
So today I got a few things knocked out! For starters I removed the old catch can bung (I won't be using the factory catch can), and had an aluminum -10 AN bung welded to the opening by a friend of mine.
Since I had to sand a lot of the paint off of the valve cover (it was looking pretty bad anyways) I decided to go ahead and re-spray the valve cover with my favorite "Cast Iron" color. I decided to ditch the old catch can for a few reasons. 1. It was a piece of ****. 2. It was too small. 3. The mounting hardware was too flimsy. I replaced it with a new Mishimoto Baffled Oil Catch Can, which is fantastic quality, and I was able to install it into existing bolt holes on the shock tower. I need to wait until the valve cover cures before I re-fit it, and make my custom AN lines. Either way I feel pretty good about everything. Now for the pictures. 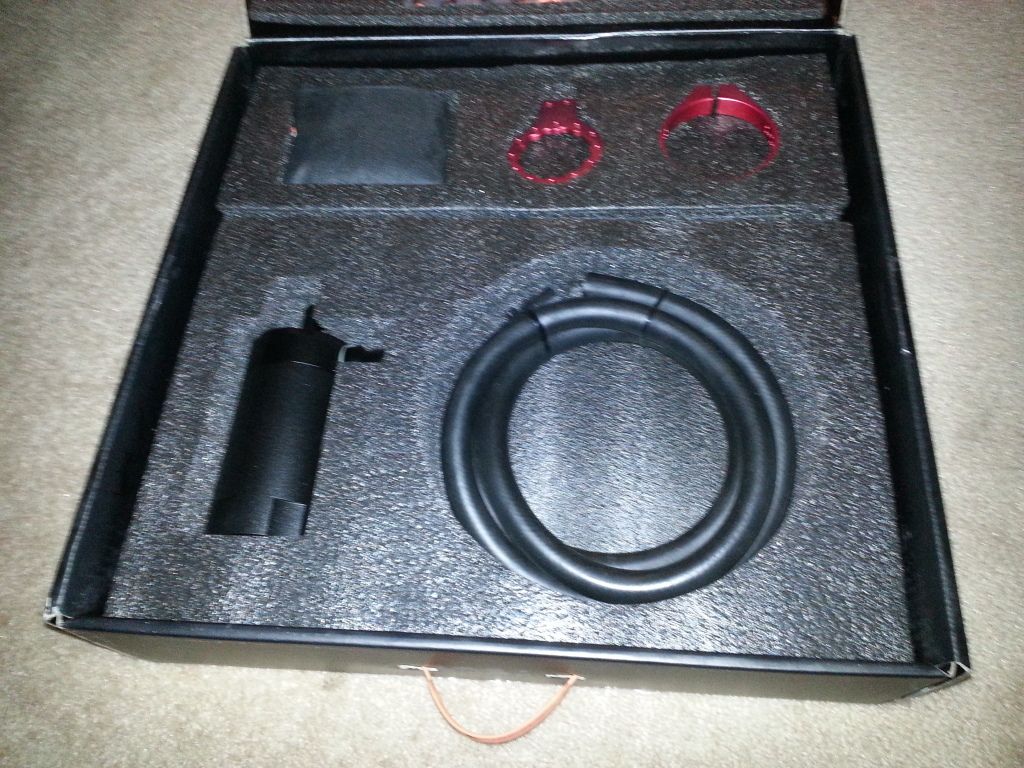    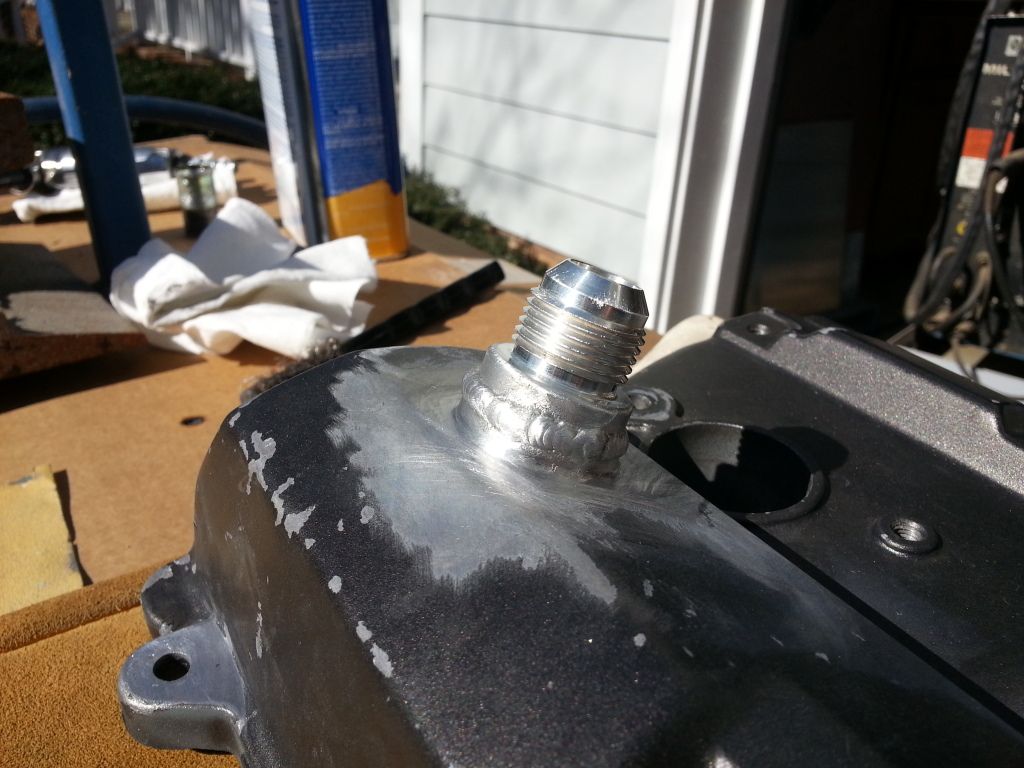   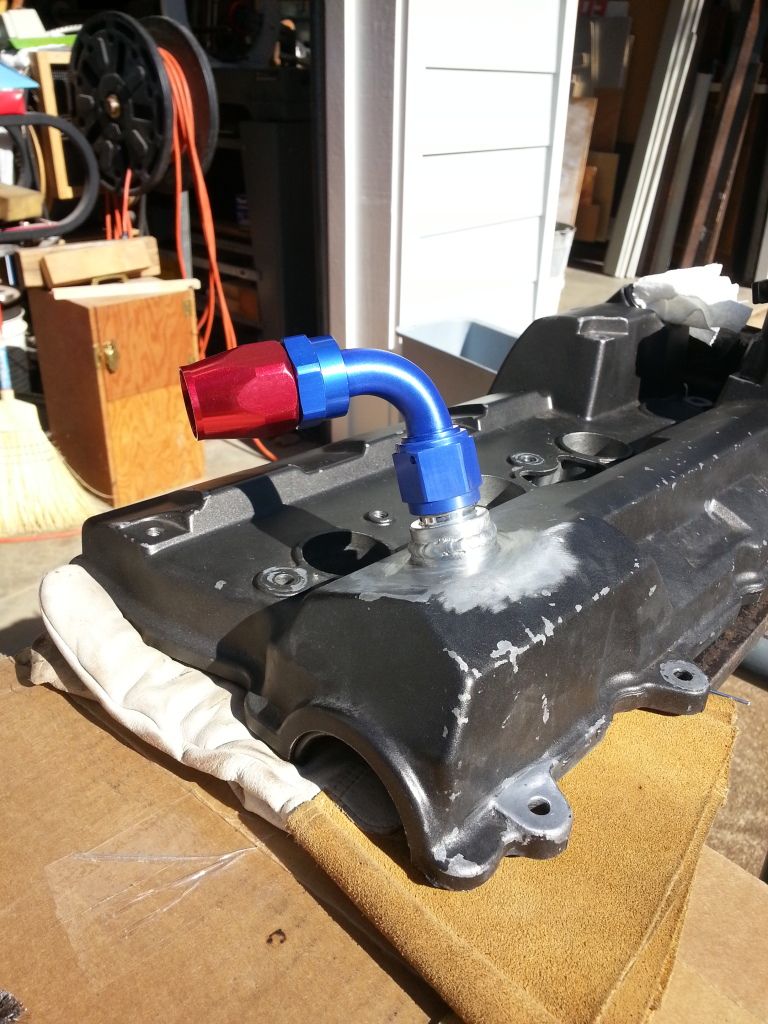     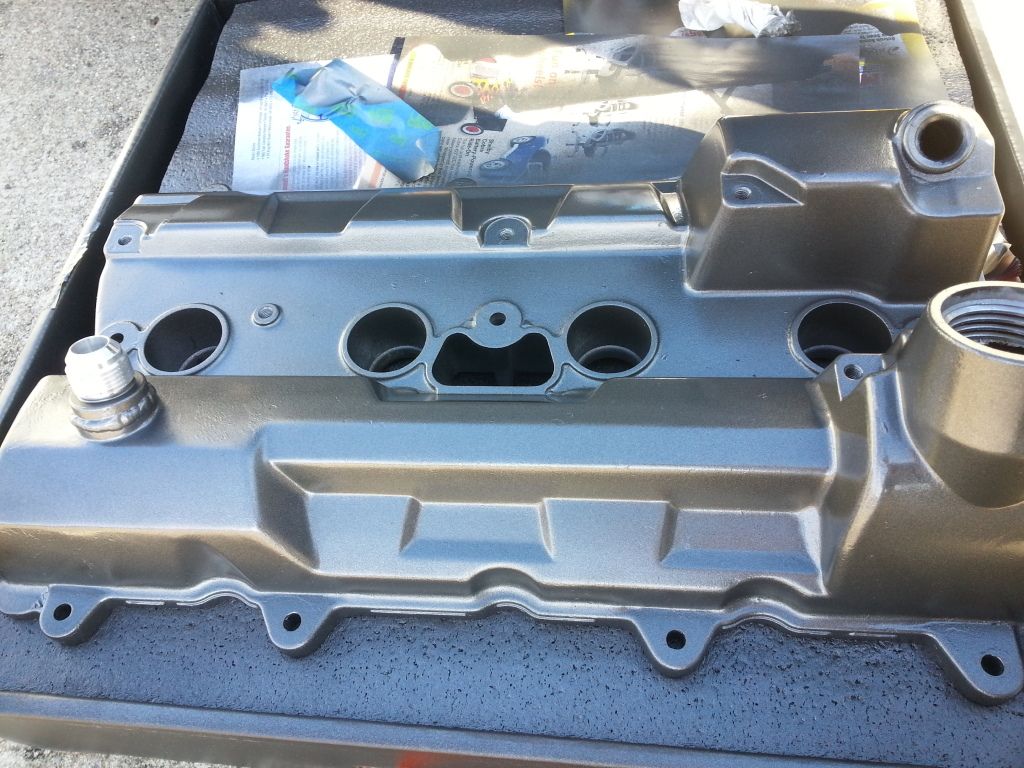 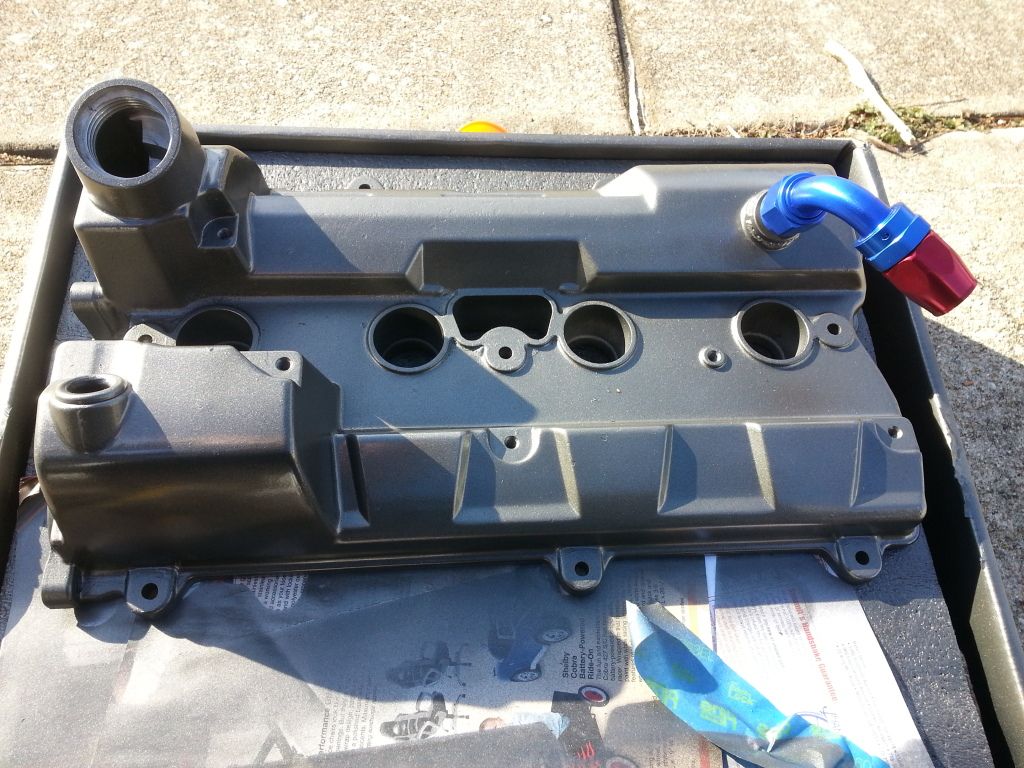   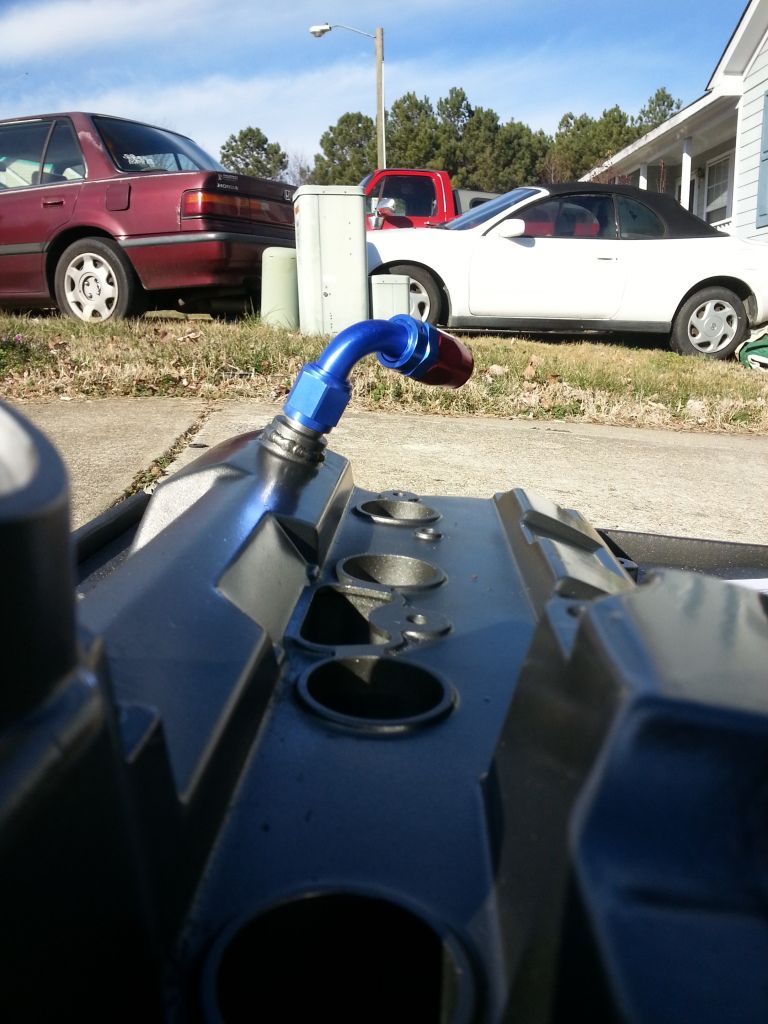   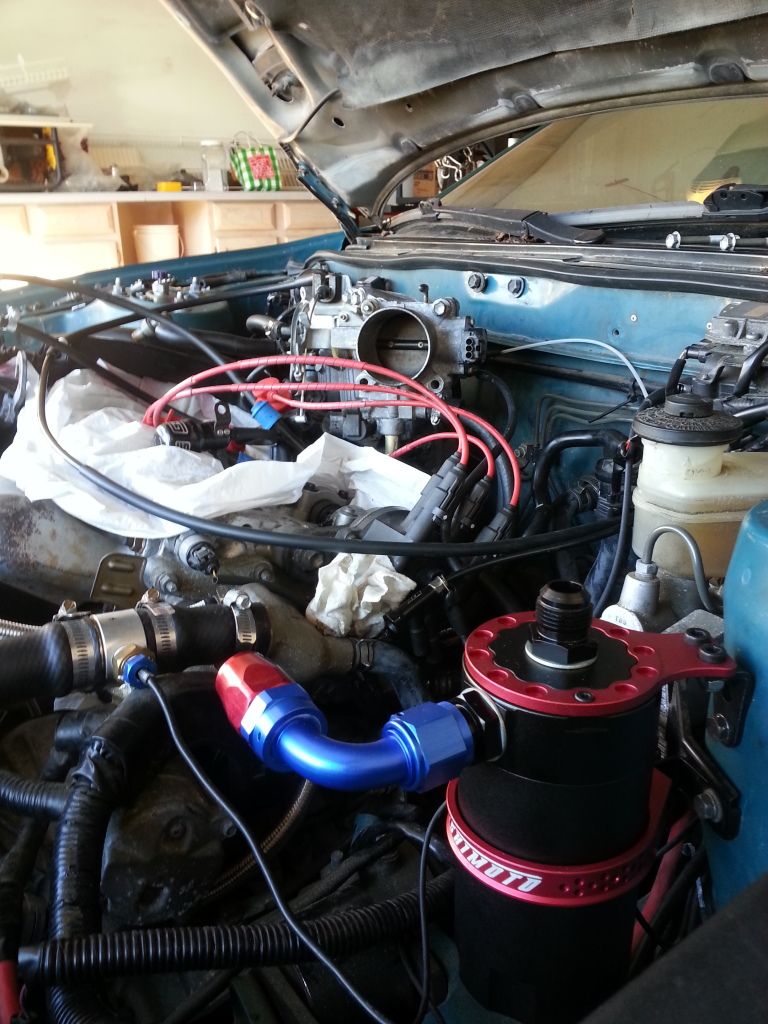 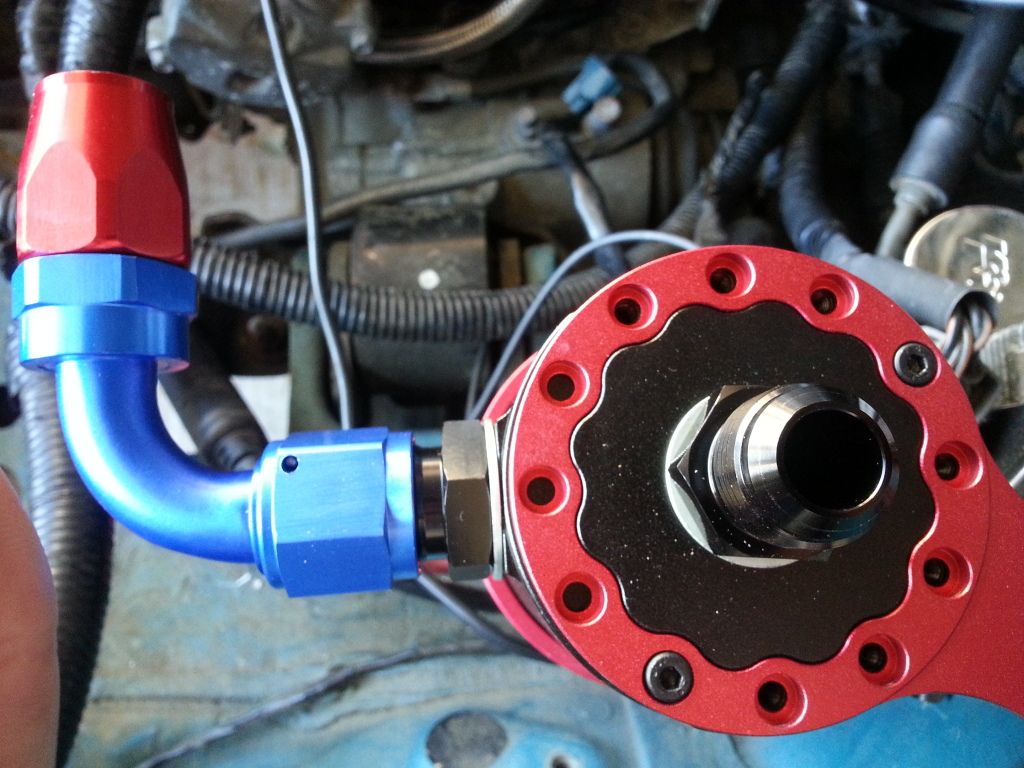 --------------------  |
 Jan 25, 2015 - 5:48 PM Jan 25, 2015 - 5:48 PM
|
|
 Enthusiast      Joined Jul 12, '08 Currently Offline Reputation: 5 (100%) |
sexy. Crazy how much work it takes to do a clean install right?
--------------------  |
 Jan 25, 2015 - 9:47 PM Jan 25, 2015 - 9:47 PM
|
|
|
Enthusiast     Joined May 16, '10 From Raleigh Currently Offline Reputation: 12 (100%) |
sexy. Crazy how much work it takes to do a clean install right? It's expensive, and exhausting! --------------------  |
 Jan 25, 2015 - 10:19 PM Jan 25, 2015 - 10:19 PM
|
|
|
Enthusiast     Joined Nov 30, '04 From Atlantic City Currently Offline Reputation: 21 (100%) |
Huge fan of the catch can install! I think i'll do the same.
-------------------- |
 Jan 26, 2015 - 7:20 AM Jan 26, 2015 - 7:20 AM
|
|
|
Enthusiast     Joined May 16, '10 From Raleigh Currently Offline Reputation: 12 (100%) |
Huge fan of the catch can install! I think i'll do the same. I accidentally discovered it. I was pretty happy when it all worked out! --------------------  |
 Jan 28, 2015 - 5:55 PM Jan 28, 2015 - 5:55 PM
|
|
|
Enthusiast     Joined May 16, '10 From Raleigh Currently Offline Reputation: 12 (100%) |
Alright guys! Got a bit done today!
Double Checked Timing (Worried that it was off. GSC cam's do not have the notches cut in them that the factory ones do for setting timing. So be extra careful, and use your good judgement!). Installed Valve Cover. (Had to wait a few days for paint to cure). Re-sized -AN fuel line (It was about 3 inches too long so I had to make it shorter.) Installed new -AN fuel line. Created -AN line from valve cover to oil catch can. Installed -AN line from valve cover to catch can. The aluminum pipe in the picture will be part of my intercooler piping, but was propped in place today for reference, and to ensure that my -AN lines weren't going to collide! Let me know what you guys think! Cheers! 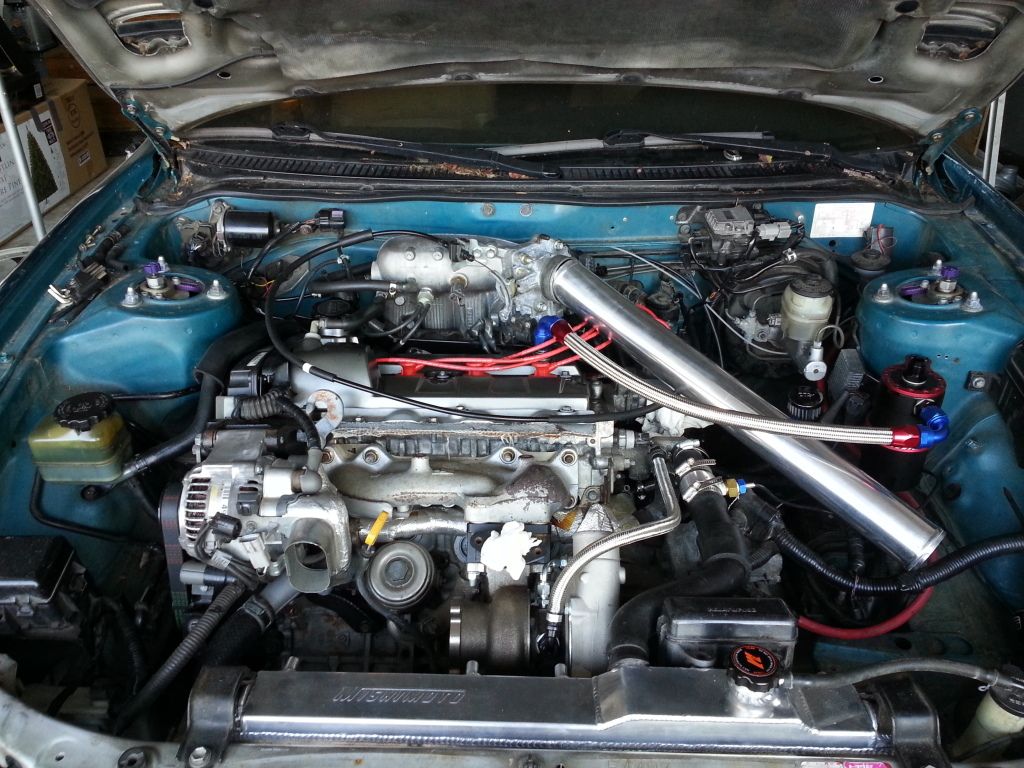 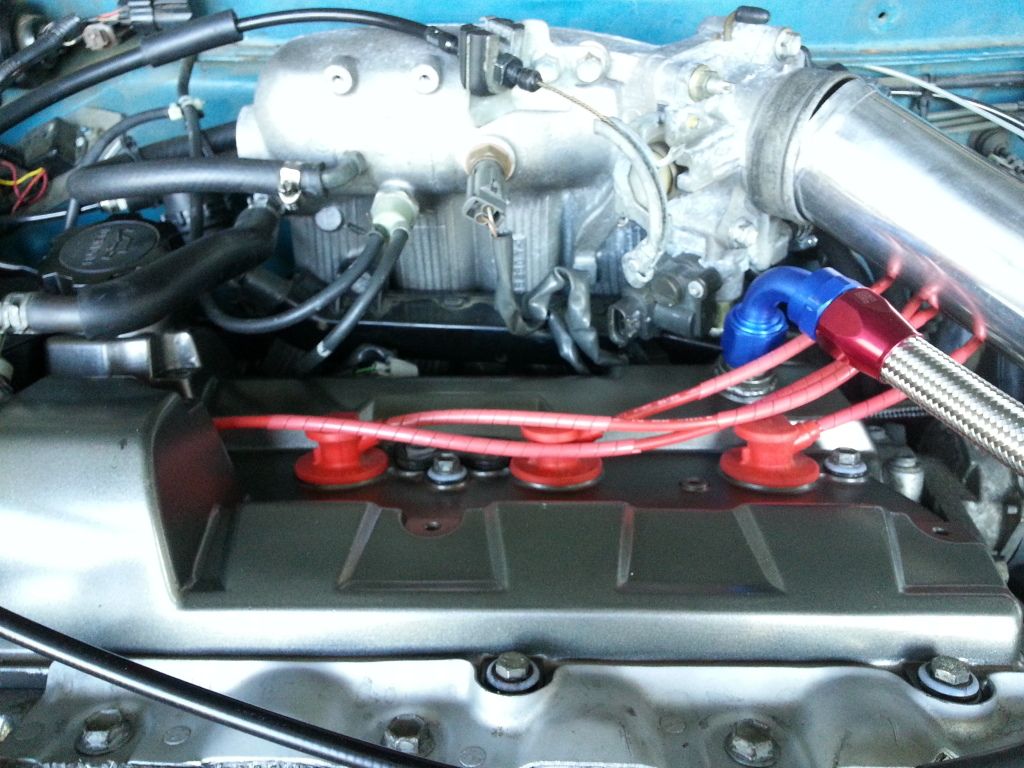     --------------------  |
 Jan 28, 2015 - 6:44 PM Jan 28, 2015 - 6:44 PM
|
|
 Enthusiast      Joined Jul 12, '08 Currently Offline Reputation: 5 (100%) |
Is that a brand new throttle cable?
--------------------  |
 Jan 28, 2015 - 7:08 PM Jan 28, 2015 - 7:08 PM
|
|
|
Enthusiast     Joined May 16, '10 From Raleigh Currently Offline Reputation: 12 (100%) |
Yup. Brand new cable!
--------------------  |
 Jan 28, 2015 - 8:51 PM Jan 28, 2015 - 8:51 PM
|
|
 Enthusiast      Joined Jul 12, '08 Currently Offline Reputation: 5 (100%) |
I almost bought one too. The price scared me away though. I tried an ST cable instead, but it wasn't long enough unfortunately
This post has been edited by enderswift: Jan 28, 2015 - 9:38 PM --------------------  |
 Jan 29, 2015 - 7:53 AM Jan 29, 2015 - 7:53 AM
|
|
 Enthusiast      Joined Mar 6, '04 From Charlotte, NC Currently Offline Reputation: 9 (100%) |
Very nice update, Ben!
The engine looks plenty ready to be fired up apart from the intercooler piping. YOu've gotten quite a bit done in the past month or so - can't wait to come back out and help once the temperature starts to rise again. -------------------- Has no more Celicas
|
 Jan 29, 2015 - 7:57 AM Jan 29, 2015 - 7:57 AM
|
|
|
Enthusiast     Joined May 16, '10 From Raleigh Currently Offline Reputation: 12 (100%) |
Come on down Brian! Got the kerosene heater in the garage! Soon enough it will be time to make the intake!
Luke, I'm believe the cable I'm using is for a GT. I'd have to double check. It's actually too long, so I'm going to have to work out some fancy fix for that. --------------------  |
 Jan 29, 2015 - 9:29 PM Jan 29, 2015 - 9:29 PM
|
|
|
Enthusiast   Joined Dec 30, '09 From Wilmington, NC Currently Offline Reputation: 1 (100%) |
Looking good Ben, keep it up!
|
 Feb 2, 2015 - 10:42 AM Feb 2, 2015 - 10:42 AM
|
|
|
Enthusiast     Joined May 16, '10 From Raleigh Currently Offline Reputation: 12 (100%) |
Got a little bit more done yesterday.
I made a stainless steel fuel return line, and I also re-secured my dash board. I didn't realize it at the time, but the passenger side air bag assembly is actually a structural part inside of the dash to keep it tight. So I removed the inflation charge, and re-assembled the basket. My dad and I then cut the whole assembly in half, (we removed two inches in the middle), and re-installed the two pieces. So now the dash is tight. I didn't take any pictures of the inflator assembly, but I do have a couple pictures of the -6 AN to -4 AN union. The reason that you have to use a reducer union is obvious when you remove the factory fuel return hard pipe that bolts to the fuel rail. The sizing from the FPR is 3/8 and steps down to 1/4 inch.  This was a super genius idea that my dad came up with to secure the fitting to the hose. It is SO much easier than screwing it on by hand!  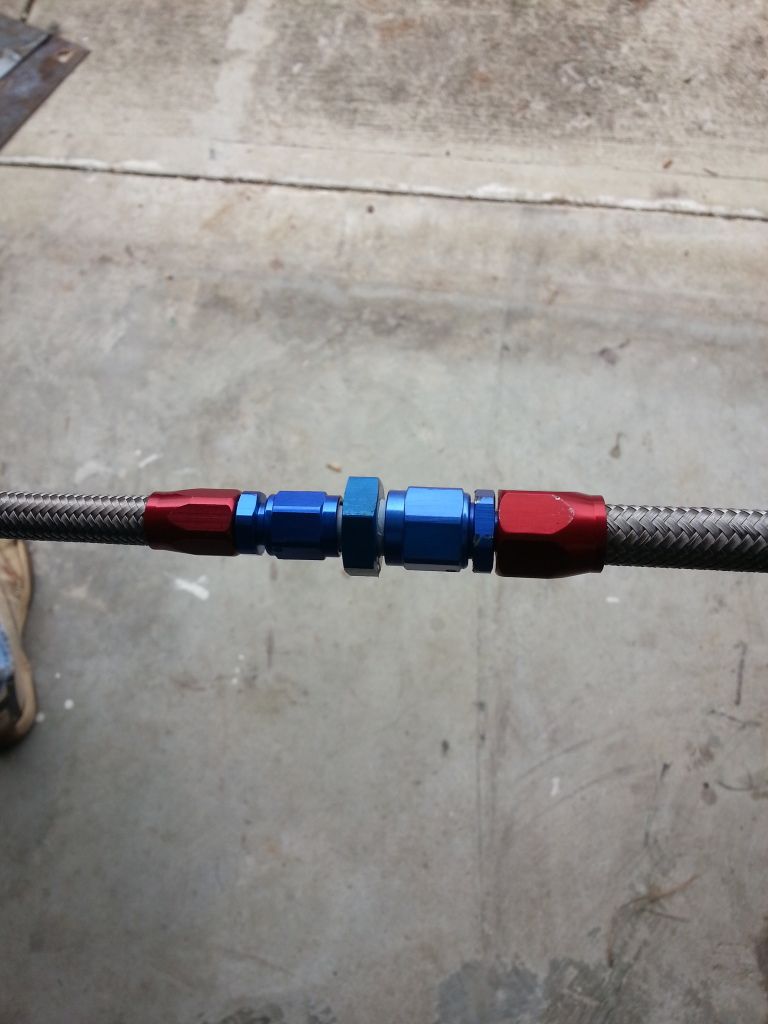 Still more to come in the next few days. I need to re-assemble the interior, extend and re-wire the IACV and TPS, and create AN lines for the brake booster, PCV valve, catch can suction pipe, and blow off valve. --------------------  |
 Feb 2, 2015 - 2:12 PM Feb 2, 2015 - 2:12 PM
|
|
|
Enthusiast     Joined May 16, '10 From Raleigh Currently Offline Reputation: 12 (100%) |
This afternoon I started working on the preliminary wiring to make the 4th gen throttle position sensor work with the 3rd gen computer. There are a few things that are involved. This information has been kind of a pain for me to get access to, and there aren't many sources out there that exist any more for a sort of "how-to"
So let's begin. Disclaimer: Do not in any way shape or form assume that the colors that I used for my wiring are the same as the factory wiring. I used what I had, and will need to solder them to the correct colors coming from the factory harness. There are also many different ways to screw in a light bulb. So what works for me might not work for you. Lastly, if you screw up your car. It is NOT my fault. Again, this is a guide that works for me, and what works for me may not work for you. The most important thing is to know your limitations. If wiring isn't your thing, then don't do it. Things you will need: 4th Gen manifold/throttle body 1zz tpms connector spare wiring wire cutters crimps tape heat shrink solder soldering iron assorted electrical connectors (I used spade clips) Nitrous WOT switch 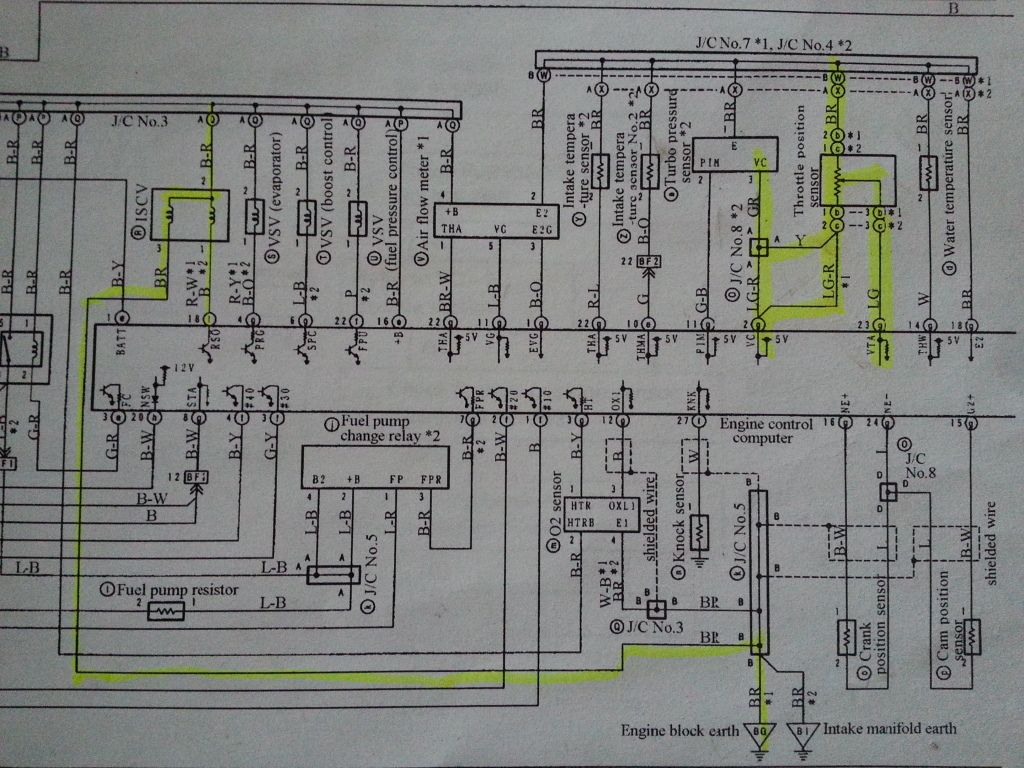 In this picture you can see that I have highlighted the circuits that need manipulation to work with the 3rd Gen ECM. This diagram belongs to a ST215 Caldina (Gen 4) 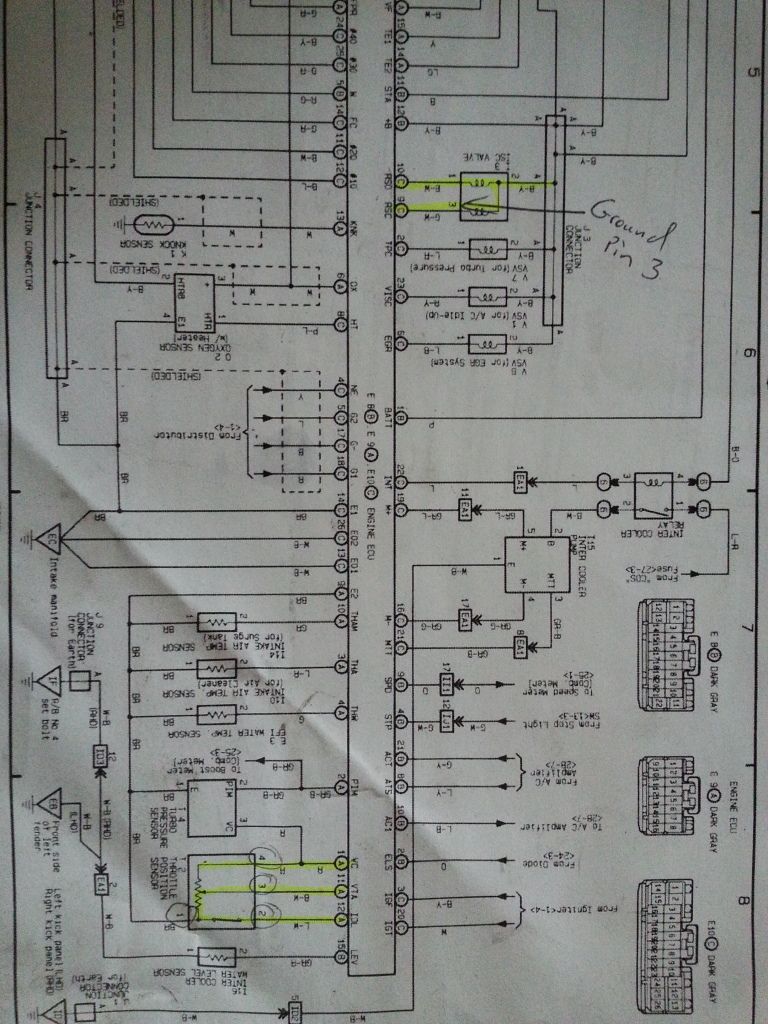 While they are fairly similar you can see differences in the circuit. This diagram belongs to an ST205 (3rd Gen) Please try to ignore my notes on the diagram. I will get into the wiring for the IACV later, but as you can see it's really easy to adapt the 4th Gen IACV.  This diagram shows the 3rd Gen Throttle Position Sensor if you were looking directly at the pinouts with the harness un-plugged.  This image shows how the 3rd Gen sensor works. You can see in the image that when the throttle shuts, that E2 and IDL will touch, which tells the ECM to idle. 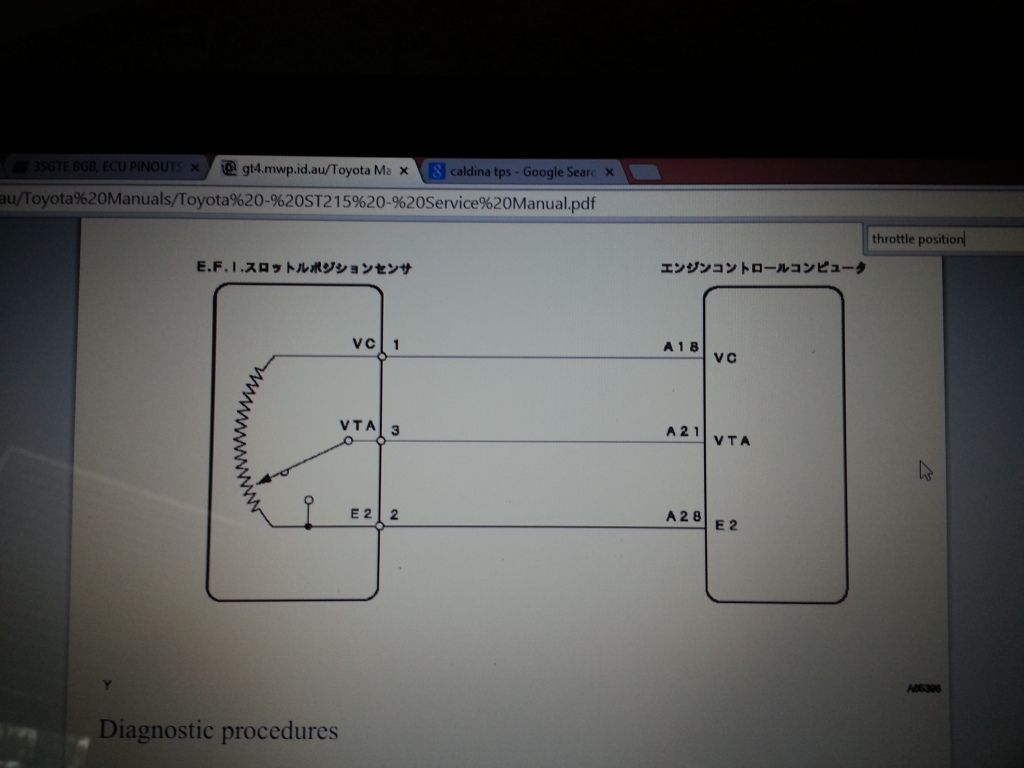 This image shows a diagram of the 4th Gen Throttle Position Sensor. Notice how IDL is missing from the 4th gen sensor. There is also no IDL pinout at the 4th gen ECM.  This is an image looking into the harness for the 4th Gen Throttle position sensor. I know it doesn't say it here, but leg three goes to VTA VC AND ETA NEED TO BE SWITCHED! LEAVING IT LIKE IT IS WILL RESULT IN FAILURE! 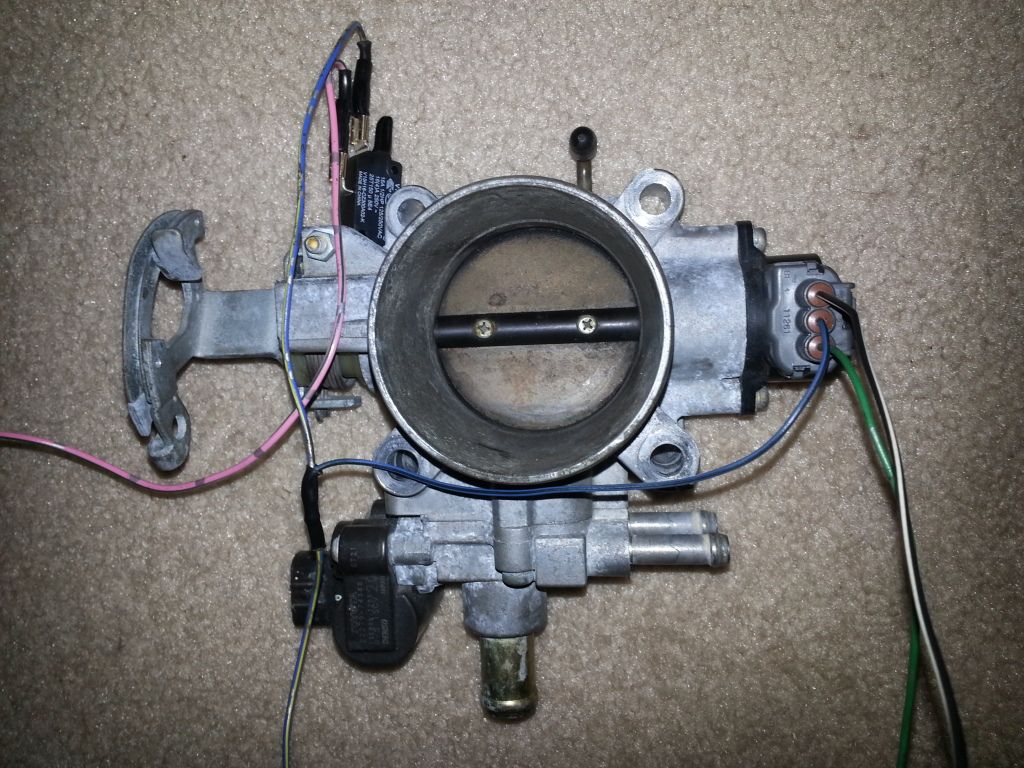 And here it what I have done. I left the wires bare to show how it works, but will cover the wiring with split loom, and clean it up before instal. At the top left you can see the Nitrous WOT switch. This switch is key to performing the duties of the IDL function that the 4th gen sensor is devoid of. On a 3rd gen 3sgte the vehicle must be switched into idle mode when your foot is not on the accelerator. The tab on this nitrous WOT switch is engaged when the throttle stop on the throttle body closes. Meaning when the throttle shuts it presses the switch down, which completes a circuit. This information is then sent to the 3rd gen ECM on the IDL pinout to tell the vehicle to idle. So in my last picture the top black wire on the TPS connector is VTA, the blue is VC, and the green is E2. I will connect these three wires directly to the same wires used for these exact functions on my factory 3rd Gen Harness. Meaning, I will solder the black wire to the black wire on the 3rd gen harness, the blue wire to the brown wire on the third gen harness, and the green wire to the red wire on the 3rd gen harness. From the 3rd gen harness I will be left with one remaining wire, that according to the diagram is Blue and White. This wire will be soldered to the pink wire coming off of my Nitrous WOT switch. You may have also noticed that I linked the blue wire from the tps to the blue wire on the WOT switch. As mentioned earlier "idle" occurs when E2 and IDL touch, BUT IN THIS CASE WILL OCCUR WHEN VC AND IDLE TOUCH. Hence when my WOT switch closes the VC and IDLE will complete the circuit. I'm going to make a bracket that holds my nitrous WOT switch. One things that must be considered is the activation points of the Nitrous WOT switch. This diagram below shows the tolerances that must be taken for the introduction of "idle" to occur at the right position of the throttle plate. I will have to make these adjustments after I get everything running, but wanted to make sure that I included this image for anyone else trying to attempt the same thing. 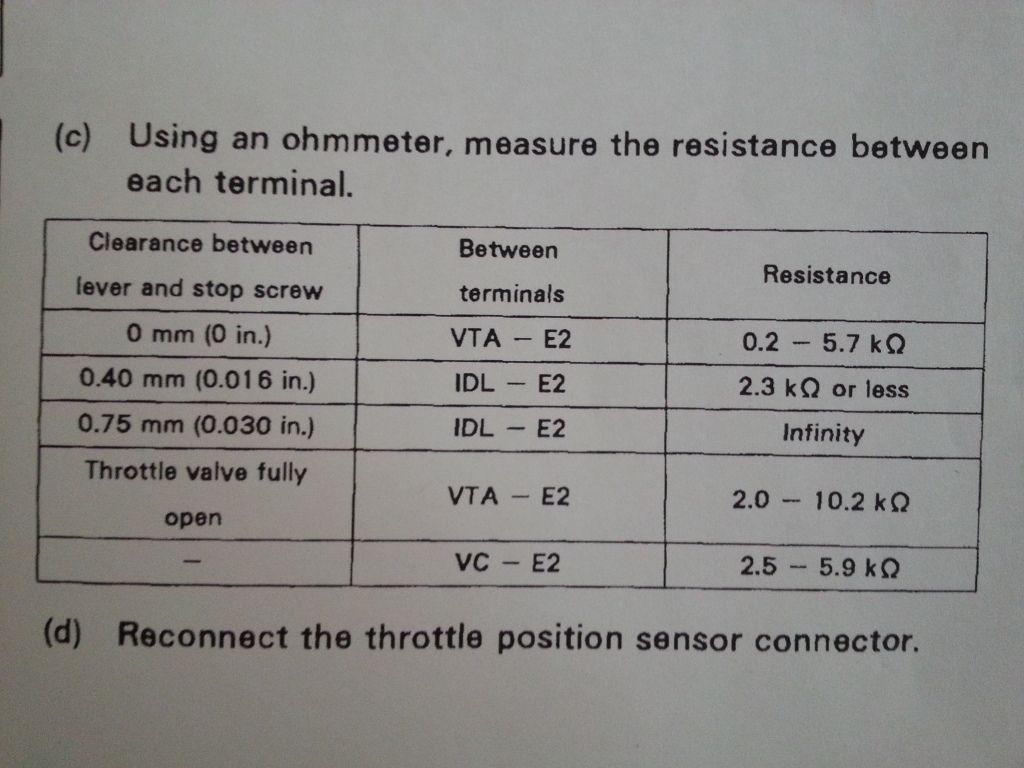
This post has been edited by bsamps4: Feb 23, 2015 - 11:43 AM --------------------  |
 Feb 2, 2015 - 7:49 PM Feb 2, 2015 - 7:49 PM
|
|
|
Enthusiast     Joined Mar 6, '12 From Brisbane, Australia Currently Offline Reputation: 6 (100%) |
Progress is looking really good! Why just fix, when you can rebuild... I like it Anyone have a gt40c log in? I need to be able to read their instructions for adapting a st215 throttle position sensor onto my 3rd gen, and every time I find the page it won't let me view it. It used to allow viewing, but I guess they changed their site security. Also need to double check. Is it the tps connector from a 2000 celica gts with 1zz engine that I need to adapt? As for the GT4OC question.... I'm a bit late, but for future reference if you google the page that you need and then use the little triangle drop down menu under the link it often (but not always, unfortunately) gives you the option to view a cached version of the website which is not hidden! It does mean that you need to go via google every time you want to change page though --------------------  SOLD :( 1997 ST204 Celica ZR -----> See it here on 6GC! 2013 October Celica of the Month XD Now: '00 NB8B Mazda MX5 -----> See it here in off topic! |
 Feb 4, 2015 - 2:19 PM Feb 4, 2015 - 2:19 PM
|
|
|
Enthusiast     Joined May 16, '10 From Raleigh Currently Offline Reputation: 12 (100%) |
Progress is looking really good! Why just fix, when you can rebuild... I like it Anyone have a gt40c log in? I need to be able to read their instructions for adapting a st215 throttle position sensor onto my 3rd gen, and every time I find the page it won't let me view it. It used to allow viewing, but I guess they changed their site security. Also need to double check. Is it the tps connector from a 2000 celica gts with 1zz engine that I need to adapt? As for the GT4OC question.... I'm a bit late, but for future reference if you google the page that you need and then use the little triangle drop down menu under the link it often (but not always, unfortunately) gives you the option to view a cached version of the website which is not hidden! It does mean that you need to go via google every time you want to change page though Thanks for the tip! --------------------  |
 Feb 4, 2015 - 2:29 PM Feb 4, 2015 - 2:29 PM
|
|
|
Enthusiast     Joined May 16, '10 From Raleigh Currently Offline Reputation: 12 (100%) |
Alright guys! Tackling a few things today! My interior has been ripped apart since the removal of that stupid passenger side air bag! So it's time to put it all back together.
I'm also sitting around right now waiting for FedEx to deliver the remaining AN parts that I need to complete my little AN line set up. So I will post again later today once those items arrive, are assembled, and are finally installed. The pictures...  Here we go! Time to get started! 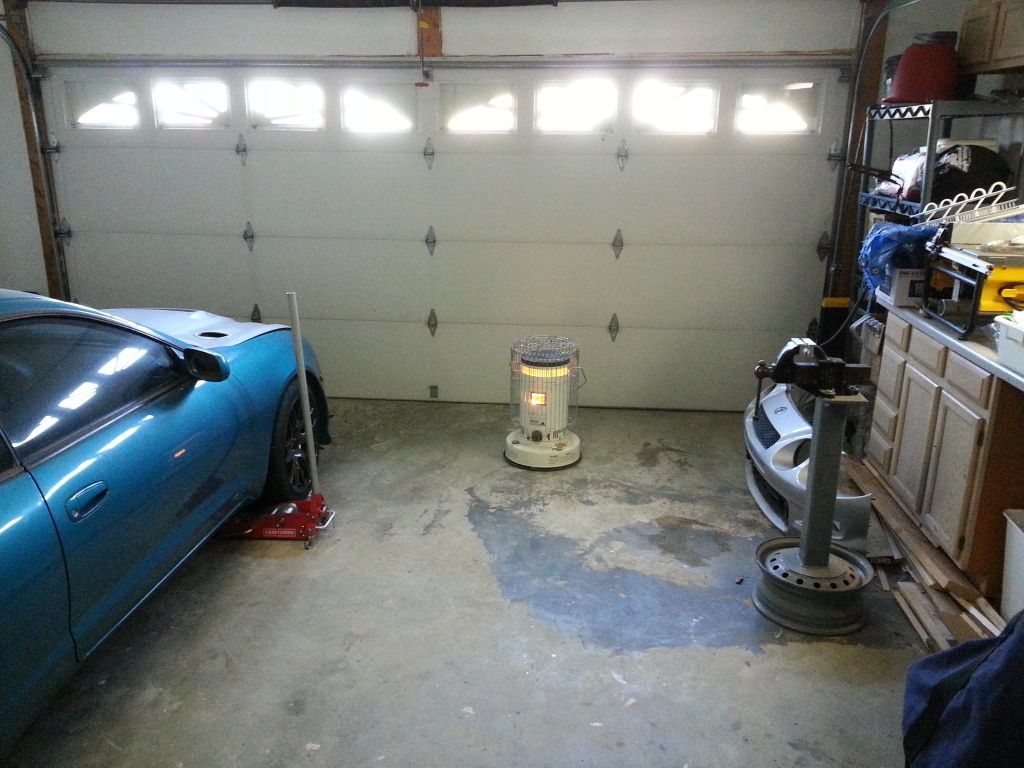 Kinda cold here so I've got my kerosene heater up and running! Got the garage to a comfortable 60 degrees. 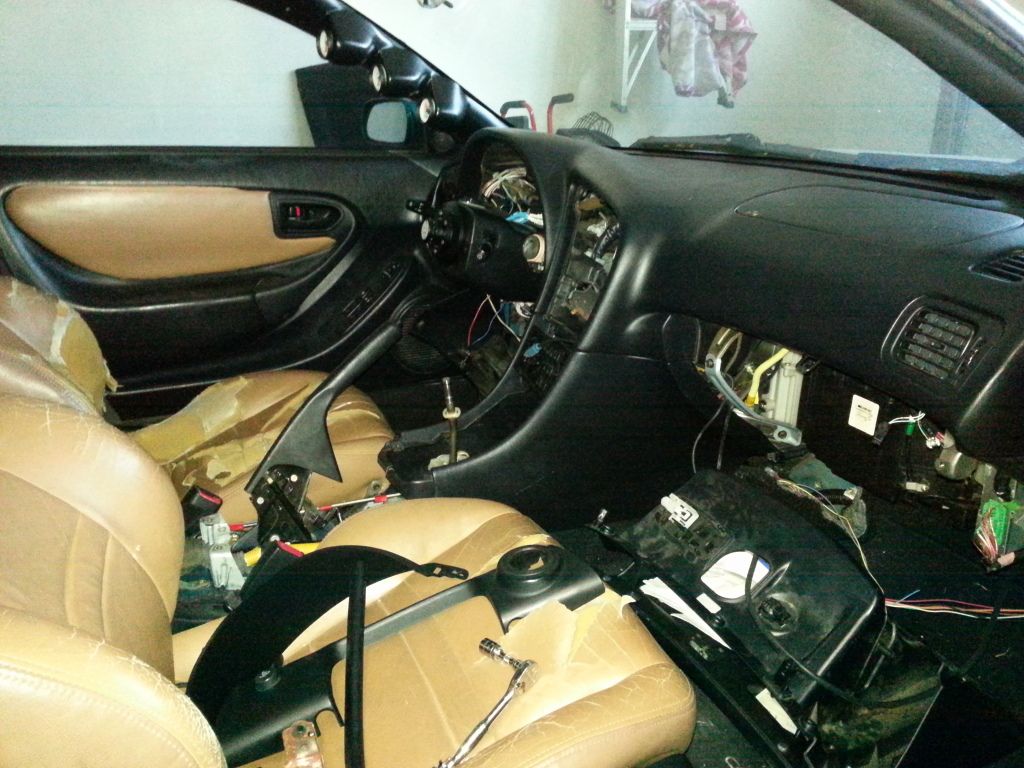 F***ing yikes! Here is the before shot after ripping everything imaginable apart. 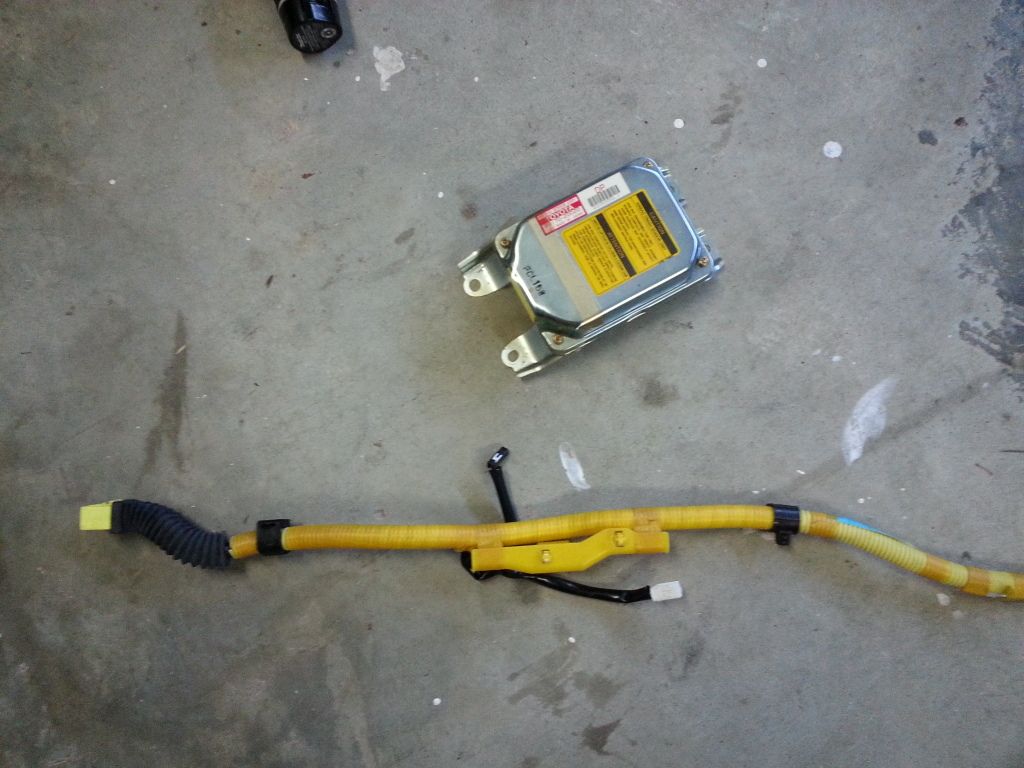 Went ahead and removed this gem, and cut the harness out. (note: if you cut this out you will not have a wired connection to the light in your ash tray, or the e-brake indicator.) I call it a weight reduction, and I absolutely HATE airbags! 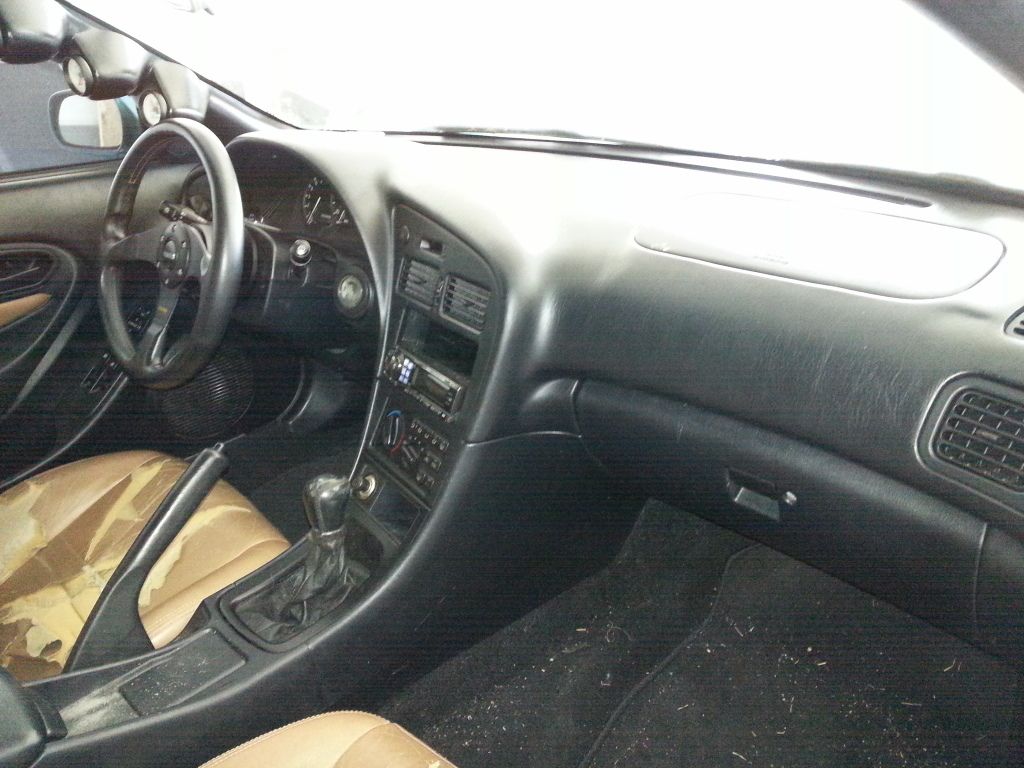 Here we go. Much better. Ignore the fact that I need to vacuum, there is still a lot of dirt and glass to clean up.  This is where I'm stuck right now until FedEx comes. I removed all of the factory bungs in preparation. 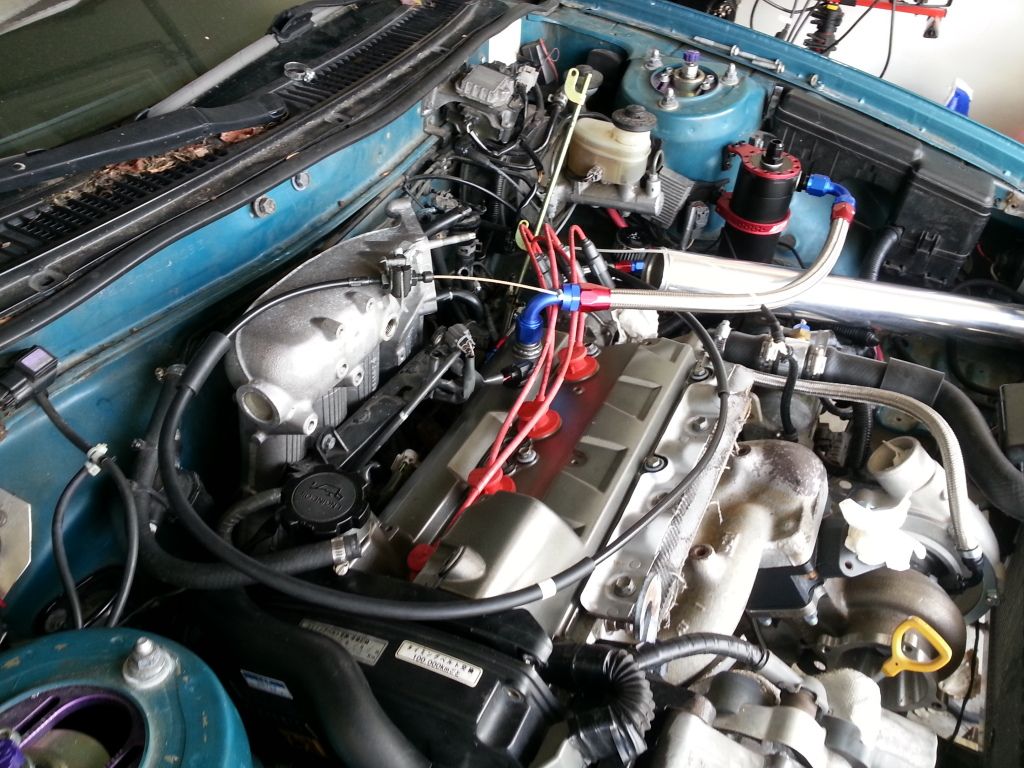 This one is pretty self-explanatory.  Here are the bungs that came out. Unfortunately I had to remove the intake air temperature sensor, and the dual vacuum port that connects to the MAP and FPR, in order to get to the bungs that I will be modifying. Hopefully everything runs smooth once I get the parts in the mail. --------------------  |
 Feb 11, 2015 - 8:26 PM Feb 11, 2015 - 8:26 PM
|
|
|
Enthusiast     Joined May 16, '10 From Raleigh Currently Offline Reputation: 12 (100%) |
Made some headway today. Still have a lot of small annoying things left to do, which are always the most time consuming and horrible. I did get my downpipe, screamer pipe, and dump pipe back today from ATS. The turbo also looked cold so I got it blanket. Enjoy!

--------------------  |
 Feb 11, 2015 - 10:23 PM Feb 11, 2015 - 10:23 PM
|
|
|
Enthusiast      Joined Feb 23, '12 From Warrior, AL Currently Offline Reputation: 0 (0%) |
The turbo also looked cold so I got it blanket. Enjoy! Did you tuck it in and read it a story? -------------------- 2001 Miata LS 5-speed
|
  |
1 User(s) are reading this topic (1 Guests and 0 Anonymous Users)
0 Members:
| Lo-Fi Version | Time is now: November 26th, 2024 - 7:28 PM |


