  |

 Aug 30, 2009 - 2:53 PM Aug 30, 2009 - 2:53 PM
|
 
|
 Enthusiast  Joined Jan 10, '06 From Mozambique, Africa Currently Offline Reputation: 8 (100%) |
Spent the day today getting stuff done on my Celi that i've been putting off. Here are some shots of what I completed today.
Easily mounted the hatch visor. 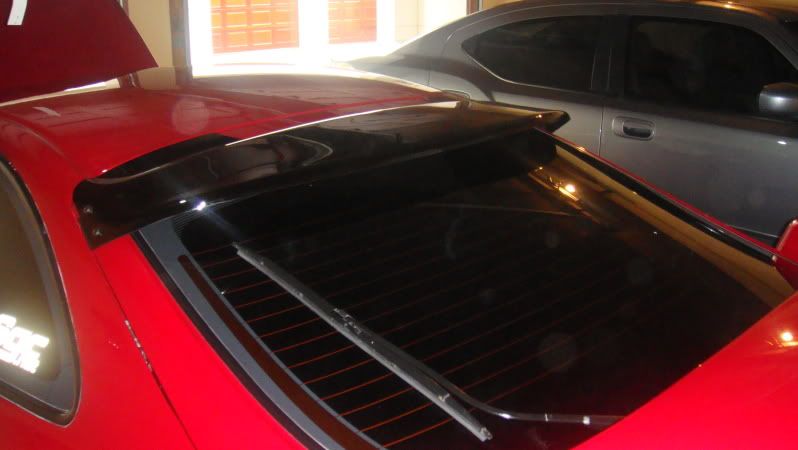 Mounted the CF license plate garnish. It took some moding but it fit in well enough. 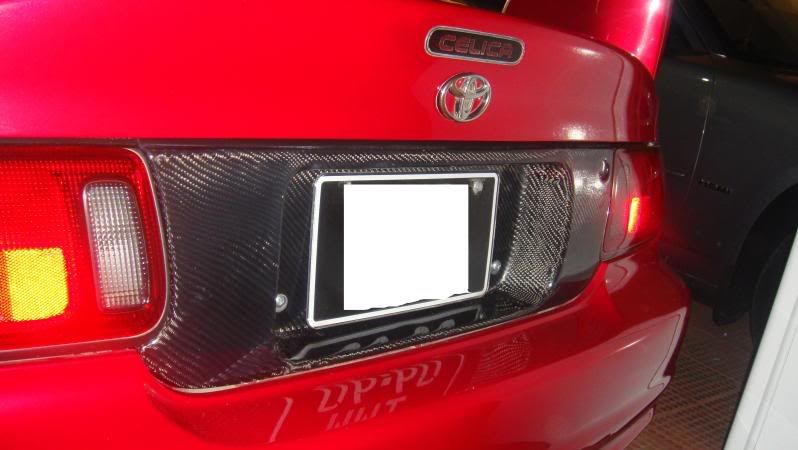 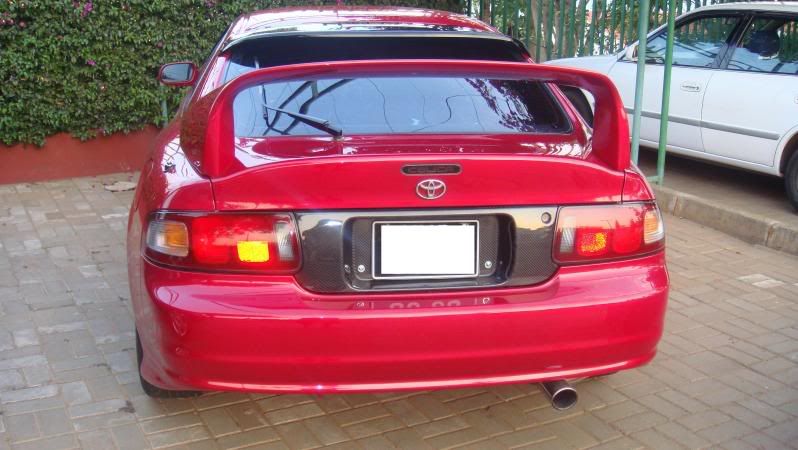 Installed the hood struts. Great mod! Thanks 6GC for the How-to! 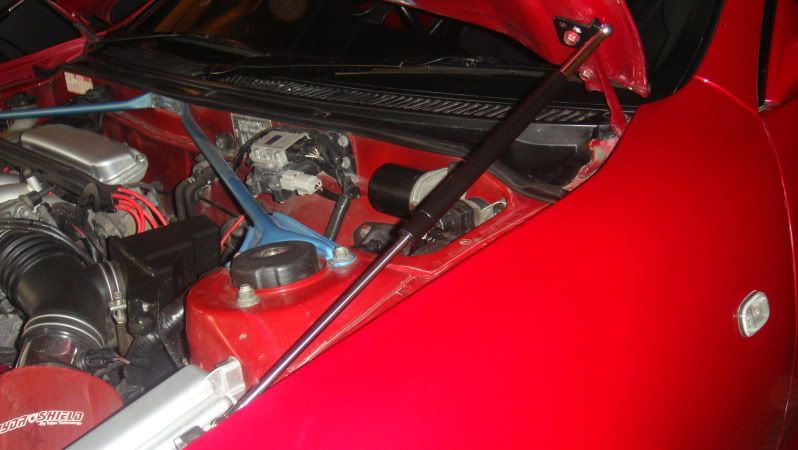 Installed the CF hood spoiler (?). It was the most painful mod yet as i had to drill holes in my newly painted hood.  But it matched nicely with the CF mirror cover. Thanks, Vincent! But it matched nicely with the CF mirror cover. Thanks, Vincent!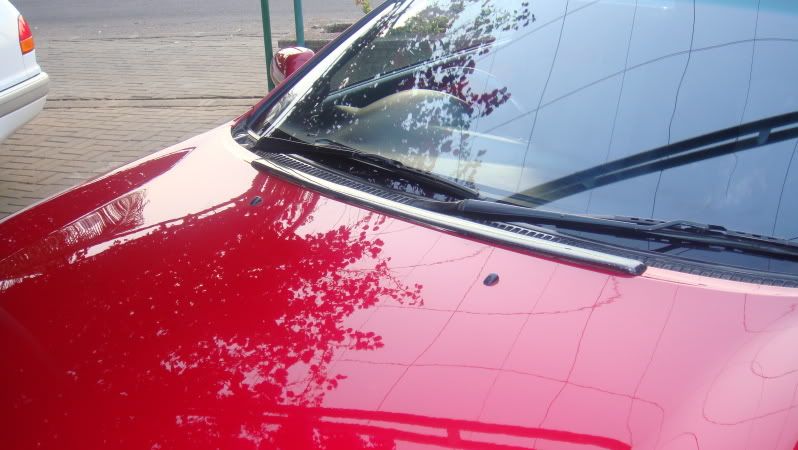 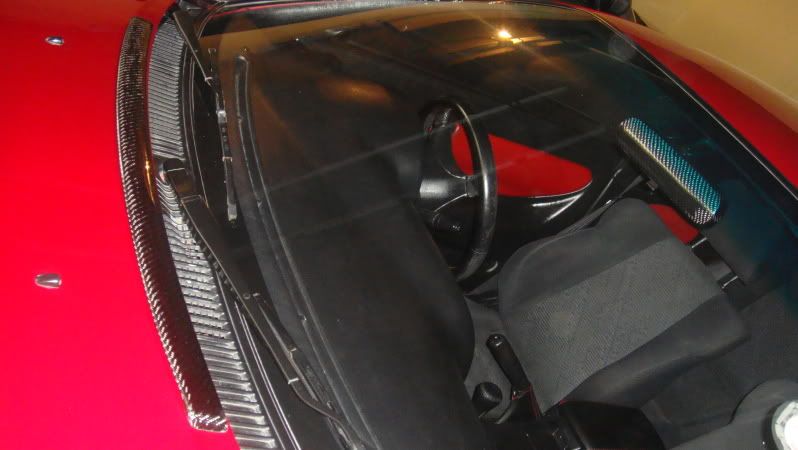
--------------------  "Remember, amateurs built the ark and professionals built the Titanic. But revolutionaries built the Celica!"- Me |

|
Aug 30, 2009 - 3:03 PM
|
|
|
Enthusiast Joined Feb 24, '07 From Oahu, Hawaii Currently Offline Reputation: 23 (100%) |
right on slick

-------------------- I don't normally drive fast, but when I do its on a curvy section of this island
 |
|
Aug 30, 2009 - 3:07 PM
|
|
 Enthusiast Joined Aug 25, '08 From England Currently Offline Reputation: 1 (100%) |
Nice

-------------------- |
|
Aug 30, 2009 - 3:10 PM
|
|
 Enthusiast Joined Feb 5, '05 From pineapple under the sea Currently Offline Reputation: 9 (100%) |
Looks good, but does that license plate garnish not mount like OEM? I think those two huge bolts on the sides of your plate look bad. Maybe if you find black flush bolts it'll look better, but otherwise I'm liking it.
-------------------- 1991 MR2 - T-tops - Crimson Red - Gen3 3SGTE - Lots of money
 I'm not really an asshole, but I play one on the internet. **** Photobucket |
|
Aug 30, 2009 - 3:21 PM
|
|
|
Enthusiast Joined Jan 10, '06 From Mozambique, Africa Currently Offline Reputation: 8 (100%) |
QUOTE (95CelicaST @ Aug 30, 2009 - 10:10 PM)  Looks good, but does that license plate garnish not mount like OEM? I think those two huge bolts on the sides of your plate look bad. Maybe if you find black flush bolts it'll look better, but otherwise I'm liking it. It does and it doesn't. The garnish itself fit like an OEM, but the back of it was missing one peg(?) and the bottom catches on either side of the garnish were flimsy and they snapped in shipment. I used those bolts because that's all i had with me and on Sunday, all of the hardware stores are closed around here. But i get what you mean and I'll look for something more inconspicous. Thanks! -------------------- "Remember, amateurs built the ark and professionals built the Titanic. But revolutionaries built the Celica!"- Me |
|
Aug 30, 2009 - 10:56 PM
|
|
|
Enthusiast Joined Jun 18, '09 From Orlando Currently Offline Reputation: 8 (100%) |
Mods are great, tasteful, tasteful.
So are you South African, or how else did you end up in Mozambique? -------------------- '97 ST \ Eibach \ KYB \ Kenwood \ Alpine \ Cusco \ OEM+ [sold 10/18]
'93 MX-5 LE |
|
Aug 31, 2009 - 12:23 AM
|
|
|
Enthusiast Joined Jan 10, '06 From Mozambique, Africa Currently Offline Reputation: 8 (100%) |
QUOTE (SwissFerdi @ Aug 31, 2009 - 5:56 AM) Mods are great, tasteful, tasteful. So are you South African, or how else did you end up in Mozambique? I'm from the U.S. (WA) and I'm a contractor at CDC with the U.S. Embassy. I've been here for a few years and I'll be here for a few more. -------------------- "Remember, amateurs built the ark and professionals built the Titanic. But revolutionaries built the Celica!"- Me |
|
Aug 31, 2009 - 7:00 AM
|
|
|
Enthusiast Joined Aug 19, '09 From Sydney Currently Offline Reputation: 0 (0%) |
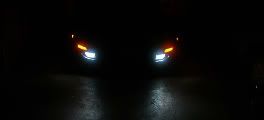
So shiny *drools*
and nice third brake light
--------------------  |
|
Sep 7, 2009 - 12:40 PM
|
|
|
Enthusiast Joined Apr 18, '06 From Calgary, Canada Currently Offline Reputation: 37 (100%) |
Ahhh - Slick; I was wondering who would be the first to "man-up" and install their hood spoiler first, you or me.
WALKER and I were just looking at mine the other day because I have the hood off of the car... can you upload some pics of the damage that occured underneath the hood for reference? I'd really like to see. ... and everything looks fantastic thus far doood; nice! -------------------- |
|
Sep 7, 2009 - 1:30 PM
|
|
|
Enthusiast Joined Jan 10, '06 From Mozambique, Africa Currently Offline Reputation: 8 (100%) |
QUOTE (KAOS @ Sep 7, 2009 - 7:40 PM) Ahhh - Slick; I was wondering who would be the first to "man-up" and install their hood spoiler first, you or me. WALKER and I were just looking at mine the other day because I have the hood off of the car... can you upload some pics of the damage that occured underneath the hood for reference? I'd really like to see. ... and everything looks fantastic thus far doood; nice! Sure thing! The top of the hood was fine and the holes are covered by the spoiler. 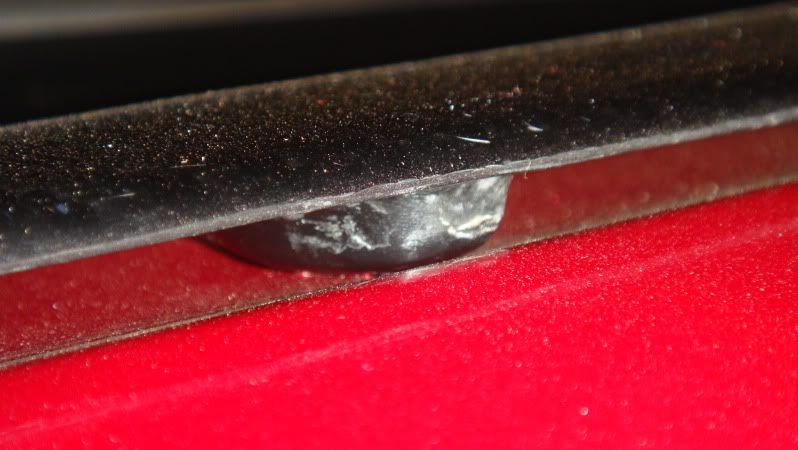 The two middle ones were easy to drill because they already had two holes precut to act as guides. I could have left it at that and used the two nuts to secure the spoiler but i didn't want a half-assed job. I used primer paint to help prevent any rust. I'll repaint the hood later. 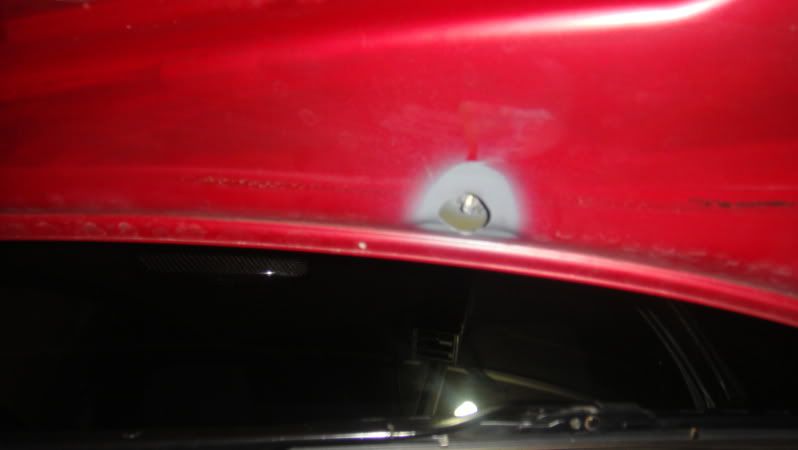 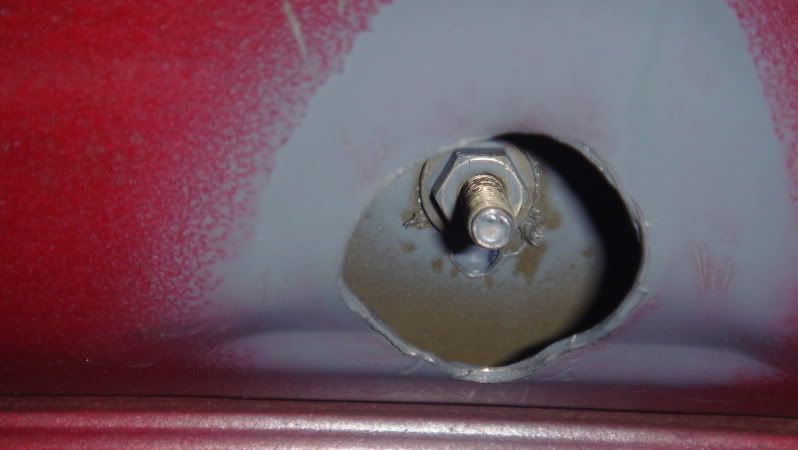 -------------------- "Remember, amateurs built the ark and professionals built the Titanic. But revolutionaries built the Celica!"- Me |
|
Sep 7, 2009 - 5:52 PM
|
|
|
Enthusiast Joined Apr 18, '06 From Calgary, Canada Currently Offline Reputation: 37 (100%) |
QUOTE (Slick @ Sep 7, 2009 - 12:30 PM) Nice work. Did you just use a dremel there? How did you line it up on the top, just with "toothpaste" like Vincent said? ... also do you have any pics of the entire hood/car after the spoiler was installed? I'm interested to see it as a whole.
This post has been edited by KAOS: Sep 7, 2009 - 5:55 PM -------------------- |
|
Sep 10, 2009 - 9:31 PM
|
|
|
Enthusiast Joined Mar 20, '07 From Bakersfield, CA Currently Offline Reputation: 10 (100%) |
lookin' good slick! I got one of those rear hatch spoilers only mine is warped in the middle for some odd reason. I think the insane heat we get here in the summer, mixed with stupid cats walking over it when I have the car cover on! GRRRR!!!! I am trying to see how I can warp it back into shape.
This post has been edited by Random_Stranger: Sep 10, 2009 - 9:31 PM -------------------- 91 MR2 Turbo SW20, 92 MR2 Turbo SW20, 95 Celica GT ST204
 |
|
Sep 10, 2009 - 10:17 PM
|
|
 Enthusiast Joined Nov 18, '08 From Idaho Currently Offline Reputation: 1 (100%) |
man that cf hood spoiler adds like 5hp! and a crazy amount of downforce! haha im just playing, but yeah cool
-------------------- A work in (extremely slow) progress
|
|
Sep 11, 2009 - 2:29 AM
|
|
|
Enthusiast Joined Jan 10, '06 From Mozambique, Africa Currently Offline Reputation: 8 (100%) |
QUOTE (KAOS @ Sep 8, 2009 - 12:52 AM) Nice work. Did you just use a dremel there? How did you line it up on the top, just with "toothpaste" like Vincent said? ... also do you have any pics of the entire hood/car after the spoiler was installed? I'm interested to see it as a whole. I aligned the spoiler from the underside of the hood by inserting the two center bolts into the precut holes and I marked it in place. I drill out the two cener holes first and then placed the spoiler on the top of the hood through the drilled holes and then marked the other two and drilled from the top and through the two layers of the hood. I then used a drill bit similar to the picture below to make the larger holes in order to be able to fasten the nuts onto the bolts. I ruined the bit, but it got the job done. I used a dremel afterwards to smooth out the edges. 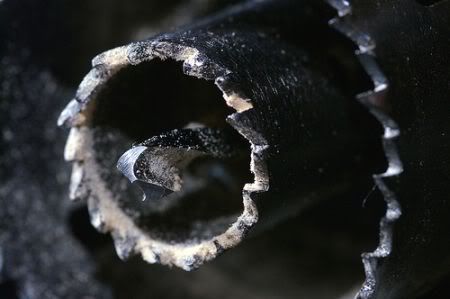 Here are some shots of the whole hood, as requested. 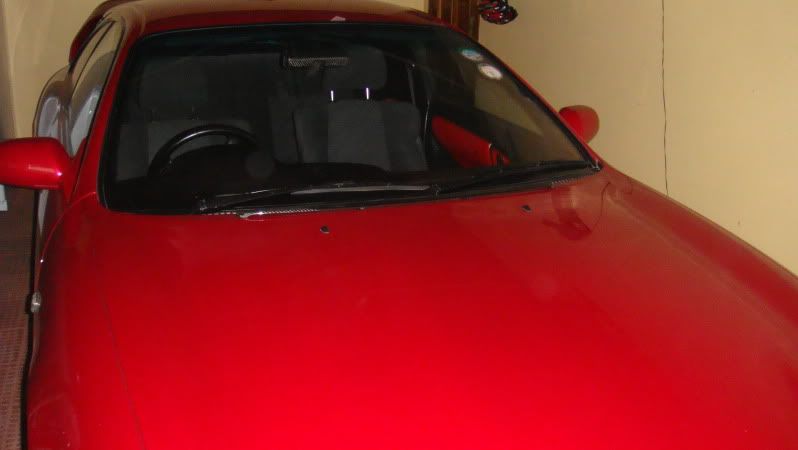 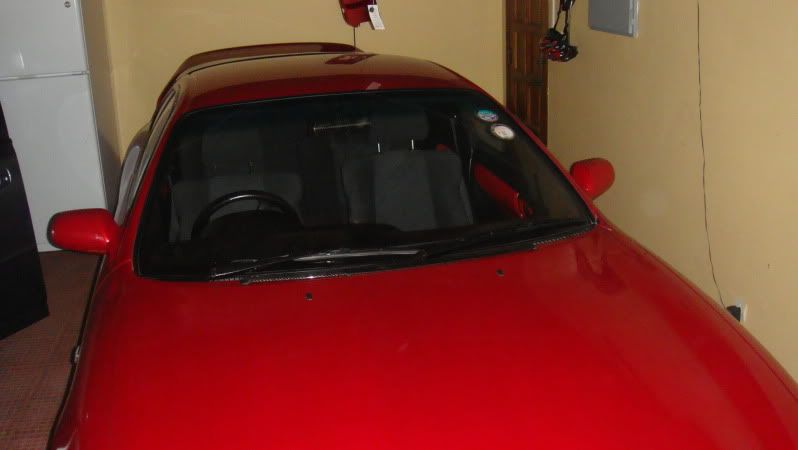 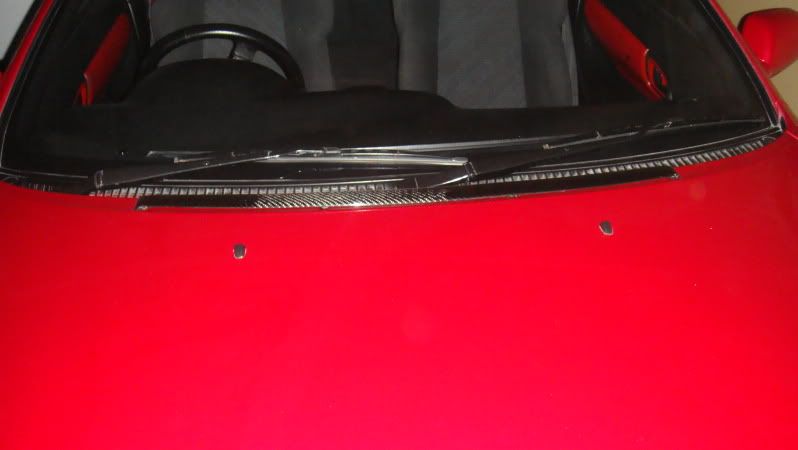  -------------------- "Remember, amateurs built the ark and professionals built the Titanic. But revolutionaries built the Celica!"- Me |
|
2 User(s) are reading this topic (2 Guests and 0 Anonymous Users)
0 Members:
| Lo-Fi Version | Time is now: February 18th, 2025 - 3:01 PM |