  |
 May 12, 2010 - 5:21 PM May 12, 2010 - 5:21 PM
|
|
|
Enthusiast    Joined Sep 22, '08 From Bergenfield Currently Offline Reputation: 5 (78%) |
--------------------
 |
 May 13, 2010 - 12:30 PM May 13, 2010 - 12:30 PM
|
|
|
Enthusiast    Joined Feb 28, '08 From Miramar, Florida Currently Offline Reputation: 16 (100%) |
Let me know how the fit is. I'm debating picking one up but Ive read mixed reviews about how fitment is in the mr2oc. Thanks and keep up the great work!
|
 May 15, 2010 - 7:37 AM May 15, 2010 - 7:37 AM
|
|
|
Moderator      Joined Oct 1, '02 From fall river, ma Currently Offline Reputation: 13 (100%) |
so i jumped the gun and ordered the clear cover, before i did the proper research, and boom, it bit me in the a$$.
it only fits 2nd gens. so no go on the clear cover for now. once again, it pays to do the proper research. on a good note, i started getting some stuff back from the coaters thursday and friday, here are a few pics of what i've gotten back so far, the rest should be done by early next week. the intake manifold: 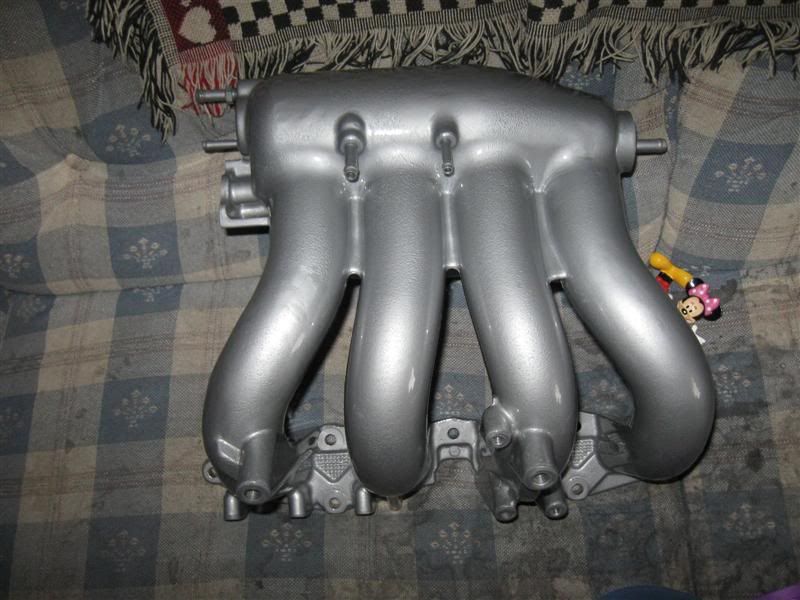 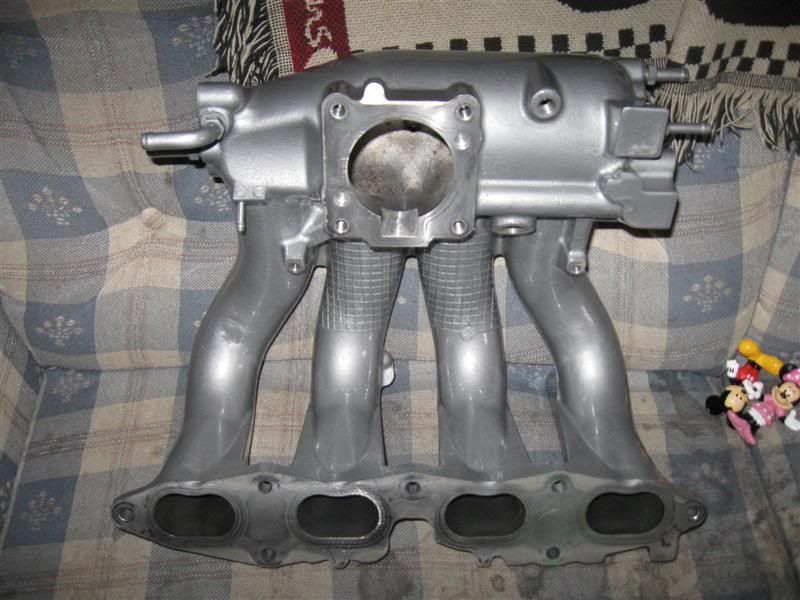 the 2 water necks: 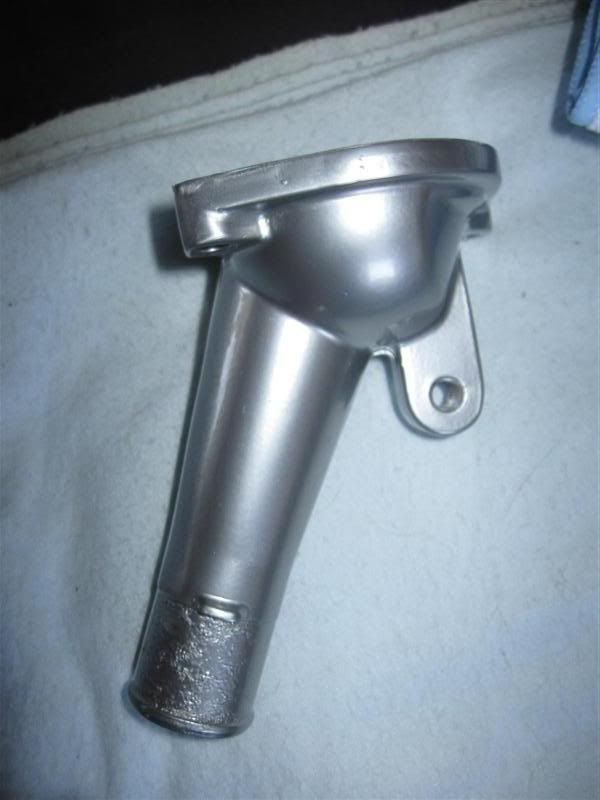 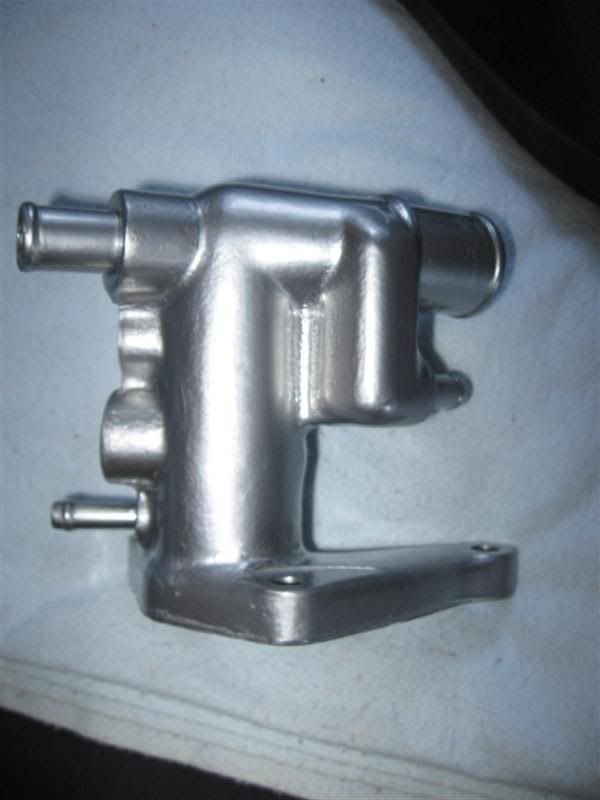 throttle body stay and throttle cable bracket: 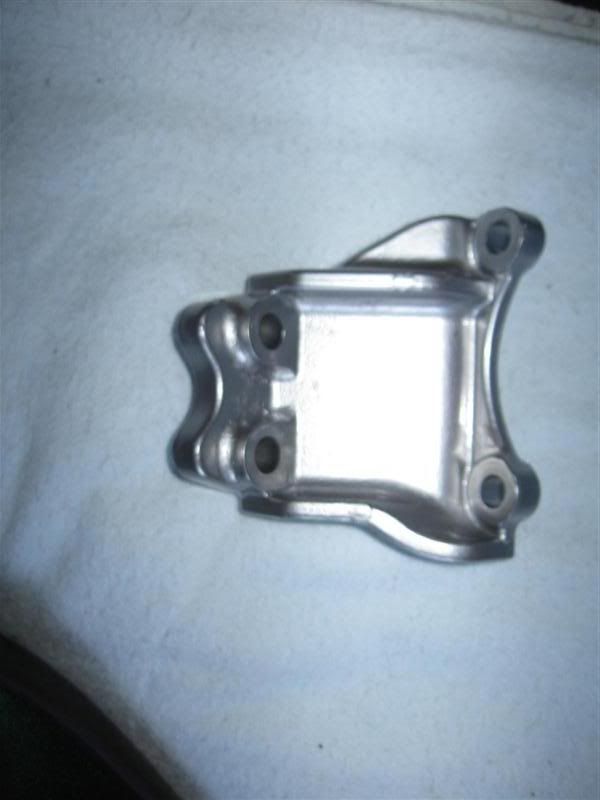 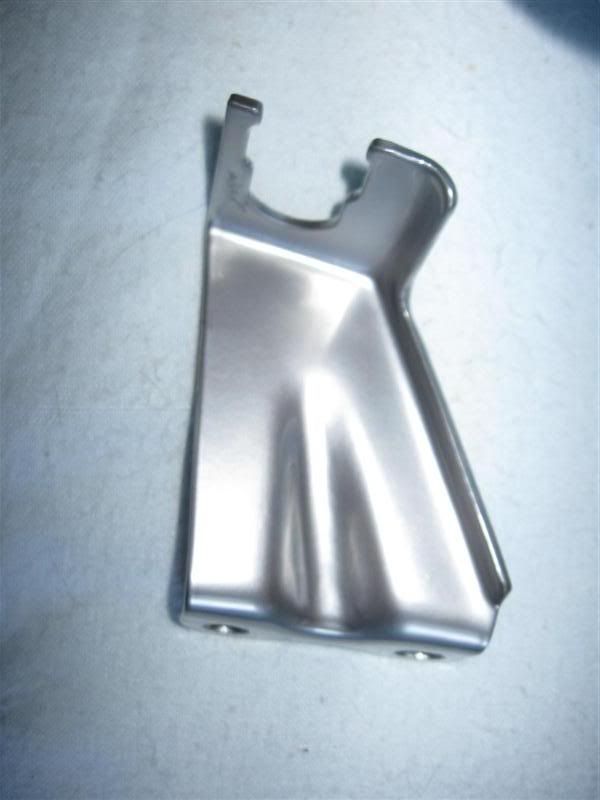 -------------------- Former Team 5SFTE pro member ;)
 13.6@108MPH, 5SFTE Powered |
 May 15, 2010 - 8:04 AM May 15, 2010 - 8:04 AM
|
|
 Enthusiast     Joined Apr 28, '09 From York pa Currently Offline Reputation: 3 (100%) |
so much shiny looks good sucks about the cover though....
|
 May 15, 2010 - 8:20 AM May 15, 2010 - 8:20 AM
|
|
|
Enthusiast     Joined Nov 30, '04 From Atlantic City Currently Offline Reputation: 21 (100%) |
looks good!
sidenote/ sorry to hear about the clear cover, i figured you knew something i didn't about 3rd gen covers being released. i check the thread on mr2oc once a week in hopes that a prototype is underway. soon enough they'll be released. -------------------- |
 May 15, 2010 - 11:02 AM May 15, 2010 - 11:02 AM
|
|
|
Moderator      Joined Oct 1, '02 From fall river, ma Currently Offline Reputation: 13 (100%) |
looks good! sidenote/ sorry to hear about the clear cover, i figured you knew something i didn't about 3rd gen covers being released. i check the thread on mr2oc once a week in hopes that a prototype is underway. soon enough they'll be released. yea, man, i was so totally awestruck by the coolness of the cover, that i read right over the part that said it fits all gen II 3sgtes...all i saw was fits all gen 3sgtes..lol i will say this tho, i ordered it monday morning, it shipped the same day, and arrived here this morning VIA fed ex. i emailed robert this morning at 5:30am, about returning it, and by 8am i had a response from him explaining it was no problem at all and he would refund my money without issue once he receives the cover back. great guy to deal with, as soon as the 3rd gen cover comes out i will be ordering without hesitation. anyway, got more clean up done on the motor, will get some pics posted up later on, things are starting to look goooooood! i'd like to smack the guy (or girl) who owned this engine. im not sure exactly what it is, but he (or she) sprayed everything down with some kind of clearcoat, that didnt do much other than attract dirt and make things harder to get clean. lol -------------------- Former Team 5SFTE pro member ;)
 13.6@108MPH, 5SFTE Powered |
 May 15, 2010 - 1:52 PM May 15, 2010 - 1:52 PM
|
|
|
Moderator      Joined Oct 1, '02 From fall river, ma Currently Offline Reputation: 13 (100%) |
more progress pics from this morning, painted the block, powersteering pump and bracket, waterpump housing, crank pully, and oil dipstick pipe
back of the block 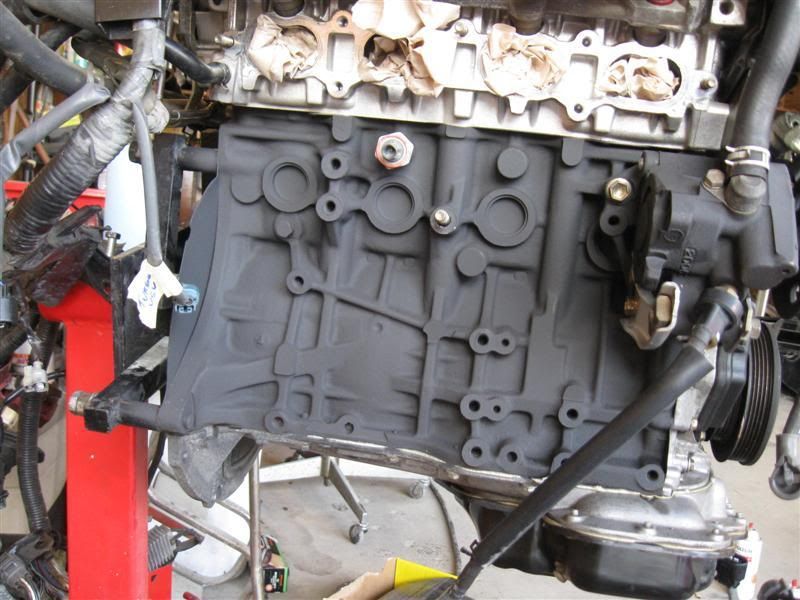 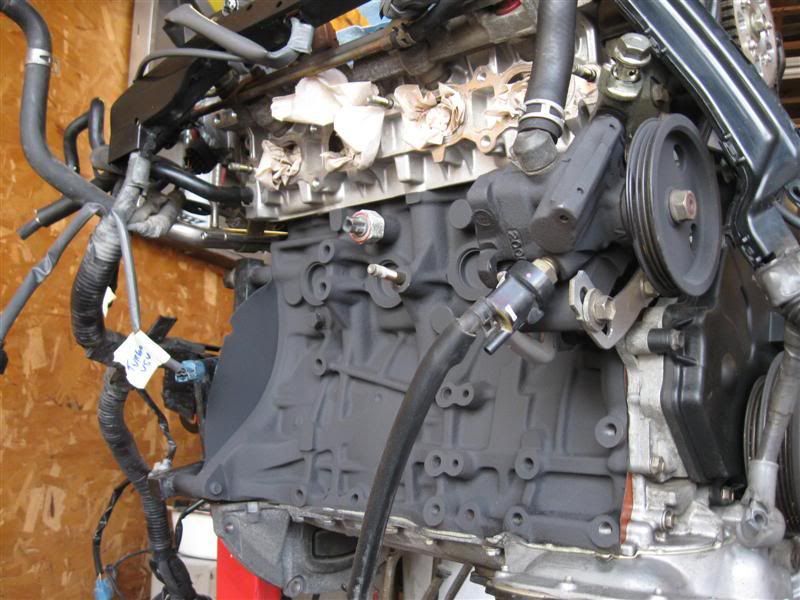 crank pully 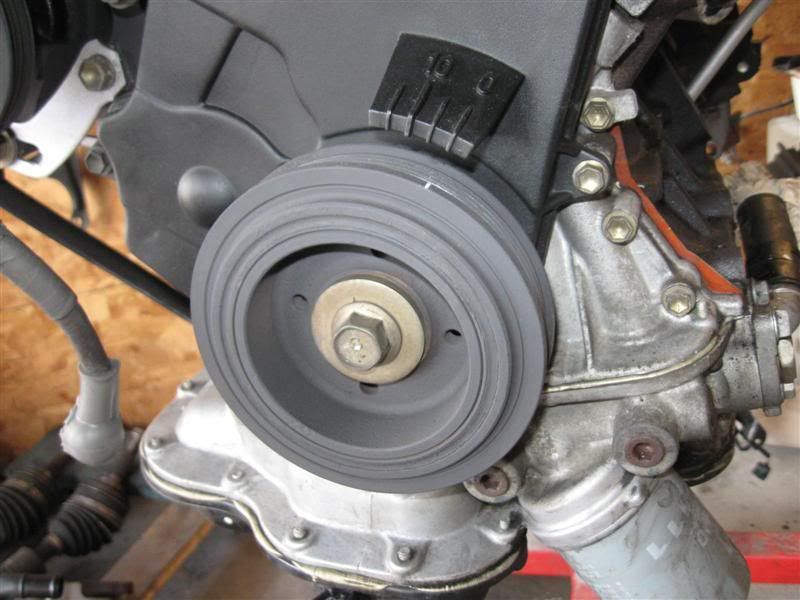 front of the block 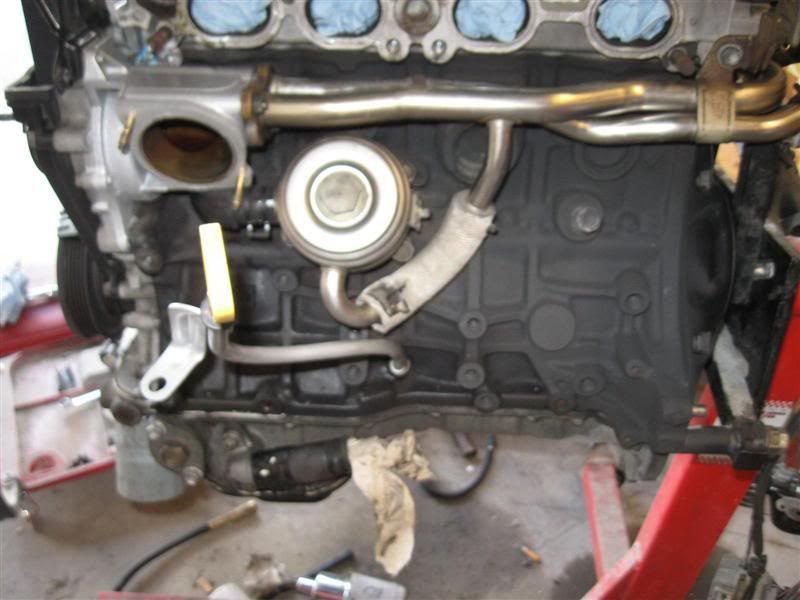 water pump housing 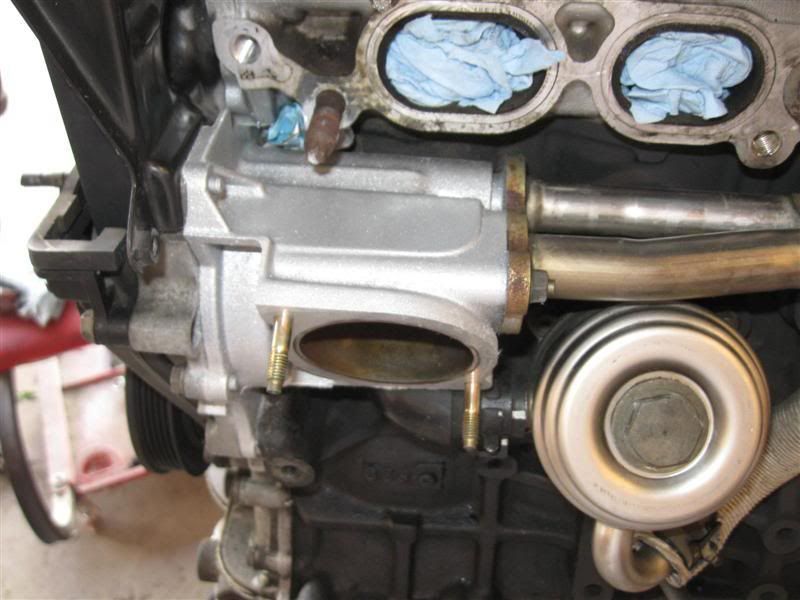 -------------------- Former Team 5SFTE pro member ;)
 13.6@108MPH, 5SFTE Powered |
 May 15, 2010 - 2:52 PM May 15, 2010 - 2:52 PM
|
|
|
Enthusiast     Joined Mar 8, '09 From Westport, MA Currently Offline Reputation: 6 (100%) |
soo clean manny, looks great. cant wait to see this bad larry go in!
-------------------- st205 powered ss3 coupe
|
 May 16, 2010 - 7:14 AM May 16, 2010 - 7:14 AM
|
|
|
Moderator      Joined Oct 1, '02 From fall river, ma Currently Offline Reputation: 13 (100%) |
soo clean manny, looks great. cant wait to see this bad larry go in! thanks, cam, trust me, i cant wait either...lol im trying to be as paitent as possible. haha so after some deliberation with my team (AKA the wifey and dustin and steff) and looking over things carefully, i've decided to partially unwrap the harness, and re-route it to enter the firewall in the stock LHD location. so far, i have ~25 wires that will need to be extended, for the DLC, ignitor and coil, IAT (the one in the airbox), reverse light switch, and possibly the speed sensor. ill get some good pics later and try and make some sense of how it goes down for you guys. one disclamer i wanna throw out there right now, before i go any further with it. do not ask me to do your harness work for you, the answer is no. i dont have time for it, and cant charge what this kind of work should cost, so i just wont do it. and no, i wont walk you thru it, step by step, explaining what wires need to be extended ect. if you cant figure it out by looking at the pics i will post, and looking at your own harness, then figuring the rest out, you shouldnt be touching it anyway. just cut a hole, like most swappers do, and be done with it. it works and its proven. sorry for the rant, but i get enough of those exact kind of pm's everyday. lol more to come this afternoon. -------------------- Former Team 5SFTE pro member ;)
 13.6@108MPH, 5SFTE Powered |
 May 16, 2010 - 9:14 AM May 16, 2010 - 9:14 AM
|
|
 Enthusiast     Joined Apr 28, '09 From York pa Currently Offline Reputation: 3 (100%) |
soo clean manny, looks great. cant wait to see this bad larry go in! thanks, cam, trust me, i cant wait either...lol im trying to be as paitent as possible. haha so after some deliberation with my team (AKA the wifey and dustin and steff) and looking over things carefully, i've decided to partially unwrap the harness, and re-route it to enter the firewall in the stock LHD location. so far, i have ~25 wires that will need to be extended, for the DLC, ignitor and coil, IAT (the one in the airbox), reverse light switch, and possibly the speed sensor. ill get some good pics later and try and make some sense of how it goes down for you guys. one disclamer i wanna throw out there right now, before i go any further with it. do not ask me to do your harness work for you, the answer is no. i dont have time for it, and cant charge what this kind of work should cost, so i just wont do it. and no, i wont walk you thru it, step by step, explaining what wires need to be extended ect. if you cant figure it out by looking at the pics i will post, and looking at your own harness, then figuring the rest out, you shouldnt be touching it anyway. just cut a hole, like most swappers do, and be done with it. it works and its proven. sorry for the rant, but i get enough of those exact kind of pm's everyday. lol more to come this afternoon. This post has been edited by Johnnyny: May 16, 2010 - 6:32 PM |
 May 16, 2010 - 2:13 PM May 16, 2010 - 2:13 PM
|
|
|
Enthusiast     Joined Mar 8, '09 From Westport, MA Currently Offline Reputation: 6 (100%) |
soo clean manny, looks great. cant wait to see this bad larry go in! thanks, cam, trust me, i cant wait either...lol im trying to be as paitent as possible. haha ya man i bet, i have to b alot more patient bc i dont have all my parts yet lol but i scored on a cut out off a kid in FR for ~125 vs ~200 brand new .. it was used for liek a week apparently. and GOOD LUCK WITH THE HARNESS! ur a brave man lol im just cuttin a whole in the wall screw that haha -------------------- st205 powered ss3 coupe
|
 May 16, 2010 - 6:02 PM May 16, 2010 - 6:02 PM
|
|
|
Moderator      Joined Oct 1, '02 From fall river, ma Currently Offline Reputation: 13 (100%) |
so after further investigation, and starting to pull the harness apart, i decided to modify how it normally runs, and cut the hole in the firewall like we've done before.
by modifying the harness, i only have to extend the 20 or so wires i have already marked, and will actually look cleaner than stock in the end. -------------------- Former Team 5SFTE pro member ;)
 13.6@108MPH, 5SFTE Powered |
 May 18, 2010 - 4:17 PM May 18, 2010 - 4:17 PM
|
|
|
Moderator      Joined Oct 1, '02 From fall river, ma Currently Offline Reputation: 13 (100%) |
so here are some pics of the harness work im doing.
first a pic of the throttle body painted. 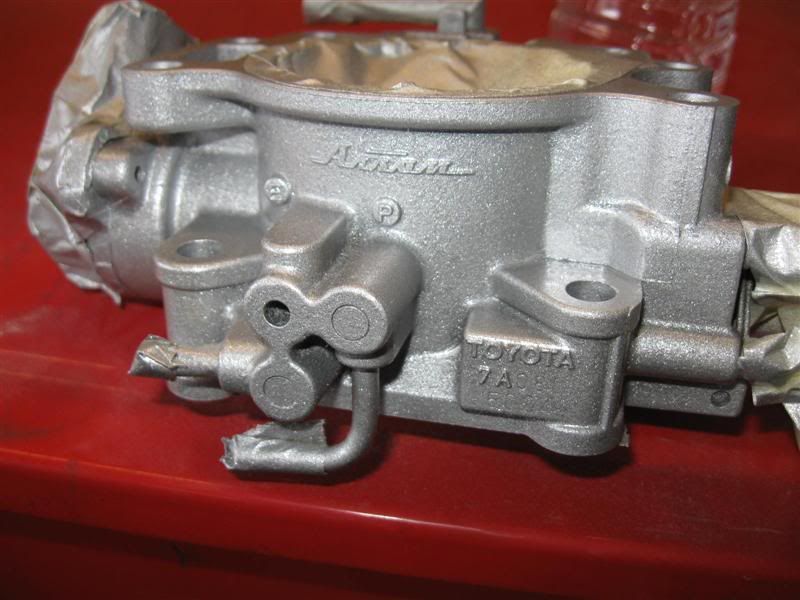 here is where 99% of the work is with the harness. you can see the way the harness is set up for a RHD car, with the boot that goes into the firewall on the left side of the pic. this is where i have alot of wires already taped and ready to be cut in this pic, the big bunch of taped up wires is for the ignitor and coil, and diagnostics box: 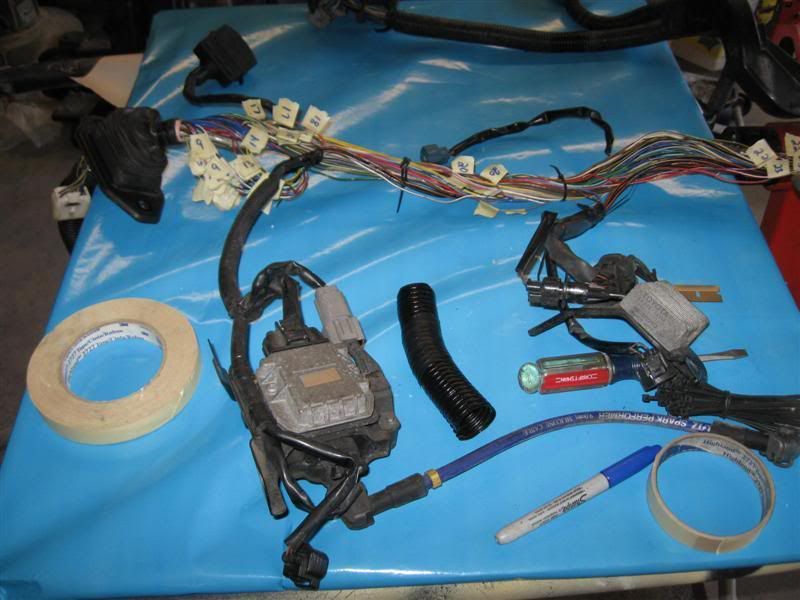 in the middle of this pic, where you see the blue plug (that is the turbo VSV plug, and the speed sensor plug near it) is where the harness will route thru now, to go behind the motor into the firewall: 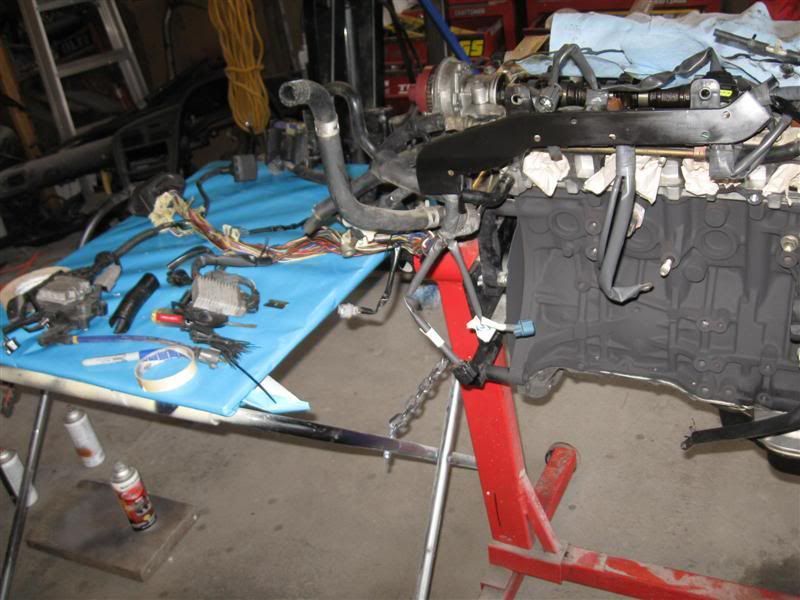 in this pic you can see how a few wires from the resistor pack and IAT that goes in the airbox go each way along the harness, that is why i have to extend those as well.: 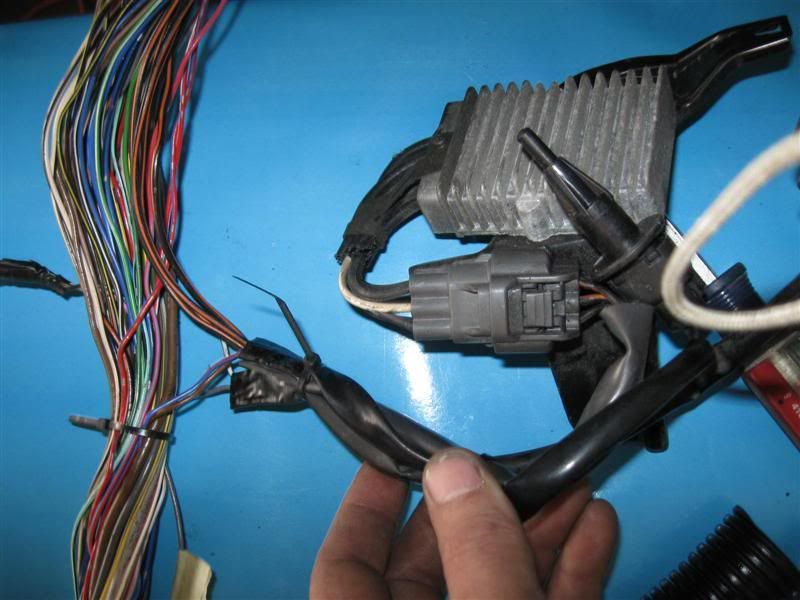 this pic shows the diagnostics box. the only wire from it i didnt have to extend is the green wire you can see going twoard the right of the pic.: 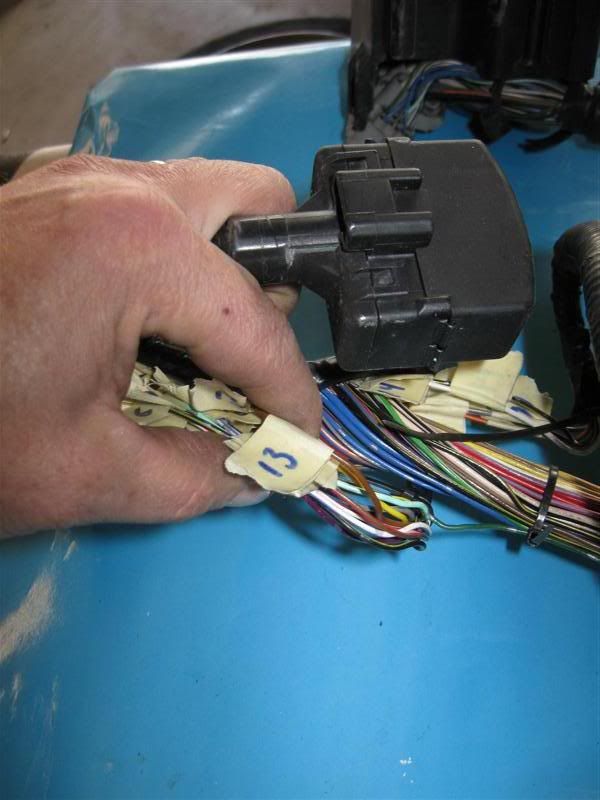 this one shows the ignitor and coil and how the wires run for those: 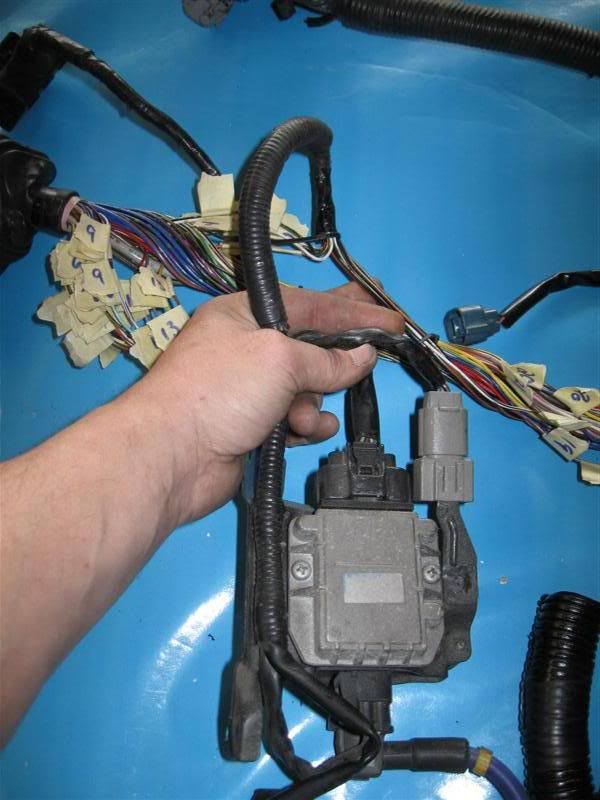 im also going to have to extend the reverse light switch wires. ill take a few more pics in a little while of what the harness is starting to look like. if i were into that sorta thing, this would be a nice way to start a wire tuck. -------------------- Former Team 5SFTE pro member ;)
 13.6@108MPH, 5SFTE Powered |
 May 18, 2010 - 4:51 PM May 18, 2010 - 4:51 PM
|
|
|
Enthusiast      Joined Aug 31, '02 From Philadelphia, PA Currently Offline Reputation: 8 (100%) |
Love the powercoating and the clean install! This is how everyone should do a swap!
As for the harness work, I think most people dont have a clue as to how time consuming of a job it is. Its one thing to see a few pics on the net and its another thing to actually unwrap the harness and rewire everything. Huge props for putting in all the work Manny! -------------------- 15PSI - 30MPG - Megasquirt Tuned
|
 May 18, 2010 - 7:04 PM May 18, 2010 - 7:04 PM
|
|
|
Moderator      Joined Oct 1, '02 From fall river, ma Currently Offline Reputation: 13 (100%) |
Love the powercoating and the clean install! This is how everyone should do a swap! As for the harness work, I think most people dont have a clue as to how time consuming of a job it is. Its one thing to see a few pics on the net and its another thing to actually unwrap the harness and rewire everything. Huge props for putting in all the work Manny! thanks art, i appreciate it. your totally right about the harness work (i know you've been there!! lol) its definetly a tedious, slow going kinda thing, especially with the way i like to solder everything in. a few more pics. this shows the basic idea of how the harness will go: 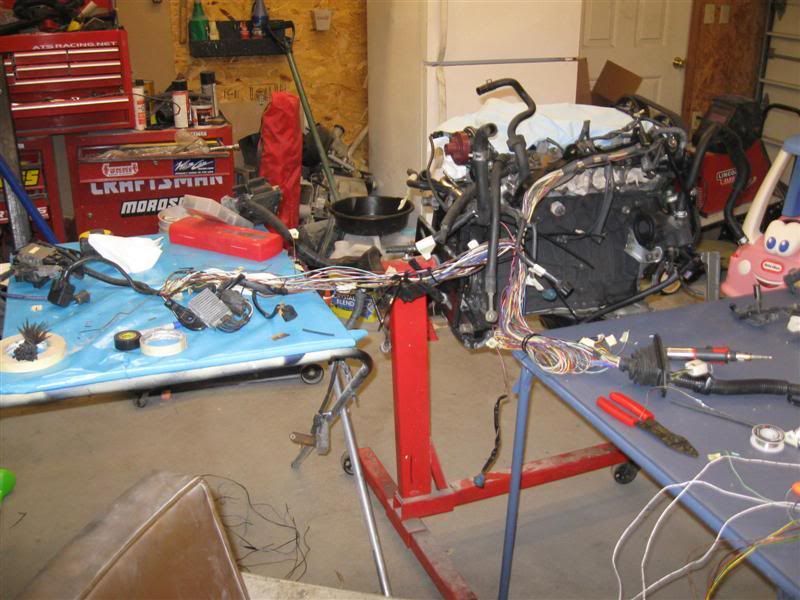 another view: 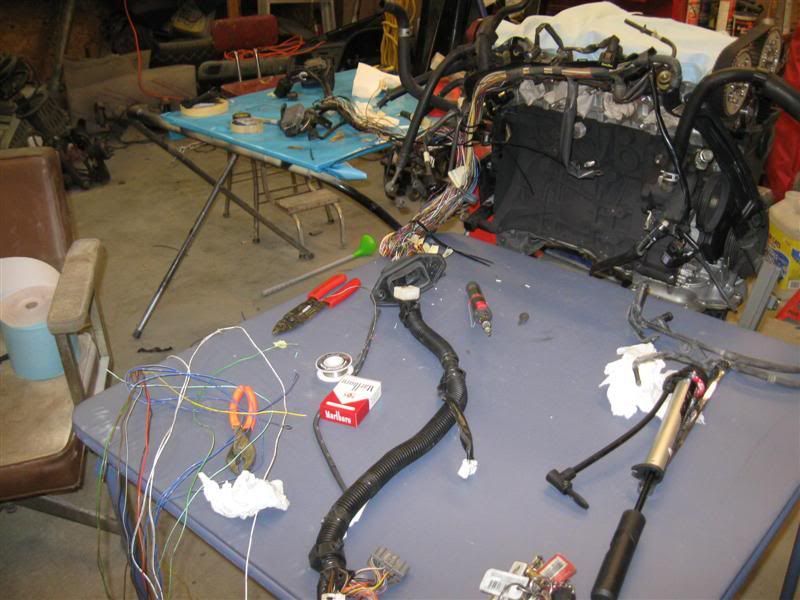 since i had an old 5s harness laying around, i pulled it apart, and was able to get matching wire colors and all. here is how i like to solder my joints together. first, i interlock the 2 wires, so that it makes a nice solid mechanical connection step 1: 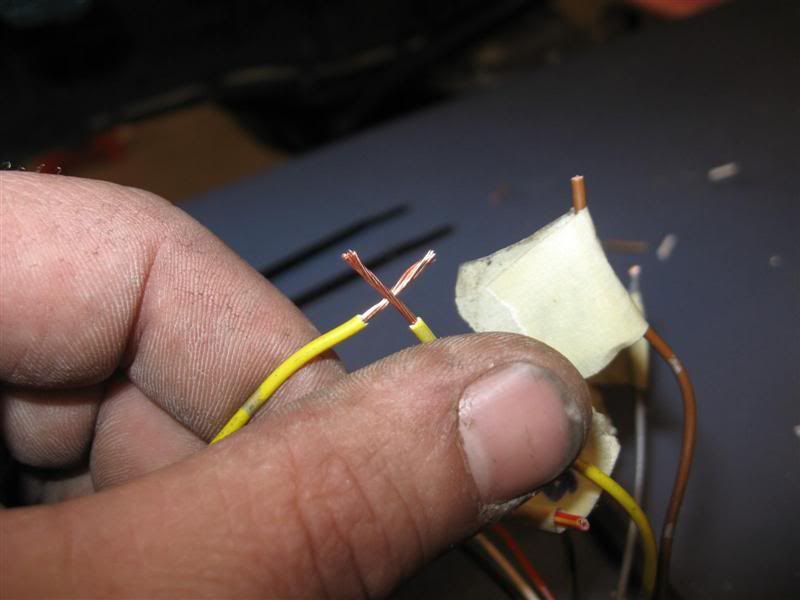 step 2: 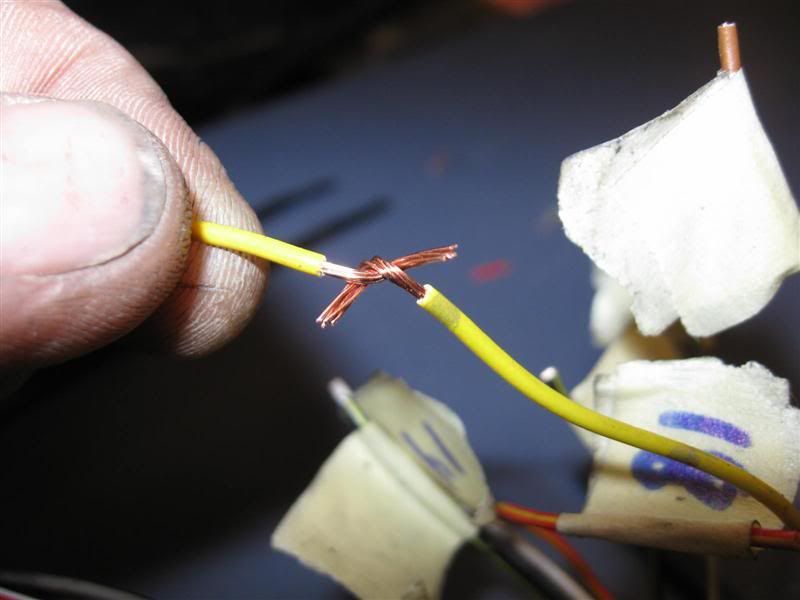 step 3: 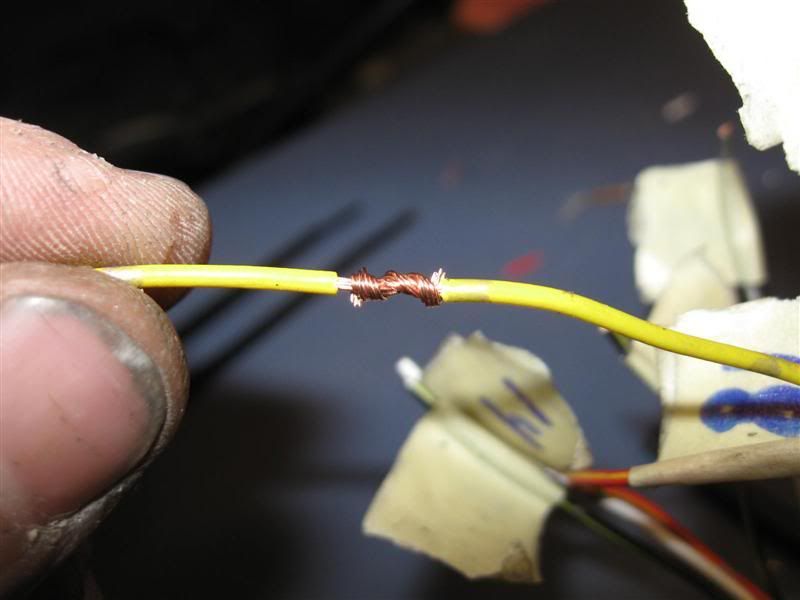 then i heat the joint with the soldering pen: 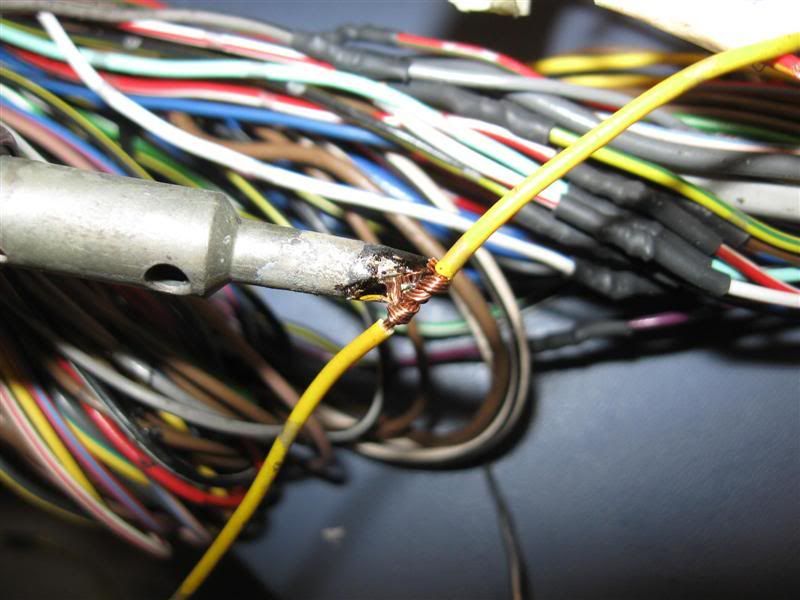 then add just enough solder to complete the electrical connection: 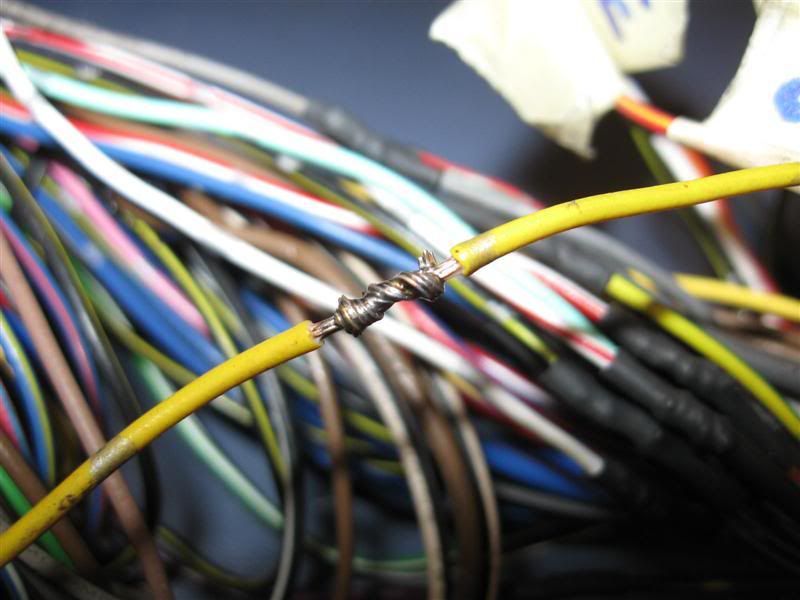 and finish it off with a peice of heat shrink tubing: 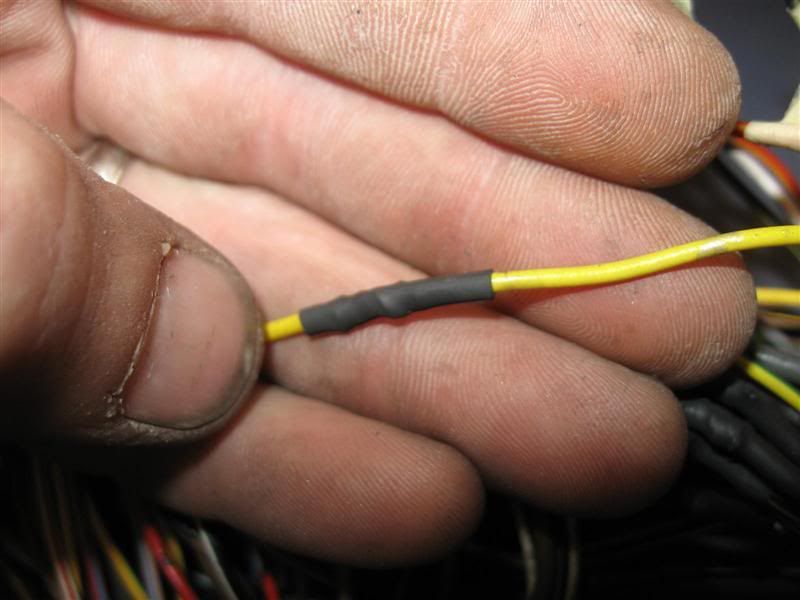 hurrayyy! only another 10 or so more wires to go, i ran out of heat shrink tubing..lol went over to the local ace and got some more, ill prolly finish up tommorow or thursday, and rewrap it up this weekend. -------------------- Former Team 5SFTE pro member ;)
 13.6@108MPH, 5SFTE Powered |
 May 18, 2010 - 7:23 PM May 18, 2010 - 7:23 PM
|
|
|
Enthusiast     Joined Apr 23, '08 From Muskego,Wi Currently Offline Reputation: 8 (100%) |
I dont know about you manny but i love to solder once your done and everything looks clean. Its something to be proud of.
Your gonna be done with this swap before me! -------------------- 2nd Gen 3s-gte.... It lives!
97celiman "92-gt-quit making up random acronyms that dont mean anything. the only real acronym is JDM" |
 May 18, 2010 - 8:59 PM May 18, 2010 - 8:59 PM
|
|
|
Moderator      Joined Jun 29, '08 From Denver Currently Offline Reputation: 59 (100%) |
Wow, I bet that wiring takes forever to do.. It's so clean though. Props.
-------------------- "Employ your time in improving yourself by other men's writings, so that you shall gain easily what others labored hard for." -Socrates. Even Socrates told us to use the search button!
 2006 Aston Martin V8 Vantage. 1998 Celica GT- BEAMS Swapped. 2022 4Runner TRD Off Road Prenium. 2021 GMC Sierra AT4. |
 May 19, 2010 - 7:10 PM May 19, 2010 - 7:10 PM
|
|
|
Moderator      Joined Oct 1, '02 From fall river, ma Currently Offline Reputation: 13 (100%) |
I dont know about you manny but i love to solder once your done and everything looks clean. Its something to be proud of. Your gonna be done with this swap before me! Wow, I bet that wiring takes forever to do.. It's so clean though. Props. i do enjoy soldering, it just takes time. thanks. i took a break from the wiring today (mostly cause i didnt have time to sit down and mess with it) so i just cleaned up the wastegate actuator, and installed the helper spring to help hold boost more consistantly. i went over to ace, and bought a couple of springs, but in the end, i ended up using one i had around the garage. i used a bike tire pump, and checked the wastegate actuator, to see when it started to crack the wastegate open without the spring, then messed with the tension and free length of the spring to get the wastegate to start to upen ~12 or so psi, and its fully open ~16psi, which should be perfect for what i want. once it was all set up, i took it off, and sprayed it. a couple of pics. 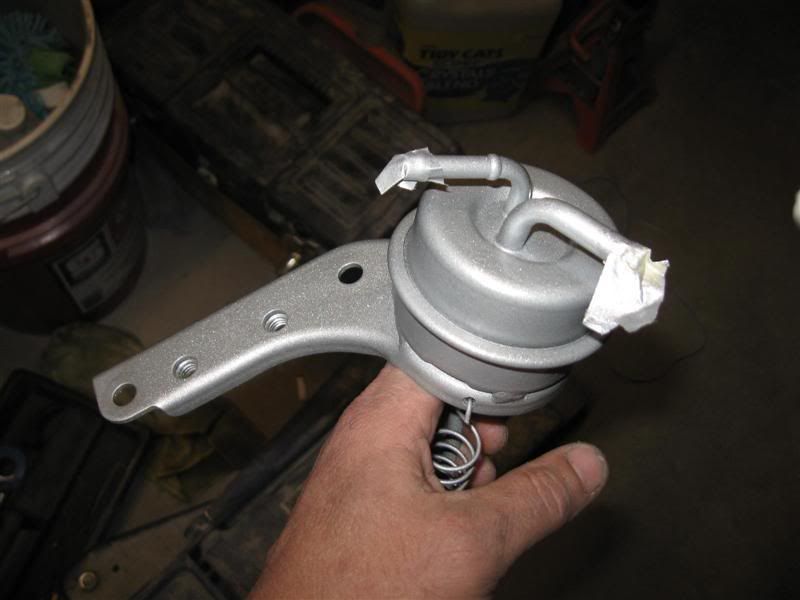 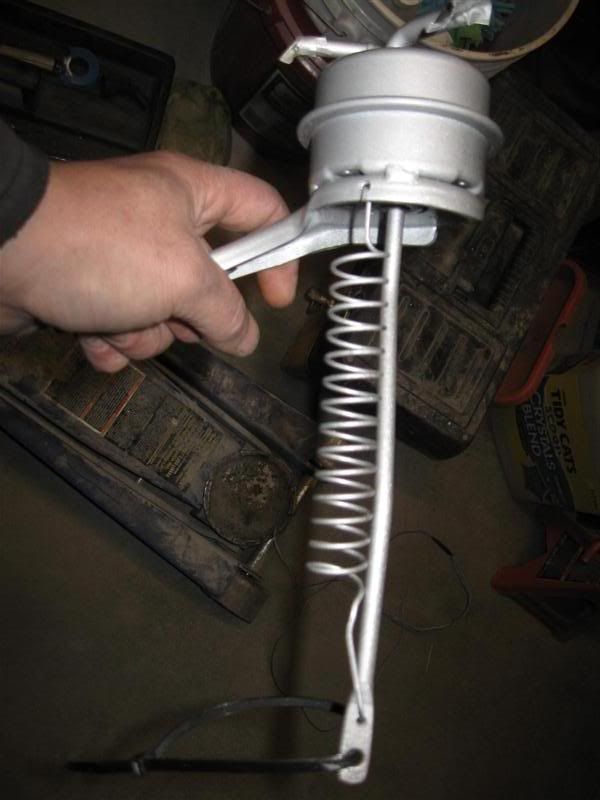 -------------------- Former Team 5SFTE pro member ;)
 13.6@108MPH, 5SFTE Powered |
 May 19, 2010 - 7:32 PM May 19, 2010 - 7:32 PM
|
|
|
Enthusiast     Joined Mar 8, '09 From Westport, MA Currently Offline Reputation: 6 (100%) |
looks sweeet manny, you use regular paint for that or does it require high heat? .. srry if its a noob question.. lol
-------------------- st205 powered ss3 coupe
|
 May 19, 2010 - 8:08 PM May 19, 2010 - 8:08 PM
|
|
|
Moderator      Joined Oct 1, '02 From fall river, ma Currently Offline Reputation: 13 (100%) |
looks sweeet manny, you use regular paint for that or does it require high heat? .. srry if its a noob question.. lol I did use high temp paint on the actuator, kinda as a "basecoat", then a couple light coats of normal stuff to get the same color as the other stuff I painted. -------------------- Former Team 5SFTE pro member ;)
 13.6@108MPH, 5SFTE Powered |
  |
3 User(s) are reading this topic (3 Guests and 0 Anonymous Users)
0 Members:
| Lo-Fi Version | Time is now: November 26th, 2024 - 2:40 AM |


