  |
 Apr 23, 2011 - 7:11 AM Apr 23, 2011 - 7:11 AM
|
|
|
Enthusiast   Joined Aug 15, '10 From Nevis, West Indies Currently Offline Reputation: 0 (0%) |
After a night of boosting about and chirping tires into 2nd gear
After doing further inspection this is what I found. 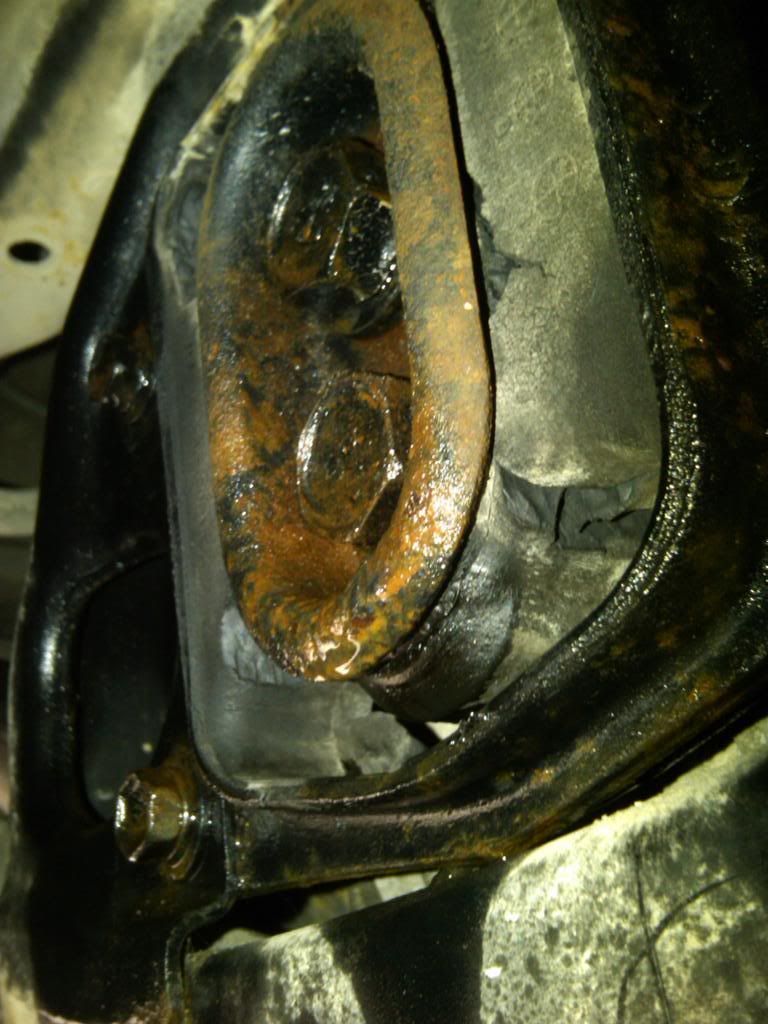 After checking out my options, I could feel a giant dent in my wallet before I even spent anything So basically I cruised around with it like that for about a month, no speeding or hard shifting, then I remembered something I did with my other car a Mitsubishi Mirage, I filled the broken mounts with 3M window Weld. I compared costs C-One diff mount 195usd+100usd shipping thinking about that just gave me a bit of a headache, then the window weld which was 22usd+some elbow grease The route I took was obvious Here we have it. Back side 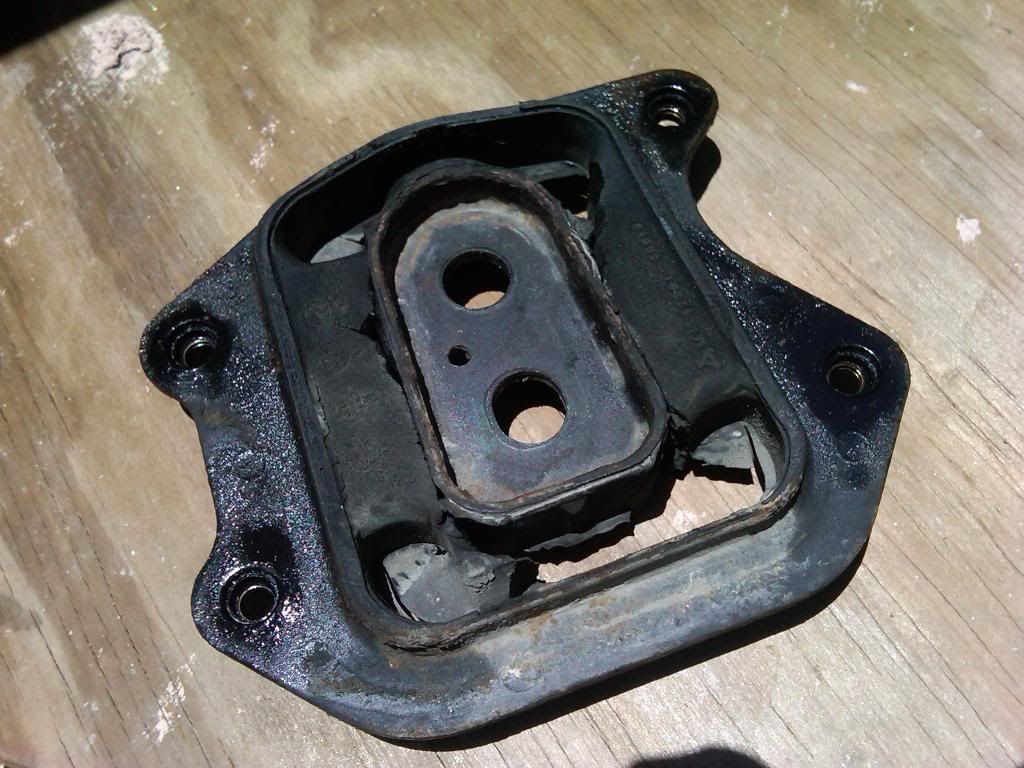 Diff side 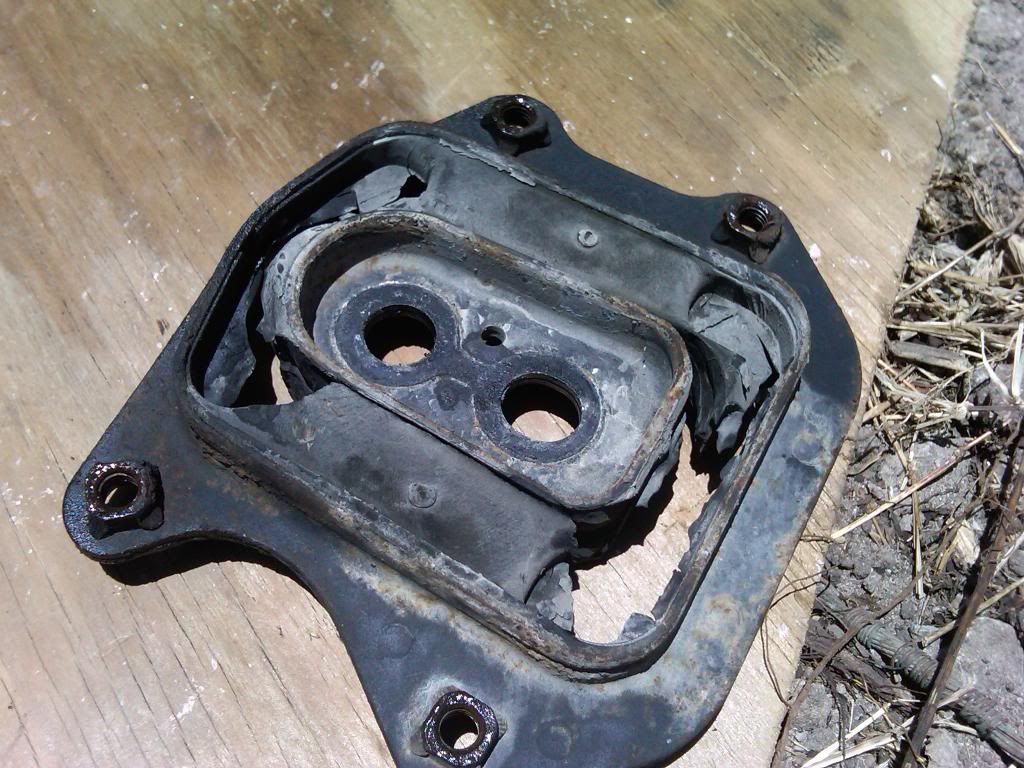 Back side 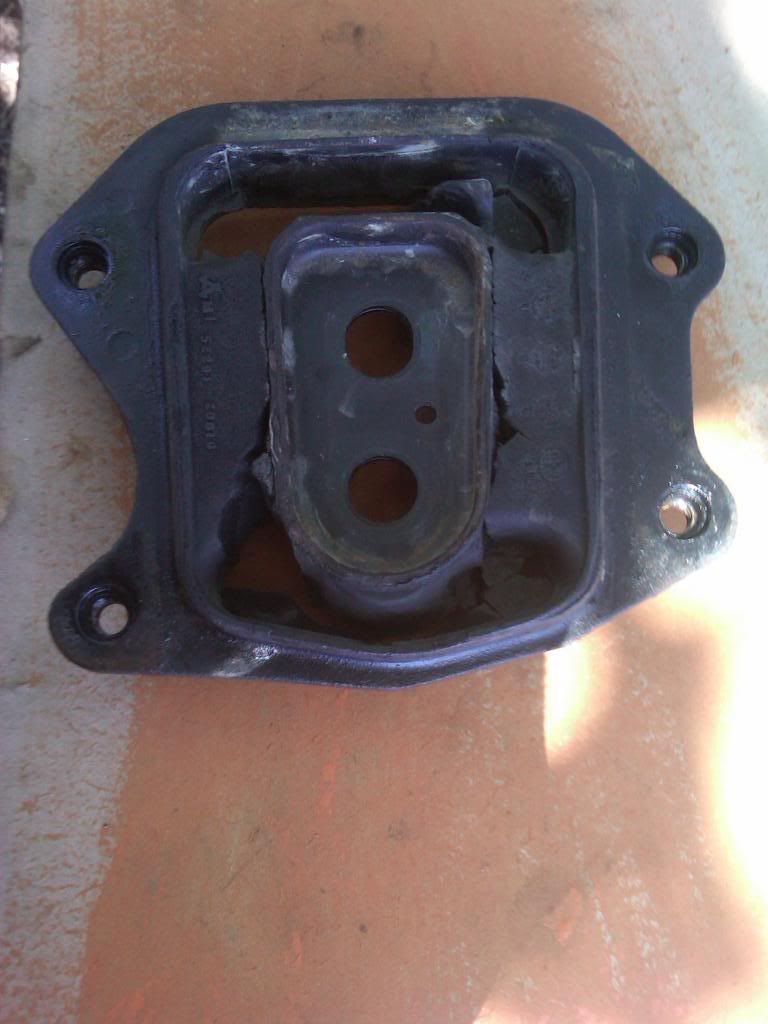 Diff side 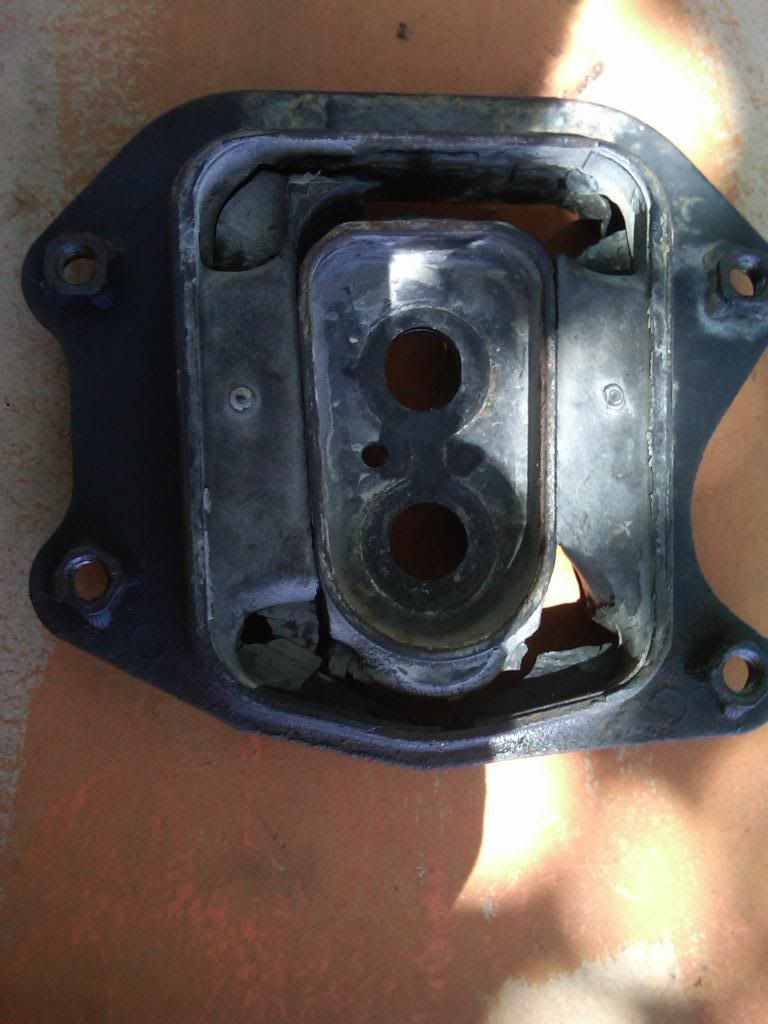 Pretty torn up if you ask me. I was able to push out the metal piece between the rubber that sat on the diff with very little to no effort. Now I decided to completely clear all the old rubber but before I did so, I thought it'd be smart to mark out the location of the center piece that bolted onto the diff, so here's what I did. I had a can of wd40 that I used to spray on those mad tight cross member bolts and diff to subframe bolt and sprayed it on the ridge of the metal on the diff then got a piece of cardboard and just rested it on the card board, obviously the wet spots would make marks. Made about 3 of em just for good measures. Took about an hour and a half chiseling away at the old rubber to get the bare metal, cleaned up both pretty well Then obviously if am putting in the window weld on one end its going straight through to the floor, so here's what I did, thinking it wouldn't stick to foil paper(I was wrong) I got some foil paper wrapped it tightly over one end and placed duct tape over it to give it some ridgidity. 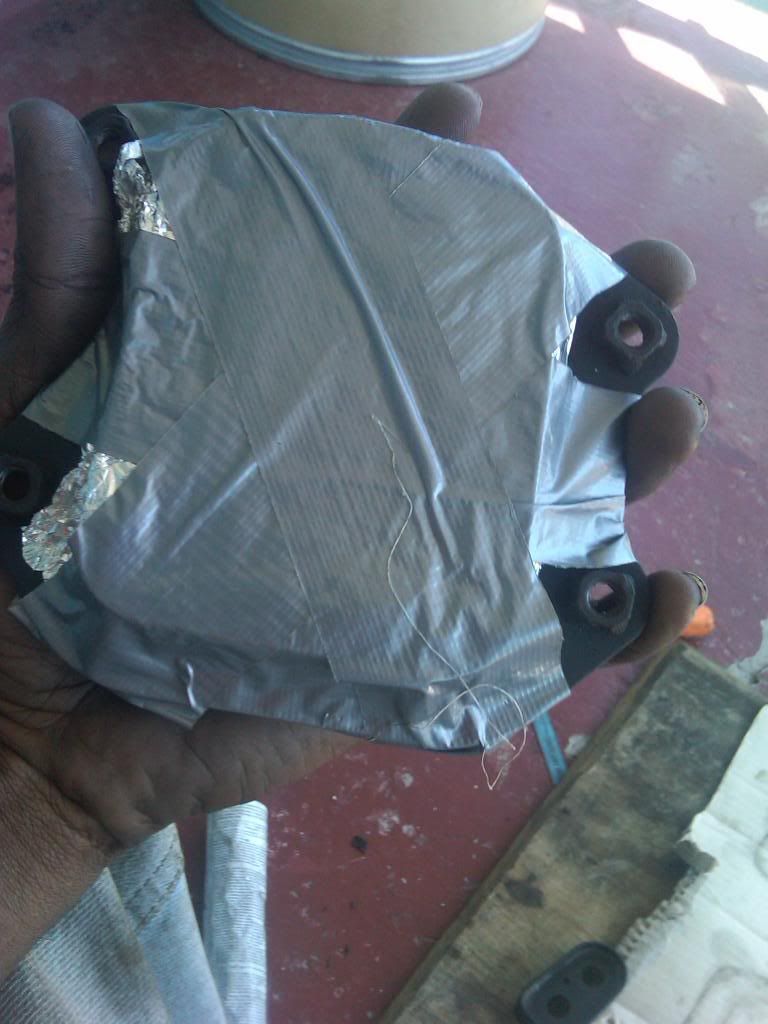 and there is the result, in this photo below you can see the mark outs I was talking about earlier using the wd40 and the edge of the mount while it was still fitted together with the bad rubber. 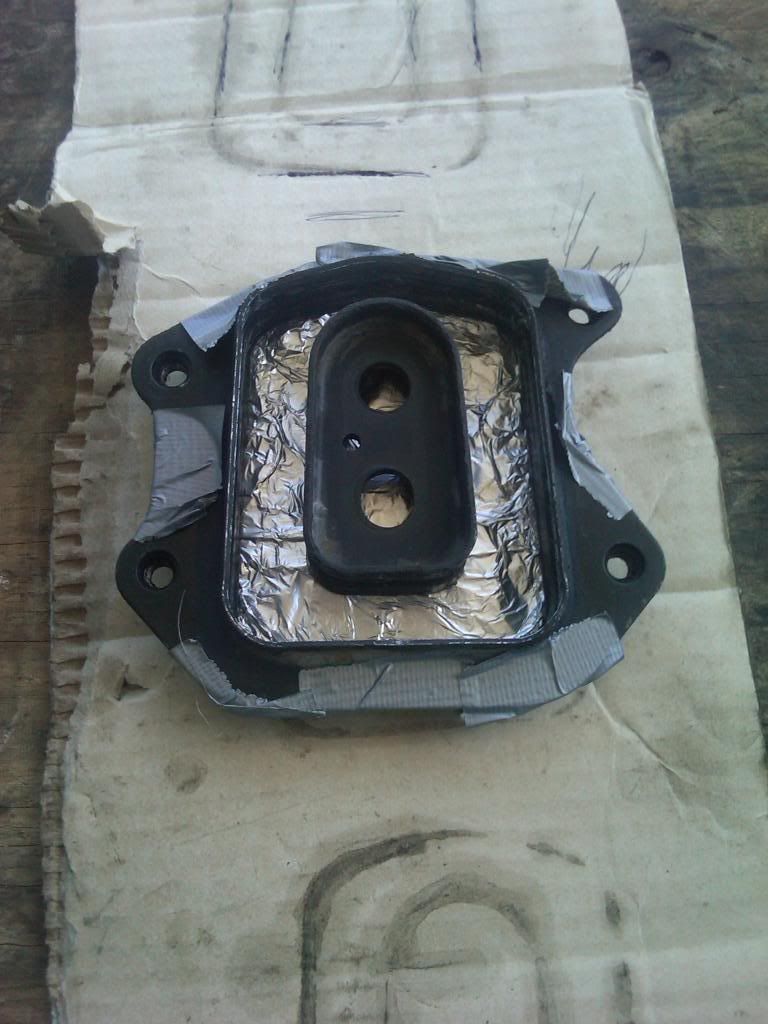 and here we have a closer look at my mount ready to be filled 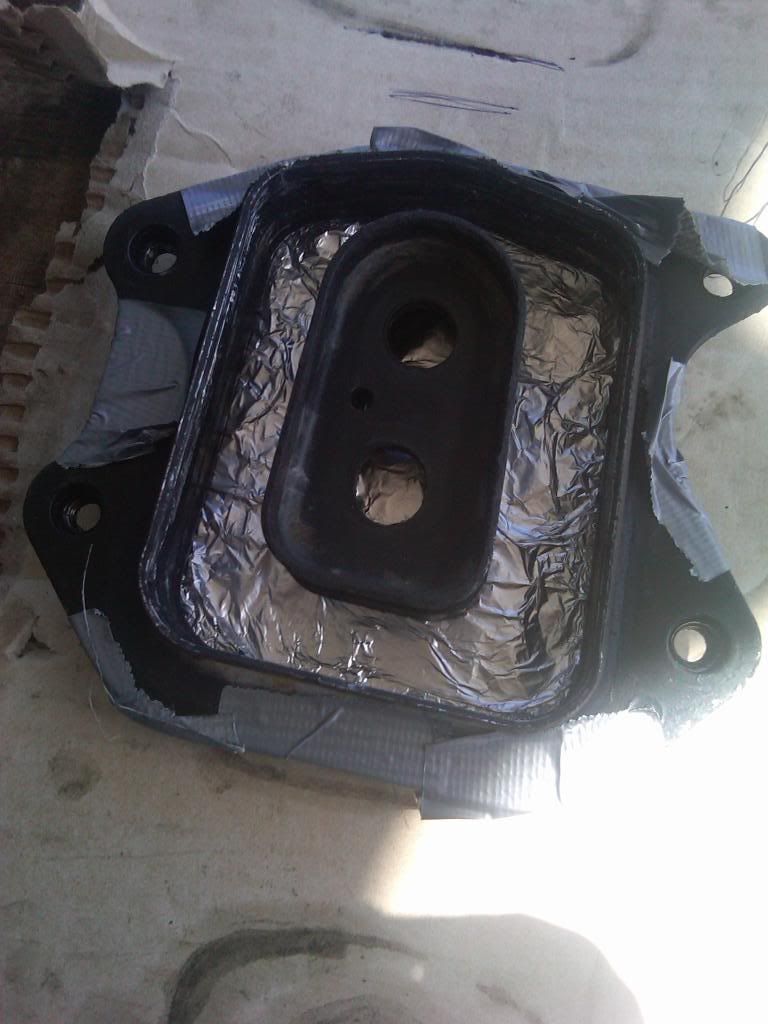 Now here's the window weld below, it took about 3/4 of the container and I used a caulking gun to squeeze it in, and some random flat pieces of wood to pack it down properly and level it off. 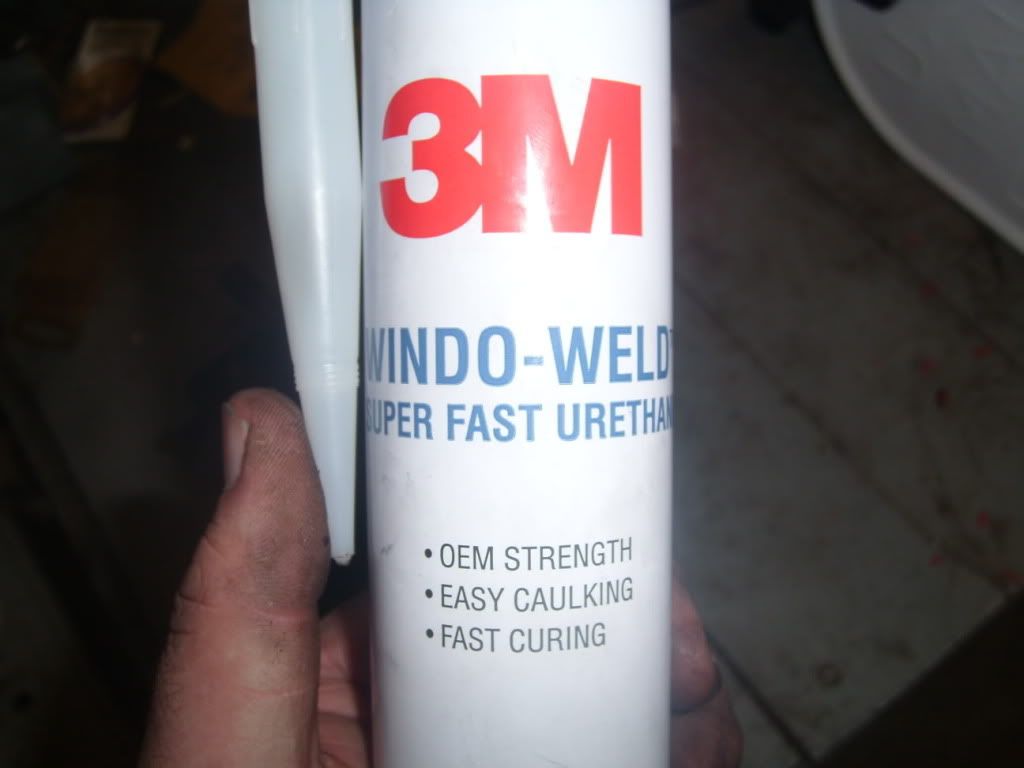 oh and I cut out the piece of cardboard and set the mount in it to prevent messing up the hold thing, this urethane thing is very messy to deal with, if you get any on your hand it'll be at least 2 days until you can get it completely off, gas helps and hand cleaner as well but won't fully come off until it has dried completely. 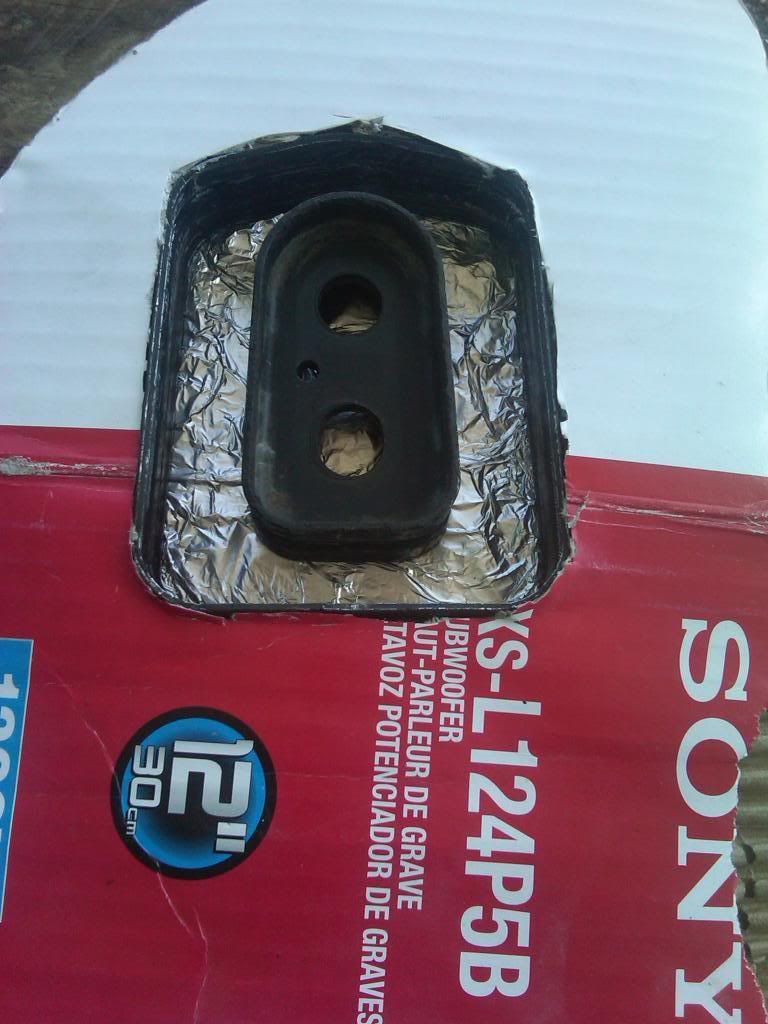 and then I began to fill, no pics after that because I got some on my hands Here we have it one day old on the top side 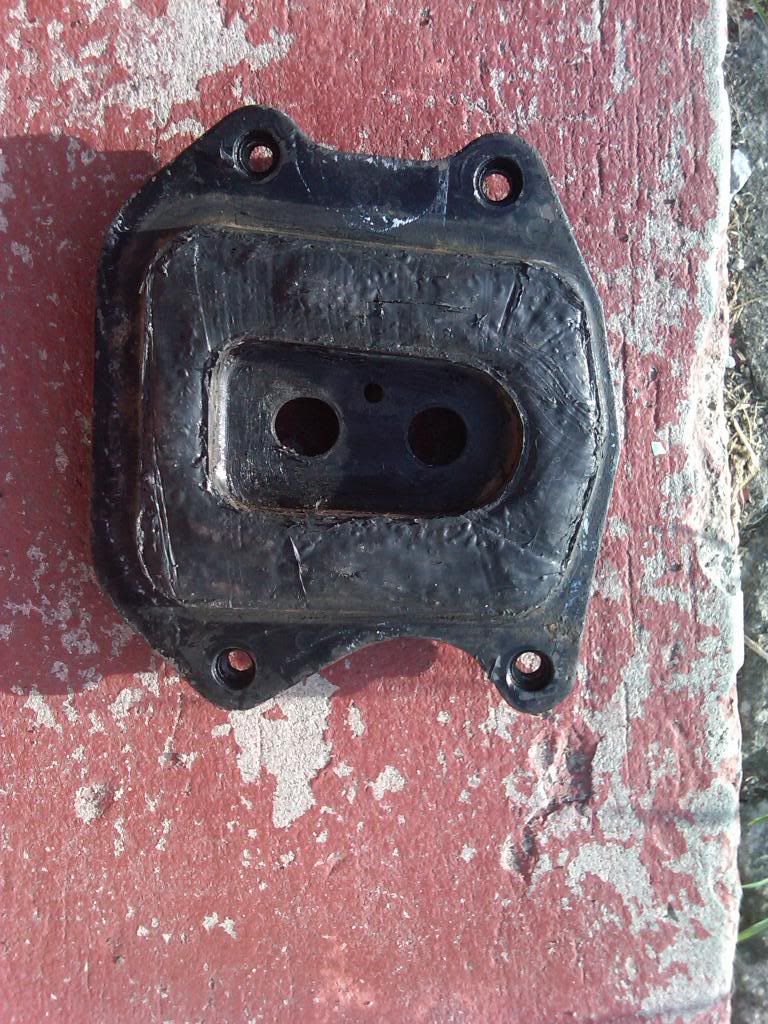 It's far from dry here, it just managed to form a dry skin on top, while pressing on it you can feel the soft stuff inside. after waiting 4 days I could comfortably say that that same side was dry, but for the other side, it seems as though the foil paper can been keeping it from direct effects of the atmosphere which hardens it and it still was soft on that side. I managed to tear it off and scratch off the little pieces of tin foil and back to the drying board/my house roof. at the end of 6days I ended up with this on the other side 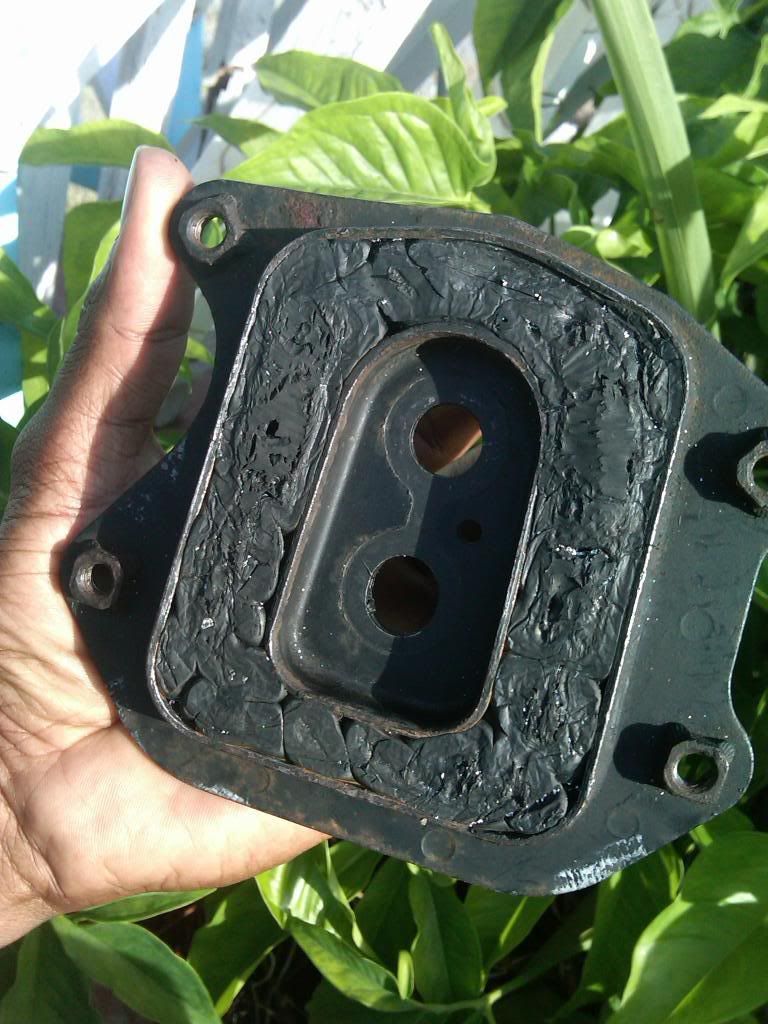 on the seventh day I re-installed and went for a little test drive and succes!! no thud noise from the rear, I drove very lightly for a next week. and found something a very sadening on the day after the install.. I seemed to have lost the photo but anyways this is one month after the install, the thrashing began from 7days after the install, so 3 weeks of intense thrashing left me with this, which is the same thing I saw that day after the install, a little on the inside was wet so it oozed out the top very slightly but it dried and now solid as rock, it gives the rear diff a very connected feel I am very happy with the results. No flex or movements that I can feel. 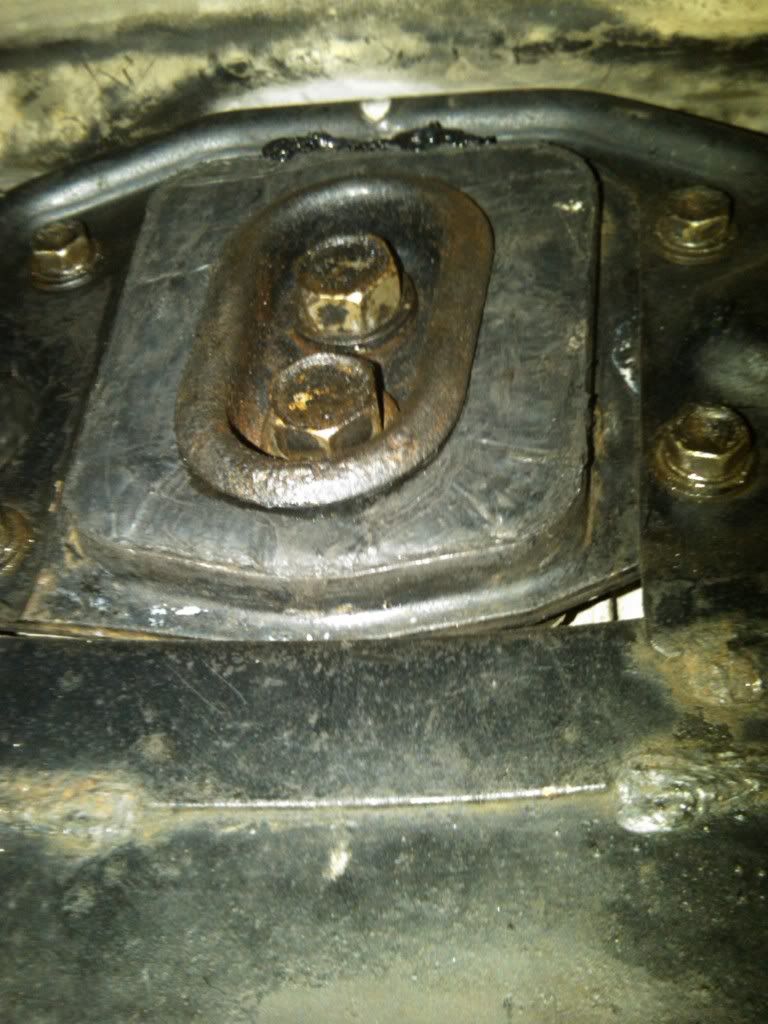 and then here we have not related it any way a shot of my exhaust during the removal of the diff mount, 3" from midpipe back with deleted resonator ghetto welded(THE CAT IS GUTTED AS WELL) 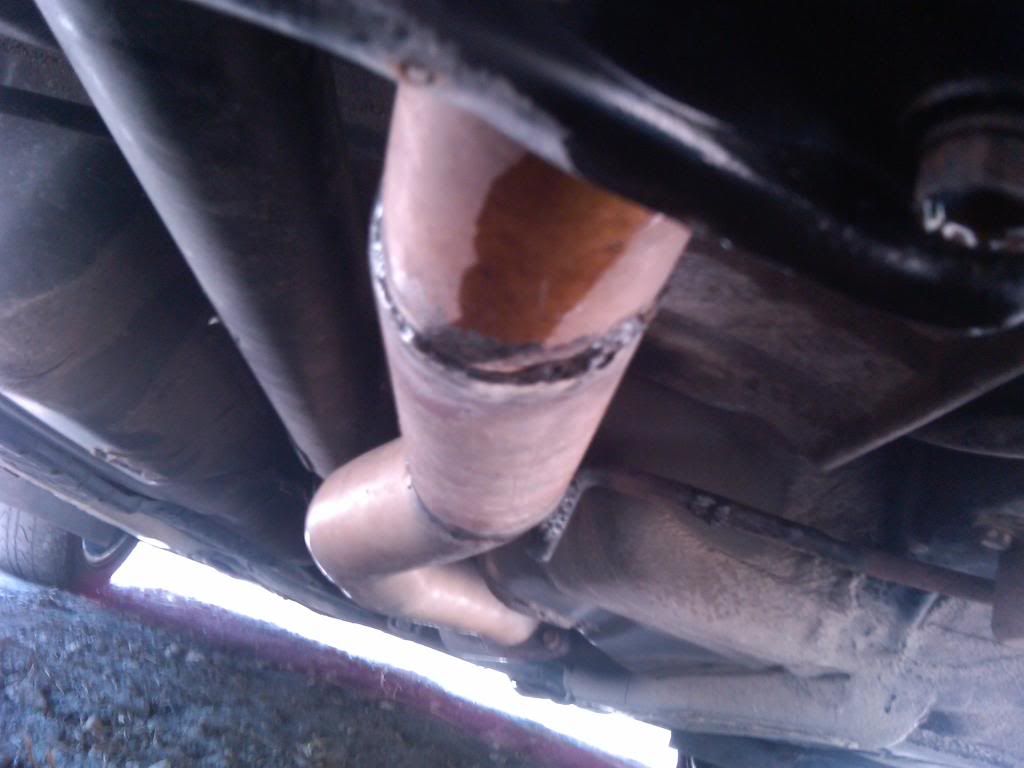
This post has been edited by cax_11: Apr 23, 2011 - 7:24 AM -------------------- 1994 Toyota Celica GT-Four ST205 Turbo 4WD, Black
Nevis, West Indies |
 Apr 25, 2011 - 6:41 AM Apr 25, 2011 - 6:41 AM
|
|
|
Enthusiast     Joined Jun 25, '06 From Box Elder, South Dakota Currently Offline Reputation: 2 (100%) |
Lol, nice DIY trick to get things fixed up. Honestly hope it continues to hold up, but still nice job man!
-------------------- (\__/)
(='.'=) This is bunny. Copy and paste bunny into your (")_(") signature to help him gain world domination. |
 Apr 25, 2011 - 6:48 AM Apr 25, 2011 - 6:48 AM
|
|
|
Enthusiast   Joined Aug 15, '10 From Nevis, West Indies Currently Offline Reputation: 0 (0%) |
Lol, nice DIY trick to get things fixed up. Honestly hope it continues to hold up, but still nice job man! I hope so too, it feels very solid so am pretty sure it should -------------------- 1994 Toyota Celica GT-Four ST205 Turbo 4WD, Black
Nevis, West Indies |
 Apr 27, 2011 - 9:24 AM Apr 27, 2011 - 9:24 AM
|
|
|
Enthusiast      Joined Mar 15, '07 From Tennessee Currently Offline Reputation: 52 (100%) |
-------------------- Learned a lot in 10 years... I hardly log in anymore, last login Today Sept 6 2019, and I was forced just to clarify a post. LOL
If you PM me and I dont respond, dont fret or cry. Im alive, better post your questions in the thread below, maybe I log back in 2grfe Swapped... Why I chose the 2GR, before you ask read here... A great civilization is not conquered from without until it has destroyed itself from within. @llamaraxing in Instagram is the best way to find me. I hardly log here anymore. |
 Apr 27, 2011 - 11:29 AM Apr 27, 2011 - 11:29 AM
|
|
 Enthusiast      Joined Feb 7, '03 From Northern Virginia Currently Offline Reputation: 23 (100%) |
that is ridiculous. i kinda want to make something like that now. hmm...what to make? |
 Apr 27, 2011 - 4:03 PM Apr 27, 2011 - 4:03 PM
|
|
|
Enthusiast      Joined Mar 15, '07 From Tennessee Currently Offline Reputation: 52 (100%) |
what is ridiculous, i dont get it. Its another way of doing things....
-------------------- Learned a lot in 10 years... I hardly log in anymore, last login Today Sept 6 2019, and I was forced just to clarify a post. LOL
If you PM me and I dont respond, dont fret or cry. Im alive, better post your questions in the thread below, maybe I log back in 2grfe Swapped... Why I chose the 2GR, before you ask read here... A great civilization is not conquered from without until it has destroyed itself from within. @llamaraxing in Instagram is the best way to find me. I hardly log here anymore. |
 May 1, 2011 - 9:49 PM May 1, 2011 - 9:49 PM
|
|
 Enthusiast      Joined Feb 7, '03 From Northern Virginia Currently Offline Reputation: 23 (100%) |
|
 May 2, 2011 - 1:48 PM May 2, 2011 - 1:48 PM
|
|
|
Enthusiast      Joined May 29, '09 From Gainesville, FL Currently Offline Reputation: 17 (100%) |
Just a little tip.
Get a old vacumn motor, and some dome shaped hard plastic bowl. Cut a hole in it, and run the hole from the vacumn and make yourself a vacumn chamber. Once you pour, or squirt your thane stick it in the chamber and suck out the air. It'll do wonders for the life of the junk. Done it before when you mix your own thane, not sure how it will function with that pre-mix stuff. but, love the DIY, looks good! This post has been edited by rave2n: May 2, 2011 - 1:49 PM |
 May 2, 2011 - 8:45 PM May 2, 2011 - 8:45 PM
|
|
|
Enthusiast   Joined Aug 15, '10 From Nevis, West Indies Currently Offline Reputation: 0 (0%) |
Just a little tip. Get a old vacumn motor, and some dome shaped hard plastic bowl. Cut a hole in it, and run the hole from the vacumn and make yourself a vacumn chamber. Once you pour, or squirt your thane stick it in the chamber and suck out the air. It'll do wonders for the life of the junk. Done it before when you mix your own thane, not sure how it will function with that pre-mix stuff. but, love the DIY, looks good! thanks for the tip -------------------- 1994 Toyota Celica GT-Four ST205 Turbo 4WD, Black
Nevis, West Indies |
  |
1 User(s) are reading this topic (1 Guests and 0 Anonymous Users)
0 Members:
| Lo-Fi Version | Time is now: November 27th, 2024 - 1:40 PM |


