  |

 Aug 24, 2009 - 12:11 AM Aug 24, 2009 - 12:11 AM
|
 
|
|
Enthusiast  Joined Feb 24, '07 From Oahu, Hawaii Currently Offline Reputation: 23 (100%) |
QUOTE (Tigawoods @ Aug 23, 2009 - 4:16 AM)  i thought we had this already yeah 
-------------------- I don't normally drive fast, but when I do its on a curvy section of this island
 |

|
Aug 24, 2009 - 12:24 AM
|
|
|
Enthusiast Joined Apr 24, '08 From Orange County, CA Currently Offline Reputation: 33 (100%) |
ok so i know wolfie makes the clear 3rd brake light. but has anybody tried putting a led strip inside of the 3rd brake light or is there just not enough room?
-------------------- Group buy to replicate Narrow E series transaxle parts
http://www.6gc.net/forums/index.php?showto...p;#entry1107514 |
|
Aug 24, 2009 - 2:59 AM
|
|
 Enthusiast Joined Dec 15, '02 From Tasmania(Australia) Currently Offline Reputation: 0 (0%) |
links to other dudes thread if one exists? on having just the word "celica" lit.
-------------------- ST205 Group A Rallye GT-Four, #61 of 77............600hp GT3582r
GRX133 Toyota Mark X 350s 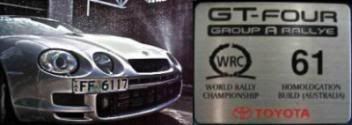 |
|
Aug 24, 2009 - 1:40 PM
|
|
|
Enthusiast Joined May 15, '09 From yonkers, NY Currently Offline Reputation: 8 (100%) |
well heres my how to
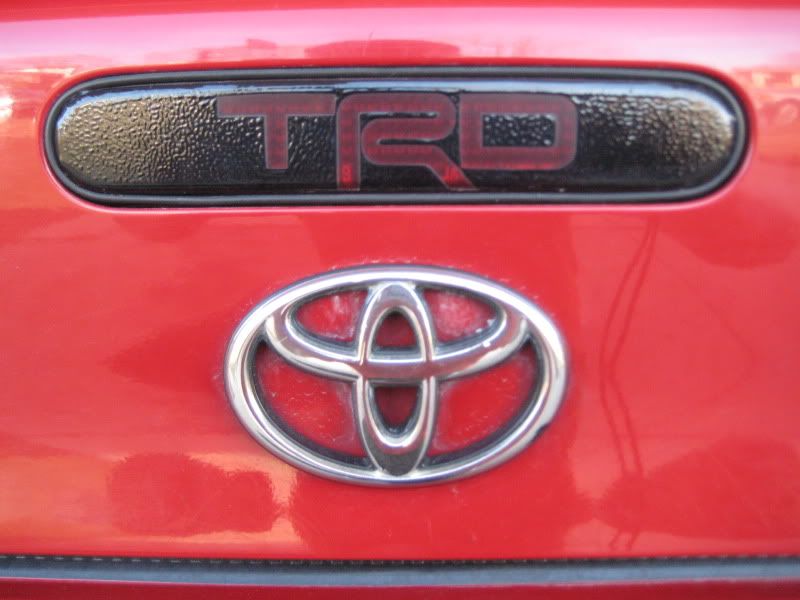
stuff you need computer paint printer paper exatoknife or scissors 12 and 10 sockets or wrench Philips screw driver small Flathead screwdriver First you need to take out the brake light like so. 1. remove the cover where the light is  2. remove the light bulb from the lights   3. Remove the whole panel like so. just get a good hold and pull its kept on by lil clips with pressure so you might have to pull kinda hard.    4. remove a metal bracket 12mm socket is best it has just 4 screws    5. okay now theres metal plate you need to remove to access the brake light. 4 screws total 2 philip and 2 10mm a wrench is better to the 10mm.   6. now you can take the light out  7. now remove the red cover from the light its 4 clips one on each side. use a small flat head and be careful i didn't break it but it seams like is delicate.     8. here is were my mad computer skills went into play. open paint.   9. get all the background black.  10. use the text box. be creative i use 90 font which i think might be just a lil too big for the light but i tried literally 10 diffrent font sizes till i figured this out. the font style i used was segoe script i wanted something like that script emblem ive seen for some of our cars. but u can pick any font you want.  11. center it. also make it smaller if its too big your gonna waste alot of black printer ink.  12. print (no pic) 13. trim it this takes a while don't take of to much other wise it'll be to small work your way down to the right size.   14. put it in the red cover mike sure its not upside down.  15. close it.   16. and put it all back together again.  ------------------- side note originally i was gonna print it on thick matte photo paper. i think the black part would not allow light to pass through and cut out the white words so it would look more bold and brighter but i did this as a trial and though looks good not going through the trouble of the other way. basically thats how i did it any comments or questions let me know. but like i said its pretty simple. and it cost me less than 50 cent. paper had in my ouse any ways and just the ink i wasted on all my trials. but font 90 woks good so you guys don't need to go trial and error on font size. Hope this helps. for a while i was thinking of putting TRD instead of celica but decided on celica cuz i have yet to get any official TRD parts so thats is another option also don't be afraid to post your out come here. or if u think of a better way i would like to know.  
This post has been edited by spy00005: Aug 24, 2009 - 2:14 PM -------------------- *Thing i want for my car(i wish i had money)*
-light blue tint (next step will do this right after i get my paint job) WTB Reasonably priced Projectors just Lows |
|
Aug 24, 2009 - 2:26 PM
|
|
|
Enthusiast Joined Jun 18, '09 From Orlando Currently Offline Reputation: 8 (100%) |
A lot simpler than I thought it would be...awesome. I might do this, actually. But I think it needs a SwissFerdi touch instead of Celica.
 Nah, that wouldn't look good. This post has been edited by SwissFerdi: Aug 24, 2009 - 2:26 PM -------------------- '97 ST \ Eibach \ KYB \ Kenwood \ Alpine \ Cusco \ OEM+ [sold 10/18]
'93 MX-5 LE |
|
Aug 30, 2009 - 5:55 PM
|
|
|
Enthusiast Joined May 28, '09 From Milwaukee, WI Currently Offline Reputation: 0 (0%) |
NIce!!!
|
|
Aug 30, 2009 - 6:23 PM
|
|
|
Enthusiast Joined Oct 11, '06 From calgary Currently Offline Reputation: 5 (100%) |
Nice creativity skills there.
But can you post a night time pic as well to see how it looks? thanks |
|
Aug 30, 2009 - 7:25 PM
|
|
|
Enthusiast Joined May 15, '09 From yonkers, NY Currently Offline Reputation: 8 (100%) |
sure ill get some.
-------------------- *Thing i want for my car(i wish i had money)*
-light blue tint (next step will do this right after i get my paint job) WTB Reasonably priced Projectors just Lows |
|
Aug 30, 2009 - 8:41 PM
|
|
 Enthusiast Joined Aug 29, '09 From Ottawa, ON, Canada Currently Offline Reputation: 1 (100%) |
I really like it. Might attempt it when I get my Celica.
|
|
Sep 1, 2009 - 1:42 AM
|
|
|
Enthusiast Joined May 15, '09 From yonkers, NY Currently Offline Reputation: 8 (100%) |
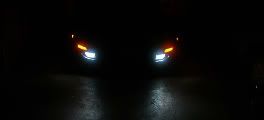
night pics up
       By the way the pics really don't do it justice personally looks 1,000,000X better in person o well. This post has been edited by spy00005: Sep 1, 2009 - 1:45 AM -------------------- *Thing i want for my car(i wish i had money)*
-light blue tint (next step will do this right after i get my paint job) WTB Reasonably priced Projectors just Lows |
|
Sep 1, 2009 - 7:57 AM
|
|
 Enthusiast Joined May 29, '09 From Lake Ariel, PA Currently Offline Reputation: 4 (100%) |
rofl i can see people abusing this, putting stuff like Fk off or princess back there
--------------------  Representing the Convertible Crew since 2008 |
|
Sep 1, 2009 - 8:57 PM
|
|
 Enthusiast Joined Oct 27, '07 From North Carolina Currently Offline Reputation: 0 (0%) |
thats pretty gnarley man. i like it

|
|
Oct 19, 2009 - 3:58 PM
|
|
|
Enthusiast Joined Jun 18, '09 From Orlando Currently Offline Reputation: 8 (100%) |
NVM.
This post has been edited by SwissFerdi: Oct 19, 2009 - 4:19 PM -------------------- '97 ST \ Eibach \ KYB \ Kenwood \ Alpine \ Cusco \ OEM+ [sold 10/18]
'93 MX-5 LE |
|
Oct 27, 2009 - 3:06 PM
|
|
|
Enthusiast Joined Nov 21, '05 From Tacoma, WA Currently Offline Reputation: 7 (100%) |
Nice job!
In stead of paper you could also try printing it out on overhead transparencies. They sell them at the office stores that can run through home printers. |
|
Oct 28, 2009 - 3:02 PM
|
|
|
Enthusiast Joined Apr 20, '09 Currently Offline Reputation: 4 (100%) |
I did this to mine with the Dragon emblem and the legitimate Celica font.
Pics up at some point. It looks awesome. For the record, I did it different. Printed a bunch of stencils like this, but then got some thick paper (index or card stock should be fine), then taped the stencil to it and cut out the letters/emblem. Then covered the back with clear tape, and placed the floating pieces back where they should be (inside of the E and the A in celica, as well as part of the dragon emblem). Then just taped it into the red lens of the light. It looks pretty awesome, but up close in the day you can see the paper, this could have been avoided if I covered the paper with electrical/black tape beforehand and then cut it. Oh well, looks awesome at night. -------------------- ~Moving on to a 2002 Corolla S~ R.I.P Tom Celica - 1994-2010 |
|
Mar 15, 2010 - 4:19 PM
|
|
|
Enthusiast Joined Sep 16, '08 From Michigan Currently Offline Reputation: 0 (0%) |
Hehe TRD,
-------------------- |
|
Mar 15, 2010 - 9:56 PM
|
|
|
Enthusiast Joined Nov 25, '08 From dillsburg pennsylvania united states Currently Offline Reputation: 12 (100%) |
decalsondemand makes stuff like thiss. he showed me pics of it.i think his goo on the inside as well the out side. (were ever u put it basically)
--------------------  those with golf balls golf those with real balls race |
|
Mar 16, 2010 - 11:10 AM
|
|
|
Enthusiast Joined Aug 28, '08 From Woolwich, Maine Currently Offline Reputation: 0 (0%) |
It has finally stopped raining in Boston and its now sunny
So i went out and measured the inside of the third brake light and completed my version of the tail light insert.Here's a file for whom ever wants it and a how to fit it into your Third brake light. I will post pics later of how mine came out. Here are the Dimensions for the inside of the brake light:  The dimensions are actually as follows (My AutoCad is set up to round to 2 decimal points): Length................ 6.125 inches or approx. 15.558 cm Width.................. 0.875 inches or approx. 2.222 cm Radius of arc....... 0.438 inches or approx. 1.111 cm Here is My version, Download and use if you like:  How To Fit to your Brake Light: 1) Right Click and save the design if you like it 2)Open with Paint (for Windows Users), not sure what the comparable program would be for Mac users 3)Print 4)Cut on the white out line(the line that represents the boarders of the inside of the brake light 5)Follow previous How To to get the brake light apart 6)Start with one end and work the paper cut out into the brake light, *MAKE SURE THAT THE LETTERING ON THE OUTSIDE OF THE BRAKE LIGHT AND THE LETTERS ON THE CUT OUT ARE FACING THE SAME DIRECTION, if you don't the cutout will be upside down* This post has been edited by barterj: Mar 16, 2010 - 11:18 AM |
|
Mar 17, 2010 - 9:05 PM
|
|
 Enthusiast Joined Mar 16, '09 From New York Currently Offline Reputation: 23 (100%) |
Did your design today.

-------------------- I've spilt my heart into this car :) And I don't ever plan to stop  - 6GC for Life - >Semper Fi< 1994 Cupra :p 3sgte 1995 Celica ST DD 1969 Chevelle SS alllll balls. P2 approved! |
|
Mar 17, 2010 - 10:42 PM
|
|
|
Enthusiast Joined Aug 28, '08 From Woolwich, Maine Currently Offline Reputation: 0 (0%) |
QUOTE (mgnt232 @ Mar 17, 2010 - 10:05 PM) Did your design today. Glad to see it came out good for you too I'm going to make more at some point This post has been edited by barterj: Mar 17, 2010 - 10:44 PM |
|
1 User(s) are reading this topic (1 Guests and 0 Anonymous Users)
0 Members:
| Lo-Fi Version | Time is now: February 13th, 2025 - 2:32 PM |