  |
 Jan 29, 2005 - 11:31 PM Jan 29, 2005 - 11:31 PM
|
|
 Enthusiast      Joined Nov 13, '02 From So Cal Currently Offline Reputation: 3 (100%) |
1994-1999 Toyota Celica Lambo Door Installation
Time: 4 hours per door with 2 people. Tools: - Metric Socket Bit Set - Metric Socket Wrenches - Hammer - Hacksaw (or electric shears) to cut fender - Screwdriver - Allen keys - Pliers - Wire cutter - Electrical wire - Zip ties - Various wire connectors (red and blue butt connectors and splices) - Wire hose cover - WD-40 or alternate grease for creaky joints. Preparation: Inspect all parts. This particular kit (www.extremedoors.com) came with 2 door hinges, 2 shocks, 2 shock boot screws, 2 shock hat loops, 2 shock hat loop rings, 2 shock hat bolts, 7 regular bolts, and 7 washers. Also included was a CD which my computer couldnt read, and confusing instructions with grainy pictures. 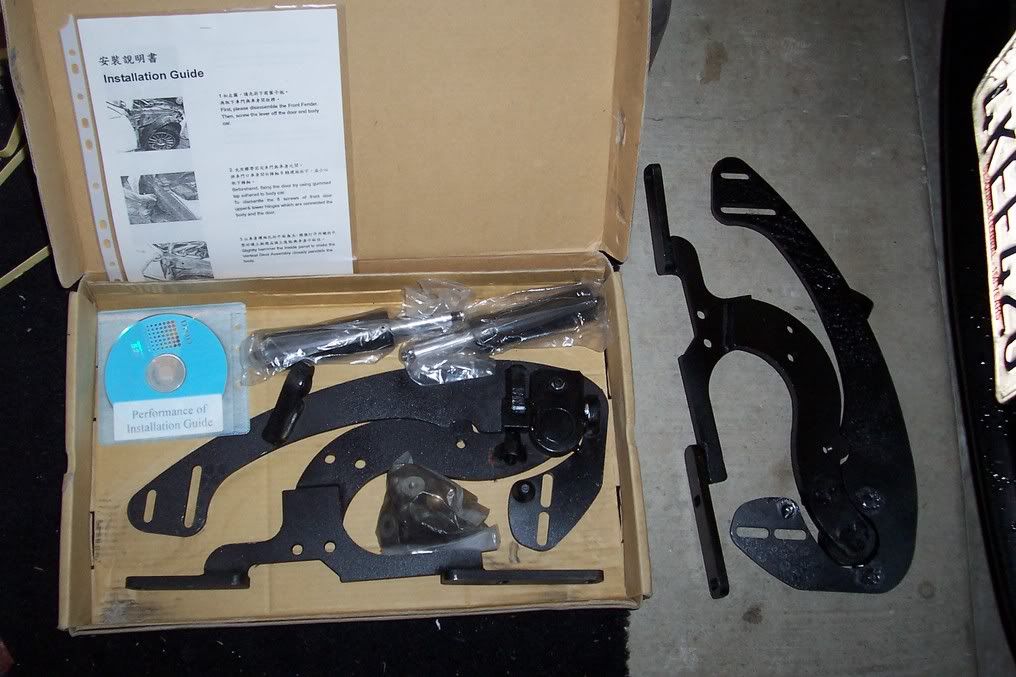 Getting started: 1. Open hood and remove the front bumper. Afterwards, take off the fender by unscrewing supporting bolts. You will need to unscrew: a. Top screw of the nearest headlight. b. 2 nuts under the nearest headlight. c. 1 bolt further back under the 2 nuts. d. Bolts holding the splash guard to the fender. e. 1 bolt in back of the splash guard behind the fender and closest to the door hinge. f. 2 bolts holding the fender to the underside of the car. g. 1 bolt inside the door jam nearest to the top. h. 3 bolts on top of the fender. At this point the fender should come out fairly easy. Reach in back and remove the sidemarker bulb housing. Pull the back out first, then ease the front part down (where you removed the 2 nuts) while pulling the headlight toward the front of the car (this is because a peg attached to the light fits into a hole which is part of the fender. This pic shows where “g”, “e”, and “f” (top to bottom) holds the fender onto the car. 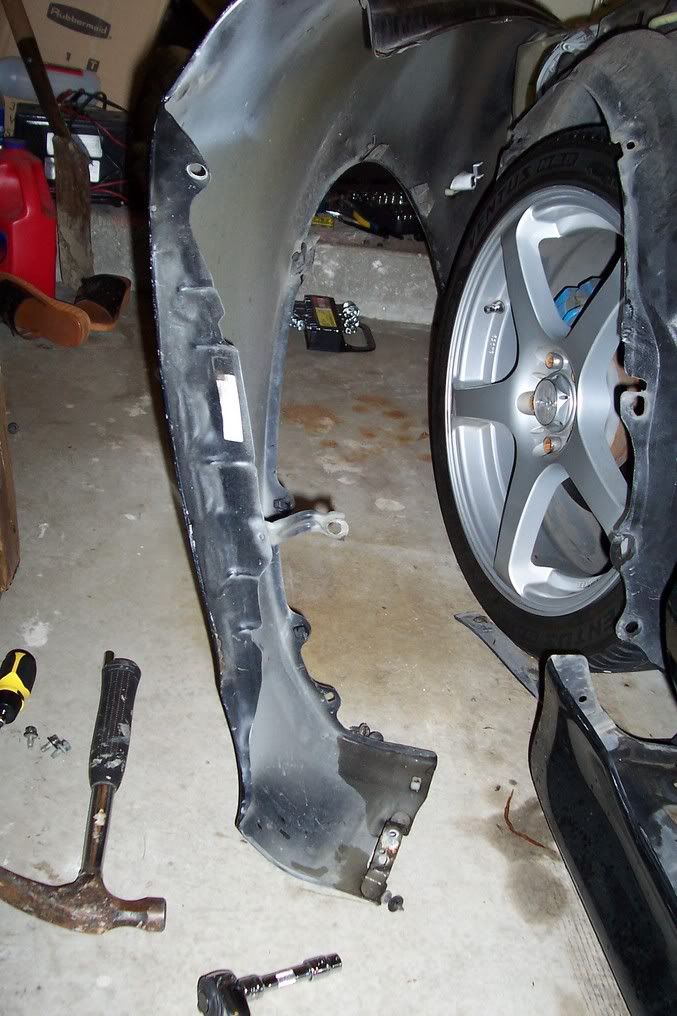 Next, you will need to cut the wires (speaker and door locks). To make sure later reconnection is easier, cut the hose and wires in the middle most location. Now you can remove the stock door hinges. There are 2 main ones and 1 small one on the inside of the door jam. 8 bolts hold the main ones, and 2 hold the small one. - Remove the small hinge, then while holding the door, remove the four bolts connecting the hinges to the door. Remove the door, then 2 remaining hinges held by 2 bolts each. Grab the hinge that looks like the one pictured below for the driver’s side. Attach it to the door. 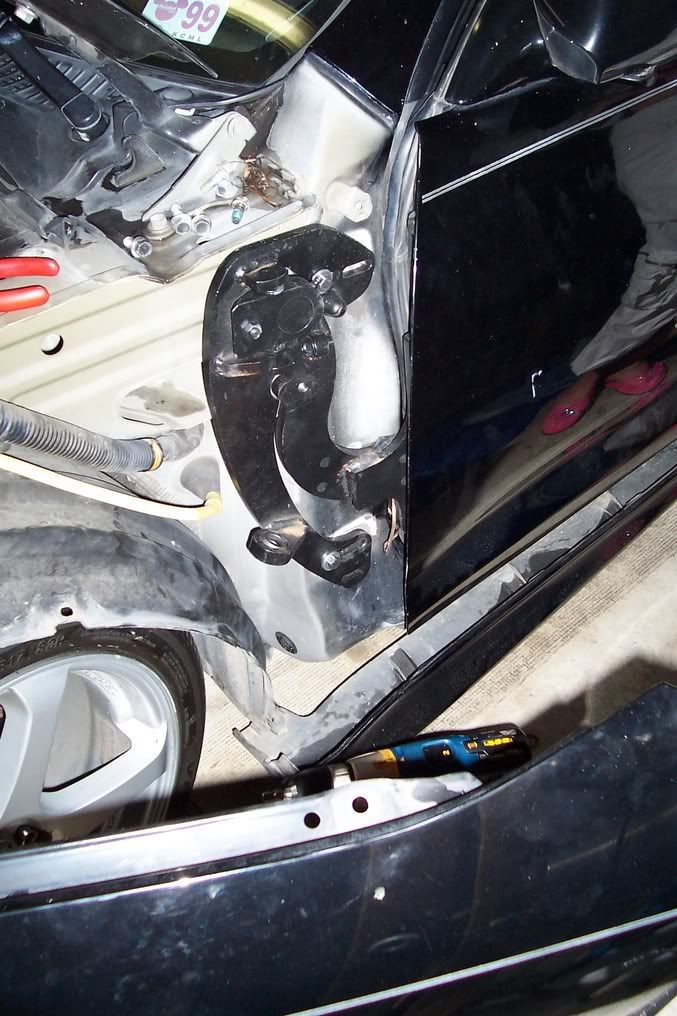 -Bring the hinge/door assembly to the car. Attach 2 bolts at the bottom and 2 at the top. Do not tighten the bolts all the way yet. You will need to rotate the hinge. Attach the shock assembly and place in the ball joint in the bottom part of the hinge. 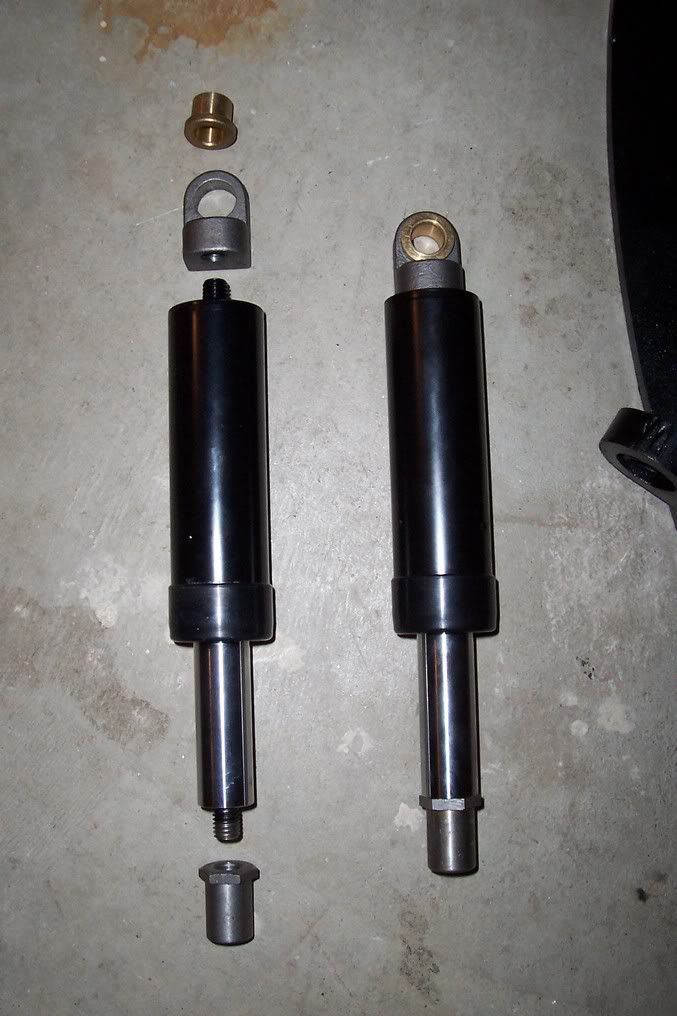 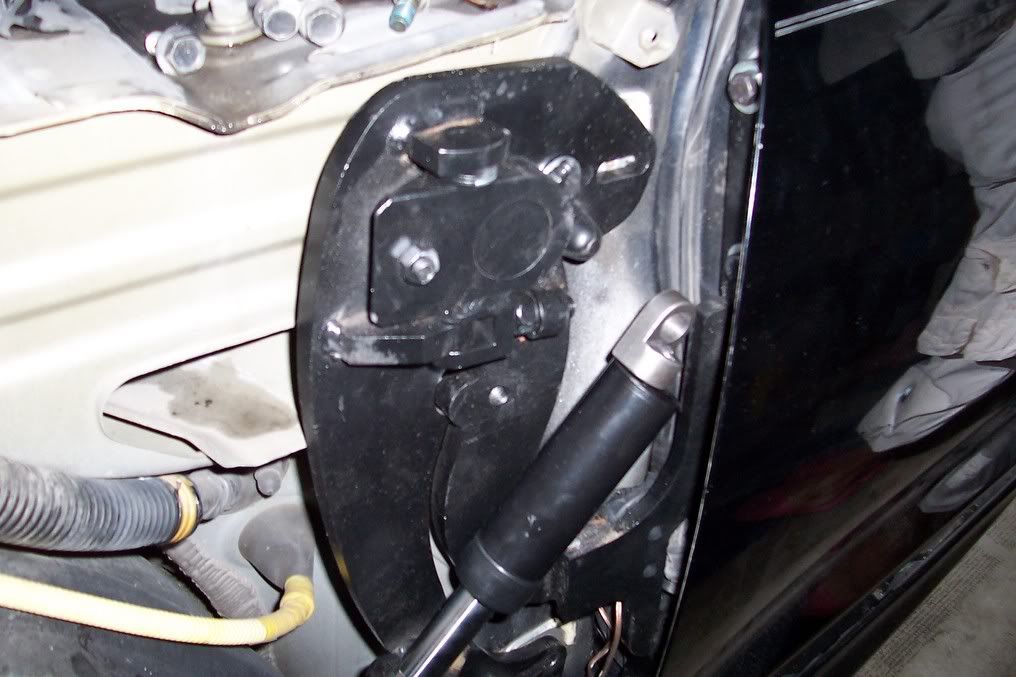 - Screw the shock (onto the door part of the hinge) with an Allen key. -Position the hinge so that the bottom is as far towards the back of the car as possible, and the top is towards the front of the car. Aligning the hinge will be the most difficult because the slightest angle error will result in the door not closing properly. Take time adjusting it until it closes perfectly horizontally when the door is fully down vertically. The bottom 2 pictures show the bolt positions in relation to the hinge. Use a hammer if needed for making slight adjustments. 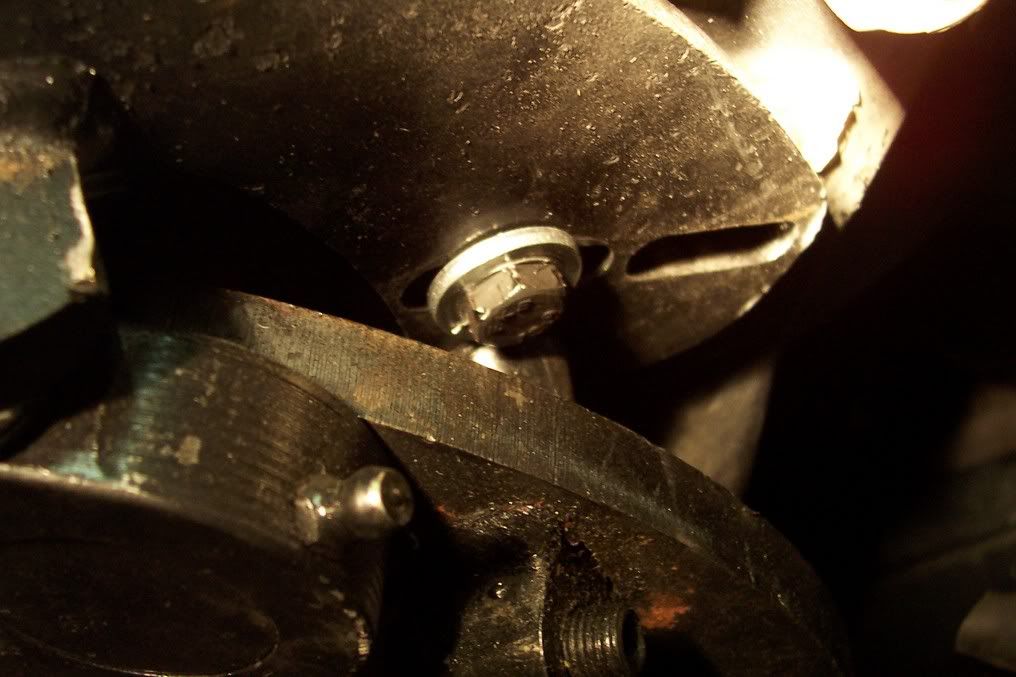 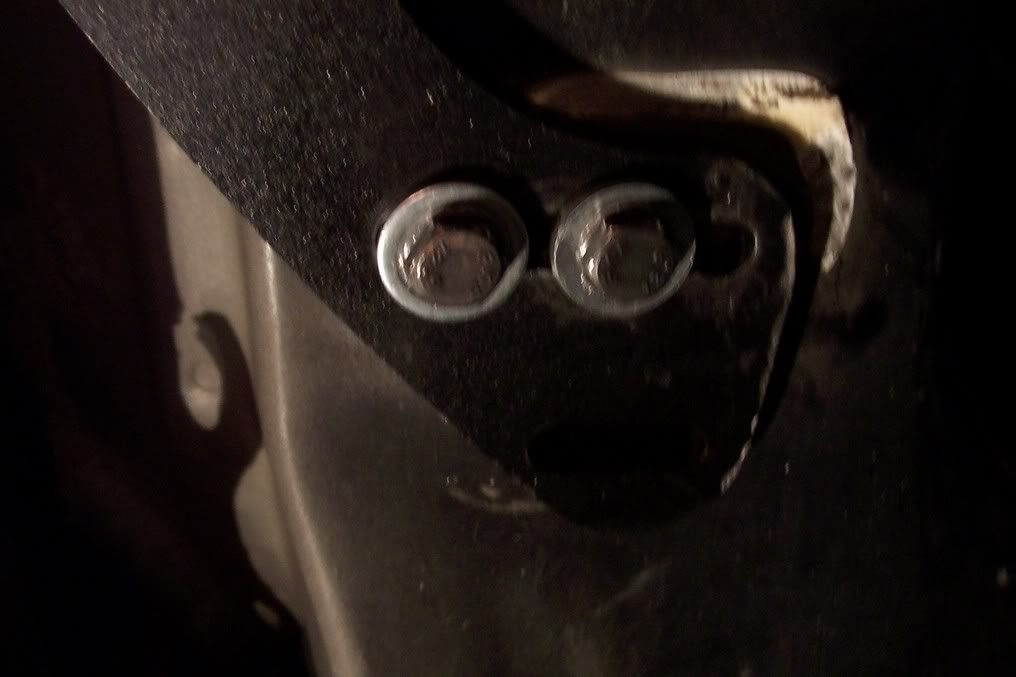 Now that it is on there, you will need to reconnect the wires going into the door. 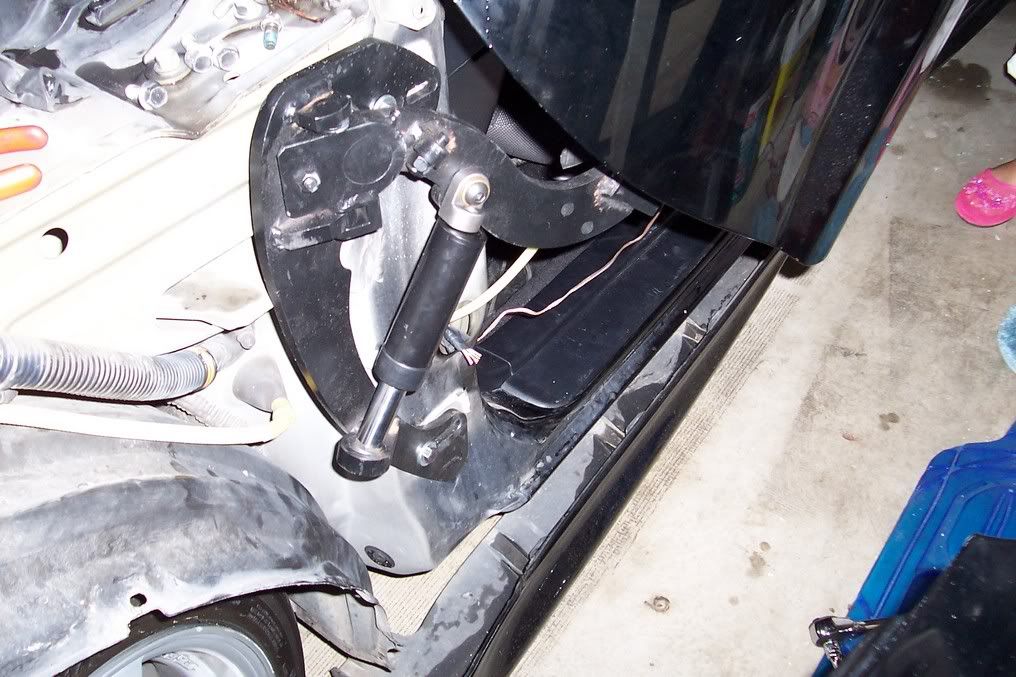 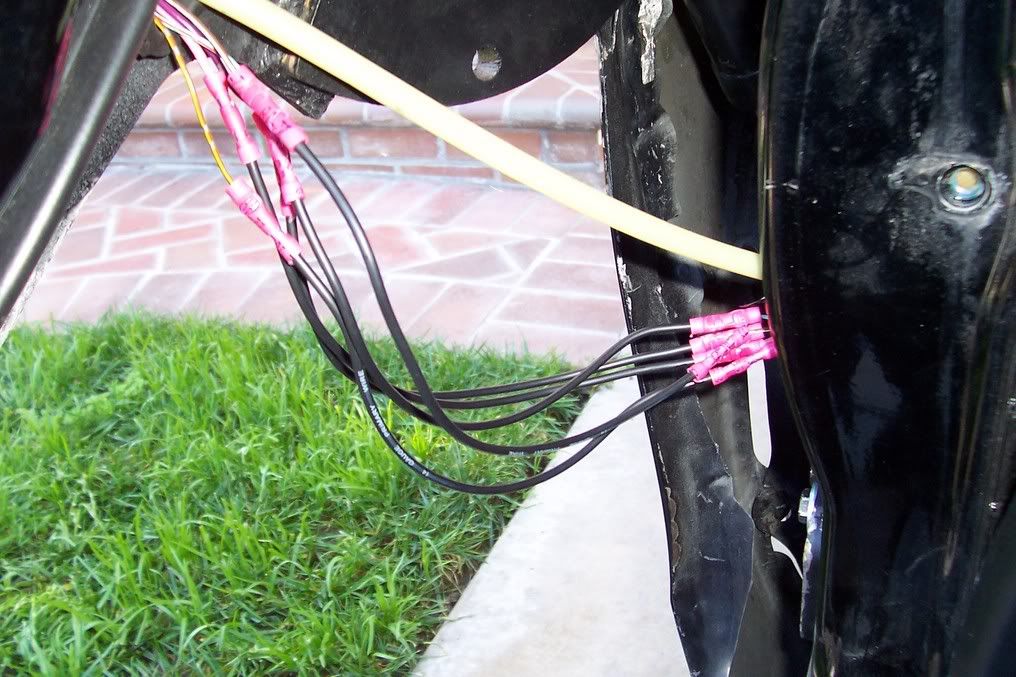 Make sure to put the loom cover over everything and zip tie the old rubber pieces to it. 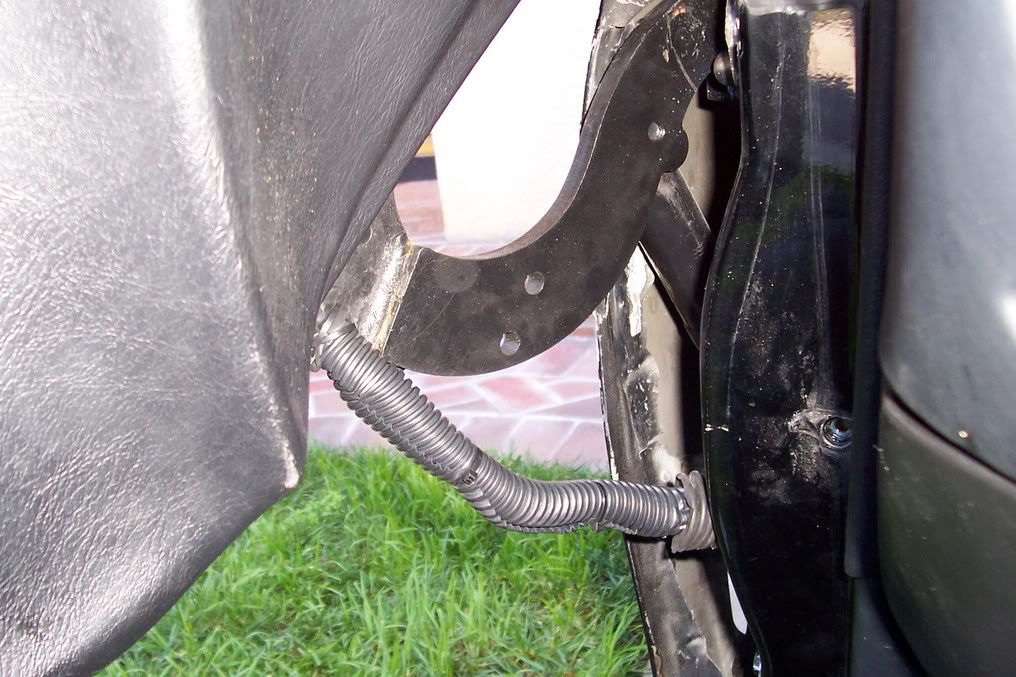 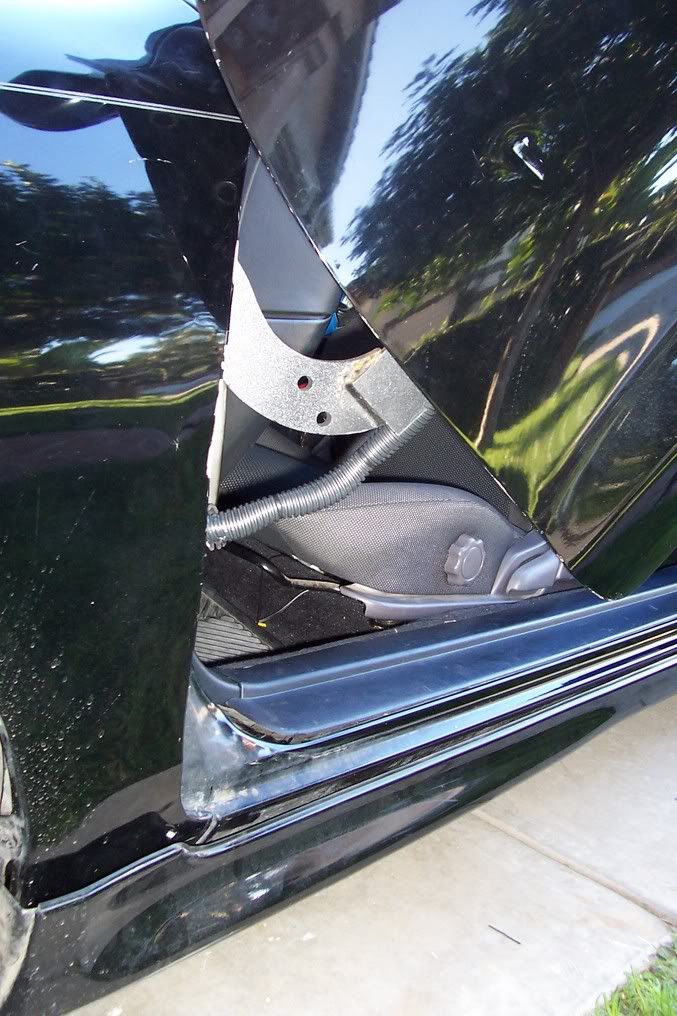 Lastly you will need to cut and/or fold the inside of the fender. Because the hinge opens up in a different position more inside the fender, it will need more clearance. See the previous pics above for how it could be. Put everything back together and you’re all done! (just do the other side now, lol.) 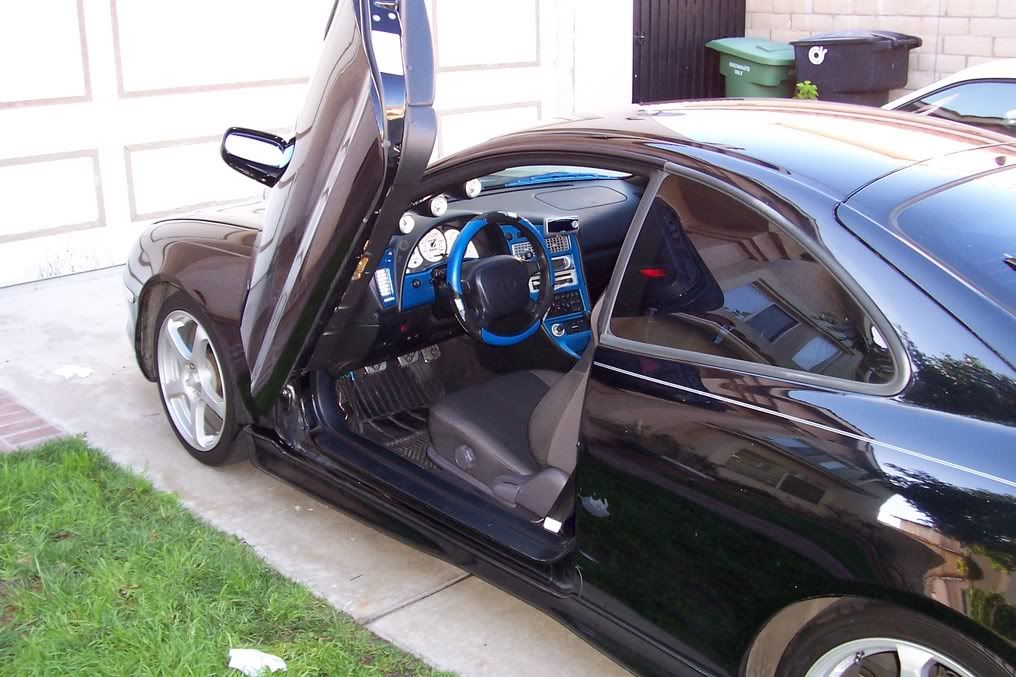 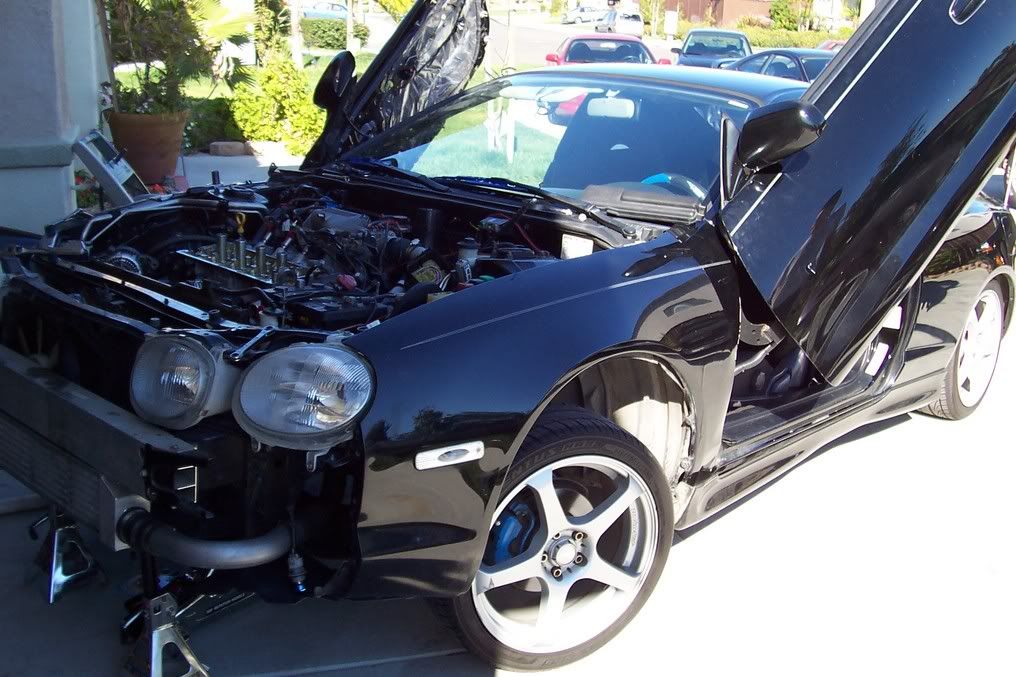 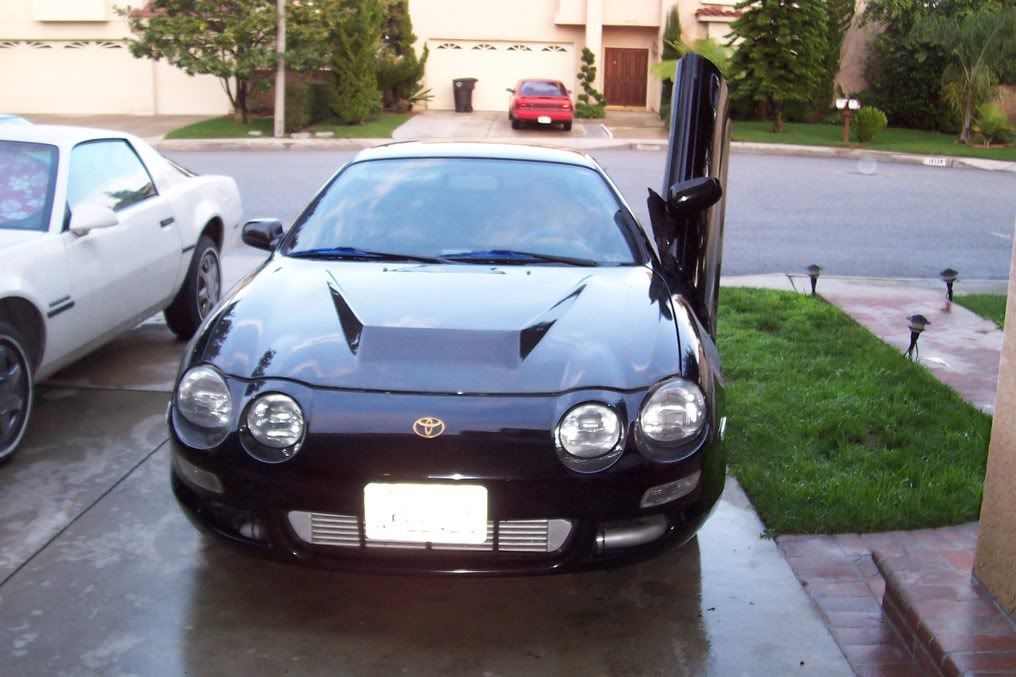 night time pics 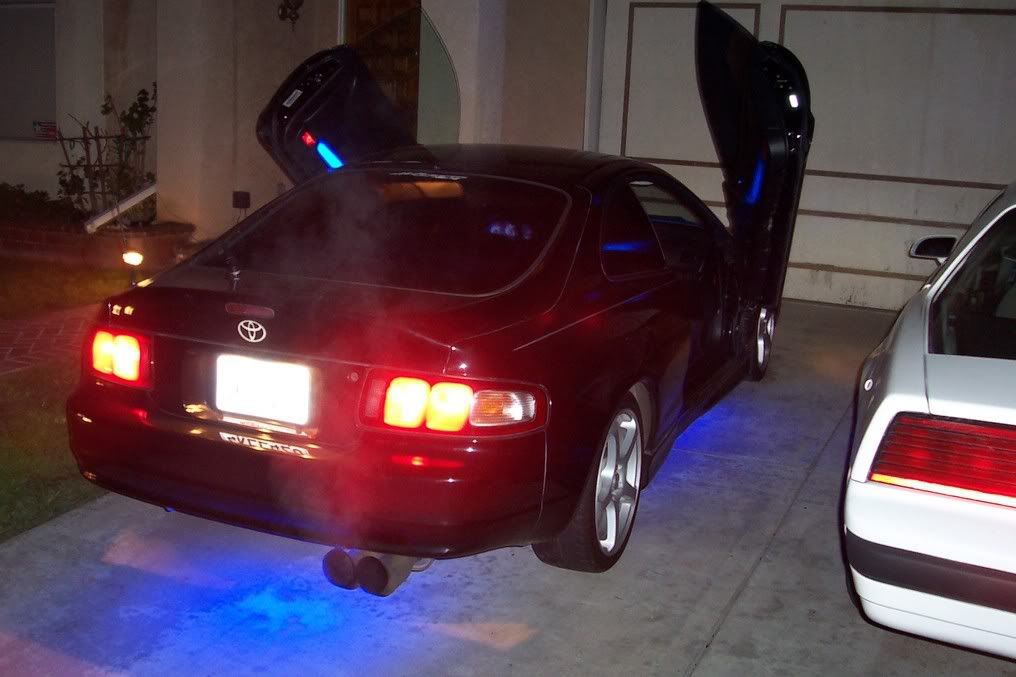 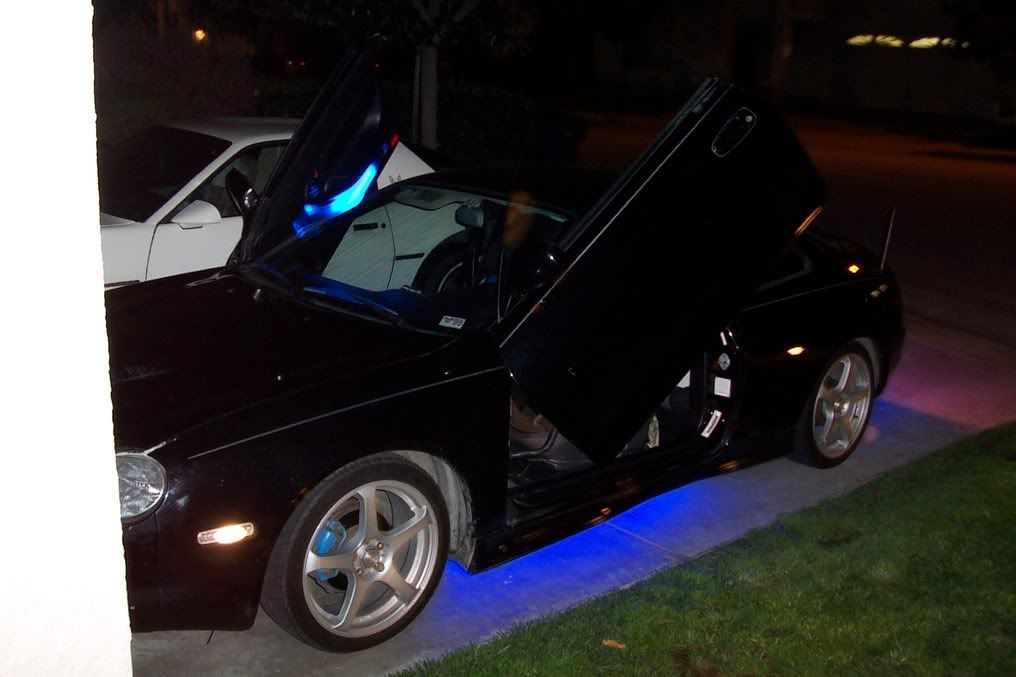
This post has been edited by forkee: Feb 15, 2005 - 12:57 AM --------------------  |
 Jan 29, 2005 - 11:40 PM Jan 29, 2005 - 11:40 PM
|
|
|
Enthusiast      Joined Oct 3, '02 From Va Team 6gc Currently Offline Reputation: 1 (100%) |
real nice bro what happened to your invader front.
--------------------  All I have in this world is my Balls and my Word and I'm not breaking em for no one,- Tony Montana Team 6gc 2005 |
 Jan 30, 2005 - 10:38 AM Jan 30, 2005 - 10:38 AM
|
|
 Enthusiast      Joined Feb 25, '04 From Wisconsin Currently Offline Reputation: 0 (0%) |
WOW, great write up. Looks frickin awesome.
-Ti |
 Jan 30, 2005 - 1:28 PM Jan 30, 2005 - 1:28 PM
|
|
 Enthusiast    Joined Dec 4, '03 Currently Offline Reputation: 0 (0%) |
i like the pink shoes
--------------------  hows it taste motha f*cka hows it taste motha f*cka |
 Jan 30, 2005 - 1:49 PM Jan 30, 2005 - 1:49 PM
|
|
|
Enthusiast    Joined Sep 16, '04 From Hershey, PA Currently Offline Reputation: 7 (100%) |
wooooww thank u...thats my next mod....where did u buy that door kit though?
|
 Jan 30, 2005 - 4:33 PM Jan 30, 2005 - 4:33 PM
|
|
 Enthusiast      Joined Feb 25, '04 From Wisconsin Currently Offline Reputation: 0 (0%) |
QUOTE(pimped6gen @ Jan 30, 2005 - 12:49 PM) wooooww thank u...thats my next mod....where did u buy that door kit though? [right][snapback]240091[/snapback][/right] look in the Buy/Sell forum -Ti |
 Jan 31, 2005 - 2:23 AM Jan 31, 2005 - 2:23 AM
|
|
 Enthusiast      Joined Nov 13, '02 From So Cal Currently Offline Reputation: 3 (100%) |
my invader front is off for the winter
the pink slippers belong to my friend who helped hold the door. =p --------------------  |
 Jan 31, 2005 - 11:30 AM Jan 31, 2005 - 11:30 AM
|
|
 Enthusiast      Joined Feb 10, '03 From Connecticut Currently Offline Reputation: 11 (100%) |
Your car looks angry.
-------------------- |
 Jan 31, 2005 - 12:13 PM Jan 31, 2005 - 12:13 PM
|
|
 Enthusiast      Joined Nov 12, '03 From Crestview, Florida Currently Offline Reputation: 2 (100%) |
QUOTE(Sev408 @ Jan 30, 2005 - 1:28 PM) i like the pink shoes [right][snapback]240084[/snapback][/right] i was about to say that. -------------------- |
 Jan 31, 2005 - 12:31 PM Jan 31, 2005 - 12:31 PM
|
|
|
Enthusiast  Joined Dec 18, '02 From Clemmons, NC Currently Offline Reputation: 0 (0%) |
Great write up! What is that CD for? I never got one of those.
|
 Jan 31, 2005 - 2:20 PM Jan 31, 2005 - 2:20 PM
|
|
|
Enthusiast      Joined Mar 23, '03 From New Orleans Currently Offline Reputation: 5 (100%) |
Looks great man. I want to do it sometime down the road but that will be when the celica starts becoming a weekend rider.
 Also its a good idea to put electrical tape around the splices to make it harder for the connections to come undone if that does happen. |
 Jan 31, 2005 - 9:53 PM Jan 31, 2005 - 9:53 PM
|
|
|
Enthusiast     Joined Nov 29, '04 Currently Offline Reputation: 5 (100%) |
Most of the time I think the vader kit makes a celica look like ass, but your car is ****in' HOTT!
-Josh This post has been edited by gt_driFFter: Jan 31, 2005 - 9:54 PM |
 Feb 5, 2005 - 1:03 PM Feb 5, 2005 - 1:03 PM
|
|
|
Enthusiast    Joined Oct 24, '03 From Cyprus Currently Offline Reputation: 0 (0%) |
Excellent job man. I just got the first kit myself. I had my kit mailed with no instructions or anything inside because i shipped it as a $50 farming equipment. I saved like $200+ on taxes this way but i am still waiting for the instructions to come. I have some queries if you don't mind.
1. There are no wire extensions included in the kit? 2. You seem to bolt half the bolts (one at each point) why? 3. The wire extensions and loom/wrap, does it just hangs there? Can it be glued or something on the upper door and upper car frame instead? 4. There is a stopper bolt at the angle. Why didn't you use that to adjust the hinge? 5. Is the spring fully extended as it comes in the kit? Do i need to do anything to it when installing? I tried to press it and nothing. Probably it needs the heavy load of the door to be pressed. correct? 6. The hinge opens to about 100 degrees. Would a spring that extends more , make the door go up more? (retorical question) 7. Can the fenders be taken out without messing with the front bumper? I think it would be easier if i took off the whole wheel to safely unscrew the bottom screw of the fender. Especially when having 17s. 8. Will the hinge need to be painted after installing for rust prevention? Thats my questions for now. |
 Feb 8, 2005 - 1:50 AM Feb 8, 2005 - 1:50 AM
|
|
 Enthusiast      Joined Nov 13, '02 From So Cal Currently Offline Reputation: 3 (100%) |
QUOTE(neoklis @ Feb 5, 2005 - 11:03 AM) Excellent job man. I just got the first kit myself. I had my kit mailed with no instructions or anything inside because i shipped it as a $50 farming equipment. I saved like $200+ on taxes this way but i am still waiting for the instructions to come. I have some queries if you don't mind. 1. There are no wire extensions included in the kit? 2. You seem to bolt half the bolts (one at each point) why? 3. The wire extensions and loom/wrap, does it just hangs there? Can it be glued or something on the upper door and upper car frame instead? 4. There is a stopper bolt at the angle. Why didn't you use that to adjust the hinge? 5. Is the spring fully extended as it comes in the kit? Do i need to do anything to it when installing? I tried to press it and nothing. Probably it needs the heavy load of the door to be pressed. correct? 6. The hinge opens to about 100 degrees. Would a spring that extends more , make the door go up more? (retorical question) 7. Can the fenders be taken out without messing with the front bumper? I think it would be easier if i took off the whole wheel to safely unscrew the bottom screw of the fender. Especially when having 17s. 8. Will the hinge need to be painted after installing for rust prevention? Thats my questions for now. [right][snapback]242392[/snapback][/right] 1. No wire extensions were included in mine. 2. Pics were taken at random points of installation. i just tried to fit within context. =p BUT i could only fit one bolt (instead of 2) for the top. im thinking maybe its just my kit? but yea, i got the 2 bottom ones to fit, and one top one. 3. you prolly will need some slack for those wires, so as long as theyre not too tight in the fully open position, im pretty sure u could do other methods. 4. u kno what......i just saw that, haha.....ill have to play around with that tomorrow 5. correct, its really tight. u pretty much get the top bolted on. then lift the door high enough to set the bottom part down. 6. yes, but it will also have to depress the same amount as the current one, or at least enough to let it go all the way down. 7. i found it impossible to do that because there are nuts and bolts that attach the fender to the car which can only be reached behind the front bumper, literally 2 inches below the headlight. 8. i dont know about this one. ill take a quick look at its rusting rate this week and let you know if i see anything. i banged it up alot so i should see something if it will rust. otherwise i think not. let me kno if you have more --------------------  |
 Feb 8, 2005 - 9:46 AM Feb 8, 2005 - 9:46 AM
|
|
 Enthusiast      Joined Aug 30, '02 From Maryland Currently Offline Reputation: 8 (100%) |
How is it getting in and out of the car? Im 6'5" and think I might have a problem.
-------------------- Member of Team 5sfTe
|
 Feb 9, 2005 - 12:17 AM Feb 9, 2005 - 12:17 AM
|
|
 Enthusiast      Joined Nov 13, '02 From So Cal Currently Offline Reputation: 3 (100%) |
yikes! ur a tall guy. well as long as ur not overly wide horizontally, getting in should be the same as normal. u just need to come in more from the back rather than the side.

--------------------  |
 Feb 14, 2005 - 8:36 PM Feb 14, 2005 - 8:36 PM
|
|
|
Enthusiast Joined Feb 14, '05 From america Currently Offline Reputation: 0 (0%) |
Dear 6g member
i was wondering if you could please give me the info on regards toward the lambo doors conversation and where you bought the kit and how much it costed, i'm impress with your kindness to share the info with fellow 6g owners. tired of seeing honda's hooked up. thankz phil |
 Feb 15, 2005 - 1:00 AM Feb 15, 2005 - 1:00 AM
|
|
 Enthusiast      Joined Nov 13, '02 From So Cal Currently Offline Reputation: 3 (100%) |
its the same kit from extremedoors.com
it should run u between 800-1000 bucks thanks for ur comments =) --------------------  |
 Feb 15, 2005 - 2:09 AM Feb 15, 2005 - 2:09 AM
|
|
|
Enthusiast      Joined Mar 19, '04 From Scottsdale, Az Currently Offline Reputation: 2 (100%) |
I wouldn't give extreme doors a penny, since they personally ripped me off, and they are getting sued by decah latches for a copyright infringement. You might send them money......then presto bankruptucy and your out of your thousand. I believe this is the reason why the 2nd group buy was cancelled on this site.
This post has been edited by madmods: Feb 15, 2005 - 2:11 AM |
 Feb 15, 2005 - 5:46 PM Feb 15, 2005 - 5:46 PM
|
|
 Enthusiast      Joined Feb 25, '04 From Wisconsin Currently Offline Reputation: 0 (0%) |
QUOTE(madmods @ Feb 15, 2005 - 1:09 AM) I wouldn't give extreme doors a penny, since they personally ripped me off, and they are getting sued by decah latches for a copyright infringement. You might send them money......then presto bankruptucy and your out of your thousand. I believe this is the reason why the 2nd group buy was cancelled on this site. [right][snapback]246174[/snapback][/right] so I guess its cancelled now? hrm -Ti |
  |
1 User(s) are reading this topic (1 Guests and 0 Anonymous Users)
0 Members:
| Lo-Fi Version | Time is now: November 23rd, 2024 - 6:13 AM |


