  |
 Oct 4, 2006 - 4:20 PM Oct 4, 2006 - 4:20 PM
|
|
|
Enthusiast  Joined Feb 27, '05 From Austin, TX Currently Offline Reputation: 3 (100%) |
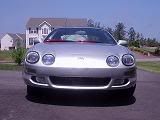
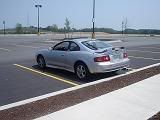
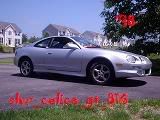
I asked for some advice on this a while back then did it but never got around to getting pics till today- let me know what you think.
   oh and here is one of my new co-pilot (broke up with my girlie a couple weeks ago) flexin the new seats i got off snap (thanks bro, i love em.) 
|
 Oct 4, 2006 - 5:45 PM Oct 4, 2006 - 5:45 PM
|
|
|
Enthusiast    Joined Jul 6, '06 Currently Offline Reputation: 1 (100%) |
those calipers are very sexy, and the seats look bangin as well!
nice --------------------  KB |
 Oct 4, 2006 - 8:24 PM Oct 4, 2006 - 8:24 PM
|
|
 Enthusiast   Joined Jul 22, '06 From San Antonio / georgetown, Texas Currently Offline Reputation: 9 (100%) |
ahh very nice. how hard was it to paint them, im thinking about doing it myself sometime.
--------------------  |
 Oct 4, 2006 - 9:38 PM Oct 4, 2006 - 9:38 PM
|
|
|
Enthusiast      Joined Jun 13, '05 From Poughkeepsie, NY Currently Offline Reputation: 2 (100%) |
u bought snapshotgt's seats? they look good, so do the calipers...nice job man
--------------------  Kawi Love |
 Oct 4, 2006 - 10:37 PM Oct 4, 2006 - 10:37 PM
|
|
|
Enthusiast      Joined Mar 9, '05 From Oakland, Cali Currently Offline Reputation: 46 (100%) |
sweeet 6gc....
about the seats...did u get new ones? or did u modify yoru oem ones? --------------------  |
 Oct 5, 2006 - 1:43 AM Oct 5, 2006 - 1:43 AM
|
|
 Enthusiast      Joined Feb 3, '06 From Czech Republic (Europe) Currently Offline Reputation: 56 (100%) |
I like those seats...
-------------------- No more replicas... This is evolution... This is SS-four :)
 ________[Featured Celica of 6gc.net @ 2010]_________ |
 Oct 5, 2006 - 1:18 PM Oct 5, 2006 - 1:18 PM
|
|
|
Enthusiast  Joined Feb 27, '05 From Austin, TX Currently Offline Reputation: 3 (100%) |
QUOTE(D_Dawg @ Oct 4, 2006 - 8:24 PM) [snapback]487713[/snapback] ahh very nice. how hard was it to paint them, im thinking about doing it myself sometime. thanks man! not too hard - i was gonna take pics and do a write up but the weather was pressing towards really really nasty outside so i was pressed for time. i just barely got the last wheel back on as there was about an inch and a half of standing water in my friends driveway under a tent he has set up for painting cars. just make sure you get the right kind of paint and clean the calipers really well. let me know if you have any questions while you are doing them. -Jimi QUOTE(DeW_H0e_GT @ Oct 4, 2006 - 10:37 PM) [snapback]487801[/snapback] sweeet 6gc.... about the seats...did u get new ones? or did u modify yoru oem ones? bought them off SnapShotGT (thanks again, i love em) pretty sure he got them from Hunsaker - http://www.hunsakersports.com/shop/ got some really nice mounting rails with them too. |
 Oct 5, 2006 - 3:47 PM Oct 5, 2006 - 3:47 PM
|
|
|
Enthusiast  Joined Jun 23, '06 From Michigan Currently Offline Reputation: 1 (100%) |
thats kinda funny actually cuz when i painted my calipers it was just about downpooring when i just had finished the back right caliper.... just a little factoid.
-------------------- |
 Oct 5, 2006 - 9:35 PM Oct 5, 2006 - 9:35 PM
|
|
|
Enthusiast    Joined Jul 18, '06 From plymouth, MA USA Currently Offline Reputation: 0 (0%) |
im panting my calipers red
--------------------    |
 Oct 5, 2006 - 9:40 PM Oct 5, 2006 - 9:40 PM
|
|
 Administrator      Joined Aug 23, '02 From Seattle, WA Currently Offline Reputation: 14 (100%) |
Those look good...I think I prefer the look of ST204 calipers to ST185 ones.
-------------------- New Toyota project coming soon...
|
 Oct 6, 2006 - 9:02 AM Oct 6, 2006 - 9:02 AM
|
|
|
Enthusiast  Joined Feb 27, '05 From Austin, TX Currently Offline Reputation: 3 (100%) |
QUOTE(TaKtikal_6G @ Oct 5, 2006 - 3:47 PM) [snapback]488111[/snapback] thats kinda funny actually cuz when i painted my calipers it was just about downpooring when i just had finished the back right caliper.... just a little factoid. hah! thats funny, i think i was throwing my front right wheel back on in about an inch and a half of standing water.. that tent saved my ass. |
 Oct 6, 2006 - 9:07 AM Oct 6, 2006 - 9:07 AM
|
|
|
Enthusiast  Joined Feb 27, '05 From Austin, TX Currently Offline Reputation: 3 (100%) |
I had someone ask me about this via PM and have had a few other people ask me about the process to do all this. i thought i would try to be helpful and document my experience here for whoever. hope this is helpful.
Sorry for the lack of pics. Did not have a camera secured or time really with a big storm rolling in, but i can revisit this later and just pull it all apart for the sake of having pics if it would help anyone. Lets see, the whole thing took the greater portion of a weekend, keep in mind that severe weather conditions ate a few hours of the re-assembly.. Please be gentle as I am more of a computer geek then a car person and might not have all the lingo proper. Not to mention I am doing this all from memory. Questions / comments / corrections are welcome. day 1- putting her up on jack stands pulling all four wheels removing all the calipers *cleaning all the calipers *prepping for painting *painting the calipers (*these went well into the night and next am a bit. take yer time, but i'll revisit this) day 2- another coat of paint removing the rotors (huge pain in the ass if they are rusted on) taking rotors to get resurfaced putting the rotors back on reassembling the calipers w/ new pads wheels back on (at some point the rain started kicking our ass so we threw in the towel for the night, i'm lucky my homeboy has a tent for painting cars in his driveway or we would have been screwed) day 3- bleeding the brake lines back on the ground things needed / to consider- --supplies -paint i went with duplicolor (i am pretty sure that's what it was called) engine enamel. a few people told me that it might not have a high enough heat rating but i have driven from Austin to San Antonio and back on them with no issues. -brake cleaner / maybe a wire brush anything as far as brake parts cleaner will likely work, be EXTRA careful not to get any on the rubber grommets / seals / whatever those things are called cuz the cleaner is hella corrosive and will melt them with a quickness. i did not end up using a wire brush but it may have made life easier. -lithium grease if you pull the calipers apart, for when you put them back together -the damn bolt to remove the rotors *grumble* as dumb as this might sound, it took me forevers to find the right sized bolt to remove the rotors. it ended up coming off a VW and now lives in my glove box --considerations -i already mentioned this, but i want to emphasize on the importance one more time, the brake parts cleaner is HELLA CORROSIVE to the rubber dust covers / grommets / whatever those things are called. it might even be advisable to get replacement rubber just in case. -when cleaning i guess it goes without saying that you want to do an extra good job so the paint takes well, but i'll say it anyway -when painting, i used plastic grocery store bags and painters tape to cover the parts of the caliper that i did not want pained. as far as curing, i left mine over night and even sprayed them a bit the next morning before doing the rotor business and have not had any issues. -if you are removing the rotors, be extra careful with the rears. i was not fully aware of how the e-brake system worked getting into this and was in for a bit of a surprise pulling them. ended up having to buy a rear brake parts kit to replace a little plate that held a spring down.. |
 Sep 5, 2007 - 12:04 AM Sep 5, 2007 - 12:04 AM
|
|
|
Enthusiast   Joined Nov 21, '05 From Wpg, MB. Canada Currently Offline Reputation: 3 (100%) |
Digging up an old thread here.. but I'm doing my rear rotor and pads soon.
-if you are removing the rotors, be extra careful with the rears. i was not fully aware of how the e-brake system worked getting into this and was in for a bit of a surprise pulling them. ended up having to buy a rear brake parts kit to replace a little plate that held a spring down.. Anyone want to elaborate about this little plate for the e-brake?.. |
  |
1 User(s) are reading this topic (1 Guests and 0 Anonymous Users)
0 Members:
| Lo-Fi Version | Time is now: November 23rd, 2024 - 10:49 AM |


