  |

 Nov 4, 2008 - 5:17 PM Nov 4, 2008 - 5:17 PM
|
 
|
|
Enthusiast  Joined Jun 25, '05 From Fort Wayne, IN Currently Offline Reputation: 14 (100%) |
Gave it a shot finally, couple of Celi parts, and one Vette part.
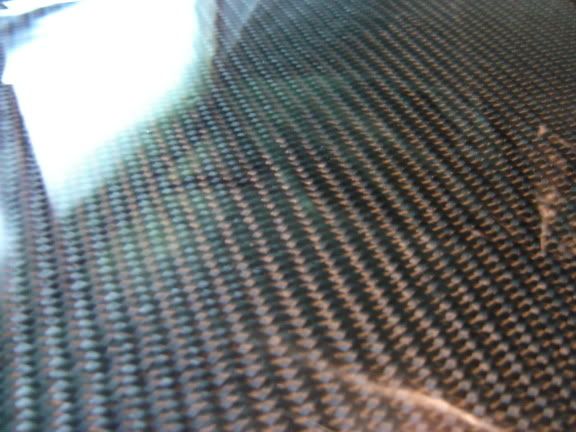
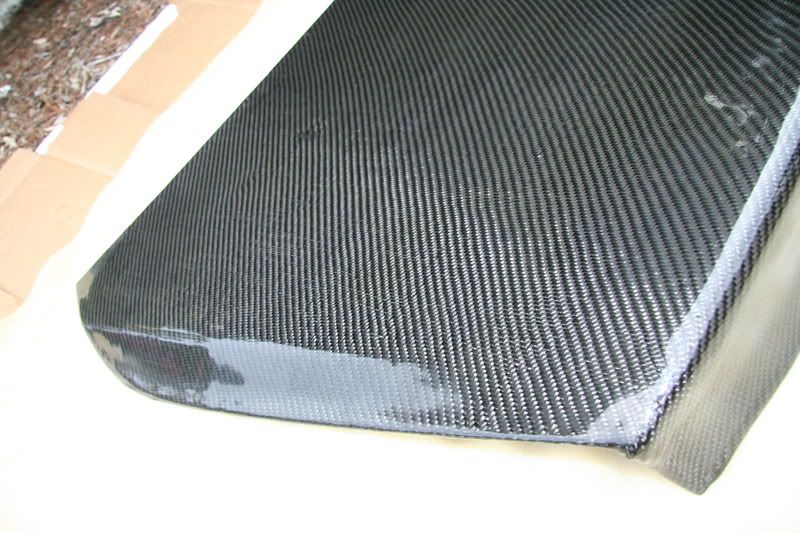
The celi parts below, came out OK. THe switch panel is a PITA because of the recessed switch area, makes it hell to keep the weave straight. This was my 2nd attempt and came out MUCH better than the first. With more practice, I'll nail this piece down. The Ash tray panel came out nice I think. Both are on their 2nd coat of resin and after one more coat should be ready for sanding.   The Vette door bezel below was done with the silver carbon fiber, and was my very first attempt at a piece with this kind of contour. I'm EXTREMELY happy with it though it has it's minor flaws. This is going in my personal car again. 2nd coat of resin drying here too.  And, with permission of the mods, I'd like to offer the service to the 6GC.net community. It's not going to be cheap because this is a time consuming thing, but the results are worth it. If anyone wants anything done, just shoot me a message and we'll talk. Next up for me is going to be the ignition panel and main stereo panel. Saving the door handle bezels for last as they're going to be a nightmare. *Edit* As referenced in this thread: http://www.6gc.net/forums/index.php?showtopic=63283&hl= I have gotten permission to offiically offer my services to the 6GC.Net community. If anyone wants any pieces wrapped, send me a PM or post up with that you want and we'll sort the details out. Pricing will be in the $35-75 range per part depending on how big, contouring, fabric used (some colors are pricier than others, like the Gold CF). Just let me know, I'm here for you guys. This post has been edited by Fastbird: Nov 6, 2008 - 9:57 AM --------------------  |

|
Nov 4, 2008 - 5:21 PM
|
|
|
Enthusiast Joined Dec 19, '07 From tx Currently Offline Reputation: 22 (100%) |
Cool - nice work man. That red and black CF is threatening to reverse my stance on CF

--------------------  ENGINE: '93 RC 3S-GTE/WRC CT-20b [18-20PSI] PERF: TRD/HKS/ARP/NGK/MSD/ACT/Blitz/STRI/APEX'i/TwosRus/GReddy/Magnaflo/KOYO SUSP: Tein/Bilstein/SusTech/ INT: SS-III SEATS/Toyota Hyper Sports EXT: WRC/TRD/404 QUOTE (lagos @ Aug 25, 2010 - 10:13 AM)  Its a safety feature so that people like you don't end up killing themselves or everyone around them. Slow down Paul Walker. 6GC Chat - Go there: [url="http://www.griffgirl.com/forum/chat/index.php[/url] |
|
Nov 4, 2008 - 5:31 PM
|
|
|
Enthusiast Joined Jun 2, '08 From Fort Worth, Texas Currently Offline Reputation: 9 (100%) |
yes i love the red and black look
i might be interested --------------------  |
|
Nov 4, 2008 - 5:33 PM
|
|
|
Enthusiast Joined Jun 21, '08 From Naples, FL Currently Offline Reputation: 0 (0%) |
Mad nasty. It would be sick to do a CF interior, a la LilJoe...
|
|
Nov 4, 2008 - 9:51 PM
|
|
|
Enthusiast Joined Jan 17, '08 From JB MDL, NJ Currently Offline Reputation: 30 (100%) |
Thats nice, row much did the cf run you?
|
|
Nov 4, 2008 - 11:03 PM
|
|
|
Enthusiast Joined Jun 25, '05 From Fort Wayne, IN Currently Offline Reputation: 14 (100%) |
QUOTE (Spider77 @ Nov 4, 2008 - 10:51 PM) Thats nice, row much did the cf run you? $35 for a 50" x 36" roll. I have access to pretty much any color: Regular, Silver, Red/Black, Blue/Black, Purple/Black, Yellow/Black, Orange/Black, ect. -------------------- |
|
Nov 5, 2008 - 10:25 AM
|
|
 Enthusiast Joined Apr 15, '07 From san antonio tx. Currently Offline Reputation: 12 (100%) |
Im diggin the red and black! Great job!
-------------------- Sorry, no animated sigs allowed.
|
|
Nov 5, 2008 - 10:34 AM
|
|
|
Enthusiast Joined Jan 18, '08 From Houston Currently Offline Reputation: 7 (100%) |
Not bad at all for a second timer.
 It's a pain to keep the threads lined, i know. There are a few different methods people use to keep from shredding it, PM if you need to know anything. Otherwise good job; and keep up the good work. 
-------------------- QUOTE (presure2 @ Nov 6, 2010 - 6:16 AM) Via FB: fcuking awsome!!! D-man FTW! QUOTE (DEATH @ Nov 11, 2008 - 5:40 PM) Damn D-Man - most impressive. QUOTE (99GT @ Nov 14, 2008 - 4:04 PM) D-Man's post should be a sticky QUOTE (samir0189 @ Nov 4, 2008 - 10:50 AM) LOL, oh boy, you can always count on D-Man for ridiculously hilarious posts. |
|
Nov 5, 2008 - 9:24 PM
|
|
|
Enthusiast Joined Jan 17, '08 From JB MDL, NJ Currently Offline Reputation: 30 (100%) |
Thats not a bad price, where do you get it through?
|
|
Nov 5, 2008 - 10:58 PM
|
|
|
Enthusiast Joined Jun 25, '05 From Fort Wayne, IN Currently Offline Reputation: 14 (100%) |
-------------------- |
|
Nov 6, 2008 - 7:02 AM
|
|
|
Enthusiast Joined Dec 7, '07 From Corpus Christi, TX Currently Offline Reputation: 7 (100%) |
U thinkin about hookin people up at all? U really did do a good job man.
-------------------- From Japan to Texas my st202 follows me.
 Being different from every angle of the word, leading the Revolution (TOYOTA NATION) The RHD st202 that made it from Japan check it out. http://www.6gc.net/forums/index.php?showtopic=78103 |
|
Nov 6, 2008 - 9:21 AM
|
|
|
Enthusiast Joined Jun 25, '05 From Fort Wayne, IN Currently Offline Reputation: 14 (100%) |
QUOTE (Lil-Joe101 @ Nov 6, 2008 - 7:02 AM) U thinkin about hookin people up at all? U really did do a good job man. As stated in the first post, I intend to start doing these parts on the side for people as time allows. They're NOT going to be terribly cheap (think $35-75 per part) but I can work on a few at a time. All anyone has to do who wants something done is post up here or preferably PM me with what you want, what color you want, and we'll work out the details. I've got tonight off, so I'm going to be sanding the first two Celi pieces I did in prep for a final coat of resin, and I'm going to be laying the red/black on the Stereo surround and the Ignition Lock/Dimmer panel. -------------------- |
|
Nov 6, 2008 - 9:58 AM
|
|
|
Enthusiast Joined Jun 25, '05 From Fort Wayne, IN Currently Offline Reputation: 14 (100%) |
Updated GOOD info in first post.
Also, hoping for some preliminary side by side pics of the ash tray cover, stick on CF vs. my wrapping tonight. -------------------- |
|
Nov 6, 2008 - 10:37 AM
|
|
 Enthusiast Joined Jan 10, '06 From Mozambique, Africa Currently Offline Reputation: 8 (100%) |
How's the fitment after put the pieces back in place? for example, the window switch.
--------------------  "Remember, amateurs built the ark and professionals built the Titanic. But revolutionaries built the Celica!"- Me |
|
Nov 6, 2008 - 11:47 AM
|
|
|
Enthusiast Joined Jun 25, '05 From Fort Wayne, IN Currently Offline Reputation: 14 (100%) |
QUOTE (Slick @ Nov 6, 2008 - 11:37 AM) How's the fitment after put the pieces back in place? for example, the window switch. We'll know soon. Looking at it, the only thing that's going to happen is going to be a slightly more snug fitment. The added thickness of the CF cloth and resin is minimal because I'm intentionally NOT carrying the lions share of the resin thickness to mounting surfaces. I'm trying to take this into account during the creation phase. Given manufacturers tendencies to have a slightly sloppy fitment in the first place, my covered pieces should snug up quite nice. I'll be test fitting this weekend. I should at least have the passenger window switch and ash tray cover finished. I might have a couple other pieces done too. -------------------- |
|
Nov 6, 2008 - 12:56 PM
|
|
|
Enthusiast Joined Nov 29, '04 Currently Offline Reputation: 5 (100%) |
I'll be keeping a close eye on this, and looking forward to finished pics! Maybe you could post a link to a page that shows what the different colors look like?
|
|
Nov 6, 2008 - 1:20 PM
|
|
|
Enthusiast Joined Jun 25, '05 From Fort Wayne, IN Currently Offline Reputation: 14 (100%) |
QUOTE (gt_driFFter @ Nov 6, 2008 - 1:56 PM) I'll be keeping a close eye on this, and looking forward to finished pics! Maybe you could post a link to a page that shows what the different colors look like? I'm planning on incorporating a CF Wrapping page showing completed work and what colors are available to by business website this weekend. -------------------- |
|
Nov 6, 2008 - 1:43 PM
|
|
 Enthusiast Joined Apr 10, '07 From lodi, ca Currently Offline Reputation: 9 (100%) |
id be interested in a full cf intereior eventually but id liek to know where ur getting your cf from? have u tried fiberglast.com ive noticed they carry a large selection of different types of cf and carbon kevlar. and the prices are ok i guess havent shopped around much. i get there monthly catalog cause io use there fiberglass for autobody repair. great guys and good shipping but id be interested in black/blue cf or the carbon kevlar
|
|
Nov 6, 2008 - 2:10 PM
|
|
|
Enthusiast Joined Jun 25, '05 From Fort Wayne, IN Currently Offline Reputation: 14 (100%) |
QUOTE (punkuup5150 @ Nov 6, 2008 - 1:43 PM) id be interested in a full cf intereior eventually but id liek to know where ur getting your cf from? have u tried fiberglast.com ive noticed they carry a large selection of different types of cf and carbon kevlar. and the prices are ok i guess havent shopped around much. i get there monthly catalog cause io use there fiberglass for autobody repair. great guys and good shipping but id be interested in black/blue cf or the carbon kevlar See my post from last night at 10:58PM. that's where I'm purchasing the fabric from. -------------------- |
|
Nov 6, 2008 - 5:09 PM
|
|
|
Enthusiast Joined Jun 21, '08 From Naples, FL Currently Offline Reputation: 0 (0%) |
*their
|
|
Nov 6, 2008 - 5:21 PM
|
|
|
Enthusiast Joined Apr 6, '08 From Overland Park Currently Offline Reputation: 9 (100%) |
Hey, I love this idea that you have going! I'm just wondering how difficult is it to do? Or is it not really difficult just more time consuming and slow going do to taking your time to make sure it looks good??
--------------------  |
|
Nov 6, 2008 - 6:38 PM
|
|
|
Enthusiast Joined Jun 25, '05 From Fort Wayne, IN Currently Offline Reputation: 14 (100%) |
It's more time consuming and slow, but getting and keeping the weave straight while doing a contour is a PITA. It take some practice, but if you're good with your hands you can do it yourself in no time.
-------------------- |
|
Nov 6, 2008 - 7:04 PM
|
|
|
Enthusiast Joined Apr 6, '08 From Overland Park Currently Offline Reputation: 9 (100%) |
QUOTE (Fastbird @ Nov 6, 2008 - 5:38 PM) It's more time consuming and slow, but getting and keeping the weave straight while doing a contour is a PITA. It take some practice, but if you're good with your hands you can do it yourself in no time. After seeing what you have done it has really inspired me to give it a try. And as much as I would love to just ship it off to you and have you do it I'm pretty sure I would appreciate it more if I did it myself, if that makes sense? I think I'm pretty good w my hands.. I hope! I'm going to give this a try, I'm going w the blue and black kevlar. -------------------- |
|
Nov 6, 2008 - 11:00 PM
|
|
|
Enthusiast Joined Jun 25, '05 From Fort Wayne, IN Currently Offline Reputation: 14 (100%) |
QUOTE (bseaman_5 @ Nov 6, 2008 - 7:04 PM) QUOTE (Fastbird @ Nov 6, 2008 - 5:38 PM) It's more time consuming and slow, but getting and keeping the weave straight while doing a contour is a PITA. It take some practice, but if you're good with your hands you can do it yourself in no time. After seeing what you have done it has really inspired me to give it a try. And as much as I would love to just ship it off to you and have you do it I'm pretty sure I would appreciate it more if I did it myself, if that makes sense? I think I'm pretty good w my hands.. I hope! I'm going to give this a try, I'm going w the blue and black kevlar. Some tips: Use the spray 3M adhesive to stick the cloth to whatever you're coating. Spray part, let get tacky, apply cloth. This will make it adhere better. When you do the carbon fiber wet-down with epoxy (your first coat), BE GENTLE when applying, you can move the weave easily. Let it have PLENTY of time to cure before a second coat or sanding too. If you have any troubles let me know and I"ll try to help out. -------------------- |
|
Nov 7, 2008 - 12:06 AM
|
|
|
Enthusiast Joined Jun 25, '05 From Fort Wayne, IN Currently Offline Reputation: 14 (100%) |
Woooo......just wrapped the ignition lock cylinder/dimmer panel (under the cluster above the steering wheel). Not bad, but there was a couple of tricky spots. The contouring around the keyhole is a PITA because the weave tries to wave. I had to waste one panel I cut because I simply was not happy. The second go around I got it pretty good, still a little tiny wave on top, but the bottom side of the keyhole the weave had to get scrunched due to how cloth lays over contours. Fortunately it's in an inconspicuous area. Then there's the underside of the crossover that passes over the steering column. THAT I couldn't figure out, and had to cut wedges out at either radius to allow it to pull around the sides. This is all unable to be seen as installed in the car, but it bugs me because it feels unfinished though I know it's fine. I'll have some pic up tomorrow to show what I'm talking about.
Good news is that I got the edges of the two prior pieces trimmed up and got one of them sanded and ready for a final coat. The other I need to trim out the switch holes and sand still. This is a long time consuming process. But so worth it in the end. -------------------- |
|
Nov 7, 2008 - 8:13 PM
|
|
|
Enthusiast Joined Jun 25, '05 From Fort Wayne, IN Currently Offline Reputation: 14 (100%) |
Today's work (not done yet by far though):
Radio Trim -- This was the initial application. I put some excess in all the holes to allow the fabric to be wrapped and adhered around the beveled edges. Next step is to wrap the outer edges around the sides and tuck the back, then I'm going to wet out the fabric with a light layer of epoxy to really adhere it to the plastic. Once that's dried tomorrow I'll come back and cut the centers of the holes out (the light epoxy coat leaves the fabric just pliable enough to work with) and wrap/glue the inside edges and give a healthy base coat of epoxy. So far this is looking like it's going to come out beautifully, I got the weave about perfect on this one.  Ignition Panel -- Wrapped and ready for epoxy. Not perfect, still working on my contouring technique, but this is very livable.   Upper vent on passenger side top of dash -- This is a test piece. I'm trying to get the fabric to wrap back on the fins. This WILL be a test piece and come off as I accidentally reversed the weave on this one anyway. Whoops. 
This post has been edited by Fastbird: Nov 7, 2008 - 8:14 PM -------------------- |
|
Nov 7, 2008 - 8:39 PM
|
|
|
Enthusiast Joined Apr 15, '07 From san antonio tx. Currently Offline Reputation: 12 (100%) |
Looks sick man! Doing a great job, cant wait to see more.
-------------------- Sorry, no animated sigs allowed.
|
|
Nov 7, 2008 - 8:59 PM
|
|
|
Enthusiast Joined Jun 25, '05 From Fort Wayne, IN Currently Offline Reputation: 14 (100%) |
Sides wrapped on the radio trim. I am EXTREMELY happy with how it's coming along.
 SONOFA!!!!!!!! I just realized that I reversed the weave on this piece too. So much for everything going the same direction because I'm NOT redoing this piece. I knew it was coming along too well that something was wrong. I'm an idiot. This post has been edited by Fastbird: Nov 7, 2008 - 9:03 PM -------------------- |
|
Nov 8, 2008 - 1:17 PM
|
|
|
Enthusiast Joined Jan 10, '06 From Mozambique, Africa Currently Offline Reputation: 8 (100%) |
Keep going, man! these pieces are going to look awesome!
-------------------- "Remember, amateurs built the ark and professionals built the Titanic. But revolutionaries built the Celica!"- Me |
|
Nov 9, 2008 - 12:02 PM
|
|
|
Enthusiast Joined Jun 25, '05 From Fort Wayne, IN Currently Offline Reputation: 14 (100%) |
Door handle Bezels. These were TOUGH. But, I tried a quicker setting epoxy and was able to get them to take quite nicely. These shouldn't be too bad to do again should someone want them done. They're overly dark because the fabric has only been wet out with epoxy, no layers have been built up yet. I still have to cut out the opening and tuck the edges there but that won't be difficult.
 
This post has been edited by Fastbird: Nov 9, 2008 - 12:03 PM -------------------- |
|
Nov 9, 2008 - 12:04 PM
|
|
|
Enthusiast Joined Jan 17, '08 From JB MDL, NJ Currently Offline Reputation: 30 (100%) |
They keeping looking better and better. Hey, which epoxy/hardener do you use, the premix or the stuff you have to do yourself?
|
|
Nov 9, 2008 - 12:42 PM
|
|
|
Enthusiast Joined Jun 25, '05 From Fort Wayne, IN Currently Offline Reputation: 14 (100%) |
QUOTE (Spider77 @ Nov 9, 2008 - 1:04 PM) They keeping looking better and better. Hey, which epoxy/hardener do you use, the premix or the stuff you have to do yourself? Stuff you have to mix yourself. I've been experimenting with some commonly store bought stuff (michael's sells this self leveling top coat epoxy that I was using, took a LONG time to set though, then I've been playing with the 2, 5, and 30 minute packages you see at the auto parts stores) but I'm getting ready to order a gallon or so of resin/hardner from one of the suppliers on line because you can get pumps with the bottles making it easier to measure out. -------------------- |
|
Nov 9, 2008 - 12:47 PM
|
|
|
Enthusiast Joined Jan 17, '08 From JB MDL, NJ Currently Offline Reputation: 30 (100%) |
SO right now your running off store bought stuff huh? Was asking cause I saw they sold a pre mix made for the colored cf and was wondering how the results are up close. Which ones gave you the best look so far?
|
|
Nov 9, 2008 - 3:29 PM
|
|
|
Enthusiast Joined Jun 25, '05 From Fort Wayne, IN Currently Offline Reputation: 14 (100%) |
QUOTE (Spider77 @ Nov 9, 2008 - 12:47 PM) SO right now your running off store bought stuff huh? Was asking cause I saw they sold a pre mix made for the colored cf and was wondering how the results are up close. Which ones gave you the best look so far? The only stuff I've used for a top coat so far is the stuff I got at Michaels, the self leveling stuff. It's awesome for a finish, but takes forever to set up. The 30 minute stuff that you get in the syringe packs is GREAT for initial wet-out and adherence though. The 2 and 5 minute stuff I wouldn't bother with. Too sketchy from what I've found. -------------------- |
|
Nov 9, 2008 - 6:54 PM
|
|
 Enthusiast Joined Mar 8, '08 From Orlando, Florida Currently Offline Reputation: 14 (100%) |
Nice job fastbird, each time I check this thread your work keeps getting better and better! Awesome!
-------------------- ◊◊◊ My F/S Thread! ◊◊◊
QUOTE (14:19:21) Daniel: That was a JDM hole in the side of the box too. There was so much JDM trapped inside that box that they couldn't contain it, so they had to put a JDM hole in the box to let the JDM out. QUOTE Ferdi says (11:29) No, it looks like a hooker put her acid vag on your hood. Acid vag = bigger problem than a few dings. |
|
Nov 10, 2008 - 3:12 AM
|
|
|
Enthusiast Joined Oct 2, '08 From New Zealand Currently Offline Reputation: 0 (0%) |
Fastbird this is Great.
I was dead set against Carbon Fibering the interior But you have almost changes my mind. Looking Forward to seeing the finished Product. Great thread (And Work)  Do you have photos of the Blue/Black ? -------------------- WWSideWinder - 1996 - 3S-FE - Auckland New Zealand
 ~ signature made by jaws4god ~ Have a look at my thread for updates on my progress. "http://www.6gc.net/forums/index.php?showtopic=63338&hl=0" |
|
Nov 10, 2008 - 9:30 AM
|
|
|
Enthusiast Joined Jun 25, '05 From Fort Wayne, IN Currently Offline Reputation: 14 (100%) |
QUOTE (WWSideWinder @ Nov 10, 2008 - 4:12 AM) Do you have photos of the Blue/Black ? Just a hotlinked pic here, as I don't have any fabric of my own here to work with. I won't be getting any unless someone wants something done in blue/black as it doesn't fit any of my schemes.  Another thing I'm thinking of doing: I have a DCW triple and single pod. Thinking of wrapping those as the finishes don't match and I think it would really set them off. This post has been edited by Fastbird: Nov 10, 2008 - 9:31 AM -------------------- |
|
Nov 11, 2008 - 3:28 PM
|
|
|
Enthusiast Joined Jun 25, '05 From Fort Wayne, IN Currently Offline Reputation: 14 (100%) |
Sorry guys (and gals if there are any watching), nothing new to report. I haven't touched anything since Sunday night. I've been sick with some kind of deep chest cold and have all around been feeling like crap, so no motivation to do anything. Hopefully tomorrow night I'll be up to throwing down some epoxy to try to finish some of these pieces up.
-------------------- |
|
Nov 11, 2008 - 3:53 PM
|
|
|
Enthusiast Joined Dec 19, '07 From tx Currently Offline Reputation: 22 (100%) |
Oh we're watching - I think you drummed up alot of interest with this thread but don't worry I and probably half the other people who watch this thread have that damn chest cold too. Your pecs hurt yet from all the clenching when you cough? This cold isn't fcukin around

This post has been edited by DEATH: Nov 11, 2008 - 3:53 PM -------------------- ENGINE: '93 RC 3S-GTE/WRC CT-20b [18-20PSI] PERF: TRD/HKS/ARP/NGK/MSD/ACT/Blitz/STRI/APEX'i/TwosRus/GReddy/Magnaflo/KOYO SUSP: Tein/Bilstein/SusTech/ INT: SS-III SEATS/Toyota Hyper Sports EXT: WRC/TRD/404 QUOTE (lagos @ Aug 25, 2010 - 10:13 AM) Its a safety feature so that people like you don't end up killing themselves or everyone around them. Slow down Paul Walker. 6GC Chat - Go there: [url="http://www.griffgirl.com/forum/chat/index.php[/url] |
|
Nov 13, 2008 - 10:54 AM
|
|
|
Enthusiast Joined Jun 25, '05 From Fort Wayne, IN Currently Offline Reputation: 14 (100%) |
No pics today but I did some work last night. Trimmed the excess off the door handle bezels, put a final coat of epoxy on the ash tray cover, third coat on the passenger door switch panel, and second coat on the upper dash vent. Going to sand and clear the ash tray panel tonight, sand and re-coat the passenger switch panel, and add a third coat to the upper vent tonight. Maybe get some pics up in the process. I've got tomorrow night, all day Saturday, and Sunday nights off so I'll be hopefully finishing up several of the pieces.
If anyone is selling the drivers side dash vent panel or drivers side door switch panel or a shifter panel for a manual car, I need each one of those to complete the interior transformation on our car. TIA. -------------------- |
|
Nov 13, 2008 - 1:20 PM
|
|
|
Enthusiast Joined Nov 29, '04 Currently Offline Reputation: 5 (100%) |
QUOTE (Fastbird @ Nov 13, 2008 - 11:54 AM) No pics today but I did some work last night. Trimmed the excess off the door handle bezels, put a final coat of epoxy on the ash tray cover, third coat on the passenger door switch panel, and second coat on the upper dash vent. Going to sand and clear the ash tray panel tonight, sand and re-coat the passenger switch panel, and add a third coat to the upper vent tonight. Maybe get some pics up in the process. I've got tomorrow night, all day Saturday, and Sunday nights off so I'll be hopefully finishing up several of the pieces. If anyone is selling the drivers side dash vent panel or drivers side door switch panel or a shifter panel for a manual car, I need each one of those to complete the interior transformation on our car. TIA. Fastbird, I've got an extra one of these. Just PM me your address and I'll pop it in the mailbox for ya. It's the one that originally was in my car, which had the woodgrain option, and when I removed it the glue had left a slight discoloration in some spots so I replaced it. Obviously you'll be covering it, so it's yours for free. This post has been edited by gt_driFFter: Nov 13, 2008 - 1:21 PM |
|
Nov 13, 2008 - 2:08 PM
|
|
|
Enthusiast Joined Jun 25, '05 From Fort Wayne, IN Currently Offline Reputation: 14 (100%) |
QUOTE (gt_driFFter @ Nov 13, 2008 - 2:20 PM) QUOTE (Fastbird @ Nov 13, 2008 - 11:54 AM) No pics today but I did some work last night. Trimmed the excess off the door handle bezels, put a final coat of epoxy on the ash tray cover, third coat on the passenger door switch panel, and second coat on the upper dash vent. Going to sand and clear the ash tray panel tonight, sand and re-coat the passenger switch panel, and add a third coat to the upper vent tonight. Maybe get some pics up in the process. I've got tomorrow night, all day Saturday, and Sunday nights off so I'll be hopefully finishing up several of the pieces. If anyone is selling the drivers side dash vent panel or drivers side door switch panel or a shifter panel for a manual car, I need each one of those to complete the interior transformation on our car. TIA. Fastbird, I've got an extra one of these. Just PM me your address and I'll pop it in the mailbox for ya. It's the one that originally was in my car, which had the woodgrain option, and when I removed it the glue had left a slight discoloration in some spots so I replaced it. Obviously you'll be covering it, so it's yours for free. DUDE! You Rock! PM Sent -------------------- |
|
Nov 14, 2008 - 12:36 PM
|
|
|
Enthusiast Joined Jun 25, '05 From Fort Wayne, IN Currently Offline Reputation: 14 (100%) |
New pics coming tonight. Used the blowtorch trick on fresh resin and it made it smooth MUCH better than before and took out every micro-bubble in the thing. I may not even have to sand and clear the ash tray cover when I get home tonight, it's THAT nice looking.
Expect lots of updates this weekend. I'll be wetting out the bigger pieces, covering the upper cluster surround piece, and finishing off the door handle bezels, ash tray cover, and passenger switch panel. -------------------- |
|
Nov 14, 2008 - 12:55 PM
|
|
|
Enthusiast Joined Apr 6, '08 From Overland Park Currently Offline Reputation: 9 (100%) |
QUOTE (Fastbird @ Nov 14, 2008 - 11:36 AM) New pics coming tonight. Used the blowtorch trick on fresh resin and it made it smooth MUCH better than before and took out every micro-bubble in the thing. I may not even have to sand and clear the ash tray cover when I get home tonight, it's THAT nice looking. Expect lots of updates this weekend. I'll be wetting out the bigger pieces, covering the upper cluster surround piece, and finishing off the door handle bezels, ash tray cover, and passenger switch panel. Looking forward to seeing the product!!!! -------------------- |
|
Nov 14, 2008 - 1:00 PM
|
|
 Enthusiast Joined Feb 7, '07 From Portland, Oregon Currently Offline Reputation: 67 (96%) |
I'm looking forward to seeing it too! You're doing a great job, I really admire you taking this project on to learn all this stuff. It's totally cool to watch as you learn by your mistakes on here. I can't wait to see when your setup is all done, I think it'll look really great!
--------------------  |
|
Nov 14, 2008 - 1:24 PM
|
|
|
Enthusiast Joined Apr 15, '07 From san antonio tx. Currently Offline Reputation: 12 (100%) |
x2! Keep us posted with pics!
-------------------- Sorry, no animated sigs allowed.
|
|
Nov 14, 2008 - 3:16 PM
|
|
|
Enthusiast Joined Sep 17, '05 From Newcastle / UK Currently Offline Reputation: 4 (100%) |
Nice work mate, almost giving me the inspiration to try this myself!
-------------------- 1994 JDM GT4 WRC
 |
|
Nov 15, 2008 - 1:46 AM
|
|
|
Enthusiast Joined Jun 25, '05 From Fort Wayne, IN Currently Offline Reputation: 14 (100%) |
Newest progress:
Cut the holes in the passenger switch panel, sanded, added another coat of resin which is still wet in this pic:  Initial wet-out coat on the door handle bezels:  Third coat of resin on the upper passenger dash vent. This one will be tricky to get the vents cut, but I think a dremel with the right bit will work:  The ash tray cover, after 400 grit sanding, Krylon thick gloss clear coat is drying on it. I'm VERY happy if it dries like it looks like it's going to:  I'd have done more tonigght but I got a late start due to business taking precedence (had to build a Corvette Line Lock and mod a set of LT1 fuel rails for -AN fittings). Tomorrow I'm planning on cutting the openings in the door handle bezels and radio trim and getting them finish wrapped, along with the initial wet-out coat of resin on each in the AM. Gotta be up early to mail off the aforementioned products, so why not make use of the day?
This post has been edited by Fastbird: Nov 15, 2008 - 1:49 AM -------------------- |
|
Nov 15, 2008 - 4:29 AM
|
|
 Enthusiast Joined Oct 30, '04 From So Cal Currently Offline Reputation: 13 (100%) |
Great job there!! Although I'd prefer plain black stitches..
-------------------- |

|
Nov 15, 2008 - 11:56 AM
|
|
|
Enthusiast Joined Jun 25, '05 From Fort Wayne, IN Currently Offline Reputation: 14 (100%) |
QUOTE (tomazws @ Nov 15, 2008 - 4:29 AM) Great job there!! Although I'd prefer plain black stitches.. That can be arranged. 
-------------------- |
|
Nov 16, 2008 - 11:11 PM
|
|
|
Enthusiast Joined May 22, '03 From NOVA Currently Offline Reputation: 16 (100%) |
what brand and type of resin + hardener are you using.
|
|
Nov 17, 2008 - 1:12 AM
|
|
|
Enthusiast Joined Jul 9, '08 From California Currently Offline Reputation: 5 (100%) |
You truly are working with something I imagine a lot of us are interested in.
I really want to see how the red CF comes out after it's installed. Right now the pieces look great, but I'm wondering if they'll come out a little dark. Either way, you will probably have another customer once you start ordering in bulk :-D -TC -------------------- Live your life for yourself. Don't hold back for anything or anyone.
 |
|
Nov 17, 2008 - 9:21 AM
|
|
|
Enthusiast Joined Jun 25, '05 From Fort Wayne, IN Currently Offline Reputation: 14 (100%) |
Sorry about the lack of updates guys, my being sick came back. I didn't even crack a computer almost the entire weekend much less do anything else. Gotta work tonight but have tomorrow night off, and Fri-Sat off again.
Playr158......check back on page 1 or 2, I mentioned the resins there. Something I found out though: The clearcoat needs to be cured at a warm temp. Cold temp (i.e. in my garage overnight) curing makes for a soft surface that scratches easily (the ash tray top). It's ok though because I've got to do some sanding down for clearancing there as that's a very tight clearance area there (front and back edges). -------------------- |
|
Nov 17, 2008 - 9:53 AM
|
|
|
Enthusiast Joined May 22, '03 From NOVA Currently Offline Reputation: 16 (100%) |
minutes and "stuff" from Michael's isn't really an answer
my question was more pertaining to brand (IE System3, Fiberglast system 2000) ect. and resin type. |
|
Nov 17, 2008 - 11:19 PM
|
|
|
Enthusiast Joined Jun 25, '05 From Fort Wayne, IN Currently Offline Reputation: 14 (100%) |
QUOTE (playr158 @ Nov 17, 2008 - 10:53 AM) minutes and "stuff" from Michael's isn't really an answer my question was more pertaining to brand (IE System3, Fiberglast system 2000) ect. and resin type. I haven't ordered anything major. it's this clear pour on two stage epoxy from Michaels, and I've been playing with varying little tubes of epoxy available at parts stores and wal-mart to get a feel for things. That's about as detailed as it gets. Most likely I'm going to order a 3:1 setup from either USComposites or Compositeenvisions. -------------------- |
|
Nov 18, 2008 - 9:13 AM
|
|
|
Enthusiast Joined Jun 2, '08 From Fort Worth, Texas Currently Offline Reputation: 9 (100%) |
you should try a whole door card that would look pimp
-------------------- |
|
Nov 18, 2008 - 9:51 AM
|
|
|
Enthusiast Joined May 22, '03 From NOVA Currently Offline Reputation: 16 (100%) |
|
|
Nov 18, 2008 - 12:04 PM
|
|
|
Enthusiast Joined Jun 25, '05 From Fort Wayne, IN Currently Offline Reputation: 14 (100%) |
QUOTE (playr158 @ Nov 18, 2008 - 10:51 AM) That's actually one of the ones I'm looking at. I haven't decided which way I'm going to go for the resin when I start bulk ordering for going into full production for people, but they are very near the top of my list based on customer service reputation. -------------------- |
|
Nov 18, 2008 - 1:46 PM
|
|
|
Enthusiast Joined May 22, '03 From NOVA Currently Offline Reputation: 16 (100%) |
This coupe decklid i made with SYSTEM3 UV protectant resin (its a little soft on the finish IMO)
  this is with the system 2000 resin (forgive the "cloudiness" of the bit, flash at night and cold temps never good) 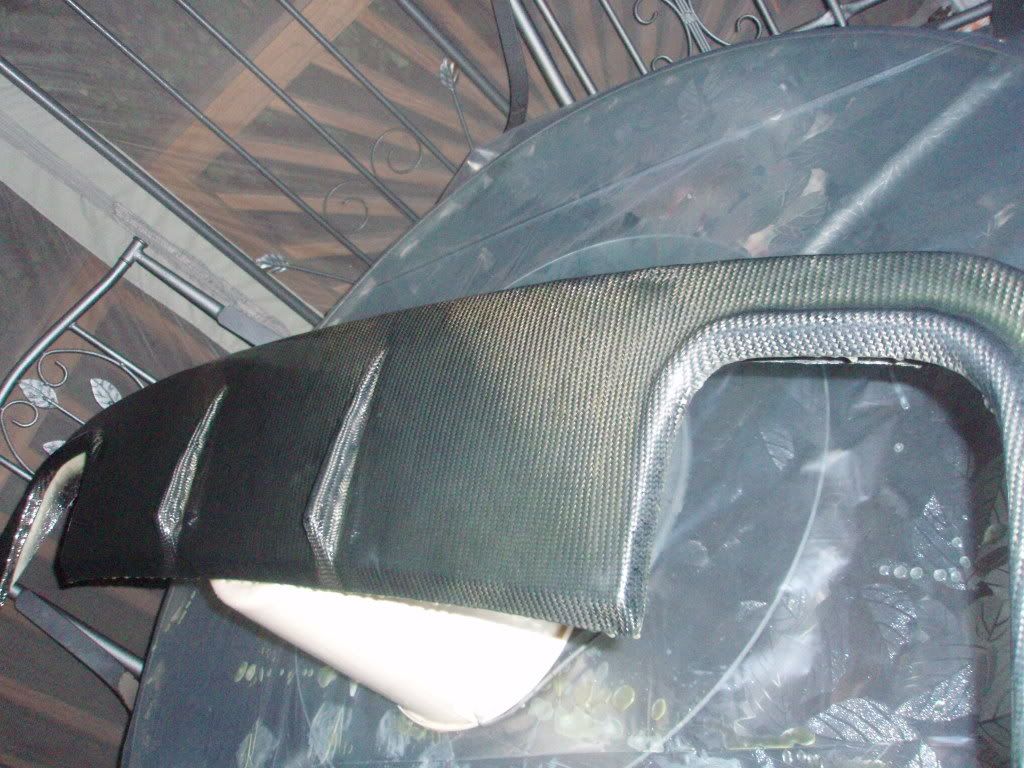 The system 2000 has actually been pretty easy to work with and consistent. I'll have some pics up in a week or so of a boat i'm making for my engineering class in carbon fiber. dont want to pic whore just give you some visuals This post has been edited by playr158: Nov 18, 2008 - 1:48 PM |
|
Nov 19, 2008 - 10:13 PM
|
|
|
Enthusiast Joined Jun 25, '05 From Fort Wayne, IN Currently Offline Reputation: 14 (100%) |
Good looking pieces man!! Nice work indeed.
Update: These three pieces are essentially finished. I'm not overly happy with the smoothness of the finish on them, so I may 2000 grit and re-clear coat and oven cure for a short bit to get it to harden up some. But, for my first pieces, I'm ok with it. My next couple of pieces I'm going to let the self leveling epoxy fully cure and see if I can get away with it as the finished surface only. The vent........pics do it justice. I basically cut out the openings with a razor......came out ok, but a little uneven. I'm going to get inside the fins with a black paint pen and darken them up some since I scuffed the surfaces with the knife while cutting. ANyway, here's pics!    Don't laugh at the screwballed spots on the switch panel, that was my first attempt. I've also wet-out the ignition switch panel and the radio trim panel though I've still got to do some trimming and edge wrapping. More to come. I'm also ordering some CF this week.....another sheet of Red/Black and Silver, and also ordering a sheet of standard carbon fiber and *might* order a sheet of blue/black carbon fiber if someone is interested in having some parts done in that. How's it looking to the public? -------------------- |
|
Nov 20, 2008 - 5:03 PM
|
|
|
Enthusiast Joined Oct 2, '08 From New Zealand Currently Offline Reputation: 0 (0%) |
WOW man that is simply great.
You are doing good work. Always hard to do it 1st time but man are you doing well Keep up the excellent work. Looking forward to seeing the finished Product in you car.
-------------------- WWSideWinder - 1996 - 3S-FE - Auckland New Zealand
~ signature made by jaws4god ~ Have a look at my thread for updates on my progress. "http://www.6gc.net/forums/index.php?showtopic=63338&hl=0" |
|
Nov 20, 2008 - 11:08 PM
|
|
|
Enthusiast Joined Jun 25, '05 From Fort Wayne, IN Currently Offline Reputation: 14 (100%) |
Slowly but surely I'm getting there with the parts for our car. I did'nt have a chance to do any work today, and yesterday was my anniversary so no work there. I've got a guy with a VERY nice 93 Corvette who is having me do his entire interior.........this should be nice when done as his car is magazine quality and he's hoping this puts it over the top.
-------------------- |
|
Nov 23, 2008 - 8:13 PM
|
|
 Enthusiast Joined May 6, '05 From PA Currently Offline Reputation: 4 (100%) |
QUOTE (Fastbird @ Nov 20, 2008 - 11:08 PM) Slowly but surely I'm getting there with the parts for our car. I did'nt have a chance to do any work today, and yesterday was my anniversary so no work there. I've got a guy with a VERY nice 93 Corvette who is having me do his entire interior.........this should be nice when done as his car is magazine quality and he's hoping this puts it over the top. Are you going to post pics of the CF vette interior? Thats something I'd like to see... -------------------- |
|
Nov 24, 2008 - 9:41 AM
|
|
|
Enthusiast Joined Jun 25, '05 From Fort Wayne, IN Currently Offline Reputation: 14 (100%) |
QUOTE (Cutrara @ Nov 23, 2008 - 9:13 PM) QUOTE (Fastbird @ Nov 20, 2008 - 11:08 PM) Slowly but surely I'm getting there with the parts for our car. I did'nt have a chance to do any work today, and yesterday was my anniversary so no work there. I've got a guy with a VERY nice 93 Corvette who is having me do his entire interior.........this should be nice when done as his car is magazine quality and he's hoping this puts it over the top. Are you going to post pics of the CF vette interior? Thats something I'd like to see... Yeah, once I get some pieces done I'll post them up. I'm waiting on a BIG shipment of stuff -- four different styled rolls of cloth this time: Red/Black (for more of my interior, another silver because it's really popular, normal black CF by request of the Vette guys, and a graphite CF that I want to try because it looks sick. One thing: Those pieces I've "finished".......I'm just not happy with the clearcoat finish. It orange peeled. Going to try a 2000 grit wet-sand then mild abrasive rubbing compound on it to smooth, but may rough sand and do an epoxy top coat under a heat lamp for quick cure and see how that turns out. I had an extremely busy weekend and wasn't able to do much. I got the keyhole and dimmer switch holes cut out of the already wrapped ignition panel, and got the clock hole cut into the radio trim panel. That's about it. This post has been edited by Fastbird: Nov 24, 2008 - 9:41 AM -------------------- |
|
Nov 25, 2008 - 12:05 AM
|
|
|
Enthusiast Joined Jun 25, '05 From Fort Wayne, IN Currently Offline Reputation: 14 (100%) |
HUGE thanks to gt_driFFter. He sent me a drivers side dash vent gratis! Many many thanks man!!! I only need a drivers door switch panel and Manual shifter plate to complete the interior now!
-------------------- |
|
Dec 10, 2008 - 8:48 AM
|
|
|
Enthusiast Joined Jun 25, '05 From Fort Wayne, IN Currently Offline Reputation: 14 (100%) |
Sorry about the lack of updates. Unfortunately I've gotten my personal life turned upside down the past few weeks with MANY developments. Latest work I've done has been for a customer. He sent me a pair of C5 Corvette Door Handles, the actual handle itself, that he wanted done in Silver. As far as I know this has NEVER been done on a Vette before, so of course I said Sure! I'm pretty happy with how they're coming out.
     As for the Celica......I really want to do more work, and I have done a little. I did a BIG screw up on the radio trim piece, I didn't leave enough extra fabric to pull around the edges in all the holes, so I ended up having to trim at the edges then going over the edges with a black paint pen. Looks ok in the non-coated form that it is, but once I get the epoxy layered and smoothed it should look a lot better. I'll try to get some pics up tonight to show you guys. I did the the shifter plate recently, so the only other piece I need for our car is the drivers door switch panel. -------------------- |
|
Dec 10, 2008 - 9:30 AM
|
|
|
Enthusiast Joined May 22, '03 From NOVA Currently Offline Reputation: 16 (100%) |
someone got skillzzz
great work! |
|
Dec 10, 2008 - 4:23 PM
|
|
|
Enthusiast Joined Jun 21, '08 From Naples, FL Currently Offline Reputation: 0 (0%) |
Those door handles look great.
|
|
Dec 10, 2008 - 6:50 PM
|
|
|
Moderator Joined Oct 1, '02 From fall river, ma Currently Offline Reputation: 13 (100%) |
looks great man!!
-------------------- Former Team 5SFTE pro member ;)
 13.6@108MPH, 5SFTE Powered |
|
Jan 29, 2009 - 2:54 PM
|
|
|
Enthusiast Joined Jul 26, '08 From Fort Bragg, NC Currently Offline Reputation: 2 (100%) |
man did this thread die or what ? Everything going ok man?
--------------------  |
|
Jan 29, 2009 - 3:26 PM
|
|
|
Enthusiast Joined Jun 25, '05 From Fort Wayne, IN Currently Offline Reputation: 14 (100%) |
QUOTE (foxcraze @ Jan 29, 2009 - 3:54 PM) man did this thread die or what ? Everything going ok man? My interest has NOT waned. My free time to do this has though. Slow_Yota sent me a couple of pieces I'm going to be doing, but with going on vacation over Christmas, then a death in the family, and when I got home I got absolutely pummeled by my two jobs, and a short timeline basement refinishing, I've had zero time. Good news is that the basement is 95% complete, so after the superbowl has passed this weekend, I should be getting back into this full force. -------------------- |
|
Jan 31, 2009 - 11:58 AM
|
|
|
Enthusiast Joined May 22, '03 From NOVA Currently Offline Reputation: 16 (100%) |
keep going dude, push through and keep up your great work.
sorry to hear about your family 
|
|
Feb 3, 2009 - 6:16 PM
|
|
|
Enthusiast Joined Dec 18, '08 From Oxford, England Currently Offline Reputation: 0 (0%) |
Dude you've defs got the right idea!! Good show!! I've just ordered a couple of yards of the Texalium cloth (silver carbon fiber) with the intention of doing my interior. It's tricky stuff to work with but you are doing a sterling job!!
I also has this idea that i might do some of the buttons on the climate control as well. And when they're covered use ink transfer paper to transfer the diagrams on the buttons onto the resin and then cover with clearcoat so that i still know what the buttons do and it looks properly done. Do you think that's do-able? I'll let you know when the stuff arrives (from america to UK) and i've had a play. Quick Q: The cloth i've ordered is 1mm thick and with all the resin and clearcoat the final finish will be a few mil. Have you had problems with getting the parts back in or is there enough tolerance? |
|
Feb 3, 2009 - 9:21 PM
|
|
|
Enthusiast Joined Jun 25, '05 From Fort Wayne, IN Currently Offline Reputation: 14 (100%) |
I think the buttons will pose a problem. The resin DEFINITELY layers up though, and yes I've run into some fitment issues due to that. I do know that pre-impregnating the cloth and vacuum bagging the item drastically cuts down on the overall thickness and still leaves a glass smooth finish. Getting ready to start experimenting with that.
-------------------- |
|
Feb 4, 2009 - 7:32 AM
|
|
|
Enthusiast Joined May 22, '03 From NOVA Currently Offline Reputation: 16 (100%) |
^vacuum bagging is a great method and preferred. (infusion is right there as well)
but setups are more expensive I wish i had the finances to do the infusion right now |
|
Feb 4, 2009 - 2:09 PM
|
|
|
Enthusiast Joined Dec 18, '08 From Oxford, England Currently Offline Reputation: 0 (0%) |
Yeah i was going to give the vacuum bagging a go. Apparantly such a method can help keep the weave straight. See here: http://www.webbikeworld.com/t2/carbon-fibe...torcycle-parts/
according to this guy a primative sort of vacuum bagging can be achieved with a sandwich bag and a hoover... |
|
Feb 4, 2009 - 2:13 PM
|
|
|
Enthusiast Joined May 22, '03 From NOVA Currently Offline Reputation: 16 (100%) |
yea thats not a quality method...not to mention you'll pull resin into your vacuum and fry it.
http://www.compositeforum.werksberg.com/ is a great resource This post has been edited by playr158: Feb 4, 2009 - 2:14 PM |
|
Feb 4, 2009 - 3:00 PM
|
|
|
Enthusiast Joined Jun 25, '05 From Fort Wayne, IN Currently Offline Reputation: 14 (100%) |
QUOTE (playr158 @ Feb 4, 2009 - 3:13 PM) yea thats not a quality method...not to mention you'll pull resin into your vacuum and fry it. Exactly. I haven't seen those forums yet but looks like a great resource to try to get a budget vacuum bag setup built to play with. -------------------- |
|
Feb 4, 2009 - 5:07 PM
|
|
|
Enthusiast Joined Apr 18, '06 From Calgary, Canada Currently Offline Reputation: 37 (100%) |
QUOTE (Fastbird @ Feb 4, 2009 - 1:00 PM) QUOTE (playr158 @ Feb 4, 2009 - 3:13 PM) yea thats not a quality method...not to mention you'll pull resin into your vacuum and fry it. Exactly. I haven't seen those forums yet but looks like a great resource to try to get a budget vacuum bag setup built to play with. So hurry up and start playing man, I got a shopping list of stuff for you! LOL -------------------- |
|
Feb 5, 2009 - 3:01 PM
|
|
|
Enthusiast Joined Jun 25, '05 From Fort Wayne, IN Currently Offline Reputation: 14 (100%) |
Well, after some research, I"m going to donate my old shop vac to the cause and give the vacuum bagging a shot without a catch resevoir. If I kill it, I kill it, as I needed a new one anyway. Going ot probably order some of the bagging fabrics next week and hopefully start bagging a couple of things shortly thereafter. Going to start small and simple, and move up slowly to see how things react.
-------------------- |
|
Feb 10, 2009 - 12:48 PM
|
|
|
Enthusiast Joined Jun 25, '05 From Fort Wayne, IN Currently Offline Reputation: 14 (100%) |
Just ordered my first vacuum bagging equipment. Expect to see some kind of result from this stuff VERY soon.....like shortly after it comes in.
-------------------- |
|
Feb 10, 2009 - 1:10 PM
|
|
|
Enthusiast Joined May 22, '03 From NOVA Currently Offline Reputation: 16 (100%) |
very nice! maybe i'll use the old old vaccum i have in my garage for giggles.
|
|
Feb 12, 2009 - 10:51 PM
|
|
|
Enthusiast Joined Jun 25, '05 From Fort Wayne, IN Currently Offline Reputation: 14 (100%) |
Ok, so I just tried a part. The vacuum bagging is going to work MARVELOUSLY, but.....
I need more stuff. Specifically, a couple of vacuum bag ports and some shutoff valves. I had ZERO luck trying to seal the bag after getting the vacuum on it. Had to scrap the process for the night, but I was trying to work a left side vent panel and it was forming beautifully with just my shop vac. With a real vacuum pump (or generator as I have a small compressor I can keep in the basement and dedicate to this) I should be able to really put this stuff to use. Ordering the check valve, bag ports, and some hose and a bleeder valve tomorrow so I may be working on this again next week. DEFINITELY more to come! *Edit* Parts are ordered. Just ordered one check vavle for now. If this first couple of test pieces come out ok, I'll get more check valves and go into full swing production. This post has been edited by Fastbird: Feb 12, 2009 - 11:19 PM -------------------- |
|
Feb 13, 2009 - 7:27 AM
|
|
|
Enthusiast Joined May 22, '03 From NOVA Currently Offline Reputation: 16 (100%) |
sweeet take pics of how you set things up!
|
|
Feb 13, 2009 - 9:20 AM
|
|
|
Enthusiast Joined Jun 25, '05 From Fort Wayne, IN Currently Offline Reputation: 14 (100%) |
QUOTE (playr158 @ Feb 13, 2009 - 8:27 AM) sweeet take pics of how you set things up! Don't really have a "setup" per se. I went ghetto fabulous iwth last nights endeavour. Duct tape to seal the bag (Using Fibreglast vacuum tube, 24"wide) wet out the CF cloth, laid the release film, bleeder/breather, set it in the bag, shoved shop vac tube into bag wit bleeder/breather on both sides of that, sealed end, and flipped on. The problem I was having was that I couldn't remove the shop vac tube and keep enough vacuum to comfortably seal the bag. So....I got the following: 1/2" Tubing:  Plastic Barb Fittings x 2 (didn't go metal because I can get them cheaper locally and am just testing the waters still):  Two way shutoff valve (I got the brass one because this is the bread and butter, if this doesn't work the bag doesn't stay sealed):  And two of these vacuum connectors:  If everything works out I"m going to grab a couple of extra shutoff valves so I can work on multiple pieces at once. I'm going to try a couple of pieces using my shop vac, and dependent on the results there I'll either stick with that or move to a air compressor run vacuum generator (since a good vacuum pump is dang expensive). More to come! One BIG positive side to this??? I'll be able to invest MUCH less time and resources into doing these parts, equating to a reduced end cost if someones wants something done. -------------------- |
|
Feb 13, 2009 - 9:39 AM
|
|
|
Moderator Joined Oct 1, '02 From fall river, ma Currently Offline Reputation: 13 (100%) |
awesome man.
cant wait to see the new results! -------------------- Former Team 5SFTE pro member ;)
13.6@108MPH, 5SFTE Powered |
|
Feb 20, 2009 - 11:35 AM
|
|
|
Enthusiast Joined Jun 25, '05 From Fort Wayne, IN Currently Offline Reputation: 14 (100%) |
Slowly getting the vacuum bagging stuff working. Actually kept enough of a seal last night to let a part sit under vacuum all night. It STILL had vac on it this morning, but it was a bit leaky.
Going to look at the part when I get home this evening. At this point, I've relegated to the fact that my shop vac will do the job, but is too freaking noisy to leave continually running (and it's probably not rated for that) for 8 hours while the cure happens. So.......rather than spend $400 on a dedicated (and noisy, 55dB) vacuum pump, I'm looking for an old but good refridgerator compressor as they work great as vacuum pumps and are quiet to boot! -------------------- |
|
Mar 4, 2009 - 11:54 PM
|
|
|
Enthusiast Joined Jun 25, '05 From Fort Wayne, IN Currently Offline Reputation: 14 (100%) |
Here's an update. I'm using a refrigerator compressor as a vacuum pump. Cheap, QUIET, and pulls insane vacuum (think 26-30 inches of mercury). As you can see from the pics, enough to jack up the left A/C vent I was testing on.
Hopefully it'll come out flat tomorrow morning when I pull it out of the bag. What you're seeing in the pics is NOT how you should do it. I simply wet the fabric, put on the item, and put in the bag. I'm trying something to see if I can't get a smooth finish to start with. The pics at the very bottom is how you should do it, with a release film and breather cloth. You can see how the breather cloth soaks up the excess resin, but this left a textured finish with the fiber weave which I didn't want. Once I get a vacuum regulator I should be able to control the vacuum without tearing up the parts (this was just a test piece) and if it's ruined, lesson learned. Anyway, on to the pics! THe bagged vent:  The WARPED vent:  The pump.  How it should be done. These didn't have enough vacuum pulled with the shop vac, so that may have played into the textured finish. Whoopsie.   -------------------- |
|
Mar 5, 2009 - 8:35 AM
|
|
|
Enthusiast Joined Jun 25, '05 From Fort Wayne, IN Currently Offline Reputation: 14 (100%) |
And as of this morning, the fridge pump was still purring away, pulling crazy vacuum. So much so that it was pulling the bagging material out from under the tacky tape.
 Yup.....need a regulator/bleeder valve. Yup.....need a regulator/bleeder valve. But, provided the warping in the part isn't permanent, I should have an easily finishable part after some trimming, and light finishing work. Something I"m going to try is putting the part on either a stiff foam block so the mounting tabs dig into it without bending, or using riser blocks on parts that have big enough sections to sit on. -------------------- |
|
Mar 5, 2009 - 8:41 AM
|
|
|
Enthusiast Joined May 22, '03 From NOVA Currently Offline Reputation: 16 (100%) |
nice work!
|
|
Mar 5, 2009 - 9:31 AM
|
|
|
Enthusiast Joined Apr 18, '06 From Calgary, Canada Currently Offline Reputation: 37 (100%) |
Dude - awesome!
-------------------- |
|
Mar 5, 2009 - 9:38 AM
|
|
|
Enthusiast Joined Jun 25, '05 From Fort Wayne, IN Currently Offline Reputation: 14 (100%) |
I'm actually VERY excited about how well the fridge pump worked. For $80 it was a tremendous investment. It's so quiet that I couldn't hear it in the back of my basement while my wife and I were 30 feet away around the corner watching TV.
-------------------- |
|
Mar 5, 2009 - 9:45 AM
|
|
|
Enthusiast Joined Apr 18, '06 From Calgary, Canada Currently Offline Reputation: 37 (100%) |
QUOTE (Fastbird @ Mar 5, 2009 - 7:38 AM) I'm actually VERY excited about how well the fridge pump worked. For $80 it was a tremendous investment. It's so quiet that I couldn't hear it in the back of my basement while my wife and I were 30 feet away around the corner watching TV. So with your current setup; how big of an object can you "cover" with CFsheets? -------------------- |
|
Mar 5, 2009 - 10:04 AM
|
|
|
Enthusiast Joined Jun 25, '05 From Fort Wayne, IN Currently Offline Reputation: 14 (100%) |
QUOTE (KAOS @ Mar 5, 2009 - 10:45 AM) QUOTE (Fastbird @ Mar 5, 2009 - 7:38 AM) I'm actually VERY excited about how well the fridge pump worked. For $80 it was a tremendous investment. It's so quiet that I couldn't hear it in the back of my basement while my wife and I were 30 feet away around the corner watching TV. So with your current setup; how big of an object can you "cover" with CFsheets? Hard to say. How big are you thinking? -------------------- |
|
Mar 5, 2009 - 10:33 AM
|
|
|
Enthusiast Joined Apr 18, '06 From Calgary, Canada Currently Offline Reputation: 37 (100%) |
QUOTE (Fastbird @ Mar 5, 2009 - 8:04 AM) QUOTE (KAOS @ Mar 5, 2009 - 10:45 AM) QUOTE (Fastbird @ Mar 5, 2009 - 7:38 AM) I'm actually VERY excited about how well the fridge pump worked. For $80 it was a tremendous investment. It's so quiet that I couldn't hear it in the back of my basement while my wife and I were 30 feet away around the corner watching TV. So with your current setup; how big of an object can you "cover" with CFsheets? Hard to say. How big are you thinking? I was thinking a few random peices of exterior panels... like the rear license plate panel, and the triangles from the rear view mirrors (the peices in between the door and mirror). What do you think? -------------------- |
|
Mar 5, 2009 - 11:19 AM
|
|
|
Enthusiast Joined Jun 25, '05 From Fort Wayne, IN Currently Offline Reputation: 14 (100%) |
QUOTE (KAOS @ Mar 5, 2009 - 10:33 AM) QUOTE (Fastbird @ Mar 5, 2009 - 8:04 AM) QUOTE (KAOS @ Mar 5, 2009 - 10:45 AM) QUOTE (Fastbird @ Mar 5, 2009 - 7:38 AM) I'm actually VERY excited about how well the fridge pump worked. For $80 it was a tremendous investment. It's so quiet that I couldn't hear it in the back of my basement while my wife and I were 30 feet away around the corner watching TV. So with your current setup; how big of an object can you "cover" with CFsheets? Hard to say. How big are you thinking? I was thinking a few random peices of exterior panels... like the rear license plate panel, and the triangles from the rear view mirrors (the peices in between the door and mirror). What do you think? I think both of those would be no problemo. That license plate panel isn't very big, and the mirror pieces would probably be pretty easy. -------------------- |
|
Mar 5, 2009 - 12:24 PM
|
|
 Enthusiast Joined Aug 17, '03 From Bloomington, Indiana Currently Offline Reputation: 62 (98%) |
can u wrap my car?
--------------------  |
|
Mar 5, 2009 - 12:28 PM
|
|
|
Enthusiast Joined Jun 25, '05 From Fort Wayne, IN Currently Offline Reputation: 14 (100%) |
QUOTE (dustin15brown @ Mar 5, 2009 - 12:24 PM) can u wrap my car? Depends on what you want it wrapped in. CF is off the list. Duct tape, saran wrap, and toilet paper are all in though.
-------------------- |
|
Mar 5, 2009 - 2:39 PM
|
|
|
Enthusiast Joined Apr 6, '08 From Overland Park Currently Offline Reputation: 9 (100%) |
Sean this is awesome! I'm really looking forward to you being able to do this for us all! Definitely keep at least me updated, let me know when you're ready! I'm down for this!
-------------------- |
|
Mar 5, 2009 - 2:55 PM
|
|
|
Enthusiast Joined Jul 26, '08 From Fort Bragg, NC Currently Offline Reputation: 2 (100%) |
I must be a retard because i still dont understand how this works lol
-------------------- |
|
1 User(s) are reading this topic (1 Guests and 0 Anonymous Users)
0 Members:
| Lo-Fi Version | Time is now: April 23rd, 2025 - 7:46 PM |