  |

 Dec 16, 2012 - 1:28 PM Dec 16, 2012 - 1:28 PM
|
 
|
 Enthusiast  Joined Aug 25, '08 From England Currently Offline Reputation: 1 (100%) |
I was certain I started a build thread on here, but for the life of me I can not find it so forgive me if I start again and its old news.
About a year and a half ago my current GT4 failed its yearly inspection (MOT) with rusty sills, they were fixed and it subsequently passed but it set alarm bells ringing in my head that the poor things days were numbered. I decided that I would buy a shell and swap everything onto it. so I hunted for a reasonable shell to start work on. While I was looking, I had to extend my garage. I only had a single car garage so not enough space to work or store stuff. So I decided to extend my garage backwards a bit Work started. 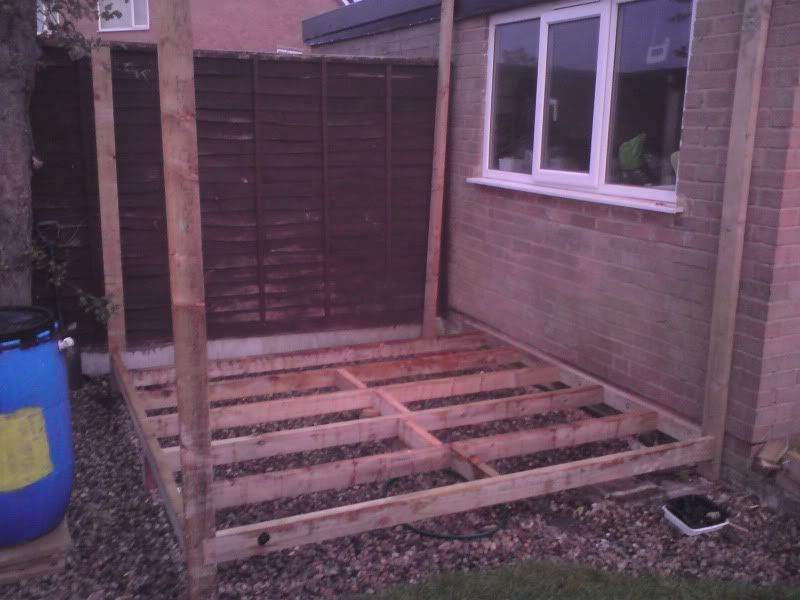 and after a few weeks, finished ;0 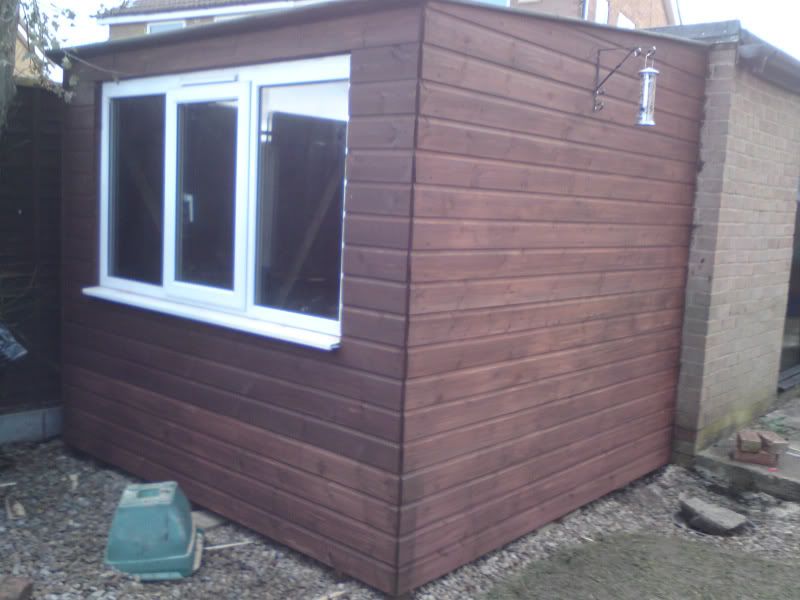 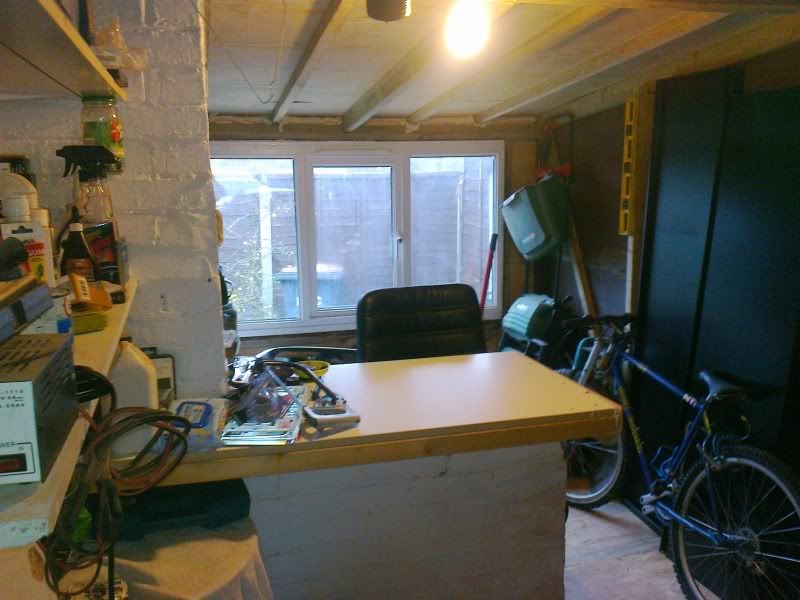 About the same time a shell turned up, well it was sold as a shell, but it was more or less a complete car minus the engine and gearbox. 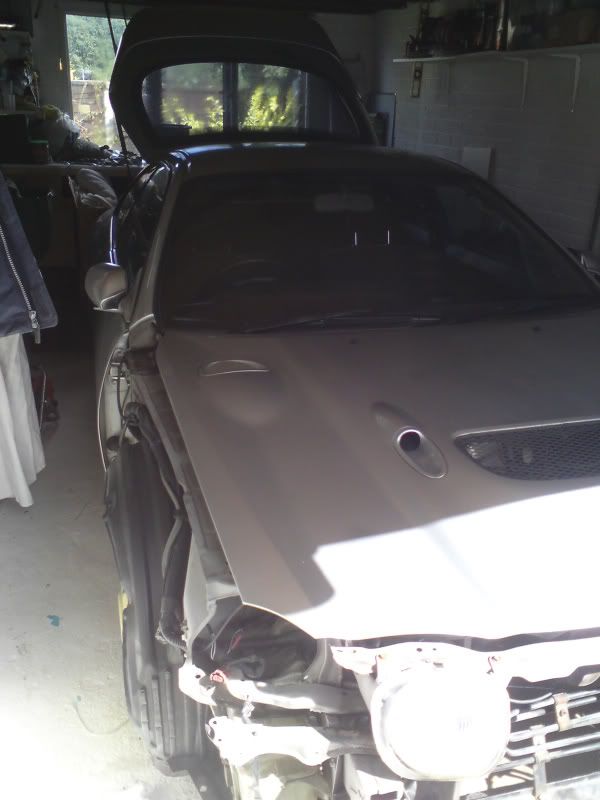 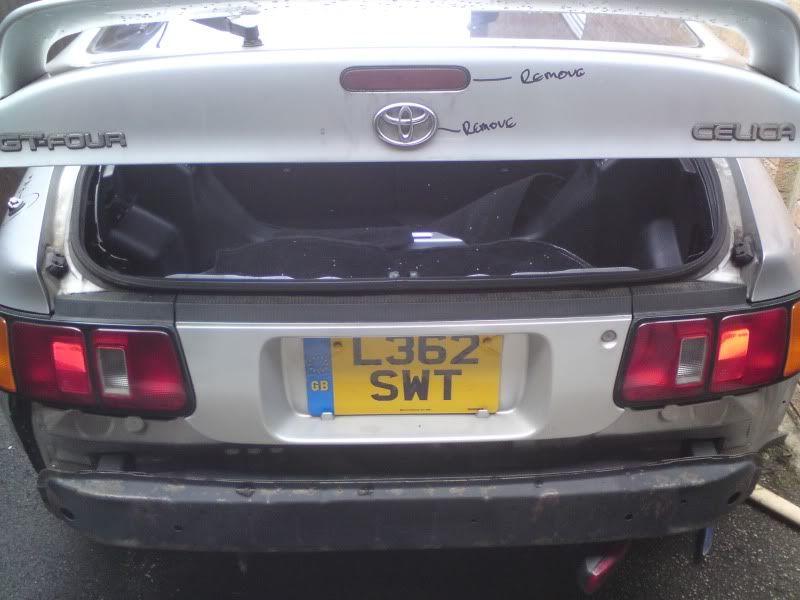 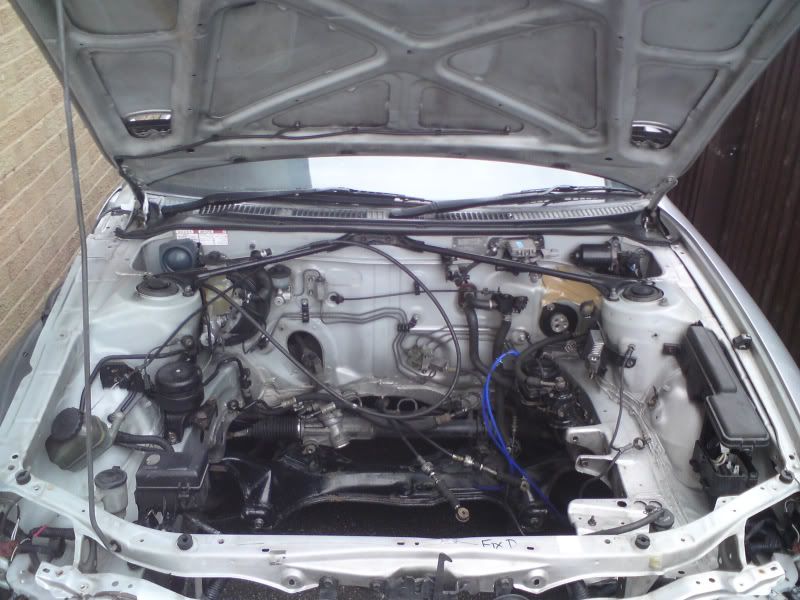 It was in good condition with no rust, even the interior was in pretty much spot on condition, not that I need much of it  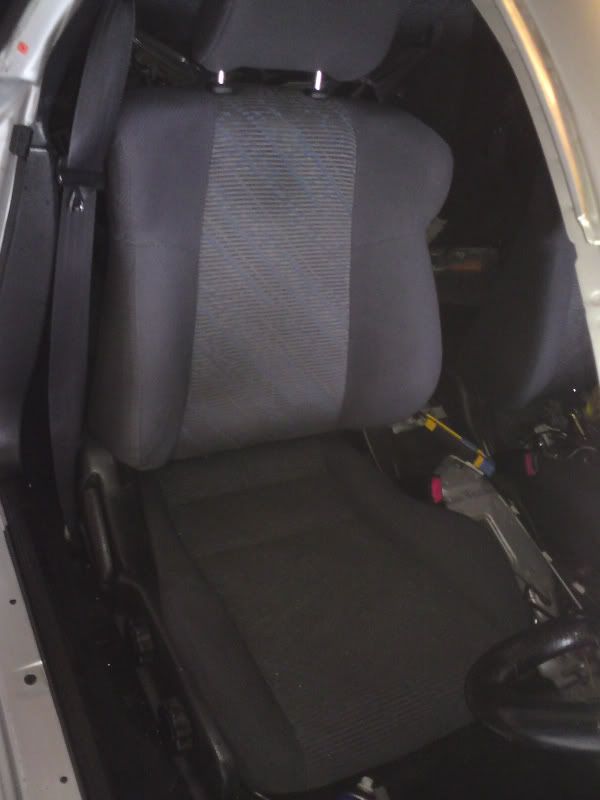 I set to wrok more or less straight away 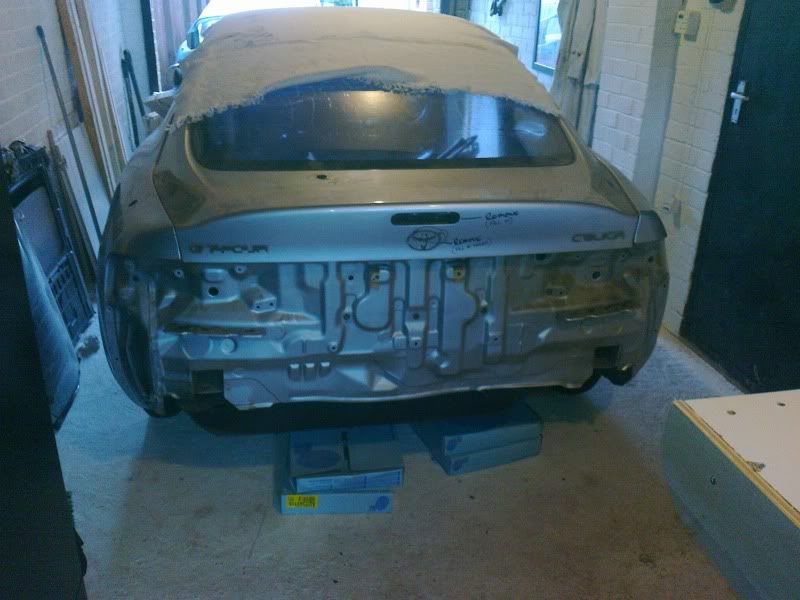 First job was to strip everything off the car 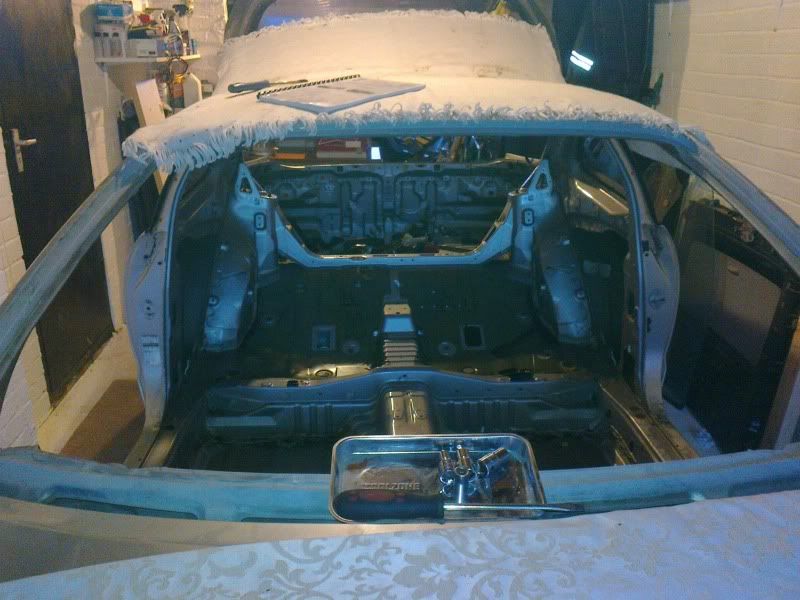 everything went, all the looms, glass, suspension the works 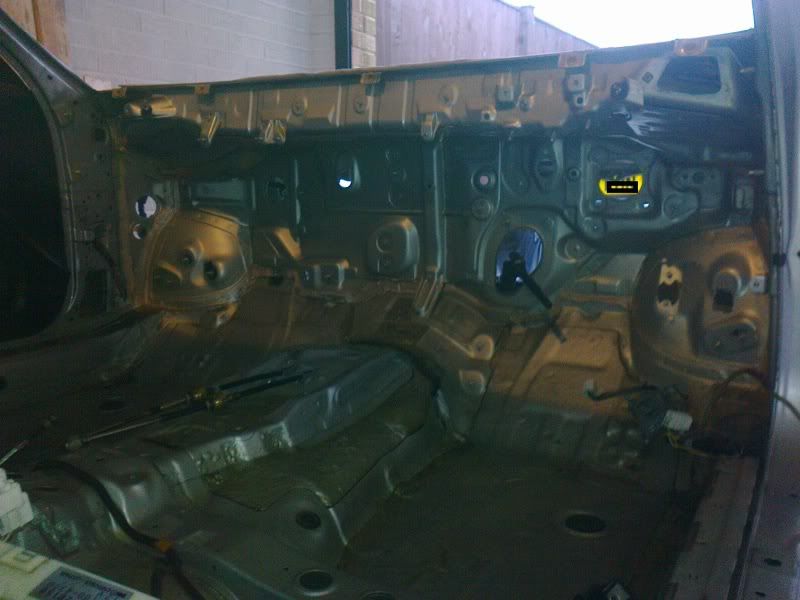 Next job was to remove the sound deadening material 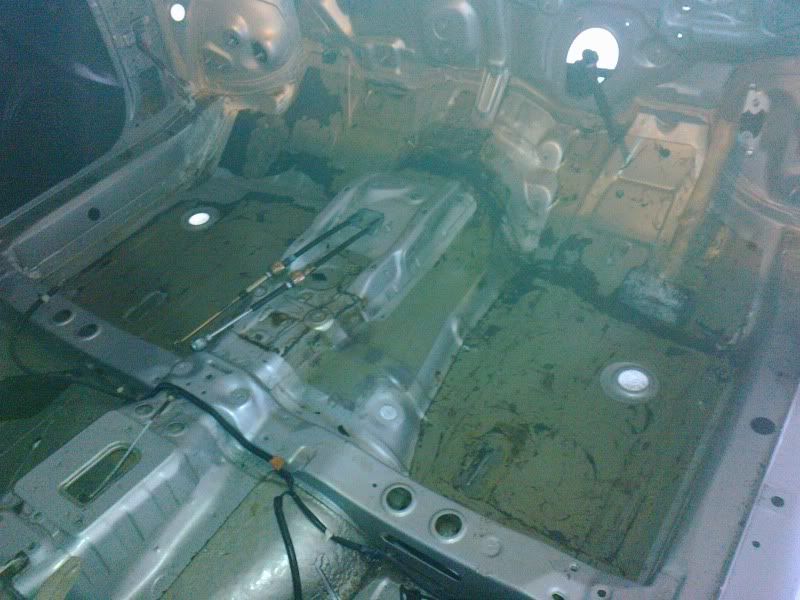 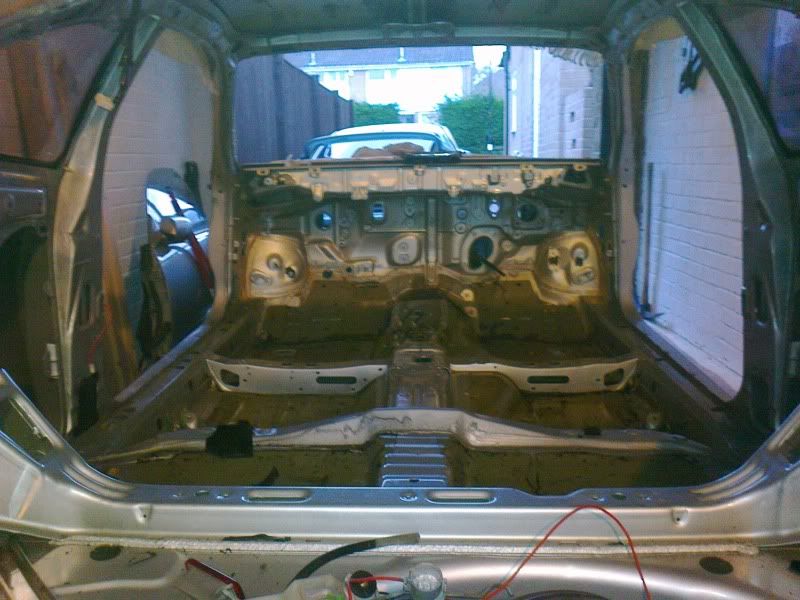 it then went outside for a thorough jet wash go get rid of all the years of crap 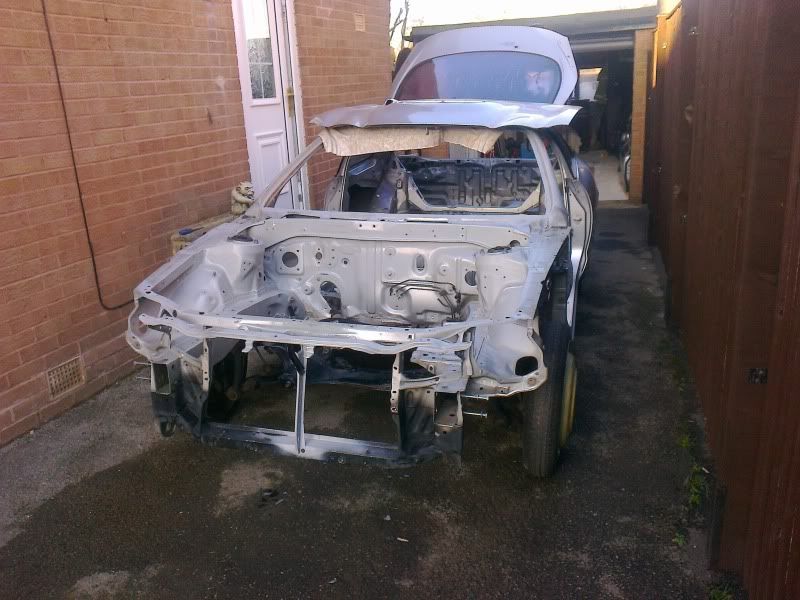 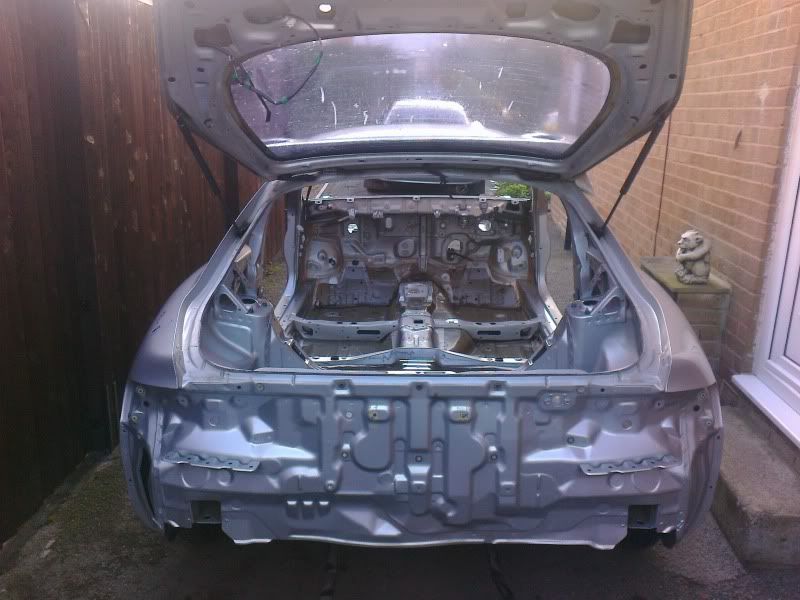 As I was moving the battery to the inside I could remove the battery tray 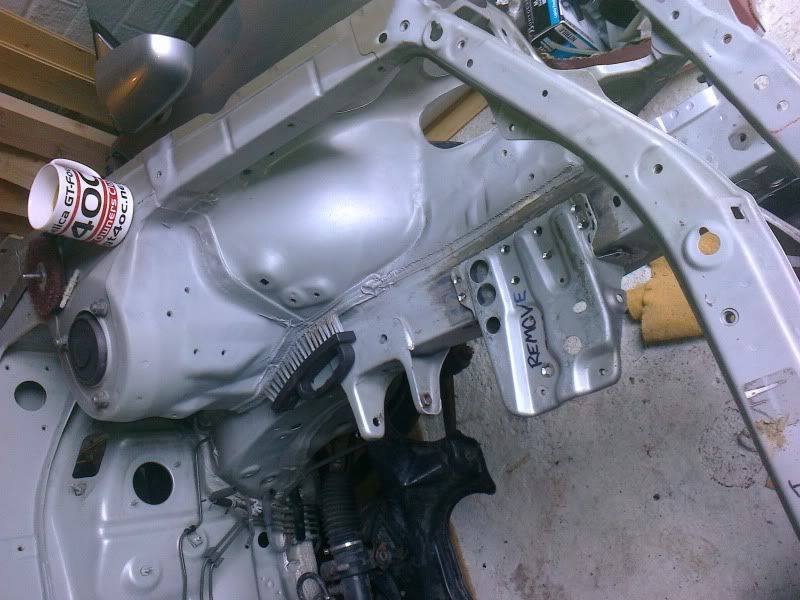 which I did 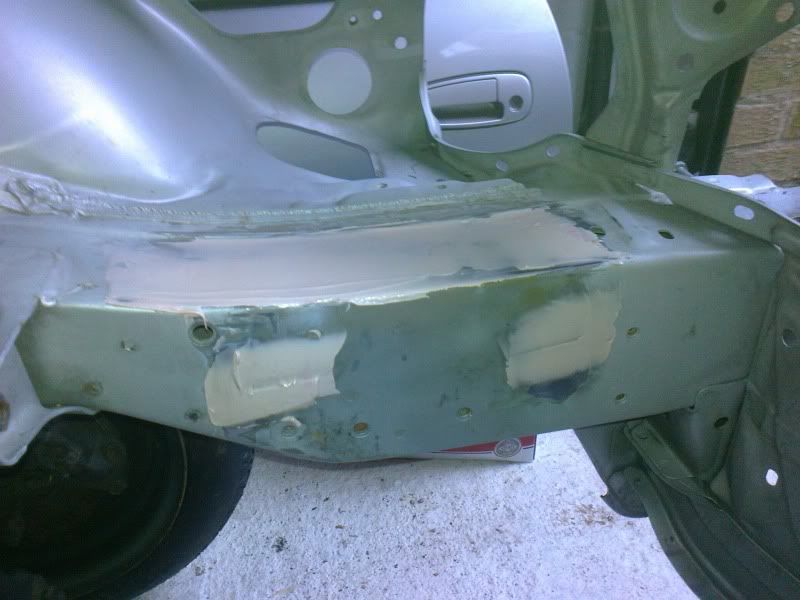 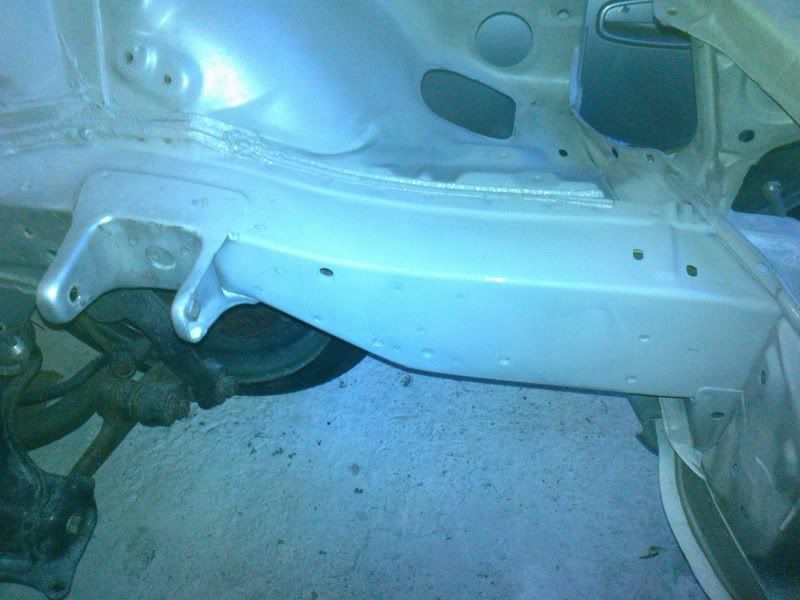 Next up I needed to get to the bottom of the car....this was going to require some ingenuity. -------------------- |

|
Dec 16, 2012 - 1:38 PM
|
|
|
Enthusiast Joined Aug 25, '08 From England Currently Offline Reputation: 1 (100%) |
I was going to have to make my own rotisserie.
So ack off to the wood yard, a few lengths of 2x4 and I made this 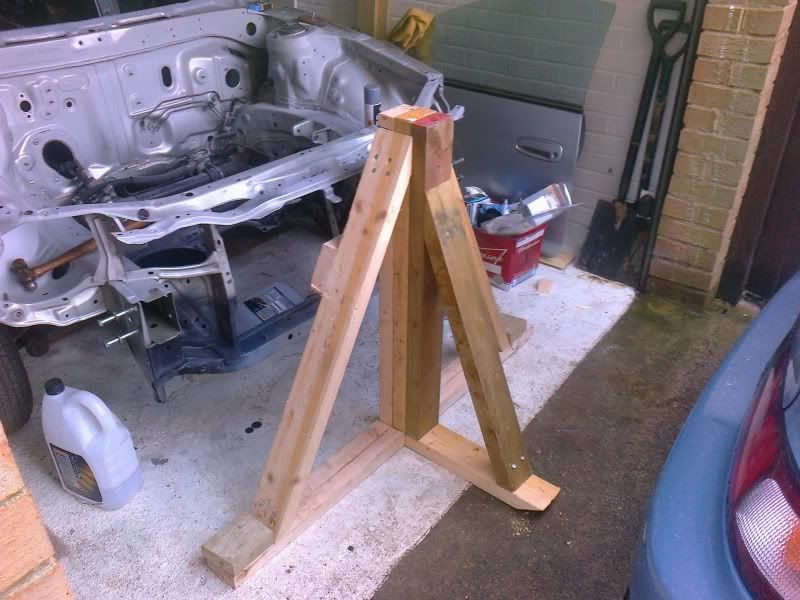 It was about now I realised two things. One I was going to have to learn to weld and two..my plans for this car were changing quite dramatically......a fancied making a cross between a rally car and a GT car...no idea how I was going to achieve this, but the seeds had been set in my mind and for once they stayed there. So I rushed out and purchased a MIG welder....learning to weld was pretty easy to be honest, by no means as neat as the pros but not bad for a complete novice. So I made a rotisserie 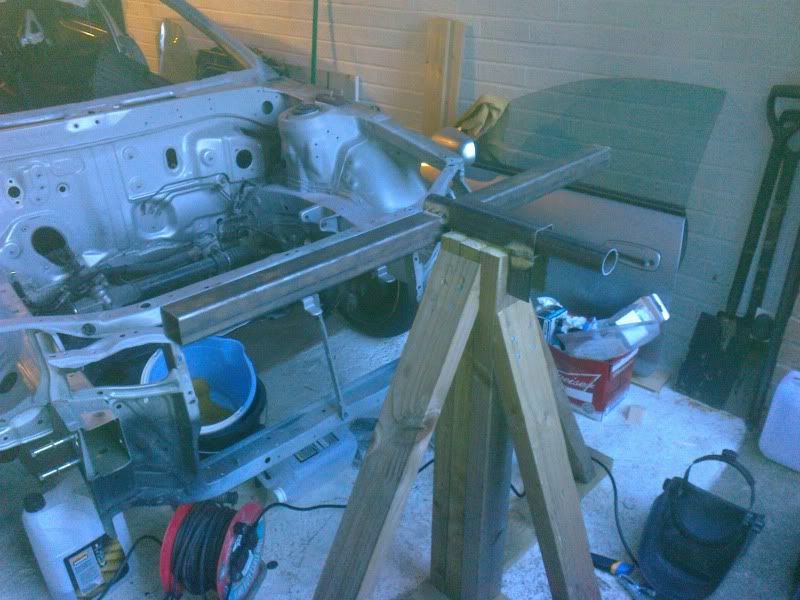 It fitted like a glove and worked perfectly 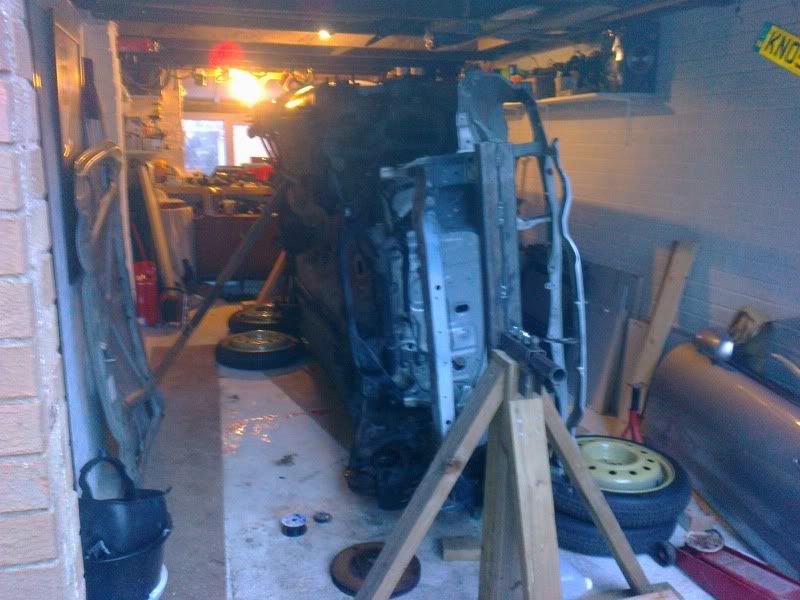 A quick look revealed the sills were pretty mangled 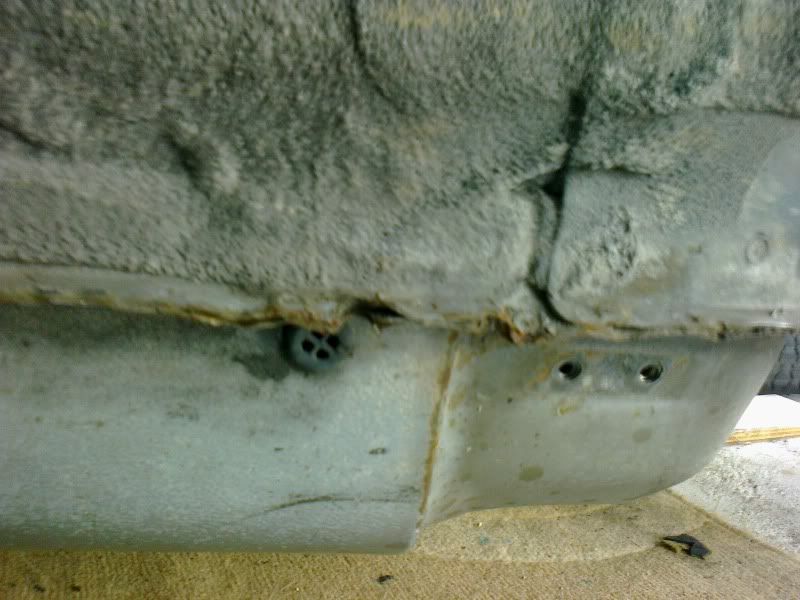 so I had to fix them up as best I could 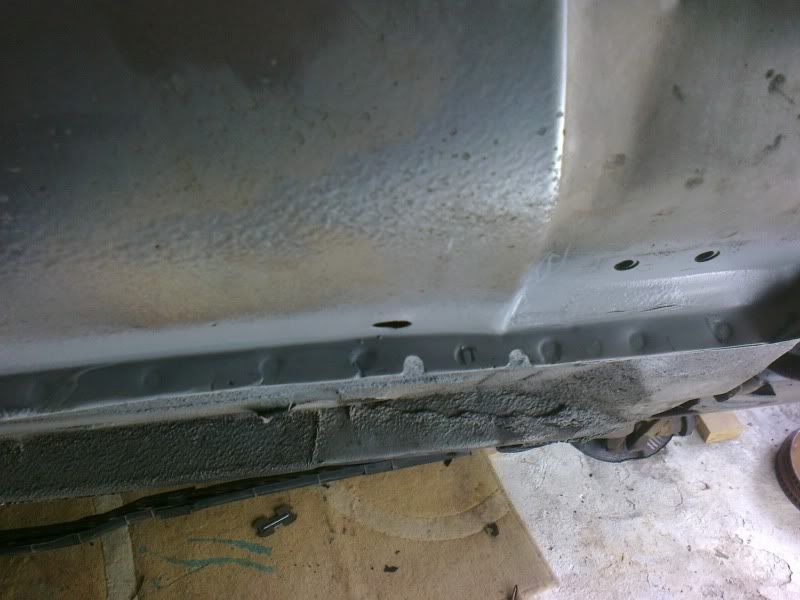 At the same time I started blasting and painting with good old POR15 the subframes and suspension parts 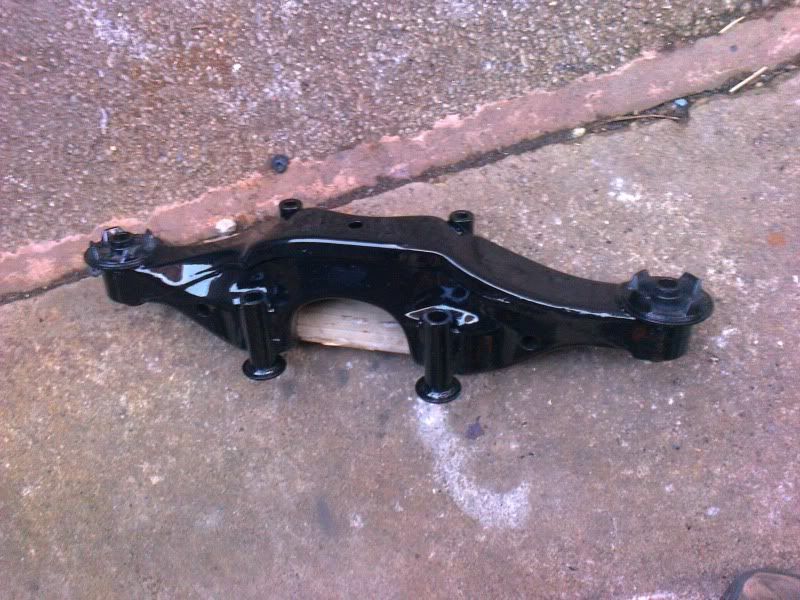 The came out quite nice 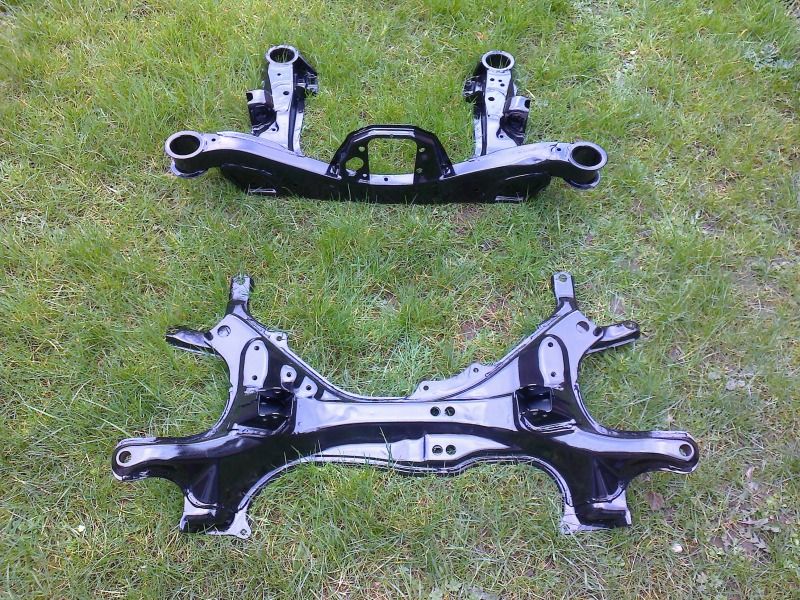 did the prop shaft too, started a bit rough 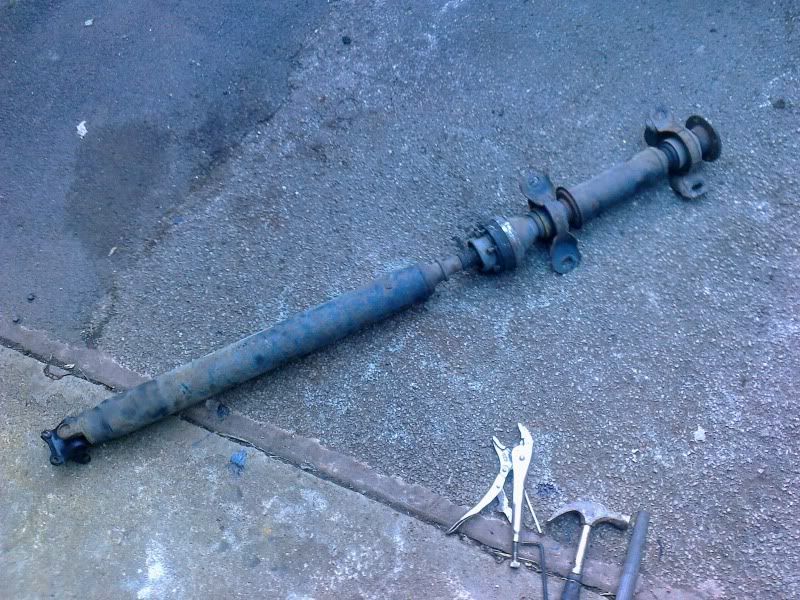 came up well 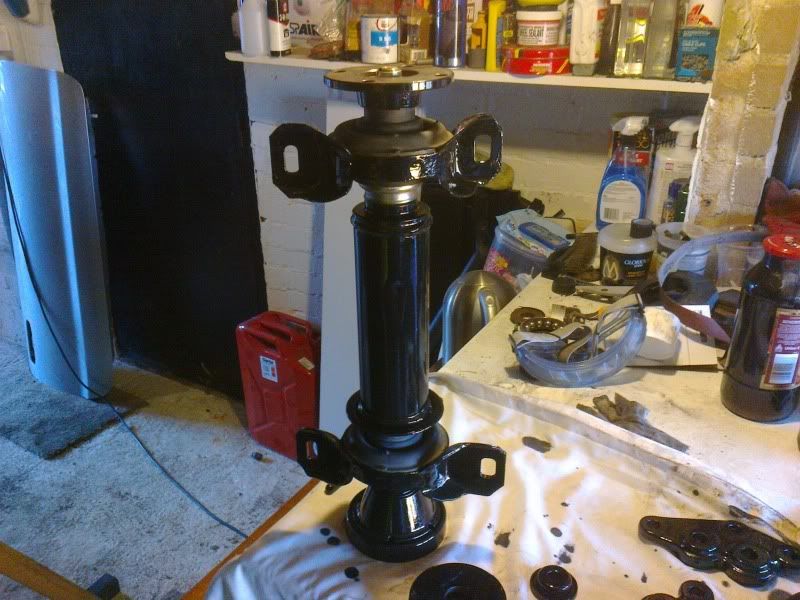 also cleaned up the steering rack 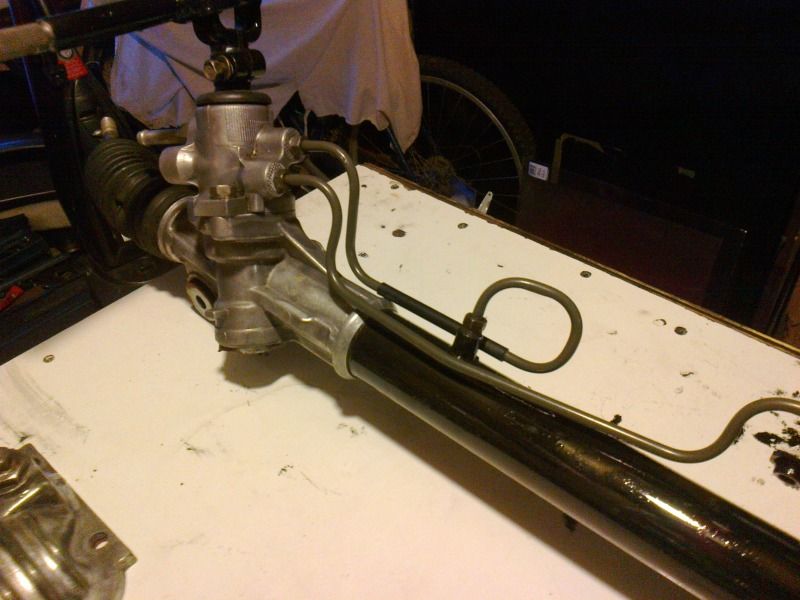 and the alloy diff end plate....gave it a good polish 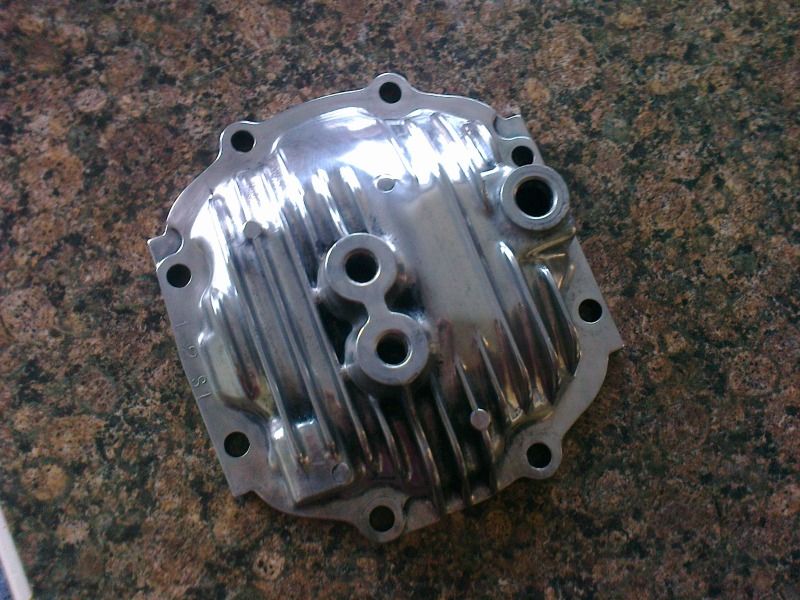 Next up I started the worst job I have ever attempted -------------------- |
|
Dec 16, 2012 - 1:45 PM
|
|
|
Enthusiast Joined Aug 25, '08 From England Currently Offline Reputation: 1 (100%) |
Tackling the stone guard on the bottom of the car.
I cant count the amount of drill & angle grinder wire brush attachments I have gone through. it makes alot of dust and takes what seems like forever 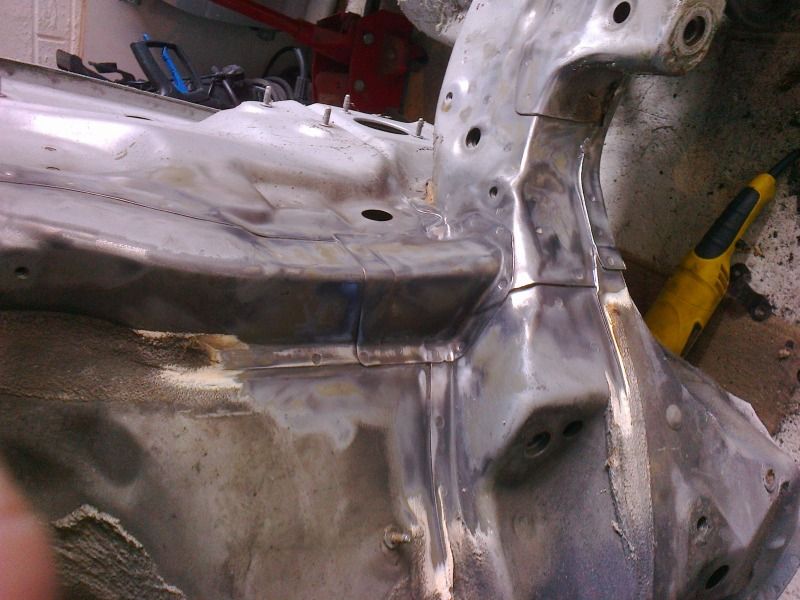 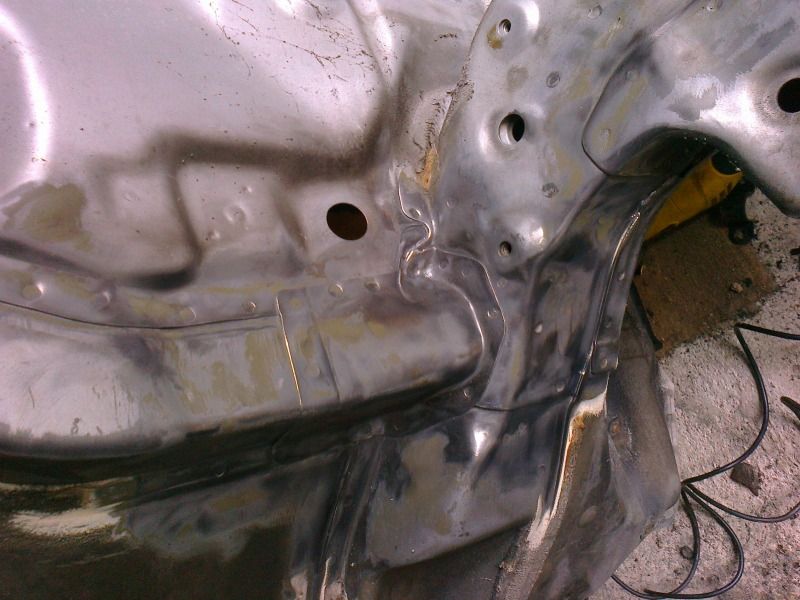 slow slow work 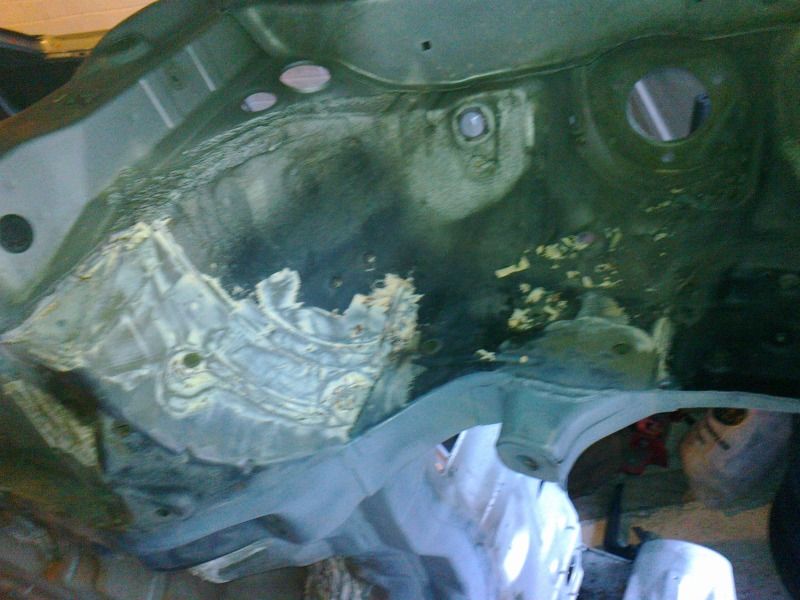 this stage took about a month 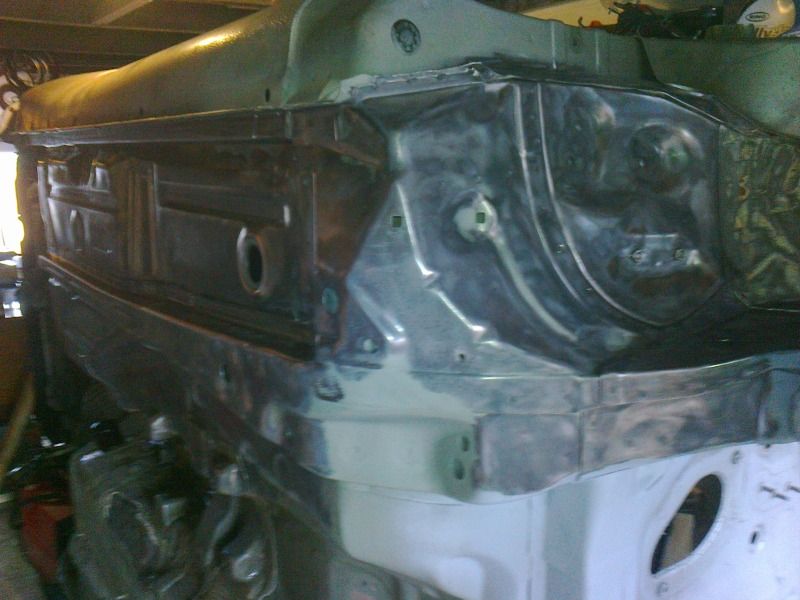 at last, more or less done  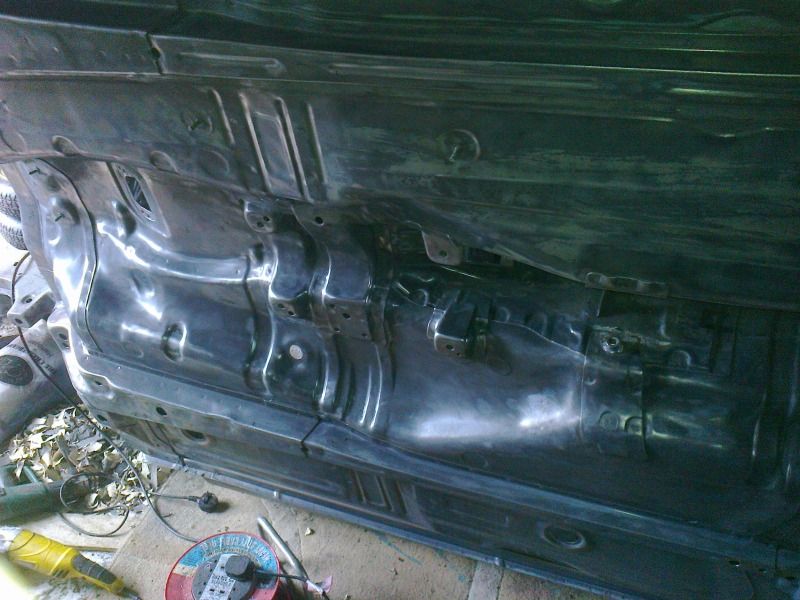 I then painted it with more POR15 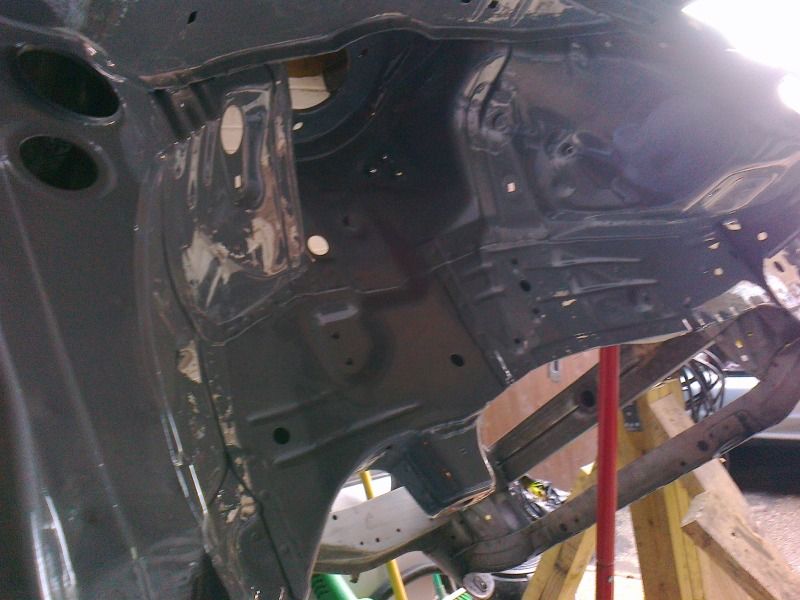 More or less at the time I was ready to slit my wrists due to constant wire brushing the roll cage turned up (I still havnt finished under the car....I am going to get the rest sand blasted....i just cant face it any more 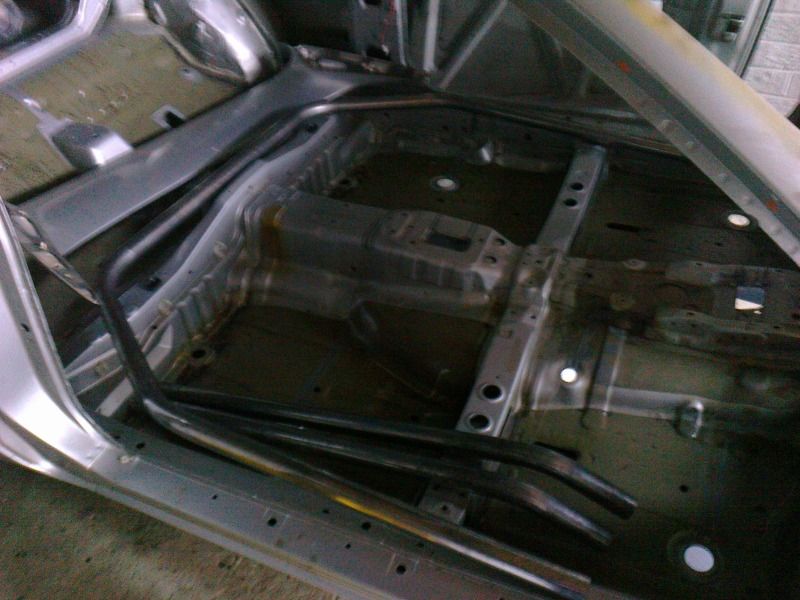 A brief test fitting and I was starting to get excited.....I was going to have to break out the welder again  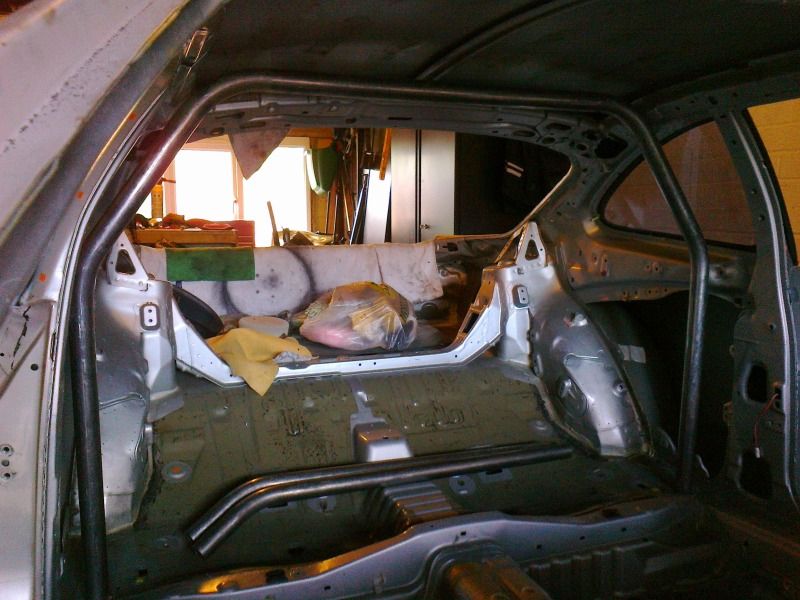
-------------------- |
|
Dec 16, 2012 - 1:54 PM
|
|
|
Enthusiast Joined Aug 25, '08 From England Currently Offline Reputation: 1 (100%) |
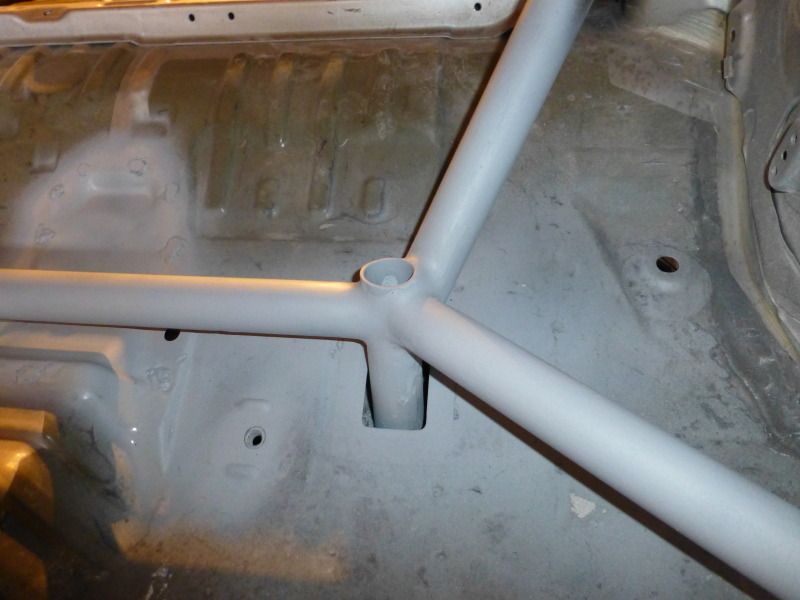
First job was to add some strengthening to the top of the rear suspension tops, so i removed the odd metal bracing off them (i think its used to just hold the rear plastics in place?)
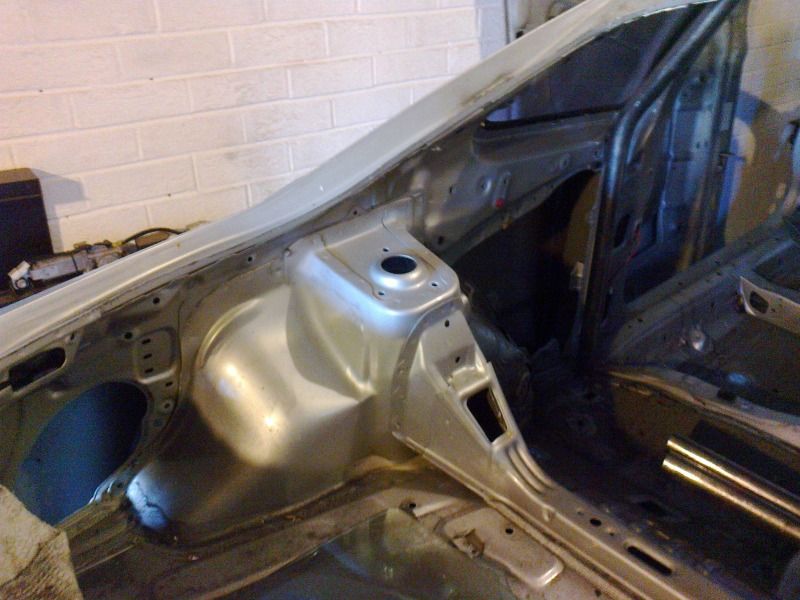 I then made a template 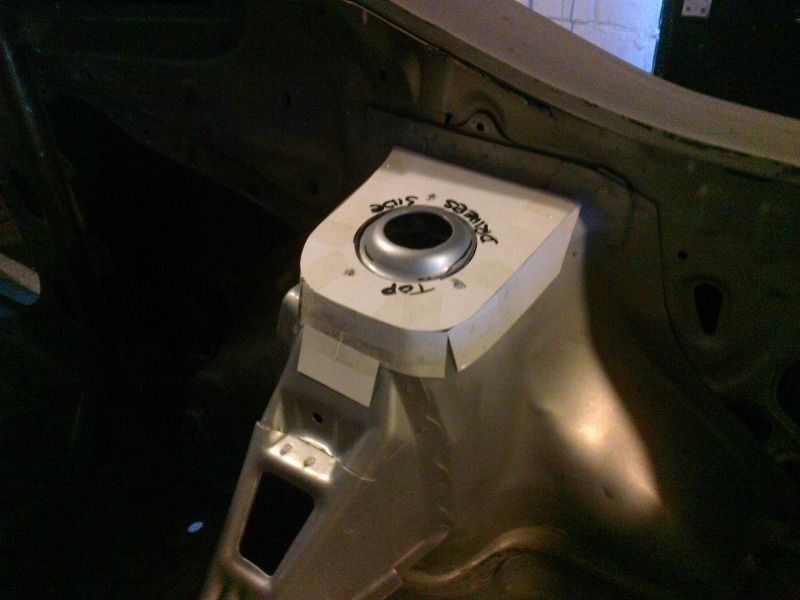 and then a metal top (3mm mild steel)  and one for the other side 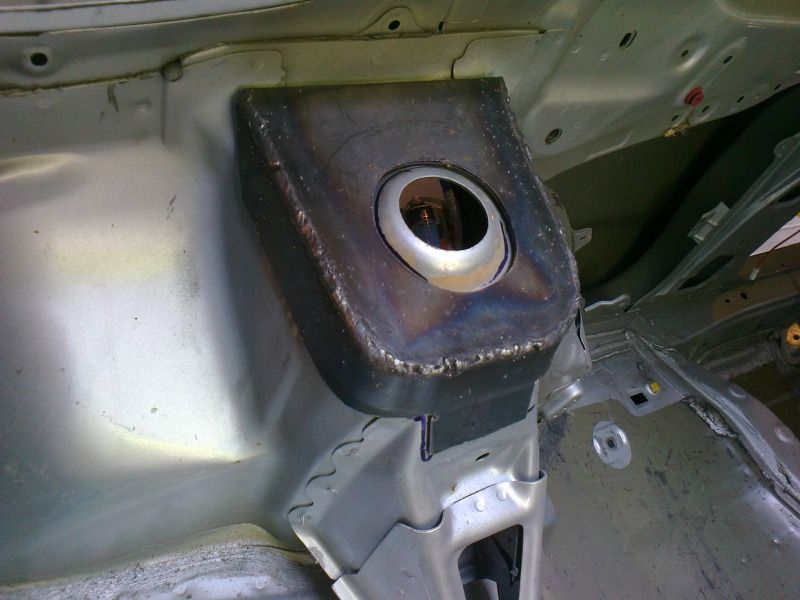 Once I had welded these to the car it was time to start getting the roll cage in 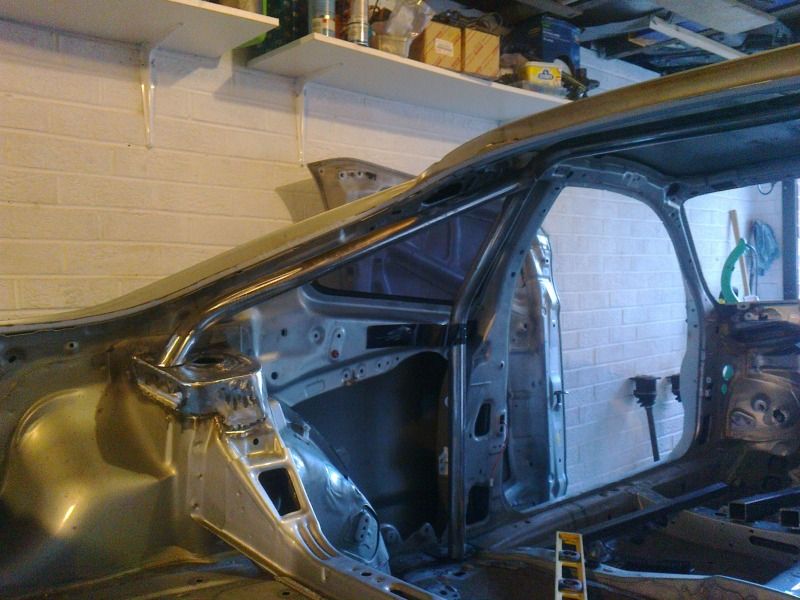 I filled the aerial hole whilst I was at it 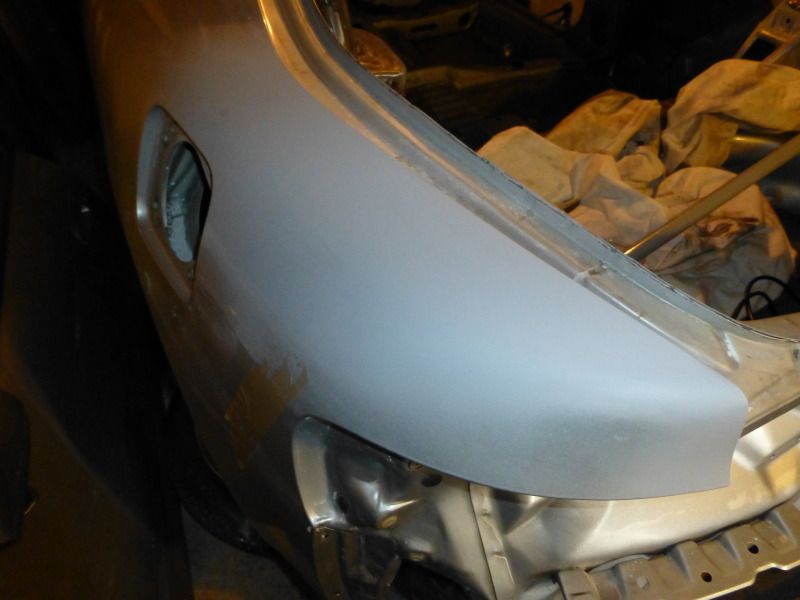 Anyway, back to the cage, more bits turned up 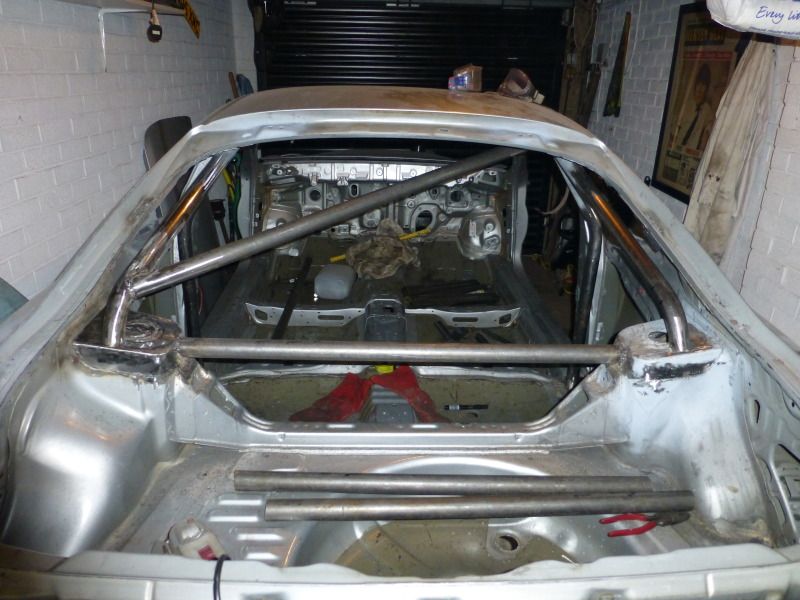 this was starting to get serious 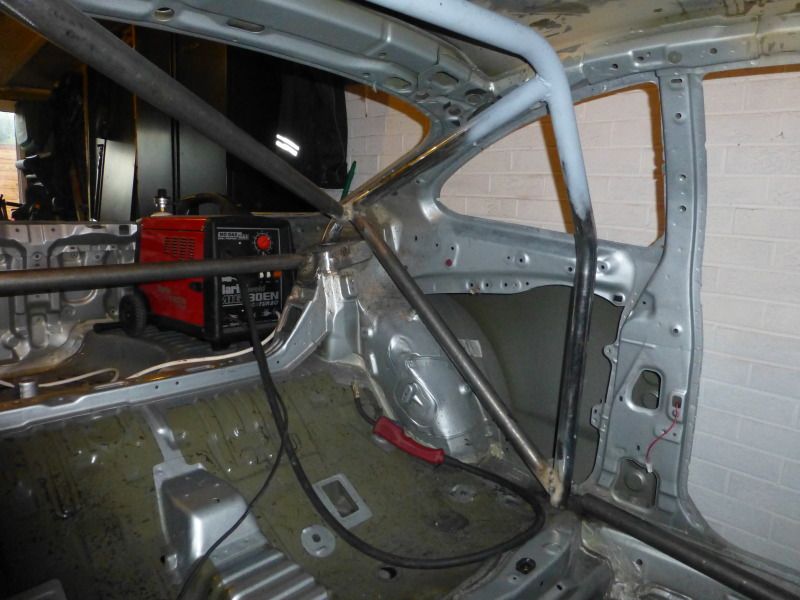 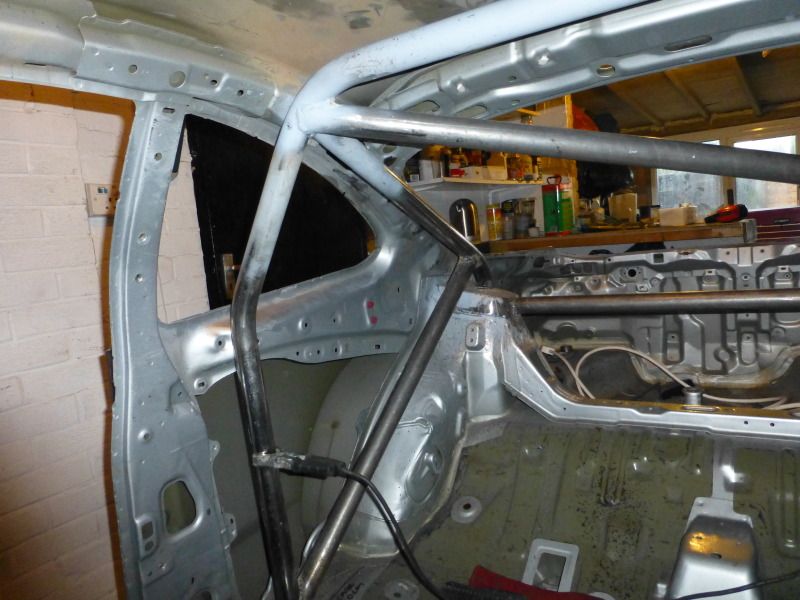 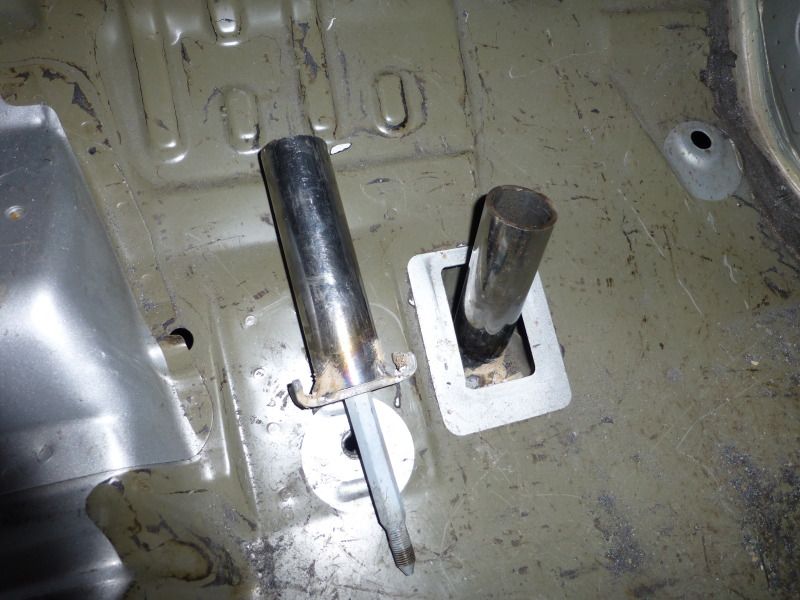 this ties in the rear sub frame to the cage, helps keep things stiff 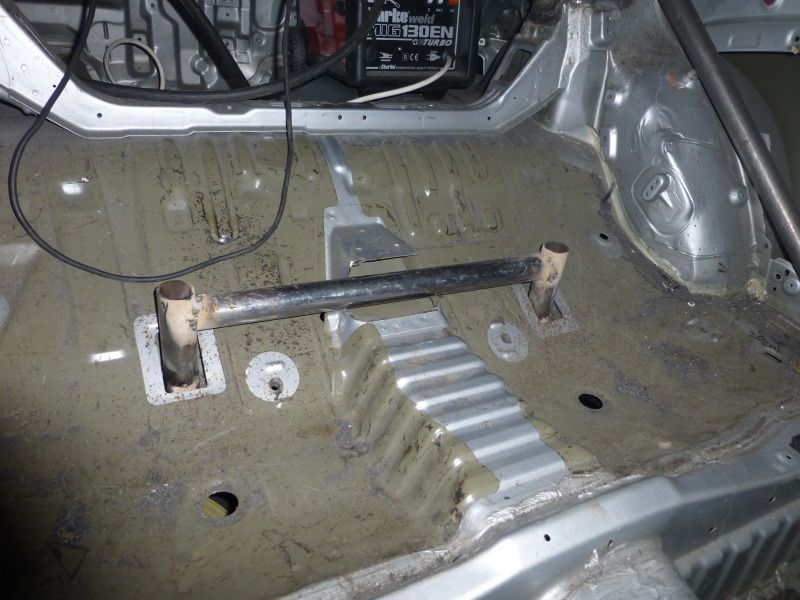 nearly there 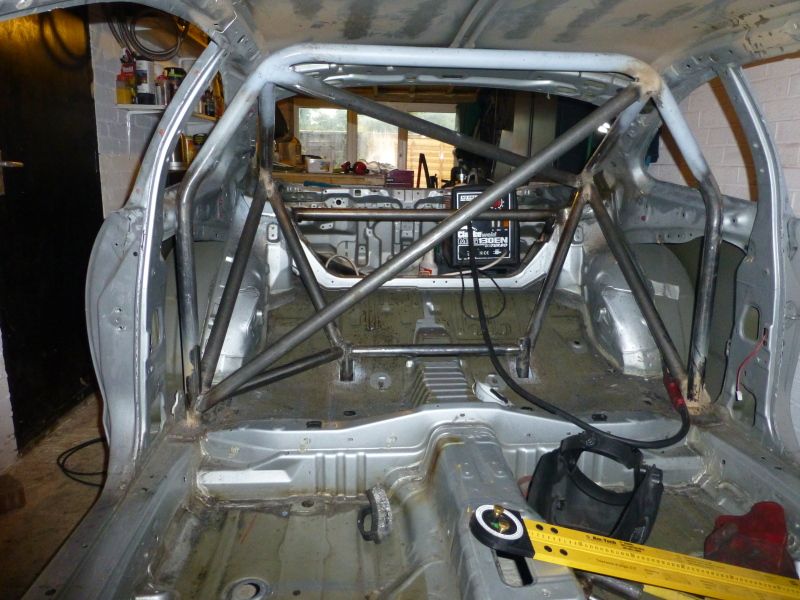 as you can see my welding isnt great, but as its more or less the seond thing I have ever welded in my life i was mildly pleased with it 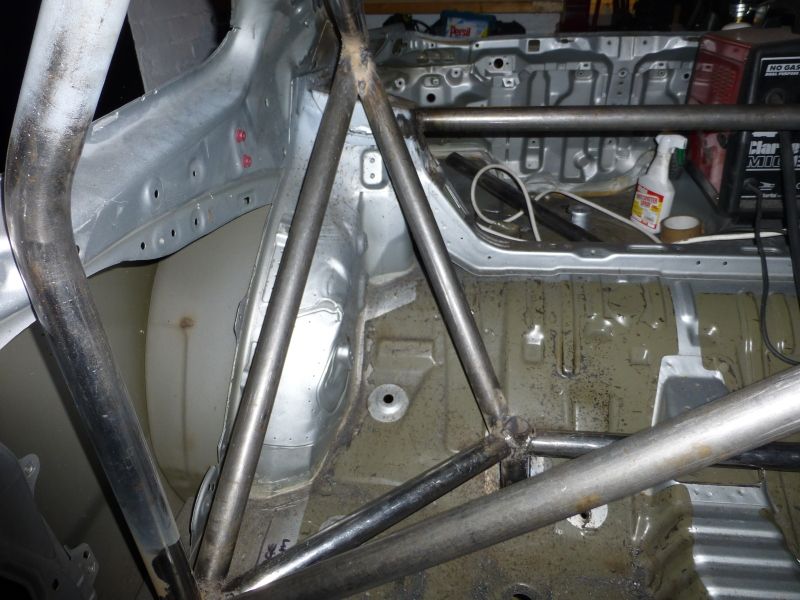 Done 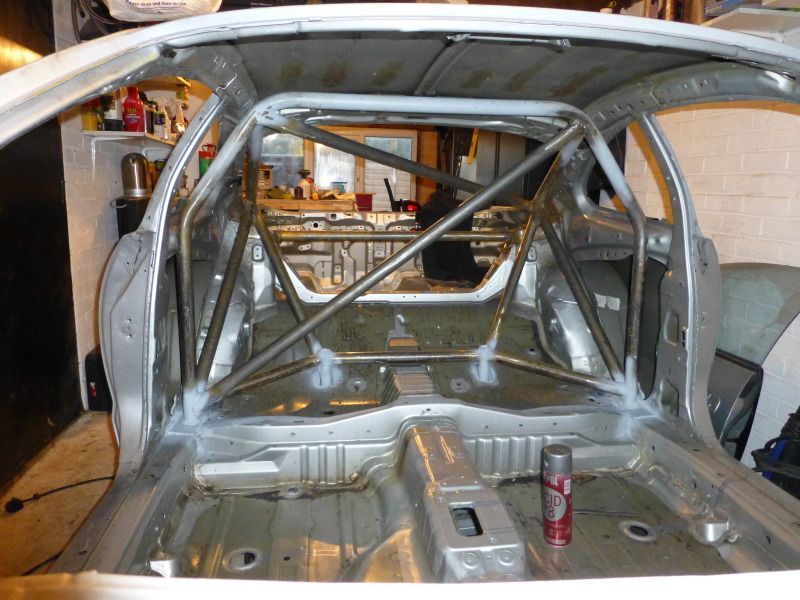 i had decided that I didnt want a full cage, at the end of the day it will be just a road car so getting in and out easily is a priority Next up I decided it was about time to learn how to cast new metal parts, as for what I had in mind the parts do not exist, I was going to have to make them. -------------------- |
|
Dec 16, 2012 - 1:59 PM
|
|
|
Enthusiast Joined Aug 25, '08 From England Currently Offline Reputation: 1 (100%) |
I was going to have to make myself a mini blast furnace...and learn how to cast metal
I needed these 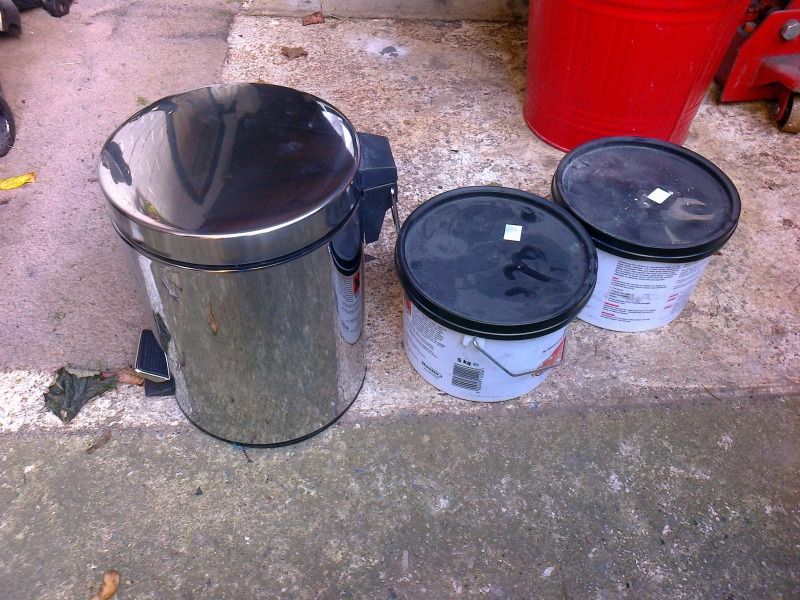 I turned the bin into a furnace with the use of some fire cement 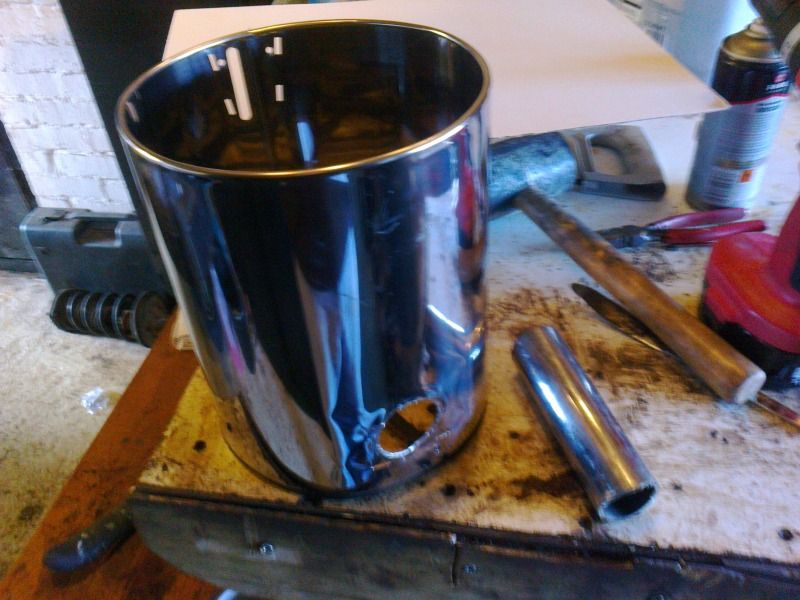 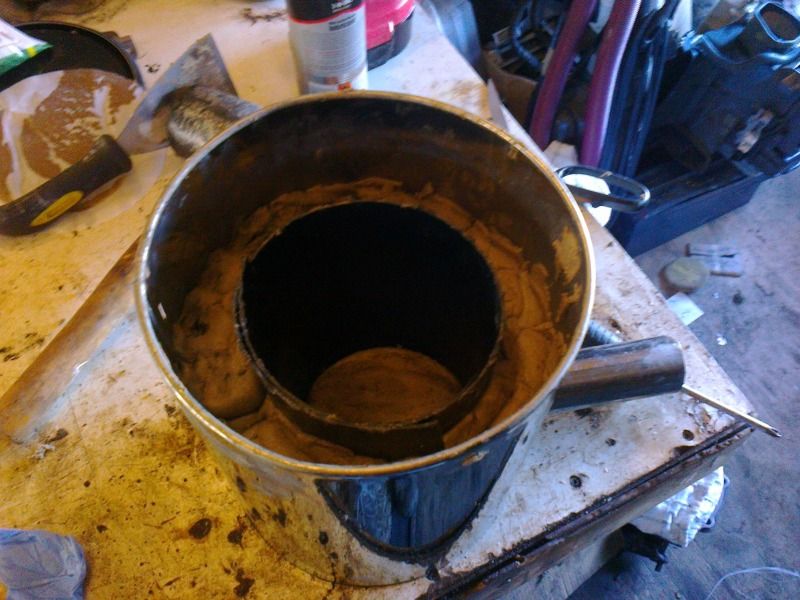 fill it with charcol, attach a heat gun, ignite and stand back 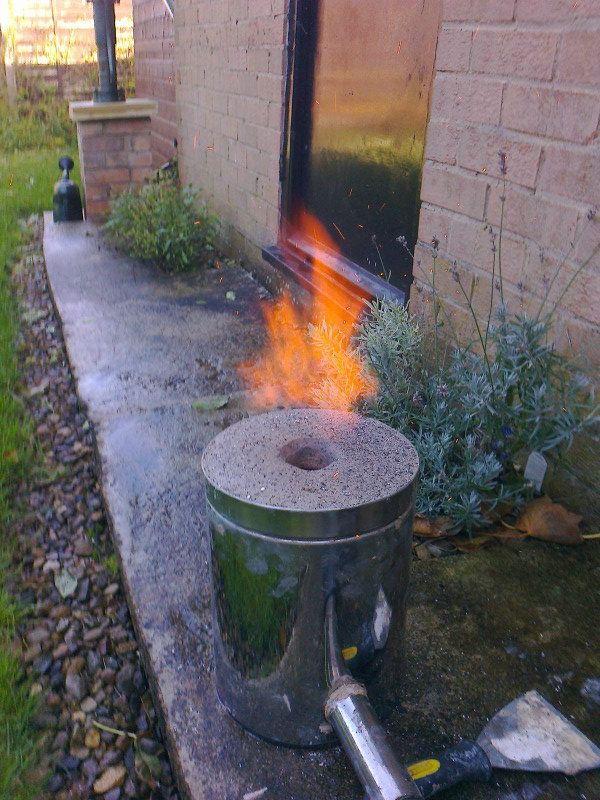 I made a vessel from a spare piece of square tube...it gets pretty hot 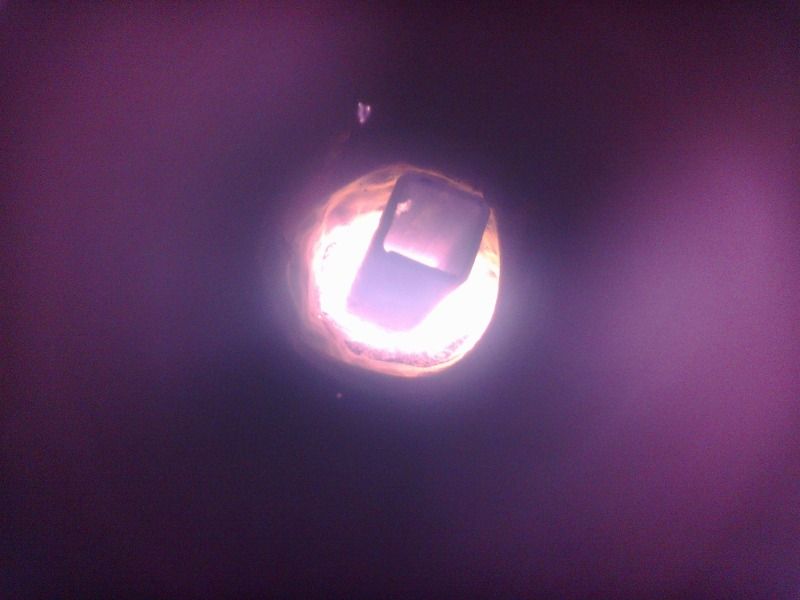 hot enough to melt alloy 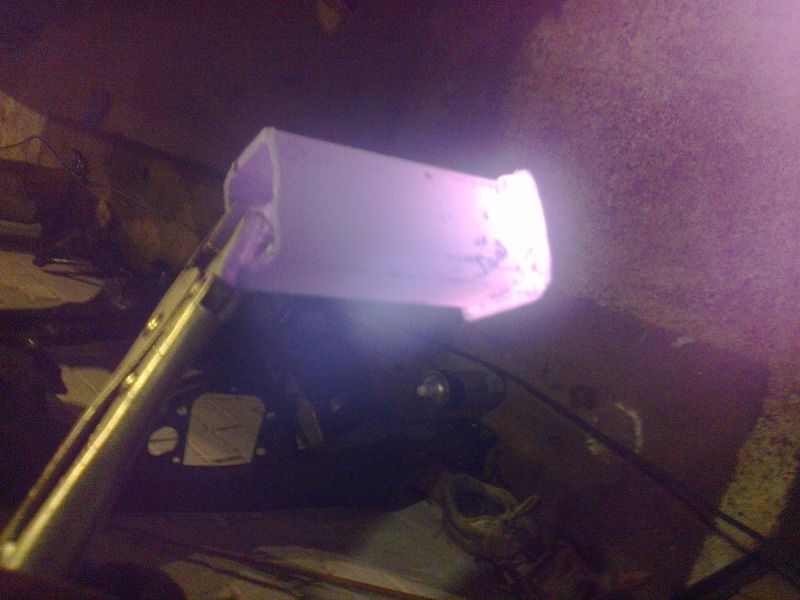 I still needed to learn how to make sand moulds so stopped there for the time being, I will pick that up again later. -------------------- |
|
Dec 16, 2012 - 2:06 PM
|
|
|
Enthusiast Joined Aug 25, '08 From England Currently Offline Reputation: 1 (100%) |
Taking a long look at my roll cage, I was not happy with the welds. so i decided to dress them, smooth them out, add a little body filler and make them smooth
 started looking much better although I did have to remove the main hoop cross member for access 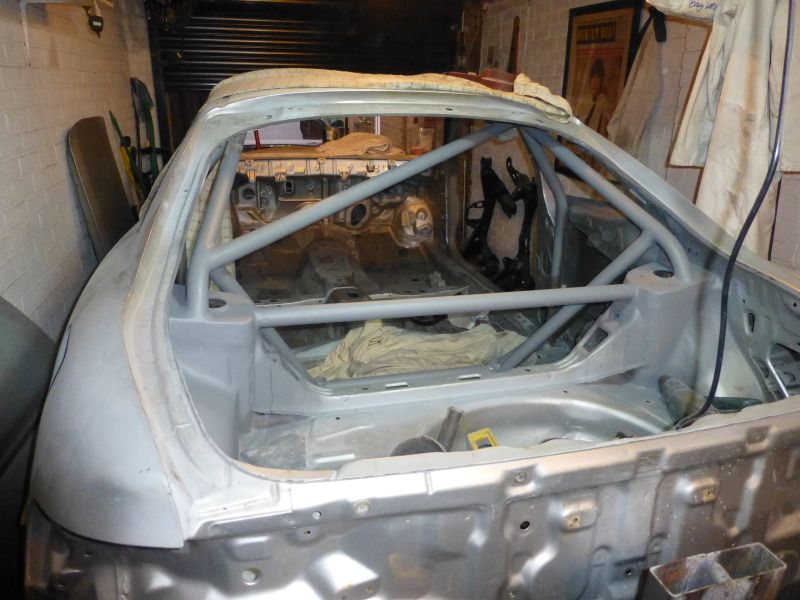 dont worry its not going to be that colour, thats just filler primer 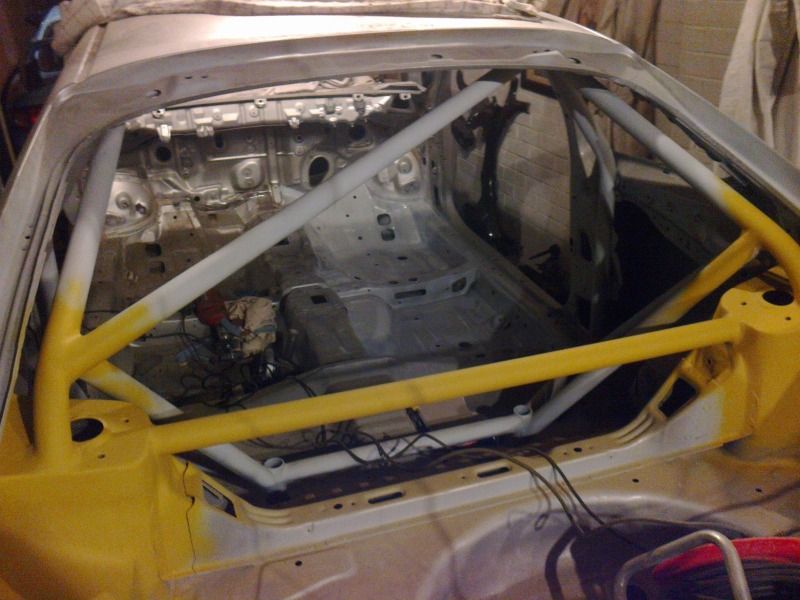 at the same time I cleaned up the floor and primed that ready for paint  the boot aswell....I also welded the cross member back in 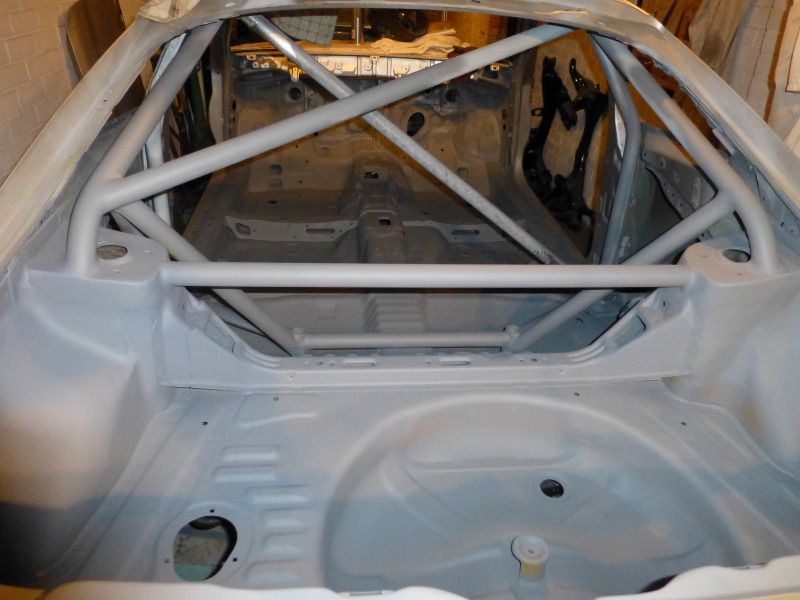 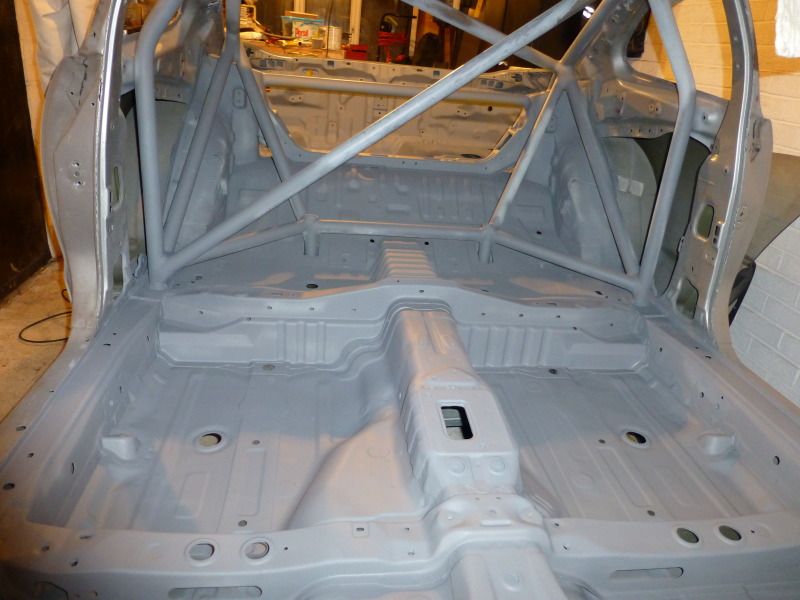 Next up was the seam sealer, so I masked off the areas I was going to apply it to 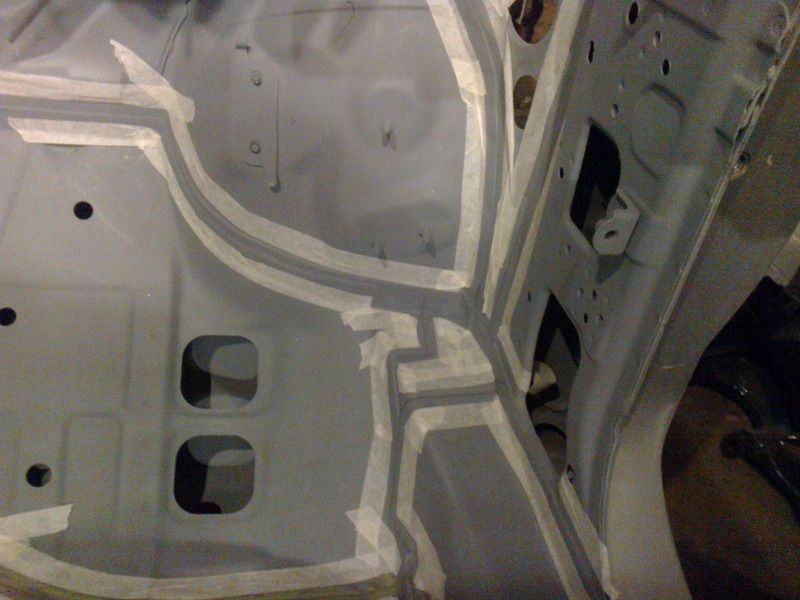 then applied the U-Pol grey stripe seam sealer (nasty stuff) 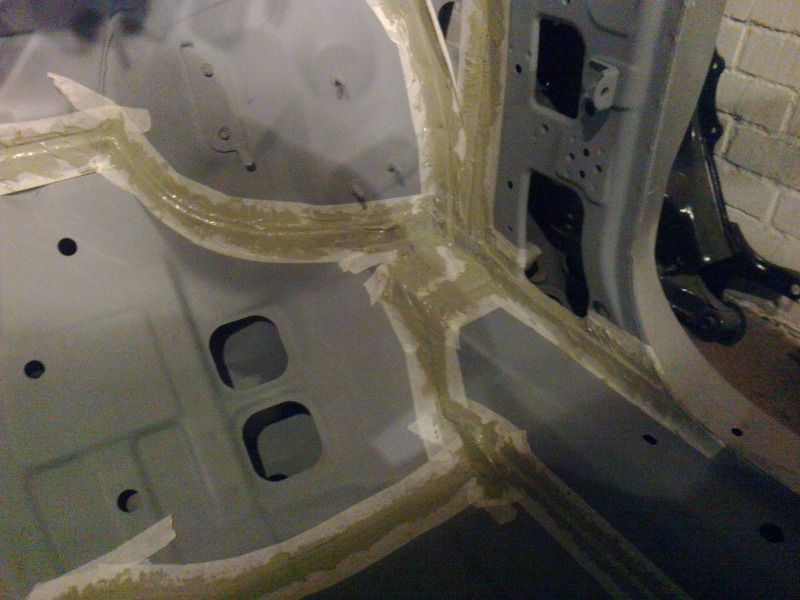  and that is about where I am up to today. Just been out into the garage to remove the masking tape. it looks a bit messy, but when its primed over the top you can hardly tell its there. I will add more pictures when I have taken them. I will update when I get a chance but I work pretty slowly so dont expect much. hope I havnt bored you to death more to come Nial -------------------- |
|
Dec 16, 2012 - 2:19 PM
|
|
 Enthusiast Joined Mar 8, '04 From Newport, RI Currently Offline Reputation: 63 (99%) |
Great job.
That's a ton of work, impressive. -------------------- |

|
Dec 16, 2012 - 10:18 PM
|
|
|
Enthusiast Joined Mar 8, '09 From Westport, MA Currently Offline Reputation: 6 (100%) |
Not your everyday build, excellent job so far man.
-------------------- st205 powered ss3 coupe
|
|
Dec 16, 2012 - 10:43 PM
|
|
 Enthusiast Joined Dec 22, '06 From Columbia, MD Currently Offline Reputation: 13 (100%) |
super diy!!
--------------------  1995 GT::::Diffusing the Situation エキサイティングカーレーシングチーム! march 2010 COTM : 6GC feature 2014 : january 2015-2016-2018 COTM |
|
Dec 17, 2012 - 12:47 AM
|
|
|
Enthusiast Joined Jun 18, '09 From Orlando Currently Offline Reputation: 8 (100%) |
QUOTE (Nial @ Dec 16, 2012 - 2:06 PM)  hope I havnt bored you to death Quite the contrary. Excellent. -------------------- '97 ST \ Eibach \ KYB \ Kenwood \ Alpine \ Cusco \ OEM+ [sold 10/18]
'93 MX-5 LE |
|
Dec 17, 2012 - 5:06 AM
|
|
 Enthusiast Joined Feb 3, '06 From Czech Republic (Europe) Currently Offline Reputation: 56 (100%) |
You are unbelievable Nial
. You are true faffer 
-------------------- No more replicas... This is evolution... This is SS-four :)
 ________[Featured Celica of 6gc.net @ 2010]_________ |
|
Dec 17, 2012 - 5:32 AM
|
|
|
Enthusiast Joined Aug 25, '08 From England Currently Offline Reputation: 1 (100%) |
Thanks all, glad you like it
QUOTE (malpaso @ Dec 17, 2012 - 5:06 AM) You are unbelievable Nial . You are true faffer Cheers. means alot from a fellow faffer I hope the end result looks as nice as your car.
This post has been edited by Nial: Dec 17, 2012 - 6:05 AM -------------------- |
|
Dec 17, 2012 - 6:28 AM
|
|
 Enthusiast Joined Jul 5, '12 From Barcelona Currently Offline Reputation: 0 (0%) |
Looks great! It'll be like new!
Just one thing I was wondering about. I don't know much about roll cages, but it is my understanding that if you put in racing seats and harnesses you'll need a horizontal shoulder height beam to attach the harnesses to (the reason being, to avoid spinal compression in the event of an accident). Have you considered this? --------------------  |
|
Dec 17, 2012 - 6:41 AM
|
|
|
Enthusiast Joined Aug 25, '08 From England Currently Offline Reputation: 1 (100%) |
QUOTE (Edser @ Dec 17, 2012 - 6:28 AM) Looks great! It'll be like new! Just one thing I was wondering about. I don't know much about roll cages, but it is my understanding that if you put in racing seats and harnesses you'll need a horizontal shoulder height beam to attach the harnesses to (the reason being, to avoid spinal compression in the event of an accident). Have you considered this? I will be using normal belts, If I want to use a racing harness I will attach it to the rear strut brace as the Rally Cars did. as they lie within the tollernece angles to avoid such injuries. -------------------- |
|
Dec 17, 2012 - 10:36 AM
|
|
|
Moderator Joined Jun 29, '08 From Denver Currently Online Reputation: 59 (100%) |
Great work so far! I can't wait to see where this goes.
-------------------- "Employ your time in improving yourself by other men's writings, so that you shall gain easily what others labored hard for." -Socrates. Even Socrates told us to use the search button!
 2006 Aston Martin V8 Vantage. 1998 Celica GT- BEAMS Swapped. 2022 4Runner TRD Off Road Prenium. 2021 GMC Sierra AT4. |
|
Dec 18, 2012 - 4:45 AM
|
|
 Enthusiast Joined May 9, '09 From Brisbane, Australia Currently Offline Reputation: 0 (0%) |
Nice work! Can't wait to see the finished product.
-------------------- |

|
Dec 18, 2012 - 2:23 PM
|
|
|
Enthusiast Joined Aug 25, '08 From England Currently Offline Reputation: 1 (100%) |
I dont know if you guys like small regular updates, or big updates every yew months?
well here is a little update. I just about finished the seam sealer today but to show you a comparison, one side of the car is finished and the seam sealer has been primed, the other side it has just been applied. 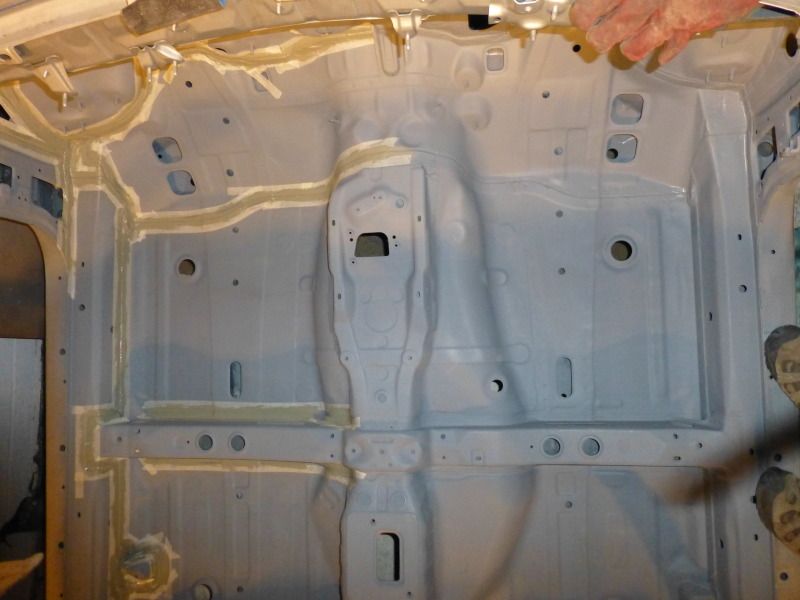 Left side it has just been applied, right side has had two coats of seam sealer and had primer sprayed over the top. I am pleased that you can hardly see anything despite the fact it will all be covered over with sound mat.....just because you cant see it dosent mean it cant be right. cheeky shot of the cage 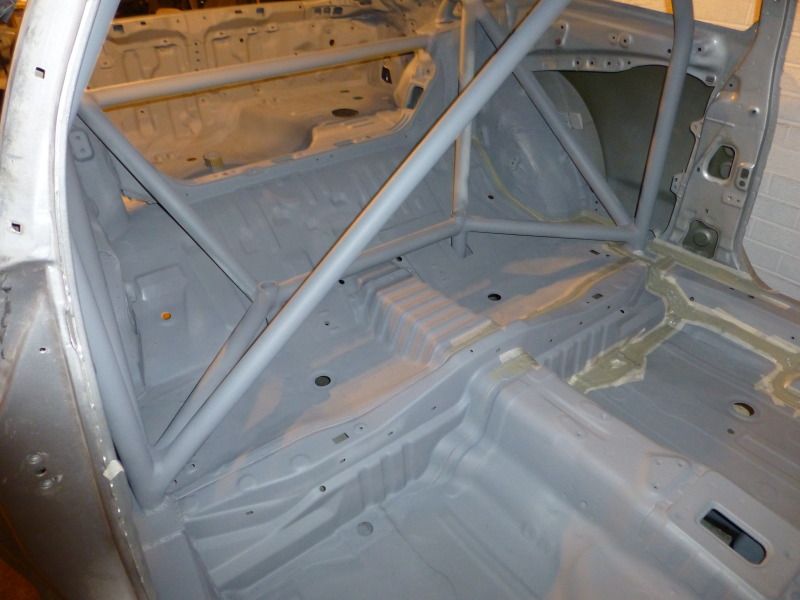
This post has been edited by Nial: Dec 18, 2012 - 4:02 PM -------------------- |
|
Dec 18, 2012 - 6:00 PM
|
|
 Enthusiast Joined Jul 12, '08 Currently Offline Reputation: 5 (100%) |
QUOTE just because you cant see it doesn't mean it cant be right This is how I know this thread will be good --------------------  |
|
Feb 25, 2013 - 3:47 PM
|
|
|
Enthusiast Joined Aug 25, '08 From England Currently Offline Reputation: 1 (100%) |
I have been busy recently, but have found some time to spend on this project.
I stripped down the petrol tank  gave it a good paint 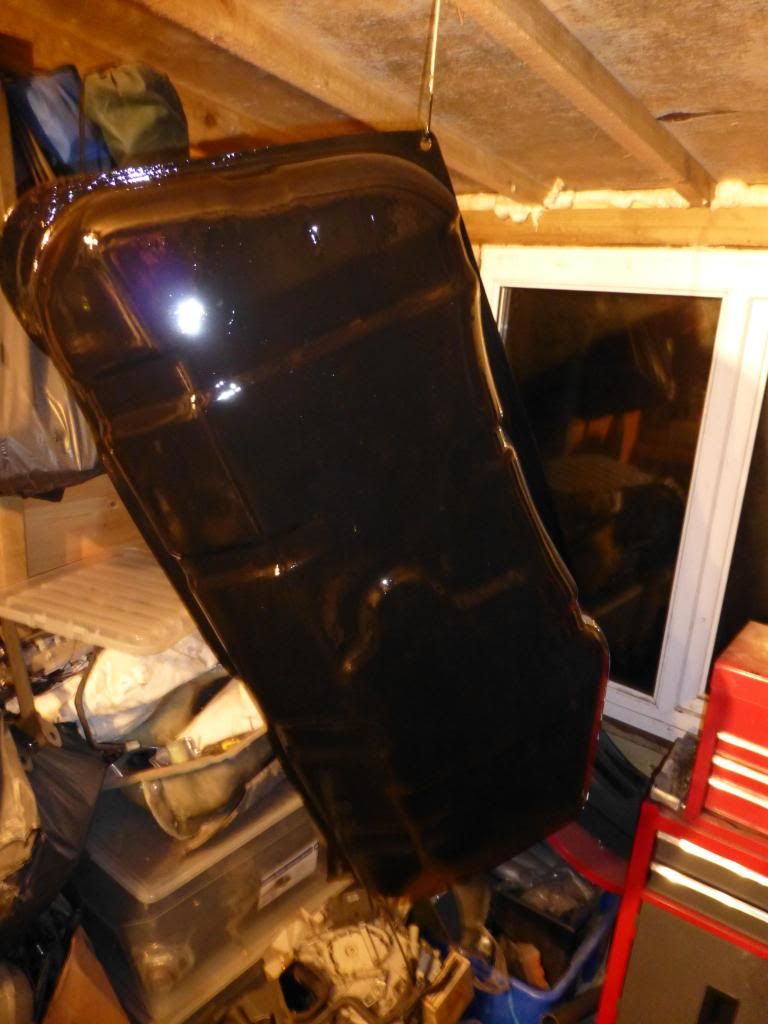 the obligatory walbro fuel pump 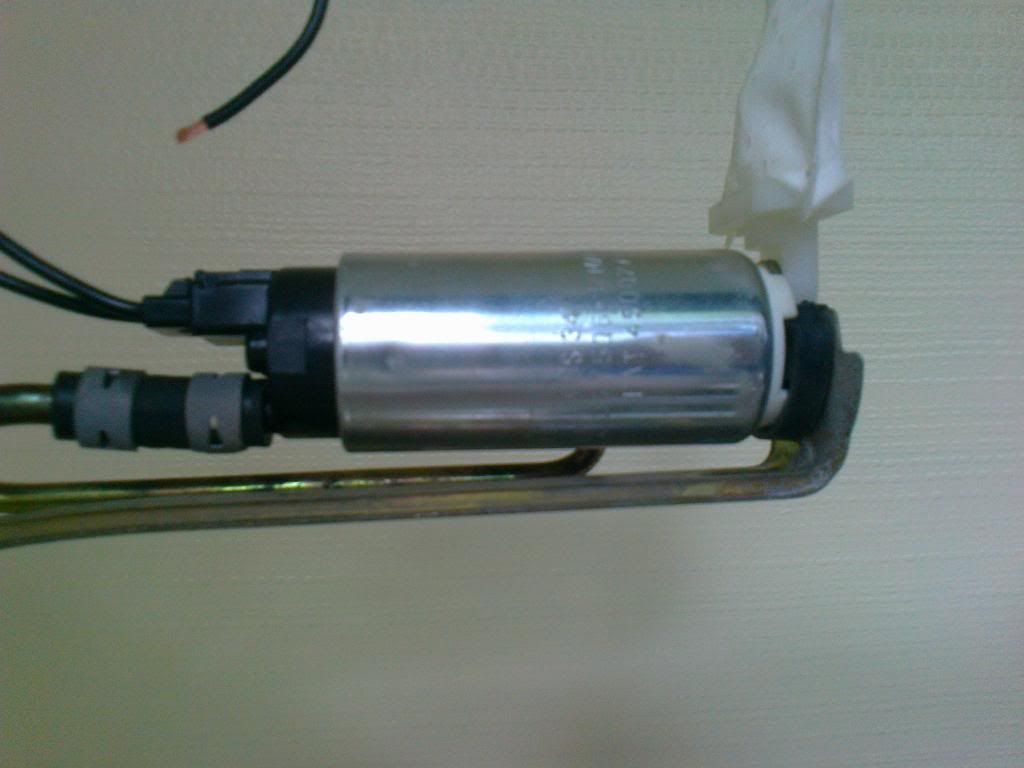 all back together with some stainless steel bolts  rejuvenated the fuel tank straps 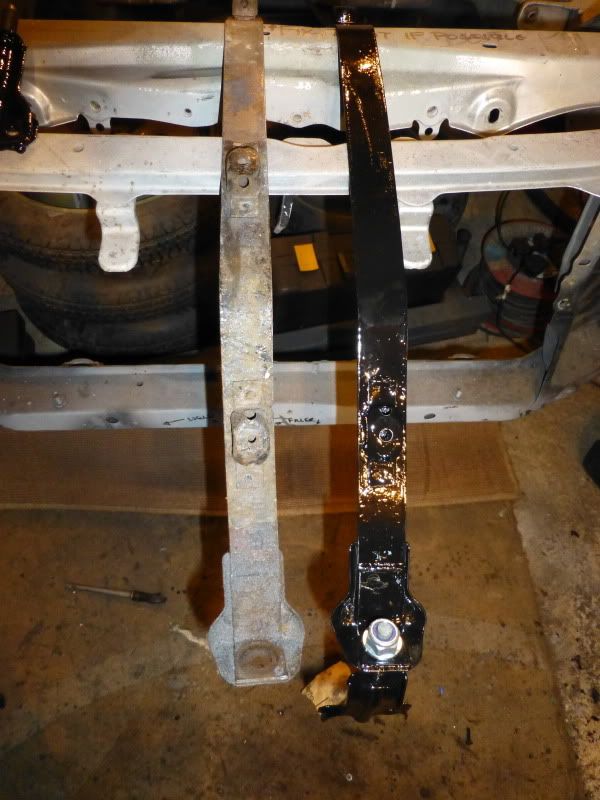 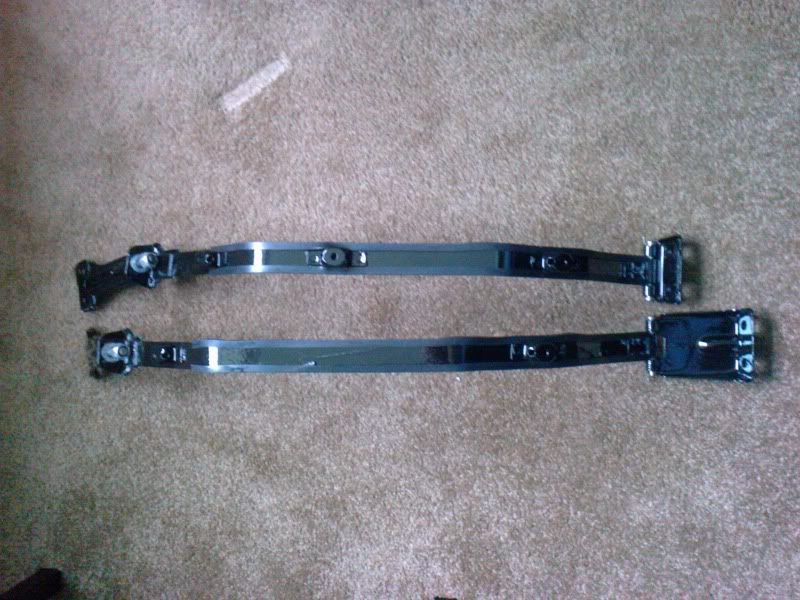 started rebuilding the rear axels 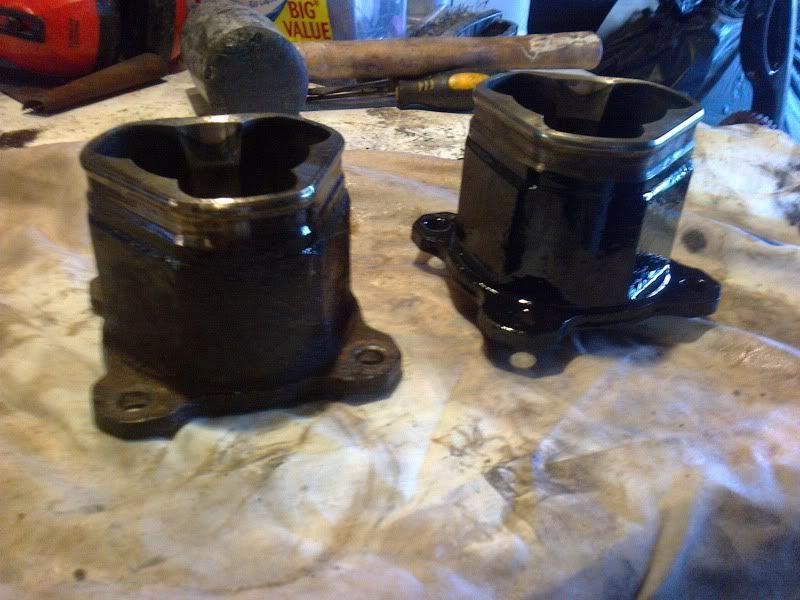 managed to rescue the rear brake disc backing plates 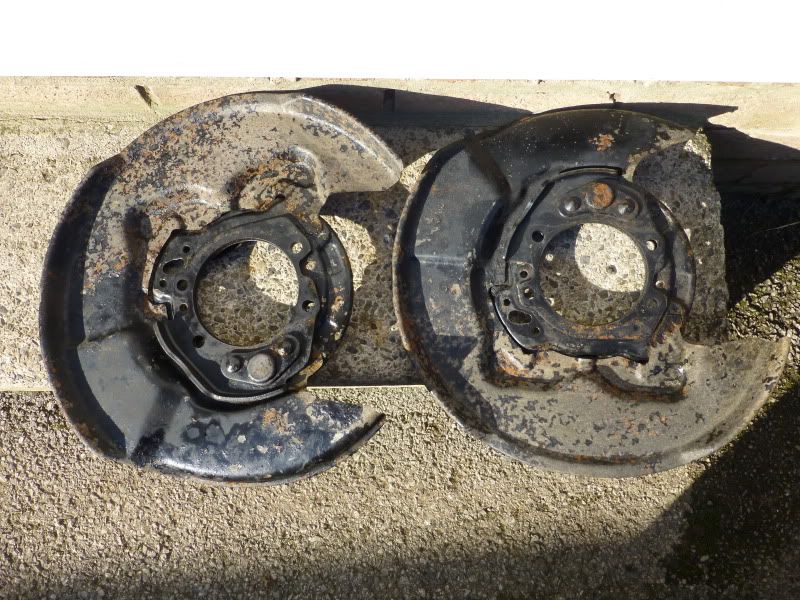 they came up well 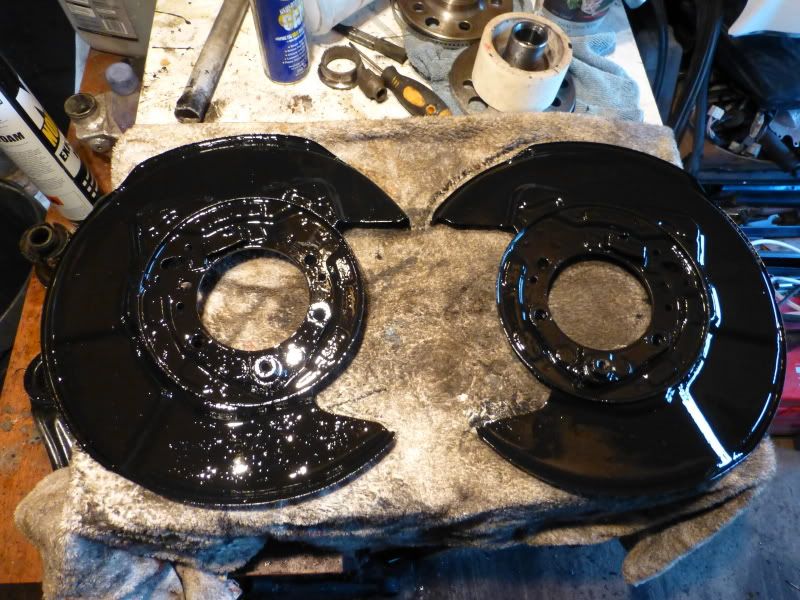 Found a product called Deox C which is great at getting rid of rust, bought the rear hub carriers up a treat 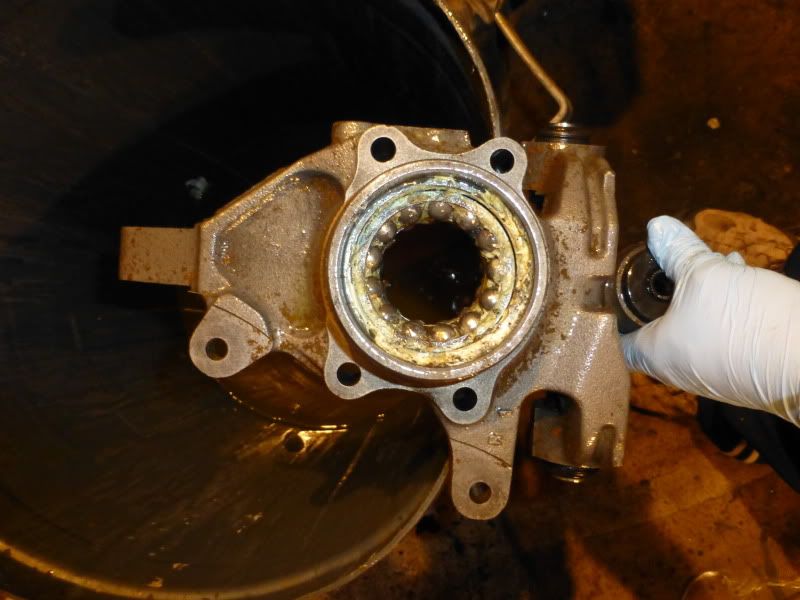 and I got alot of bolts zinc plated 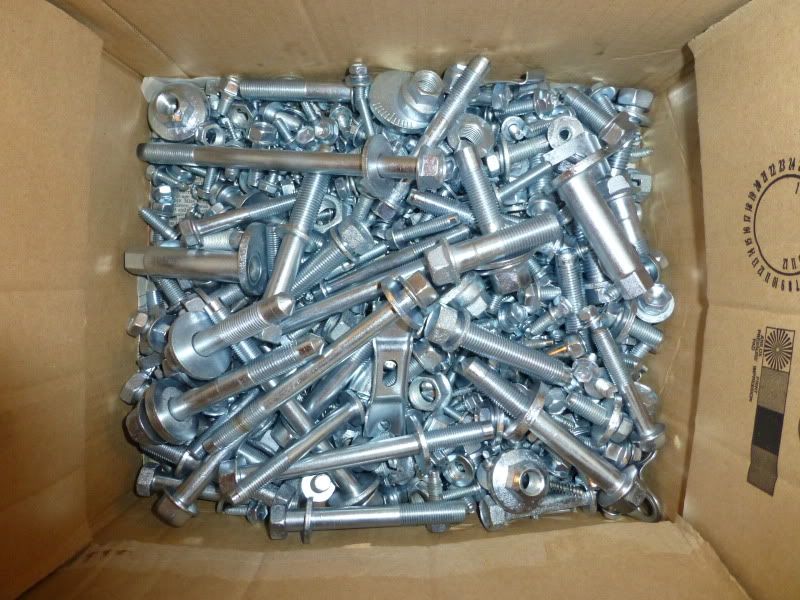 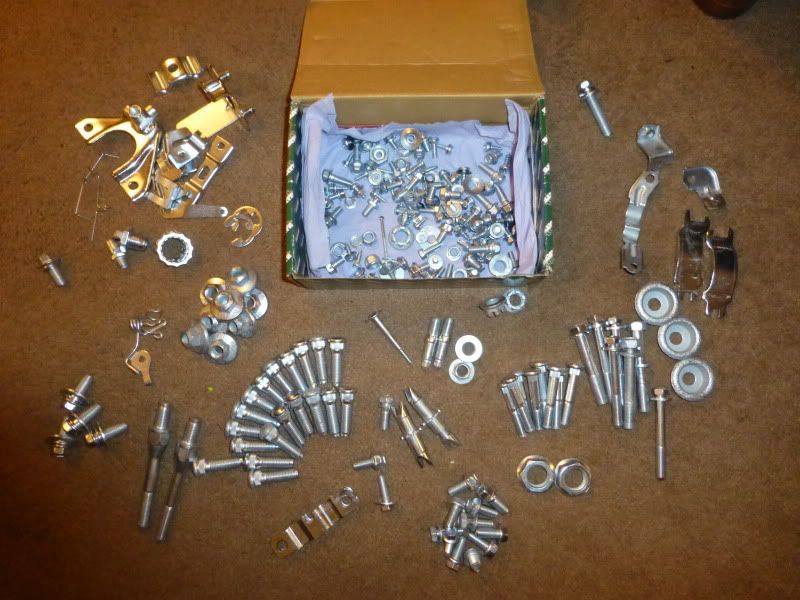 and the door catches chromed 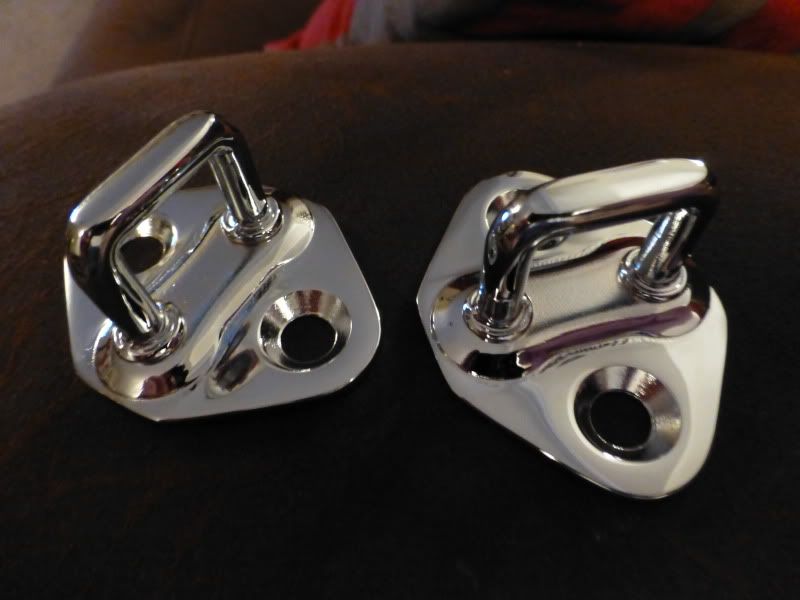 things are starting to go back together now, the rear subframe and suspension parts are all half built, just waiting for the paint on the rear hubs to dry and cure and they can go back together, need some snap rings for the rear axels, then they can go back on. Rear diff can be completed tomorrow if I get time. -------------------- |
|
Feb 25, 2013 - 4:10 PM
|
|
|
Enthusiast Joined Sep 10, '08 From UK Currently Offline Reputation: 0 (0%) |
absolutely epic Nial, top work.
fancy doing my car when your done with this one? 
|
|
Feb 25, 2013 - 4:28 PM
|
|
|
Enthusiast Joined Aug 25, '08 From England Currently Offline Reputation: 1 (100%) |
QUOTE (paulgtt @ Feb 25, 2013 - 4:10 PM) absolutely epic Nial, top work. fancy doing my car when your done with this one? Hahaha...errr no thanks, this one has taken long enough.....if you dont mind loosing your car for about 4 years and costing...well this will probably cost me the thick end of £30,000 by the time I am done. -------------------- |
|
Feb 25, 2013 - 5:53 PM
|
|
 Enthusiast Joined Feb 11, '08 From Auckland, New Zealand Currently Offline Reputation: 0 (0%) |
f**k yeah! I want to reshell into yours!!!
-------------------- Mike W
1996 Toyota Celica ST205 GT-FOUR GT2860RS turbine, TiAL mvr44, JE 86.5φ piston, Clutchmasters FX400, APEX P-FC 269awhp / 273ft-lbs |
|
Feb 25, 2013 - 10:28 PM
|
|
|
Enthusiast Joined Feb 18, '13 From Portland, OR Currently Offline Reputation: 3 (100%) |
Wow, just wow. I truly admire your attention to detail. I've done some detailed builds over the years but it really falls short of the amount of work you're putting in here. Really looking forward to future updates. I've gotta ask though...what on earth do you want to make that requires you cast your own metal parts??
-------------------- 1999 Celica GT Auto - GF's car
1996 4Runner SR5 5sp - Ol' Faithful 2006 Evo 9 MR - For sale 1998 Supra NA Auto very slow |
|
Feb 26, 2013 - 3:28 AM
|
|
|
Enthusiast Joined Aug 25, '08 From England Currently Offline Reputation: 1 (100%) |
QUOTE (Legen-dary @ Feb 25, 2013 - 10:28 PM) I've gotta ask though...what on earth do you want to make that requires you cast your own metal parts?? I was going to make an alloy version of the bracket that holds the alternator in place but it prooved too difficult. I kind of knew from the start it would be, I just wanted to make fire and a noise like a jet engine. The insides have now been completed, all the seam sealing has been done and painted. roll cage is ready for a coat of colour, I think I am going to go for a satin black finish. This post has been edited by Nial: Feb 26, 2013 - 3:33 AM -------------------- |
|
Feb 26, 2013 - 4:25 AM
|
|
|
Enthusiast Joined Feb 11, '08 From Auckland, New Zealand Currently Offline Reputation: 0 (0%) |
Ahhh is that what that was, I was thinking of just grinding off the humps from the radiator and making a flat L bracket, either that or getting some alloy stumps welded on and using brackets from another car. just some ideas.
of all the chinese copy alloy rads out there I'm guessing some line up the brackets others dont, i had to carve out the rubber bush from mine to fit -------------------- Mike W
1996 Toyota Celica ST205 GT-FOUR GT2860RS turbine, TiAL mvr44, JE 86.5φ piston, Clutchmasters FX400, APEX P-FC 269awhp / 273ft-lbs |
|
Feb 26, 2013 - 4:31 AM
|
|
|
Enthusiast Joined Aug 25, '08 From England Currently Offline Reputation: 1 (100%) |
QUOTE (delusionz @ Feb 26, 2013 - 4:25 AM) Ahhh is that what that was, I was thinking of just grinding off the humps from the radiator and making a flat L bracket, either that or getting some alloy stumps welded on and using brackets from another car. just some ideas. I will be building my radiator from scratch so will be doing something similar...TTE used this method so it must be effective. -------------------- |
|
Feb 26, 2013 - 4:50 AM
|
|
|
Enthusiast Joined Feb 11, '08 From Auckland, New Zealand Currently Offline Reputation: 0 (0%) |
do you know what the pre-rad thing is on the TTE car, i cant work it out, is it transfering engine heat with oil, or cycling water for the turbo or what
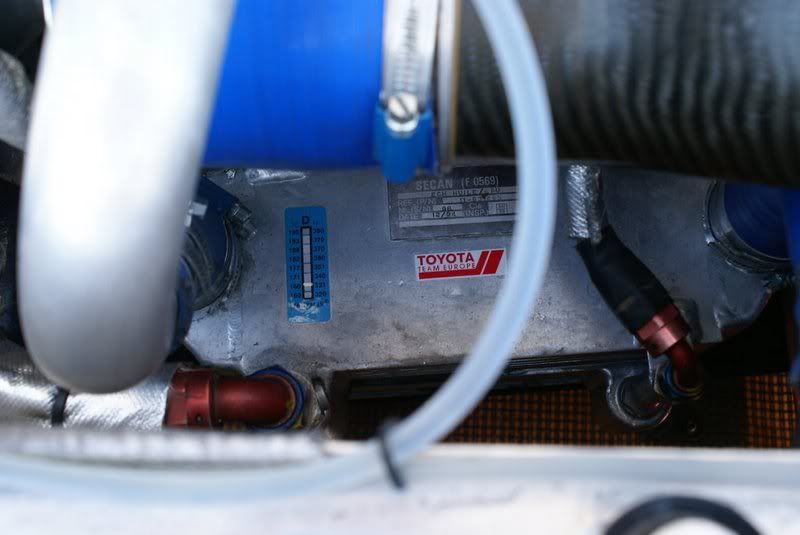 as im sure your well aware of engine bay temps, i think were on the same page when it comes to cooling system design, i tried to follow TTE too This post has been edited by delusionz: Feb 26, 2013 - 4:51 AM -------------------- Mike W
1996 Toyota Celica ST205 GT-FOUR GT2860RS turbine, TiAL mvr44, JE 86.5φ piston, Clutchmasters FX400, APEX P-FC 269awhp / 273ft-lbs |
|
Feb 26, 2013 - 4:53 AM
|
|
|
Enthusiast Joined Aug 25, '08 From England Currently Offline Reputation: 1 (100%) |
QUOTE (delusionz @ Feb 26, 2013 - 4:50 AM) do you know what the pre-rad thing is on the TTE car, i cant work it out, is it transfering engine heat with oil, or cycling water for the turbo or what as im sure your well aware of engine bay temps, i think were on the same page when it comes to cooling system design, i tried to follow TTE too Thats an engine oil cooler (it replaces the one on the front of the block). I have one similar to that sat on the shelve in the garage although you can still buy TTE ones, but they cost about £1500 -------------------- |
|
Jun 4, 2013 - 2:57 PM
|
|
|
Enthusiast Joined Aug 25, '08 From England Currently Offline Reputation: 1 (100%) |
Well, it's been a while, haven't done much on the car really. I have taken the bonnet catch apart which I am going to get chromed, then I have had to have custom stepped rivets made so I can put it all back together again. I have also been working on the interior, a few ideas which have fallen by the wayside and a few new ideas.
I started rebuilding the interior plastics to work around the roll cage, a bit more complex than I bargained for, but its going to challenge my fibreglassing skills.  Now that I have finally taken the other Faff off the road I can start transferring bits over. After talking to some rally boffins and TTE experts I have decided on two options for the engine rebuild. Initially I am going to use a 185 block and head as these are stronger than the 205 block, the head isn't as good but is more workable...or some am told. Also there are more bits available for the 185 blocks like moroso sumps etc will re using my Link G3 ECU with a brand new engine loom. Plans are afoot for a TTE charge cooler.
-------------------- |
|
Jun 6, 2013 - 4:26 AM
|
|
|
Enthusiast Joined Oct 30, '12 From Cheshire Currently Offline Reputation: 0 (0%) |
Love this thread, your car is going to be epic!
|
|
Sep 8, 2013 - 2:38 PM
|
|
|
Enthusiast Joined Aug 25, '08 From England Currently Offline Reputation: 1 (100%) |
Its been a while, but a bit of progress this weekend.
I got hold of an ST202 front bumper, an old knackered GT4 front bumper, both of which I have cut up to make into one. I also managed to get hold of a TOMs front lip which I think suits the car very well. had to use the parts car to line the bumper up.  still so much to do and it seems like two steps forward one step backwards all the time. i might have retired by the time I finish this rebuild. This post has been edited by Nial: Sep 8, 2013 - 2:39 PM -------------------- |
|
Sep 8, 2013 - 2:49 PM
|
|
|
Moderator Joined Jun 29, '08 From Denver Currently Online Reputation: 59 (100%) |
Love that bumper.
-------------------- "Employ your time in improving yourself by other men's writings, so that you shall gain easily what others labored hard for." -Socrates. Even Socrates told us to use the search button!
2006 Aston Martin V8 Vantage. 1998 Celica GT- BEAMS Swapped. 2022 4Runner TRD Off Road Prenium. 2021 GMC Sierra AT4. |
|
Sep 8, 2013 - 4:11 PM
|
|
|
Enthusiast Joined Mar 6, '12 From Brisbane, Australia Currently Offline Reputation: 6 (100%) |
Oh, so not content with a perfectly rebuilt st205.... have to go and make it an amazingly awesome SS-FOUR whilst you're at it...

This post has been edited by JoshuaM: Sep 8, 2013 - 4:11 PM --------------------  SOLD :( 1997 ST204 Celica ZR -----> See it here on 6GC! 2013 October Celica of the Month XD Now: '00 NB8B Mazda MX5 -----> See it here in off topic! |
|
Sep 8, 2013 - 5:34 PM
|
|
|
Enthusiast Joined Jun 18, '09 From Orlando Currently Offline Reputation: 8 (100%) |
Very funny, I actually had that idea myself (SS-FOUR + TOM's lip) a few months ago. I was wondering if anyone else had done it. Nice job Nial!
-------------------- '97 ST \ Eibach \ KYB \ Kenwood \ Alpine \ Cusco \ OEM+ [sold 10/18]
'93 MX-5 LE |
|
Sep 9, 2013 - 12:27 AM
|
|
|
Enthusiast Joined Aug 25, '08 From England Currently Offline Reputation: 1 (100%) |
Thanks
just need to start sanding it all smooth now....anyone want to lend me a spare arm? I think I am going to need it.-------------------- |
|
Sep 9, 2013 - 1:38 AM
|
|
|
Enthusiast Joined Aug 23, '11 From kenton ohio Currently Offline Reputation: 14 (100%) |
Good to see an update on such a sweet build
-------------------- 95 gt coupe, v6 swap weekend toy
99 gt hatch beams swapped wife's 94 st hatch my daily driver http://www.6gc.net/forums/index.php?showtopic=82235  n n |
|
Sep 9, 2013 - 2:12 PM
|
|
|
Enthusiast Joined Aug 25, '08 From England Currently Offline Reputation: 1 (100%) |
QUOTE (JoshuaM @ Sep 8, 2013 - 5:11 PM) Oh, so not content with a perfectly rebuilt st205.... have to go and make it an amazingly awesome SS-FOUR whilst you're at it... Hahaha,I was thinking instead of SS-Four, how about GT4 Evolution? But then I thought everyone would think I was copying the Mitsubishi Evo name. -------------------- |
|
Sep 17, 2013 - 10:19 AM
|
|
|
Enthusiast Joined Aug 25, '08 From England Currently Offline Reputation: 1 (100%) |
Hmmmm shiny bits

-------------------- |
|
Sep 17, 2013 - 12:18 PM
|
|
|
Enthusiast Joined Oct 18, '06 From cincinnati Currently Offline Reputation: 10 (100%) |
Wow, most impressive sir. Keep up the good work! And if you ever decide to take the motor mounts out and make copies, I would be happy to buy a set. haha Thanks.
-------------------- proud =3sgte SWAPPED= '95 Celica ST owner [calling it the GT2 or half-trac]
309,000 miles n' .... |
|
Sep 17, 2013 - 12:34 PM
|
|
|
Enthusiast Joined Aug 25, '08 From England Currently Offline Reputation: 1 (100%) |
Thanks
i will just be using standard motor mounts!.....i think! -------------------- |
|
Sep 18, 2013 - 4:35 AM
|
|
|
Enthusiast Joined Sep 6, '12 From Holland Currently Offline Reputation: 1 (100%) |
Really really impressive! Nice work!
-------------------- |
|
Sep 22, 2013 - 11:46 PM
|
|
|
Enthusiast Joined Sep 23, '12 From Australia Currently Offline Reputation: 4 (100%) |
Just read through this whole build... I am so jealous it is not funny man.
I wish I had the time, money, patients and skill to pull this off... Make us some of those bumpers?
--------------------  ------------------------------| White '94 Celica | Bought 11/05/12 | Sold 12/05/15 |------------------------------ |
|
Sep 25, 2013 - 12:16 PM
|
|
|
Enthusiast Joined Apr 18, '06 From Calgary, Canada Currently Offline Reputation: 37 (100%) |
Excellent!
-------------------- |
|
Sep 25, 2013 - 3:58 PM
|
|
|
Enthusiast Joined Aug 25, '08 From England Currently Offline Reputation: 1 (100%) |
Thanks.....have been busy paint stripping and underseal stripping today as I will be repainting the chassis with epoxy paint and redoing all the seam sealer. Will be so glad when its done, stripping it all off with a wire wheel is a nightmare, especially trying to get into all the nooks and crannies. Then I can start rebuilding the bottom of the car. Will be ordering some BC coilovers...then the expensive bit......buying all new suspension arms.......why are the damn things so expensive??
-------------------- |
|
Sep 30, 2013 - 3:12 PM
|
|
|
Enthusiast Joined Aug 25, '08 From England Currently Offline Reputation: 1 (100%) |
Still removing paint and underseal......sigh. Just the fiddle bits left to do which is no fun at all.
Beginning to wish I had a compressor and sand blaster.  As you can see there isn't a great deal more on the GT4 than the normal celica for the rear sub frame. For those wishing to do a proper GT4 conversion you should be able to get the extra bits to weld to a non GT4 to allow for fitment of the rear subframe. Would need looking into it in a bit more detail just to make sure there isn't any hidden parts, but it shouldn't be a difficult task. It would make it as close as possible to a GT4 without buying one. I can check part numbers for those wishing to investigate.  As you can see, I don't have much room to work in 
This post has been edited by Nial: Sep 30, 2013 - 3:13 PM -------------------- |
|
Oct 10, 2013 - 2:43 PM
|
|
|
Enthusiast Joined Aug 25, '08 From England Currently Offline Reputation: 1 (100%) |
I could do the chassis welding route, but for two reasons, one, my welding isn't very good, and two, there is an art to chassis welding to get it right, It's easy to balls it up and ruin a good chassis....but mainly my welding isn't very good :lol:
Managed to put the bonnet catch back together after I dismantled it to get it zinc plated  I also got some of this  So I can make a mould of and replicate the rear high level brake light in clear plastic instead of the standard red, it's only practice as I will be filling in the standard high level brake light and rebuilding the trailing edge of the spoiler out of clear plastic and LEDs for a different type of brake light 8) I pick up the BC coilovers on saturday, and another gt4 front bumper to use the small slot intake on the hybrid 202/205 bumper. -------------------- |
|
Oct 11, 2013 - 2:54 AM
|
|
|
Enthusiast Joined Feb 3, '06 From Czech Republic (Europe) Currently Offline Reputation: 56 (100%) |
QUOTE (Nial @ Oct 10, 2013 - 9:43 PM) ...on the hybrid 202/205 bumper. FYI it is called "ss-four bumper" . Official name for it .btw.: you are more crazy than expected... unbeliveable  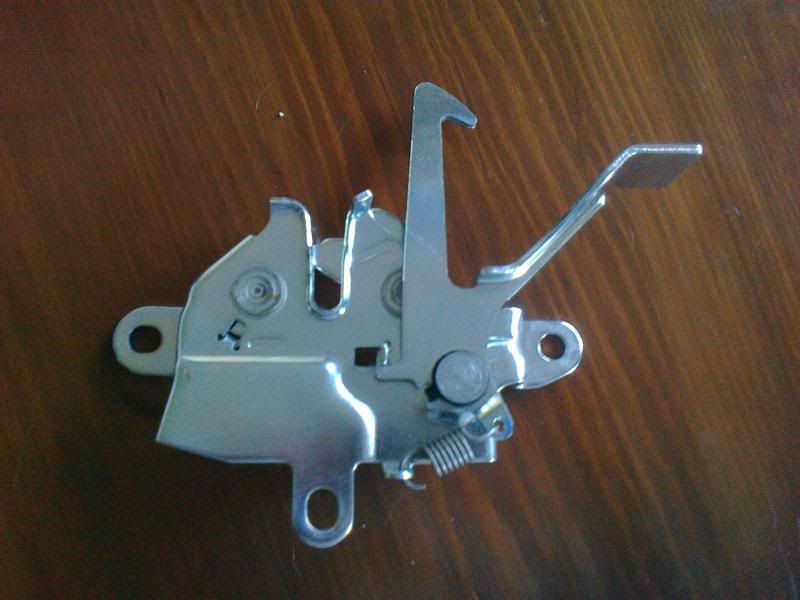
-------------------- No more replicas... This is evolution... This is SS-four :)
________[Featured Celica of 6gc.net @ 2010]_________ |
|
Oct 12, 2013 - 12:25 PM
|
|
|
Enthusiast Joined Aug 25, '08 From England Currently Offline Reputation: 1 (100%) |
Well, not much being done today, spent a large portion of the day driving around the country picking up bits n pieces.
Did pick up these though the obligatory suspension in a box shot....some nice BC coilovers  The castings are in the garage currently painted in grey self etching primer. I picked up yet another GT4 front bumper to finish off the SS4 front bumper.....that will be 3 GT4 front bumpers that have bitten the dust thanks to me ....oh well.Tomorrow, hopefully I will complete the cleaning off of the bottom of the car so I can do the final derust and clean ready for applying the paint next weekend. -------------------- |
|
Oct 13, 2013 - 10:07 AM
|
|
|
Enthusiast Joined Aug 25, '08 From England Currently Offline Reputation: 1 (100%) |
Finally getting round to finishing the SS4 front bumper

-------------------- |
|
Oct 27, 2013 - 10:42 AM
|
|
|
Enthusiast Joined Aug 25, '08 From England Currently Offline Reputation: 1 (100%) |
Well finally got to apply some paint instead of stripping it off.
 still some stripping to do in the engine bay area, but I have to get this painted before the weather gets too cold.....paint dosent like being applied in the cold....paints a wuss :lol: :lol: :lol: After another coat of epoxy mastic, I will apply some seam sealer in a few areas, then some POR high build tie coat primer as the epoxy mastic has load of brush marks, it will then get a smoothing rub down before I apply some POR15 flex coat for a silky smooth glossy finish 
-------------------- |
|
Oct 27, 2013 - 10:54 AM
|
|
|
Enthusiast Joined Jul 12, '08 Currently Offline Reputation: 5 (100%) |
So much epicness
-------------------- |
|
Oct 27, 2013 - 11:33 AM
|
|
|
Enthusiast Joined May 16, '10 From Raleigh Currently Offline Reputation: 12 (100%) |
That is ridiculously epic!
--------------------  |
|
Oct 27, 2013 - 2:20 PM
|
|
|
Enthusiast Joined May 23, '12 From northridge,CA Currently Offline Reputation: 3 (100%) |
I am really impressed with the amount of work just in ur garage or back yard. Seriously impressed, and I really like how ur going over every detail it makes me wish I can do that with my car but unfortunately I can not.
And also Are you gonna be ok putting everything back right? |
|
Oct 27, 2013 - 2:44 PM
|
|
|
Enthusiast Joined Aug 25, '08 From England Currently Offline Reputation: 1 (100%) |
QUOTE (mi645 @ Oct 27, 2013 - 2:20 PM) And also Are you gonna be ok putting everything back right? Thanks........now there's a question!! the only thing that is going to be a problem (I think) is the dashboard loom which my memory instantly forgot the second I removed it from the car. Luckily I can just use my other GT4 for reference as I transfer the parts from one to the other. Or just muddle through until I get it right. Logic dictates though that I am bound to forget something. -------------------- |
|
Nov 8, 2013 - 12:50 PM
|
|
|
Enthusiast Joined Dec 9, '08 From Blainville Currently Offline Reputation: 4 (100%) |
Will you post how to mod the BC coils?
 I plan to get a pair of these (Not sure yet which model to go for, ER RA or RH) |
|
Nov 8, 2013 - 5:13 PM
|
|
|
Enthusiast Joined Aug 25, '08 From England Currently Offline Reputation: 1 (100%) |
There is no modding of BC coilovers required, simply weld them together which any welder could do easily.
which ones you go for depends on what you are going to use the car for. For road use, just buy the basic ones that I go wthich will also manage track use. The expensive ones are for expert use really and offer more function & adjustability than you would be ever likely to use. -------------------- |
|
Nov 9, 2013 - 7:10 AM
|
|
|
Enthusiast Joined Aug 29, '02 From Lake Orion, MI Currently Offline Reputation: 6 (100%) |
QUOTE (dudeofchaos @ Nov 8, 2013 - 12:50 PM) Will you post how to mod the BC coils? I plan to get a pair of these (Not sure yet which model to go for, ER RA or RH) They were ~$1K USD shipped. -------------------- -Mike
mjcoury@gmail.com Team Reynolds Style Celica Blog Celica Wiki It will take him a moment to realize that he's about to make a 180 degree turn at speed, but you will be ready for it. Brace for the g's, and fast heel-toe work. |
|
Nov 9, 2013 - 7:32 AM
|
|
|
Enthusiast Joined Aug 29, '02 From Lake Orion, MI Currently Offline Reputation: 6 (100%) |
.
This post has been edited by qatar11: Nov 9, 2013 - 7:32 AM -------------------- -Mike
mjcoury@gmail.com Team Reynolds Style Celica Blog Celica Wiki It will take him a moment to realize that he's about to make a 180 degree turn at speed, but you will be ready for it. Brace for the g's, and fast heel-toe work. |
|
Nov 10, 2013 - 3:33 PM
|
|
|
Enthusiast Joined Dec 9, '08 From Blainville Currently Offline Reputation: 4 (100%) |
QUOTE (Nial @ Nov 8, 2013 - 7:13 PM) There is no modding of BC coilovers required, simply weld them together which any welder could do easily. which ones you go for depends on what you are going to use the car for. For road use, just buy the basic ones that I go wthich will also manage track use. The expensive ones are for expert use really and offer more function & adjustability than you would be ever likely to use. I'm just not sure I'll be able to explain the welder where it needs to be cut though. The car will see some track days but mostly be a summer DD and the roads here are absolutely horrible, I can't drive around with the same setup than on track. Not sure I'll get the ER model though, I guess it'd be too overkill. Except for the fact that I wanted to get the 9kg front/6kg rear model which is only available for the ER's and I'd rather have pillowball top mounts for the rear which the RA's don't have. As for now, the RH will be my final choice. |
|
Nov 10, 2013 - 7:11 PM
|
|
|
Enthusiast Joined Aug 29, '02 From Lake Orion, MI Currently Offline Reputation: 6 (100%) |
QUOTE (dudeofchaos @ Nov 10, 2013 - 3:33 PM) Except for the fact that I wanted to get the 9kg front/6kg rear model which is only available for the ER's and I'd rather have pillowball top mounts for the rear which the RA's don't have. As for now, the RH will be my final choice. This is incorrect... when ordering directly from BC (via phone) you can specify pillowball top mounts for the rear... -------------------- -Mike
mjcoury@gmail.com Team Reynolds Style Celica Blog Celica Wiki It will take him a moment to realize that he's about to make a 180 degree turn at speed, but you will be ready for it. Brace for the g's, and fast heel-toe work. |
|
Nov 10, 2013 - 7:51 PM
|
|
|
Enthusiast Joined Dec 9, '08 From Blainville Currently Offline Reputation: 4 (100%) |
QUOTE (qatar11 @ Nov 10, 2013 - 9:11 PM) QUOTE (dudeofchaos @ Nov 10, 2013 - 3:33 PM) Except for the fact that I wanted to get the 9kg front/6kg rear model which is only available for the ER's and I'd rather have pillowball top mounts for the rear which the RA's don't have. As for now, the RH will be my final choice. This is incorrect... when ordering directly from BC (via phone) you can specify pillowball top mounts for the rear... Really? On their site it states that RA model does not come with pillowball top mounts. Well.. thanks for the info then!
|
|
Nov 16, 2013 - 1:36 PM
|
|
|
Enthusiast Joined Aug 25, '08 From England Currently Offline Reputation: 1 (100%) |
Well a bit more progress, some high build primer into the engine bay, the epoxy mastic is so rough its going to take several coats of primer, sand down, more primer etc etc to get an even half flat finish.
 Somethings missing.....oh yea, everything 
This post has been edited by Nial: Aug 16, 2014 - 2:17 AM -------------------- |
|
Nov 22, 2013 - 4:57 PM
|
|
|
Enthusiast Joined Aug 25, '08 From England Currently Offline Reputation: 1 (100%) |
adding some seam sealer now. need more masking tape

-------------------- |
|
Nov 22, 2013 - 5:31 PM
|
|
 Enthusiast Joined Jan 8, '09 From Netherlands Currently Offline Reputation: 54 (100%) |
Awesome rebuild, very impressive!
|
|
Nov 27, 2013 - 2:58 PM
|
|
|
Enthusiast Joined Aug 25, '08 From England Currently Offline Reputation: 1 (100%) |
Only about a million hors of sanding left to go

-------------------- |
|
Nov 27, 2013 - 3:41 PM
|
|
|
Enthusiast Joined Jun 18, '09 From Orlando Currently Offline Reputation: 8 (100%) |
Yes!
I almost feel bad for Martin that his design is copied so much, but damn if it's not the best-looking use of a facelift bumper. -------------------- '97 ST \ Eibach \ KYB \ Kenwood \ Alpine \ Cusco \ OEM+ [sold 10/18]
'93 MX-5 LE |
|
Nov 28, 2013 - 7:12 AM
|
|
|
Enthusiast Joined Feb 11, '08 From Auckland, New Zealand Currently Offline Reputation: 0 (0%) |
I looked back and noticed martin didn't transfer the little mini grill in the middle, I would prefer to keep that too
-------------------- Mike W
1996 Toyota Celica ST205 GT-FOUR GT2860RS turbine, TiAL mvr44, JE 86.5φ piston, Clutchmasters FX400, APEX P-FC 269awhp / 273ft-lbs |
|
Nov 28, 2013 - 2:35 PM
|
|
|
Enthusiast Joined Aug 25, '08 From England Currently Offline Reputation: 1 (100%) |
Not that I have been following all others that have don't this little hybrid bumper build, but I can't recall anyone else keeping the little letterbox vent, it would be nice to claim to be the first but someone somewhere is bound to have done it long before now.
-------------------- |
|
Nov 29, 2013 - 4:20 AM
|
|
|
Enthusiast Joined Feb 3, '06 From Czech Republic (Europe) Currently Offline Reputation: 56 (100%) |
QUOTE (SwissFerdi @ Nov 27, 2013 - 9:41 PM) I almost feel bad for Martin that his design is copied so much, but damn if it's not the best-looking use of a facelift bumper. No need to mate . For it is prove I had great idea In terms of improvement. In fact I wanted that vent on my bumper as well but unfortunately "teeth" were broken on my donor bumper so decided to not using it in the end... it is bit visible (two in the middle) in picture below: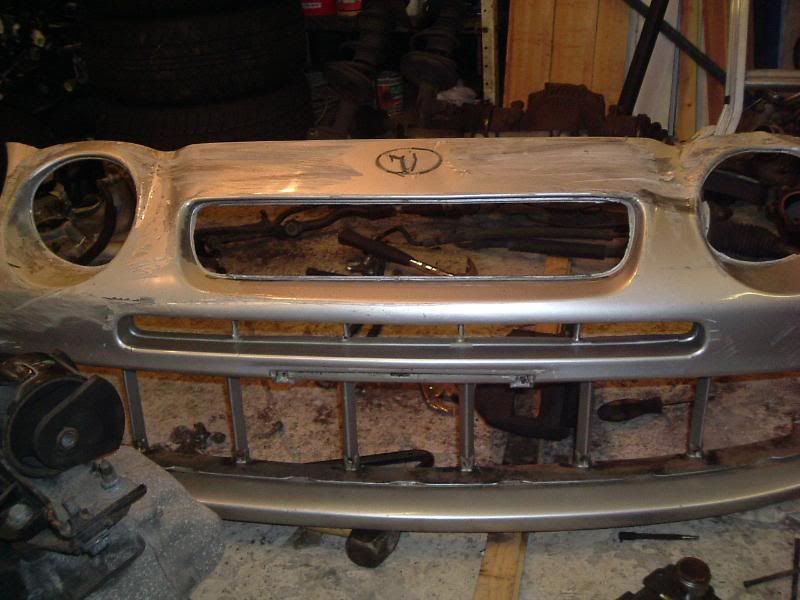 I am really glad I can see result how it would look like with that vent as well
-------------------- No more replicas... This is evolution... This is SS-four :)
________[Featured Celica of 6gc.net @ 2010]_________ |
|
Nov 29, 2013 - 4:11 PM
|
|
|
Enthusiast Joined Jan 20, '08 From East Coast Currently Offline Reputation: 1 (100%) |
Everything you are doing is effing incredible.
|
|
Nov 29, 2013 - 6:14 PM
|
|
|
Enthusiast Joined Aug 25, '08 From England Currently Offline Reputation: 1 (100%) |
Thanks.
More sanding today, managed to get a nice smooth finish. Sorting out the brake lines and fuel lines this weekend as well as the front sub frame. Still the engine bay to finish cleaning and painting but as the cars in the rotisserie it's difficult tote to. I think I have managed to find myself a 5sfe engine so it looks like a 5sgte might be in order. 5sfe' see hard to come by here. Then I can start overhauling and rebuilding the front hubs, brake callipers and remaining suspension arms, So much to do...will it ever end? -------------------- |
|
Nov 29, 2013 - 6:26 PM
|
|
|
Enthusiast Joined Aug 25, '08 From England Currently Offline Reputation: 1 (100%) |
Any 6gc club meets in Florida in April next year? As guess where I will be for a few weeks
-------------------- |
|
Nov 29, 2013 - 6:26 PM
|
|
|
Enthusiast Joined Feb 23, '12 From Warrior, AL Currently Offline Reputation: 0 (0%) |
DISNEY WORLD!!!!
-------------------- 2001 Miata LS 5-speed
|
|
Nov 29, 2013 - 6:28 PM
|
|
|
Enthusiast Joined Aug 25, '08 From England Currently Offline Reputation: 1 (100%) |
Yep
On my honeymoon.....but if you can't attend the odd car meet or two on your honeymoon then what's the world coming to eh -------------------- |
|
Nov 29, 2013 - 6:39 PM
|
|
|
Enthusiast Joined Feb 23, '12 From Warrior, AL Currently Offline Reputation: 0 (0%) |
What do I win for getting it right?
-------------------- 2001 Miata LS 5-speed
|
|
Nov 29, 2013 - 7:11 PM
|
|
|
Enthusiast Joined Sep 23, '12 From Ireland Currently Offline Reputation: 0 (0%) |
QUOTE (Nial @ Nov 29, 2013 - 6:14 PM) Thanks. More sanding today, managed to get a nice smooth finish. Sorting out the brake lines and fuel lines this weekend as well as the front sub frame. Still the engine bay to finish cleaning and painting but as the cars in the rotisserie it's difficult tote to. I think I have managed to find myself a 5sfe engine so it looks like a 5sgte might be in order. 5sfe' see hard to come by here. Then I can start overhauling and rebuilding the front hubs, brake callipers and remaining suspension arms, So much to do...will it ever end? yea i like it.. i was looking into the 5sfe for a conversion in the future.. it seems like the "better" method, will be a overall better performance from the 5sgte less lag and more torque, they are getting rare over here too.. great job on the bumper lad.. im loving this build! |
|
Dec 16, 2013 - 3:47 PM
|
|
|
Enthusiast Joined Aug 25, '08 From England Currently Offline Reputation: 1 (100%) |
Taking a break from this project while I decide what to do, the latest layer of paint looks terrible, no matter how carefully you apply it, it runs everywhere and looks like a child painted it on. To top it all off it then reacted with the other paint so it all has to come off. Back to square one, options are spend more months wire brushing the paint off, sending it away to get sand blasted, buy a sand blaster and do t myself or give up, right this very second the giving up option is mighty appealing, I can't afford to keep throwing money at this project for it to keep going wrong. Might be time to call it a day!
-------------------- |
|
Dec 16, 2013 - 3:50 PM
|
|
|
Enthusiast Joined Dec 22, '06 From Columbia, MD Currently Offline Reputation: 13 (100%) |
yup! time to call it a day! Fly it over to me. Itll give me something to do in the afternoons.....chances are you wont get it back though
-------------------- 1995 GT::::Diffusing the Situation エキサイティングカーレーシングチーム! march 2010 COTM : 6GC feature 2014 : january 2015-2016-2018 COTM |
|
Dec 16, 2013 - 4:22 PM
|
|
|
Enthusiast Joined Jul 12, '08 Currently Offline Reputation: 5 (100%) |
QUOTE (Nial @ Dec 16, 2013 - 4:47 PM) Taking a break from this project while I decide what to do, the latest layer of paint looks terrible, no matter how carefully you apply it, it runs everywhere and looks like a child painted it on. To top it all off it then reacted with the other paint so it all has to come off. Back to square one, options are spend more months wire brushing the paint off, sending it away to get sand blasted, buy a sand blaster and do t myself or give up, right this very second the giving up option is mighty appealing, I can't afford to keep throwing money at this project for it to keep going wrong. Might be time to call it a day! you wouldn't happen to be having trouble with POR paint are you? Because I just went through numerous attempts applying POR chassis coat black only to have it look absolutely horrible no matter what I tried. Foam brushes, bristle brushes, lots of mixing, little mixing, high temperature, low temperature, various humidities, anything and everything. It always came out exactly like you described, as though a child did the painting 
This post has been edited by enderswift: Dec 16, 2013 - 4:32 PM -------------------- |
|
Dec 16, 2013 - 4:37 PM
|
|
|
Enthusiast Joined Aug 25, '08 From England Currently Offline Reputation: 1 (100%) |
It is a POR paint yes. Sick of it. It runs no matter how thinly you apply it. I know it's under the car and no one will see it, but I would know and it would annoy me constantly. Frustrated.
-------------------- |
|
Dec 16, 2013 - 8:33 PM
|
|
|
Enthusiast Joined Jul 12, '08 Currently Offline Reputation: 5 (100%) |
QUOTE (Nial @ Dec 16, 2013 - 5:37 PM) It is a POR paint yes. Sick of it. It runs no matter how thinly you apply it. I know it's under the car and no one will see it, but I would know and it would annoy me constantly. Frustrated. I know the feeling. All that prep work only to have it messed up in the end. I think it suffices to say that POR wont be getting my money again. Stay strong and seriously consider blasting. Once you blast there really is no other alternative haha -------------------- |
|
Dec 17, 2013 - 1:17 AM
|
|
|
Enthusiast Joined Aug 25, '08 From England Currently Offline Reputation: 1 (100%) |
QUOTE (enderswift @ Dec 16, 2013 - 8:33 PM) QUOTE (Nial @ Dec 16, 2013 - 5:37 PM) It is a POR paint yes. Sick of it. It runs no matter how thinly you apply it. I know it's under the car and no one will see it, but I would know and it would annoy me constantly. Frustrated. I know the feeling. All that prep work only to have it messed up in the end. I think it suffices to say that POR wont be getting my money again. Stay strong and seriously consider blasting. Once you blast there really is no other alternative haha POR won't be getting any of my money either, rustbuster is pretty good, but my favourite so far is a paint from the US called eastwood, nice to apply, forgiving, a nice finish, a bit on the pricey side, but considering the amount that POR has cost me!! Today will be spent pricing up air compressors and finding out just how feasible it is to sand blast in the garage. -------------------- |
|
Dec 28, 2013 - 11:25 AM
|
|
|
Enthusiast Joined Aug 25, '08 From England Currently Offline Reputation: 1 (100%) |
Well, a bit of work today, decided to refurbish a set of spare brake Calipers I had, they are in mint condition so didnt need much fettling, I took them to bits, removed all the seals etc, the bolts will be sent away to get zinc plated.
The callipers were painted with Eastwood chassis black extreme, a beautiful paint that goes on very nicely and has a great finish.  and a hint as to what the finished callipers will look like 
This post has been edited by Nial: Aug 16, 2014 - 2:19 AM -------------------- |
|
Dec 28, 2013 - 11:45 AM
|
|
|
Enthusiast Joined Dec 8, '03 From Lancaster CA Currently Offline Reputation: 6 (100%) |
keep up the good work!!! This is what I want to do to my Supra
-------------------- 2001 Celica GT-S Turbo
1997 Supra TT 6speed 1997 Celica 3MZ/1MZ swap 1990 Celica All-Trac |
|
Mar 23, 2014 - 12:44 PM
|
|
|
Enthusiast Joined Aug 25, '08 From England Currently Offline Reputation: 1 (100%) |
Well after getting over a rather mild winter, i have ventured back into the garage.
I have finally stripped my pride and joy down to a bare shel and it has been shipped off to the great B road in the sky. After saying goodbye to it I have been trying to find space for all the parts I now have, the garage is full to the brim with car parts, plus I had to buy a small wooden shed to store more stuff in....so the garage is a bit of a mess. i manged to clear myself a small patch of surface to resume work on. First off was the clutch master cylinder, i know its only small and probably not of much interest but its a step in the right direction. I could have done with sending the shaft away to get zinc plated as I am not happy with its finish, but i guess as it will never be seen it will have to do.  I have replaced the insides with a brand new piston and seals. Painted the body black and cleaned up the reservoir. Then i made a start on the brake master cylinder and vacuum cylinder. it was a bit rusty so after a soak in Bilt Hamber Deox C rust remover and a quick wire brushing I have primered it and this is where I could do with your help....... Baring in mind everything in the car will be either black, silver or the colour of the car, what colour shall i paint the vacuum housing? as i want to paint the cylinder black to match the clutch master cylinder I was thinking about painting it the same colour as the car so that there is a bit of contrast...or should I go with standard black? Currently primered and waiting for me to make my mind up....excuse the mess.  coming to the US in a couple of weeks for a few weeks, any car meets in florida from the 6th april? Going to Disney for my honeymoon cheers all Nial This post has been edited by Nial: Mar 23, 2014 - 1:29 PM -------------------- |
|
Mar 23, 2014 - 1:13 PM
|
|
|
Enthusiast Joined Mar 6, '12 From Brisbane, Australia Currently Offline Reputation: 6 (100%) |
I would personally go black because it will look the most sophisticated and original and your car is going to be MINT! I am a bit boring like that though, and a bit of colour might spice things up... so I'm no help I guess
-------------------- SOLD :( 1997 ST204 Celica ZR -----> See it here on 6GC! 2013 October Celica of the Month XD Now: '00 NB8B Mazda MX5 -----> See it here in off topic! |
|
Mar 30, 2014 - 1:26 PM
|
|
|
Enthusiast Joined Aug 25, '08 From England Currently Offline Reputation: 1 (100%) |
So, i went with black, looks ok. Will contrast well against the silver of all the braided hoses.
Another box of bits (mostly bolts) arrived back from the electroplaters.  should be fun trying to remember where all the bolts go...i give myself about an 80% chance of getting it wrong I also managed a few smaller jobs, put the ignitor assembly back together along with the nice shiny dipstick holed, wiper motor which i finally managed to get the bolts for, and the steering shaft gaiter.  it should look nice on the bulkhead  Nearly got the front driveshafts finished, just need to locate a replacement vibration damper for the right side drive shaft.  The brake stopper polished up well  front hubs also came back from the electroplaters.  A box of parts ready to be sent off to the electroplaters when i get back rom Florida  still nothing of much substance really, just all little jobs that make the big jobs easier. A few weeks of nothing now while I go on my honeymoon should be big progress when I get back as i will be putting the suspension back on etc
-------------------- |
|
May 14, 2014 - 10:34 AM
|
|
|
Enthusiast Joined Apr 24, '14 From Durham, NC, USA Currently Offline Reputation: 0 (0%) |
Nial, reading about your Celica build is like reading a 'pot boiler' or 'page turner'; I had to read the whole thing from beginning to end without stopping! I offer a sincere congratulations on your work, and your wedding.
You have inspired me sir, although I stand on the shore of the lake dipping my toes into the icy cold waters you seem to be thriving in, I am afraid to make the jump. I started working on my 94 ST Coupe (1.8L) over a month ago by saying to myself it was only fair to give her a completely all-new or rebuilt brake system since she was fast approaching her 20th birthday, and that would keep her safe, and then changed out the rear wheel bearings "while I was at it.' Once started, it is hard to stop, because I keep seeing more things that need to be done. I think I'm being bit by the bug in a more 'bottom up' fashion, in comparison with your 'top down' all out attack. Most of your description makes sense to me, and I feel I kind of understand how much effort you have put into the job, since it is so well written and photo documented. If you don't mind, I would like to ask a silly question, however. You sent a lot of hardware, many nuts, bolts, etc. to the electroplater's to get them zinc plated. I am wondering if that is an expensive proposition? I don't see many shops that do that here in NC and wonder if there are many in the UK. |
|
May 18, 2014 - 9:55 AM
|
|
|
Enthusiast Joined Aug 25, '08 From England Currently Offline Reputation: 1 (100%) |
Well got a bunch of tstuff back from the zinc platers and got a few more things back together.
 The brake and clutch pedals refurbished and ready to be refitted  I took the power steering pump apart, there's quite a few bits inside that all decide they want to head in many different directions when you open the thing up.  And the tensioner for the alternator belt  The next task is building a new dolly to help transport the shell around as it doesn't fit on a car transporter with the current dolly, time to break out the welder again. -------------------- |
|
May 18, 2014 - 9:14 PM
|
|
|
Enthusiast Joined Dec 8, '03 From Lancaster CA Currently Offline Reputation: 6 (100%) |
such an awesome build...
How much do you think you have spent already? -------------------- 2001 Celica GT-S Turbo
1997 Supra TT 6speed 1997 Celica 3MZ/1MZ swap 1990 Celica All-Trac |
|
May 19, 2014 - 12:25 AM
|
|
|
Enthusiast Joined Aug 25, '08 From England Currently Offline Reputation: 1 (100%) |
I dread to think how much I have spent.....probably edging towards £10,000 if you include tools, mistakes and building the little extension. I recon it's going to cost me about another £20,000 to finish it all..but that's everything, tools, consumables, paint, engine fuel etc.
-------------------- |
|
May 20, 2014 - 8:25 AM
|
|
|
Enthusiast Joined Dec 8, '03 From Lancaster CA Currently Offline Reputation: 6 (100%) |
stick with it man, its going to be worth it when its all done
-------------------- 2001 Celica GT-S Turbo
1997 Supra TT 6speed 1997 Celica 3MZ/1MZ swap 1990 Celica All-Trac |
|
May 20, 2014 - 11:52 AM
|
|
|
Enthusiast Joined Aug 25, '08 From England Currently Offline Reputation: 1 (100%) |
I hope so, the number of things to do seems endless, every day something new crops up. The next task is making a transport device for the shell that doubles as a rotisserie. That's going to be fun, better dust off the welder, break out the design hat and order some steel.
-------------------- |
|
May 23, 2014 - 12:55 PM
|
|
|
Enthusiast Joined Aug 25, '08 From England Currently Offline Reputation: 1 (100%) |
It's about time I had a new rotisserie, so I have made this one to be very strong, to be able to rotate the car, obviously, but also to enable it to be transported it's wheel width will match that of a car transporter ramps, it's adjustable in both length and height
a step up from the wooden supports I was using :lol:   Should finish it tomorrow
-------------------- |
|
Jun 20, 2014 - 10:44 AM
|
|
|
Enthusiast Joined Aug 25, '08 From England Currently Offline Reputation: 1 (100%) |
Sent the shell away for Media blasting at last, and it's done.
 Along with a super tough primer/undercoat....not the final colour, but quite a nice colour, not sure if it would suit a celica or not.....think I will stick with me original colour
This post has been edited by Nial: Jun 20, 2014 - 12:37 PM -------------------- |
|
Jun 20, 2014 - 3:04 PM
|
|
|
Enthusiast Joined Apr 24, '14 From Durham, NC, USA Currently Offline Reputation: 0 (0%) |
QUOTE (Nial @ Jun 20, 2014 - 11:44 AM) Sent the shell away for Media blasting at last, and it's done. Along with a super tough primer/undercoat....not the final colour, but quite a nice colour, not sure if it would suit a celica or not.....think I will stick with me original colour That shot was taken at the place that did your blasting? Nial, I'm interested in getting more information about your designs for your rotisseries, both of them. Basic idea is clear. Could you show close up detail about how it is made and how you bolted the shell to it? |
|
Jun 20, 2014 - 3:36 PM
|
|
|
Enthusiast Joined Aug 25, '08 From England Currently Offline Reputation: 1 (100%) |
QUOTE (Langing @ Jun 20, 2014 - 4:04 PM) That shot was taken at the place that did your blasting? Nial, I'm interested in getting more information about your designs for your rotisseries, both of them. Basic idea is clear. Could you show close up detail about how it is made and how you bolted the shell to it? Yes that picture was taken at the unit John uses to do the blast cleaning, it's just a shed on an old farm. I get the car back home tomorrow so I will take some pictures of the rotisserie for you. The old wooden rotisserie has been cut up now and utilised for something else but I will see if I can dig out some old pictures. The rear of the rotisserie I used an old rear bumper crash bar, welded some steel and a pivot to it, the front bit of the rotisserie that holds the car is just 2inch box section welded together. -------------------- |
|
Jun 20, 2014 - 3:42 PM
|
|
|
Enthusiast Joined Aug 25, '08 From England Currently Offline Reputation: 1 (100%) |
This s one of the wooden supports kinda three quarters built
 You can see the use of the box section to hold the shell at the bumper support points, with the bumper supports removed obviously.  I reused this part on the second metal rotisserie. -------------------- |
|
Jun 20, 2014 - 5:28 PM
|
|
|
Enthusiast Joined Apr 24, '14 From Durham, NC, USA Currently Offline Reputation: 0 (0%) |
To set my reference: The last two photos show the vehicle first looking from the front and second looking from the rear?
The first photo shows the open end of a rectangular cross section frame member where a bumper support has already been removed (lower left, with plastic bottle beneath, with two bolts protruding at the left)), and when you bolted the box section steel cross member of the rotisserie to the vehicle, you bolted it at those two bumper support positions? I've never taken a bumper off, so I got out my BGB. Exactly two pages of drawings and that's it! For the front I believe I can see the bumper supports. On the back I see three points where an "upper retainer" ties in, and I see a "lower back finish center panel," and after that is a strong steel "reinforcement" bar. I'm guessing that's what you call the "crash bar?" Beyond that are the energy absorbers which are covered by the "bumper covers"? I'm looking forward to some more detailed photos. It is interesting to see what you did. " |
|
Jun 21, 2014 - 12:55 AM
|
|
|
Enthusiast Joined Aug 25, '08 From England Currently Offline Reputation: 1 (100%) |
QUOTE (Langing @ Jun 20, 2014 - 6:28 PM) The first photo shows the open end of a rectangular cross section frame member where a bumper support has already been removed (lower left, with plastic bottle beneath, with two bolts protruding at the left)), and when you bolted the box section steel cross member of the rotisserie to the vehicle, you bolted it at those two bumper support positions? That is correct yes QUOTE (Langing @ Jun 20, 2014 - 6:28 PM) To set my reference: The last two photos show the vehicle first looking from the front and second looking from the rear? No, both the last photos are the front of the car. The rear is a bit more complicated as the bumper/crash bar is set lower down so it would make the pivot point too low, it will be clear with photos but slightly more fabrication is needed. Excuse the crappy welding but it was the first thing I ever welded in my life. -------------------- |
|
2 User(s) are reading this topic (2 Guests and 0 Anonymous Users)
0 Members:
| Lo-Fi Version | Time is now: April 21st, 2025 - 7:31 AM |