  |
 Jun 23, 2014 - 11:56 AM Jun 23, 2014 - 11:56 AM
|
|
|
Enthusiast   Joined Apr 24, '14 From Durham, NC, USA Currently Offline Reputation: 0 (0%) |
Excuse me for repeating a post, but this was buried where I was not sure someone would read it in time to be of any help.
I need to ask an urgent question: When I finished pressing the wheel bearing back in place and installed the snap ring, both oil seals, the lower ball joint, the dust cover, everything, I tried turning the hub by hand. TROUBLE. . . I could hear and feel that something was wrong with the new bearing. It made a slight but rough sound as it rotated, and I could actually feel a vibration in the steering knuckle where I held on to it while turning the hub. Now, considering that I had trashed the bearing, I have it taken back apart, except for pressing out the outer race. I have another bearing set which I was going to use on the other front that I will use on this side, but don't want to do it again and get the same results, so. . . WHAT MESSED UP THE BEARING; WHAT DID I DO WRONG; HOW WAS THE BEARING AFFECTED SUCH THAT IT WAS VIBRATING? BTW: I used a Harbor Freight front wheel bearing tool set to press in the bearing and hub. I used an adapter that caught the just outer race of the bearing when pressing it into place. But, for pressing the bearing onto the hub I used a flat adapter against the pulled side of the bearing, such that it might catch both the inner race and outer race at the same time. I'm thinking this is the problem but need verification by someone telling me EXACTLY what I've done to the bearings to make a perfectly good new bearing immediately bad. Here is a photo of the inside of the steering knuckle showing the newly pressed bearing and its snap ring locking it in place. 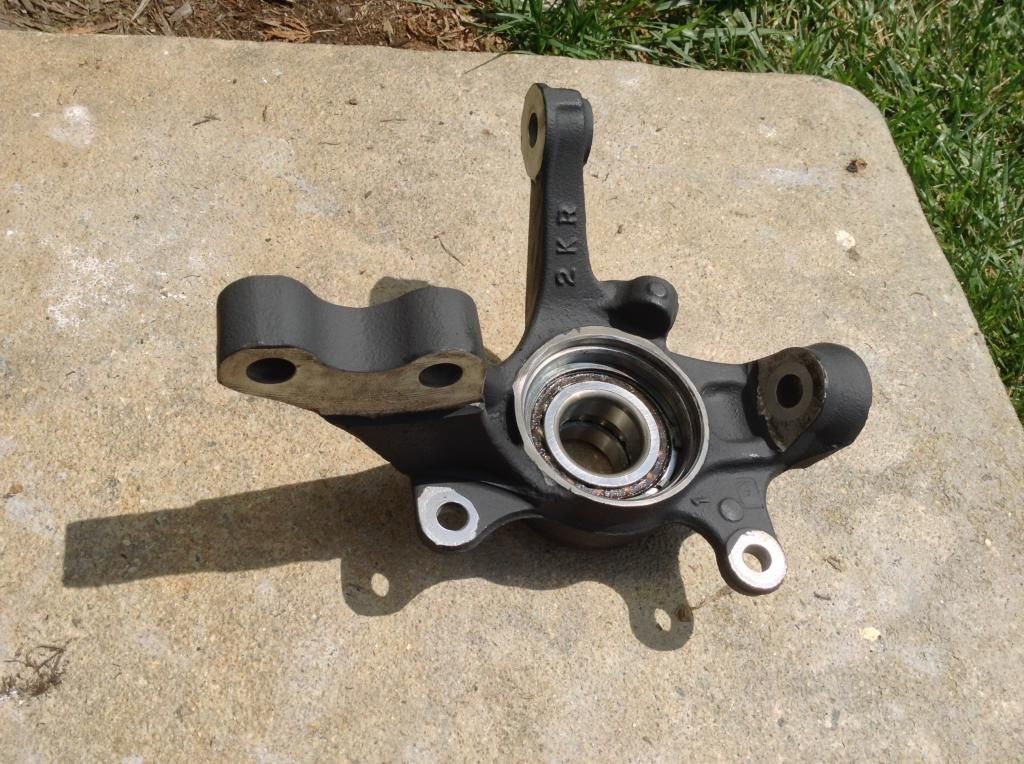 Notice that the two inner races have begun to come apart. The bearing came with a plastic insert which I took out as soon as possible. Perhaps that was used to keep the two races together until they were pressed onto the hub spindle? Also, from looking at this photo, now I am guessing that the flat adapter must have been forcing against the snap ring as well as the inside race of the bearing when pushing it onto the hub spindle. I also messed up the inner oil seal by banging on it too hard, and by using a punch where I thought it wasn't set deep enough. THAT'S A SECOND QUESTION: How far into the bore does the outer seal go, and is there an open space left between the bearing and seal. \When putting in the inner oil seal, I began using an adapter that caught the ring of the seal and tapped it into the bore. I couldn't seem to get the seal seated far enough down into the bore such that it provided a 'seal' over the bearing. That is to say, there was space left open between the seal and bearing, space into which I imagined I should be pushing a wheel bearing grease to fill it up. That's why I began using a punch on the metal of the seal (that's a no-no, from reading about seal installations). It got so bad that when I was almost down to where the seal would make closure with the bearing, I could see that I had damaged the seal in such a way that the little weird spring-ring (See photo) part that is inside the seal had come off and was pushed down into the bearing area. Here is the photo: 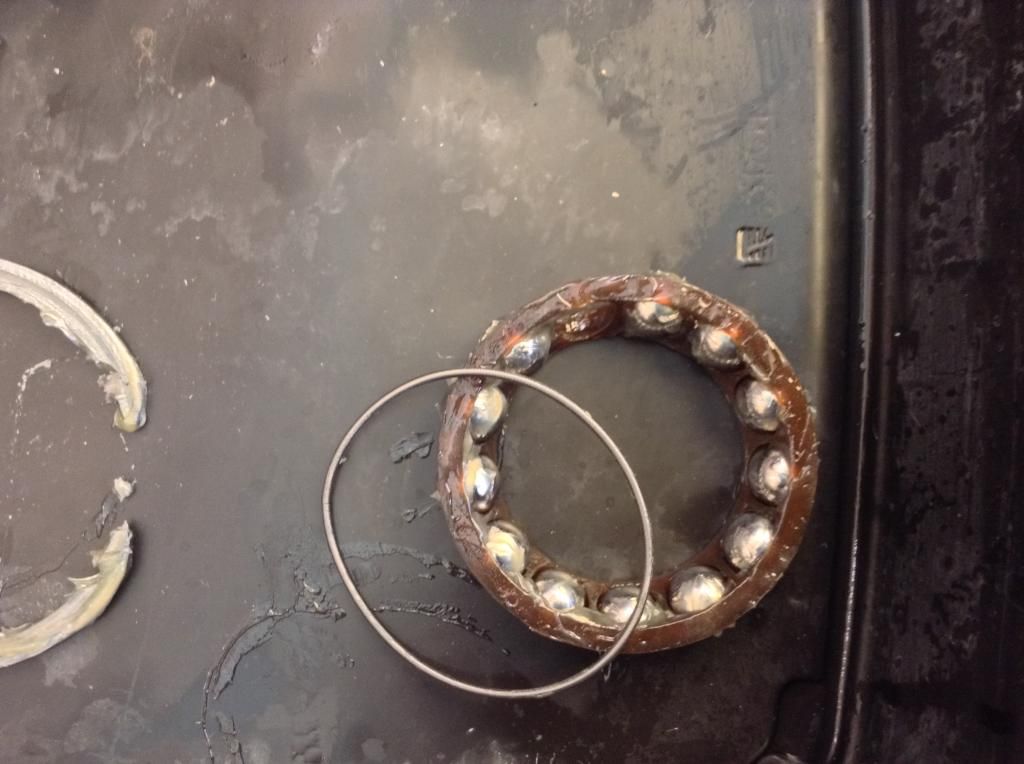
|
 Jun 23, 2014 - 12:58 PM Jun 23, 2014 - 12:58 PM
|
|
|
Enthusiast   Joined Mar 4, '10 From Bronx NY Currently Offline Reputation: 3 (100%) |
1) bearing should bottom out..... outer race of the bearing into the hub. tap it till it -bottoms out-
2)yes there will be a space between seal and bearing . but again make sure bearing are bottomed out. and seal should be flushed with outer hub. no need to past the flush point. use and adapter to go over the whole seal. do not tap it directly. (purchase a Press or seal adapter kit, use the size that fits over the whole seal and tap firm) 3) as to vibration... are you sure you placed hub and all back correctly? is the tabs on the knuckle bent ? (if so gently but firmly tap them back while hub is mounted. look for clearance where the rotor and hub meet. make sure the space is equal) 4) also the plastic middle piece is to keep the two inner race in during shipping. yes the inner race removes easy they are not the solid pressed type that you see on other bearings This post has been edited by timdog1720: Jun 23, 2014 - 1:09 PM -------------------- Always fast and going for the look......
 |
 Jun 23, 2014 - 5:43 PM Jun 23, 2014 - 5:43 PM
|
|
|
Enthusiast   Joined Apr 24, '14 From Durham, NC, USA Currently Offline Reputation: 0 (0%) |
1) bearing should bottom out..... outer race of the bearing into the hub. tap it till it -bottoms out- 2)yes there will be a space between seal and bearing . but again make sure bearing are bottomed out. and seal should be flushed with outer hub. no need to past the flush point. use and adapter to go over the whole seal. do not tap it directly. (purchase a Press or seal adapter kit, use the size that fits over the whole seal and tap firm) 3) as to vibration... are you sure you placed hub and all back correctly? is the tabs on the knuckle bent ? (if so gently but firmly tap them back while hub is mounted. look for clearance where the rotor and hub meet. make sure the space is equal) 4) also the plastic middle piece is to keep the two inner race in during shipping. yes the inner race removes easy they are not the solid pressed type that you see on other bearings Thank you for the rapid reply. I'm at an impasse until I am sure that the next time I will not mess the bearing when installing. 1) I'm using a tool set (kit) made by Harbor Freight specifically for use in replacing press-fit front wheel bearings. This tool replaces the functionality of the hydraulic 20-ton press they sell, but is much less powerful, and uses a screw, manpower, and a mechanic's skill, rather than hydraulic fluid, to generate the pressure that "presses" the bearing home. It works, but requires WORK! On YouTube there is a guy who shows that if you use a "breaker bar" to turn the screw, you can wring off the bolt head. . . so, cheap tool When installing the bearing, it is pressed into the steering knuckle, which you might be calling the "hub" (the FSM has an illustration showing FRONT AXLE HUB COMPONENTS SA-12, which includes a part called the AXLE HUB, which is the short spindle attached to a circular 5" dia circular piece that rotates in the bearing. The AXLE HUB carries five threaded studs that are used to mount the wheel via lug nuts). There is no "tapping" in this step, just screwing. And I just now went back out to the garage and checked to be absolutely sure. It WAS driven all the way home, to the point at the front of the steering knuckle bore where there is a raised stop. The outer race of the bearing is dead up against that stop, and its surface stands a millimeter or so proud (out from, or above) of that stop, as can be seen in the following pics. This first one is to set your frame of reference:  This second zooms in on the bearing outer race seat; it is flush all round:  2) I used one of the pieces in the HF front wheel bearing tool kit that had a thick round outer edge that fit almost exactly the shape of the oil seal, all the way around, and I was tapping from the flat side, much like I might have tapped if I had used a large socket, but the diameter of the seal is larger than any socket I know of. If I remember correctly, I tapped the outer seal all the way down to where it "seated," way past flush. Could that have been a problem? 3) no, I had only taken the assembled FRONT AXLE HUB (i.e. steering knuckle with dust cover, ball joint, axle hub and bearing) in my hands and turned the hub with my hands, trying to see how smoothly the bearing was operating. Normally, a wheel bearing will give me a really nice feeling when I spin the hub. But, instead, it was making a slightly rough sound like there was a problem with the bearing. I could even feel a vibration that correlated with the sound, felt by the hand that was holding the assembly. I had not begun to re-attach the assembly to the suspension of the car or put back the brake. The assembly was entirely off the vehicle! I understand what you are saying but I had not gotten to that point. 4) thanks for verifying what that plastic part is used for. Today I can see why they wanted to ship it with that in place, and it might have been better if I had pressed the bearing while the plastic piece was still inside, and then take it out just prior to mounting the AXLE HUB. A) I know I tapped the inner oil seal way too far in to the bearing, trying to close the gaping hole I saw where debris could have easily gotten into the bearing. Or at least thats what I thought. But today, except for the outer race, which is still in the steering knuckle, I cleaned all the grease off the parts of the bearing and took it completely apart. Took out all the balls out of and cleaned the cages, etc. I put it all back together and can now see that the thickness of the two inner races is greater than the thickness of the outer race, so when putting on the AXEL HUB I should have selected a push piece that was the same diameter as the inner race. Here's a lengthwise view of the outer race from the junkyard sn with the guts of the new bearing I wasted: 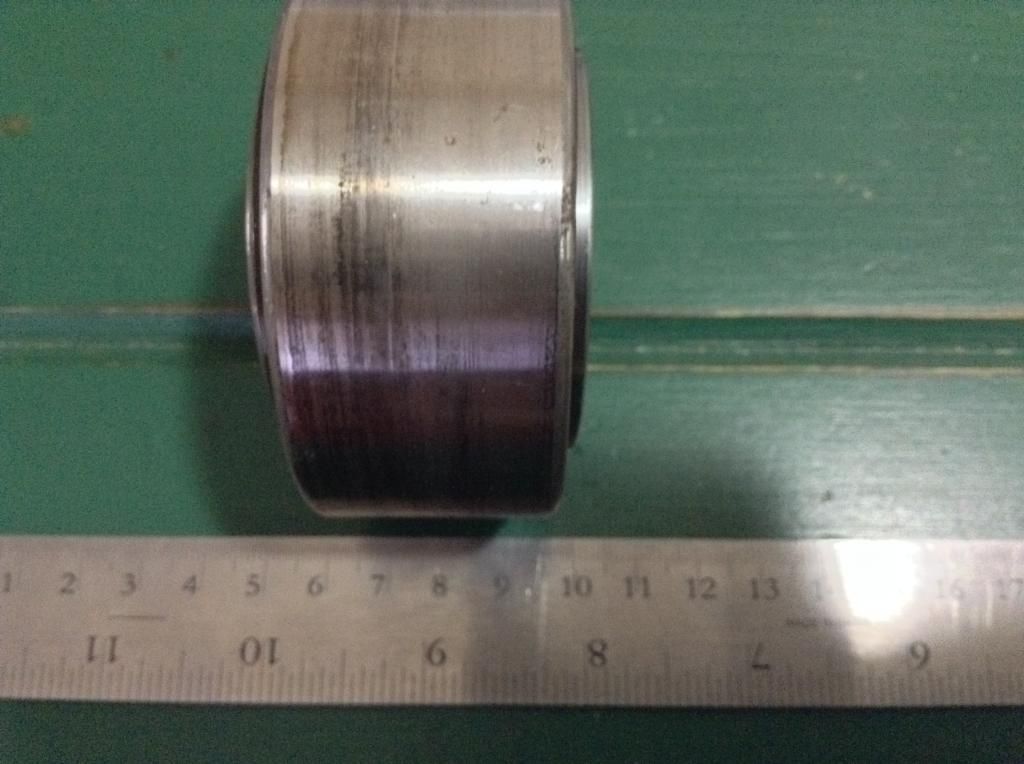 A photo of the guts of the bearing all cleaned of grease, just the parts: 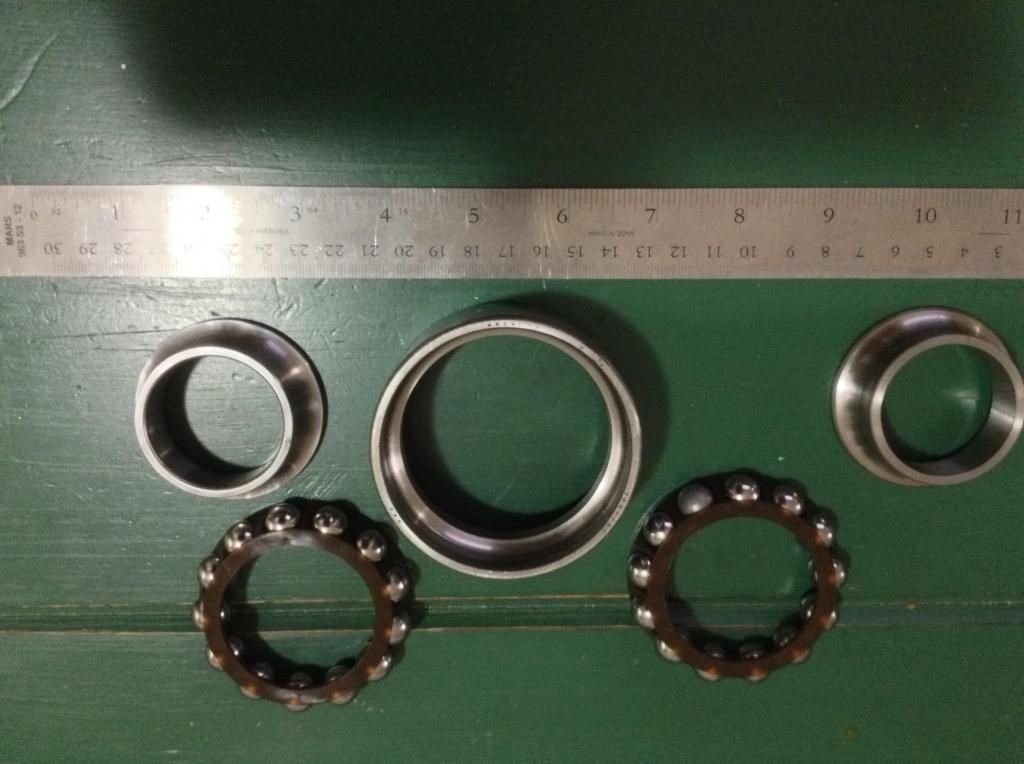 The greaseless bearing on its side. You can see the black "filler" I thought was the bearing grease, but turns out it is the edge of the ball bearing cage: 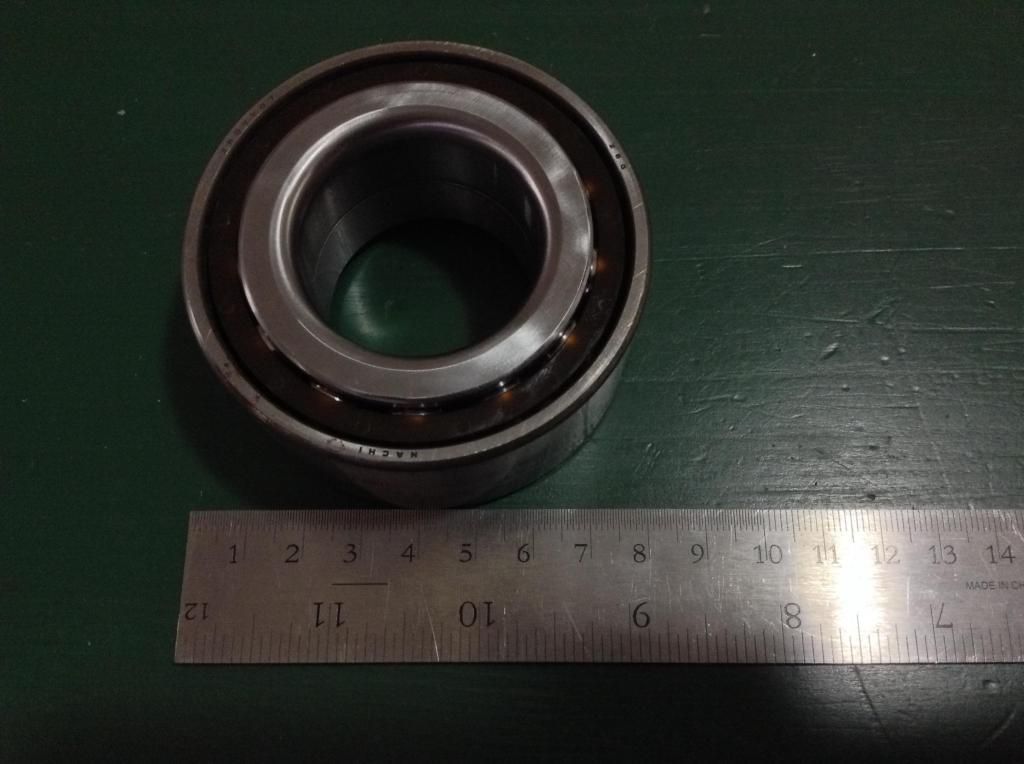 The whole assembled bearing, with all its parts (but without any grease) has a strong tendency to hang together. I shook it up and down a few times before I found a way to shake it to get the guts to spill out. Amazing how they do that: 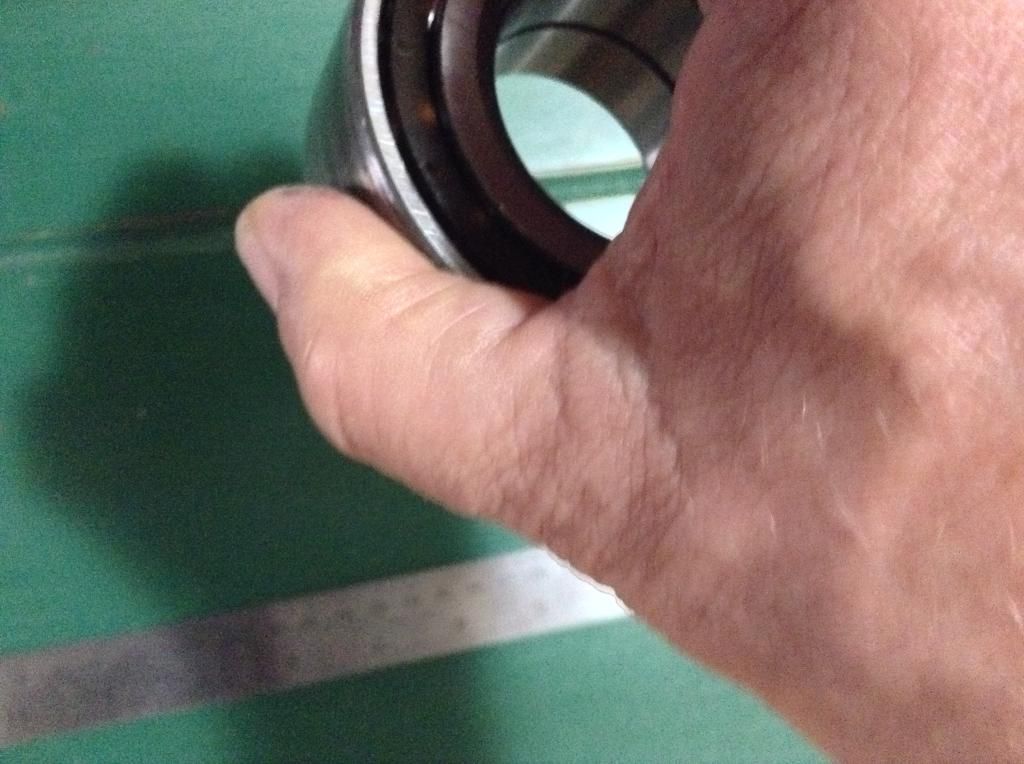
This post has been edited by Langing: Jun 24, 2014 - 10:17 AM |
 Jun 23, 2014 - 9:46 PM Jun 23, 2014 - 9:46 PM
|
|
|
Moderator      Joined Jun 29, '08 From Denver Currently Offline Reputation: 59 (100%) |
Forgive me for speed-reading, as I may have missed it. Did you tighten the axle nut all the way? I had to replace two bearing back to back, two weekends in a row, over that simple mistake once.
-------------------- "Employ your time in improving yourself by other men's writings, so that you shall gain easily what others labored hard for." -Socrates. Even Socrates told us to use the search button!
 2006 Aston Martin V8 Vantage. 1998 Celica GT- BEAMS Swapped. 2022 4Runner TRD Off Road Prenium. 2021 GMC Sierra AT4. |
 Jun 23, 2014 - 9:58 PM Jun 23, 2014 - 9:58 PM
|
|
|
Enthusiast     Joined Dec 3, '13 From Missourah Currently Offline Reputation: 0 (0%) |
my friend has that Harbor Freight press too, and he used it when we did mine. I don't remember which adapter he used.
-------------------- Bust a Deal; Face the Wheel.
|
 Jun 24, 2014 - 10:48 AM Jun 24, 2014 - 10:48 AM
|
|
|
Enthusiast   Joined Apr 24, '14 From Durham, NC, USA Currently Offline Reputation: 0 (0%) |
Forgive me for speed-reading, as I may have missed it. Did you tighten the axle nut all the way? I had to replace two bearing back to back, two weekends in a row, over that simple mistake once. Hello richee3, You bring up an important issue that I do not not fully understand. First, the answer is NO. . . I never re-assembled the FRONT AXLE HUB ASSEMBLY (steering knuckle assembly) back onto the axle and strut, so never used the axle nut at all. I had seen/read/heard somewhere that the bearing is set up by the torque you put on that nut, but didn't think of it before I decided to start over. I had only manipulated the AXLE HUB by hand, while holding the assembly in the other hand. That's when I heard and felt what I interpreted as bearing roughness. Should I have gone all the way to torquing the axle nut before deciding that the bearing was truly messed? And, if that's the case, could I just get some wheel bearing grease (since I removed all of it to see the guts of the bearing) and put back the ball bearings (in their cages) and the inner races, and tap on new oil bearings? I can't see any damage to the bearings or races. Second, it turns out that I had damaged at least the inner oil seal, by hammering on it in an attempt at 'seating' it down to the bearing (to eliminate what I thought was an opening to the outside), which was not correct. Certain about the inner seal, but I think that both seals lost their springy-ring thingy (see photo). BTW: How far should the oil seals be tapped down into their respective bores?:  Third: I failed to explain this, and have no idea whether it could have negatively affected the bearing, so let me document that now, to make the problem description complete. Before pressing the bearing in place in the steering knuckle, I froze the bearing and heated the steering knuckle to 300 degrees F, to slightly expand the bore while slightly decreasing the diameter of the bearing, just enough to make it easier on the Harbor Freight tools. If anyone can tell me why that would be wrong, please let me know. Thanks for asking this question richee3. |
 Jun 24, 2014 - 10:56 AM Jun 24, 2014 - 10:56 AM
|
|
|
Enthusiast   Joined Apr 24, '14 From Durham, NC, USA Currently Offline Reputation: 0 (0%) |
my friend has that Harbor Freight press too, and he used it when we did mine. I don't remember which adapter he used. Each of the adapters has a number stamped on its side. And, it is important to select the right adapter for each pressing action (e.g., when pushing in the bearing itself you want an adapter that catches ONLY the edge of the outer race). Do you think it would be helpful for people reading this if I went back and determined which adapters I used for each pressing step, considering that everyone supposedly has a 6G Celica which all have the same bearing assemblies? |
 Jun 25, 2014 - 11:15 AM Jun 25, 2014 - 11:15 AM
|
|
|
Enthusiast   Joined Apr 24, '14 From Durham, NC, USA Currently Offline Reputation: 0 (0%) |
Since the wheel bearing I installed was a Timken, I tried to find a way to ask them my question. Luckily, on a YouTube video they talked about place where you can go to ask them for information about their bearings and I want to share it:
http://timkeninfo.com They have useful information, like you can enter your car and they will tell you the Timken bearings and seals that fit for front and back. After filing out lots of details, they let you ask a question. I don't know how speedy they respond or even it they will, but this is my question to them: DIY and first time. With steering knuckle in vise, used a Harbor Freight tool set to press in the wheel bearing, then installed the snap ring and both oil seals. I messed up oil seals by trying to seat them close to the bearing; their springs came off. When holding the assembly in my hand and turning the hub, felt and heard roughness. Took everything apart, including bearing. Cleaned the bearing parts and examined them. Can't find anything wrong. Toyota considers these bearings "sealed" but I don't know what that means and want to know if I can replace the wheel bearing grease and reassemble as before and put back onto the vehicle. |
  |
1 User(s) are reading this topic (1 Guests and 0 Anonymous Users)
0 Members:
| Lo-Fi Version | Time is now: November 25th, 2024 - 11:40 PM |


