 Nov 16, 2014 - 3:09 PM Nov 16, 2014 - 3:09 PM
|
|
 Enthusiast  Joined Jul 5, '12 From Barcelona Currently Offline Reputation: 0 (0%) |
Having worked on the second-hand leather interior that I purchased, I thought that I would write about the experience, and share what I have learned.
I picked up this leather interior. It needed refurbishment. 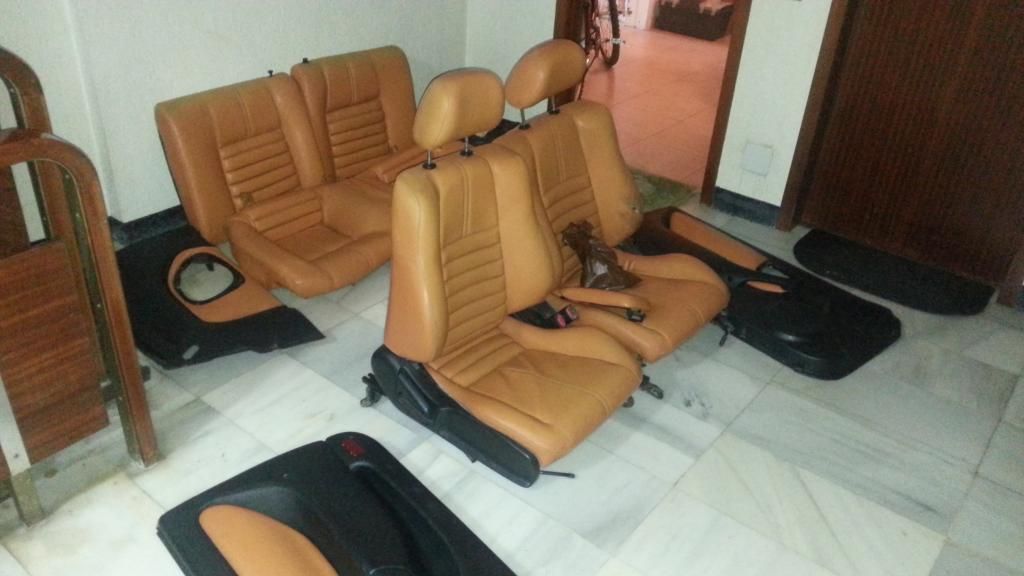 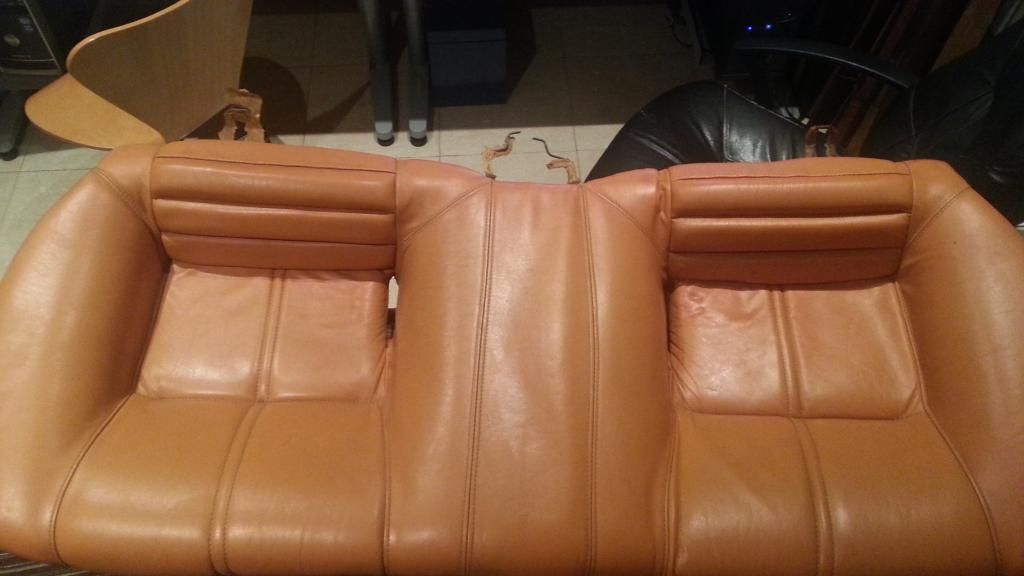 This is what the back seats looked like after the colour change.  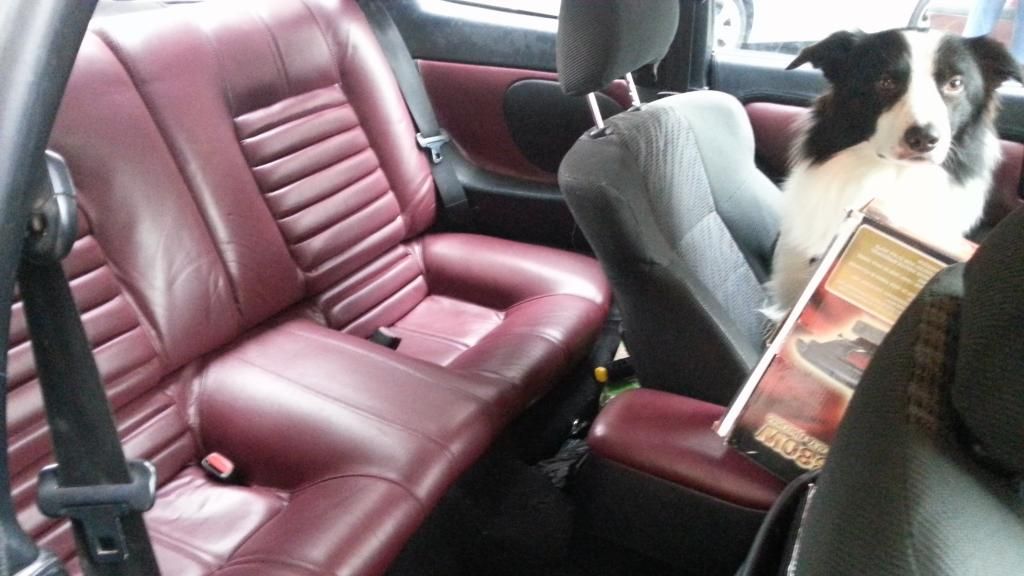 The leather was in quite good condition. I'm not sure how old it was, but there was some wear on the drivers side bolster (and indeed a big hole there too). The leather on it had had its surface worn off, which in its self was not a big problem as the Leatherique product that I was going to use actually creates a new smooth surface on the leather, and the most worn areas are actually the places where the product sticks best to. I sent the drivers seat off to get a new piece of leather fitted to replace the piece that had the hole. 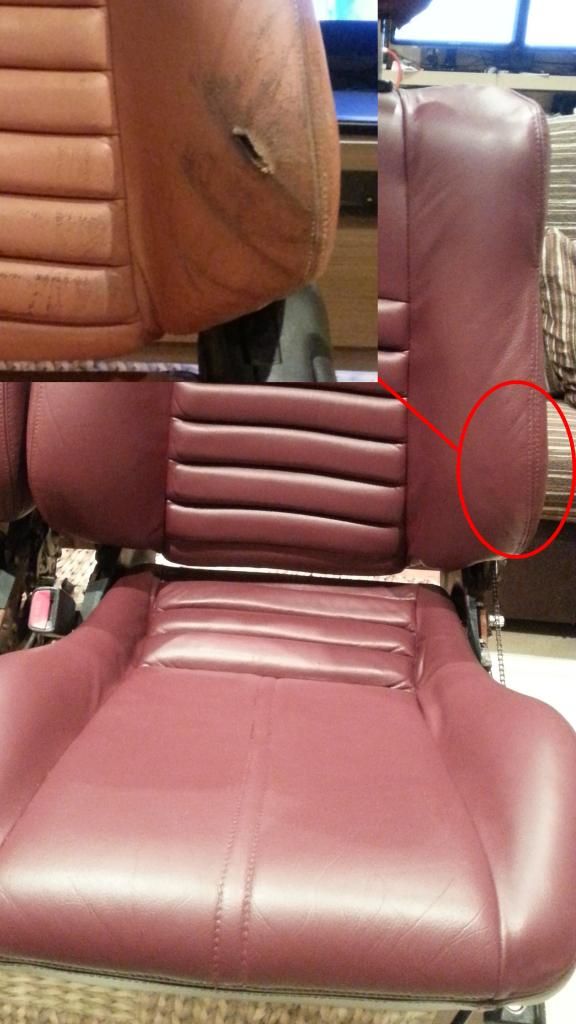 This is how the worn area turned out. Its quite satisfactory I think.  What was needed to complete this job: 1. Leatherique leather restoration kit (in your desired colour). The kit composes of a bottle of a leather rejuvenator oil, a cleaning liquid and a colour tinte (basically like a paint for leather). Also included were a small sponge on a stick (for small hard to reach areas), a small piece of fine grade sandpaper, a spatula and tub of filler (which I didn't need). 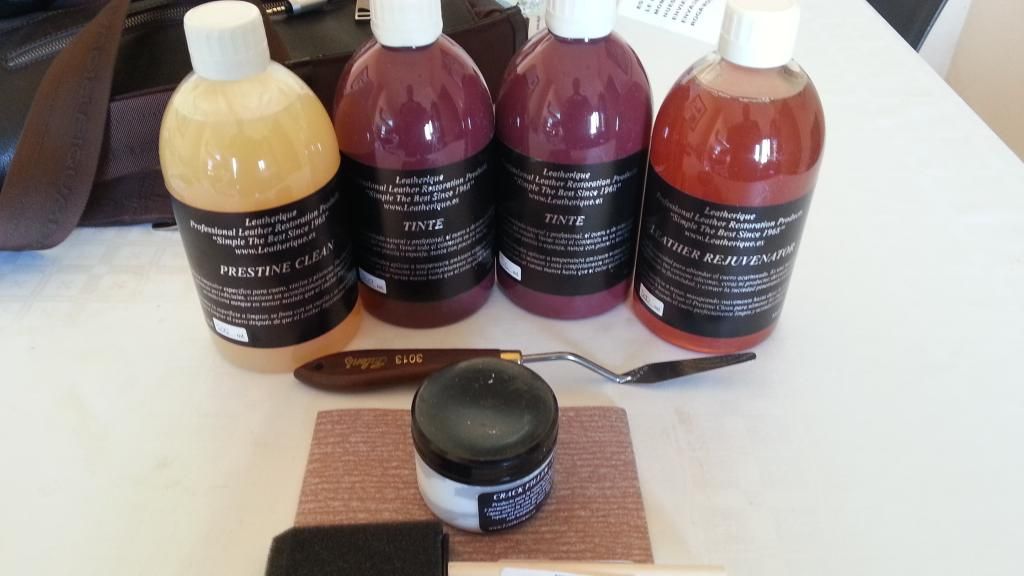 2. Some soft clean cloths. 3. A soft brush, like a clothes brush. 4. A number of sponges. Maybe 4 or five, depending on how long you take to complete the job. The sponges need to be washed after every time that you leave the product to dry. However, the sponges usually retain a certain amount of dried product which can come off on to your seat as small dirt speckles, so it is best to always use a new clean sponge for the final coat of tinte. Sponges are only necessary if you are not applying the tinte by spray gun. The spray gun option is a good one if you can, as it applies the tinte very evenly, however, hard to reach areas such as the folds in the leather can be missed. 5. Gloves. Lots of gloves, latex or vinyl it doesn't matter. I went through two packs of twenty. You must not touch the leather with bare skin once the leather has been cleaned as the oils from your hands can prevent adherence of the tinte. 6. A plate or bowl to put the tinte into. 7. Tools to remove the seat part from the metal seat base. To start remove your leather seats from the car and take off the plastics surrounding the metal seat base frame. This is quite easy as there is only one screw and some clips holding on the knobs and the lever. Now you can see the four bolts holding the seat cushion to the frame. One is hidden behind the seatbelt catch and is awkward to remove if you don't remove the seatbelt catch first. I got one of the seatbelt catches off but the other wouldn't budge, so I removed the bolt through the small aperture hidden behind the arm of the seatbelt catch. Now that you have separated the seat bottom from the seat back you can start preparing the leather. Brush the leather with the clothes brush, especially in the hard to reach areas and joins in the leather. Here you will find everything from dust and dirt to coins and shards of glass. All of this must be brushed away to ensure a good finish. Apply the Rejuvenating oil with a soft cloth. Rub it well into the leather, making sure to get it into all the gaps and hidden areas. The surface should be slick and shiney, the oils will soak into the leather and soften it. This is especially important with old poorly maintained leather. Leave the oily leather over night or 24 hours if you can. Now put your gloves on if you haven't already. The next day you can start cleaning the leather cleaning liquid. You will need a number of soft clean cloths for this as the oil makes a mess of the cloths very quickly. Apply the cleaning liquid to the leather or the cloth and rub it well into the leather to remove the oil and dirt. A dry cloth can be used to clean off the cleaner residues, and this will leave the leather with a satin finish. Once I completed this I wiped the leather down with a clean damp cloth to ensure all of the product had been removed. Now is the part which will probably trouble most people. The sanding. Sanding of the leather creates a key to the surface so that the tinte adheres properly. There's no need to sand too much, but certainly when you see the surface is matt, then you know the tinte has something to stick to. The leather is tough, it can take a good sanding, but too much sanding will remove the grain and texture of the leather. If the leather is old and worn, it may already have a smooth shiney surface just as my center arm rest had. Generally, I didn't have any problems with the grain, it all looked good when it was finished. Now I brushed the leather again, and finally wiped it with another clean damp cloth. Put some new gloves on. Regularly change these gloves as the build-up of tinte on the gloves can flake off, and mess up your leathers finish. Also, tinte can come of the gloves when you are handling the parts creating clumpy residue. When the leather is perfectly dry, you can start the application of the tinte. As with painting things, it is usually best to start with the hard to reach areas first. I shook the tinte bottle well and then poured a small amount into a plate. I took the small sponge and dabbed it into the tinte, before applying it to some hard to reach areas. When the sponge was damp with tinte I smeared it into the folds of leather. The way to apply the tinte is by dabbing NOT brushing (as this leaves brush strokes marked on the leather). However, as the joins and folds in the leather are almost impossible to dab, I smeared the tinte in, and then dabbed over the area to ensure brushing strokes won't be seen.  The tinte should be applied slowly dabbing a lot, ensuring a thin coat. It is better many thin coats than one horrific ugly one that might peel off or leave no leather grain visible. This is what one coat looks like:  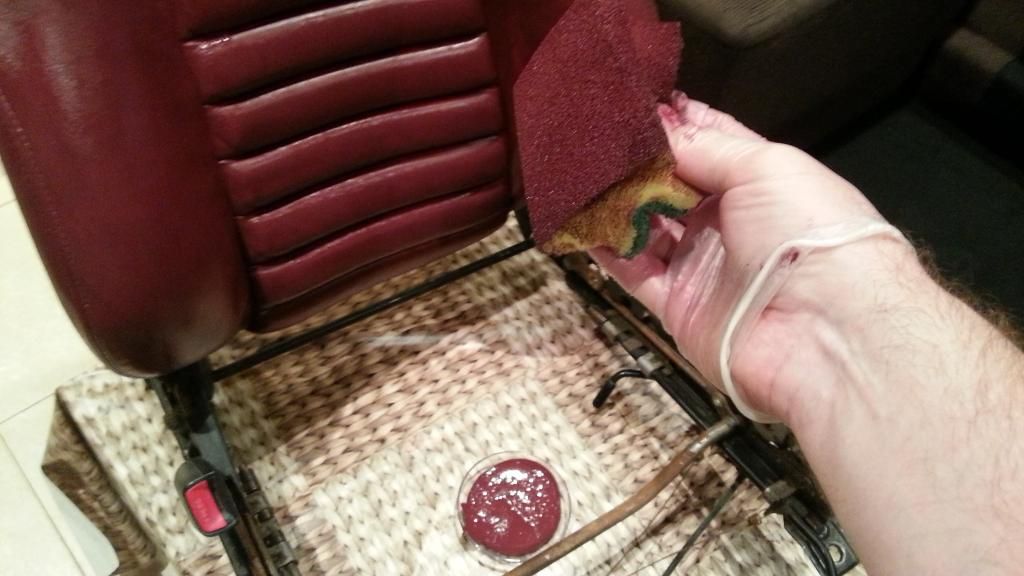 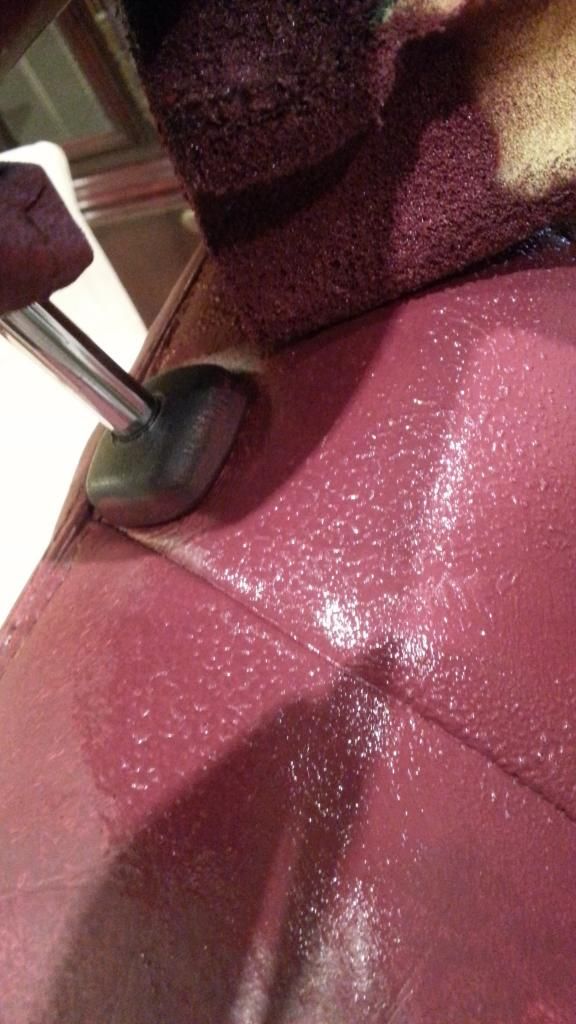 Do not worry too much about getting tinte on the small plastic parts as it does not stick well to them and can be rubbed off with a cloth when the tinte is dry. Most important thing here is to get the tinte under and around the plastic, so that the original colour does not get seen if the leather is stretched or moved. Leave each individual part for 15 minutes before the next coat. The hard to reach areas may need to be left to dry over night before a second coat can be applied. In general, I found that 3 coats was nearly enough, with the fourth coat as the finishing coat. As applying the leather tinte took some time, the sponges had the tendency to start to dry out in places. This meant that small dots of dry tinte would come off the sponge and be left on the leather where they would become glued to the surface. When the tinte on the leather was dry, these specks could be lightly sanded off, and a final top coat could be applied with a brand new clean sponge. This is very important as this is what you will see, so it's important to get a very smooth clean final coat. 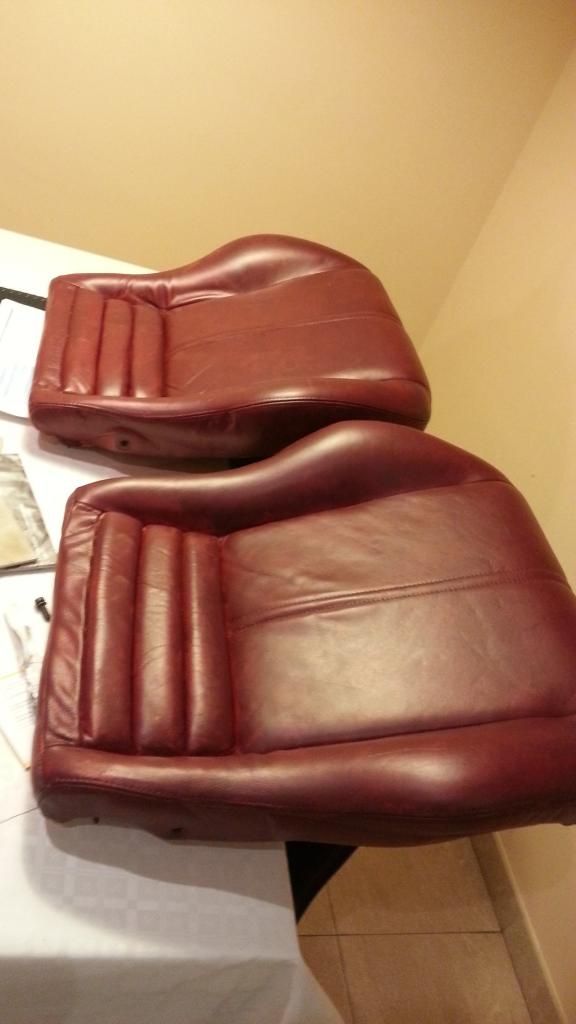 The leather will be touch-dry over night, but I would recommend not touching them at all for at least a few days, and not sitting on them or fitting them into the car for a week. The new leather should last a lifetime, they say, but I shall keep the left over bottle of tinte just in case any area becomes worn. As time goes by I will report back over how the leather holds up, and what wear and tear it has. This post has been edited by Edser: Nov 21, 2014 - 1:37 PM --------------------  |
 |
Replies
(1 - 1)
 Nov 16, 2014 - 5:10 PM Nov 16, 2014 - 5:10 PM
|
|
|
Enthusiast    Joined May 10, '14 From Tulsa, OK Currently Offline Reputation: 5 (100%) |
Excellent write up and good successful experiment.
Thanks for sharing. |
  |
1 User(s) are reading this topic (1 Guests and 0 Anonymous Users)
0 Members:
| Lo-Fi Version | Time is now: February 24th, 2026 - 4:41 AM |


