
 Feb 12, 2013 - 11:40 PM Feb 12, 2013 - 11:40 PM
|
 
|
 Enthusiast  Joined Apr 17, '10 From Maitland, NSW Currently Offline Reputation: 3 (100%) |
Photoshop Tutorials - Basic Info
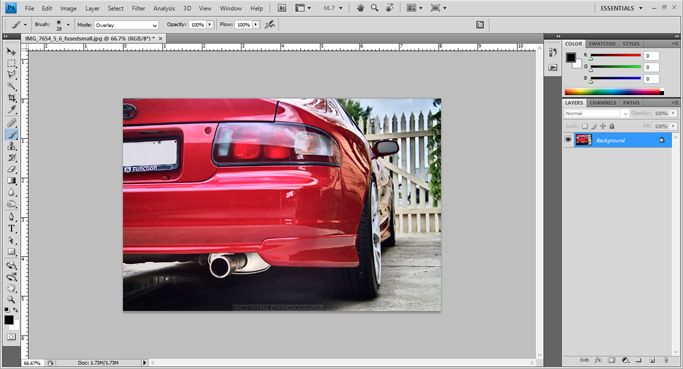
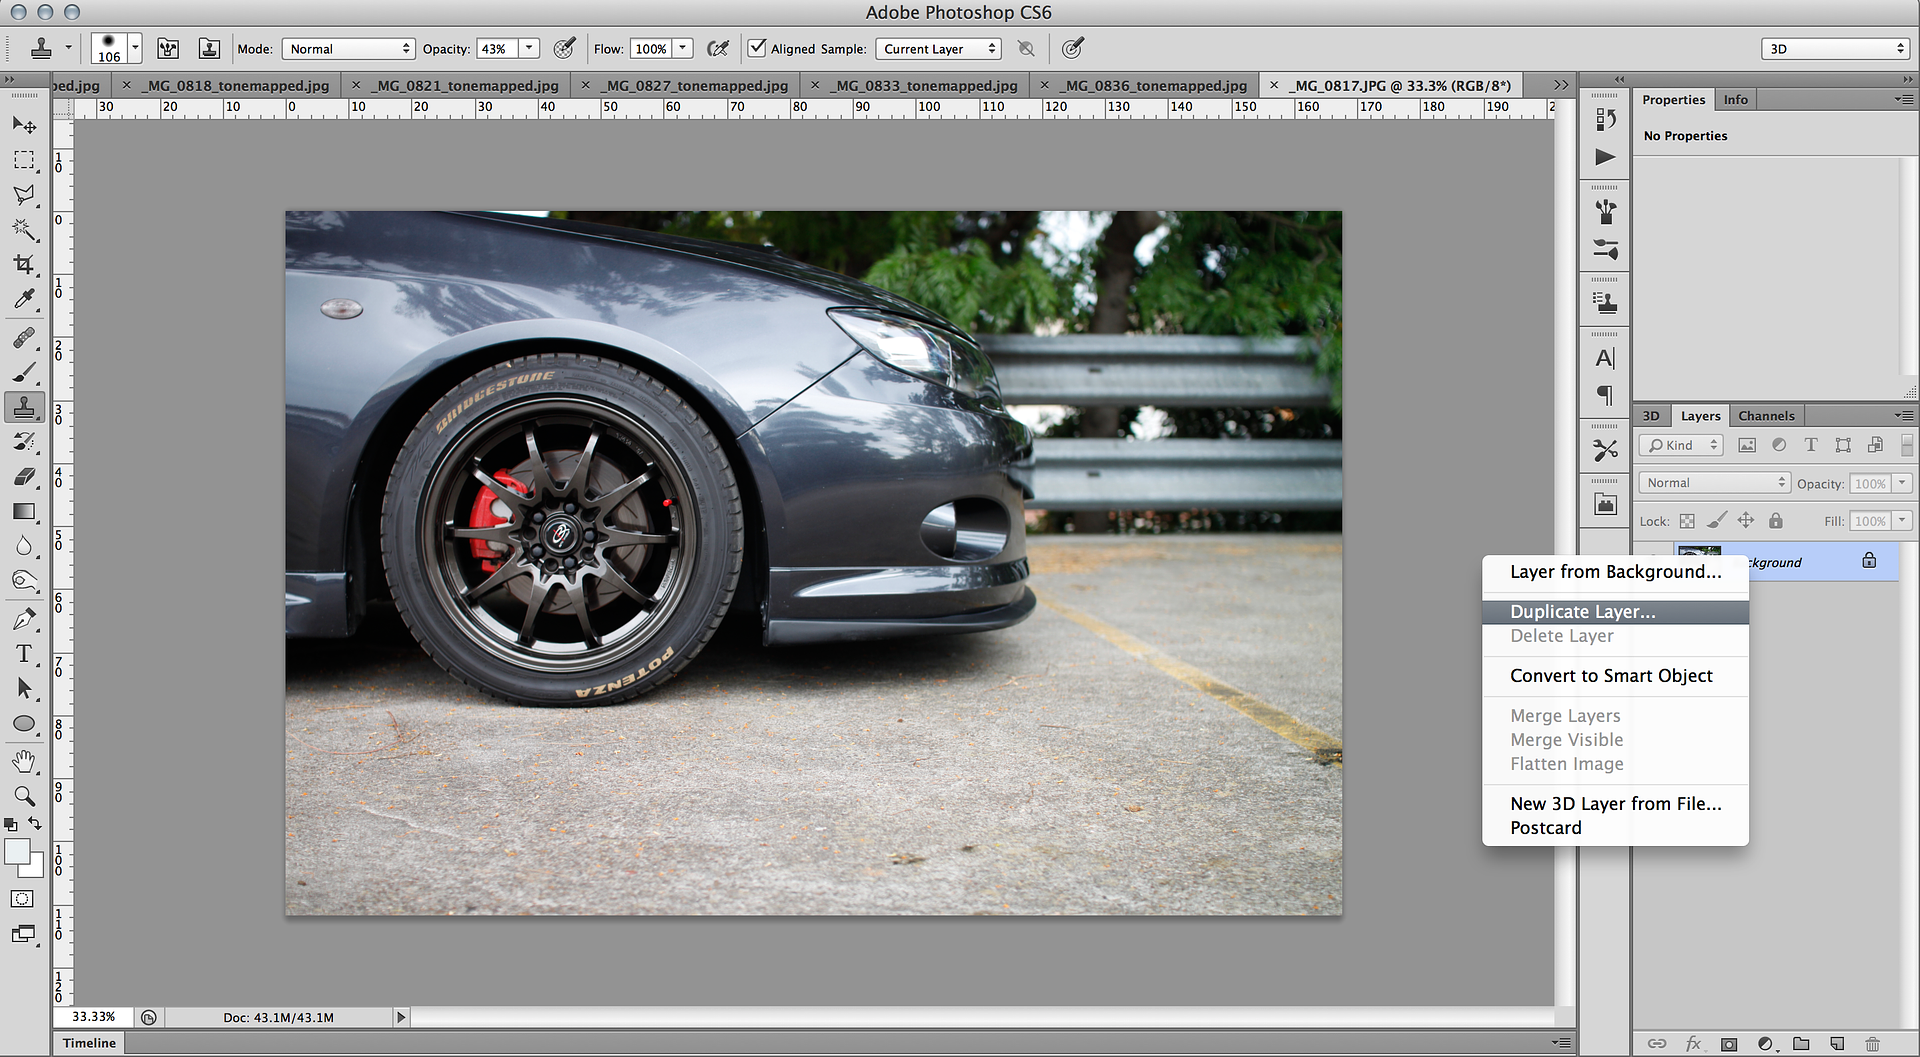
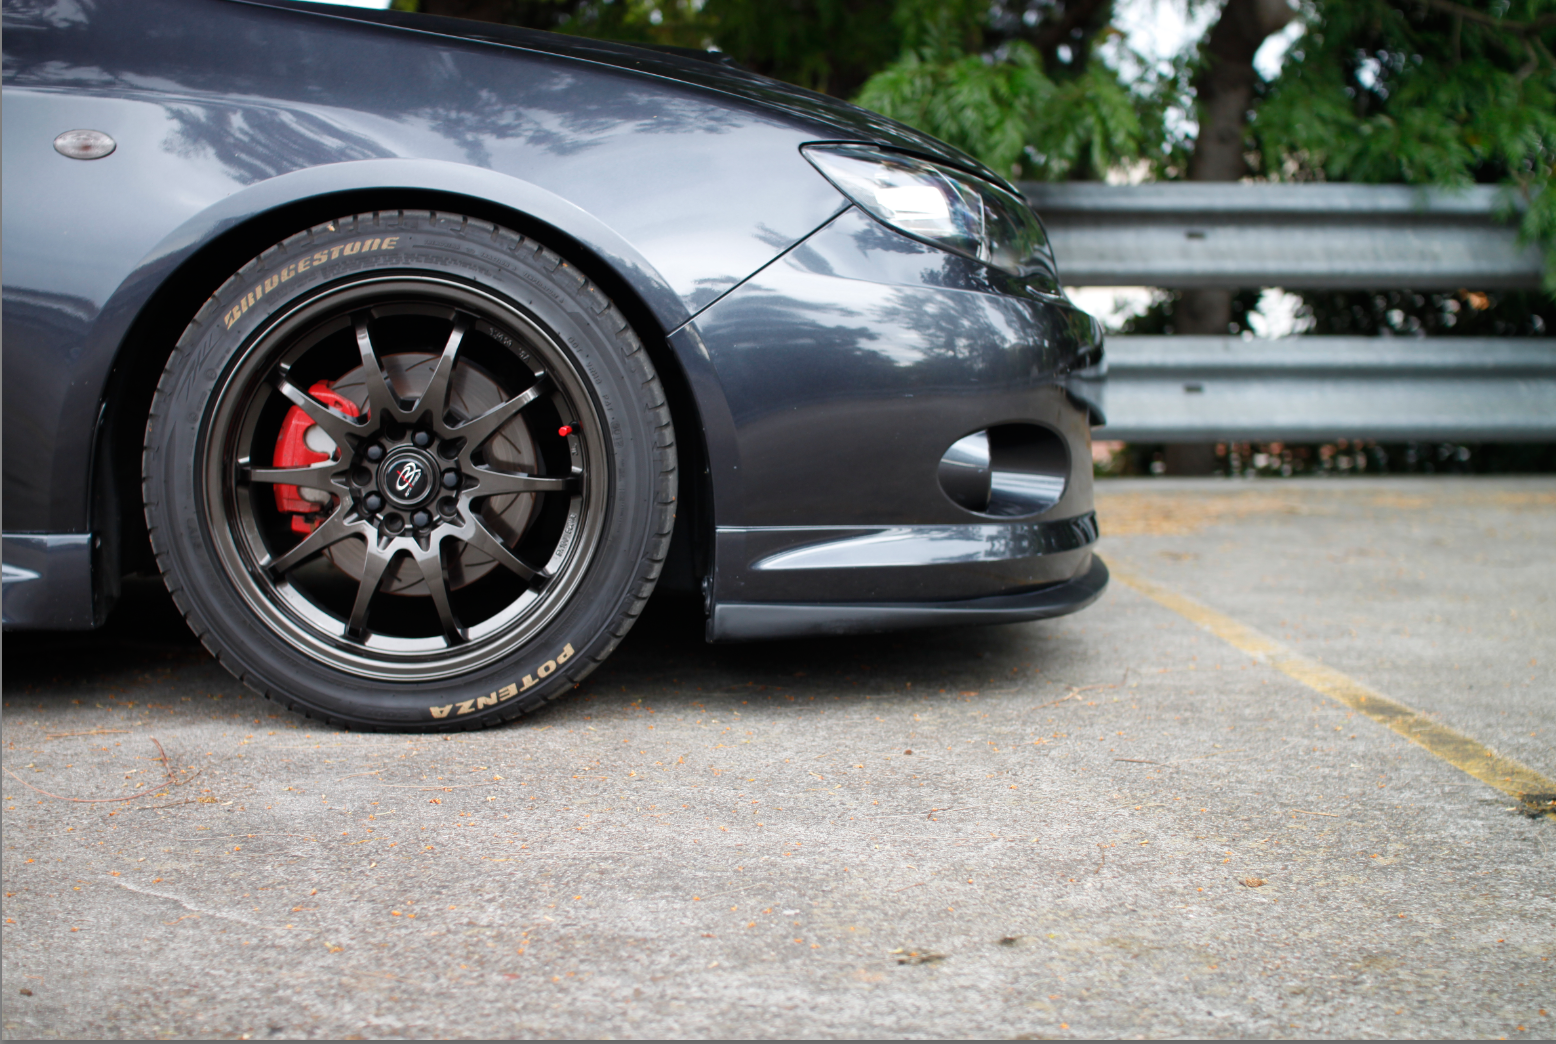
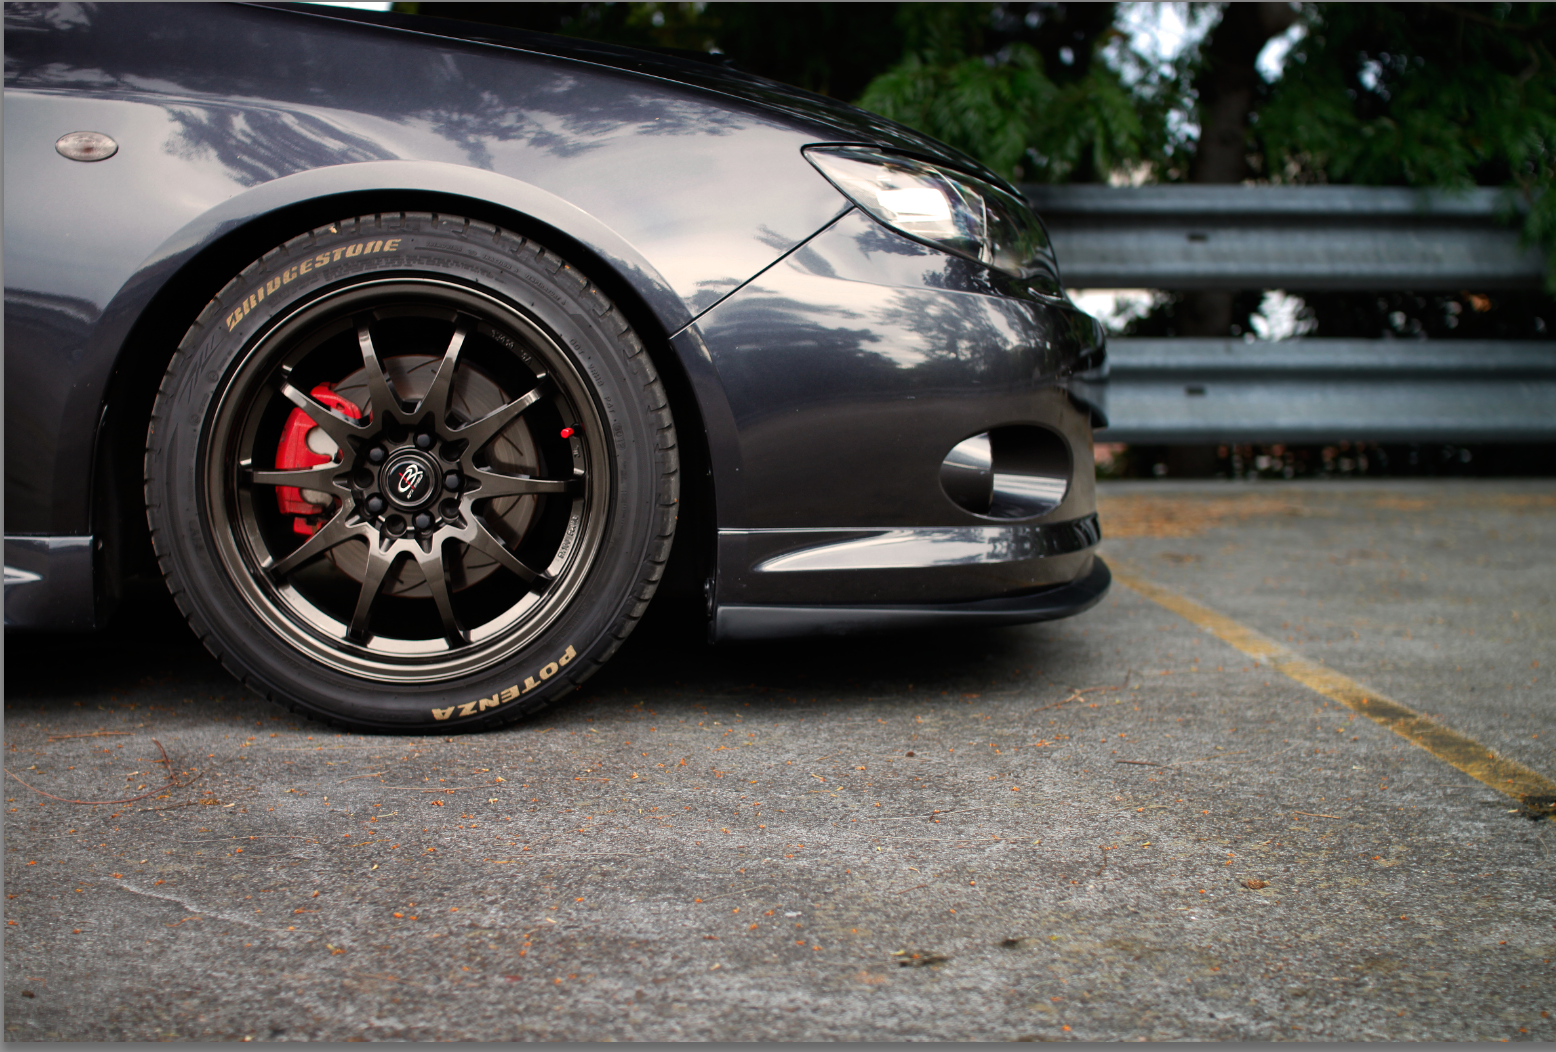
Basic Tools Depending on the program/version you are running, you should have a pretty similar toolbar on the left of your screen, or will see these symbols throught the program.  1. This is your Moving tool It lets your drag the current layer around your screen. 2. Selection tool. When making rough square/circle cuts. 3. Lasoo tool. This will be used for more precise cutting, around the cars body, wheels etc. 4. Magic wand. Cleverly selects certain connecting areas in the object. Usually works best when its more of a solid color. 5. Crop tool. 6. Eyedropper, to select colors. 7. Healing brush, removes blemishes by usuing surrounding colours to blend it together. 8. Paintbrush tool. 9. Clone stamp. Creates a replication of a certain area, to paste in another. 10. History brush, removes any painting yourve done to the image. 11. Eraser. 12. Gradient tool. 13. Blur/Sharpen/Smudge 14. Dodge/Burn/Sponge 15. Pen tool. 16. Text 17. Path selection 18. Line/rectangle tool. Explaining some of these tools in more depth *Right clicking on most of these icons, will show submenus for you to click* Lasoo Tool If your icon looks a little different, eg with a Round bubble etc, here you can right click and choose an appropriate setting. 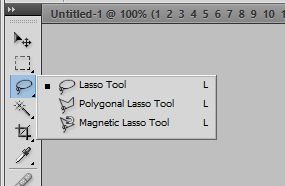 Here i use the Polygonal Tool. When using this, instead of drawing around your image in one single step, you make points around your objects, for a more precise selection. *Remeber to link back up to where you started* Magic Wand When using the magic wand tool, it is going to look for surrounding edges based on color/shape to form your selection. Upon selecting any tool on the left, your toolbar on the top will change. 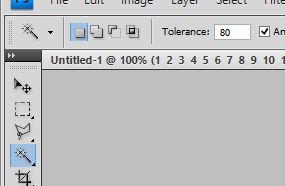 Up here we see the 'Tolerance' tab. Here, you select how much detail, you wish the wand to look for. With the tolerance set at <10 you will have a selection like so: 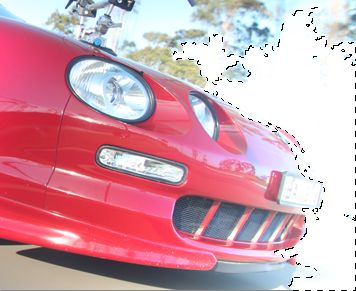 The smaller number will select less, more detailed areas. With a tolerance selection of a greater number, eg >80 will result in: 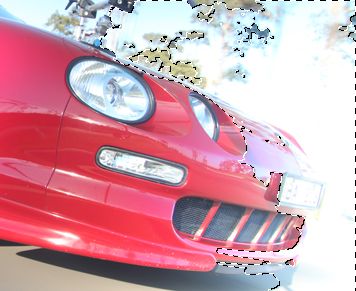 Notice that it selects some of the car. Certain times will call for the magic wand, but usually if you give the time, the Lasoo tool will serve better. Now that you have done selecting, what next? Once you have your selection, for whatever reasons, you can choose to either Delete or Copy/Cut it to a new layer. Simply Right Clicking on your selection will bring up this menu.  Layer via Copy - will duplicate your selection into another layer. This is the safest way to try editing and still have your original image. Layer via Cut - cuts the selection out of the image, in some cases we will require this. If you no longer need it, you can simply hit the Delete key on your keyboard. Clone Pretty self explanitory. With the clone tool selected, you will hold down your 'ALT'or'Option' key, and click the area you wish to duplicate. On the top toolbar, you will see Brush, Mode, Opacity.  Select the required brush you desire, and change the opacity to your needs. [u]*Remember 100% Opacity will be a full duplicate, 0% will be blank, try stick around 80%*[u] Healing The healing brush blends surrounding colors together. This is most helpful when you have been 'Cloning' If you are trying to remove certain features, grills, camera rigs etc, the clone tool will remove the majority of it, but it wont be blended in together very well. Using the same method as the clone tool, holding down 'ALT' in a similar clear area, than painting over your cloned area, should blend it all together. Dodge Dodge tool allows you to lighten certain parts of the image. When it is selected, your upper toolbar will provide you with three ranges: 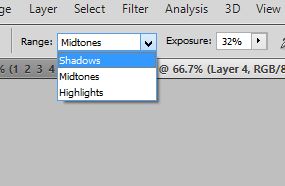 Again choose the appropriate Exposure (how much/hard you want it to be) and go to town with it. When dodging, you really want to lighten up the highlights in your darker areas, Tyre sidewalls, Projectors etc Burn Right clicking on your Dodge tool, will bring up this menu: 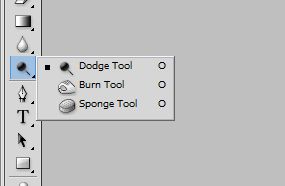 Same settings apply for the Burn tool as the Dodge tool, but this time you will be making your things darker. Better Examples will be shown below on how to use these! Hopefully by the end of this you can have a basic knowledge to be able to muck around with your car, trying new things, or achieving edits like this: 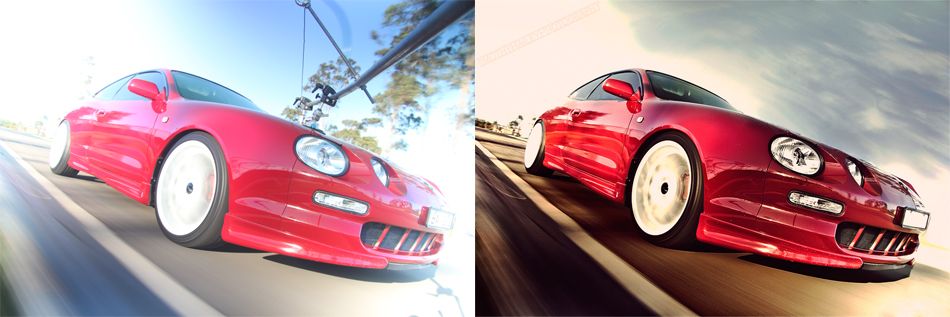
This post has been edited by Timmyface: Feb 13, 2013 - 2:31 AM -------------------- |


 |
Replies
|
Feb 12, 2013 - 11:56 PM
|
|
|
Enthusiast Joined Apr 17, '10 From Maitland, NSW Currently Offline Reputation: 3 (100%) |
*reserved for*
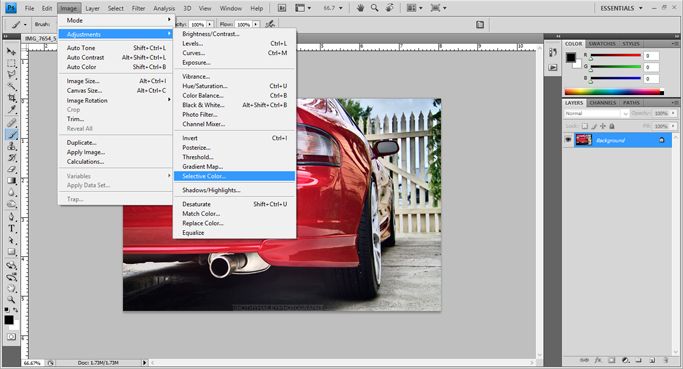
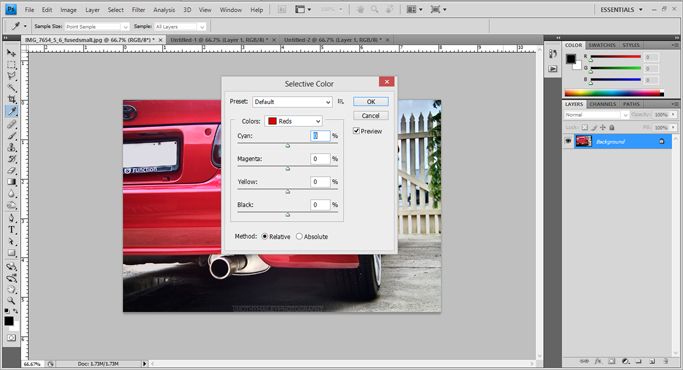
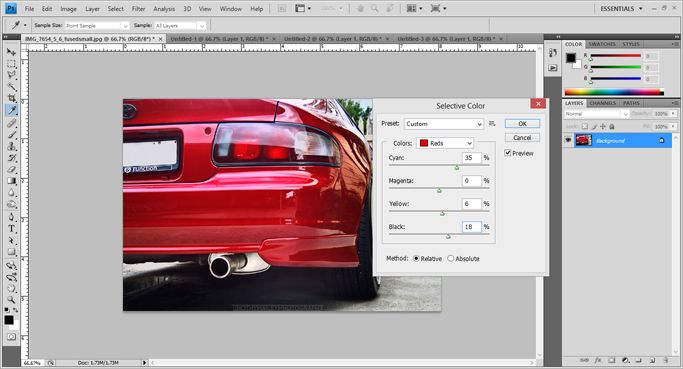
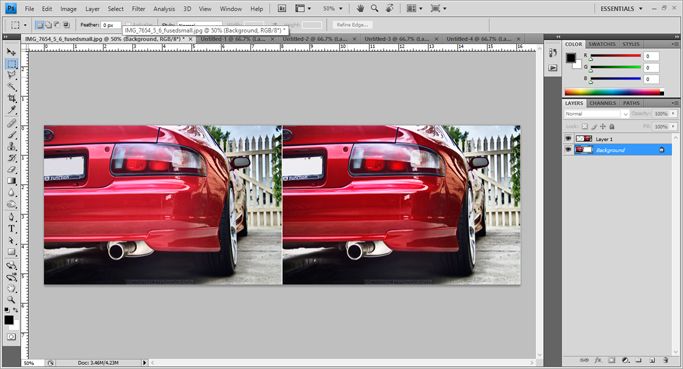
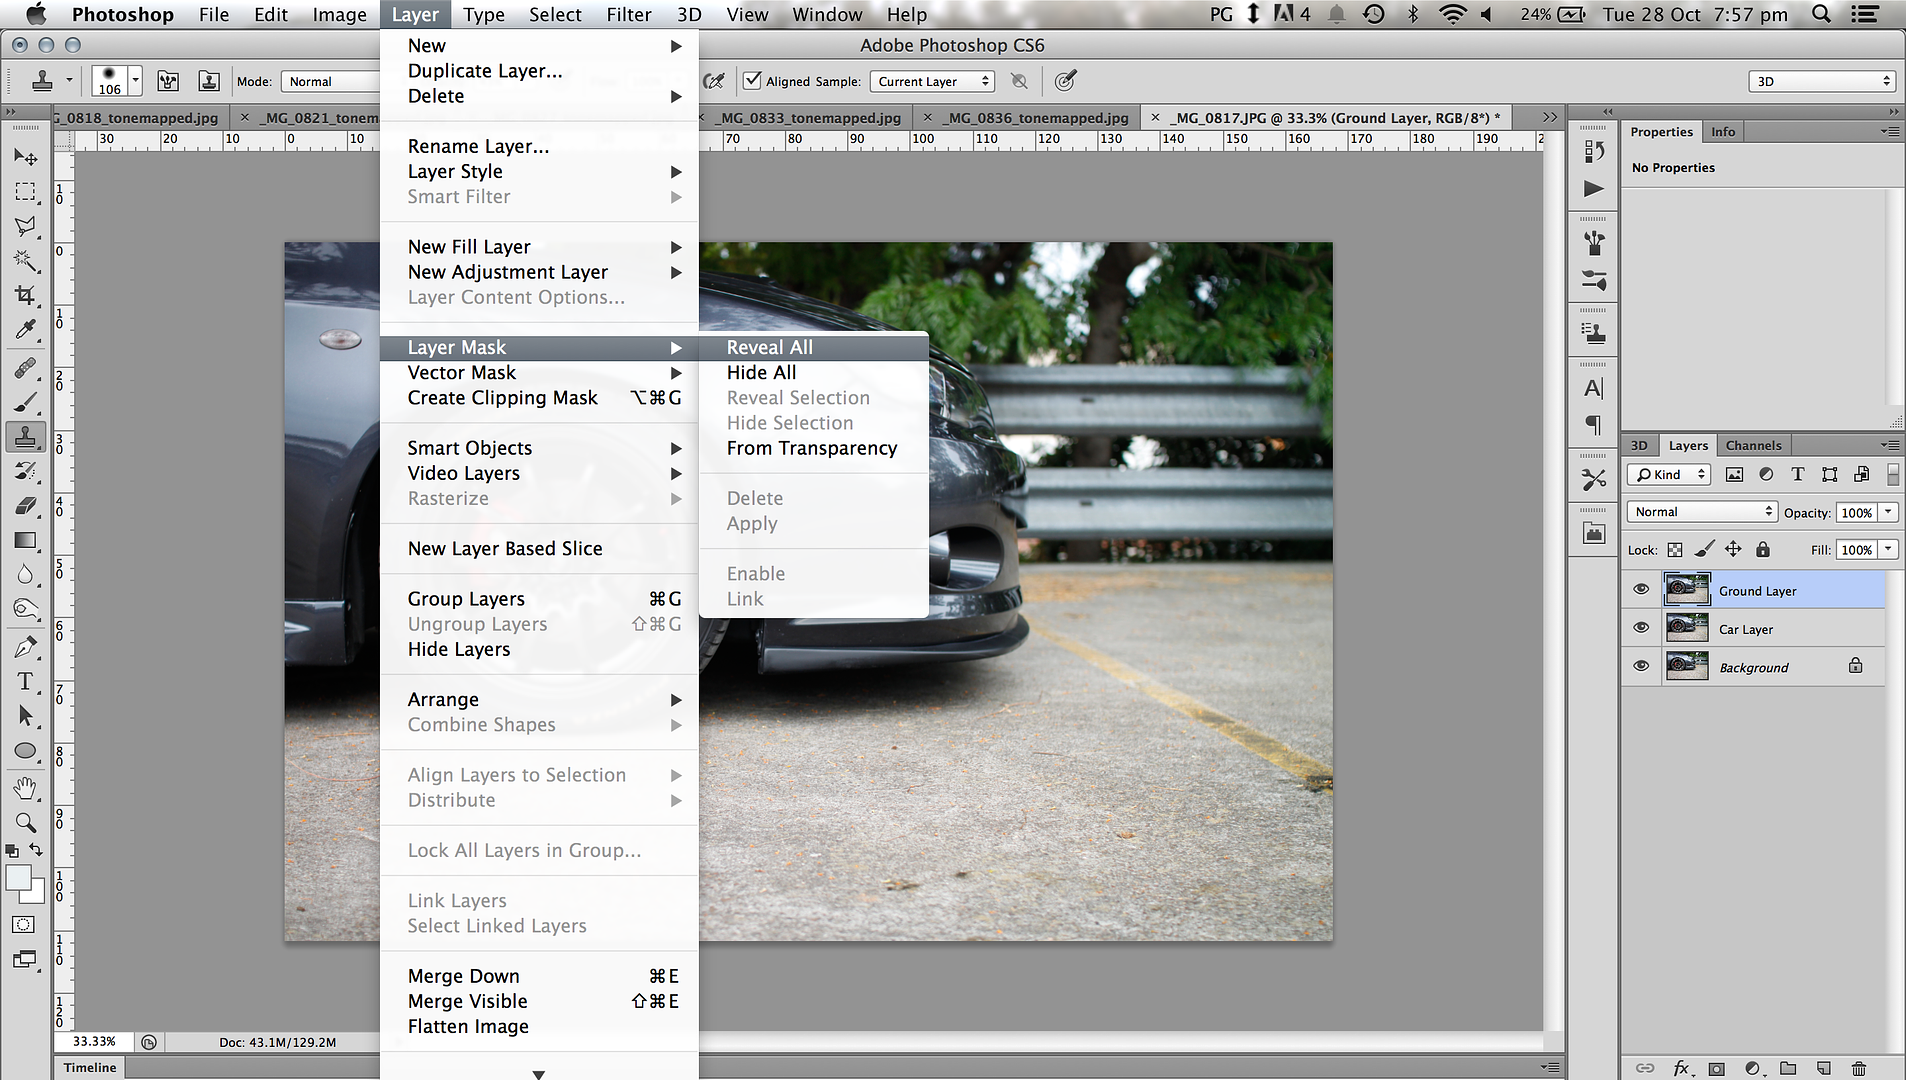
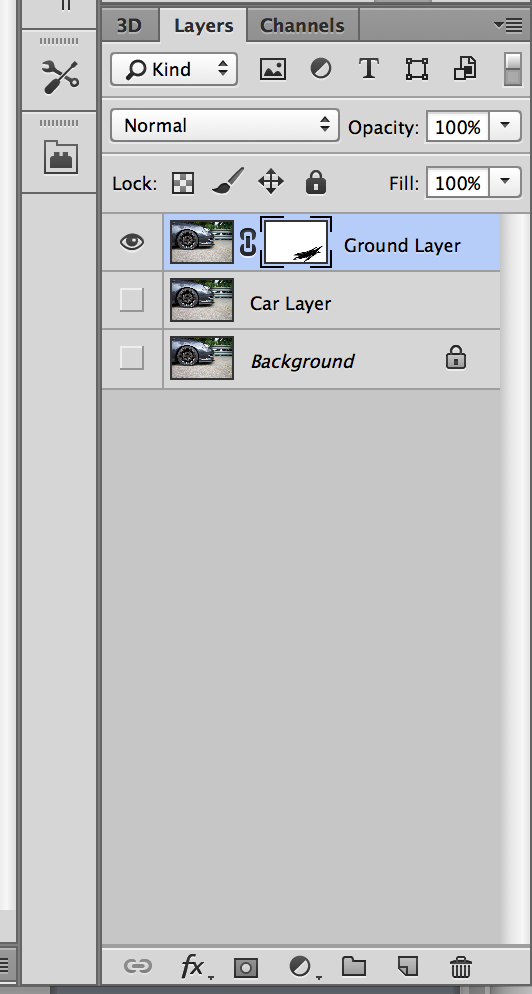
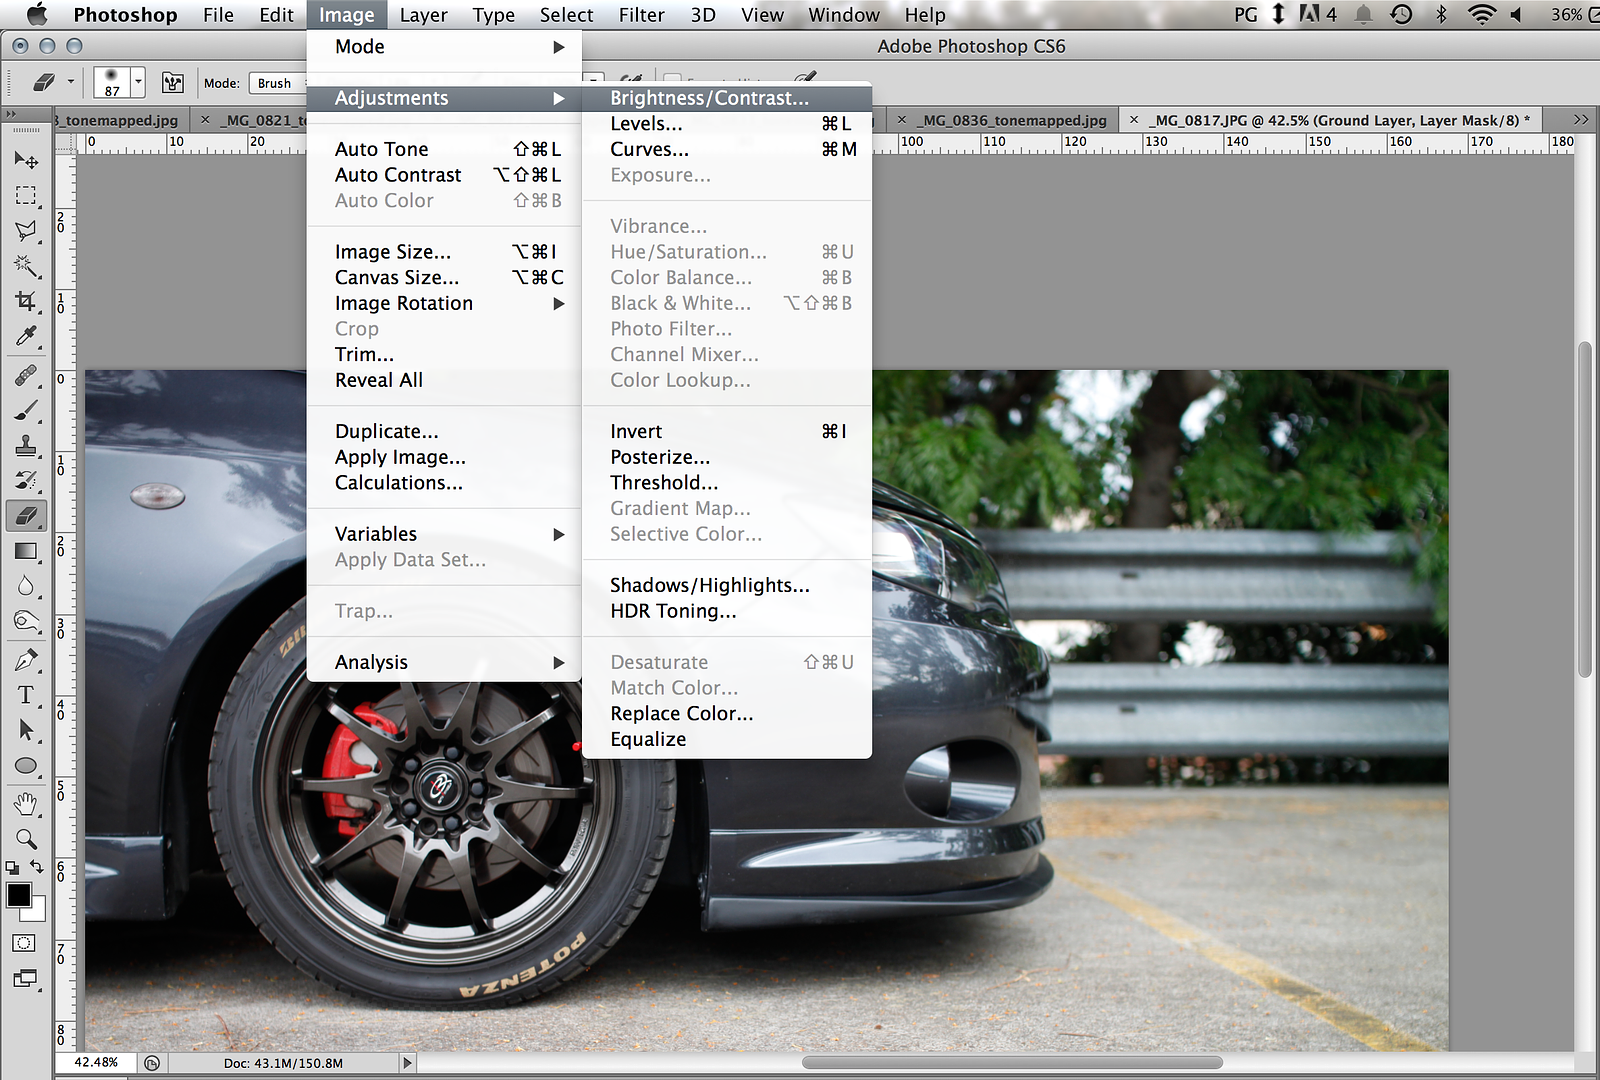
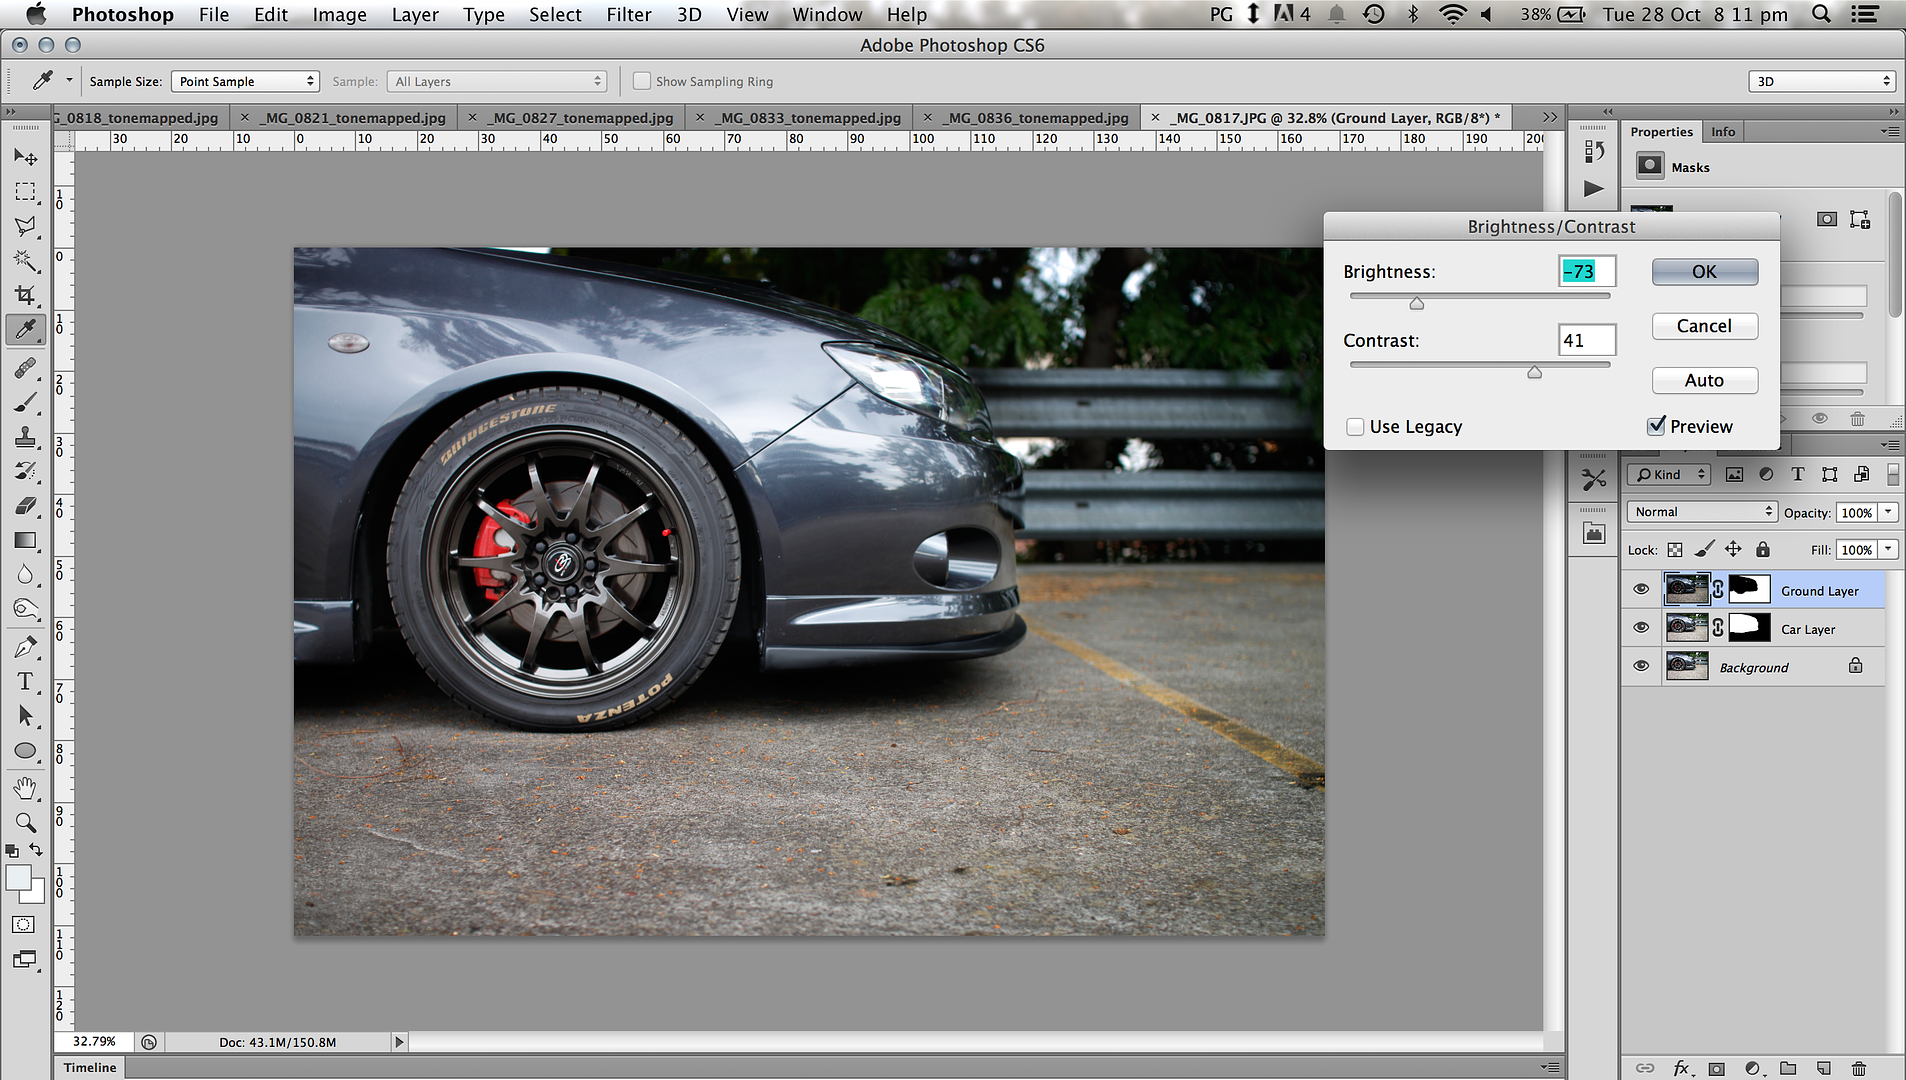
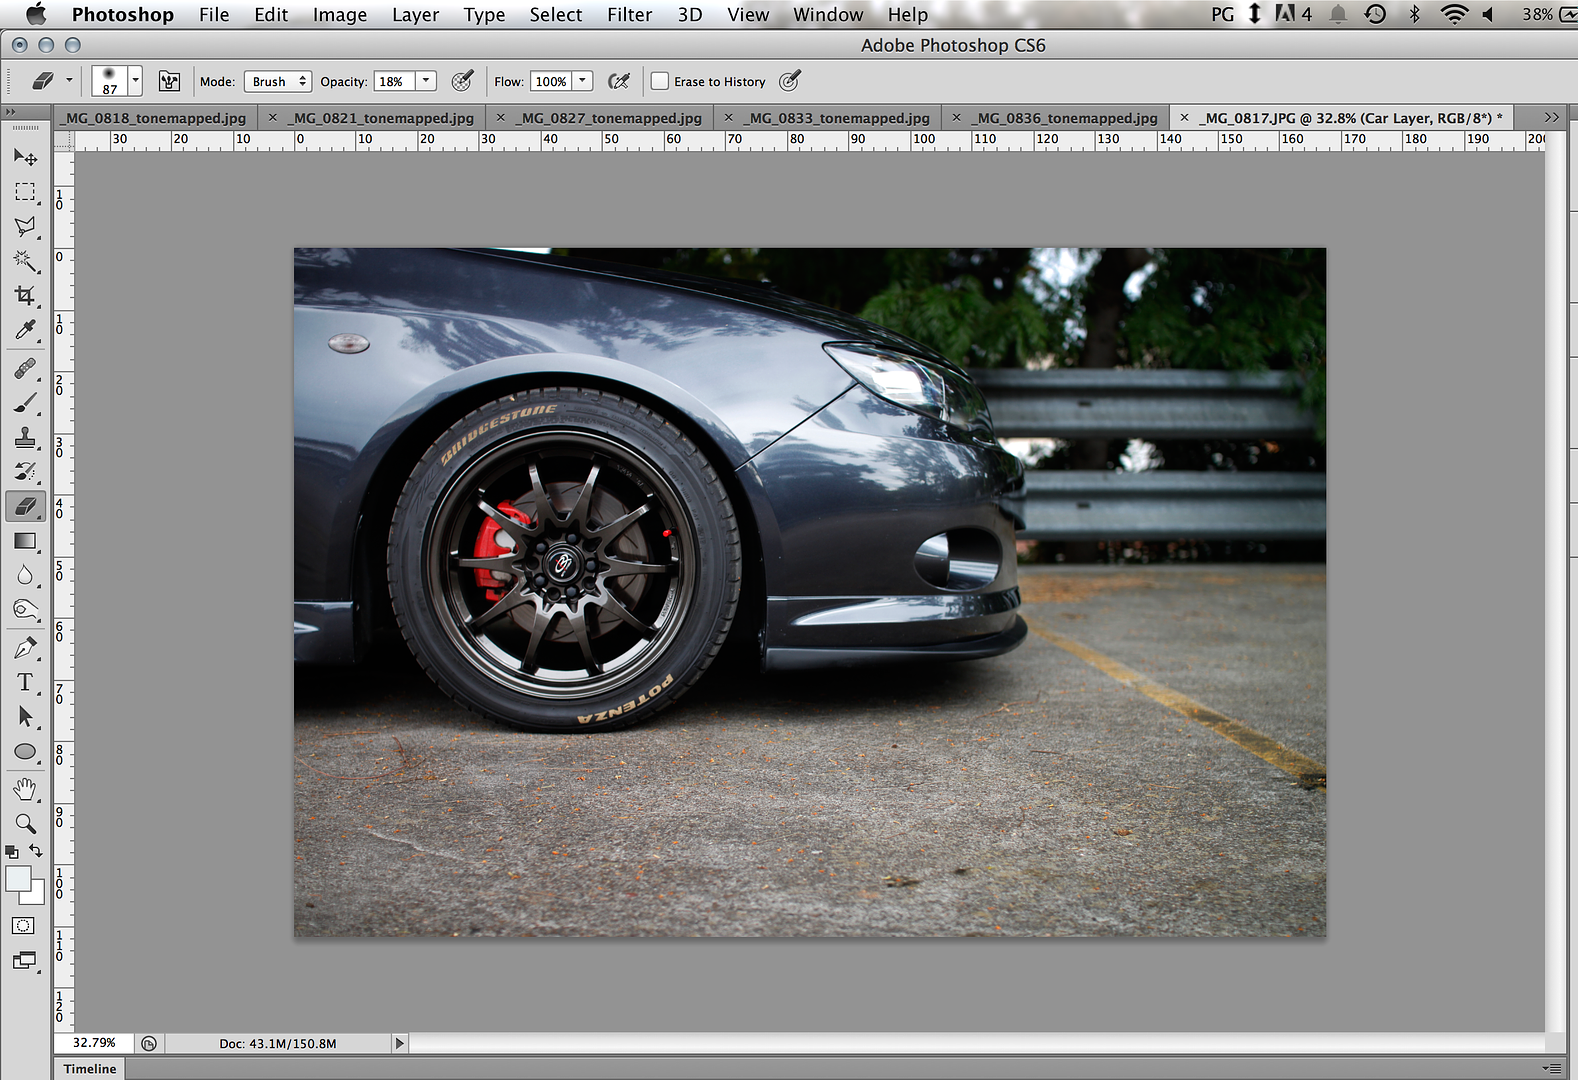
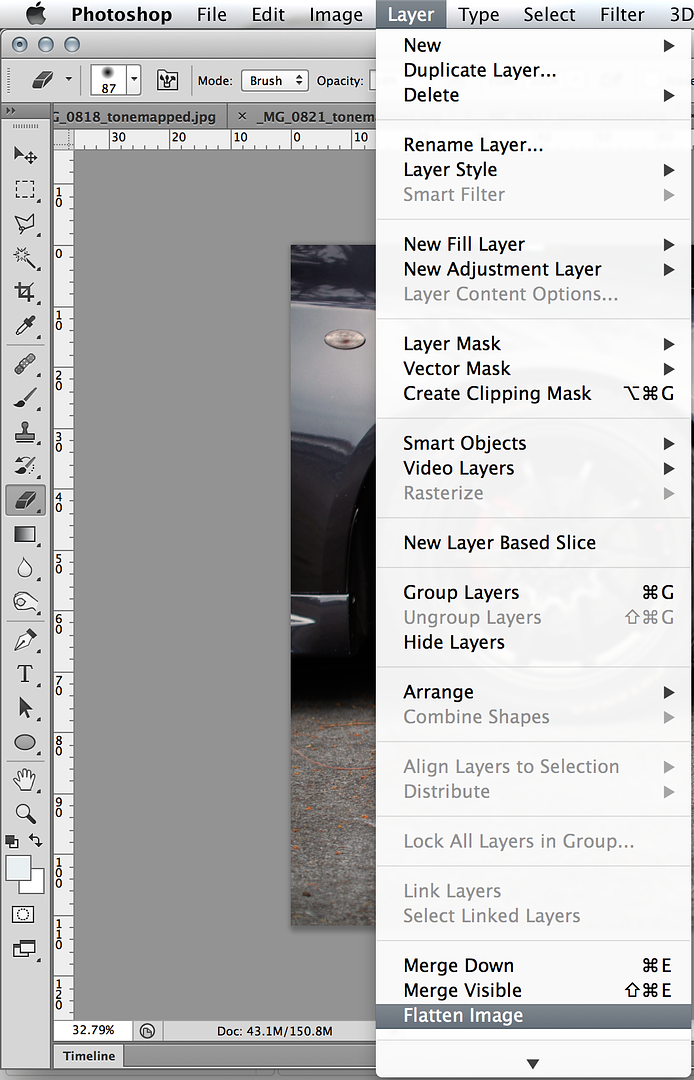
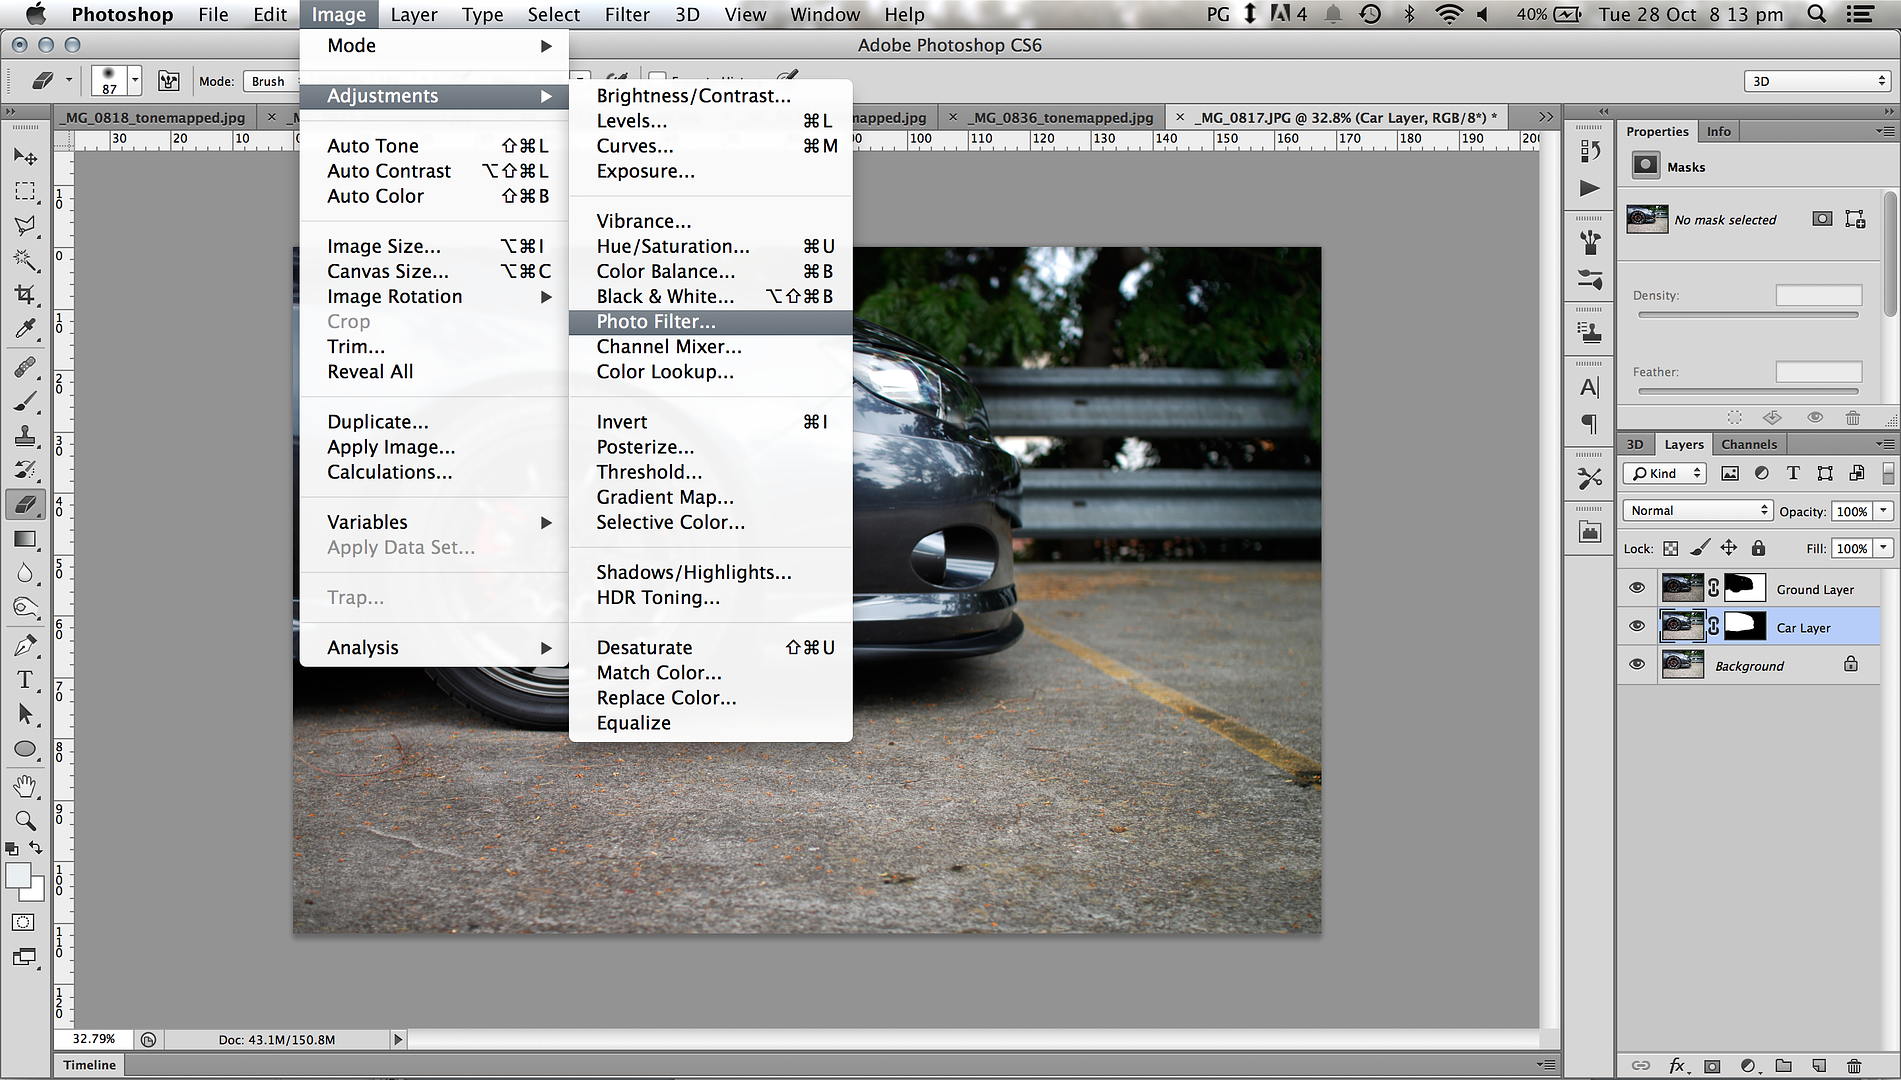
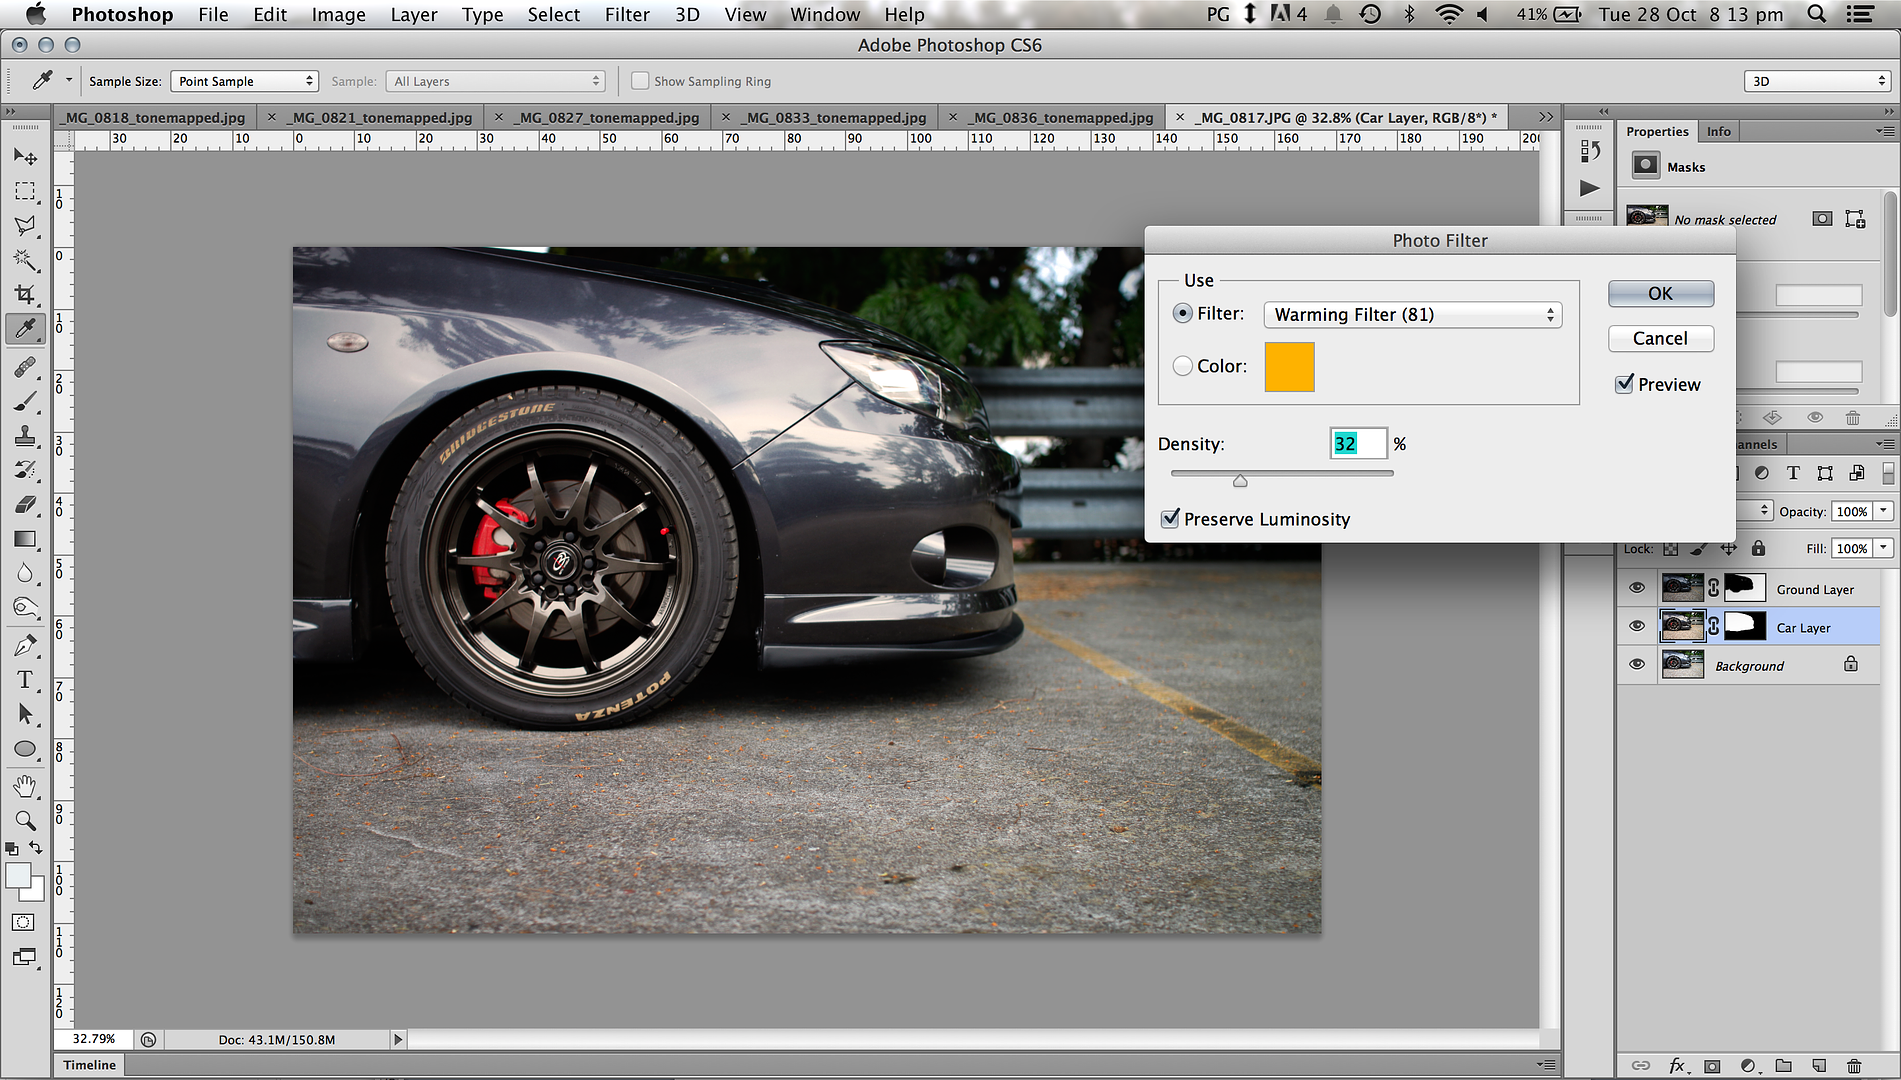
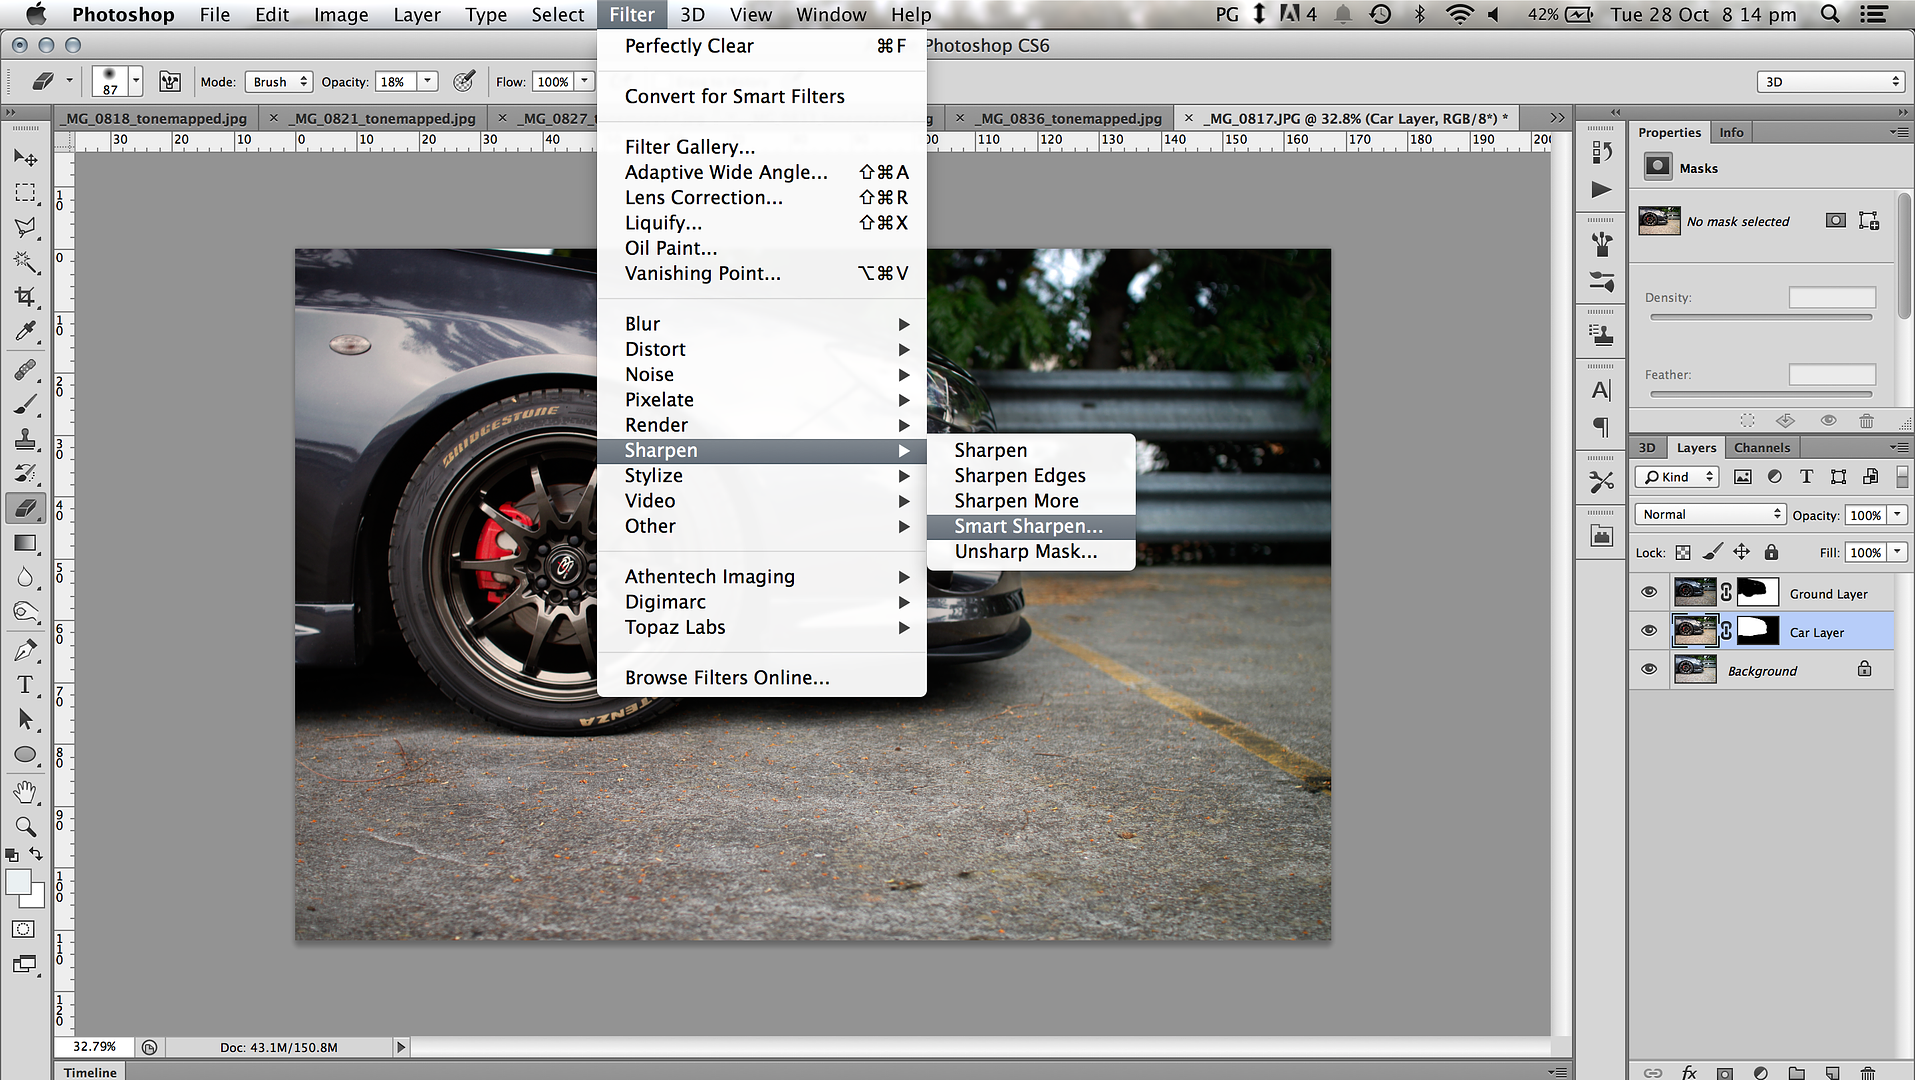
Adjustments
This post has been edited by Timmyface: Oct 28, 2014 - 4:39 AM -------------------- |

Posts in this topic
 Timmyface Photoshop Tutorial Thread Feb 12, 2013 - 11:40 PM
 Timmyface Editing
Lowering your car
Open up your image in p... Feb 13, 2013 - 12:01 AM Timmyface *reserved for*
Post Production
Editing out backgr... Feb 13, 2013 - 12:07 AM richee3 Nice! I'm definitely going to have to star... Feb 13, 2013 - 5:26 PM Timmyface It really pays off with a 10 minute edit. You don... Feb 13, 2013 - 5:33 PM richee3 I played around with CS4 a bit tonight, still suck... Feb 17, 2013 - 10:40 PM Timmyface Whatever your getting confused with/wanting to do,... Feb 17, 2013 - 10:43 PM
Timmyface Editing
Lowering your car
Open up your image in p... Feb 13, 2013 - 12:01 AM Timmyface *reserved for*
Post Production
Editing out backgr... Feb 13, 2013 - 12:07 AM richee3 Nice! I'm definitely going to have to star... Feb 13, 2013 - 5:26 PM Timmyface It really pays off with a 10 minute edit. You don... Feb 13, 2013 - 5:33 PM richee3 I played around with CS4 a bit tonight, still suck... Feb 17, 2013 - 10:40 PM Timmyface Whatever your getting confused with/wanting to do,... Feb 17, 2013 - 10:43 PM
 richee3 QUOTE (Timmyface @ Feb 17, 2013 - 9... Feb 17, 2013 - 10:49 PM Timmyface Update: Just added:
Lowering your car
Adding wheel... Feb 25, 2013 - 6:14 AM Malhar95 Thank you so much for this! Feb 26, 2013 - 1:53 AM ILoveMySilly97 Timmyface. You think you can recommend any free ph... Mar 10, 2013 - 5:56 AM Timmyface I haven't actually tried many others, but I... Mar 10, 2013 - 5:59 AM manphibian Awesome! Stickied. Mar 10, 2013 - 6:24 AM Rusty QUOTE (manphibian @ Mar 11, 2013 - 12... Mar 22, 2013 - 2:40 AM ILoveMySilly97 Going to give GIMP and paint.net a try.
UPDATE: ... Mar 10, 2013 - 11:59 PM rentaspace Just a quick edit I did in around 30mins due to ov... Mar 18, 2013 - 10:52 PM ILoveMySilly97 What's the best website that allow free photo ... Jul 4, 2013 - 12:59 AM Timmyface I'd personally say Flickr atm Jul 4, 2013 - 1:03 AM ILoveMySilly97 QUOTE (Timmyface @ Jul 3, 2013 - 11... Jul 4, 2013 - 1:09 AM richee3 I wish this thread was complete. I have pictures t... Oct 23, 2014 - 6:56 PM Timmyface Richee, what are you looking to do? Or just after ... Oct 23, 2014 - 6:59 PM richee3 Speak of the devil! General tips work great. I... Oct 23, 2014 - 7:03 PM Timmyface too easy than bud, I'll have a flick through t... Oct 23, 2014 - 7:07 PM Timmyface Bump. Added a Brightness/Contrast, Masking, Photo ... Oct 28, 2014 - 4:41 AM Jaws4God wow. that is a great tutorial! Feb 1, 2023 - 5:45 PM
richee3 QUOTE (Timmyface @ Feb 17, 2013 - 9... Feb 17, 2013 - 10:49 PM Timmyface Update: Just added:
Lowering your car
Adding wheel... Feb 25, 2013 - 6:14 AM Malhar95 Thank you so much for this! Feb 26, 2013 - 1:53 AM ILoveMySilly97 Timmyface. You think you can recommend any free ph... Mar 10, 2013 - 5:56 AM Timmyface I haven't actually tried many others, but I... Mar 10, 2013 - 5:59 AM manphibian Awesome! Stickied. Mar 10, 2013 - 6:24 AM Rusty QUOTE (manphibian @ Mar 11, 2013 - 12... Mar 22, 2013 - 2:40 AM ILoveMySilly97 Going to give GIMP and paint.net a try.
UPDATE: ... Mar 10, 2013 - 11:59 PM rentaspace Just a quick edit I did in around 30mins due to ov... Mar 18, 2013 - 10:52 PM ILoveMySilly97 What's the best website that allow free photo ... Jul 4, 2013 - 12:59 AM Timmyface I'd personally say Flickr atm Jul 4, 2013 - 1:03 AM ILoveMySilly97 QUOTE (Timmyface @ Jul 3, 2013 - 11... Jul 4, 2013 - 1:09 AM richee3 I wish this thread was complete. I have pictures t... Oct 23, 2014 - 6:56 PM Timmyface Richee, what are you looking to do? Or just after ... Oct 23, 2014 - 6:59 PM richee3 Speak of the devil! General tips work great. I... Oct 23, 2014 - 7:03 PM Timmyface too easy than bud, I'll have a flick through t... Oct 23, 2014 - 7:07 PM Timmyface Bump. Added a Brightness/Contrast, Masking, Photo ... Oct 28, 2014 - 4:41 AM Jaws4God wow. that is a great tutorial! Feb 1, 2023 - 5:45 PM |
6 User(s) are reading this topic (6 Guests and 0 Anonymous Users)
0 Members:
| Lo-Fi Version | Time is now: February 20th, 2025 - 2:36 PM |