 Jun 23, 2013 - 3:11 AM Jun 23, 2013 - 3:11 AM
|
|
|
Enthusiast   Joined May 11, '09 From California Currently Offline Reputation: 4 (100%) |
Alright, so this is how I swapped the superstrut tie rods onto my AT200 rack and pinion. We didnt swap it on the another Celica and we snapped the linkage in half so we found out the reason for the C curve the hard way. Here you go. Suggestions and questions welcome.
Compare 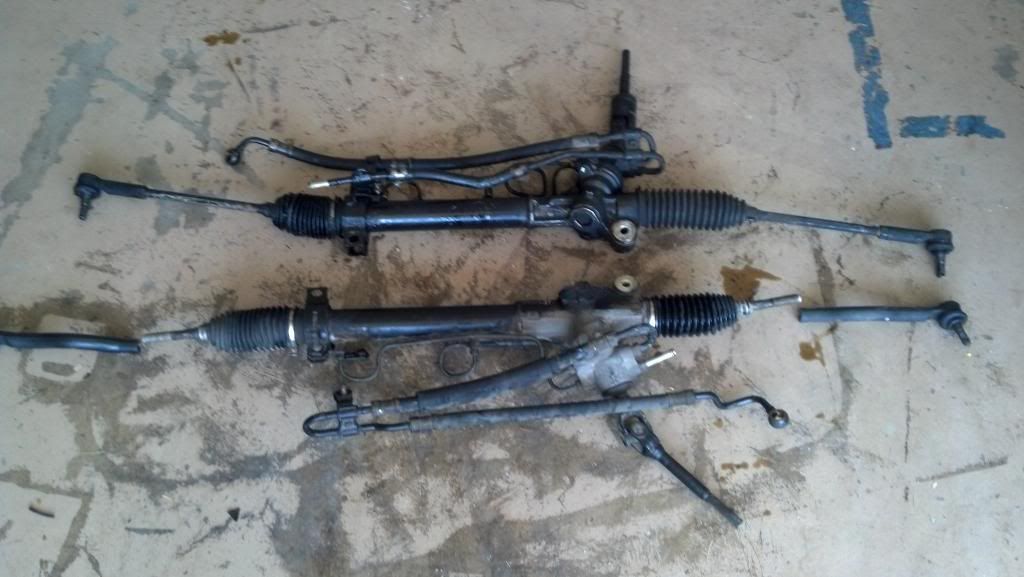 Dissasemble 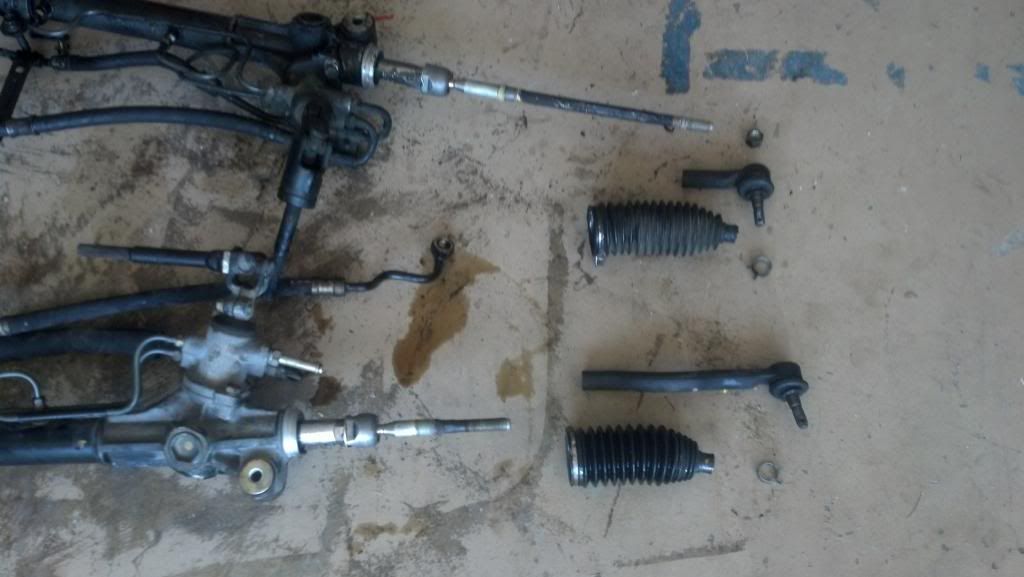 They are the same 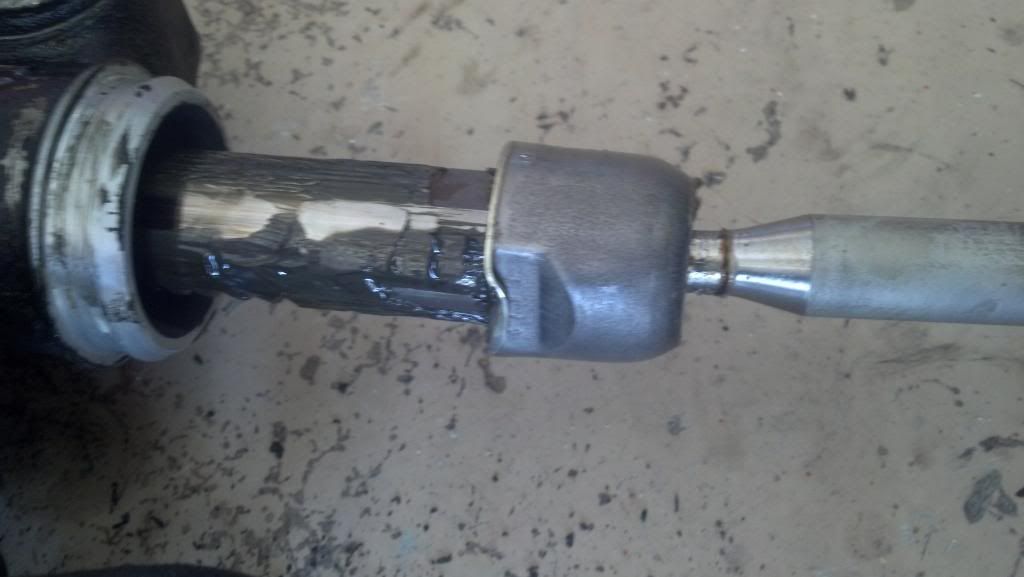 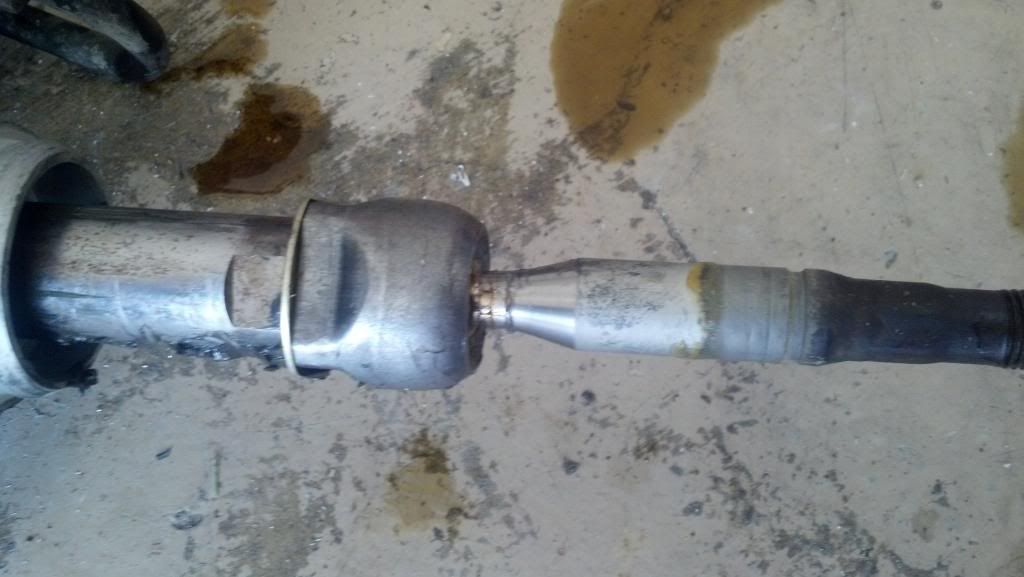 Pry the gold back then use a set of pliers and a 19mm to separate the inner rod from the rack and pinion 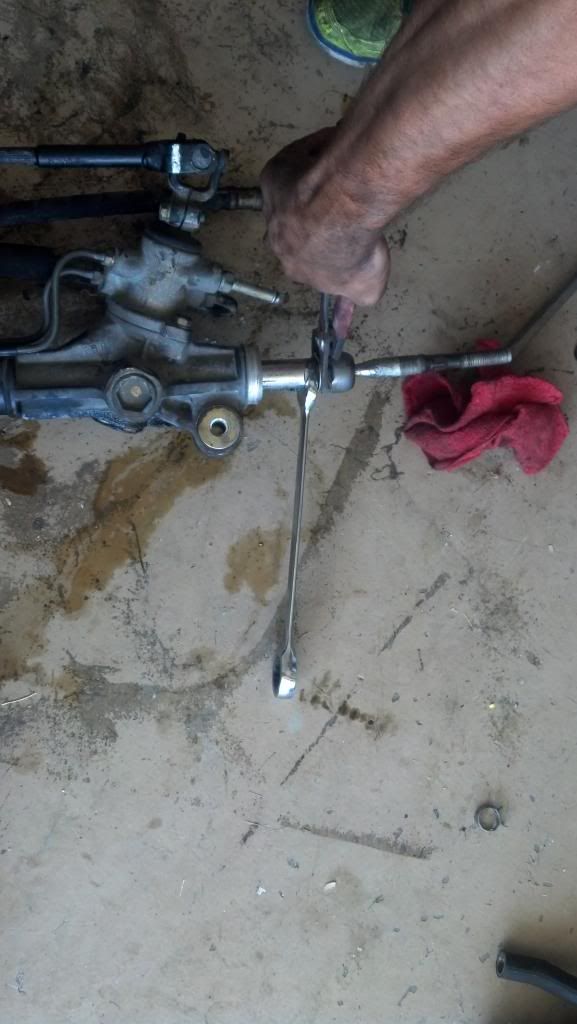 Separated 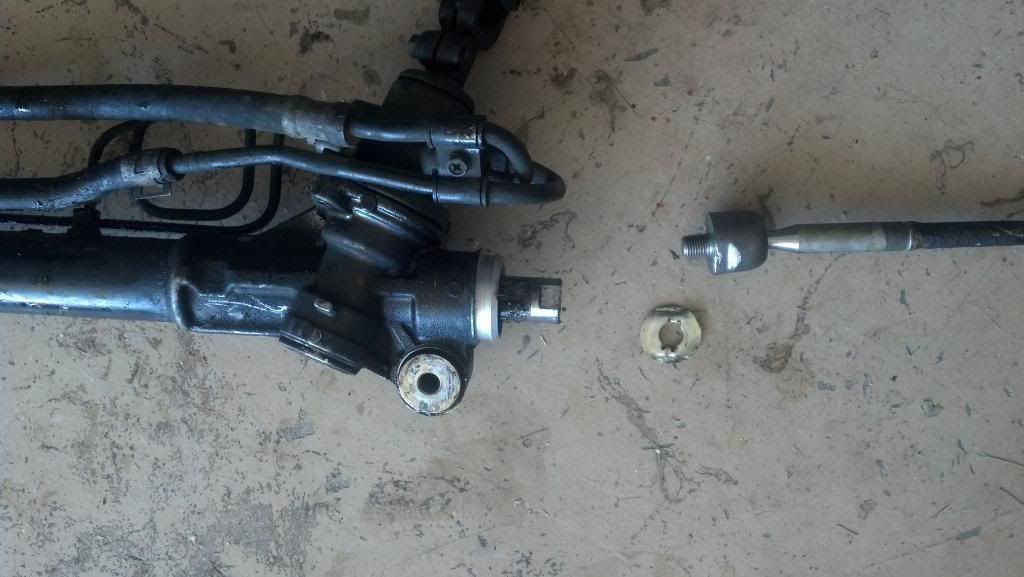 Difference is minor, an alignment should fix any discrepancies 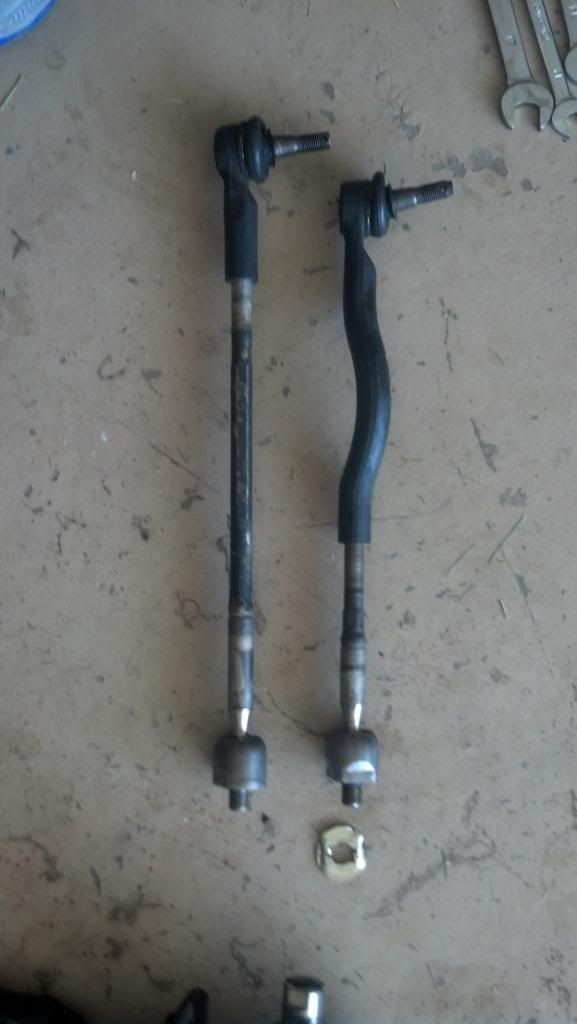 Attatch 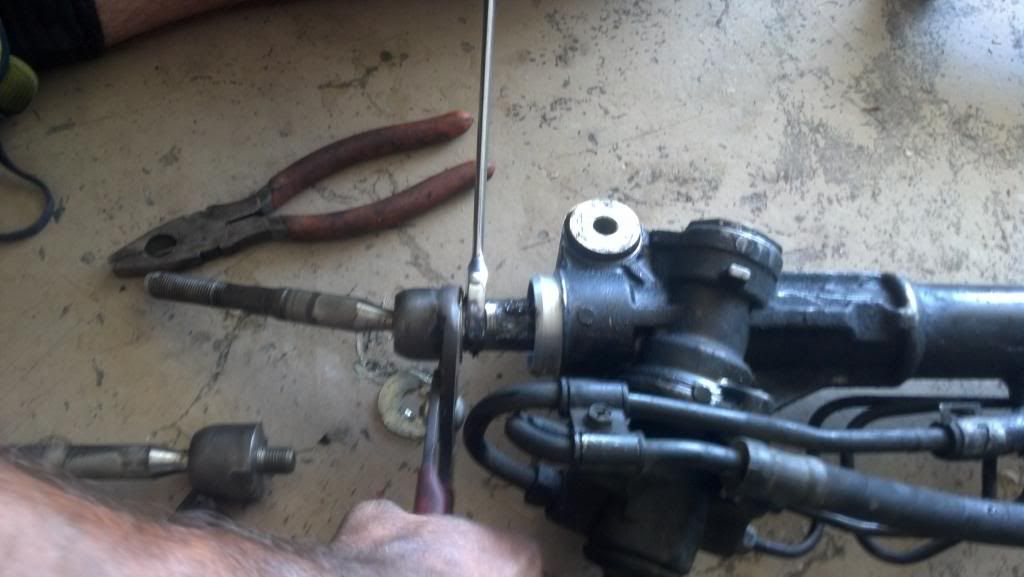 Attatched 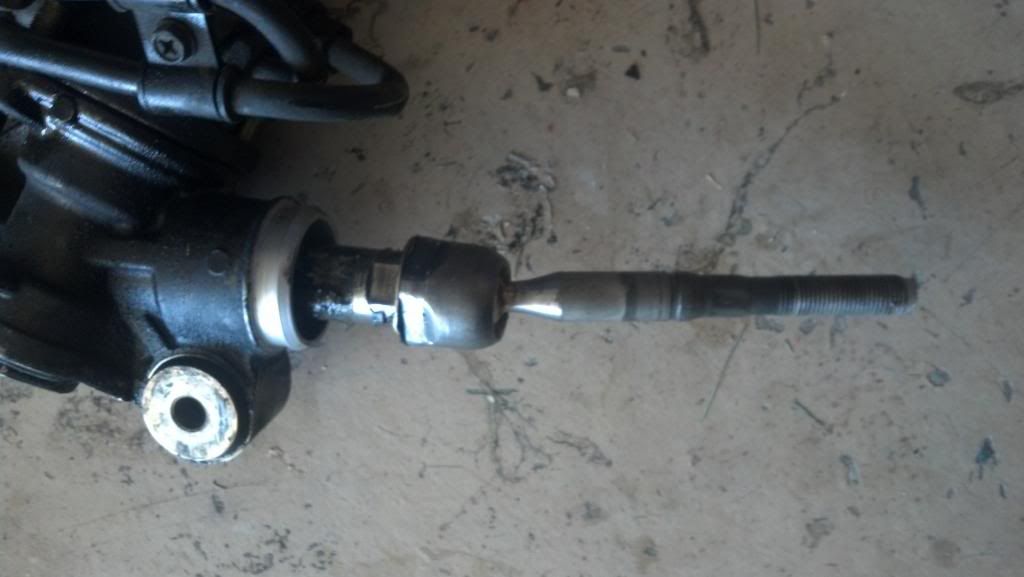 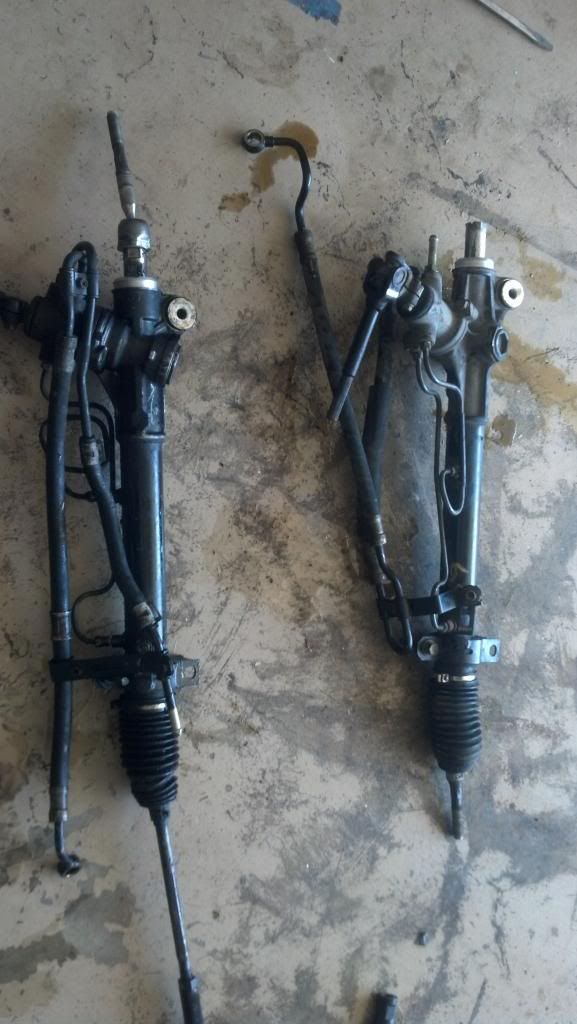 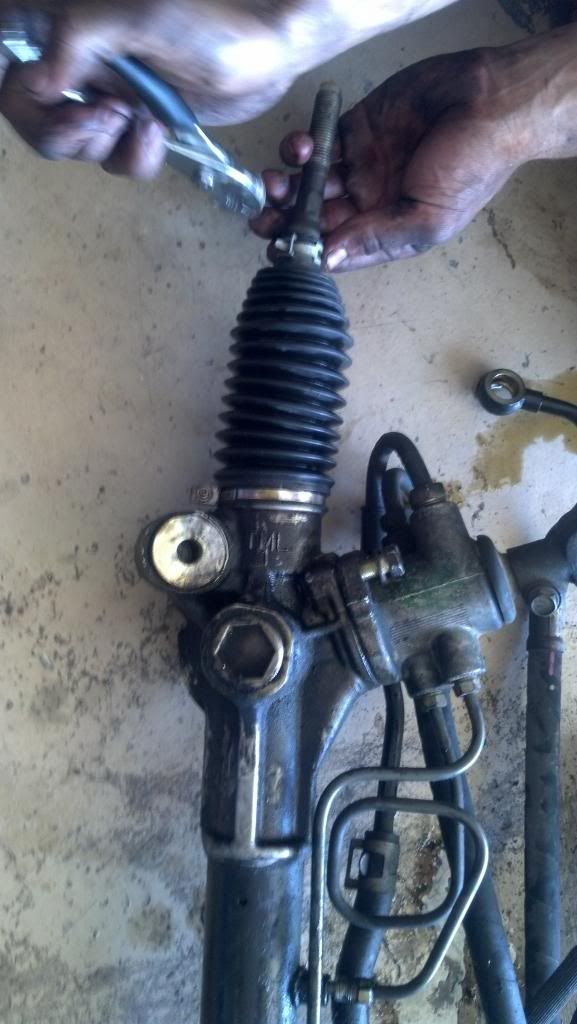 Attatch Boot 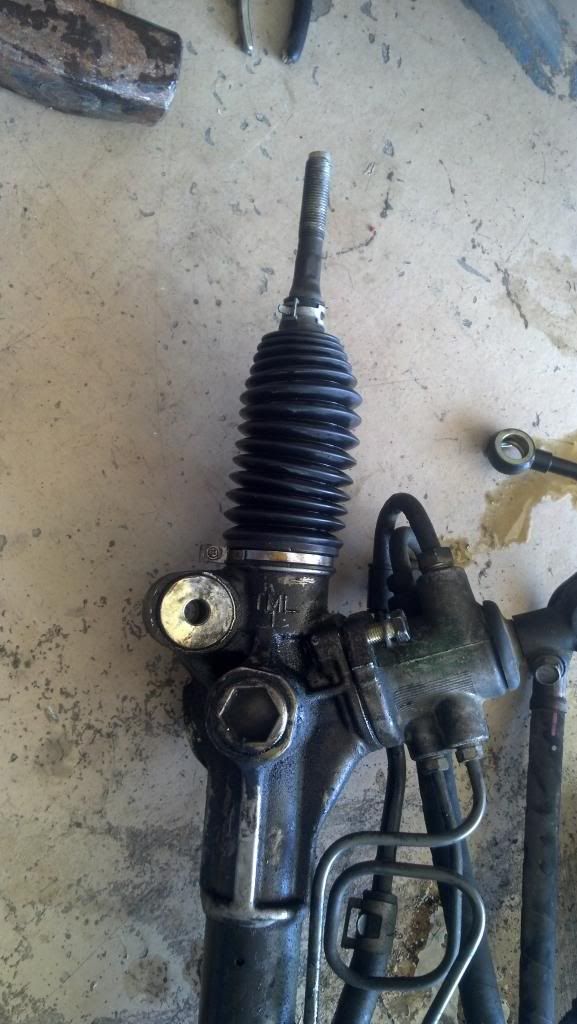 Done, rinse and repeat for the other side. 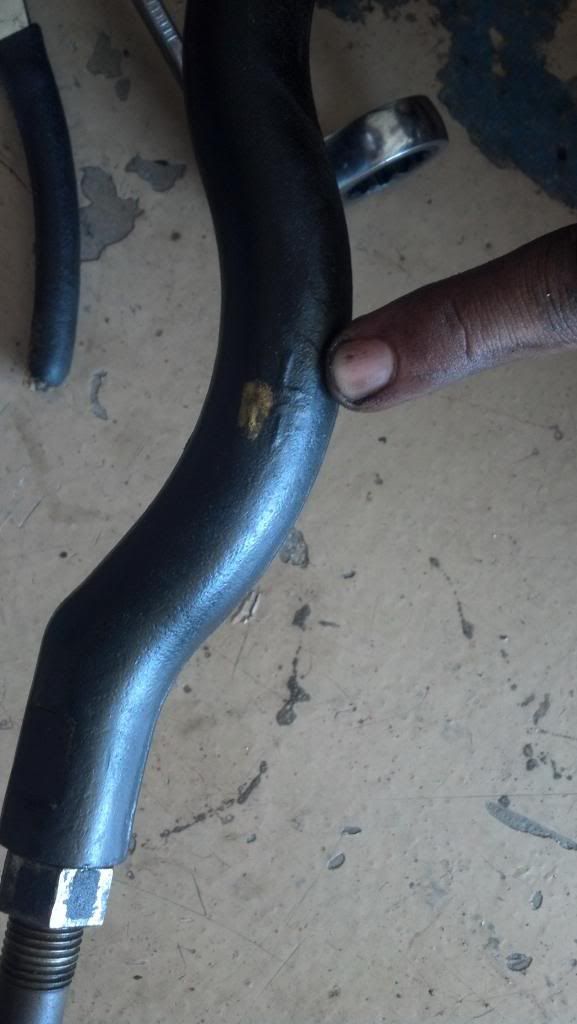 any thoughts are welcome, I havent driven the car yet but ill post again to update with problems if any arise. This post has been edited by DST94: Nov 18, 2013 - 11:23 AM -------------------- |
 |
Replies
 Nov 6, 2013 - 10:03 PM Nov 6, 2013 - 10:03 PM
|
|
|
Enthusiast      Joined Apr 24, '08 From Orange County, CA Currently Offline Reputation: 33 (100%) |
Information provided Enderswift!!! (however check the bottom of this post)
I also worked on creating inner tie rods that would allow me to use ST205 outer tie rods with a USDM steering rack. I measured the USDM rack and found a ~21" total length, whereas the ST205 rack measured roughly ~24". Therefore I had to create parts that were 1.5" longer than the ST205 rods. Luckily USDM steering racks came with inner tie rods that were much longer than what is needed for the custom parts. So making inner tie rods that would work was only a matter of cutting the USDM rods to the right length, machining the proper diameter, and threading:  On top is an inner USDM tie rod after it has been cut short. It is 1.5 inches longer than the ST205 part below. Next step was to turn the piece to the proper size for threading.  Machining the diameter down.  Get ready for hands down, 'the' most exciting video you have ever seen. Ever  And here is the final product. Original ST205 rod on the left, new machined rod on the right. We later added flat spots to give the alignment guy something to put his wrench onto. For those considering this swap in the future, all you need is a USDM rod to be cut short and threaded. Any machine shop with a lathe can do this without a problem. All of this work just to have a little bulge in the outer tie rod.  However all this work that enderswift did was a waste of time and money as we now know (updated this description as of 11/18/2014). You can simply buy Supra/SC300/SC400 Inner Tie rods which are 8.98" inches and attach the outer superstrut end tie rods This post has been edited by BonzaiCelica: May 31, 2023 - 6:19 PM -------------------- Group buy to replicate Narrow E series transaxle parts
http://www.6gc.net/forums/index.php?showto...p;#entry1107514 |
Posts in this topic
 DST94 McPherson to Superstrut Conversion Jun 23, 2013 - 3:11 AM
 enderswift Never understood why everyone considered the steer... Jun 23, 2013 - 10:01 AM
 njccmd2002 Looks like an inch difference times two. And whe... Jun 23, 2013 - 11:01 AM

 DST94 QUOTE (njccmd2002 @ Jun 23, 2013 - 9... Jun 23, 2013 - 12:33 PM
 playr158 Yup I went RHD and kept McPherson...modding the st... Jun 23, 2013 - 1:33 PM
 LimitedGT4 Thank you for demostrating to the forum the simpli... Jun 23, 2013 - 10:01 PM

 DST94 QUOTE (LimitedGT4 @ Jun 23, 2013 - 8... Jun 24, 2013 - 10:27 PM
 LimitedGT4 the first time i swapped i used the stock linkages... Jun 24, 2013 - 11:19 PM
 BonzaiCelica I'll leave this here. thanks to qatar11 for me... Sep 12, 2013 - 10:28 PM
 BonzaiCelica concerning the bulge that you see in the superstru... Nov 7, 2013 - 12:53 AM
 BonzaiCelica information over load
Stock ST205 superstrut f... Nov 7, 2013 - 1:14 AM
 yellowchinaman WOW! Hold up!
So you are going from Macphe... Nov 11, 2013 - 12:10 PM
 Rusty QUOTE (BonzaiCelica @ Nov 7, 2013 - 6... Nov 11, 2013 - 3:09 PM
 BonzaiCelica chinaman. read the superstrut thread you can find ... Nov 11, 2013 - 4:53 PM
 enderswift Why do you want to use the gt swaybar? Nov 12, 2013 - 10:36 AM

 BonzaiCelica QUOTE (enderswift @ Nov 12, 2013 - 11... Nov 12, 2013 - 6:55 PM

 LimitedGT4 QUOTE (BonzaiCelica @ Nov 12, 2013 - 7... Nov 12, 2013 - 7:45 PM

 enderswift QUOTE (BonzaiCelica @ Nov 12, 2013 - 7... Nov 13, 2013 - 11:05 AM
 njccmd2002 apparently superstrut parts here in the US are che... Nov 13, 2013 - 7:53 AM
 Trodai Hi I have a st205 gt4 which i have converted to Mc... Nov 23, 2013 - 5:10 PM
 yellowchinaman yes I too find it strange when people go from McPh... Nov 25, 2013 - 10:34 AM

 Trodai QUOTE (yellowchinaman @ Nov 25, 2013 - 1... Nov 25, 2013 - 12:43 PM

 enderswift QUOTE (yellowchinaman @ Nov 25, 2013 - 1... Nov 25, 2013 - 2:27 PM
 bri-boy This is not only possible but actually very easy t... Jun 18, 2014 - 6:04 AM
 enderswift If you are trying to convert your car to superstru... Sep 1, 2014 - 3:42 PM

 DST94 QUOTE (enderswift @ Sep 1, 2014 - 1... Sep 1, 2014 - 5:38 PM
 BonzaiCelica not to confuse anyone else but the 93-98 supra and... Sep 1, 2014 - 5:50 PM
 njccmd2002 buy new, not used... they last longer. Sep 1, 2014 - 6:06 PM
 enderswift Guess I should post this here. NOT CONFIRMED YET:
... Sep 9, 2014 - 10:54 PM
 BonzaiCelica even though the bottom of this superstrut cartridg... Oct 4, 2014 - 2:44 AM
 BonzaiCelica Edophus was right the shock housing is pinched on ... Oct 6, 2014 - 3:15 AM
 enderswift Aftermarket source for st205 bearings confirmed:
... Feb 12, 2015 - 5:29 PM
 BonzaiCelica So I failed my friend and I'm still wondering ... May 21, 2015 - 11:52 PM
 mi645 Takes math class and still fails. Whats going on??... May 22, 2015 - 12:44 AM
 enderswift Sigh. Bro, why are you driving urself crazy . Just... May 23, 2015 - 10:31 AM
 qatar11 I can confirm all you need is an off the shelf inn... May 27, 2015 - 4:34 AM
 BonzaiCelica bump added pictures to the 1st page. like the inne... Jun 30, 2015 - 1:22 PM
 BonzaiCelica Well as this thread was created to make a super st... Nov 17, 2015 - 5:24 PM
 BonzaiCelica https://youtu.be/mvxi3qYj5Is?si=qkf1qXb7wusPFmsn May 20, 2024 - 2:27 AM
  |
16 User(s) are reading this topic (16 Guests and 0 Anonymous Users)
0 Members:
| Lo-Fi Version | Time is now: November 22nd, 2024 - 10:56 PM |


