 May 14, 2014 - 11:42 AM May 14, 2014 - 11:42 AM
|
|
|
Enthusiast   Joined Apr 24, '14 From Durham, NC, USA Currently Offline Reputation: 0 (0%) |
JULY 22 UPDATE: "BRAKE JOB" FINISHED. (See comment of today's date.) JUNE 2 UPDATE: REAR BRAKES FINE NOW; FRONT RIGHT STEERING KNUCKLE DEFINITELY BENT (AT THE EARS); SEEKING ANOTHER KNUCKLE. MAY 28 UPDATE: NOW WHAT? THE REAR WHEELS ARE LOCKED BUT THE PB IS DOWN! WHAT THE HECK IS GOING ON? MAY 27 UPDATE: SATISFIED THAT THE REAR DRUM BRAKES ARE NOW FUNCTIONING PROPERLY; PROBLEM DEFINED DOES NOT AFFECT THE BRAKE AT ITS PROPER ADJUSTMENT OPERATING POINT; MOVING ON TO NEXT TASK MAY 23 UPDATE: REAR DRUM BRAKE PROBLEM DEFINITION IS NARROWING SUCH THAT AN EXPERT MIGHT BE ABLE TO HELP ME (SEE LAST POSTS) This is my first experience doing such an extensive job on my Celica, and I have the Green Books (FSM). Everything looks beautiful (to me), have photos. I have finished replacing/rebuilding all parts of the brake system -- meaning at all four wheels (including new hardware, hoses, wheel bearings, etc) and am ready to put her back on the road, but . . . with all new shoes, pads, drums and rotors, how can I know they are working properly? Iíve already discovered a couple of assembly mistakes I had to correct, which tells me there may be something else I am missing? First known issue: because I donít have a vernier caliper longer than 6Ē, an AMPRO T71558 Brake Drum Resetting Gauge will arrive on Friday so I can set the Ďclearanceí between the shoes and drums at the rear. Beyond that I have some confusion on how the parking brake works to maintain the proper clearance, given the initial setting of the rear brakes. I want to be totally clear about what I am doing so I am not making a stupid but costly mistake. For example: the manual says to verify that the parking brake levers (on the rear shoes) turns the adjusters (they do) and then to minimize the length of the adjusters (I did), then install the drums and pull the parking brake lever (in the cabin) all the way up until a clicking sound can no longer be heard (did that as well). The very next procedure is to check shoe clearance, but the last step left the parking brake on? And I was thinking that engaging the parking brake and then releasing it was the cause of the adjuster turning, and that it turns only by just one gear tooth distance. All that said, the manual has me just setting the initial clearance, popping on the drums and tires I'm good to go. Is that really all I need to do to make sure the rear breaks are functioning properly? Second issue: with new rotors and pads on the front disc brakes, there isnít a lot of free space in the caliper bracket and there is a scraping sound when I turn the rotors by hand, so there is obvious interference. I donít know whether the slide pins are not working well, since the calipers arenít sliding in and out when hand manipulated, or are they just supposed to rub together until enough friction material wears off that they can begin to have enough space to work once the car is on the road? How do I check them BEFORE I put her on the road, so I can be certain they are working properly? My inexperience has me ready to go, but dead in the water. This post has been edited by Langing: Jul 22, 2014 - 11:06 AM |
 |
Replies
 May 16, 2014 - 5:44 PM May 16, 2014 - 5:44 PM
|
|
|
Enthusiast   Joined Apr 24, '14 From Durham, NC, USA Currently Offline Reputation: 0 (0%) |
THANK YOU richee3! I think that's going to speed up the process, so let me test it out.
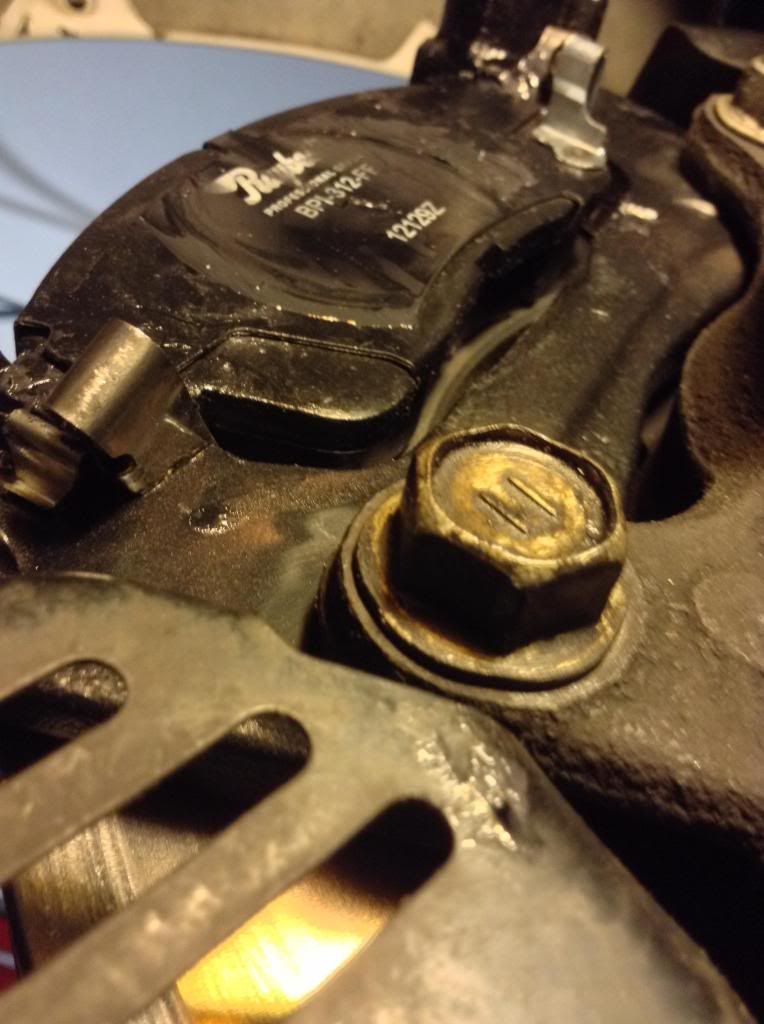
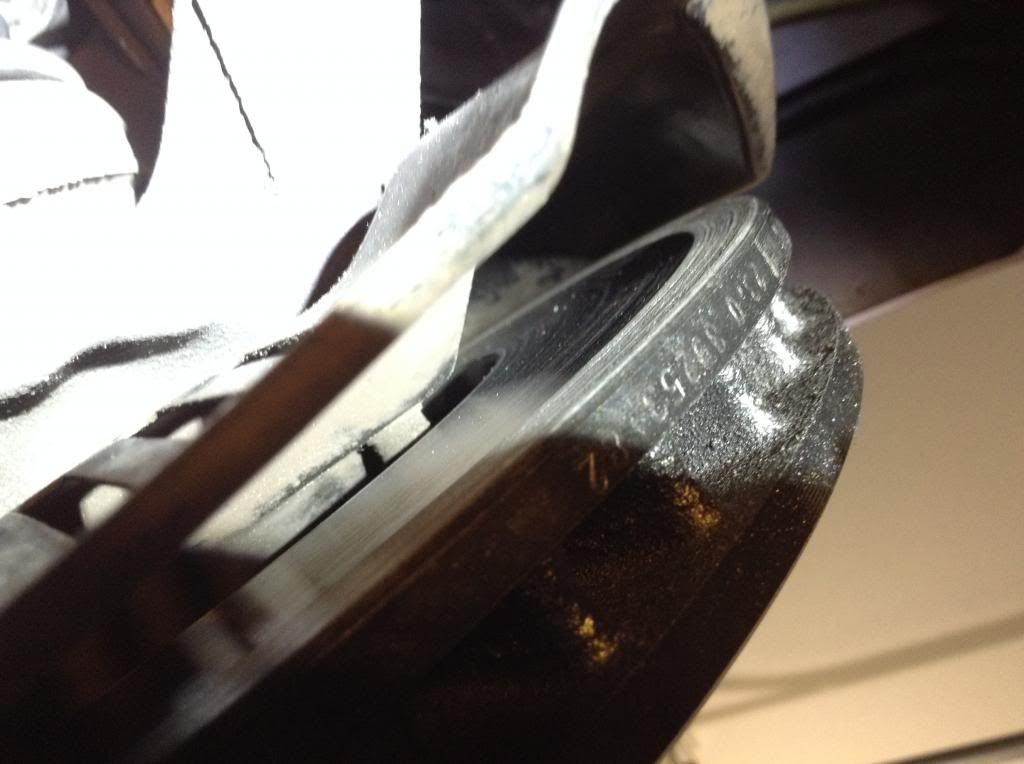
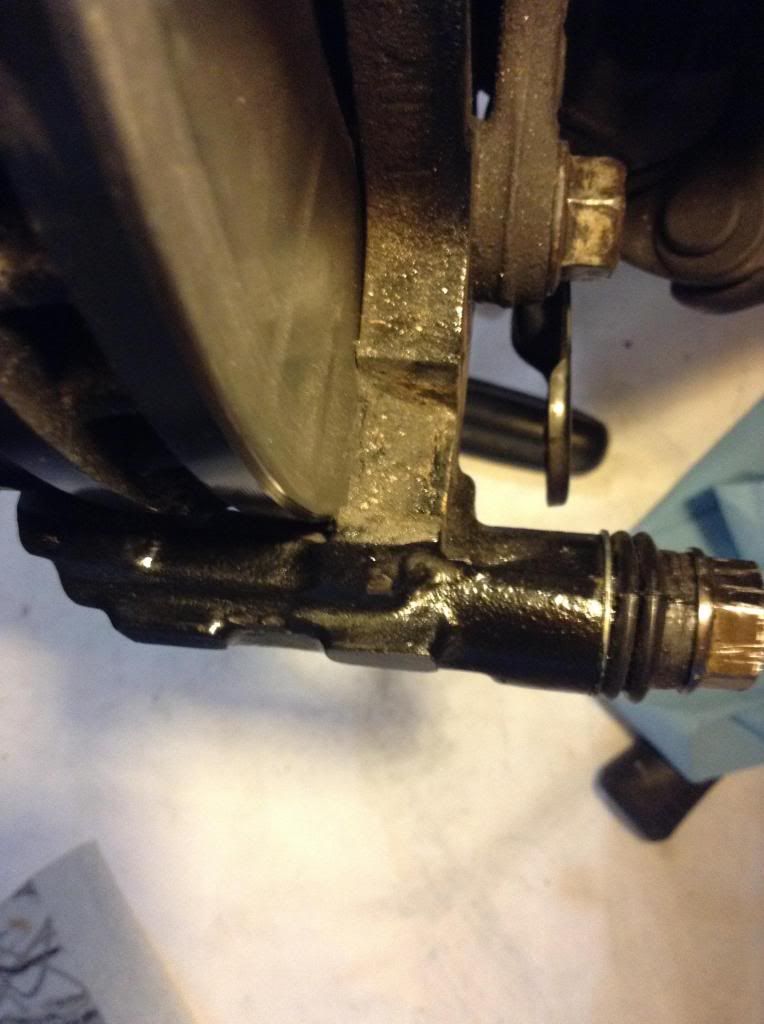
Ok,what I want to show now is how I knew that something was really messed up in my right front disc brake (other than hearing all the racket the wheel was making when I tried to drive on it) Since the loud sound seemed clearly to be coming from the right front, that's where I started looking. Twice during my checkout regime, when I popped off the tire after driving, I discovered a pad support plate in the lower inside position that looked loose in its slot in the torque plate (caliper mounting bracket).  The first time I just hammered it back in place, thinking, good, I've fixed another problem. The second time it happened, I dug deeper. That's when I saw the ugly scarring on the backside of the brand new rotor.  At first I was thinking that the top part of the torque plate was interfering with the rotor, but then I took the inside brake pad off and that flipped out the pad support bracket at the bottom position. All of a sudden I could clearly see a mound of rotor dust that had accumulated in the recess where the pad suport plate was supposed to be. More than that, I could see that the rotor and the mounting bracket were coming together at a small acute angle, a sure sign that they were not parallel to one another, and I have a very strong feeling that parallelism is a requirement in this situation. IMO something is wrong with the mounting surface(s) of the caliper mounting bracket, possibly something I had messed up when I was aggressively cleaning them prior to painting. I wasn't intending on painting, but when I had them almost bare metal clean, I watched a Youtube vidwo and heard a guy saying that you never want to leave clean metal exposed to the elements; it causes immediate rust to form all over it. When I couldn't get clear high temp spray paint, I settled for black. Now I rather like the effect. Funny how I stumble into things.  Evidently, it must have been when I was backing up that the rotor pushed the pad support plate out of position each time. So, there it was, clearly the caliper mounting bracket was causing the interference, as it was bolted on. So, I wanted to come back here to show the experts what I had discovered and ask them what's the easiest (or correct) way to fix this problem. While waiting, I moved along to the left front wheel to check it out, and of course expected to fix another sticky slide pin with another swelled bushing. I was not disappointed. Sure enough, that lower slide pin with the rubber bushing was locked as tight as the right side had been. So, I fixed that and regreased the upper slide pin as well. Then I examined both sides of the rotor, the mounting bracket, the pad support brackets, everything about that disc brake assembly that I could think to check. I even caused the rotor to revolve so I could check for any bad sounds. It looked and sounded about as perfect as I could have hoped. Yes, there was a very slight grinding sound, as the pads were lightly touching the rotor. So, I torqued down the caliper bolts and the lug nuts and declared that wheel finished! Still feel a bit far from being complete, but my to do list is now fairly short:
Let me make a prediction. I am guessing, and it is ONLY a guess (bases on experience), but I almost know for certain that I am going to need more help, so I am going to keep this thread going until I am completely done. This is, to me, a relative novice, a major project. Thanks to everyone who is helping. |
Posts in this topic
 Langing Need expert advice on finishing 94 Celica brake job May 14, 2014 - 11:42 AM
 richee3 I just went through an issue with slider pins. The... May 14, 2014 - 12:57 PM
 VavAlephVav Second Issue: the thin metal dust cover plate may... May 14, 2014 - 2:01 PM
 Special_Edy Test the emergency brake and if it works go for a ... May 14, 2014 - 3:40 PM
 Langing Thanks, I do appreciate the responses. I will be b... May 14, 2014 - 4:14 PM
 Langing Sorry, forgot to say that this is a manual transmi... May 14, 2014 - 4:19 PM
 Langing Remember, the tool I ordered to set the rear drum ... May 14, 2014 - 5:01 PM
 Langing Continued. . .
When I put on the rear tires I cou... May 14, 2014 - 8:44 PM
 richee3 The rubber-on-metal noise and rotation noise are d... May 14, 2014 - 9:59 PM

 Langing QUOTE (richee3 @ May 14, 2014 - 10:5... May 14, 2014 - 10:25 PM
 Special_Edy Your certain you bled all the air bubbles from the... May 15, 2014 - 12:57 PM
 Langing Special Edy
Did a lot of 'bleeding' durin... May 15, 2014 - 1:16 PM
 cheela drums suck. next time i need to change mine i... May 15, 2014 - 2:09 PM
 Langing More useful information about my problem:
I took ... May 15, 2014 - 2:42 PM

 mkernz22 QUOTE (Langing @ May 15, 2014 - 3:42... May 16, 2014 - 3:29 PM

 Langing QUOTE (mkernz22 @ May 16, 2014 - 4:2... May 16, 2014 - 4:00 PM
 Langing QUOTE (rave2n @ May 16, 2014 - 11:14... May 16, 2014 - 11:01 AM
 richee3 To post pictures from your Photobucket, simply cop... May 16, 2014 - 4:16 PM
 Langing Here's a question based on my current understa... May 18, 2014 - 11:47 AM
 Langing Another quetion:
Ok, I set both rear wheel adjust... May 18, 2014 - 1:52 PM
 Langing Parking break question:
Adjusted the parking brea... May 18, 2014 - 5:24 PM
 Special_Edy Never press the brake pedal when the caliper or dr... May 19, 2014 - 9:08 PM

 Langing QUOTE (Special_Edy @ May 19, 2014 - 10... May 20, 2014 - 8:45 AM
 mkernz22 When you bleed the brakes, you're suppose to b... May 20, 2014 - 12:17 PM

 Langing QUOTE (mkernz22 @ May 20, 2014 - 1:1... May 21, 2014 - 10:49 AM
 Special_Edy Just make sure there is are no air bubbles present... May 20, 2014 - 3:21 PM

 Langing QUOTE (Special_Edy @ May 20, 2014 - 4... May 21, 2014 - 10:59 AM
 Langing Yesterday I removed both drum brake adjusters to i... May 21, 2014 - 11:28 AM
 Langing REAR BRAKE INSTALLATION procedure
In the FSM has ... May 21, 2014 - 6:06 PM
 Langing KING'S X
Looks like I was fooling myself whe... May 22, 2014 - 12:11 PM
 Langing A week ago I met the man (on-line) who amazed me w... May 29, 2014 - 8:05 AM
 VavAlephVav you know how I solved this problem??
BuY a Damn... May 29, 2014 - 10:56 AM

 Langing QUOTE (VavAlephVav @ May 29, 2014 - 11... May 29, 2014 - 11:41 AM

 Langing QUOTE (Langing @ May 29, 2014 - 12:4... May 29, 2014 - 2:36 PM
 VavAlephVav with mine I had it set to about 5-7 clicks and it ... May 29, 2014 - 4:57 PM
 Langing Really? Sounds like I better loosen it a bit more ... May 29, 2014 - 9:27 PM
 VavAlephVav I think It may have something to do with how worn ... May 29, 2014 - 10:28 PM

 Langing QUOTE (VavAlephVav @ May 29, 2014 - 11... May 30, 2014 - 9:03 AM
 Langing Found a thread that is encouraging:
Keep warping... May 30, 2014 - 11:01 PM
 Langing MAJOR MILESTONE:
Thanks to everyone who helped m... Jul 22, 2014 - 11:03 AM
 richee3 Congrats! I'm sure you were more than read... Jul 22, 2014 - 11:42 AM

 Langing QUOTE (richee3 @ Jul 22, 2014 - 12:4... Jul 22, 2014 - 12:36 PM
 Special_Edy 6gcs definately look better an inch or two lower.
... Jul 22, 2014 - 10:55 PM
 Langing QUOTE (Special_Edy @ Jul 22, 2014 - 11... Jul 23, 2014 - 10:06 AM
  |
9 User(s) are reading this topic (9 Guests and 0 Anonymous Users)
0 Members:
| Lo-Fi Version | Time is now: December 2nd, 2024 - 1:42 PM |


