
 Jun 26, 2006 - 1:05 PM Jun 26, 2006 - 1:05 PM
|
 
|
 Enthusiast  Joined Apr 18, '05 From Calgary Currently Offline Reputation: 20 (100%) |
How To Adjust Your Door Line ---------------------------------- Tools used: 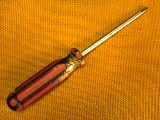 - A fairly large phillips screw driver - A fairly large phillips screw driver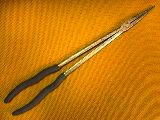 - Long-nose pliers - Long-nose pliersIntro ------- This How-To will explain how to adjust your door line. Not all Celica's are like this, only some are. My car was in a previous front-end collision and brought back in running condition, however it seems like the door hinges have slightly shifted causing the door line to stick out from the rest of the rear quarter-panel. I'm sure there are some celi owners who have this issue as well. This may also help keep the cabin insulated.. last winter, i thought my heater wasn't functioning well when now i realise that this crack has been letting out all the heat. also, for those living in hotter climates, this will even help keep the cool inside when the A/C is on. This has been bugging the HELL outta me because the subwoofer in the door makes the window and all the inner door parts rattle and it's SO annoying! With the door pushed in and lined up, the window seals up with the weather seal and the door tightens keeping it from making that horrible vibrating rattle sound. Also doing this makes the car look much sleeker too! 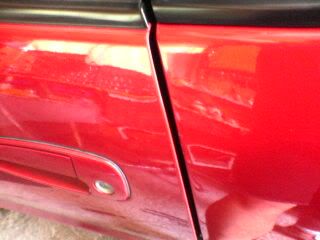 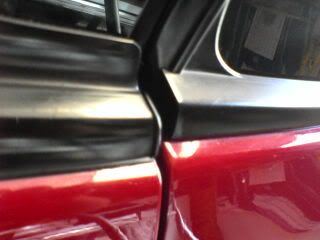 Procedures ----------- 1. Using the screwdriver, remove the two screws holding the door striker in. This may take A LOT of torque so you may want to add WD-40, use mechanic gloves with lots of grip, or even use a torch to heat it up (this helps loosen it a bit). Be sure not to mess up the screw, or else you won't be able to unsrew it. Luckily, I did it on the first try  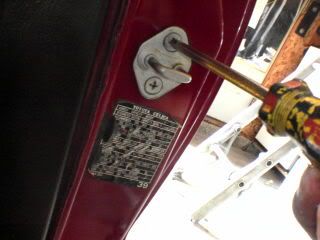 2. You'll need the pliers or anything else with a pointed tip to push on the metal plate inside. In case you're wondering, the threading for the striker screws is on a separate plate of metal and not actually on the door pillar. This is great (thank you toyota engineers!) and allows the door striker to be slightly adjusted. Although, adjusting the metal plate inside will take EVEN MORE force than removing the screws in step 1. Make sure you push on the flat side of the plate and NOT on the threading, if you ruin the threading you obviously won't be able to put the screw back in. 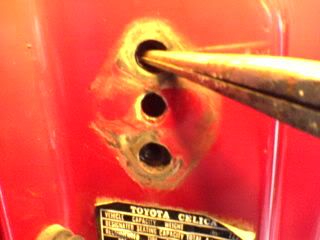 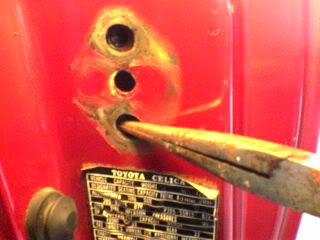 Here's how it looks after being adjusted: 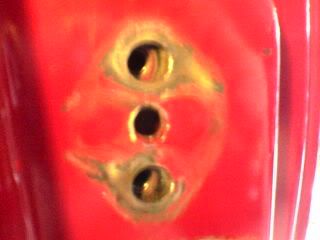 Don't even bother removing the interior rear quarter panel because there's too much metal and you won't have enough room to work in anyway. 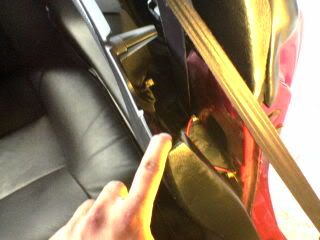 3. Be sure not to move it too far as it may loosen or soften the welds. So after moving it a couple of millimeters, reattach the striker back on and close the door to see how much more it would need to be adjusted. It's all basically 'Trial and Error' for this step. 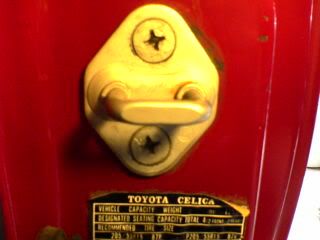 4. Once you think you have it adjusted right, you're pretty much finished. 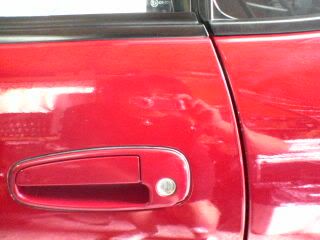 Total Time: 15-20 mins Before and After -------------------- 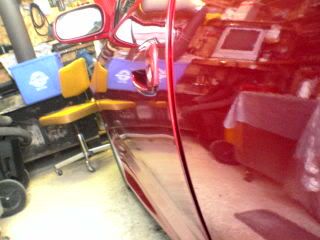 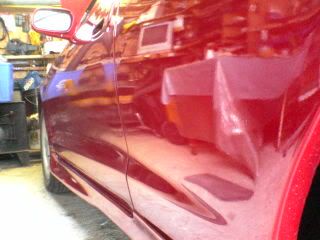
This post has been edited by azian_advanced: Jan 29, 2010 - 9:34 AM -------------------- -------------------------------------------------------------------------------- -------------------------------------------------------------------------------- |

 |
Replies
|
Jun 27, 2006 - 4:29 PM
|
|
|
Enthusiast Joined Apr 12, '05 Currently Offline Reputation: 0 (0%) |
Wow im gonna go get on that right now. I had to pull the door-open wire cause it kept going off since my passenger side door doesnt sit flush enough
|
Posts in this topic
 azian_advanced How To Adjust Your Door Line Jun 26, 2006 - 1:05 PM
 playr158 very nice idea i never thought about moving that..... Jun 26, 2006 - 1:20 PM vincent_doggy Good learn! Thanks! Jun 26, 2006 - 1:33 PM b1gr3d QUOTE(playr158 @ Jun 26, 2006 - 12:2... Jun 26, 2006 - 1:59 PM playr158 good reason to adjust at fender but both will wor... Jun 26, 2006 - 3:19 PM celiracer Just did it on my drivers side. My dad said that i... Jun 26, 2006 - 7:55 PM b1gr3d oh come on lambo doors don't count lol..the f... Jun 26, 2006 - 8:27 PM CelicaBuddy oh this is awesome!
When I bought my car it ... Jun 26, 2006 - 8:41 PM azian_advanced so that's what it's called, a striker... ... Jun 26, 2006 - 8:49 PM
playr158 very nice idea i never thought about moving that..... Jun 26, 2006 - 1:20 PM vincent_doggy Good learn! Thanks! Jun 26, 2006 - 1:33 PM b1gr3d QUOTE(playr158 @ Jun 26, 2006 - 12:2... Jun 26, 2006 - 1:59 PM playr158 good reason to adjust at fender but both will wor... Jun 26, 2006 - 3:19 PM celiracer Just did it on my drivers side. My dad said that i... Jun 26, 2006 - 7:55 PM b1gr3d oh come on lambo doors don't count lol..the f... Jun 26, 2006 - 8:27 PM CelicaBuddy oh this is awesome!
When I bought my car it ... Jun 26, 2006 - 8:41 PM azian_advanced so that's what it's called, a striker... ... Jun 26, 2006 - 8:49 PM
 |
1 User(s) are reading this topic (1 Guests and 0 Anonymous Users)
0 Members:
| Lo-Fi Version | Time is now: July 29th, 2026 - 12:56 AM |