 Jul 21, 2007 - 9:05 PM Jul 21, 2007 - 9:05 PM
|
|
 Enthusiast   Joined Mar 13, '07 From Gold Coast, QLD, Australia Currently Offline Reputation: 0 (0%) |
Well I finally received the rest of my kit on Friday and fitted it yesterday. I thought I'd start a project thread too so that I could make some notes along the way and show off when it's all done
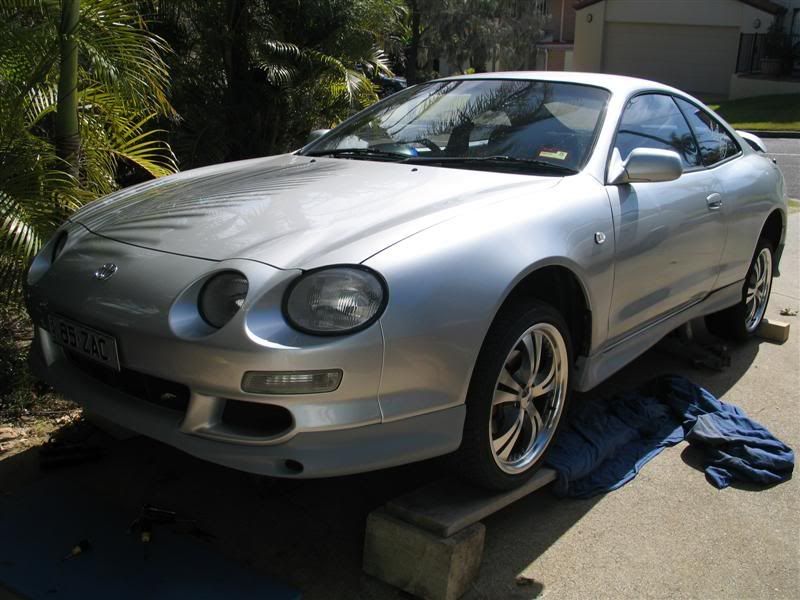
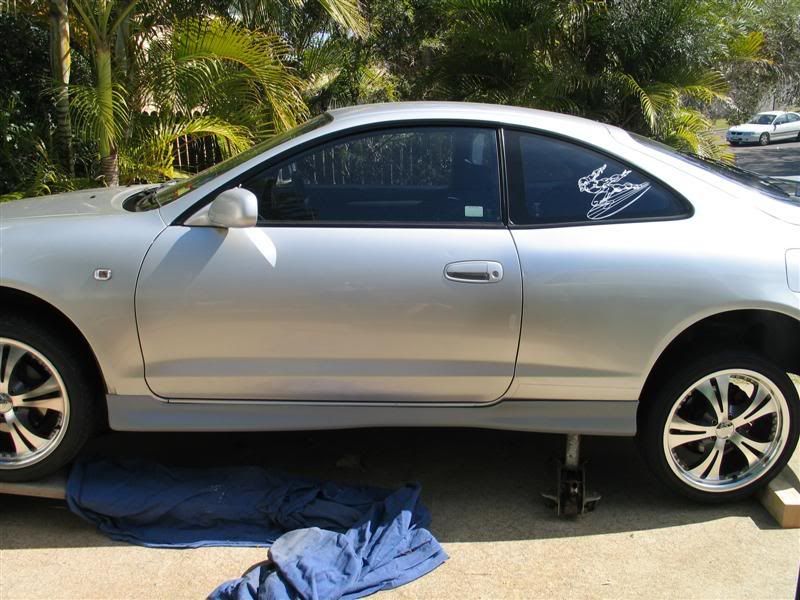
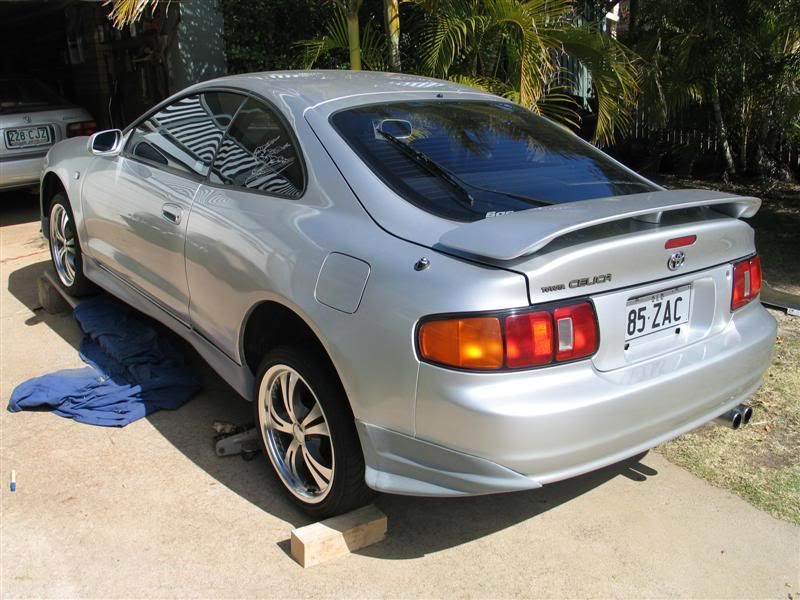
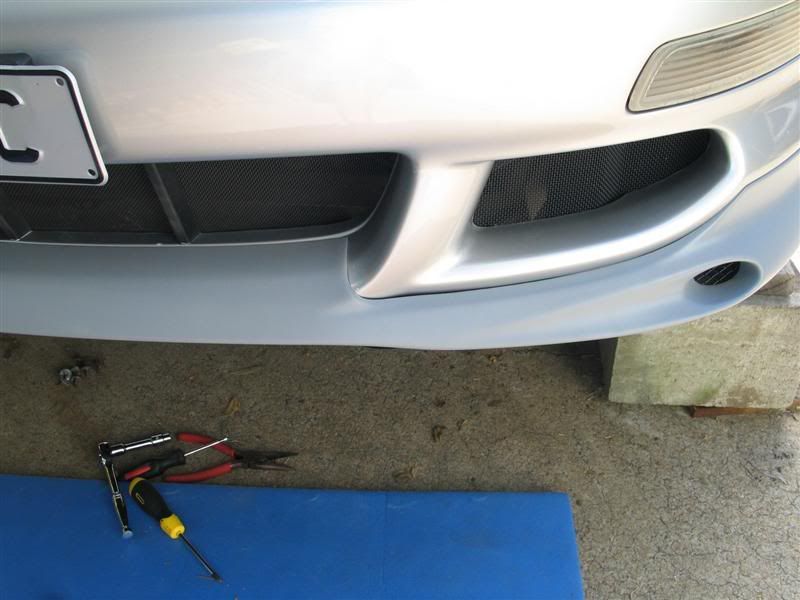
Fitting was an interesting exercise. I drove the car up on some makeshift ramps and jacked up the rear side that I was working on in turn. The best thing we have for when working on the car is a foam 'camping mattress'. I'd hate to ever sleep on it but it makes lying under the car soo much more comfortable Oh yeah also notice the black stainless steel mesh I put in the front vents a couple of weeks ago!    Yeah I know that there's big gaps. They have been moulded using a heat gun but until they are taped everything still bends back out 5-10mm. So here's the notes/questions: The front lip is kind of nasty to put on. It has these fibreglass brackets underneath that have to be bent whilst the lip is squeezed into place. I wouldn't want to mount/remove it too many times. Also it tends to gouge bits of paint from the front bumper where the lip piece comes up and into the main front vent.  This pic is showing where the skirt meets the front wheel well. The other skirt was a much tighter fit and needed a bit of filing and heating to get it on. I did as suggested here and cut up the mud flaps but I think it looks a bit dodge. I'll investigate getting a pair of the correct parts to go there (anyone got some they want to part with?). Also, there's a bit of a mark left from where the mudguards wrap onto the side panel. I'll have a go at polishing it out today - may have to give it a go with a buffer...  Last picture. These are DCW OEM rears and needed a fair amount of work (compared to the Topmix parts). I've just got the one screw that you can see on the inside of the well holding them on. I reckon that once it's taped up it should hold on OK but if anyone wants to advise otherwise I'm happy to listen That wheel arch is looking really nasty - I swiped a post there early in the year and although it didn't bare any metal, it took off a lot of the top coat of paint (the car had been resprayed so it's the original coat that shows through). I'm thinking of getting some touch up guys to attack the area and get it looking better than it currently is...  Hopefully I'll get the kit painted this week. I was thinking about getting the painters to do the final fitting too (they do a lot of this stuff) but we'll see what happens. It's so great to finally have it all coming together! I'll definitely get some pics posted as soon as it's all finished. Zac |
 |
Replies
 Aug 5, 2007 - 10:08 AM Aug 5, 2007 - 10:08 AM
|
|
 Enthusiast    Joined Sep 13, '04 From Sydney/Australia Currently Offline Reputation: 2 (100%) |
welcome to the tom's special edition replica club lol -R6
q. why did you go with the trd rear splitters? -------------------- ROM-23L 67 + 76 = 143
"I wasn't pursuing Sephiroth, I was being summoned by him." - Cloud Strife |
 Aug 5, 2007 - 4:02 PM Aug 5, 2007 - 4:02 PM
|
|
|
Enthusiast    Joined Nov 14, '06 From Northampton, UK Currently Offline Reputation: 5 (100%) |
QUOTE(DSRT-FX @ Aug 5, 2007 - 4:08 PM) [snapback]585426[/snapback] q. why did you go with the trd rear splitters? Mmm. I know it is a personal thing, but the combination of TRD splitters and Euro skirts doesn't work for me as-is. You either need to mold the splitters or mold a fake seam line a couple of inches above the top of the rear of the Euro skirts so that the lines flow round the car better. -------------------- Davey
Items for sale |
Posts in this topic
 Mangozac My exterior styling project thread Jul 21, 2007 - 9:05 PM
 Redline08 404 is the cleanest non-ricey kit you can go with,... Jul 21, 2007 - 9:50 PM

 DeW_H0e_GT QUOTE(Redline08 @ Jul 21, 2007 - 9:5... Jul 22, 2007 - 2:47 AM
 SlowCelica94 Good lord, that looks unsafe. Please do me a favor... Jul 21, 2007 - 10:12 PM
 Culpable04 QUOTE(Redline08 @ Jul 21, 2007 - 9:5... Jul 21, 2007 - 10:23 PM

 dustin15brown QUOTE(Culpable04 @ Jul 21, 2007 - 11... Jul 21, 2007 - 11:30 PM
 Redline08 looked like it, looked alot like it, sept for the ... Jul 21, 2007 - 11:40 PM
 goferris hey that's what my car is going to look like o... Jul 22, 2007 - 1:52 AM
 Mangozac QUOTE(SlowCelica94 @ Jul 22, 2007 - 1... Jul 22, 2007 - 5:48 AM
 Mangozac I finally got the parts painted today:
I was or... Jul 31, 2007 - 8:22 PM
 QuintinGT QUOTEBased on that last sentence I really need a g... Aug 1, 2007 - 1:25 AM
 Mangozac It's all done!
It took a few hours to do ... Aug 5, 2007 - 4:01 AM

 Mangozac QUOTE(DSRT-FX @ Aug 6, 2007 - 1... Aug 5, 2007 - 5:35 PM


 DSRT-FX QUOTE(Mangozac @ Aug 6, 2007 - 8:35 ... Aug 5, 2007 - 8:03 PM

 malpaso QUOTE(DSRT-FX @ Aug 5, 2007 - 4... Dec 3, 2007 - 6:53 AM
 dustin15brown need a drop now... and I really love your lip... I... Aug 5, 2007 - 3:03 PM
 Mangozac Next step. As some may note from a previous thread... Dec 1, 2007 - 7:47 PM
 HaRv3sTeR nice...needs a drop now Dec 2, 2007 - 10:42 AM
 dtlwrc Really cool! I love your front lip, very good ... Dec 2, 2007 - 2:30 PM
 DSRT-FX used as rear fog lights. aus cars dont have the fo... Dec 3, 2007 - 6:49 AM
 Mangozac QUOTE(DSRT-FX @ Dec 3, 2007 - 9... Dec 3, 2007 - 5:00 PM
 CelicaZR Nice and clean
Keep it up!
Are you goin spoi... Dec 3, 2007 - 5:27 PM
 trdproven Time to lower your car and bring out the best of i... Dec 3, 2007 - 10:22 PM
 Mangozac QUOTE(CelicaZR @ Dec 4, 2007 - 8:27 ... Dec 4, 2007 - 1:07 AM
 goferris don't get bigger wheels
that will only make it... Dec 4, 2007 - 2:27 AM

 Mangozac QUOTE(goferris @ Dec 4, 2007 - 5:27 ... Dec 4, 2007 - 4:48 PM
 goferris from what i have read on the boards you will want ... Dec 4, 2007 - 5:48 PM
 m0dd3d1 Love the look mate! I'm getting the same ... Dec 5, 2007 - 9:23 PM
 Mangozac QUOTE(goferris @ Dec 5, 2007 - 8:48 ... Dec 5, 2007 - 9:59 PM
 NGHTKD man i just read u ****n baggin me, ill ****in kill... Dec 20, 2007 - 11:35 PM
 Mangozac QUOTE(NGHTKD @ Dec 21, 2007 - 2:35 P... Dec 21, 2007 - 1:08 AM
  |
1 User(s) are reading this topic (1 Guests and 0 Anonymous Users)
0 Members:
| Lo-Fi Version | Time is now: December 11th, 2024 - 9:56 PM |


