 Jun 2, 2007 - 3:01 PM Jun 2, 2007 - 3:01 PM
|
|
|
Enthusiast      Joined Jun 13, '05 From Poughkeepsie, NY Currently Offline Reputation: 2 (100%) |
So the background, for about a year my car has been leaking small amounts of oil. (my garage floor shows it.) When i brought my car in for the inspection in november, the mechanic said i was leaking oil, and he presumes its from the valve cover gasket. So about 2 weeks ago I got a replacement gasket, and today i finally maned up, and put it in.
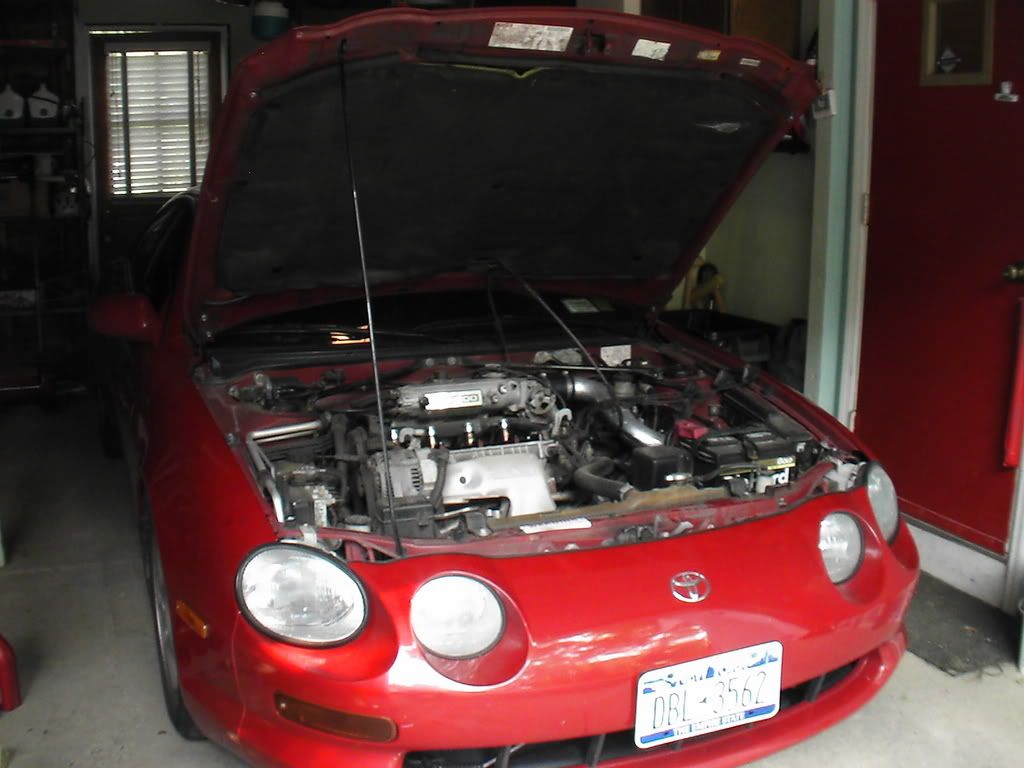 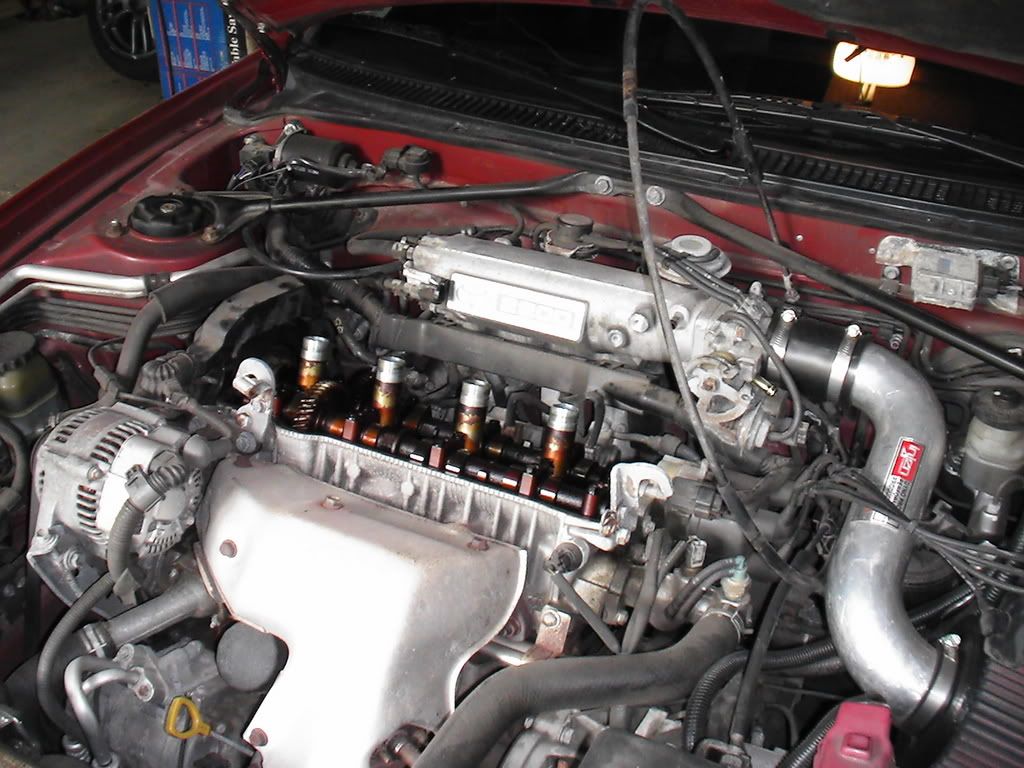 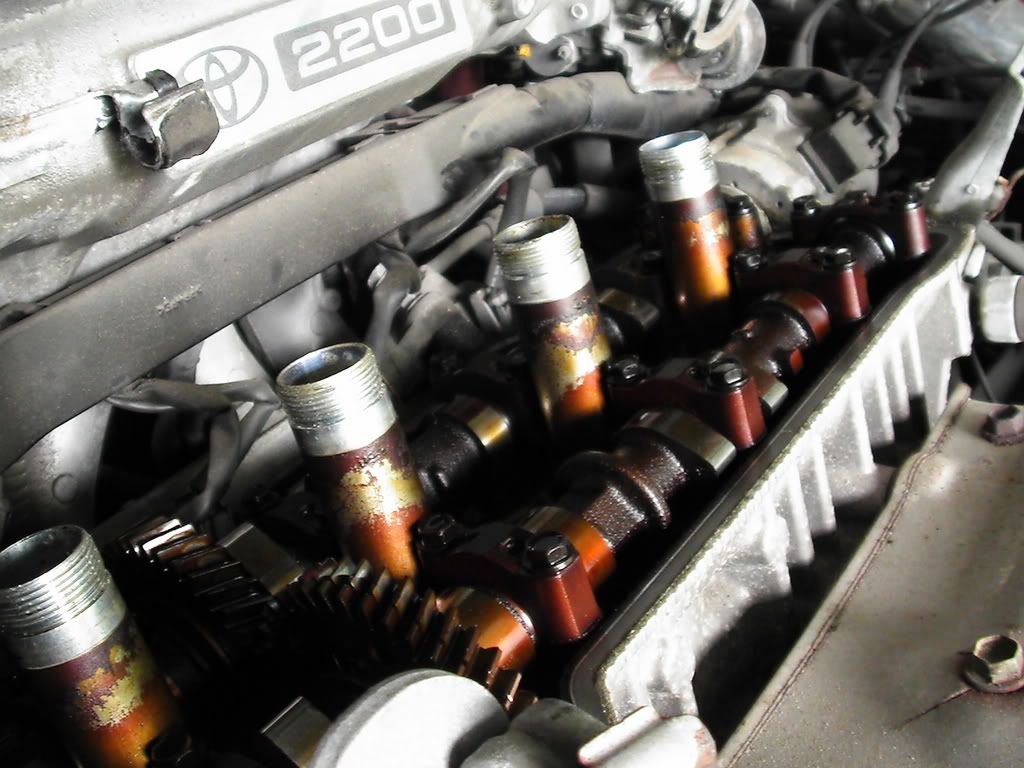 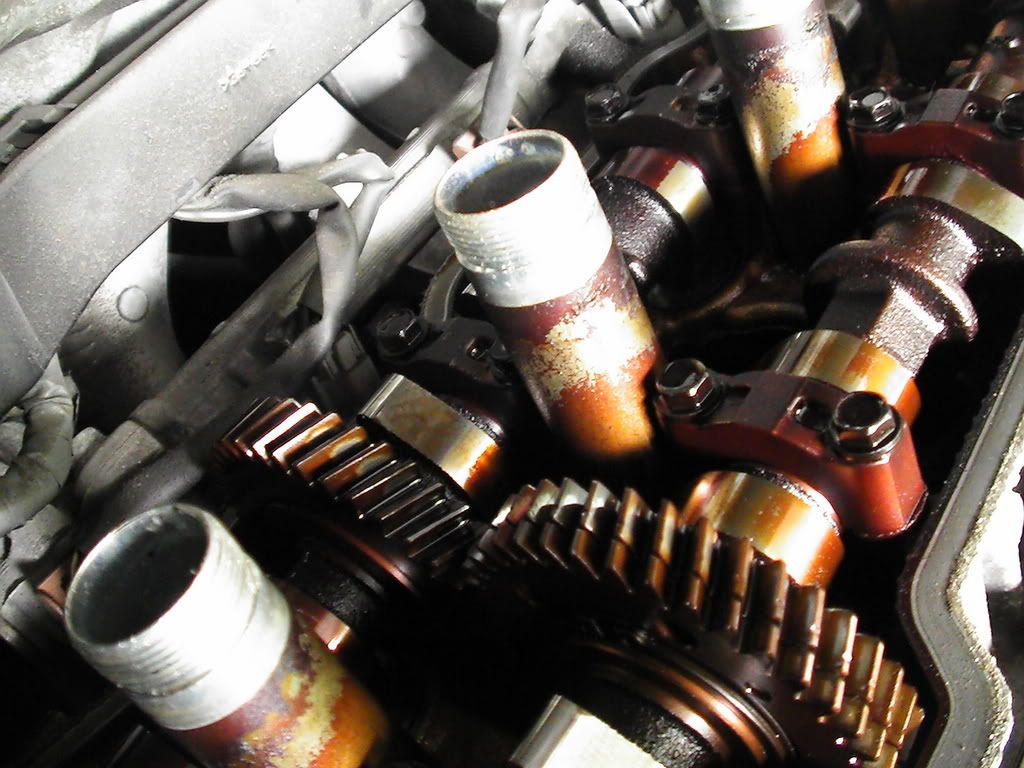 ^top of the motor off. While I was at AutoZone getting oil and a filter (im also going to do my oil) I picked up some Duplicolor High temp engine paint. 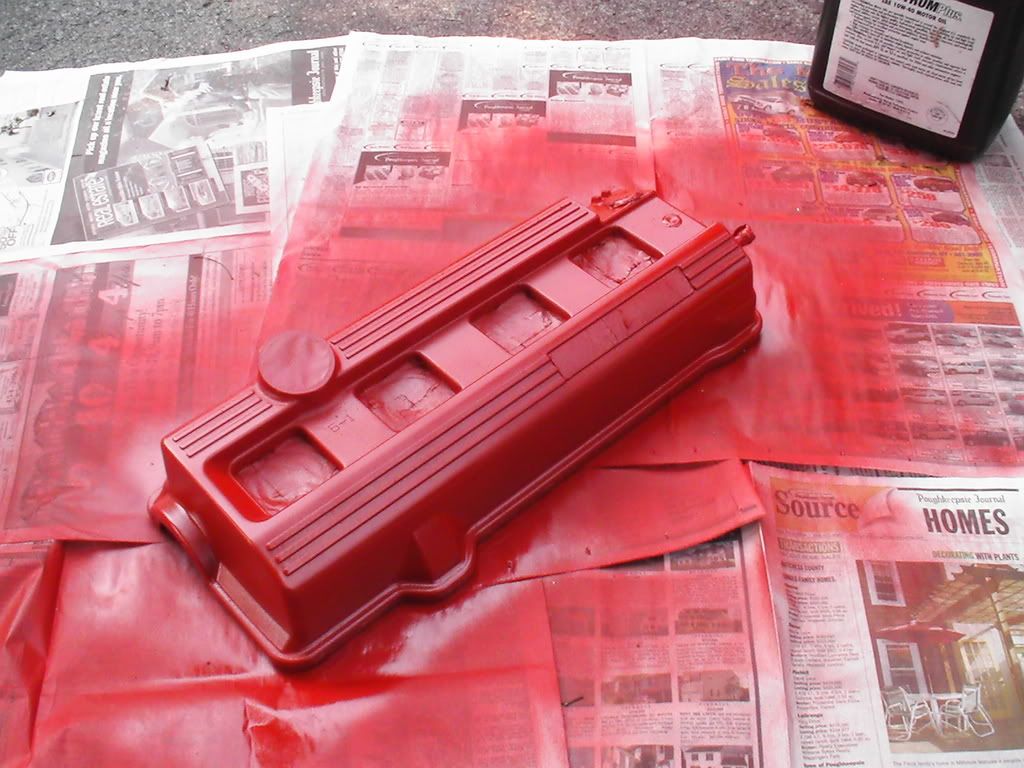 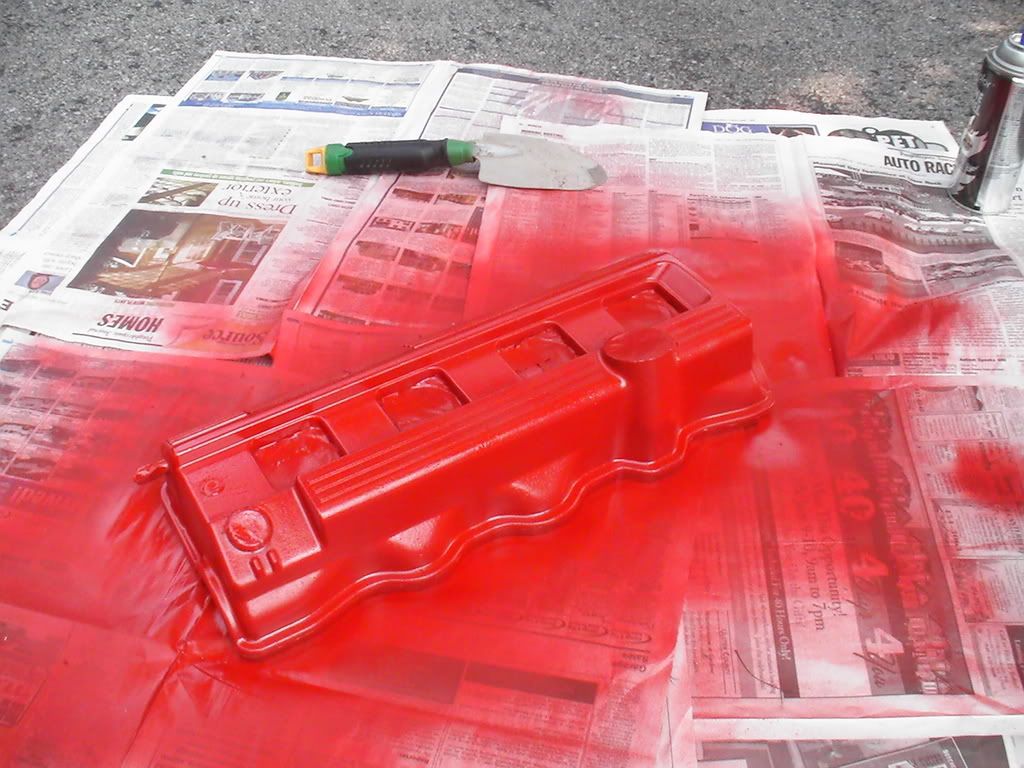 ^ its the same color, just ones in the sun, other is in shadow....I masked off the 16valve part, and the oil, and top where the plugs are put in. REad on for more info. This post has been edited by devilsden97: Jun 2, 2007 - 3:57 PM --------------------  Kawi Love |
 |
Replies
 Feb 3, 2008 - 3:06 PM Feb 3, 2008 - 3:06 PM
|
|
|
Enthusiast     Joined Aug 31, '02 From Virginia Currently Offline Reputation: 4 (100%) |
I will post pics up later this week when I am all finished. My valve cover is drying at the moment...I painted it the high gloss black |
 Feb 3, 2008 - 5:35 PM Feb 3, 2008 - 5:35 PM
|
|
|
Enthusiast      Joined May 12, '06 From Wilmington, NC Currently Offline Reputation: 45 (100%) |
QUOTE(Celicav @ Feb 3, 2008 - 12:06 PM) [snapback]637542[/snapback] I will post pics up later this week when I am all finished. My valve cover is drying at the moment...I painted it the high gloss black for some reason, it seems some celicas have these screws and others don't. mine didn't. --------------------  94 GT - Sold -------- 69 Pontiac Lemans - Sold 88 Alltrac - Sold ---- 04 WRX - Sold 00 GT-S - Sold ------ 91 Miata - project/drift car 95 GT - Sold -------- 96 GT - New Daily Drive |
Posts in this topic
 devilsden97 Did my Valve Cover Gasket Jun 2, 2007 - 3:01 PM
 m0dd3d1 What all is involved when doing this? I need to d... Jun 2, 2007 - 3:20 PM
 presure2 good job so far migga, be sure to use the FIPG in ... Jun 2, 2007 - 3:26 PM
 jcaron9gt4 looks good! wait till you see mine in a coupl... Jun 2, 2007 - 3:51 PM
 devilsden97 OK, paint is dry...and its on the car!
^i l... Jun 2, 2007 - 3:59 PM
 laff09 I'm about to do this myself, but I have a ques... Jun 2, 2007 - 4:19 PM
 devilsden97 i jsut got shafted by autozone....they didnt have ... Jun 2, 2007 - 4:32 PM
 dennischan0919 use brake cleaner to clean the valve cover, it wor... Jun 2, 2007 - 4:35 PM
 laff09 Also, will Permatex Form-A-Gasket #1 Sealant work ... Jun 2, 2007 - 4:52 PM
 devilsden97 I got the toyota stuff from Alltracman (on 6gc.net... Jun 2, 2007 - 6:33 PM
 RisingSun1 good work bro- Jun 3, 2007 - 2:09 AM
 6strngs do you have to use sealant? I didn't use any w... Jun 3, 2007 - 2:15 AM

 presure2 QUOTE(6strngs @ Jun 3, 2007 - 3:15 A... Jun 3, 2007 - 5:45 AM
 m0dd3d1 So you should use the gasket and the sealant? Jun 3, 2007 - 7:57 AM
 jcaron9gt4 i used a gasket, but then a thin layer of FIPG. S... Jun 3, 2007 - 8:07 AM
 devilsden97 QUOTE(m0dd3d1 @ Jun 3, 2007 - 8:57 A... Jun 3, 2007 - 10:38 AM
 m0dd3d1 Sorry for all the questions, I figured if you... Jun 3, 2007 - 11:36 AM
 m0dd3d1 laff09 or whoever was wondering, found this while ... Jun 3, 2007 - 11:48 AM
 Daftboy nice moves migga ...now you need to see mine...ill... Jun 3, 2007 - 12:10 PM
 devilsden97 QUOTE(m0dd3d1 @ Jun 3, 2007 - 12:36 ... Jun 3, 2007 - 2:11 PM
 lagos great job! Jun 3, 2007 - 5:44 PM
 m0dd3d1 Thanks Devilsden! So has anyone done/thought ... Jun 3, 2007 - 7:36 PM
 devilsden97 QUOTE(m0dd3d1 @ Jun 3, 2007 - 8:36 P... Jun 3, 2007 - 7:40 PM
 CaliJeff So it IS totally necessary to get a new gasket whe... Jun 3, 2007 - 10:40 PM
 devilsden97 QUOTE(CaliJeff @ Jun 3, 2007 - 11:40... Jun 3, 2007 - 10:43 PM
 bufferdan You can paint anything on the engine... The valve... Jun 3, 2007 - 10:54 PM
 CaliJeff Sounds good. So for the valve cover i should just ... Jun 4, 2007 - 10:28 AM
 devilsden97 i cleaned mine with some engine degreaser, let it ... Jun 4, 2007 - 11:31 AM

 6strngs QUOTE(devilsden97 @ Jun 4, 2007 - 9... Jun 4, 2007 - 12:13 PM

 Defgeph Good job Miguel. I happy to see you working on the... Jun 4, 2007 - 3:04 PM
 Sinyk Now some red calipers to go with that shiny red ca... Jun 4, 2007 - 3:33 PM
 devilsden97 QUOTE(Defgeph @ Jun 4, 2007 - 4:04 P... Jun 5, 2007 - 3:19 PM
 laff09 Anyone elses valve cover a SOB to get off? I remov... Jun 6, 2007 - 2:23 PM
 Valo666 Migga, b4 u did the valve cover gasket, did you ha... Jun 6, 2007 - 2:58 PM
 OOBE Good job, brother. Hey, why does the 5S lean back ... Jun 6, 2007 - 3:01 PM

 6strngs QUOTE(OOBE @ Jun 6, 2007 - 1:01 PM) ... Jun 6, 2007 - 3:06 PM
 devilsden97 QUOTE(laff09 @ Jun 6, 2007 - 3:23 PM... Jun 6, 2007 - 3:16 PM
 laff09 Thanks, I *forgot* to take off the washers..thatd ... Jun 6, 2007 - 5:22 PM
 hurley97 QUOTE(devilsden97 @ Jun 2, 2007 - 3... Feb 3, 2008 - 5:46 PM
 Celicav So, I finished up painting my valve cover, put the... Feb 5, 2008 - 2:08 AM
 6strngs 1: you might have just spilled some oil if you dra... Feb 5, 2008 - 2:32 AM
 GriffGirl I have 2 questions, as I intend to undertake this ... Feb 5, 2008 - 1:33 PM

 Batman722 QUOTE(GriffGirl @ Feb 5, 2008 - 1:33... Feb 5, 2008 - 5:03 PM
 thespacepanda I was wondering, if anyone has taken the valve cov... Feb 6, 2008 - 11:58 PM
 Rook nice job on the valve cover man! now i'm w... Nov 19, 2008 - 9:48 PM

 6strngs QUOTE (Rook @ Nov 19, 2008 - 6:48 PM... Nov 28, 2008 - 4:01 PM
 Rook Did my valve cover gasket! now i got a new pro... Nov 28, 2008 - 2:09 PM
 Rook oh...well i already put one on...but im not sure w... Nov 28, 2008 - 9:10 PM

 6strngs QUOTE (Rook @ Nov 28, 2008 - 6:10 PM... Nov 28, 2008 - 9:28 PM
 Rook yeah i got 3/8 hose from oreilly's. i spent ab... Nov 28, 2008 - 9:45 PM
 6strngs can you describe the noise it makes?
also, you... Nov 28, 2008 - 9:54 PM
 Rook ah...engine almost sounds like it rattles. yeah im... Nov 28, 2008 - 11:11 PM

 6strngs QUOTE (Rook @ Nov 28, 2008 - 8:11 PM... Nov 28, 2008 - 11:40 PM

 Rook QUOTE (6strngs @ Nov 29, 2008 - 12:4... Nov 29, 2008 - 1:08 AM
 6strngs unless the gearing in the transmission changed, or... Nov 29, 2008 - 1:31 AM

 Rook QUOTE (6strngs @ Nov 29, 2008 - 1:31... Nov 29, 2008 - 8:11 PM
 6strngs was it the oil pressure sensor that's right be... Nov 29, 2008 - 8:46 PM
 Rook haha...well i think i'm just gonna go for it. ... Nov 29, 2008 - 9:04 PM
 Lil-Joe101 Yeah painted valve covers are a nice touch to the ... Nov 29, 2008 - 9:52 PM
 Rook I painted my Valve cover red Looks good. I took ... Dec 3, 2008 - 11:59 PM

 6strngs QUOTE (Rook @ Dec 3, 2008 - 8:59 PM)... Dec 4, 2008 - 12:50 AM
 Rook nah i didn't. this time i did everything mysel... Dec 4, 2008 - 6:06 PM
 stephen_lee was it hot when you turned the key on? Dec 5, 2008 - 12:16 AM

 Rook QUOTE (stephen_lee @ Dec 5, 2008 - 12... Dec 5, 2008 - 4:09 PM
 schmooot the fans will run constantly if the coolant temp s... Apr 26, 2010 - 3:07 PM
 trdproven just for accuracy and correction, if you are using... Jun 20, 2011 - 4:12 AM
 Arsaces How hot does the valve cover get? Would 500 temp p... Jul 7, 2011 - 2:58 PM
 RabidTRD QUOTE (devilsden97 @ Jun 2, 2007 - 5... Jul 7, 2011 - 9:35 PM
 RabidTRD QUOTE (Arsaces @ Jul 7, 2011 - 3:58 ... Jul 7, 2011 - 9:39 PM

 Arsaces QUOTE (RabidTRD @ Jul 7, 2011 - 9:39... Jul 7, 2011 - 10:04 PM
 xXZunGPhunGXx what you use the 1 1/4 socket for? Apr 3, 2012 - 3:28 PM
 Special_Edy QUOTE (xXZunGPhunGXx @ Apr 3, 2012 - 3... Apr 3, 2012 - 3:47 PM
  |
7 User(s) are reading this topic (7 Guests and 0 Anonymous Users)
0 Members:
| Lo-Fi Version | Time is now: November 29th, 2024 - 5:04 AM |


