 Nov 16, 2006 - 6:07 PM Nov 16, 2006 - 6:07 PM
|
|
|
Enthusiast    Joined Nov 14, '06 From Northampton, UK Currently Offline Reputation: 5 (100%) |
Hi,
Anyone have a part number for Toyota group audio controls that (might) fit the 6g 4-spoke celica steering wheel? Two friends have independently suggested that they were available on some ranges from Toyota (but not celica) in the mid-90s (I'm pretty sure they weren't options for the Celica). I've searched the Internet but can't find any pictures, although I did find these: (lexus, grey) http://media.trafficdriver.com/evox/stilll...2006/4sa/54.jpg http://www.alliedmotors.net/pics/JULY06/LE...GOLD%20(34).JPG (edited for clarity) This post has been edited by BloodyStupidDavey: May 26, 2008 - 2:15 PM -------------------- Davey
Items for sale |
 |
Replies
 May 26, 2008 - 3:55 PM May 26, 2008 - 3:55 PM
|
|
|
Enthusiast    Joined Nov 14, '06 From Northampton, UK Currently Offline Reputation: 5 (100%) |
There appear to be six units that aren't built into the steering wheel itself:
86230-13010 Yaris, Echo, Corrolla 01- 86230-17010 MR2 91-99 (SW20) 86230-20010 Avensis 00- (ST220) 86230-31010 Crown 97- 86230-60010 LX470, Land Cruiser 02- 86230-60020 Land Cruiser 02- I wasn't able to determine the part number of the Lexus pictured above that has a 4-spoke steering wheel that appears to be very similar to the Celica 4-spoke. I think it might be a 2001 LS430. So there are a number of options. One could source a Toyota/Lexus steering wheel with the controls built-in or that has optional controls and simply swap the steering wheel over. Here is a picture of the Avensis 4-spoke steering wheel for instance: 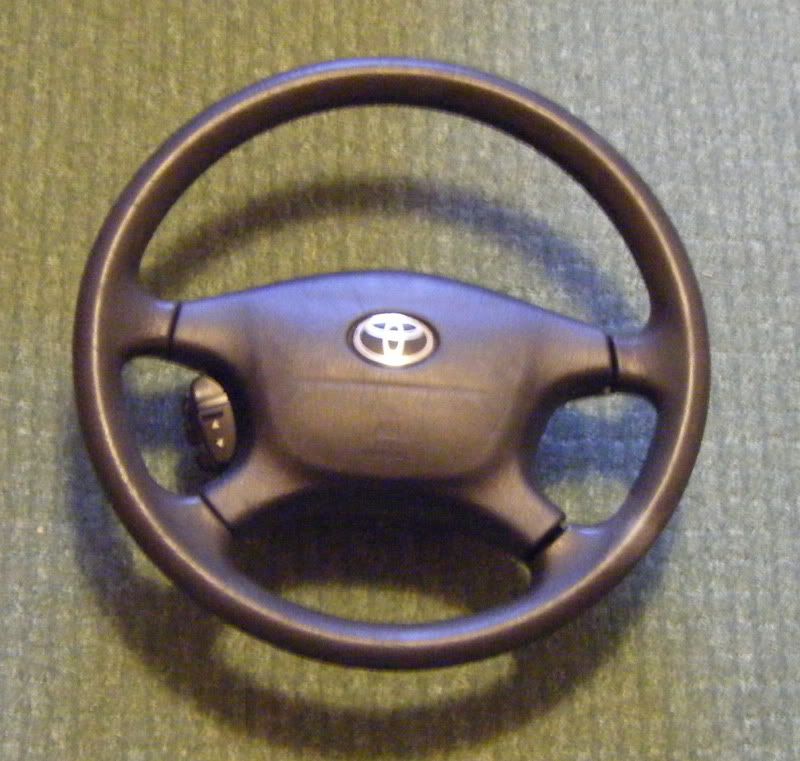 The Avensis wheel is similar, but is about 1.5 inches wider in diameter than the tiny Celica wheel. I really wanted to keep my existing wheel but add steering controls. The rest of this post is part one of a two-part guide ...describing how to modify the Avensis stalk for the Celica 4-spoke steering wheel I used the steering wheel above as a parts donar. The parts needed are: 86230-20010 Controller Assy, Stereo Component Fixing screw and cover for fixing screw for 86230. Bracket for stalk. This isn't available seperately from Toyota, it is part of 45100-05100 or 45100-05110. Wiring loom - coil spring to stereo controller. Again, part of 45100-05100 or 45100-05110. Two rubber washers. Tools needed:  Variable speed rotary power tool with cutting disk and pointed grinding tool attachments. A variety of files and sanding sticks, from fairly course to buffing and polishing. Screwdriver set with Torx bits. Safety goggles - cutting disks have a tendancy to shatter plus we will be cutting metal. Vacuum cleaner Some more photos of the stalk: 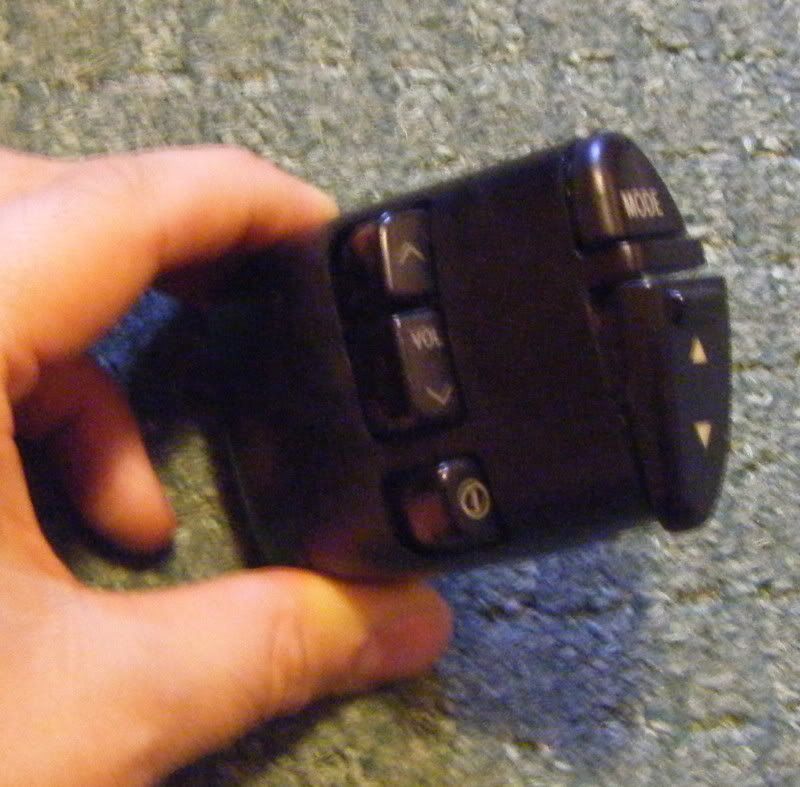 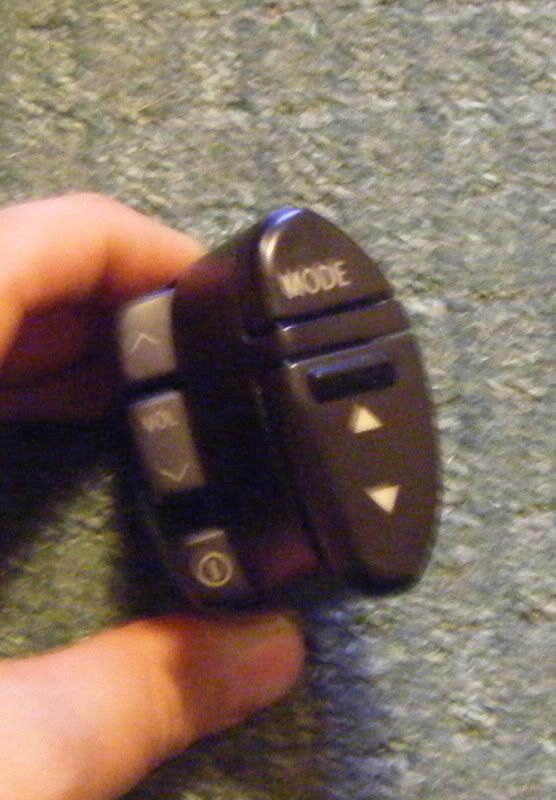 Step 1 - Disconnect the car power We will be removing the steering wheel airbag so it is essential that the battery is disconnected before continuing. I prefer to physically remove the battery and store it so I can be absolutely certain that the wire won't inadvertantly move and touch the battery terminals while I'm not looking. Next wait at least ten minutes. Now is a great time to go hunting for the tools you are going to need, grab a beer, make a coffee, toilet break, etc. Step 2 - Remove airbag You have disconnected the battery and waited 10 minutes haven't you? If you are not familiar with removing the airbag, read this guide. As a reminder: Remove steering pad covers Using Torx bit, unscrew the torx bolt holding the air bag in place. One bolt under each steering pad cover. Gently remove airbag from steering wheel. Disconnect loom from airbag and place airbag somwhere safe. Please remember that an airbag is an explosive device. Please treat it with respect. Step 3 - modify stalk bracket Undo the left hand side torx bolts holding the left hand bracket in place on the Avensis steering wheel. Separate the parts and locate the stalk bracket. 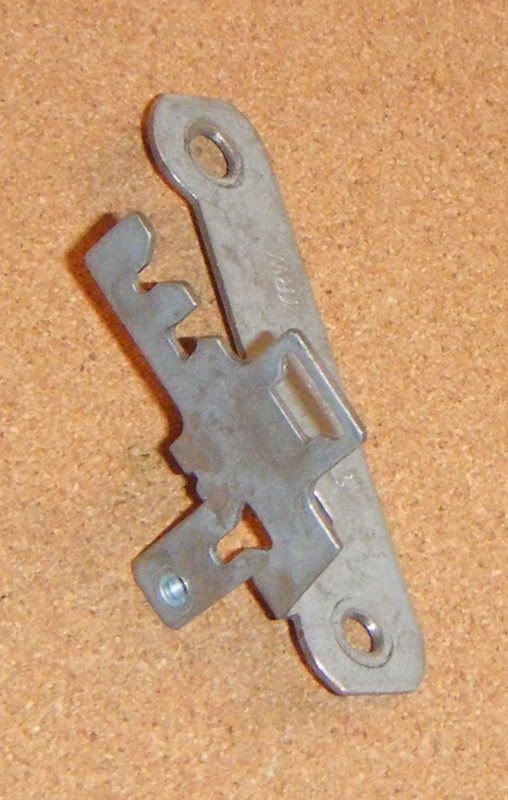 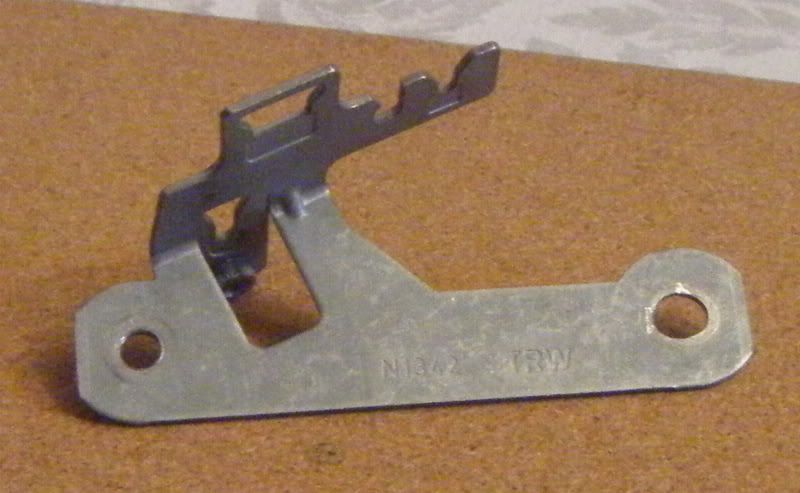 We need to cut the horn lugs off (the Celica wheel has a slightly different setup, which we will continue to use). We will also extend the top hole downwards by 2mm and open it up slightly to remove the thread: 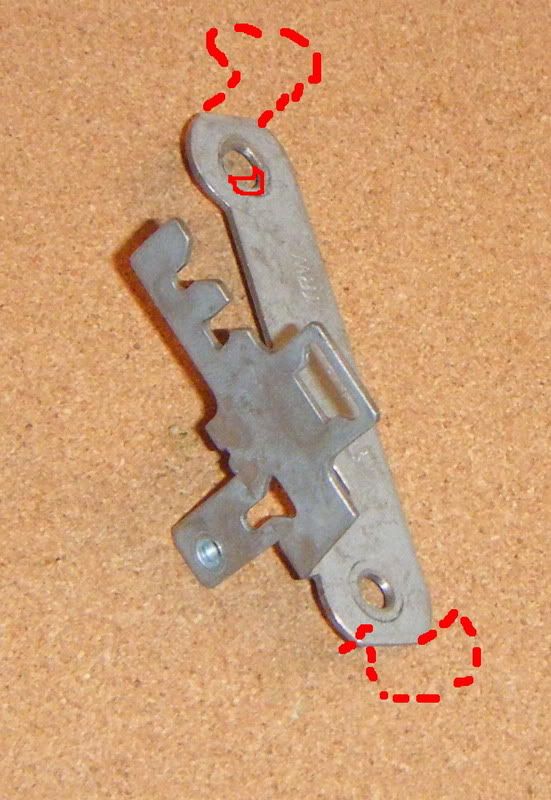 Step 4 - modify Celica horn contact locating lugs The little lugs that hold the copper horn contacts in place protrude too far and will foul our new stalk bracket. So we will use the rotary tool to shorten them to about 0.5mm tall: 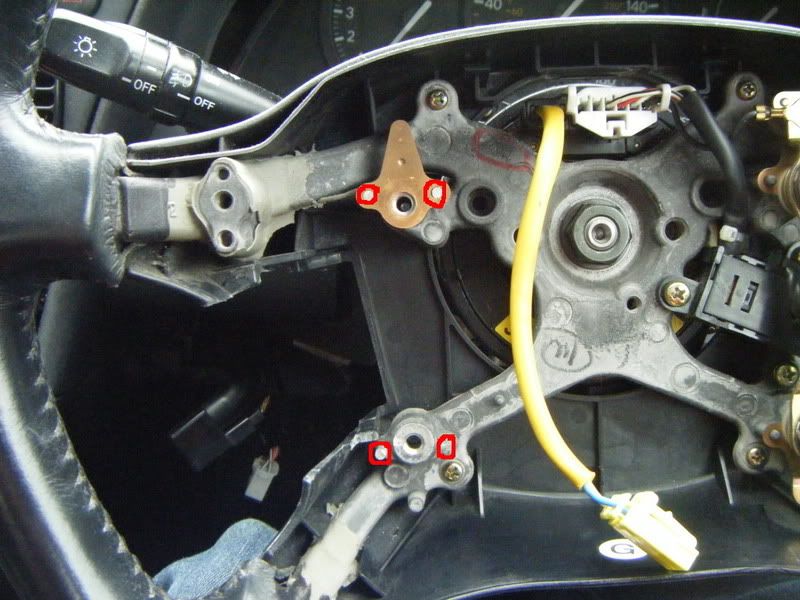 Step 5 - modify the left hand Celica steering wheel bracket The stalk bracket causes the left hand side of the airbag to sit further forward than it should, so we need to modify the left-hand bracket to compensate. Remove the white plastic washers and discard. Remove the springs, noting which is which (the softer bronze coloured one is the rear (top), the harder steel coloured one is the front (bottom) spring). Add another rubber washer onto the colar of each bolt. You can use plumbing washers or remove them from the equivilent bolts on the Avensis steering wheel. The washer should be about the same thickness again (about 1mm). 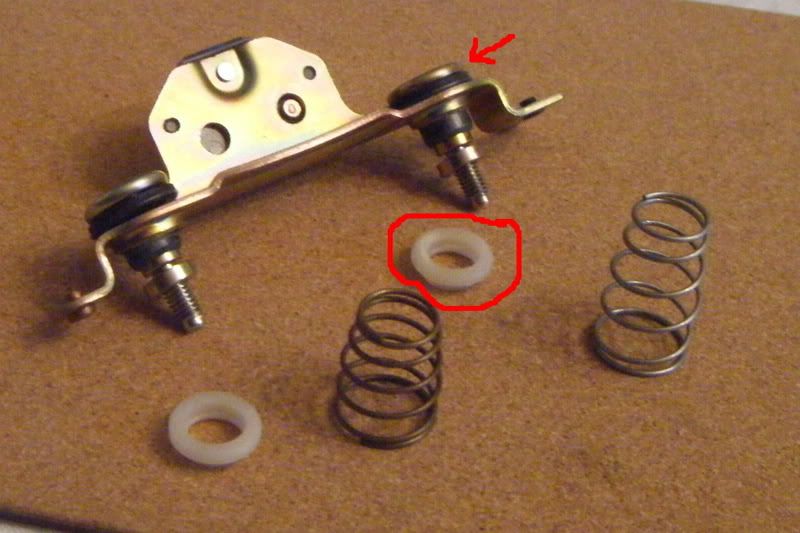 Step 6 - cut the steering wheel plastic to take the new controller pad Take the rotary tool and cut here, using the bracket and stalk to check as you go: 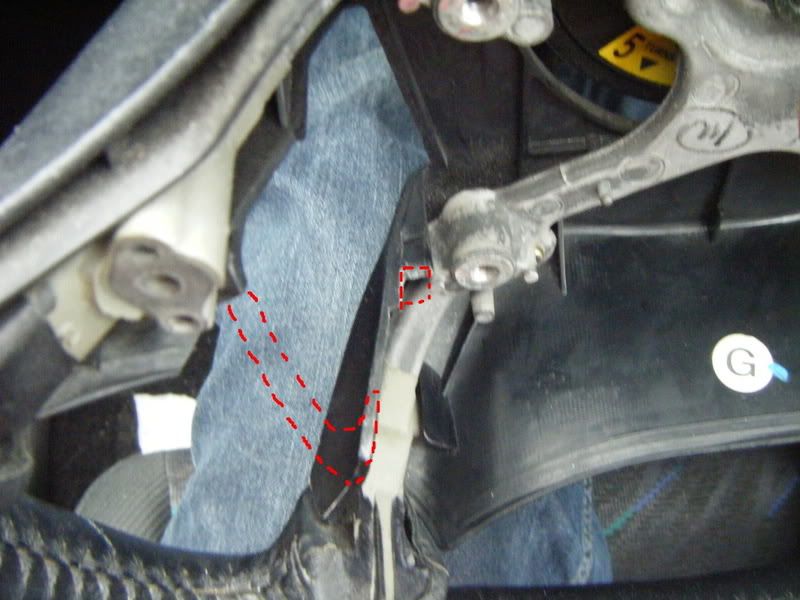 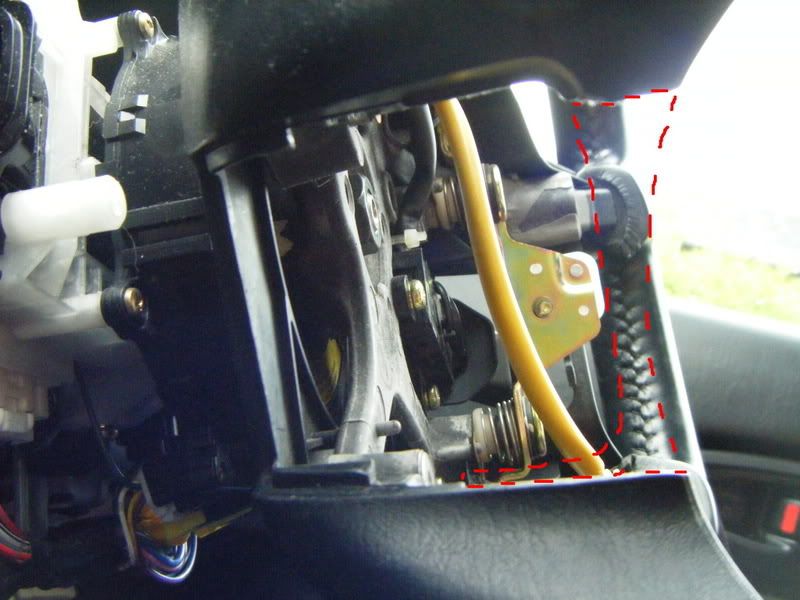 At this point, you can reassemble the left-hand bracket with the stalk bracket, check for fit of the stalk and make any adjustments to the steering wheel plastics to get a nice snug fit. It is really worth taking your time over step 6. Use the files to make adjustments, don't be tempted to use the rotary tool unless you need to remove a lot of material. Step 7 - modify the airbag We need to remove a little material from the edge of the airbag cover so that it fits over the stalk properly and allows us to use the horn: 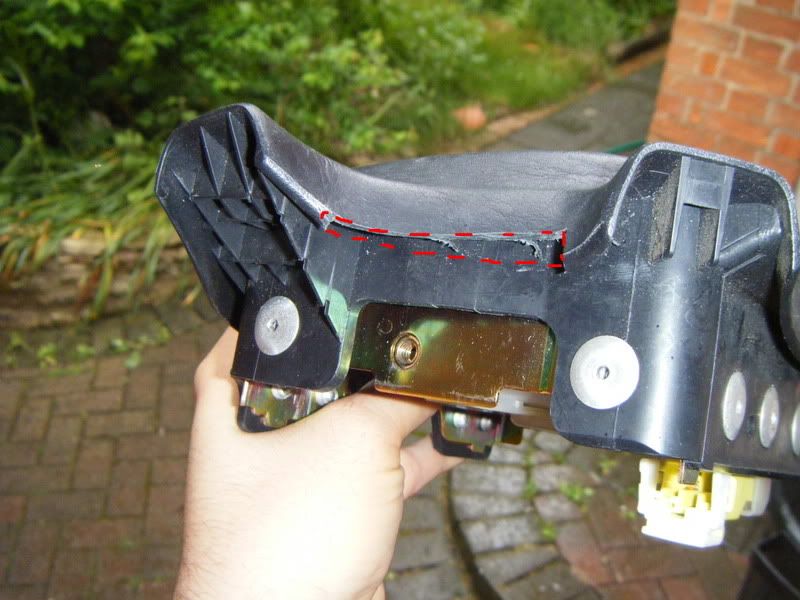 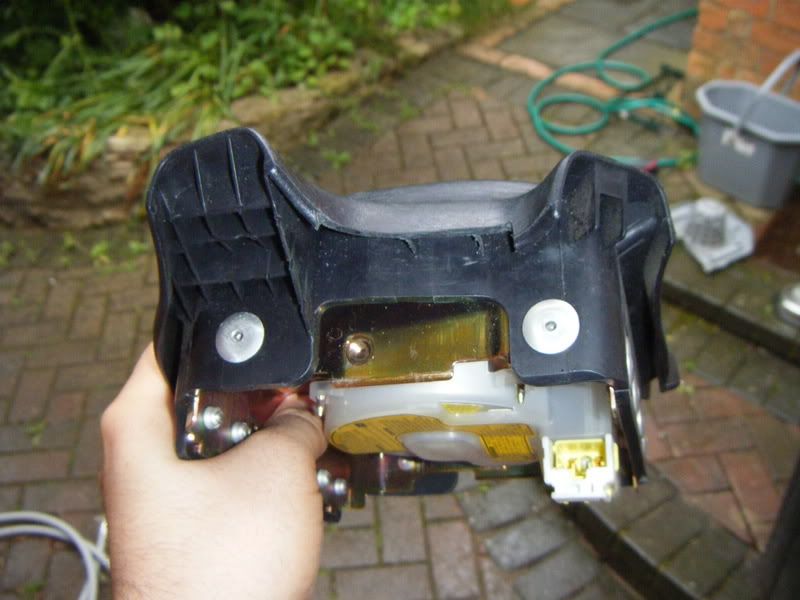 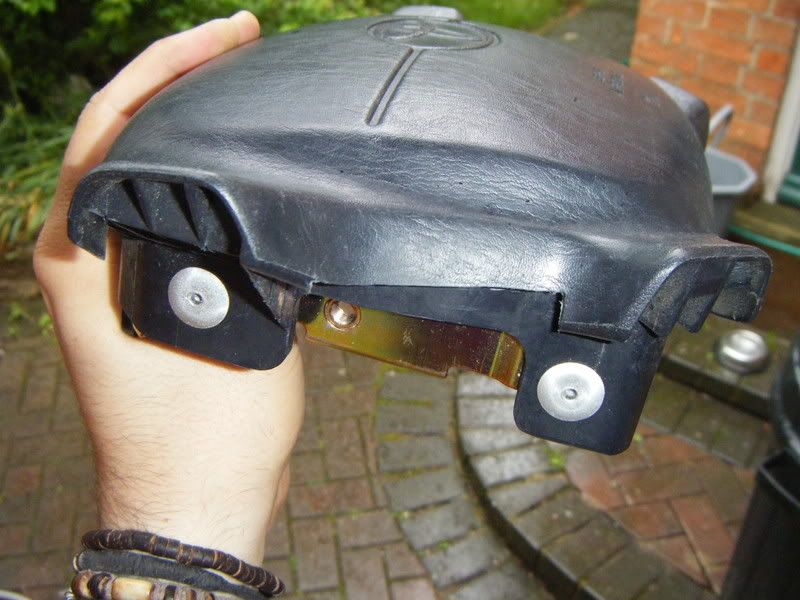 Notice that we need to take around 8mm off towards the bottom, tapering to just 2mm at the top. Test-fit the airbag (don't bother plugging it in) to check clearance and operation of the horn contacts (you'll hear the contacts touch when you push the airbag). Step 8 - tidy up Once you are happy with the fit, use sequentially finer files and then the course to fine sanding sticks to remove any burs or tags on the plastic. The finest sanding sticks and the buffing and polishing sticks can be used to polish the cut edges of the plastic and airbag cover to give a professional finish. Next, vacuum up all the dust and filings. You really don't want those filings working their way into the clock spring or other airbag components. Step 9 - reassemble Reverse the process of step 2 to reattach the airbag. Here are some photos at the end of part one:   In part two I'll explain how to complete the electronics and trim the steering pad cover to fill in the gap at the top and back of the stalk. This post has been edited by BloodyStupidDavey: May 26, 2008 - 5:22 PM -------------------- Davey
Items for sale |
Posts in this topic
 BloodyStupidDavey How-to add OEM 4-spoke steering wheel (stalk) controls Nov 16, 2006 - 6:07 PM
 Rayme I actually think you're looking for something ... Nov 16, 2006 - 6:36 PM
 Bigmeanbulldog55 My car came with everything avaible in 94, and I d... Nov 16, 2006 - 7:06 PM
 BloodyStupidDavey Ah, found a Lexus wheel with black controls. Wond... Nov 16, 2006 - 7:30 PM
 hurley97 I doubt it will fit the same though, not to mentio... Nov 16, 2006 - 9:03 PM
 Alex-UKSC looks nothing like my wheel, why not install your ... Nov 17, 2006 - 8:15 AM
  |
3 User(s) are reading this topic (3 Guests and 0 Anonymous Users)
0 Members:
| Lo-Fi Version | Time is now: November 24th, 2024 - 3:55 AM |


