 Feb 1, 2008 - 9:41 PM Feb 1, 2008 - 9:41 PM
|
|
 Enthusiast    Joined Dec 15, '02 From Tasmania(Australia) Currently Offline Reputation: 0 (0%) |
hey as title says im a noob to this forum (well i signed up years ago but was too lazy to post)
ive had a few celicas, and i dont reckon ill stop there. (ST185 RC, Series 6 13b turbo RA23, widebody ST185R and the 205) currently also have a TA63 GT-TR celica as a daily. since there is no members ride thread section i could see in a quick view i thought ide post up what ive done to my bus. Ive had it for about 2.5 years, done all the work myself, including all fabrications, rebuild etc) umm thats about all i can think to add atm, if you have any questions feel free to post up, im open 2 all opinions Ride: 1994 Toyota Celica GT-Four, ST205 Group A Rallye #61 Built not bought Donk: Gen 3 3sgte. 600x300 hybrid front mount with custom (2" stainless and 2.5" ally piping) Turbosmart supersonic BOV Turbosmart Ultragate external wastegate with screamer pipe 6boost exhaust manifold ceramic coated Garrett GT3082 turbo (.64 rear, .7 front) speedflow turbo fittings stainless braided turbo oil feed Custom side feed inlet manifold with velocity stack runners Modified 2zz-ge throttle body Custom Billet aluminium oversize idler pulley Custom aluminium oil catch can Custom silver steel slave cylinder pushrod Custom carbon fibre airbox Cutsom carbon fibre CAI scoop Custom Bronze impregnated teflon shifter bush Custom twin pod 4\\\" intake pipe 3" m/s and stainless mandrel bent zaust, heat wrapped dump pipe, Apexi megaphone dunk 7" cannon with 4"dump tip TRD low temp racing thermostat, TRD high preasure radiator cap TRD oil cap TRD engine mounts TRD oil filter ARP rod bolts ARP head studs ARP main bolts NPC 5 puck brass button clutch and uprated preasure plate, (good for 350kw atw) Reco'd clutch slave and master cylinders Stainless braided clutch line Redline supershock proof lightweight gear oil Stainless braided gearbox oil cooler lines relocated geatbox oil cooler C-One sports diff mount New OE idler and tentioner bearings New OE valve spring retainers New OE valve stem seals New OE head gasket (steel) New OE gaskets and belts New OE rear main seal New OE water pump New OE clutch fork New OE throwout bearing New OE oil pump New OE flywheel bolts New OE preasure plate bolts NGK Super Silicone plug leads GReddy timing belt GReddy Profec B Spec II electronic boost controller Apexi Power FC Pro Apexi Pod x2 HKS adjustable cam gears HKS 264 deg cams HKS valve springs HKS Twin Power CDI ignition Walbro 550hp fuel pump Sard DRR fuel preasure regulator and adapter Sard fpr guage Sard 800cc injectors ACL Race Series pistons ACL Race Series rings ACL Race Series engine bearings ACL Alu glide little end bearings deburred, balanced & blue printed shot peened rods and crank recut valve seats (3 angle stainless steel valves from the factory) combustion chambers cleaned up and deburred. acid dipped block heat proof painted exhaust manifold and turbine housing red rocker cover stainless cap screws Removed EGR valve Removed purge tank Davis Craig thermo fan Samco blue silicone hose. Extra engine earths Outer: JDM tinted tail lights clear side repeaters clear (and inner tinted) front indicators semi debadged lipped guards dark tinted windows Slimline and offset number plate :lolhit: Projector headlights Narva 100mm fog lights Apex cone HID\\\'s 6000k LED parkers "Mook" "GT-Four" spoiler raiser block infills Inner: Momo steerer TRD type 2 gearknob turbo timer Autometer phantom II boost guage Autometer phantom II Oil preasure guage White face dials by "mook" Leather recovered centre console and gearshift boot Stezza n other: Pioneer mp3 head unit Pioneer 4 channel amp (splits) Pioneer 2 channel amp (sub) JL Audio 6.5" front splits JL Audio 6" rear splits JL Audio 10" dvc sub Pivot voltage stabaliser Stinger ground loop isolater x2 Odyssey dry cell battery (under drivers seat) 2 way pageing alarm LED interior lights LED electric window control light LED indicators LED heater control lights LED dash lights Suspension and stoppers: Tein 1 1/2 drop 4.5kg/3.7kg spring rate spring KYB super special adjustable shocks Slotted rotors all round Project Mu B spec pads Cusco adjustable pillow ball strut tops Cusco 4 point chassis brace Whiteline adjustable rear sway bar Racing Beat adjustable end links. New fig 8 joints New leading and trailing control arms Nolethane front sway bar bushes Stainless braided brake lines Motul DOT 5.1 fluid Rice red and clear coated brake calipers :lolhit: [/size] Wheels: Momo m1 18x8.5\\\" stock ST205 16" 3 spokers (for racing) Future Plans: replace all bushes TRD corners TRD side skirts Custom or aftermarket front strut brace ally radiator and aftermarket oil cooler and more: thanks to: Don (aka dons bodyworks) for the continuous use of the hoist/pit, and painting. Tangcla for the continuing seach for parts ART in melbourne for the tune At the time of writing its making 265 kw atw on 22psi, with the radiator sturggling with engine temps. Best from the stock turbowas 204 kw atw. best 1/4 mile was 12.8 @ 108 mph (stock turbo, 200kw atw) 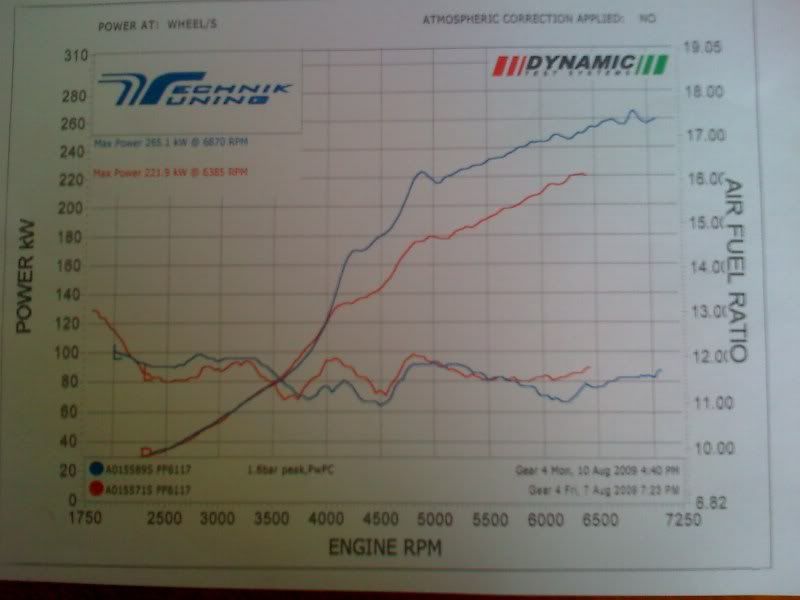  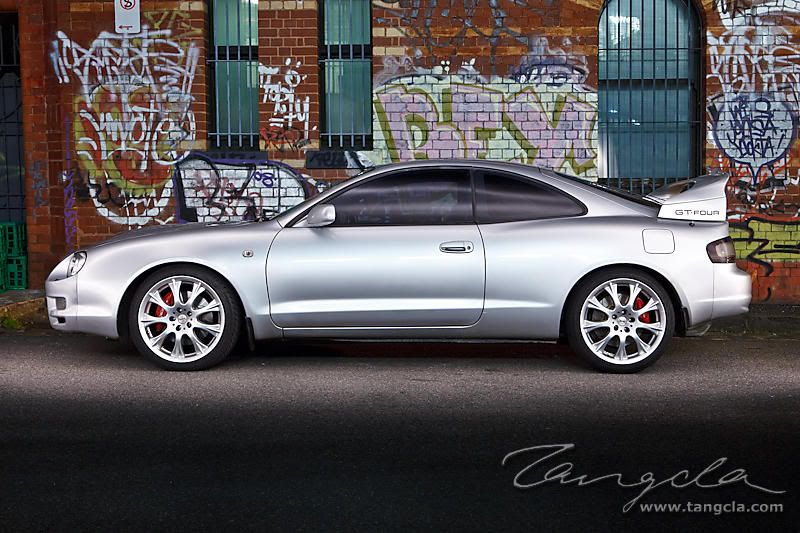 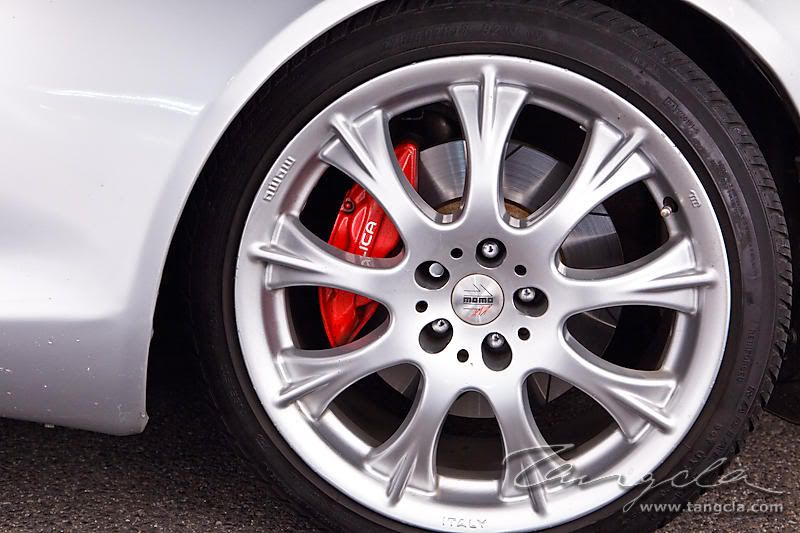 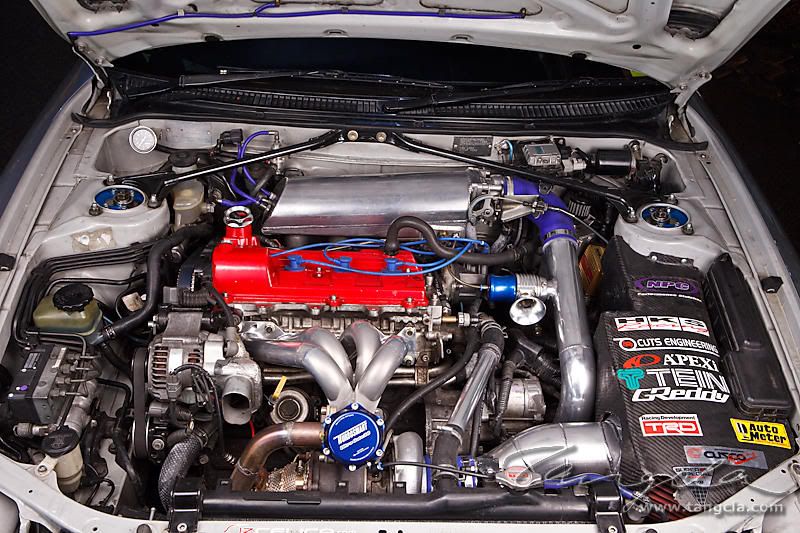 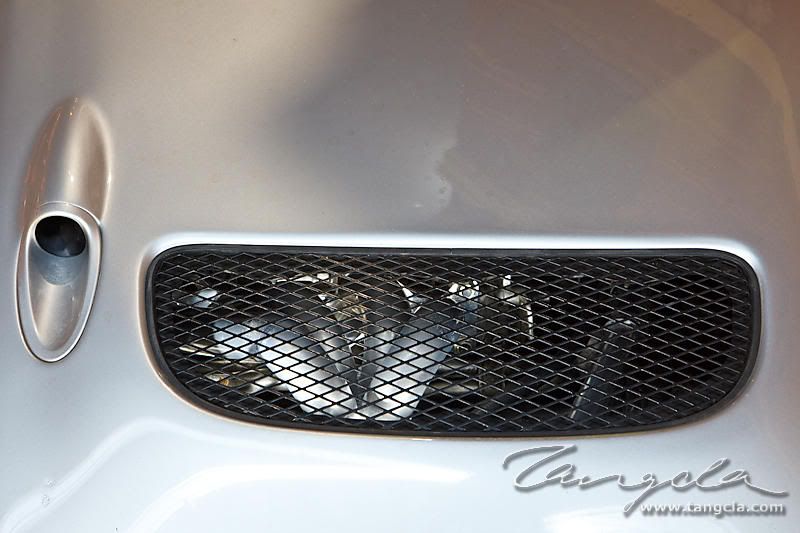 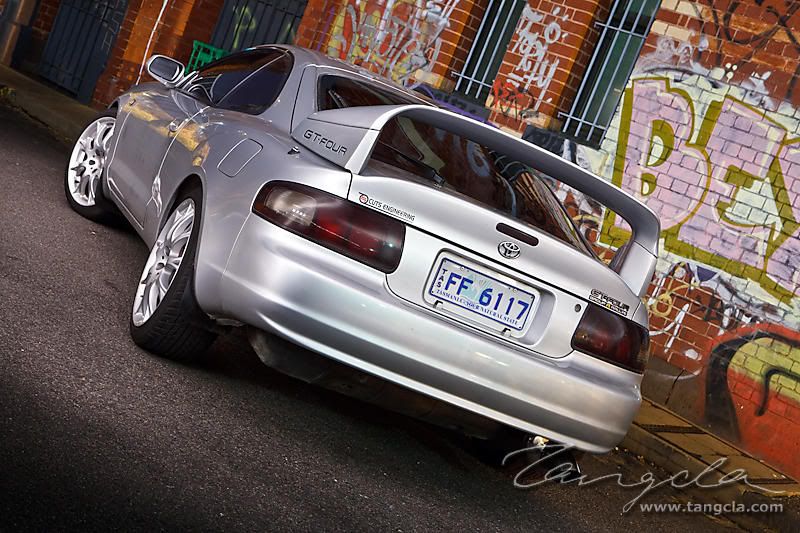 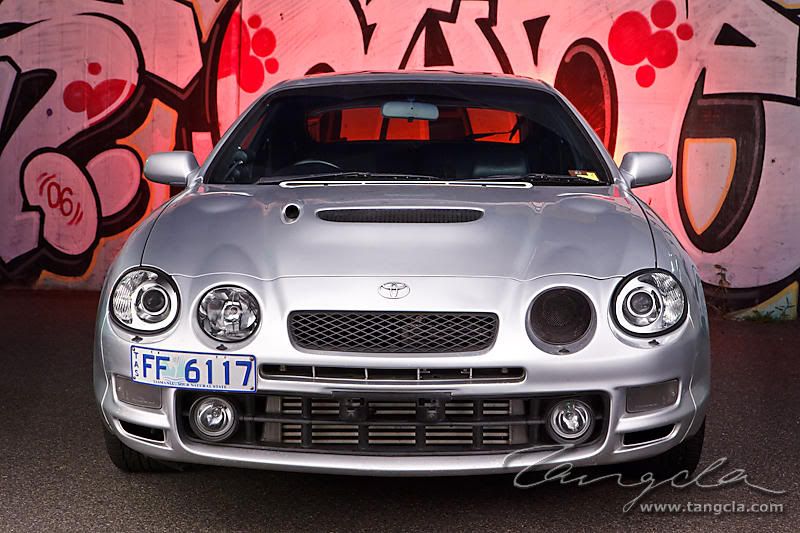 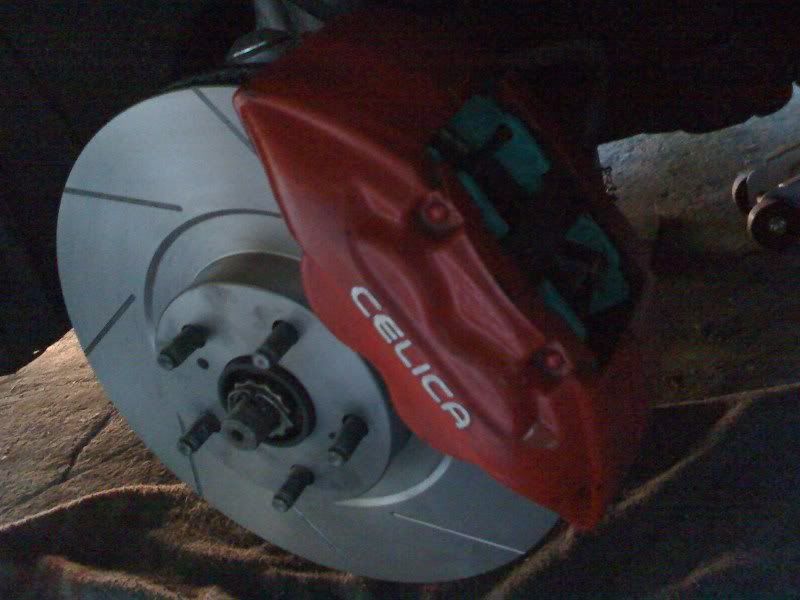 Hot Rod :lolhit: 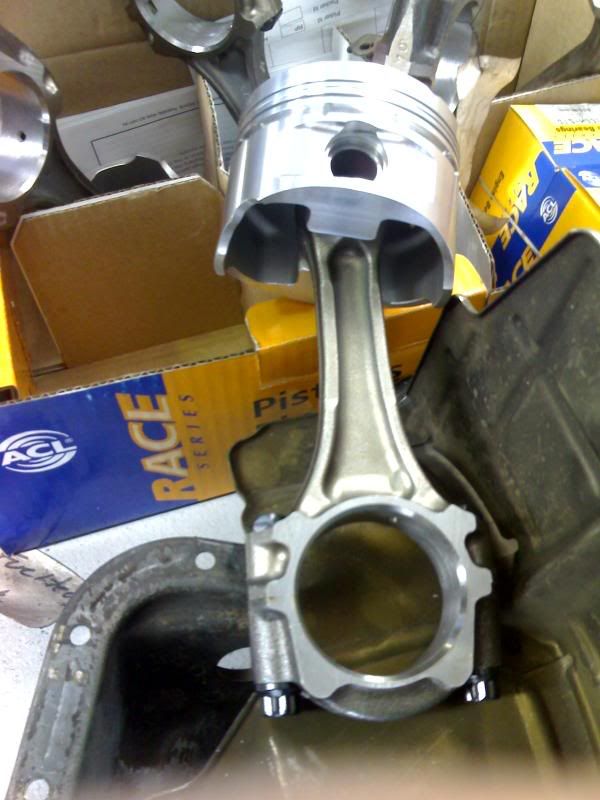 Good head. 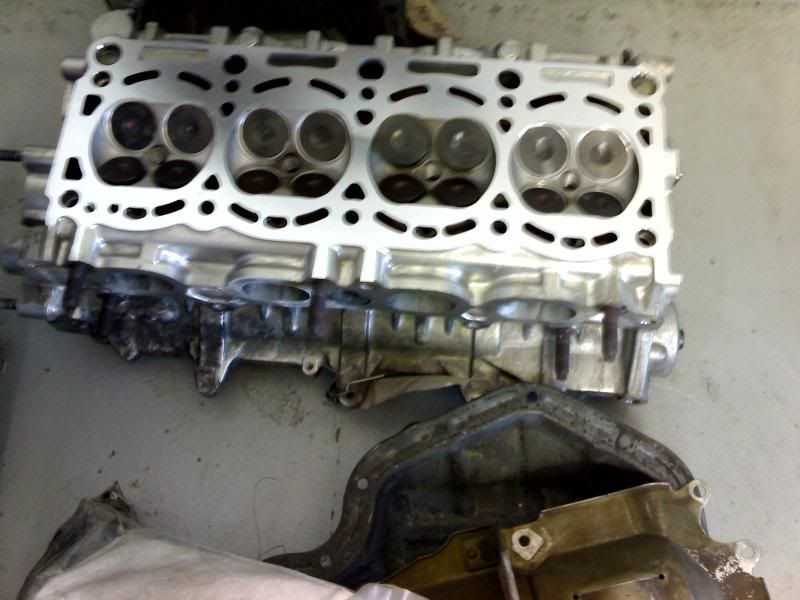 If you squint you can read HKS 3SG 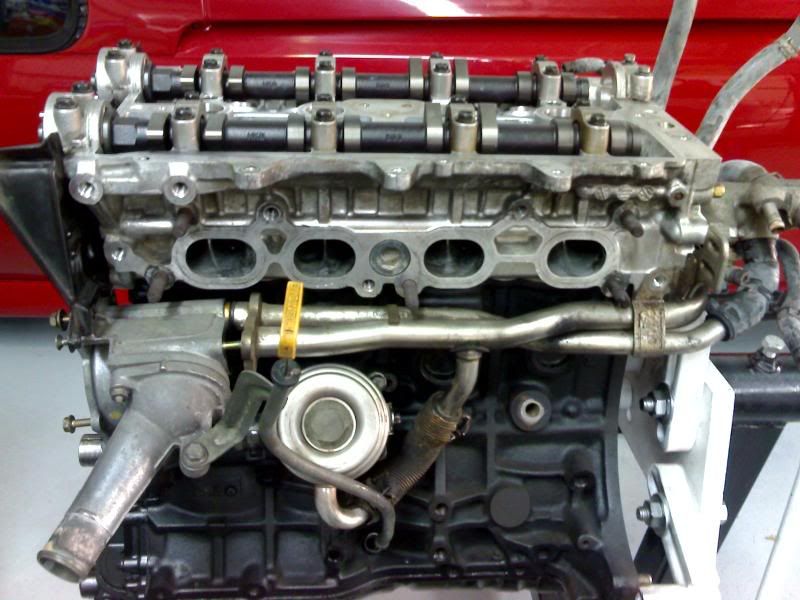 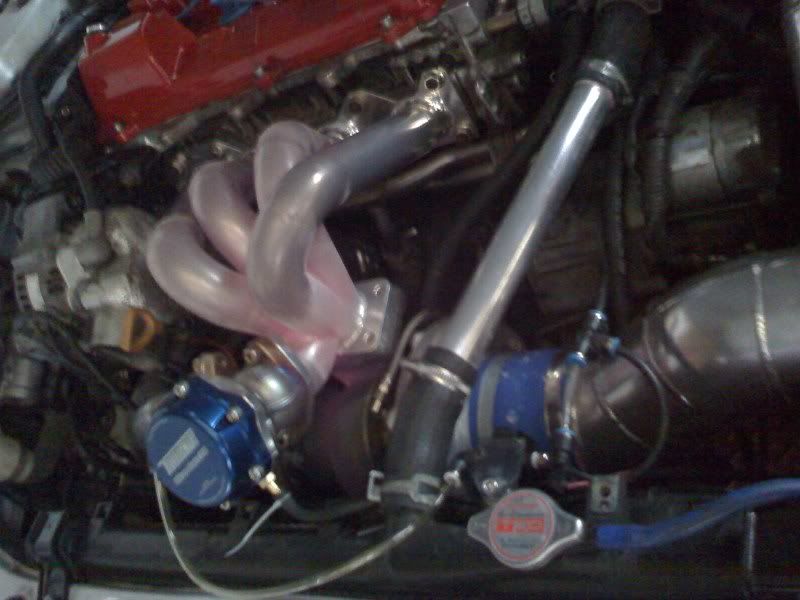 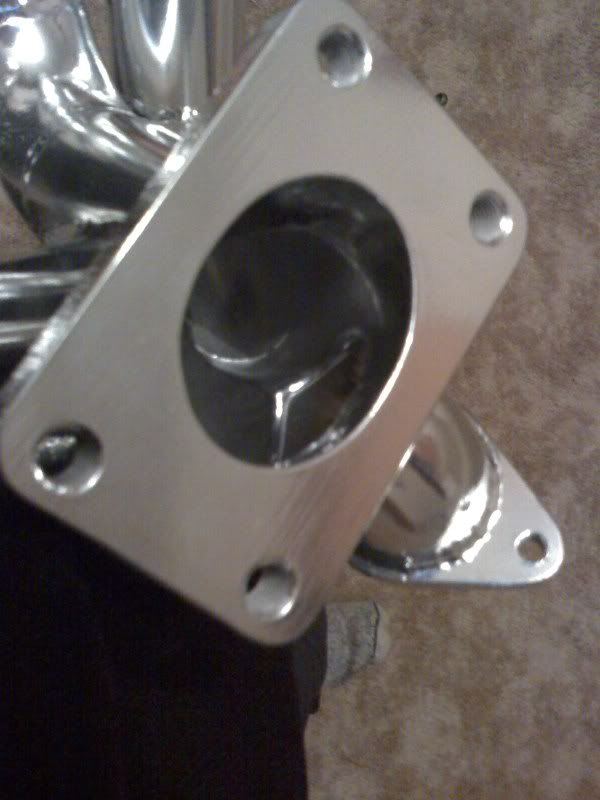 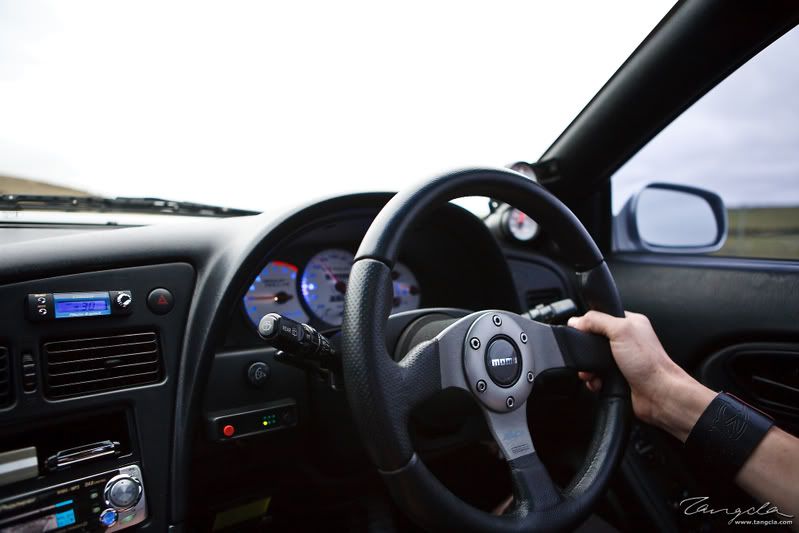
This post has been edited by Cuts_the_Pilot: Aug 13, 2009 - 2:09 AM -------------------- ST205 Group A Rallye GT-Four, #61 of 77............600hp GT3582r
GRX133 Toyota Mark X 350s 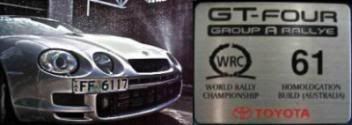 |
 |
Replies
 Oct 30, 2008 - 4:52 PM Oct 30, 2008 - 4:52 PM
|
|
 Enthusiast    Joined Dec 15, '02 From Tasmania(Australia) Currently Offline Reputation: 0 (0%) |
ok update time, plenum is getting fully welded monday or tuesday, im really happy with the design, i think it will be the balls.
Ok I suspect some of you out there would be thinking, yeah 2zz throttle body would be a cool mod. Well before you go having a crack at it i thought ide do a little write up on whats needed to modify a 2zz tb for a gtfour.  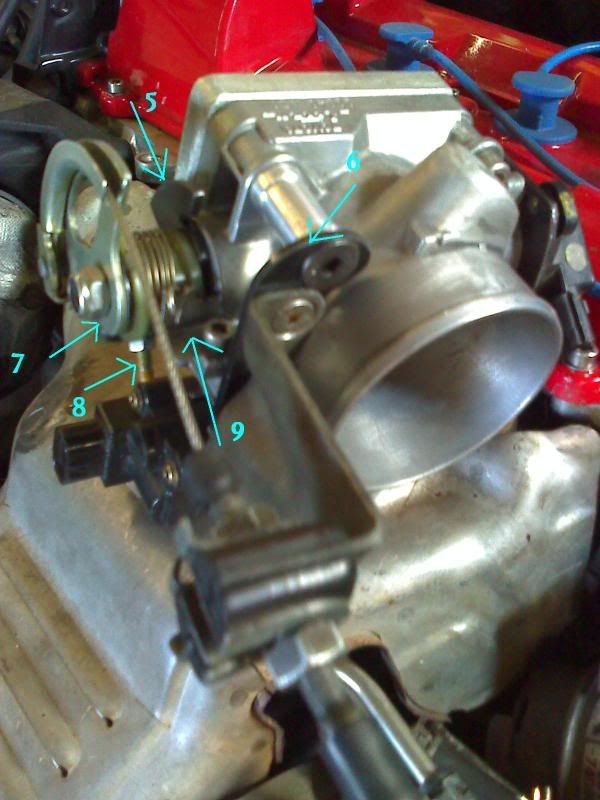 ill go by numbers: 1. Cut off and weld a plate over what was the pcv (positive crank ventilation) nipple. 2. Spacer for the plate that holds the outer sheath of the throttle cable. 3. Plate to hold the tps (because 2zz uses a 3 pin tps and 3sg uses 4) 4. New closed throttle stop, (reasons explained next)\ 5. New open throttle stop 6. Plate that converts the outer sheath holding bracket to the pcd (pitch circle diameter, meaning the distance straight across from the centre of one hole to the other) of the 2zz tb. 7. Bracket that the cable runs around (dont know the proper name) 8. Close throttle stop again 9. Bracket for holding the springs (for spring return closed obviously) Ok so here we go. First task was to make a plate to hold the 205 tps (could of used the 2zz one, and added a limit switch for the closed earth loop, but would have encountered the same problems later). Problem being that the actuation of the 2zz and 3sg tps is heaps different, 2zz uses a blade type about 12mm long and 3sg uses pins about 25mm appart. So i had to come up with a way of converting the blade to the spaced pins. So having that sorted i needed to mount the 3sg tps somehow. The pcd of the 2zz throttle body is about 5mm smaller then the 3sg one, coupled with the fact i needed to space the 3sg tps at least 6mm from the tb to allow enough space for the actuation adapter i decided to make a piece out of 3mm ally. So simply used a hole saw and a file to get the ID (internal diameter) i needed, drill 2 holes to mount the plate to the tb. Then drill and tap new holes in it for the holding screws for the 3sg sensor (keeping in mind the 3sg tps needs some adjustment so the sensor reads closed when it should (2zz tb isnt adjustable). Then i needed to space it another 3mm, so made some banana shaped ally bits to space it out further and to hold it central to the tb shaft. With all this done i thought brilliant done. Not so, problem being the 2zz tb rotates (when opening) anti clockwise and 3sg goes clockwise. So naturall it wouldnt turn. Bummer i thought, ill have to make it rotate the right way, meaning i needed to pull the butterfly out of the tb and spin it around so it will allow clockwise rotation. Naturally the screws that hold the butterfly in are tight as all hell, meaning i stripped the heads. So then i had to drill the heads off. And when i did that i went a bit offline and stuffed some of the thread in the shaft. So then i had tp pull the shaft out and weld the threads up so i could drill and tap new holes. Naturally when you weld something like this it bends, so then i had to straighten the shaft and drill and tap the new holes. With that done and me gettin over this whole tb fiasco i put it all back togther, then because it now rotates the other way i couldnt use the 2zz thottle cable holder and spring assembly. So i got the one off the 3sg tb, But then the open and closed stops didnt work, So i had to drill and tap a hole into one of the cast brackets on the tb for the adjustable closed stop, and weld a small piece of flat plate to the 3sg spring assembly. With that done it was down to the open stop and the bracket for holding the springs. That wasnt too bad, bent peice of stainless with a "V" cut in it for the springs to hook into. The open stop is a piece of 3mm m/s welded to the spring assembly bracket, and the actual stop rests up against the s/s capscrew that holds the spring bracket. I simply filed it down till it stopped when the throttle is completly open. Then it was left to make the bracket to hold the bracket that holds the outer sheath of the throttle cable. After much thinking i came up with what you see, with a couple of ally spacers turned up it uses the bolts that hold the tb to the plate (which will be welded to the plenum) to hold the plate that holds the plate that holds the outer sheath....still following :lolhit: After this was done it now became apparent that there wasnt enough adjustment on the outer sheath, i needed it further from the tb. As this would involde turning up another couple of spacers and me being lazy i dedided insted to rotate the cable holding half round brackety thing a bit anti clockwise. Doing this effectivally legnthned the distance from the sheath holder and where the end of the cable is. I slotted the half hole that grips to the shaft out a bit so i could rotate it, then when i was happy i drilled and tapped a hole into the spring plate to as an additional way of holding the cable half moon plate thingy. (if i didnt do this the plate MAY have rotated a bit sometime when i was driving, if that happened the throttle would have only rotated to about 3/4.) I did a bit of port matching on the plate that bolts to the tb (which will be welded to the plenum like i mention earlier), ill do some more later on when its welded to the plenum to give the air a smoother path into the plenum. luckily the 2zz and 3sg use the same iscv (idle speed control valve), so i dont have to touch that. so there you go, if your keen on putting in the hard yards then go for it. As for me..... never fncking doing it again. EDIT. todays efforts, new foggies (look awsome compared to the stock units, suit the headlights) almost all of the cold pipe intercooler pipework is complete, just waiting for the plenum to be finished to finish it off. 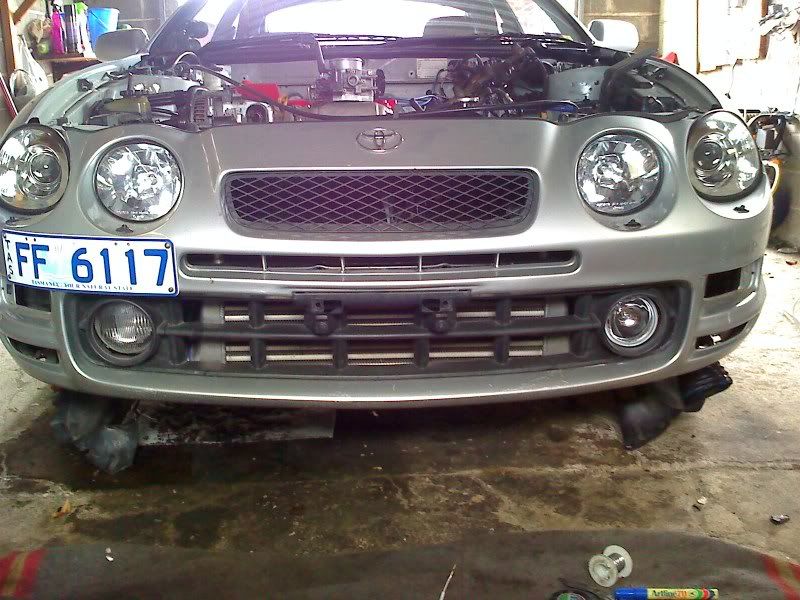 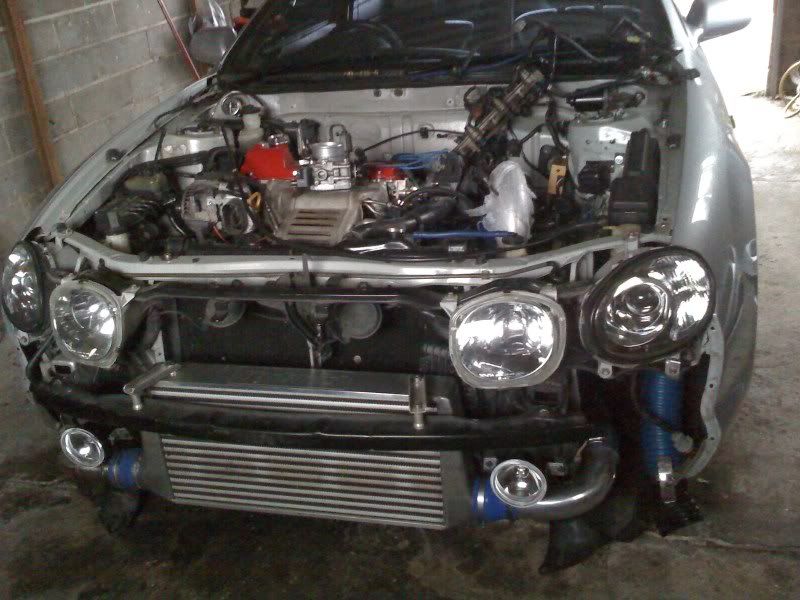 This post has been edited by Cuts_the_Pilot: Oct 30, 2008 - 11:28 PM -------------------- ST205 Group A Rallye GT-Four, #61 of 77............600hp GT3582r
GRX133 Toyota Mark X 350s  |
Posts in this topic
 Cuts_the_Pilot ST205 Group A Rallye GT-Four Feb 1, 2008 - 9:41 PM
 Athorn That is a sick car. Feb 1, 2008 - 9:43 PM
 Stogbob ^^^^
x2 I love those rims they look awesome Feb 1, 2008 - 9:46 PM
 hongkongnerdboy my expression ----> o.O Feb 1, 2008 - 9:52 PM
 goferris beautiful!!
i would add a new strut bar to... Feb 2, 2008 - 1:09 AM
 dtlwrc This is a sick,sick car! Man i love it! Feb 2, 2008 - 1:19 PM
 tomazws Simply amazing! Feb 3, 2008 - 4:59 AM
 Batman722 beautiful car
impresssive. Feb 3, 2008 - 11:08 AM
 Hanyo wow. those rims go perfectly with your car. what s... Feb 3, 2008 - 11:28 AM
 Insanity-74 Nice car mate...bet that kicks some serious arse. Feb 3, 2008 - 12:11 PM
 presure2 you had me at :
Ride:
1994 Toyota Celica GT-Four,... Feb 3, 2008 - 12:32 PM
 ScoobyDooCruiser I want your car!
Looks aweome. I bet thats to... Feb 3, 2008 - 1:19 PM
 Cuts_the_Pilot thats for all of your replies and comments folks.
... Feb 3, 2008 - 8:42 PM
 DEATH Clean and beautiful. I so love seeing a clean stoc... Feb 4, 2008 - 1:45 PM
 Cuts_the_Pilot hey guys. Just thought ide give a little update.
... Sep 24, 2008 - 6:12 AM
 zero07 Your cars just sick! Thanks for the update, th... Sep 24, 2008 - 8:14 AM
 Cuts_the_Pilot if your talking about the last pic with the brake ... Sep 24, 2008 - 7:06 PM
 Rusty wow ITB on a turbo car, a bit different, but can I... Sep 25, 2008 - 1:48 AM
 Cuts_the_Pilot its not going to be itb but it shall have the velo... Sep 25, 2008 - 2:13 AM
 Rusty ok
wow I didn't know that Sep 25, 2008 - 5:07 PM
 reko post pis of this when you'll get it installe Sep 28, 2008 - 12:46 AM
 RickJamesBish That pic of yours next to that 7th gen is pretty d... Oct 1, 2008 - 10:13 AM
 Cuts_the_Pilot went to the drags today, new pb of 12.8 @ 108 mph
... Oct 5, 2008 - 1:40 AM
 parriehunter Thats pretty sweet. Oct 5, 2008 - 2:03 AM
 Cuts_the_Pilot She's a big unit, thats roughly where it will ... Nov 5, 2008 - 1:33 AM
 Cuts_the_Pilot couple of pics with many more to come soon from an... Dec 2, 2008 - 4:07 AM
 Cuts_the_Pilot It runs....it lives....kinda.
There is too much a... Dec 9, 2008 - 3:22 PM
 hockeyplyr24 your car is sick. i like where your going with eve... Dec 9, 2008 - 4:10 PM
 twolownissan2002 Love the new fog light they really look good with ... Dec 10, 2008 - 12:26 PM
 Cuts_the_Pilot It is complete Dec 17, 2008 - 11:20 PM
 Batman722 ^^ damn. Dec 17, 2008 - 11:29 PM
 C3L1CA Thats a really sweet build.
I'd be kind of sc... Dec 18, 2008 - 2:54 AM
 Cuts_the_Pilot ive pressure tested it to 35 psi, and ill only eve... Dec 18, 2008 - 2:56 AM
 jcbass7 nice car, very clean
one question, what is the ga... Dec 18, 2008 - 10:05 PM
 Cuts_the_Pilot fuel pressure. Dec 19, 2008 - 6:00 AM
 95st-celica wanna sell your 20b to me and upgrade? i love this... Dec 19, 2008 - 7:28 AM
 Cuts_the_Pilot ha, yeah i need to upgrade pretty bad, its such a ... Dec 19, 2008 - 4:02 PM
 Cuts_the_Pilot Well well well.
Been a long time since ive done a... May 25, 2009 - 5:15 AM
 TRDGT4 looking good mate
i'll be watching to see how... May 25, 2009 - 11:28 PM
 delusionz does your ct20b have any shaft play? May 30, 2009 - 2:30 AM
 Cuts_the_Pilot sure doesnt.
well it has the normal stuff all amm... Jun 26, 2009 - 3:24 AM
 Cuts_the_Pilot Well then i guess as im back i should tell the sto... Aug 10, 2009 - 8:28 PM
 mmmchocolate QUOTE (Cuts_the_Pilot @ Aug 10, 2009 - 7... Aug 10, 2009 - 8:40 PM
 SwissFerdi Probably why it was labeled "hot stuff." Aug 10, 2009 - 8:44 PM
 mmmchocolate psh i dont read i look at pictures Aug 10, 2009 - 8:49 PM
 ST-Autosport very nice project.
i like the carbon fibre airbox... Dec 18, 2009 - 4:13 AM
 Cuts_the_Pilot No welding required, they are the full super stree... Dec 18, 2009 - 5:47 AM

 sips QUOTE (Cuts_the_Pilot @ Dec 18, 2009 - 6... Dec 18, 2009 - 12:51 PM
 ST-Autosport ok thank you very much Dec 18, 2009 - 6:15 AM
 Quidam One of the cool things about being fairly new to a... Dec 18, 2009 - 2:17 PM
 Cuts_the_Pilot Yeah they are KYB super street adjustable shocks, ... Dec 19, 2009 - 4:07 AM

 sips QUOTE (Cuts_the_Pilot @ Dec 19, 2009 - 5... Dec 19, 2009 - 10:16 AM
 ST-Autosport do you have the part numbers for the kyb shocks? i... Dec 19, 2009 - 5:25 AM
 Rusty I've seen 2 recaro front seats for sale in NZ ... Dec 19, 2009 - 11:38 AM
 Cuts_the_Pilot I have the part numbers somewhere, i'll see if... Dec 19, 2009 - 3:33 PM
 Rusty comes ST202 rails (ST205 and ST202 have different ... Dec 19, 2009 - 11:32 PM
 sips As I expected my ST205 struts are going.
Cuts_th... Jul 14, 2010 - 11:52 AM
 TEAMFaint QUOTE (sips @ Jul 14, 2010 - 12:52 P... Jul 14, 2010 - 12:54 PM
 sips ^ I only see ST202 Super specials. I know both use... Jul 14, 2010 - 1:33 PM
 Cuts_the_Pilot kyb translated page
enjoy obviously the super sp... Jul 16, 2010 - 12:27 AM
 m4dm4n ***droolzz*** Only 77 released in Oz. I hate you. ... Aug 17, 2010 - 8:12 PM
  |
4 User(s) are reading this topic (4 Guests and 0 Anonymous Users)
0 Members:
| Lo-Fi Version | Time is now: November 27th, 2024 - 4:40 AM |


