 Dec 24, 2008 - 6:48 PM Dec 24, 2008 - 6:48 PM
|
|
|
Moderator      Joined Oct 1, '02 From fall river, ma Currently Offline Reputation: 13 (100%) |
so yea,
as most of ya know, we recently did up a 3rd gen swap for jim and as "payment" he gave me his 2nd gen setup. as most of ya also know, this setup was originally RJB23's car, which was pretty much a mess from the day jim and shannon bought it. Click me for details of that story so once we got the 2nd gen motor up here, it has been sitting on a stand, waiting its turn. i finally got around to getting the harness off, and am starting to get it cleaned, stripped, repaired, rerouted, rewrapped, and reloomed. like everything else about the swap in that car, this engine harness was no diffrent, and in defense to the guy who did it (IIRC DGperformace did it) it did work, it was just routed and wrapped all crazy, and the ECU end basicly looked like a birds nest from people troubleshooting the ecu and wiring while it was in the car. so i started tearing into it, and dustin came by last night and helped me get the interior plugs sorted out, since there was lots of "dead" (wires that go to nowhere) wires in the harness. i also removed all the stuff i wont need or use, including all the ac stuff, TVIS, TVSV, ect. once that was done, i went about cleaning and fixing any loose or broken wires, (there were a few, one of which wouldnt allow the car to start with the key...lmao) and rerouting and rewrapping it, getting it ready to be reloomed. here are a few pics of how that is going. first, the before. sorry for the blurry pic, its the only one i took..lol 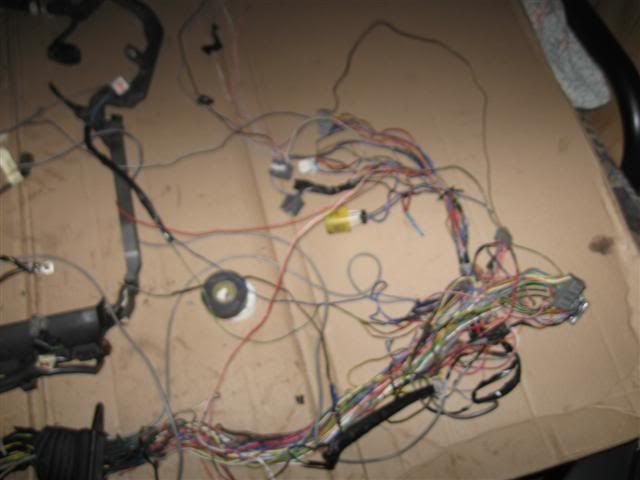 this wire was in the harness that was routed behind the intake manifold, instead of inside of it, like it should be, and chaffed on the IM until it broke..just so happens this is the wire that tells the starter to crank. yes, jim, this really is why your car wouldnt start with the key! lmao 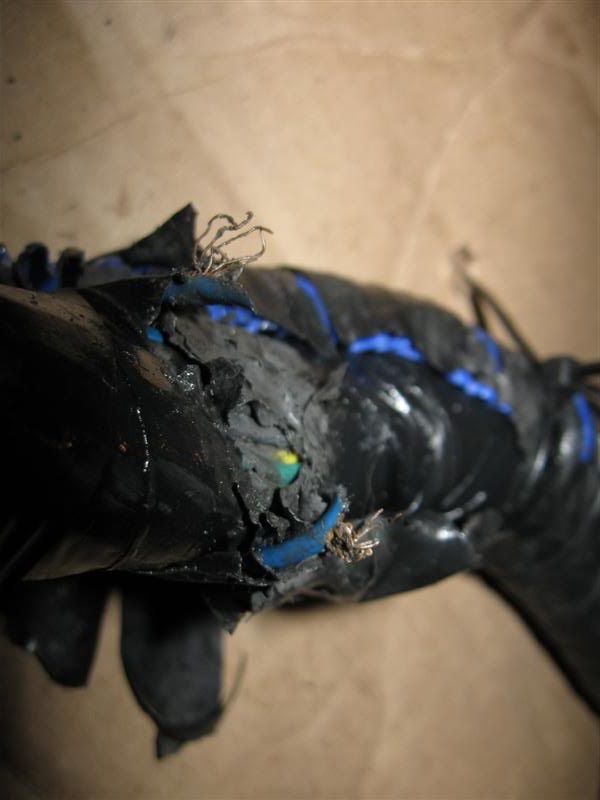 how the ECU side of the harness looks now: 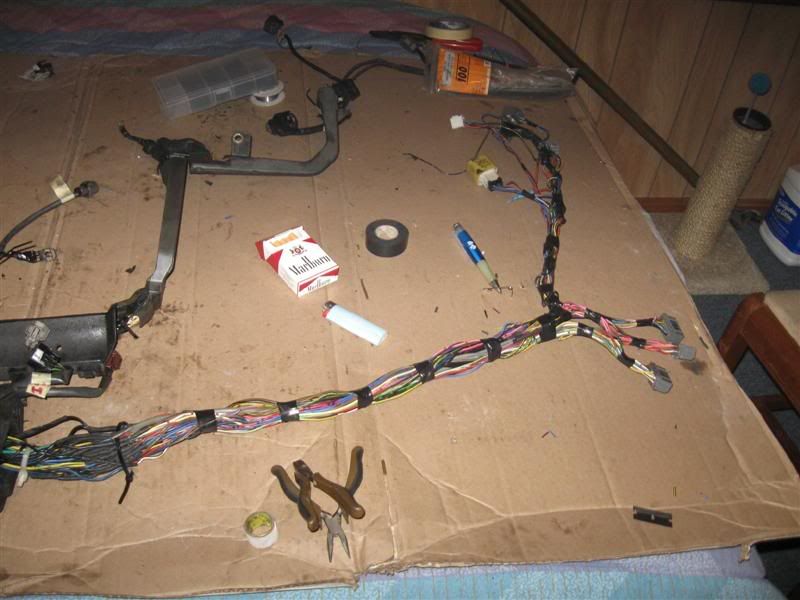 and some of the leftovers: 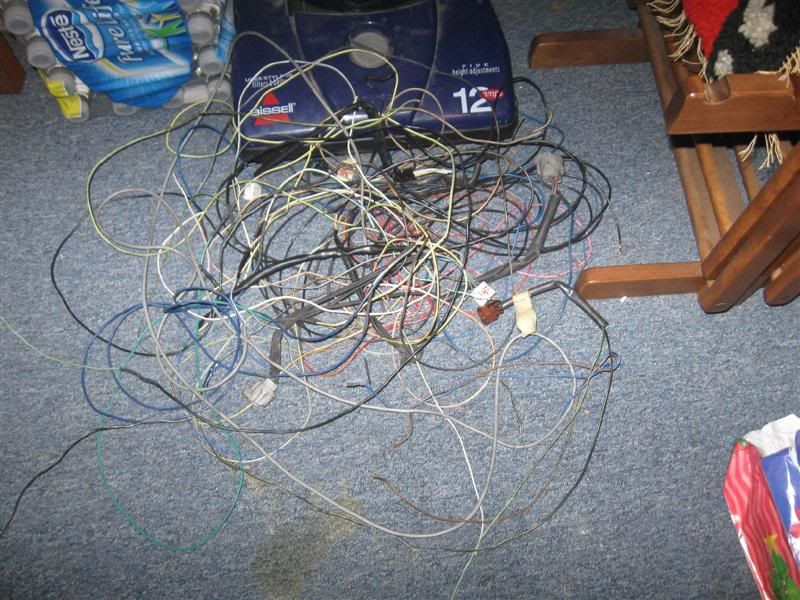 and just for refrence, a pic of what a stock USDM 3s harness looks like, for an idea of what this one should look like when its done. 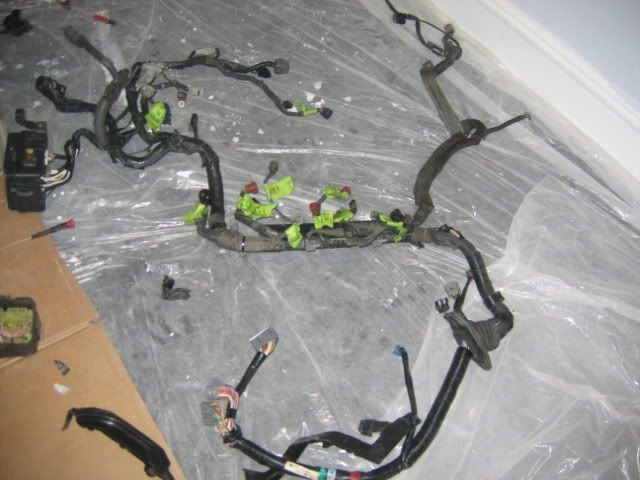 ill keep updating this thread and adding pics as i go along and continue with the project. -------------------- Former Team 5SFTE pro member ;)
 13.6@108MPH, 5SFTE Powered |
 |
Replies
 Dec 28, 2008 - 3:12 PM Dec 28, 2008 - 3:12 PM
|
|
|
Enthusiast      Joined Mar 31, '04 From Summerville, SC Currently Offline Reputation: 5 (100%) |
Manny... to ditch the fuel pump relay, take the 3 blue wires and solder them together. Then you will have 1 wire left over (goes to the ecu), just wrap that up or remove it from the harness. The fuel pump relay should only be there if your going to use the resistor pack. If not, ditch it because it will end up sending full voltage through a really thin gauge wire and will end up burning out the realy. It's easier than that actually. There should be one (factory) wire, blue/black, coming from the circuit opening relay going to one of the interior plug. FP (diagnostic block) is spliced into that. Just leave it all factory and don't touch it. goddamnit i hate the way this harness was put together. it made SO much more work for me, i basicly have to cut and rewire every wire in this harness because of how long it was. art/tweak can you tell me what this power wire plug is for? its located at the starter plugs. 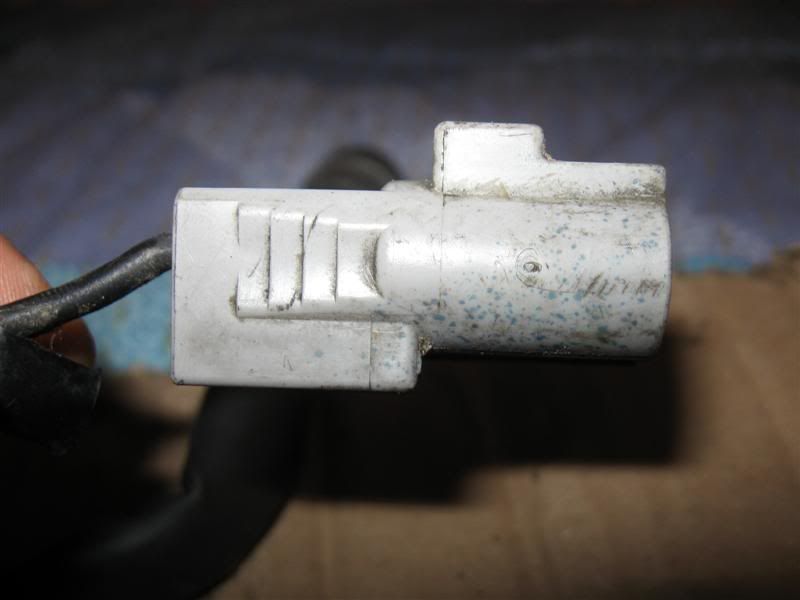 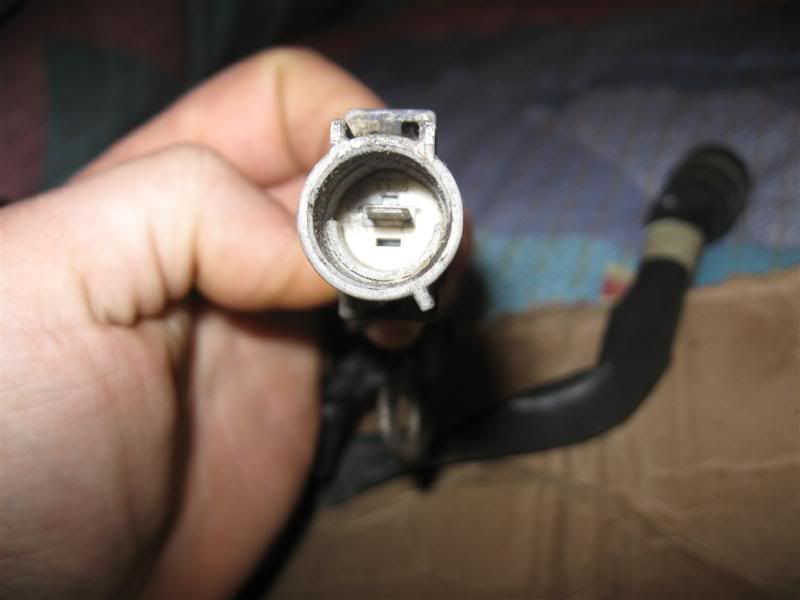 Yeah I noticed with a lot of the harnesses that were sent to me for repair (that DG originally did) that it seemed like he was matching up wire colors and didn't actually know what any of the wires did. For example, I saw a few times he had the ignition/injectors power wire connected to the starter, because on some 6GC harnesses the power wire is solid black. The effect, obviously, was that the car would crank as soon as the key was turned to the on position and keep cranking, but never start You are correct about the JDM harness being long enough once you turn it back around, basically you end up needing to extend just a few plugs, like the igniter and AFM connectors. That plug above is for the starter sub-harness on ST harnesses, it plugs into the wire that then goes to the starter (remember on the ST it's down below the intake manifold). Normally you would eliminate that plug. I ran into something that I cant figure out. Plug EA1 has a blue wire on pin 16, yet I can't find any mention of what this wire is for in any of my books. Anyone have a clue what its does? It might be something year specific, and thats why its not in my book. Sorry for jacking your thread with my own questions Manny. If its a problem, I can start a new one. Oh and thanks to this thread, you motivated me to start working on this thing. I was slacking...big time, but now that I started on it, Im actually having a lot of fun with it. art, the blue wire is for the fan switch in the radiator in ST's. for some reason it routes that way, the GT's dont. ill post a pic in a few of what the harness looks like now. my harness is routed just like a 5s harness now, art. it starts at the diagnostics box, ignitor and coil (i moved the map sensor to the stock 5s location, then goes to the waterneck, then some wires go the the fuse box, the rest go up thru the manifold, and into the boot on the other side, just like a stock harness. i had to cut and splice a few wires as i went, to get the rest of the wires to be able to "flip", then cut out all the extra wire out (which sucked because of how dave extended it, once i had it all going the right way. That's correct on the blue wire, should be blue/black actually. Normally when I do a 3SGTE into an ST, I go to a GT radiator, get the GT fan switch, and then extend that wire down to connect to the stock GT fan switch in the bottom of the radiator. Then everything works just like factory Thanks for the plug manny -Doc This post has been edited by Dr_Tweak: Dec 28, 2008 - 3:14 PM -------------------- -Dr Tweak, 6GC's resident engine swap wiring expert extraordinaire Click here to see my swaps drtweak@phoenixtuning.com |
Posts in this topic
 presure2 Fixing a 2nd gen 3sgte harness / preping for my swap Dec 24, 2008 - 6:48 PM
 njccmd2002 hey now that you bring it up. Wiring is the same ... Dec 24, 2008 - 9:42 PM

 presure2 QUOTE (njccmd2002 @ Dec 24, 2008 - 9... Dec 25, 2008 - 7:46 AM
 Dr_Tweak Nice work. LOL, good old DG, huh? Dec 24, 2008 - 10:22 PM
 x_itchy_b_x haha thats classic.
You inspired me Dec 24, 2008 - 10:39 PM
 lagos In DGs defence I can tell you that this looks like... Dec 25, 2008 - 12:30 AM
 x_itchy_b_x Hahaha were all working on harness wtf. we should ... Dec 25, 2008 - 12:37 AM
 lagos QUOTE (njccmd2002 @ Dec 24, 2008 - 9... Dec 25, 2008 - 12:44 AM

 njccmd2002 QUOTE (lagos @ Dec 25, 2008 - 12:44 ... Dec 25, 2008 - 9:50 AM
 Dr_Tweak Wait, hookers? (puts on shoes)
Yeah Manny, I was ... Dec 25, 2008 - 12:54 AM

 presure2 QUOTE (Dr_Tweak @ Dec 25, 2008 - 12... Dec 25, 2008 - 6:47 AM
 x_itchy_b_x QUOTE (lagos @ Dec 25, 2008 - 2:44 A... Dec 25, 2008 - 1:24 AM
 _Jim_ LOL, OMG Manny......what a mess. Dec 25, 2008 - 7:59 AM
 99GT Hey Lagos, for two the white wires that goes to th... Dec 25, 2008 - 9:35 AM
 lagos Manny... to ditch the fuel pump relay, take the 3 ... Dec 25, 2008 - 10:15 AM

 presure2 QUOTE (lagos @ Dec 25, 2008 - 10:15 ... Dec 25, 2008 - 10:40 AM
 lagos 99GT, there are 2 wires that go from the alternat... Dec 25, 2008 - 10:25 AM
 99GT My wires are burnt completely in two so I have to ... Dec 25, 2008 - 10:35 AM
 lagos QUOTE (99GT @ Dec 25, 2008 - 10:35 A... Dec 25, 2008 - 10:48 AM
 WannabeGT4 Nice to see people doing it the right way. It... Dec 26, 2008 - 12:41 AM
 lagos ^ will do! Dec 26, 2008 - 1:23 AM
 presure2 goddamnit i hate the way this harness was put toge... Dec 27, 2008 - 8:20 AM
 95celgt i remember that one, it didn't really go any w... Dec 27, 2008 - 3:19 PM

 presure2 QUOTE (95celgt @ Dec 27, 2008 - 3:19... Dec 27, 2008 - 4:52 PM
 lagos Im looking at my harness right now...
So on the JD... Dec 27, 2008 - 9:33 PM
 devilsden97 no to interupt the amazingly high level of electro... Dec 27, 2008 - 9:50 PM
 Batman722 post more pics !!!!!!... Dec 27, 2008 - 11:56 PM
 lagos I ran into something that I cant figure out. Plug ... Dec 28, 2008 - 3:06 AM
 presure2 art, the blue wire is for the fan switch in the ra... Dec 28, 2008 - 7:09 AM
 presure2 as promised, a few pics.
the harness is 99% finish... Dec 28, 2008 - 7:40 AM
 lagos I've been raving about those butane soldering ... Dec 28, 2008 - 1:56 PM
 95st-celica glad to see its getting done, Art.. im excited to ... Dec 28, 2008 - 3:05 PM
 presure2 QUOTE That plug above is for the starter sub-harne... Dec 28, 2008 - 3:36 PM
 njccmd2002 Sticky, so that everyone knows what wiring entails... Dec 28, 2008 - 3:50 PM

 presure2 QUOTE (njccmd2002 @ Dec 28, 2008 - 3... Dec 28, 2008 - 4:25 PM
 lagos ^ Yep, thats perfect. Dec 28, 2008 - 4:48 PM
 lagos QUOTE (njccmd2002 @ Dec 28, 2008 - 3... Dec 28, 2008 - 4:56 PM
 lagos QUOTE Yeah I noticed with a lot of the harnesses t... Dec 28, 2008 - 5:00 PM
 presure2 yup, mikes original diagrams back in the day had a... Dec 28, 2008 - 5:32 PM
 lagos QUOTE (presure2 @ Dec 28, 2008 - 5:3... Dec 28, 2008 - 5:37 PM

 presure2 QUOTE (lagos @ Dec 28, 2008 - 5:37 P... Dec 28, 2008 - 6:57 PM
 presure2 so since we're going over all this stuff, i fi... Dec 29, 2008 - 8:04 AM
 playr158 very nice work my friend.
I dig the attention to d... Dec 29, 2008 - 9:19 AM
 presure2 QUOTE and finding 1 more way to save weight.
i... Dec 29, 2008 - 9:29 AM
 lagos Nice!
I'll try to post up some pics of the... Dec 29, 2008 - 3:11 PM
 CelicaST_CALI Another swap..-_-...rabbits i tell you...
Some ... Dec 29, 2008 - 8:38 PM
 presure2 so i took the harness out to the garage for a quic... Dec 30, 2008 - 2:20 PM
 lagos so i was looking at my harness here, and correct m... Dec 30, 2008 - 2:28 PM

 presure2 QUOTE (lagos @ Dec 30, 2008 - 2:28 P... Dec 30, 2008 - 6:26 PM
 lagos Right, so I will have to shorten the harness then. Dec 30, 2008 - 8:50 PM

 presure2 QUOTE (lagos @ Dec 30, 2008 - 8:50 P... Dec 30, 2008 - 9:10 PM
 Defgeph Nice work dude Dec 31, 2008 - 5:48 PM

 hurley97 QUOTE (Defgeph @ Dec 31, 2008 - 5:48... Dec 31, 2008 - 6:30 PM
 lagos I noticed a potentially horrible mistake that a n0... Jan 5, 2009 - 1:24 AM

 presure2 QUOTE (lagos @ Jan 5, 2009 - 1:24 AM... Jan 5, 2009 - 7:40 AM
 95st-celica very nice.your the man..solder that bitch up! ... Jan 5, 2009 - 1:51 AM
 lagos Here are the two wires in question...
Top two ar... Jan 5, 2009 - 2:18 AM
 playr158 great job Art
even the small things matter Jan 5, 2009 - 7:20 AM
 presure2 so here is a pic of what im talking about:
so, ... Jan 5, 2009 - 8:39 AM
 Dr_Tweak Nice. So the starter was being powered directly ou... Jan 5, 2009 - 10:05 AM

 presure2 QUOTE (Dr_Tweak @ Jan 5, 2009 - 10:0... Jan 5, 2009 - 12:58 PM
 lagos But what about those two wires from the efi relay ... Jan 5, 2009 - 1:36 PM

 presure2 QUOTE (lagos @ Jan 5, 2009 - 1:36 PM... Jan 5, 2009 - 3:17 PM
 lagos I did a quick voltage drop test between the batter... Jan 5, 2009 - 4:29 PM
 lagos I need some help figuring this out...
So, the way... Jan 9, 2009 - 3:40 AM

 presure2 QUOTE (lagos @ Jan 9, 2009 - 3:40 AM... Jan 9, 2009 - 6:24 AM
 lagos right, but if you do that, you are powering the co... Jan 9, 2009 - 3:00 PM

 presure2 QUOTE (lagos @ Jan 9, 2009 - 3:00 PM... Jan 9, 2009 - 6:38 PM
 lagos So are you saying you ran a brand new wire from pi... Jan 9, 2009 - 6:59 PM

 presure2 QUOTE (lagos @ Jan 9, 2009 - 6:59 PM... Jan 10, 2009 - 6:34 AM
 Batman722 Art, was the car that your doing this harness for ... Jan 10, 2009 - 12:05 AM
 lagos Always a manual. Its just a difference in how the ... Jan 10, 2009 - 12:47 AM

 Dr_Tweak QUOTE (lagos @ Jan 10, 2009 - 12:47 ... Jan 10, 2009 - 11:30 PM
 lagos I was really wondering how you handled that circui... Jan 11, 2009 - 1:20 AM
  |
12 User(s) are reading this topic (12 Guests and 0 Anonymous Users)
0 Members:
| Lo-Fi Version | Time is now: December 2nd, 2024 - 10:44 AM |


