 Apr 6, 2009 - 3:59 PM Apr 6, 2009 - 3:59 PM
|
|
 Enthusiast      Joined Feb 7, '07 From Portland, Oregon Currently Offline Reputation: 67 (96%) |
So I've been working towards this for a while, and I finally got the time and a dry weekend to complete my projector retrofit. This is my first time doing anything like this, so go easy on me! I used Rayme's lenses and his stickied How-To write-up for guidance. I took pix along the way sort of as an appendix to his write-up for those of us who do better with detailed visuals. I put clear lenses on all 4 headlights, but the pix below specifically pertain to the low beams, as the high beams is self explanatory.
Before: 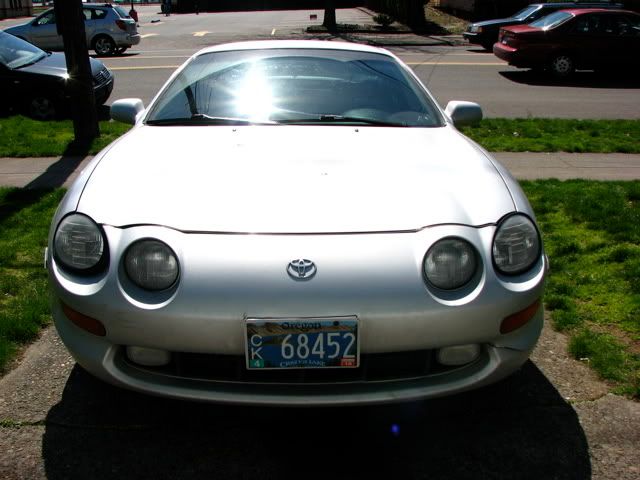 Lense Removed from one of the low beams: 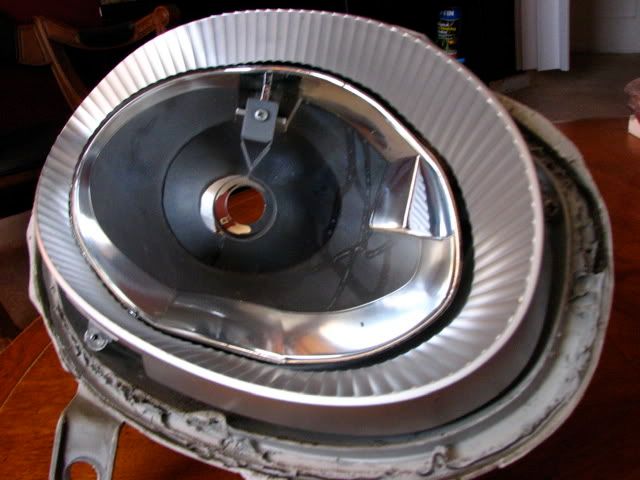 "Exploded view" of the components that make up the low beam internals:  Tiny stainless bowl of vegetable dip mix (!) and bathtub faucet ring for shroud and bezel use: 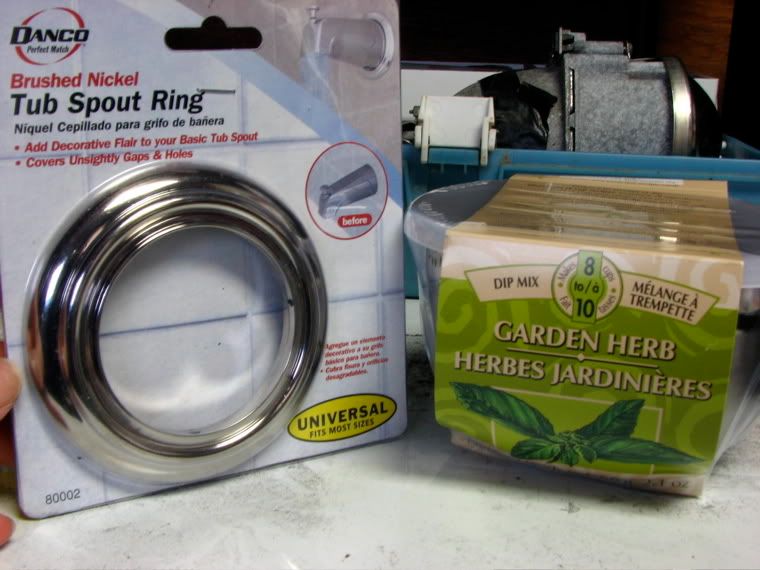 Cut out the bottom of the bowl for the lens to fit through: 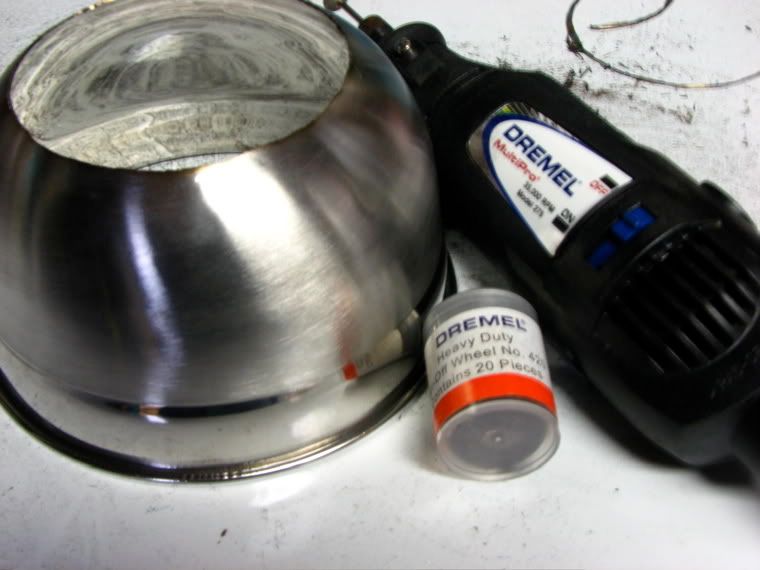 Cut out the reflector to fit the back of the projector through - no turning back at this point! 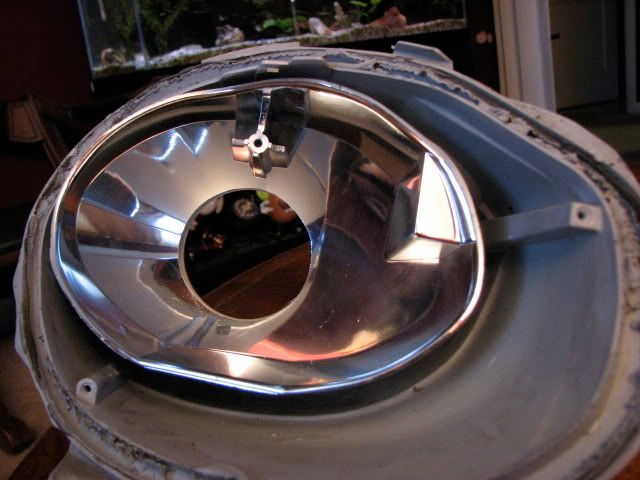 Test fitting the projector. When I marked up the reflector to mount the projector, I removed the lens from the projector so I could make sure the cutoff shield was level. Then I test fit the projector in the reflector only, to make sure it bolted in correctly. Once I was sure that it was correct, I mounted the reflector back into the headlight bucket, tightened it in, and then drilled the projector mounting holes all the way through. By doing this, I'm able to adjust the alignment of the projector itself within the reflector. 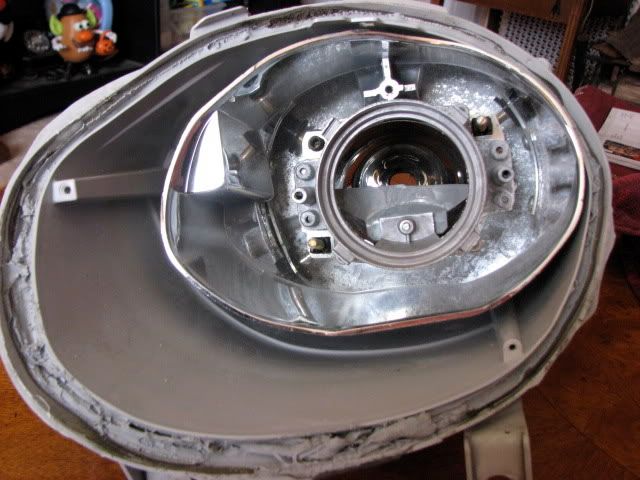 Test-fitting the shroud I made. I had to cut a notch at the top of it to allow it to recess into the reflector without the glare shield mounting point obstructing it. 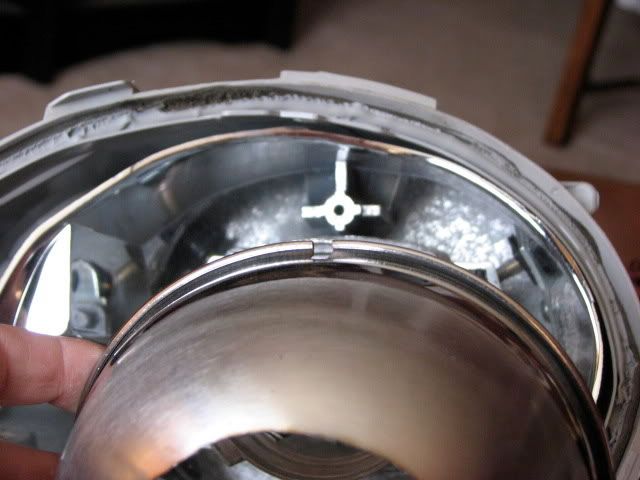 I also bent the bottom part of the shroud up to flatten it down some. The bent part doesn't show once it's in, but it allows the shroud to fit better into the reflector unit. I probably could have just cut this part out, but I wasn't sure how much of that would show, and I wanted to keep it as finished looking as possible. 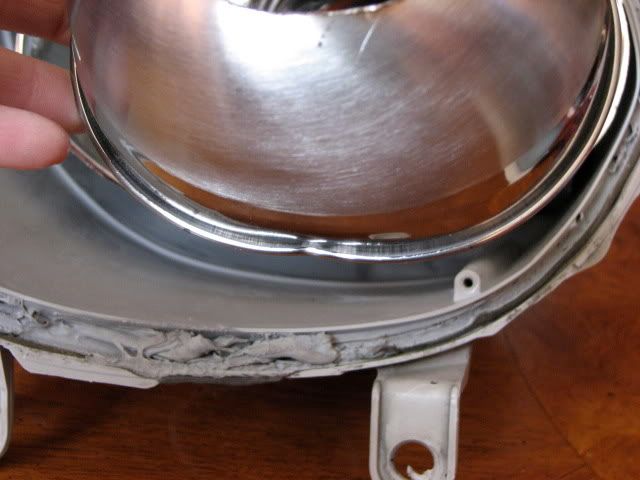 Test fitting it over the mounted projector (still without the lens on it, so I didn't risk chipping or scratching the glass lens: 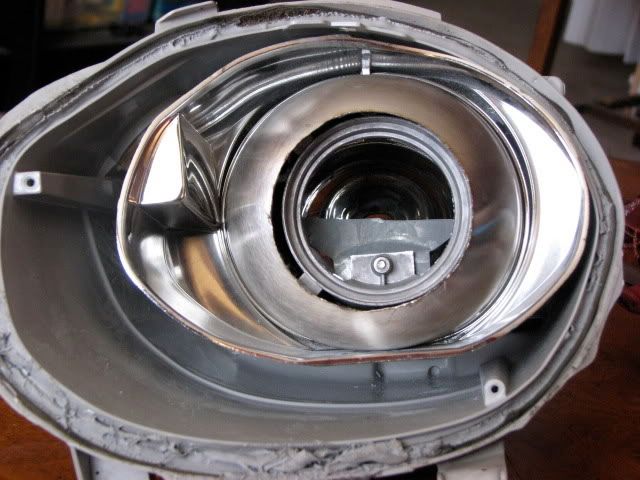 Mounting the shroud to the reflector unit. JDM, yo! 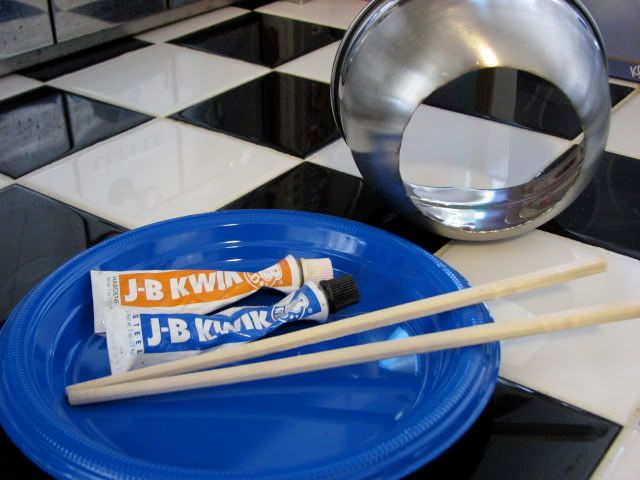 After. This morning I learned that JB weld was a bad idea, as it doesn't bond metal to plastic well at all. Note the top part of the shroud on the passenger side. Now my celi has a lazy eye. Bummer. If I get home in time tonight, I will take it apart and figure out a plan B. It will probably involve using the mounting point where the glare shield went to screw the shroud to. The screw is small, and will probably not show at all, but we'll see. 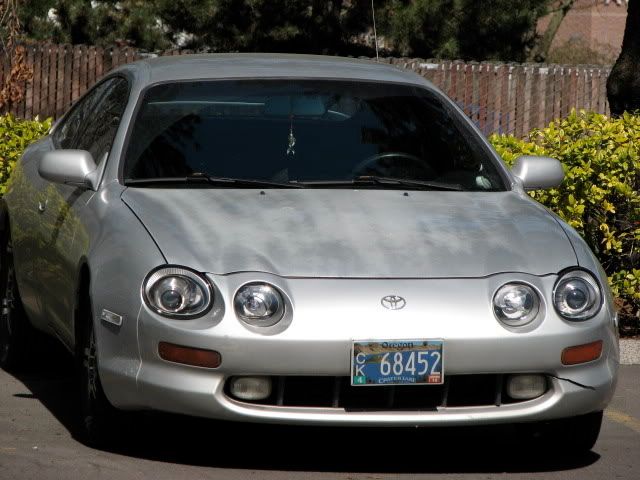 Close-up of the driver's side. Other than the issue with the passenger shroud, I'm really happy with how they came out. Once I get the passenger side fixed, I will aim them and take night shots of the cutoff. It looks really good though and has nice color banding at the top. 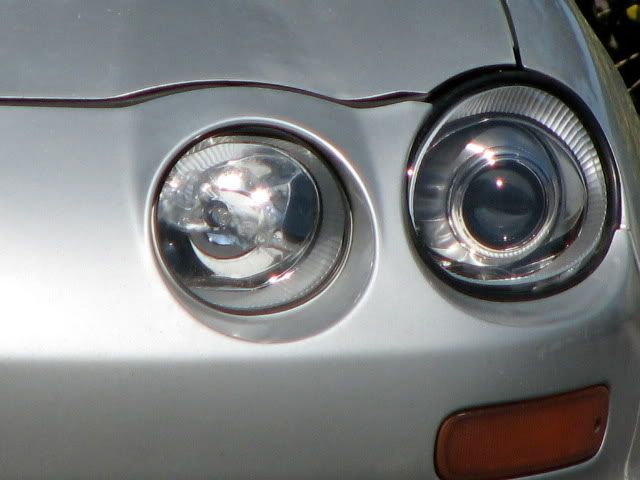 --------------------  |
 |
Replies
 Apr 6, 2009 - 5:09 PM Apr 6, 2009 - 5:09 PM
|
|
 Enthusiast      Joined Aug 17, '03 From Bloomington, Indiana Currently Offline Reputation: 62 (98%) |
they look good, how's the beam pattern?
Also, your highs aren't going to work nearly as well since those are just us oem lights with clear lenses. Just incase you didn't know! I would suggest that you do do something to the shroud. it would be really easy to smooth them out and paint them to match. I did it with one set, but idk where they went. --------------------  |
 Apr 6, 2009 - 5:40 PM Apr 6, 2009 - 5:40 PM
|
|
 Enthusiast      Joined Feb 7, '07 From Portland, Oregon Currently Offline Reputation: 67 (96%) |
they look good, how's the beam pattern? Also, your highs aren't going to work nearly as well since those are just us oem lights with clear lenses. Just incase you didn't know! I would suggest that you do do something to the shroud. it would be really easy to smooth them out and paint them to match. I did it with one set, but idk where they went. Beam pattern looks potentially great. About the shroud - by paint to match do you mean paint them to match the color of the body of my car? I thought about that. I also considered smoothing them out to blend them with the reflector - how though? I don't have a vacuum but is there another way? How can I make the high beams better? (LOL - I should've asked these questions a week ago, huh.) --------------------  |
 Apr 6, 2009 - 10:43 PM Apr 6, 2009 - 10:43 PM
|
|
 Enthusiast      Joined Aug 17, '03 From Bloomington, Indiana Currently Offline Reputation: 62 (98%) |
they look good, how's the beam pattern? Also, your highs aren't going to work nearly as well since those are just us oem lights with clear lenses. Just incase you didn't know! I would suggest that you do do something to the shroud. it would be really easy to smooth them out and paint them to match. I did it with one set, but idk where they went. Beam pattern looks potentially great. About the shroud - by paint to match do you mean paint them to match the color of the body of my car? I thought about that. I also considered smoothing them out to blend them with the reflector - how though? I don't have a vacuum but is there another way? How can I make the high beams better? (LOL - I should've asked these questions a week ago, huh.) hahahaha 'potentially great' I dig it You dont need a vaccum to smooth it out. Just fiberglass, sand paper, primer, paint *of the car or maybe to match the housing* It shouldn't be too hard, but when I did it I was 16 and they looked like ass. You can't make the high beams better from anything I know. They will indeed look like a spotlight and are still usable, just something I hated when I had them on my car so I bought JDM highbeams --------------------  |
 Apr 7, 2009 - 11:50 AM Apr 7, 2009 - 11:50 AM
|
|
 Enthusiast      Joined Feb 7, '07 From Portland, Oregon Currently Offline Reputation: 67 (96%) |
they look good, how's the beam pattern? Also, your highs aren't going to work nearly as well since those are just us oem lights with clear lenses. Just incase you didn't know! I would suggest that you do do something to the shroud. it would be really easy to smooth them out and paint them to match. I did it with one set, but idk where they went. Beam pattern looks potentially great. About the shroud - by paint to match do you mean paint them to match the color of the body of my car? I thought about that. I also considered smoothing them out to blend them with the reflector - how though? I don't have a vacuum but is there another way? How can I make the high beams better? (LOL - I should've asked these questions a week ago, huh.) hahahaha 'potentially great' I dig it You dont need a vaccum to smooth it out. Just fiberglass, sand paper, primer, paint *of the car or maybe to match the housing* It shouldn't be too hard, but when I did it I was 16 and they looked like ass. You can't make the high beams better from anything I know. They will indeed look like a spotlight and are still usable, just something I hated when I had them on my car so I bought JDM highbeams so what is the difference between JDM highs and USDM highs, is it the reflector? --------------------  |
Posts in this topic
 GriffGirl Projector Retro Apr 6, 2009 - 3:59 PM
 d0w0rkS0n wow! that looks so sexy!! great job... Apr 6, 2009 - 4:10 PM
 96bluevert nice work!
Props for originallity. Apr 6, 2009 - 4:17 PM
 manphibian Great Job!!!!
I think you should ... Apr 6, 2009 - 4:25 PM
 DEATH Holy fcukin sh*t - nice job Griffy
Now make me som... Apr 6, 2009 - 4:42 PM
 njccmd2002 rivets, that bonds well Apr 6, 2009 - 4:44 PM
 GriffGirl Yeah, I was thinking rivets
QUOTE (DEATH @ A... Apr 6, 2009 - 5:03 PM

 DEATH QUOTE (GriffGirl @ Apr 6, 2009 - 5:0... Apr 6, 2009 - 5:25 PM

 razor7 QUOTE (GriffGirl @ Apr 6, 2009 - 6:0... Apr 11, 2009 - 11:40 PM

 GriffGirl QUOTE (razor7 @ Apr 11, 2009 - 9:40 ... Apr 13, 2009 - 11:54 AM

 razor7 QUOTE (GriffGirl @ Apr 13, 2009 - 12... Apr 13, 2009 - 7:19 PM

 richee3 QUOTE (GriffGirl @ Apr 6, 2009 - 5:4... Apr 6, 2009 - 6:08 PM
 xs94st Awesome work griff..good sense of ingenuity =)
A+... Apr 6, 2009 - 11:33 PM
 dustin15brown I would ASSUME so, but don't quote me on that Apr 7, 2009 - 1:26 PM
 GriffGirl When you molded the fiberglass to make the shrouds... Apr 7, 2009 - 2:16 PM
 SveNRG Respect for your work and originality. They look m... Apr 7, 2009 - 3:57 PM

 GriffGirl QUOTE (SveNRG @ Apr 7, 2009 - 1:57 P... Apr 9, 2009 - 5:14 PM
 trdproven looks good except for the lazy eye. Just my 2 cen... Apr 9, 2009 - 9:46 PM
 Rayme Nice one girl, you made your research well ! Apr 10, 2009 - 6:37 AM
 Lil-Joe101 Kinda reminds me of Number Johnny5 from Short circ... Apr 10, 2009 - 6:47 AM

 d0w0rkS0n QUOTE (Lil-Joe101 @ Apr 10, 2009 - ... Apr 10, 2009 - 9:32 AM
 GriffGirl Totally! Apr 10, 2009 - 11:18 AM
 malpaso that's totally cool making own projectors... t... Apr 13, 2009 - 12:08 PM
 KAOS Nice work Michelle...
Or in the words of Johnny ... Apr 13, 2009 - 4:47 PM
 GriffGirl It's supposed to be warm and sunny this weeken... Apr 14, 2009 - 5:10 PM
 vile_v you should maybe to try painted all the shiny silv... Apr 19, 2009 - 6:58 PM

 ra65_22re QUOTE (vile_v @ Apr 19, 2009 - 4:58 ... Apr 19, 2009 - 7:47 PM
 GriffGirl Well that's actually what I wound up doing whe... Apr 21, 2009 - 5:21 PM

 razor7 QUOTE (GriffGirl @ Apr 21, 2009 - 5... Apr 22, 2009 - 4:34 PM
 95CelicaST You should really put some drift ties on that crac... Apr 21, 2009 - 7:32 PM

 GriffGirl QUOTE (95CelicaST @ Apr 21, 2009 - 5... Apr 22, 2009 - 10:54 AM

 96bluevert QUOTE (GriffGirl @ Apr 22, 2009 - 8... Apr 22, 2009 - 1:29 PM

 KAOS QUOTE (96bluevert @ Apr 22, 2009 - 12... Apr 22, 2009 - 1:33 PM
 96bluevert good work... I think they are fine as is. Apr 21, 2009 - 11:54 PM
 GriffGirl Where'd you get the shrouds? I'm at the po... Apr 22, 2009 - 5:16 PM
 razor7 QUOTE (GriffGirl @ Apr 22, 2009 - 6... Apr 27, 2009 - 1:49 AM
  |
5 User(s) are reading this topic (5 Guests and 0 Anonymous Users)
0 Members:
| Lo-Fi Version | Time is now: November 26th, 2024 - 11:26 AM |


