 Aug 29, 2009 - 8:03 PM Aug 29, 2009 - 8:03 PM
|
|
|
Enthusiast   Joined Nov 22, '05 From New Zealand, Hamilton Currently Offline Reputation: 2 (100%) |
Hi all,
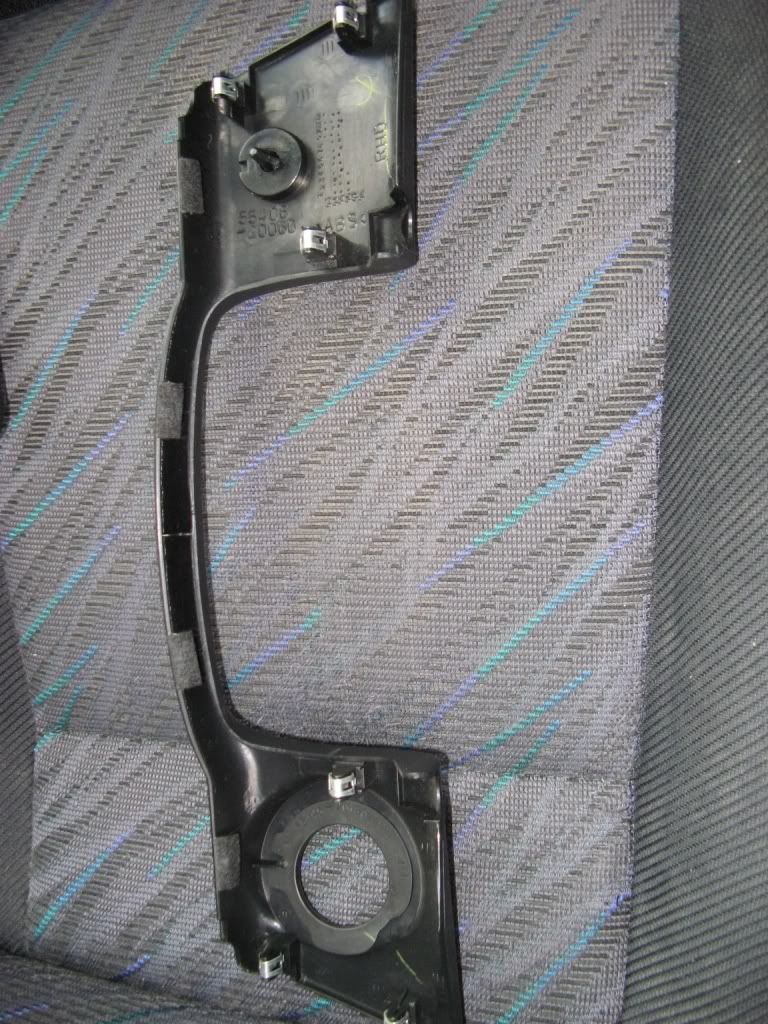
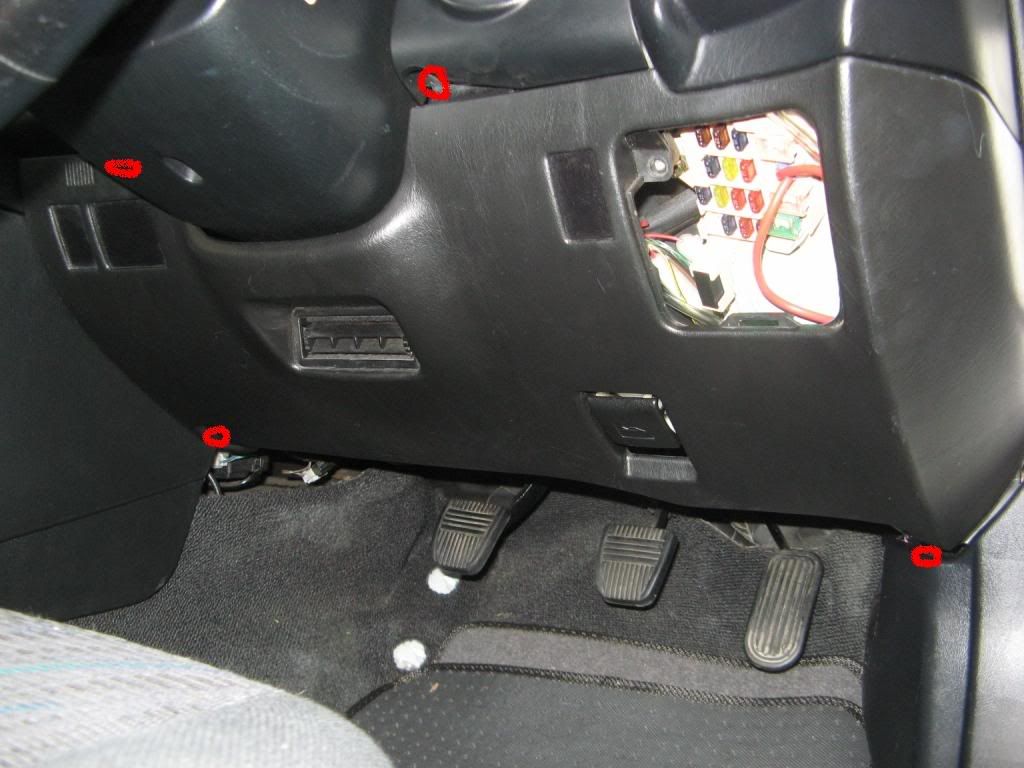
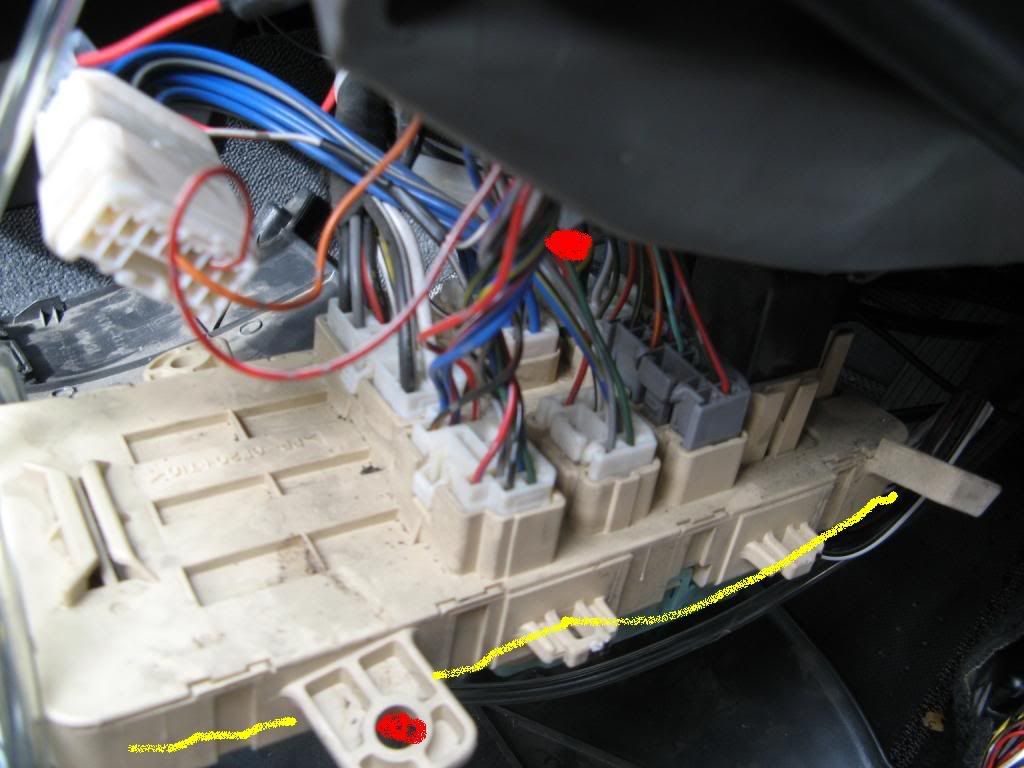
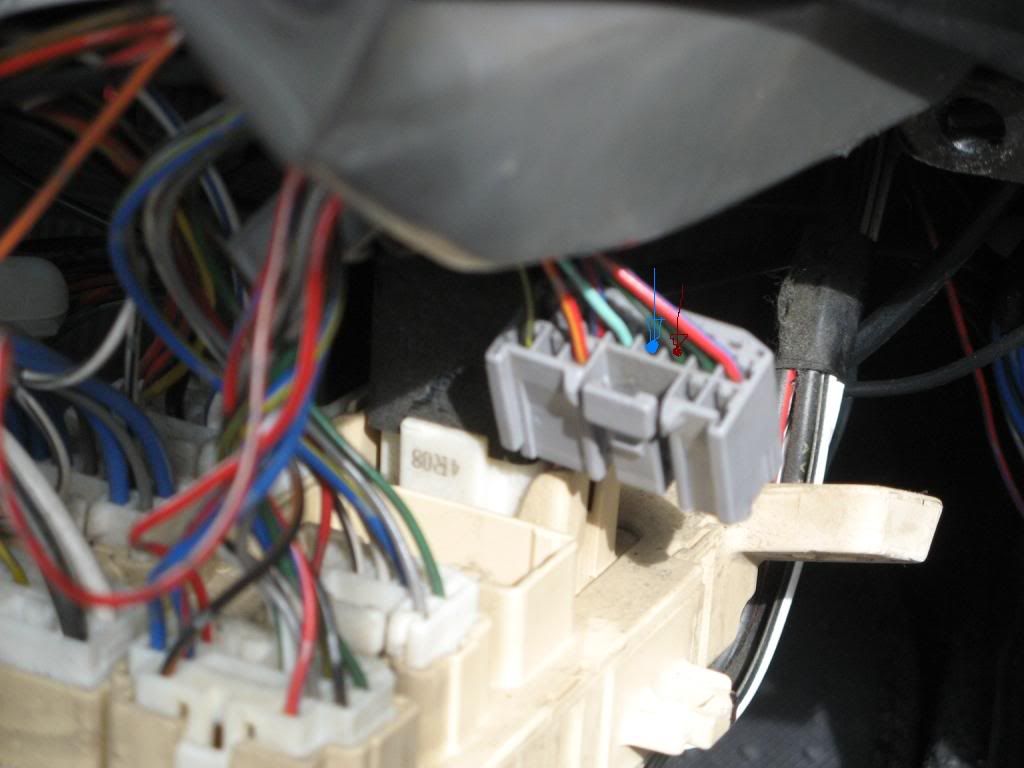
I did not like how my Celica was missing the keyring light as I found it frustrating finding the key hole at night... so I decided to do a write up to hopefully make it easier for someone else to install it.. This write up is to install a ignition key ring light so that it turns on when the car door is opened and has a 5 second delay time to switch off once the door has been closed. It makes it a lot easier to put the keys in the ignition at night. I'm writing this up because i was wanting to do this to my car for about two years and i finally got the information from a member on here (Cavegod) but thought a clear write up would make things easier for people. Tools: Philips screw driver Size 10mm socket Wire strippers Soldering iron or connector lugs and tape Two bits of wire Bulb and housing Ignition key ring light piece- i got mine from the car wreckers (picture shown below). Black is the old one, clear is the new one  Photo above came from delusionz (post at http://www.6gc.net/forums/index.php?showto...ignition+light) How-To Install: The circles in the pictures are for screws that need to be removed. On your bulb housing its probably best to increases the length of the wires, so they were about 200mm-300mm long, before you begin. Lift up the side skirt panel- labeled 1. Then take off the panel labeled 2.  Remove the panel around the key. Here is a photo showing the clips  Remove large plastic panel. Note: that cream fuse box is what we want to get to.  Remove fuse box as the wires you want are on the reverse side of this. It was two 10mm bolts holding it in place. There was this gray plastic part, that was where the yellow marking is, I detached this as it allows the cream fuse box to come down further giving you more room to work in.  The gray lug seen in the picture above is the one you want. The light blue marking is where the factor delayed earth is (-ve) i.e. the fourth port. This will give you the 5 second delay time for the circuit. There was nothing in my -ve spot as my car didn't come with the key ring light from factory. The brown marking is where a constant +ve is i.e. the third port. You need to find a way to connect one of your wires in to the -ve spot. One way i found to do this is to strip your wire back about 15-20mm and then feed it through the 4th hole (when the gray lug is unplugged) and bend it up on the outside of the lug so when you put the lug back in its spot it will hold the wire in place so it cant come out. Next cut the 3rd wire (shown as brown) and join in your other wire (which will be your +ve). I used a wiring joiner to do this and then taped it up. Soldering and heat shrink would be your best option though. Note: You can also find a constant +ve feed from your clock etc.  With your two wires you installed you need to join these up to your bulb housing (you may have done this already). Note: It doesn't matter which way you wire the bulb housing up to your +ve and -ve wires- as bulbs aren't polarised so orientation doesn't matter. Now you are pretty much done. All you need to do now is replace the black factory ignition light housing with the clear one you brought (shown in the first picture) and plug in the light bulb housing. Then put all the panels back on in the reverse of what you have done. I hope this helps some one This post has been edited by beno: Jun 1, 2011 - 2:46 AM |
 |
Replies
 Sep 17, 2009 - 1:54 AM Sep 17, 2009 - 1:54 AM
|
|
|
Enthusiast Joined Jul 7, '08 From Hallandale Beach Currently Offline Reputation: 0 (0%) |
it might be a dumb question but where did you got a hold of the clear ignition key ring
|
Posts in this topic
 beno How to install ignition key ring light Aug 29, 2009 - 8:03 PM
 Cavegod Glad to be of service!! theres a few other... Sep 17, 2009 - 6:56 AM
 beno Sorry for the late reply, but i got it from a wrec... Oct 15, 2009 - 8:47 PM
 delusionz Thanks for that, I've always wondered where th... Nov 10, 2009 - 7:32 AM
 delusionz Are those pictures from your 96 GT4 ?
From what I... Nov 10, 2009 - 7:36 AM
 GriffGirl never mind oops Nov 13, 2009 - 12:43 PM
 beno Hi delisionz, another late reply just to clarify ... May 31, 2011 - 2:52 AM
  |
1 User(s) are reading this topic (1 Guests and 0 Anonymous Users)
0 Members:
| Lo-Fi Version | Time is now: January 13th, 2025 - 1:04 PM |


