 Feb 26, 2007 - 12:19 AM Feb 26, 2007 - 12:19 AM
|
|
 Administrator      Joined Aug 23, '02 From Seattle, WA Currently Offline Reputation: 14 (100%) |
I've had some people ask me, so here it is...my notes on my recent (well, at the time I wrote this, it was recent
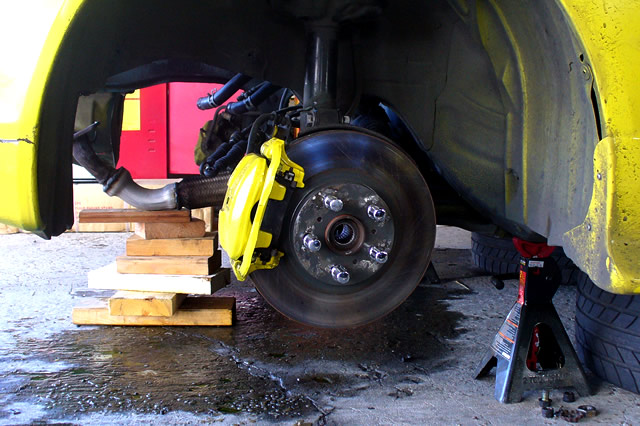
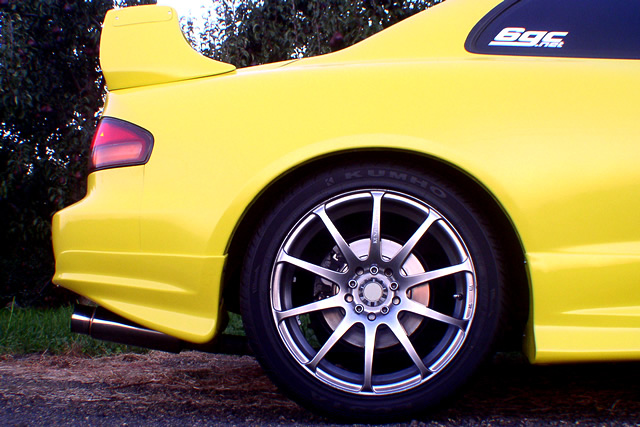
Front Setup Stock AT200 spindles/hubs and backing plates OEM ST185 single-piston calipers, caliper brackets, and unknown pads Brembo ST185 OEM-replacement rotors (part number 25440) Stock AT200 brake lines Rear Setup Stock AT200 spindles/hubs OEM ST185 backing plates OEM ST185 internal e-brake components OEM ST185 e-brake cables OEM ST185 single-piston calipers Satisfied ST185 ceramic brake pads Brembo ST204 OEM-replacement rotors (part number 25162 I think...may have been 25163) OEM AT200 front brake lines For the front, the rotors do not fit without modification. The AT200 hub has a center bore that's 54.something mm, 1mm larger than the ST185's center bore. The rotors will slide on, but they won't go all the way flush against the hub, which is how they need to be. I used a drill with a round sanding bit and bored out the rotors. I think it took approximately ten minutes per rotor. Once I did that, the rotors slid on perfectly. Then the caliper and caliper bracket bolt right up. The stock brake lines do get pulled fairly tight if you bolt them to the strut using the factory short bolt. I found a longer bolt and used several spacers between the strut and the brake line mounting tab to give the brake line more slack. This is a temporary fix, as I'm going to get ST204 stainless steel brake lines soon. For the rears, the ST185 backing plates with the internal e-brake components bolt in just fine. I used the ST185 e-brake cables, with mounted up to the bottom of the car just fine. I do believe I used the cable splitter (that hooks the single cable from the e-brake handle to the two seperate e-brake cables) from the ST185, but I can't remember for sure. Once the backing plates and internal e-brake components are on, I mounted the rotors and adjusted the e-brake mechanisms so that the rotors locked up equally. The rotors go on just fine. Once the rotors were on, the calipers went right on as well and bolt up just fine. I didn't have the ST185 brake lines, so I used some front AT200 brake lines from a parts car, which work just fine. I don't abuse my brakes enough (well, at all typically) to notice a huge difference, but my car does stop plenty well, and the few times I've been on high speed canyon road runs I've had no problems whatsoever. If you've got questions, just ask...hopefully this thread will be helpful. By the way, here are a couple pics...the front is from a few days ago, after a couple thousand miles on the brakes. The rear is from a while ago, and now the calipers are painted yellow (the same shade as the car.)
Attached image(s)
 
-------------------- New Toyota project coming soon...
|
 |
Replies
 Dec 27, 2010 - 4:06 AM Dec 27, 2010 - 4:06 AM
|
|
|
Enthusiast   Joined Jan 3, '06 From The Netherlands Currently Offline Reputation: 6 (100%) |
Some more pictures:
SSIII brakepad surface:  Sideview of the pad. This one is close to brand new,only done around 1000 km: 
This post has been edited by nsxtypeR: Dec 27, 2010 - 4:07 AM -------------------- JDM ST205
|
Posts in this topic
 Coomer My Upgraded Brake Setup (ST185, ST204, AT200 components) Feb 26, 2007 - 12:19 AM
 j0e_p3t awesome. i love everything about your car. would i... Feb 26, 2007 - 12:40 AM
 Bitter why not st165 2 piston calipers? Feb 26, 2007 - 2:09 AM
 Batman722 Coomer, did you ever have st204 rear brakes in the... Feb 26, 2007 - 10:41 AM
 Bitter USDM ST185 were only single, JDM used (i think) th... Feb 26, 2007 - 11:41 AM
 Coomer The ST185 single piston calipers and larger rotors... Feb 26, 2007 - 12:03 PM
 Bitter well i'm putting st165 calipers on rotors abou... Feb 26, 2007 - 5:25 PM
 BonzaiCelica Do the ST185 Dual Piston front Brake Calipers have... Dec 25, 2010 - 9:01 PM
 bccentaur3 only the earlier jdm st185s came with twin pot cal... Dec 25, 2010 - 10:32 PM
 BonzaiCelica oh alright then. Yea my guess is that the ST202 SS... Dec 26, 2010 - 1:47 AM
 BonzaiCelica Well here it is. Now all I need is the measurement... Dec 27, 2010 - 3:31 AM
  |
1 User(s) are reading this topic (1 Guests and 0 Anonymous Users)
0 Members:
| Lo-Fi Version | Time is now: November 29th, 2024 - 11:13 PM |


