 Oct 19, 2011 - 1:42 AM Oct 19, 2011 - 1:42 AM
|
|
|
Enthusiast      Joined Aug 2, '05 From Guam Currently Offline Reputation: 15 (100%) |
9006 to H1 Conversion Adapter How-To Specifically for Projectors (HID or Non-HID)
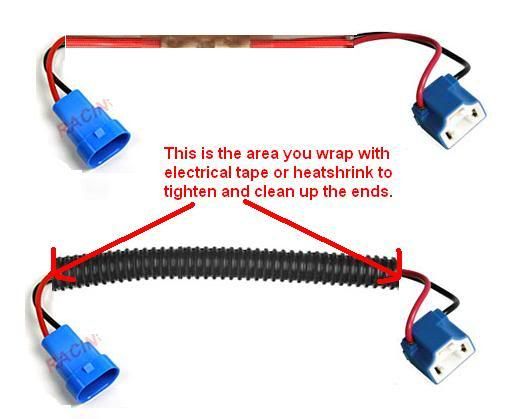
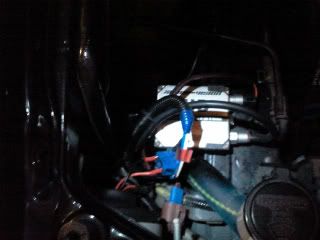
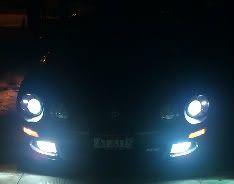
My apologies, these are not actual pics just taken off the internet, but enough to get the idea. I'm attempting an end all HID conversion adapter solution due to the many request i keep getting. Request to update the sticky with this version. Tools: -Crimper which has the crimp end, the cutting end, and wire stripper. -Solderer (optional) To Buy: -9006 heavy duty harness or get the female side of it -H1 harness or substitute with H4 Harness (at least with pigtails) -Butt Connectors (optional) -Wire Loom -Heatshrink or electrical tape (depends on you) Just a rough estimate (depends where you get it, could be cheaper, thats just how much i bought it at the time and from the vendors pricing): 9006 Heavy duty Harness: $20.00 H1 Harness: $24.00 Butt Connector: $0.20 Wire Loom: $1.00 for 1 ft Totals: Its going to cost you somewhere (give or take some dollars) ~$45.00 to make an adapter for both sides. Keep in mind that depends where you get the parts. 1. Buy this and cut the female side off the 9006 heavy duty harness, the reason why I chose this is because I knew it already had the female side that i could use, and i had em already when I used to use 9006 high wattage bulbs, but that is the concept. This female piece is used to connect to your existing 9006 stock harness.  2. Buy this, H1 harness (for illustration, it is colored blue in this example thats the other half that connects to your female 9006 half, and which will complete your adapter piece. its basically what will be connecting to your HID spades or even just your stock projecter H1 bulb if you choose not to go HIDs. This will be spliced together with the female side of step 1. or you can use an H4 harness as a substitute illustrated with 3 terminals. which means you just don't use the third terminal. this is actually what I used cus i couldn't get an H1 type. H1 < The correct one H4 < Not exact but still works, just don't use the third terminal.  3. Now this is where you connect them together. there are many different methods, use your creativity or preference. -you can twist the wires together and electrical tape (i don't recommend, so ghetto), or twist cap (sucks too)   another decent method is to crimp them together with a butt connector (this is what I did and its still clean),  and lastly you can also solder them together and then electrical tape and/or heatshrink it.   4. Next buy wire loom or wire management, something like this. have the wires fit in, I recommend buying the best fitting wire loom, not the big ones cus these are only 2 wires. Then you have the option to either electrical tape the ends of the loom or professionally use a good thick heatshrink or any for the two ends.  5. Now your adapter should look like this. Just for clarification, the butt connector method was used in this case, and keep in mind, the illustration is showing just one wire, it should be two as obviously there are positive and negative wires. i just wanted to show the example. I just used electrical tape at the ends to tighten up the wire loom, reason for doing so is many OEM cars have it this way.  6. Here's sample of mine, you can tidy it up better if you can tuck it somewhere or zip tie it.  7. Plug it in and rock in roll, please for safety precautions please be mindful of the wires you are connecting don't make them backwards or opposite connections. its easy, its color coded! and the bestest thing about it is that, you looks OEM-ish, looks just like any other wire in your engine bay. and you can easily go back to 9006, no harm, just by removing the adapter, clean and reversible action. Get ready to bling.  If i need changes please provide feedback or if I catch it, I will make changes myself. Good Luck and Happy Wiring.... This post has been edited by trdproven: Oct 24, 2011 - 4:29 AM -------------------- 94 Celica GT
|Toyota OEM Japan|Toyota Racing Development|Tom's|Competition Clutch|5Zigen|Apexi| |Laille/Beatrush|Magnecor|Denso|Royal Purple|Optima|PIAA|PW JDM|Megan Racing|Nitto| |Work|Greddy|Samco|Project Mu|H&R|Gates|Moog|Rota|Yokohama|Epman|1320|Upgr8 04 Celica GT |Toyota OEM Japan|Toyota Racing Development|Tein|BC Racing|Greddy| |
 |
Replies
 Oct 20, 2011 - 12:44 AM Oct 20, 2011 - 12:44 AM
|
|
|
Enthusiast      Joined Aug 2, '05 From Guam Currently Offline Reputation: 15 (100%) |
its true, i keep talking about how i did it but never really did something about it. well, i've received a good number of request in my pms that my last pm got me to do it, thank MALHAR95 for it. This solution is a lot better than the sticky where you just slide the bare wire into the stock 9006 harness, mines a lot safer and cleaner and makes more sense really - an adapter.
This post has been edited by trdproven: Oct 20, 2011 - 12:46 AM -------------------- 94 Celica GT
|Toyota OEM Japan|Toyota Racing Development|Tom's|Competition Clutch|5Zigen|Apexi| |Laille/Beatrush|Magnecor|Denso|Royal Purple|Optima|PIAA|PW JDM|Megan Racing|Nitto| |Work|Greddy|Samco|Project Mu|H&R|Gates|Moog|Rota|Yokohama|Epman|1320|Upgr8 04 Celica GT |Toyota OEM Japan|Toyota Racing Development|Tein|BC Racing|Greddy| |
Posts in this topic
 trdproven How-To: Create a 9006 to H1 Conversion Adapter Oct 19, 2011 - 1:42 AM
 Malhar95 thank you soo much for this.
vote stickyy Oct 19, 2011 - 1:51 AM
 trdproven no prob, you actually got me to jump on creating t... Oct 19, 2011 - 7:32 PM
 HectortheRican Great how-to! This is similar to what I'm ... Oct 19, 2011 - 10:27 PM
 richee3 I've seen half a dozen posts from trdproven ab... Oct 19, 2011 - 11:47 PM

 Malhar95 QUOTE (trdproven @ Oct 20, 2011 - 1... Oct 20, 2011 - 12:54 PM
 richee3 Done and done. Total cost: $9. My projectors ... Oct 22, 2011 - 10:05 PM
 trdproven thats great, how did yours come with pigtails were... Oct 22, 2011 - 10:26 PM

 richee3 QUOTE (trdproven @ Oct 22, 2011 - 10... Oct 23, 2011 - 9:48 AM
 matts94celica Stupid question. My 9006 harness came with white a... Nov 30, 2011 - 9:37 PM
 trdproven since color scheme is off just pick which one beco... Dec 1, 2011 - 7:08 PM
 matts94celica Ok cool I think I got it figured out gotta wait ti... Dec 1, 2011 - 9:31 PM
 chacha couldn't you just buy an hid kit and buy the H... Dec 2, 2011 - 1:38 PM

 richee3 QUOTE (chacha @ Dec 2, 2011 - 12:38 ... Dec 2, 2011 - 5:43 PM

 trdproven QUOTE (chacha @ Dec 3, 2011 - 4:38 A... Dec 9, 2011 - 12:06 AM

 chacha QUOTE (trdproven @ Dec 9, 2011 - 12... Dec 9, 2011 - 2:07 AM
 matts94celica Yeah i got a Hid kit and the wiring harness' f... Dec 3, 2011 - 5:58 PM
 trdproven what i mean is that the stock harness connects dir... Apr 10, 2012 - 8:13 PM
 yaj204 i got a H1 harness but it only have one black wire... May 31, 2013 - 6:21 PM

 ILoveMySilly97 QUOTE (yaj204 @ May 31, 2013 - 4:21 ... May 31, 2013 - 6:36 PM

 yaj204 QUOTE (ILoveMySilly97 @ May 31, 2013 - 6... May 31, 2013 - 6:47 PM

 richee3 QUOTE (ILoveMySilly97 @ May 31, 2013 - 6... May 31, 2013 - 7:20 PM
 ILoveMySilly97 The usdm Celica came with 9006 harness. If you hav... May 31, 2013 - 8:00 PM
 Syaoran Silly is correct. HID kits plug the harness from t... May 31, 2013 - 11:24 PM

 richee3 QUOTE (Syaoran @ May 31, 2013 - 11:2... Jun 1, 2013 - 6:23 AM
 yaj204 i am converting my headlights to the jdm projector... Jun 1, 2013 - 1:24 AM

 ILoveMySilly97 QUOTE (yaj204 @ May 31, 2013 - 11:24... Jun 1, 2013 - 3:43 AM
 ILoveMySilly97 I'll go into more detail since I'm on the ... Jun 1, 2013 - 3:54 AM
 rentaspace Been trying all day to source the parts for this..... Jun 6, 2013 - 9:08 PM

 ILoveMySilly97 QUOTE (rentaspace @ Jun 6, 2013 - 7... Jun 9, 2013 - 4:49 AM

 rentaspace QUOTE (ILoveMySilly97 @ Jun 9, 2013 - 4... Jun 9, 2013 - 7:44 AM
 Justin73 On a side note for these JDM lights and people fit... May 23, 2015 - 3:23 AM
 jordisonjr To clarify you WILL need this adapter regardless i... Aug 30, 2016 - 8:55 AM
  |
6 User(s) are reading this topic (6 Guests and 0 Anonymous Users)
0 Members:
| Lo-Fi Version | Time is now: November 30th, 2024 - 10:53 PM |


