
 Sep 18, 2006 - 12:23 AM Sep 18, 2006 - 12:23 AM
|
 
|
 Enthusiast  Joined Mar 8, '04 From Newport, RI Currently Offline Reputation: 63 (99%) |
there are a few ways to remove the sway bar end links. You need to remove them (or at least the top bolt) to change your rear struts (for lowering and such).
this is a commonly used and a very effective way here QUOTE spray the old links down really well with PB blaster like 15min before you start, put a 14mm boxed end wrench over the old end link bolt, turn it, to break it loose from the mounting tab. then get a 5mm allen SOCKET. this is what it looks like:  hammer it into the old endlink. attach a wrachet to the socket, and use that to hold the bolt in place, and turn the 14mm WRENCH, not the socket. ^^ taken from an old post by presure2 the problem is that our cars are getting older and bolts exposed to the elements tend to rust/sieze up, and with this method sometimes the allen wrench/allen socket would strip out the end link. As posted here by dustin15brown At this point there aren't too many options. The first time this happen to me, Manny (presure2) used a sawzall to cut through the old links. That took a long while and obviously we had to replace them. Since then we have run into the same stripped out allen hole problem again. Manny (presure2) had developed a new way to remove them without the hassles we have had before. here we go with the "JDM Guy" way tools needed : 14mm socket and rachet needle nose vise grips PB Blaster once you have gotten the wheel off things should look like this 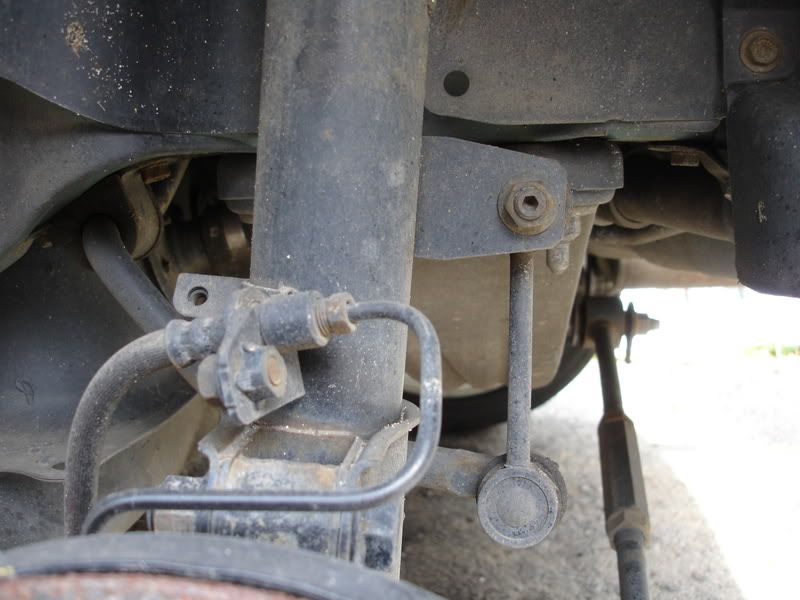 this is the end link 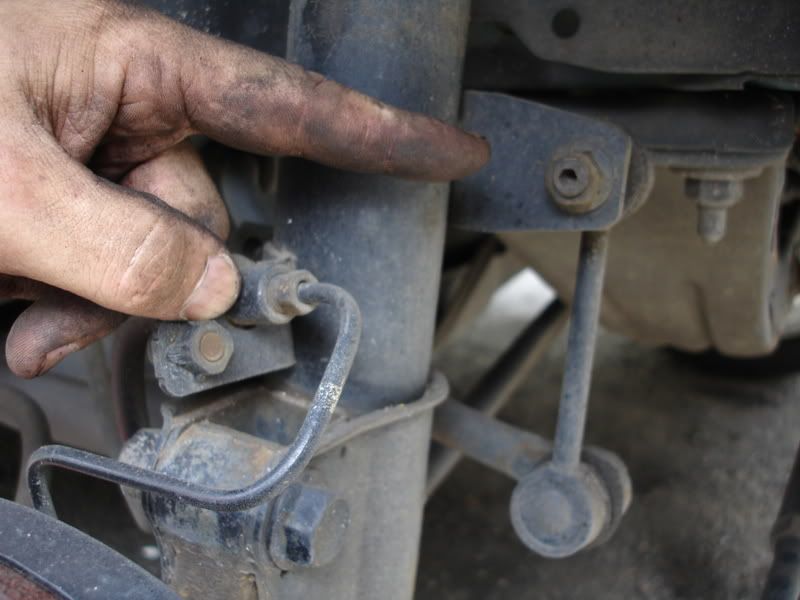 use this 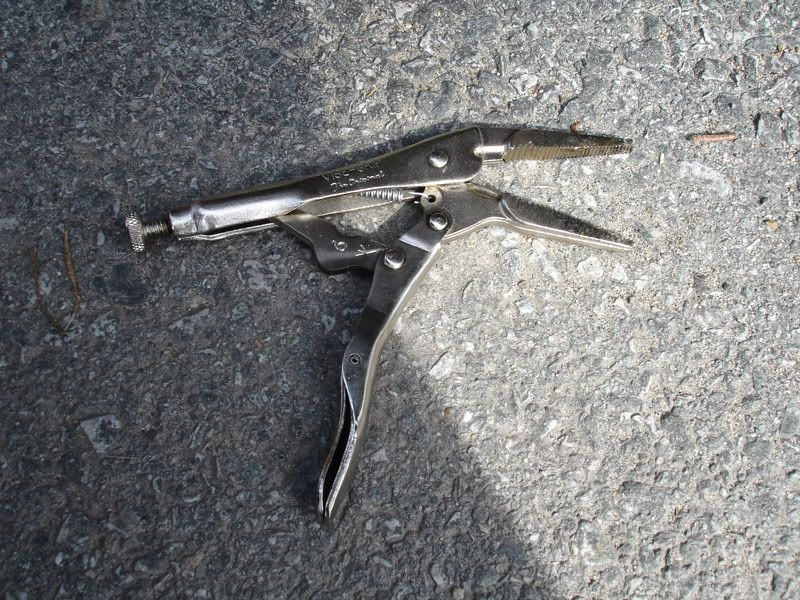 to do this 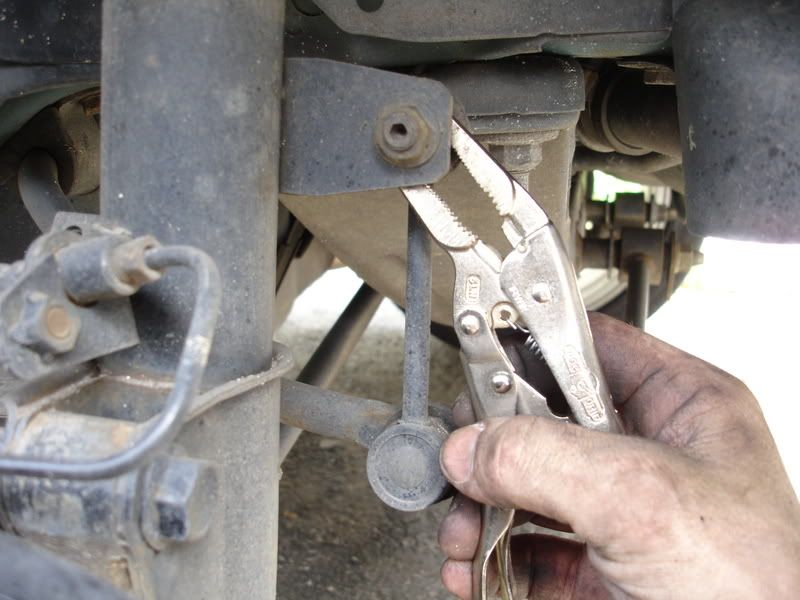 another angle 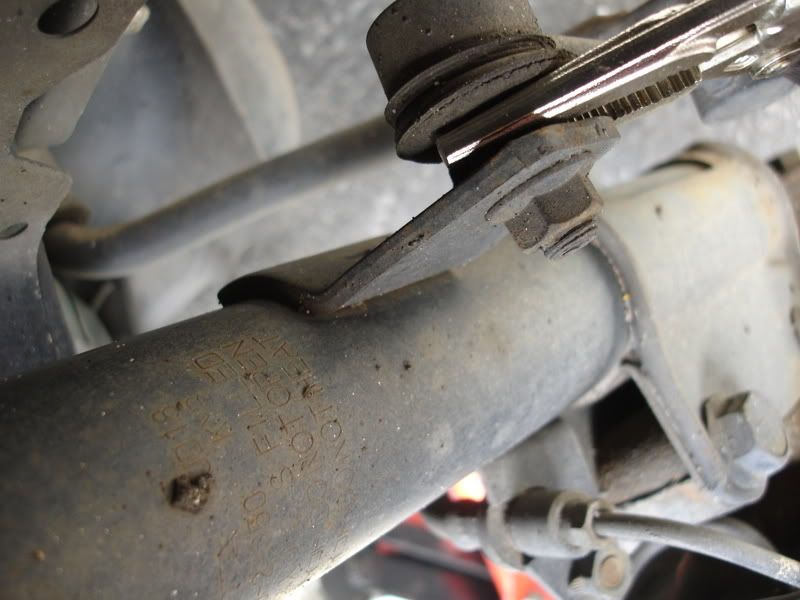 I then used a jack to lift up the knuckle to put less strain on the end link 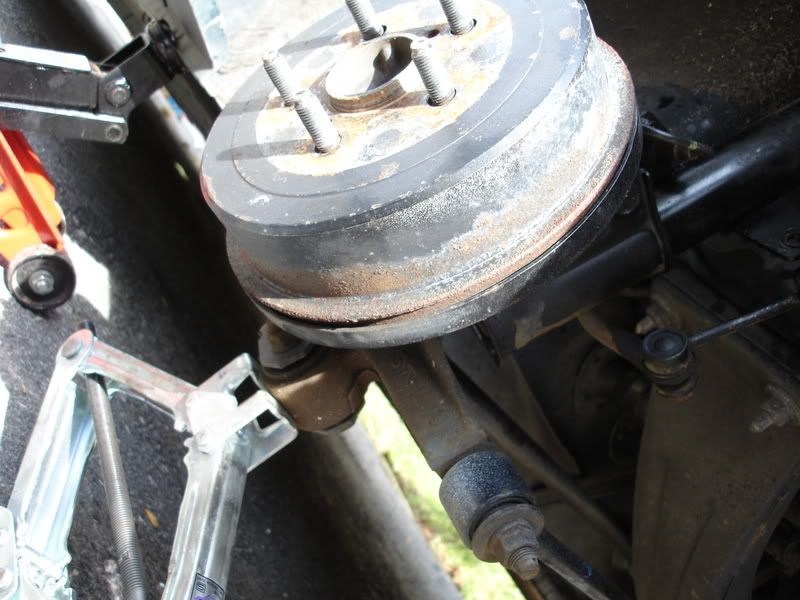 make sure the vise grips are not grabbing the boot of the end link, you do not want to tear it if you plan on reusing the link. also, make sure you spray things down with some PB Blaster to help the removal process then use the 14mm socket w/rachet to turn the nut holding the link 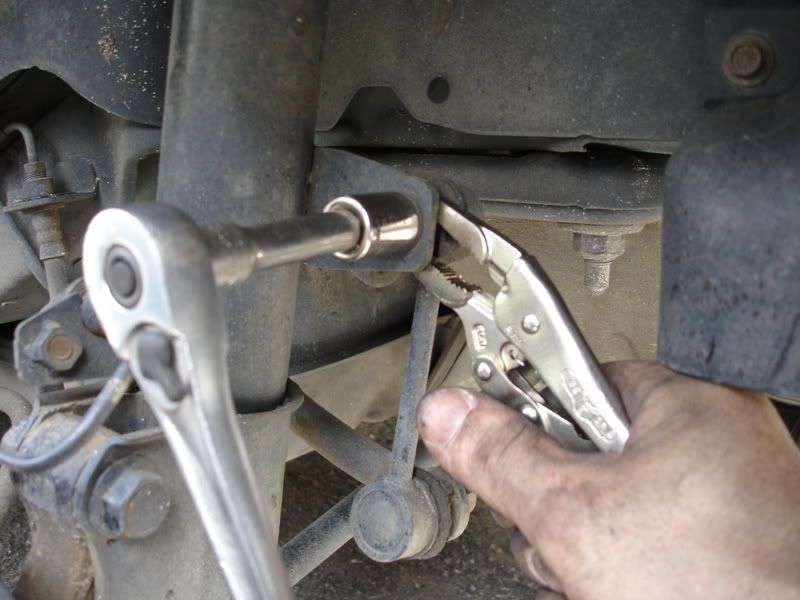 just make sure you hold the vise grips steady and remove the nut the end result should look like this  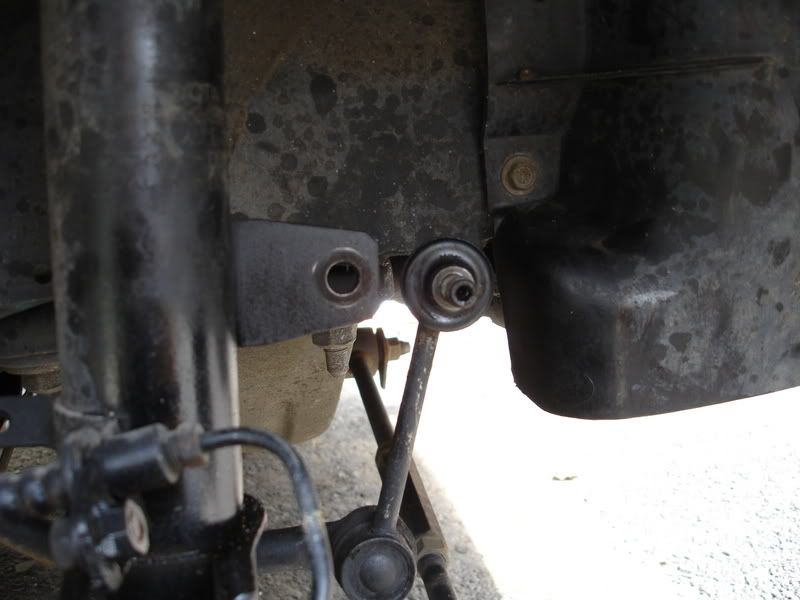 and another angle of the vise grips on the "lip" of the end link - between the boot and the threaded bolt 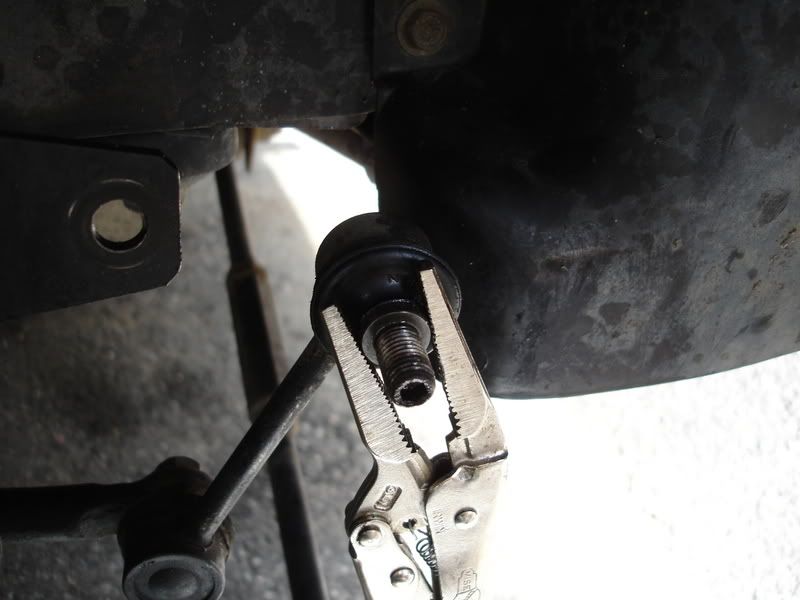 any questions ? -------------------- |


Posts in this topic
 Batman722 rear sway bar end link removal Sep 18, 2006 - 12:23 AM
 Coomer Good option.
I was just under that area last nig... Sep 18, 2006 - 1:02 PM orvillescelica ^ i had the same problem when i tried to use vice ... Sep 18, 2006 - 3:11 PM Bitter NOTHING worked for me, except that. the nut was t... Sep 18, 2006 - 3:18 PM orvillescelica If you do go the 'cut them off' route, che... Sep 18, 2006 - 3:49 PM
Coomer Good option.
I was just under that area last nig... Sep 18, 2006 - 1:02 PM orvillescelica ^ i had the same problem when i tried to use vice ... Sep 18, 2006 - 3:11 PM Bitter NOTHING worked for me, except that. the nut was t... Sep 18, 2006 - 3:18 PM orvillescelica If you do go the 'cut them off' route, che... Sep 18, 2006 - 3:49 PM
 Batman722 QUOTE(orvillescelica @ Sep 18, 2006 - 4... Sep 18, 2006 - 6:55 PM hurley97 QUOTE(Batman722 @ Sep 18, 2006 - 7:5... Sep 19, 2006 - 6:50 PM presure2 nice post D
added to the stickys! Sep 18, 2006 - 4:14 PM LewFX i tried pb blaster, a allen key, 14mm with okiers ... Sep 18, 2006 - 4:26 PM presure2 QUOTE(LewFX @ Sep 18, 2006 - 5:26 PM... Sep 18, 2006 - 5:54 PM orvillescelica QUOTE(LewFX @ Sep 18, 2006 - 2:26 PM... Sep 18, 2006 - 4:53 PM Culpable04 I have stronger rear end links, I don't know t... Sep 18, 2006 - 5:59 PM j0e_p3t QUOTE(LewFX @ Sep 18, 2006 - 2:26 PM... Sep 18, 2006 - 10:00 PM hitcachi QUOTE(j0e_p3t @ Sep 18, 2006 - 10:00... Sep 19, 2006 - 12:55 AM Bitter do they use gratuitous amounts of road salt in neb... Sep 19, 2006 - 12:40 PM azian_advanced ^ try doing it on a car with 400+k kms with tons o... Sep 19, 2006 - 1:01 PM lxarmijo hey i was told that my end links could be loose an... May 17, 2007 - 10:56 AM
Batman722 QUOTE(orvillescelica @ Sep 18, 2006 - 4... Sep 18, 2006 - 6:55 PM hurley97 QUOTE(Batman722 @ Sep 18, 2006 - 7:5... Sep 19, 2006 - 6:50 PM presure2 nice post D
added to the stickys! Sep 18, 2006 - 4:14 PM LewFX i tried pb blaster, a allen key, 14mm with okiers ... Sep 18, 2006 - 4:26 PM presure2 QUOTE(LewFX @ Sep 18, 2006 - 5:26 PM... Sep 18, 2006 - 5:54 PM orvillescelica QUOTE(LewFX @ Sep 18, 2006 - 2:26 PM... Sep 18, 2006 - 4:53 PM Culpable04 I have stronger rear end links, I don't know t... Sep 18, 2006 - 5:59 PM j0e_p3t QUOTE(LewFX @ Sep 18, 2006 - 2:26 PM... Sep 18, 2006 - 10:00 PM hitcachi QUOTE(j0e_p3t @ Sep 18, 2006 - 10:00... Sep 19, 2006 - 12:55 AM Bitter do they use gratuitous amounts of road salt in neb... Sep 19, 2006 - 12:40 PM azian_advanced ^ try doing it on a car with 400+k kms with tons o... Sep 19, 2006 - 1:01 PM lxarmijo hey i was told that my end links could be loose an... May 17, 2007 - 10:56 AM  |
2 User(s) are reading this topic (2 Guests and 0 Anonymous Users)
0 Members:
| Lo-Fi Version | Time is now: February 18th, 2025 - 7:53 PM |