 May 3, 2015 - 8:07 AM May 3, 2015 - 8:07 AM
|
|
|
Enthusiast   Joined Dec 17, '02 From UK Currently Offline Reputation: 0 (0%) |
I saw this as a bit of a project, because although I had a few pointers off the web from QP swaps on other cars, I couldn't find any specific or detailed info for the gen 6. It was very much a case of try it and see.
My original quarter panel had a combination of a heavy impact right on the wheel arch, some smaller dents and serious corrosion on the lower/sill - making it beyond worthwhile salvage. Originally I planned to buy a brand new panel, but the only available was original Toyota at over £500. After searching, I found a good second hand panel in a local scrapyard for £75, original paint (i.e. no hidden repairs/filler etc.) and also off a standard car (not full of holes from body kit etc.). The scrapyard cut it out from the donor car still attached to the inner shell (as pic). They do this because its much quicker than separating it from the shell as you will see later. The recommended place to cut is at the middle and rear pillars. You need to make sure you get the area behind the tail lights too. 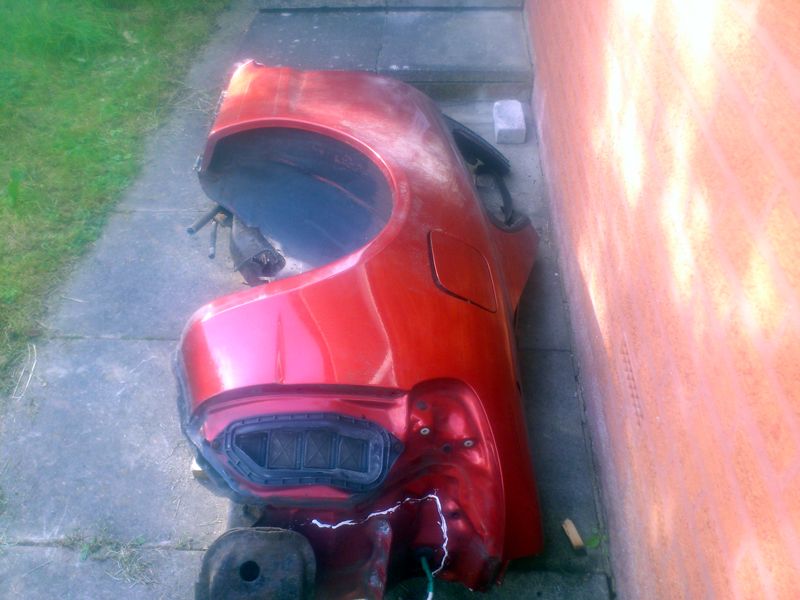 Swapping the QP out on most modern cars is a big task.. make no mistake. It's really a last resort if it's too damaged or corroded to repair. But there is a positive on the gen 6 - the rear pillar is relatively narrow and flat making it easier later on when re-joining and blending the QP to the car. The middle pillar is covered by the window and trim so doesn't need to look cosmetically perfect. The QP is held on to the inner shell by around 130 spot welds. Some are easily visible like the ones along the sill or wheel arch. Some are hidden under trim, the bumper, rear lights, tailgate rubber and the rear quarter glass. There is also plenty of seam sealer along most of the spot welded areas. Opinions vary as best way to remove spot welds - I chose to drill out completely but some use spot weld cutters. Wheel arch: 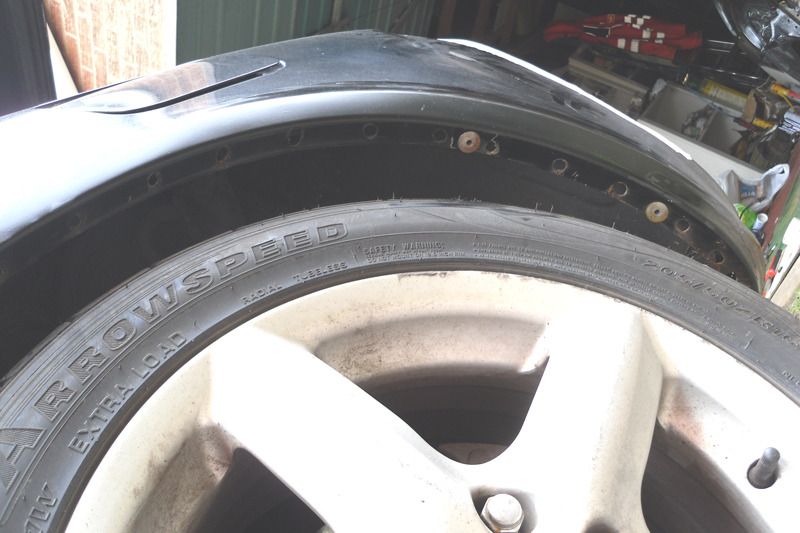 Tail gate: 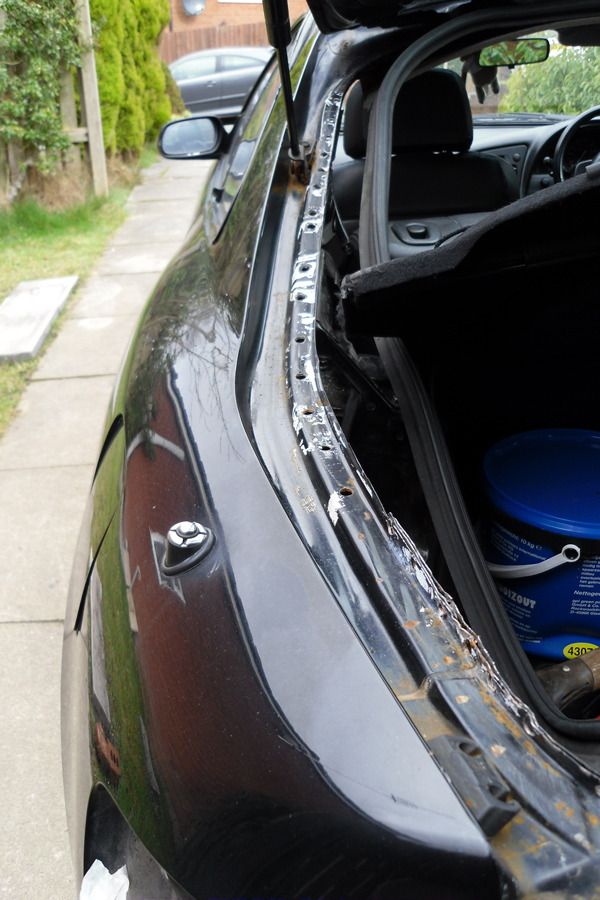 Behind bumper/tail light area: 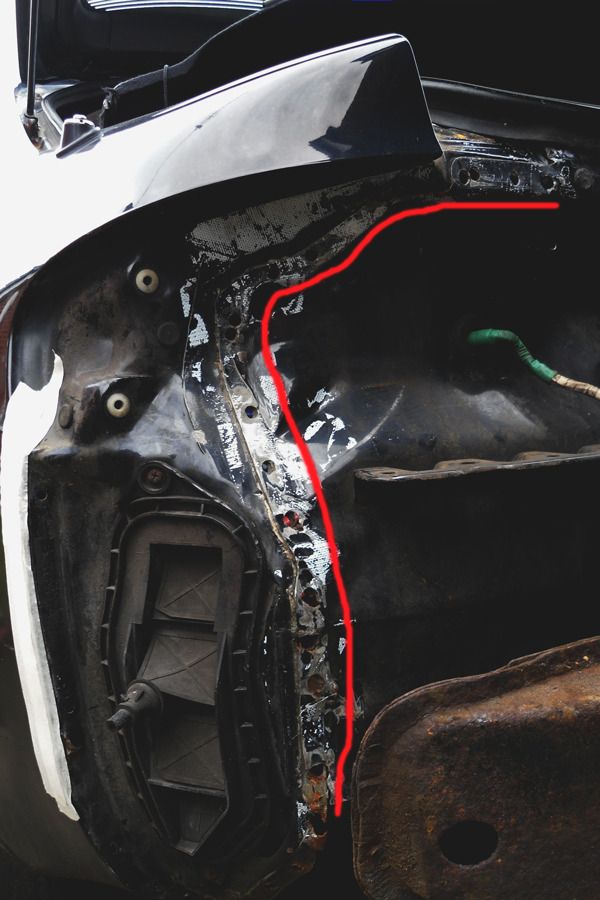 Centre pillar area: 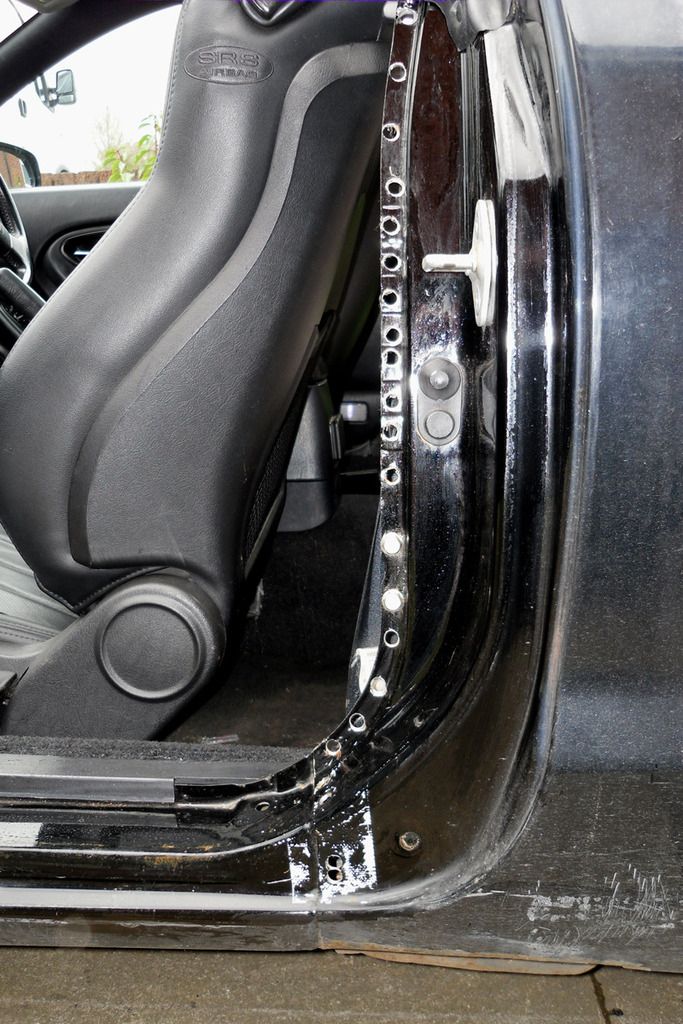 Lower centre pillar into sill area: 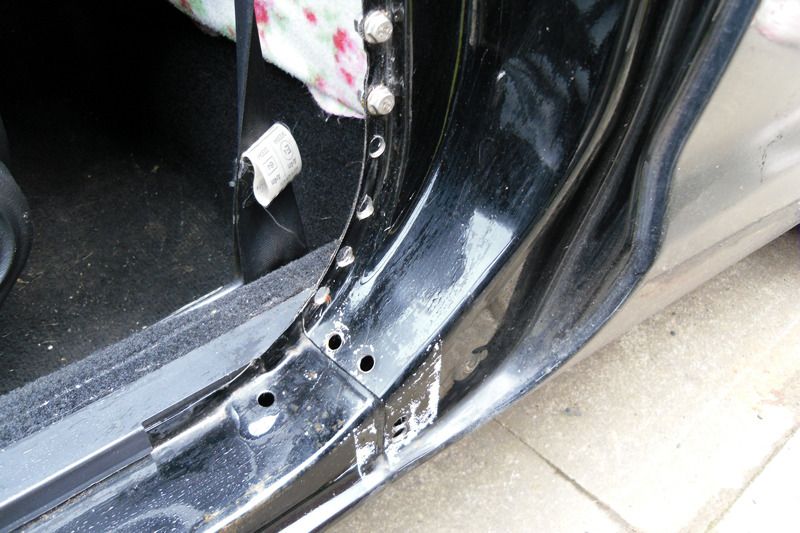 The rear quarter glass needs to come out in this process. As its bonded in, the sealant that holds it in will need cutting to free it. I followed various guides, using a cut off knife. It was tough going and I found it tricky not to catch the glass or bodywork so take care. Some suggest using 'piano wire' or similar but you may end up with cosmetic damage to the window's trim. I managed to remove mine intact, but it later spontaneously cracked and then shattered With the glass out, and after removing the remnants of any sealant, you can see the spot welds that require removing. If you're removing the QP on the fuel cap side, you will also need to open the flap and undo the 4 bolts circled (to remove the inner cap's surround trim) and undo the big nut for the flap's catch. Fuel flap area: 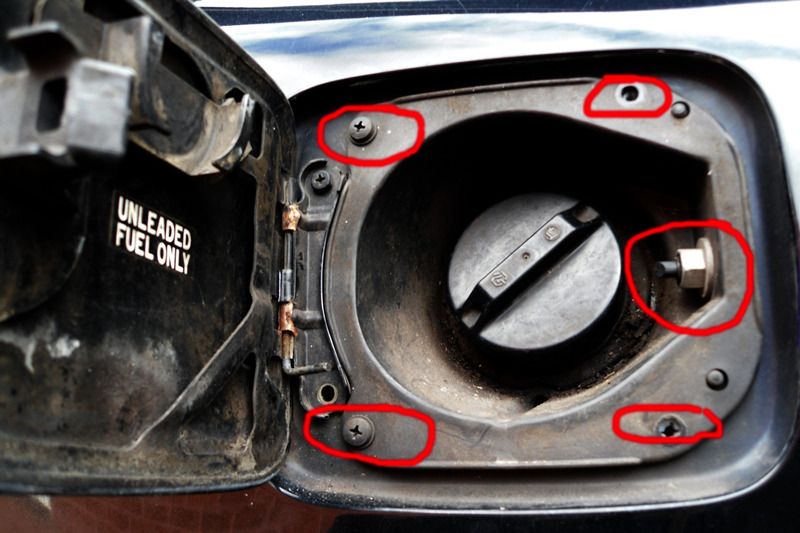 When you undo the catch, it will fall back into the inner arch. Don't worry, its easy to get hold of again through the boot area with the boot trim removed. If there is an aerial fitted to the QP, this will obviously also have to be removed too. With all the spot welds out, its time to cut the QP at the pillars. You only want to remove the outer shell so don't cut too deep. Taking care getting a straight and accurate cut will make it easier when trying to join the new panel later. The rear pillar is tricky because the tailgate gets in the way a little. I managed just about, but it may be easier with it removed altogether. In any case you will have to unbolt the tailgate strut on the side being removed and support the tailgate with something else during the process. Be sure to double check the cut points so they match the new QP that will be going in it's place. You want a very slight gap that will be better for welding. I used a Ryobi multi-tool, which is a bit like a heavy duty Dremel. It gave a very fine cut but other tools may be suitable. Quarter panel cut end pillar: *Note this pic also shows some of the spot welds that were previously covered by the glass. 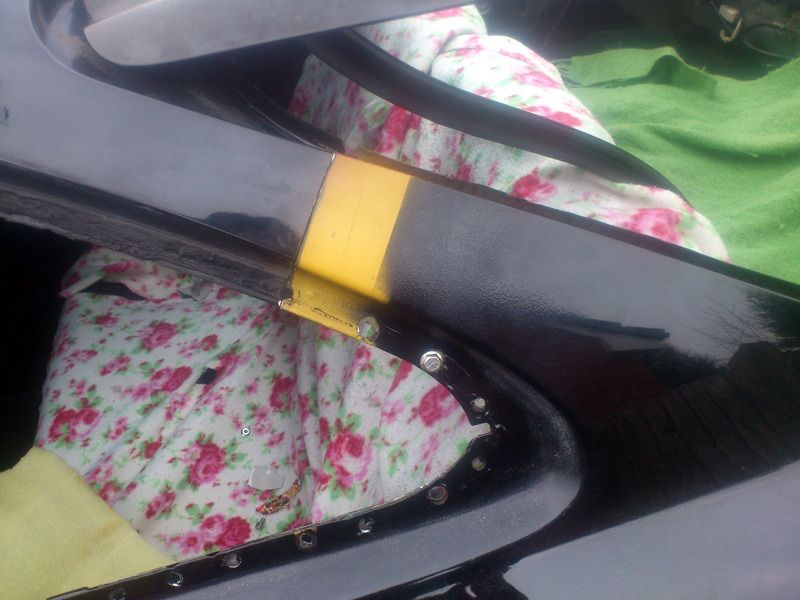 Quarter panel cut mid pillar: 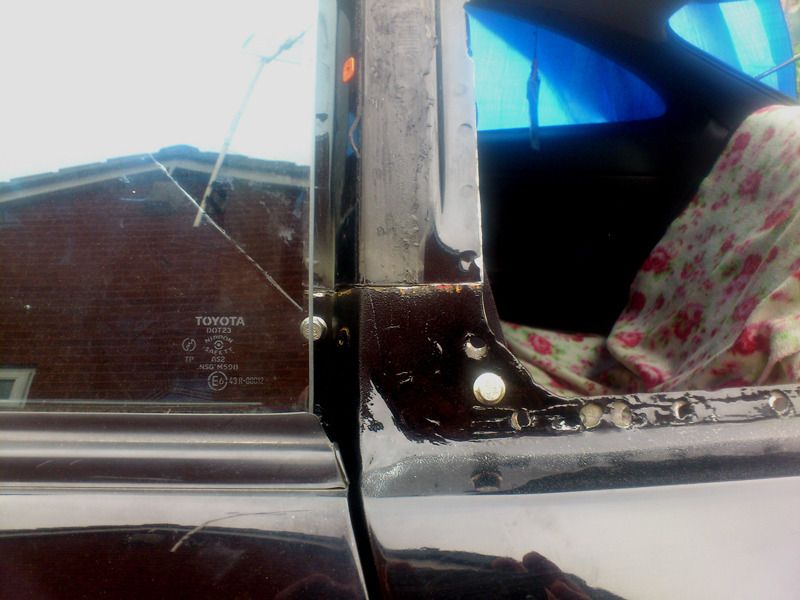 With the QP cuts made, you'll find it still stuck to the inner shell quite hard because of all the seam sealer they put on at the factory. In some places the assistance of a heat gun will help loosen its grip especially in the wheel arch area. Just take care if working around the fuel cap area. You'll also need to undo the door courtesy light switch from the panel. Now is a good time to inspect it for any corrosion or other damage (in my case some rust, and bent inner wheel arch) and repair as necessary. Its then time to trial fit the replacement panel and trim if necessary. Watch out for the tail light area, where the edge of the panel is sandwiched between two pieces of the car body. Once you're happy with the fit, apply plenty of seam sealer between the panel and the car's inner shell and re-fit. Some of the spot weld holes match up and some don't.. What I used initially to temporarily hold the QP in place was short stainless bolts. These would be sufficient to hold the panel on , but depending on regulations in your country, you may have to attach the quarter panel the same way it was attached from the factory to pass any inspection/test etc. i.e. welded/spot welded. Removal in progress: 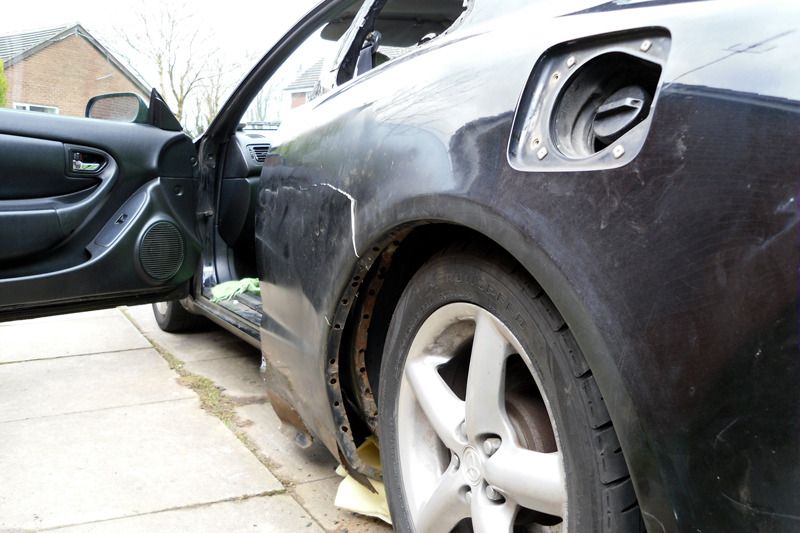 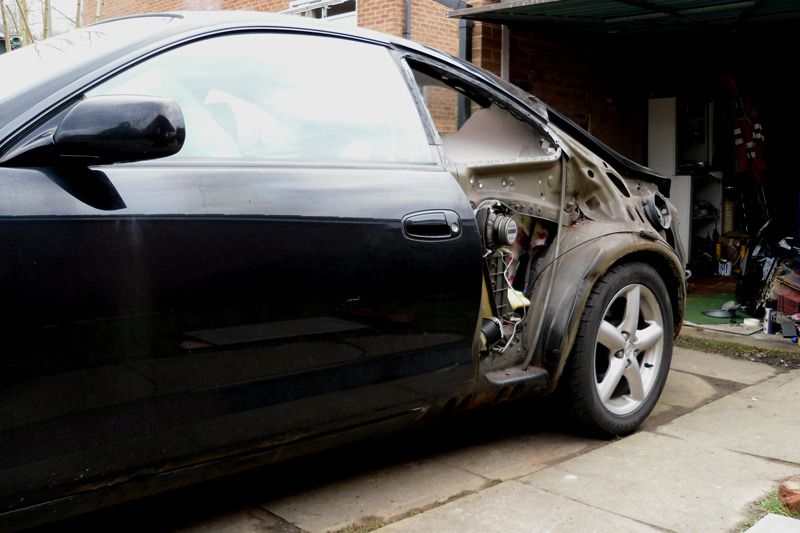 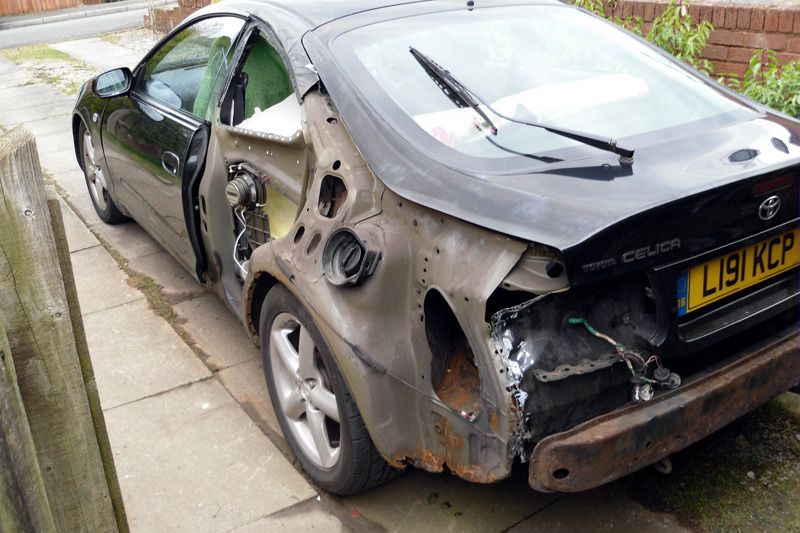 New QP in place: 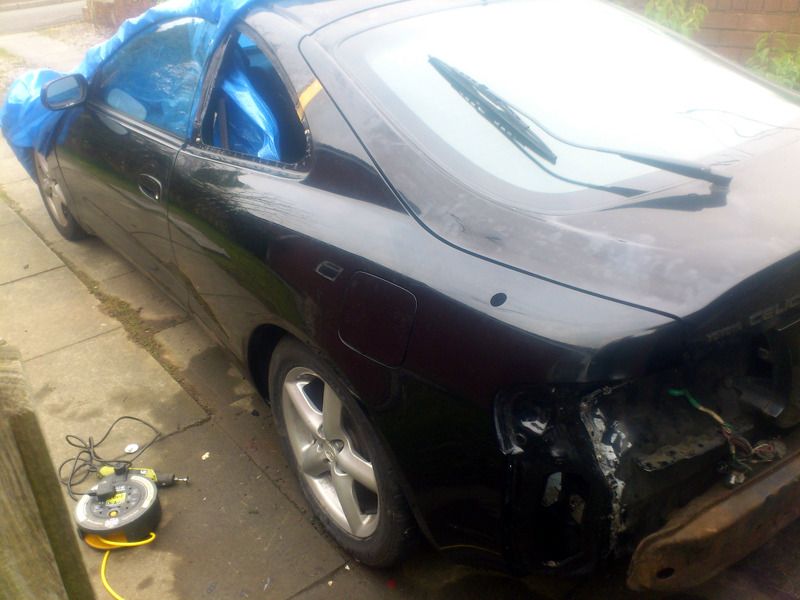 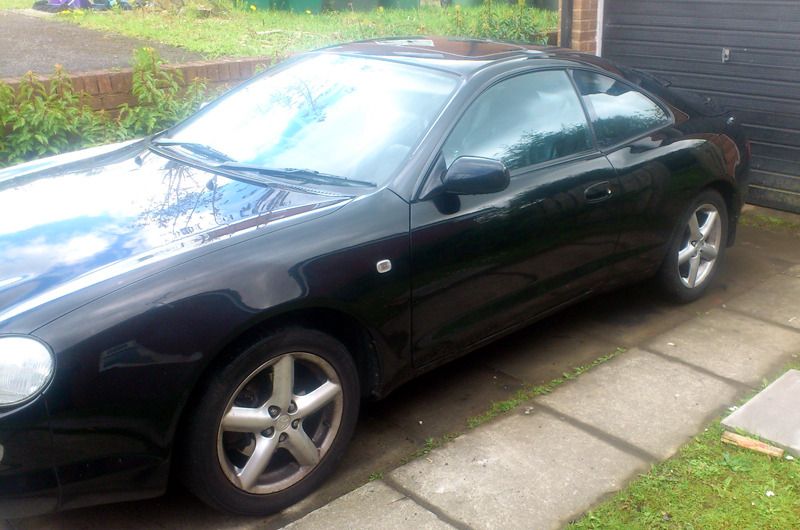 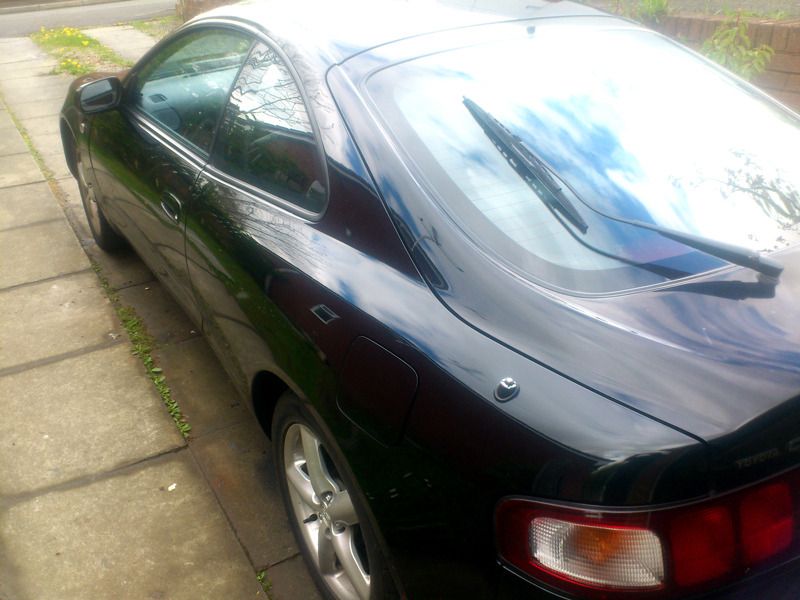 Blending in the join at the rear pillar was not as difficult as it might have been because its relatively flat and narrow. This is best done while the glass is still out. It took me a couple of attempts to get perfect, because black shows the slightest defect in the surface, and in the end I had to take the paint all the way along the narrow roof panel to where it ends at the windscreen. I had no issues at all with alignment of the panel, and all the close lines and panel gaps were fine. Despite the car's paint being old, once polished up it matched extremely well to the panels new paint. Of course you could always leave the tricky filler and paintwork to a body shop. This post has been edited by Tony-94: May 4, 2015 - 3:51 AM -------------------- Facelift bumper-foglights-clear indicators, clear side repeaters, 16in O.Z alloys, stainless steel grill. JDM facelift tail lights. clear sidelights. Retro-fit A/C conversion. APEX performance springs. Remus exhaust. K&N performance filter. KYB excel G shocks.
Hyundai coupe Mk 3 (US Tiburon) leather seats. Gen 7 s/wheel. SR black vinyl door cards. Late spec spoiler-less tailgate with 3rd brake light. |
Posts in this topic
 Tony-94 Tony-94's quarter panel swap project/guide May 3, 2015 - 8:07 AM
 njccmd2002 Thats an awesome job. Did you get the rusty part ... May 3, 2015 - 11:09 AM

 Tony-94 Cheers
QUOTE (njccmd2002 @ May 3, 2015 ... May 4, 2015 - 3:34 AM
 Jmk91 You did a good job with the paint as well, looks l... May 3, 2015 - 8:55 PM
 cheela wow!!! amazing work!
I vote we st... May 3, 2015 - 11:28 PM
 bloodMoney very cool. Thanks for sharing! May 4, 2015 - 10:18 AM
  |
2 User(s) are reading this topic (2 Guests and 0 Anonymous Users)
0 Members:
| Lo-Fi Version | Time is now: November 27th, 2024 - 12:42 AM |


