  |
 Apr 5, 2015 - 2:26 PM Apr 5, 2015 - 2:26 PM
|
|
|
Enthusiast   Joined Jul 1, '14 From Hawaii Currently Offline Reputation: 3 (100%) |
So on my first attempt of course i removed the needles, but I did recalibrate them afterward. All was good, until i realized one of the gauges themselves didn't work due to the rear circuit board (of the speedometer) broke while the RPM signal i could never get quite right... So i bought a new set of gauges and figured id leave them on this time. Sure enough you don't need to remove the gauge face to get the green crap off!
NOTE: All my pictures were taken after i had already removed the green tint Things you'll need: Phillips screwdriver Acetone 400 or 600 grit sandpaper about 30 q-tips/cotton swabs First you need to remove all 3 gauges from the gauge cluster housing. There should be 6 holding the fuel and temp gauge in. 4 holding the Speedometer in. And 3 Holding the Tachometer in. Once you have all 3 out, start with the Tachometer it will be the easiest. Get your sandpaper and slide it in between the gauge face and the clear plastic 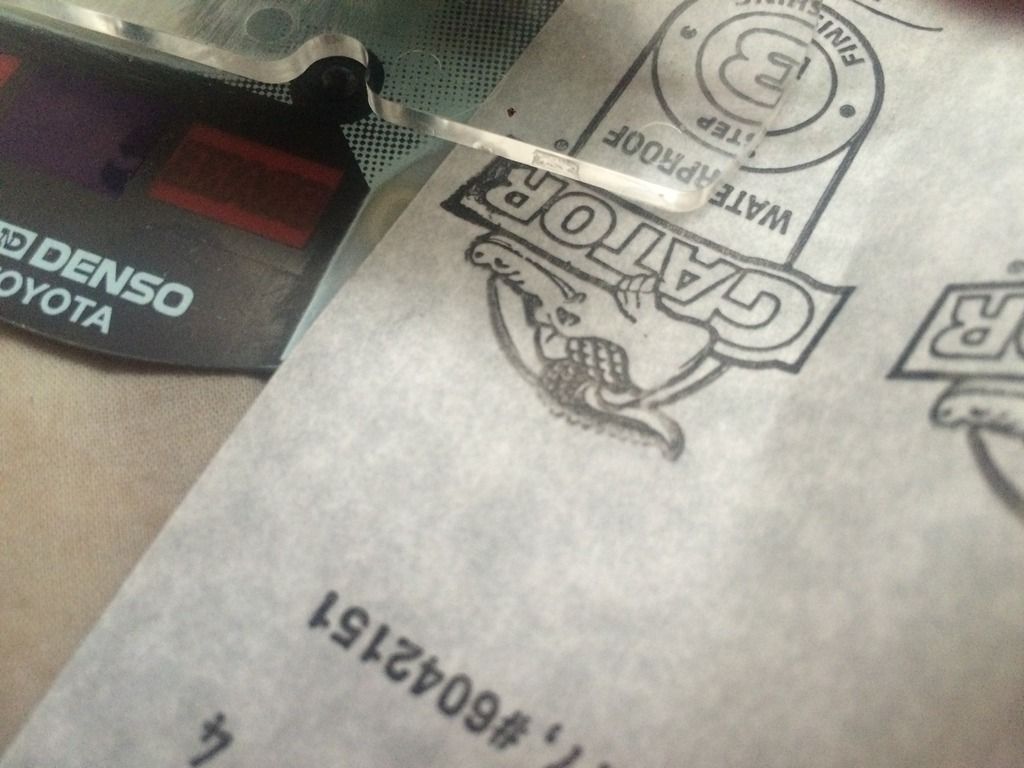 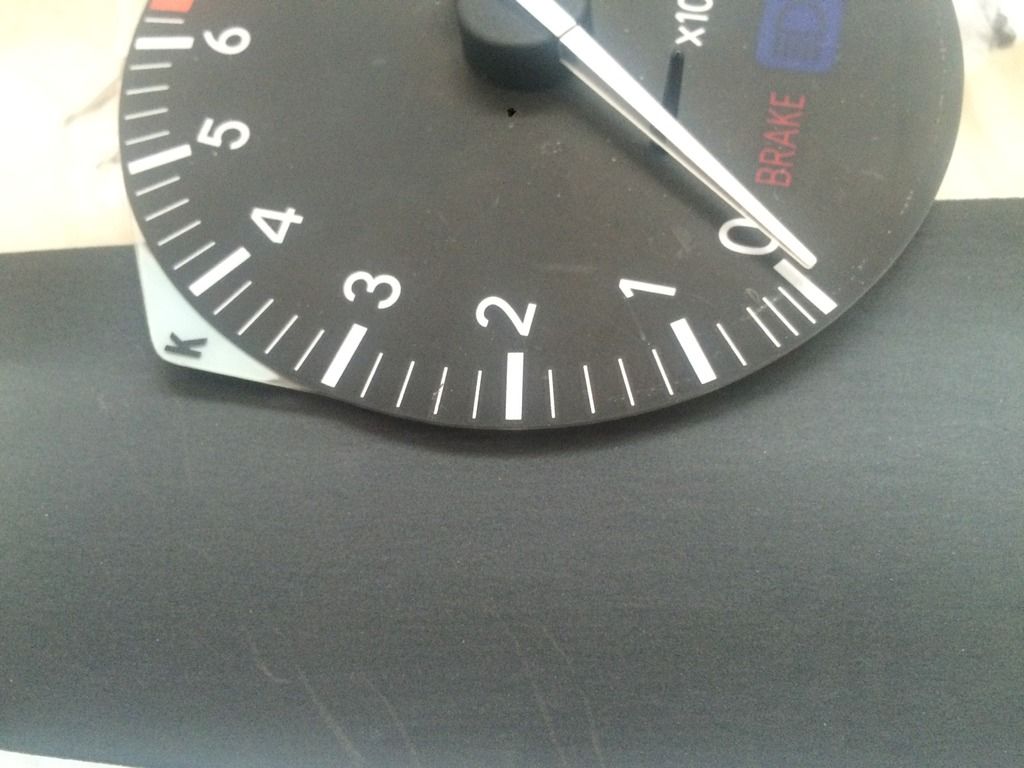 Then rest your finger down on the area you want sanded such as on the numbers and the tick marks, id start with the numbers though 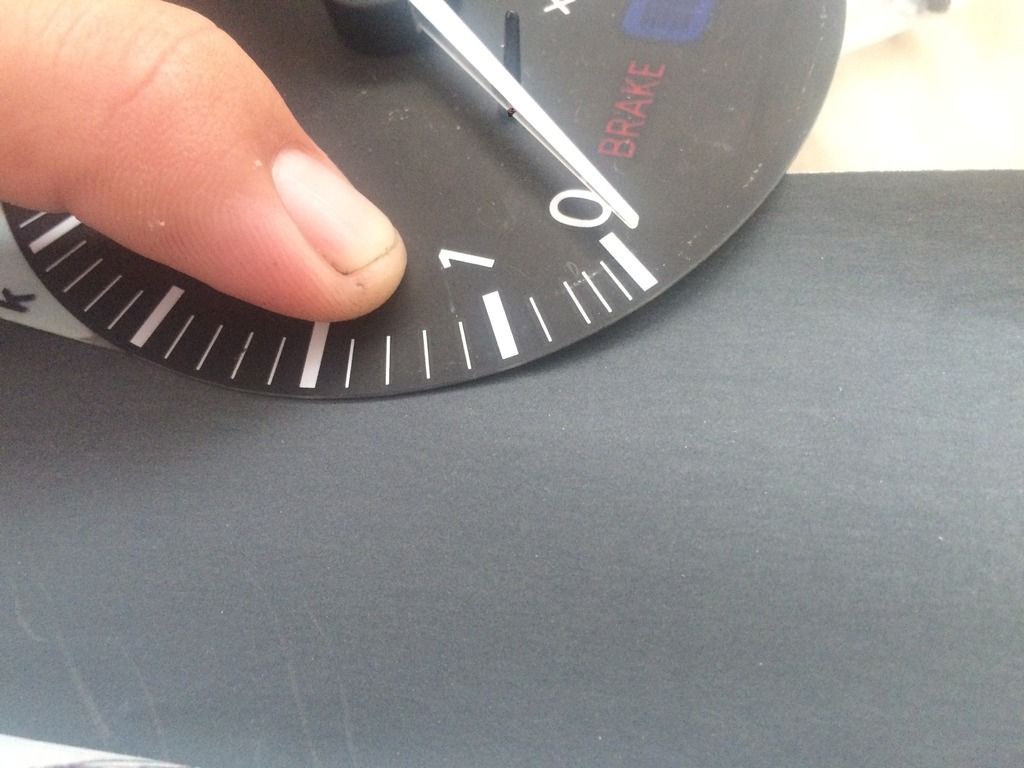 At this point you're not trying to sand off the green tint. You're just scuffing up the back so the acetone will have an easy time removing the stuff. You want to minimize the time the acetone is on the plastic as it will make it brittle and when you lift it, it will crack a little if you're not careful (ask me how i know...) Once everything is scuffed up, take your q tip, and acetone, dip the tip in the acetone and slide it under the gauge face. BE CAREFUL NOT TO GET THE ACETONE ON THE TOP OF THE GAUGE FACE!! lift the gauge face with your finger, NOT the q tip... don't get lazy! 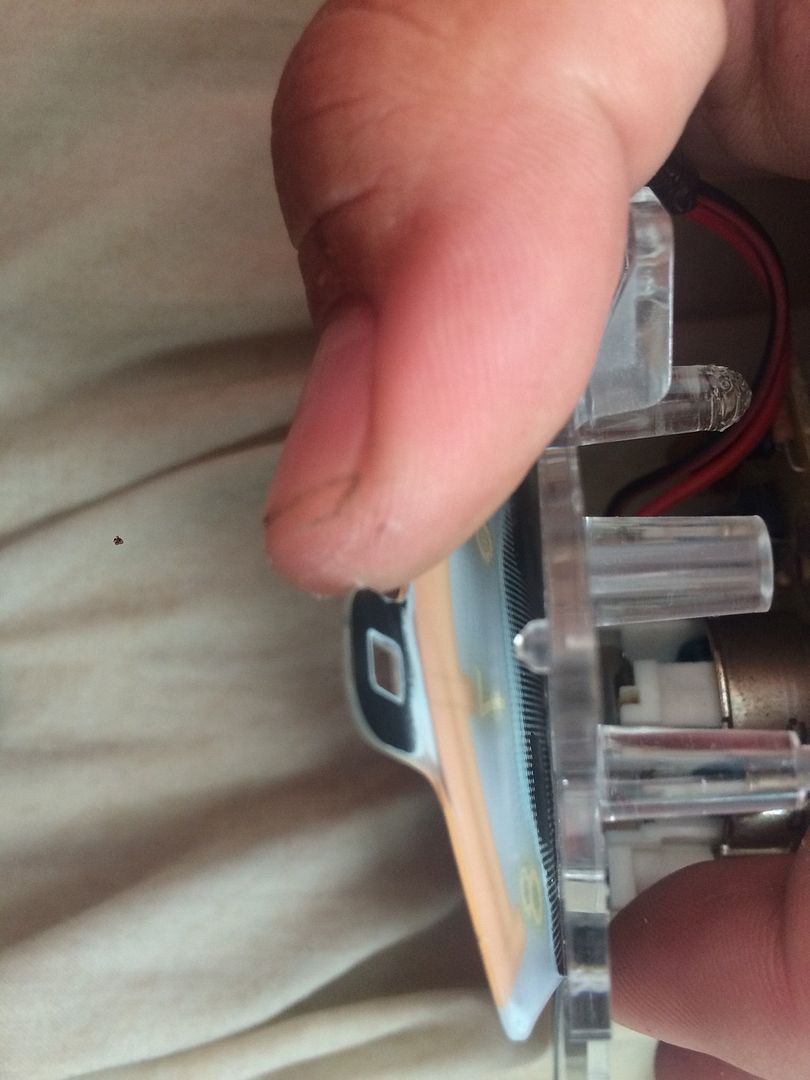 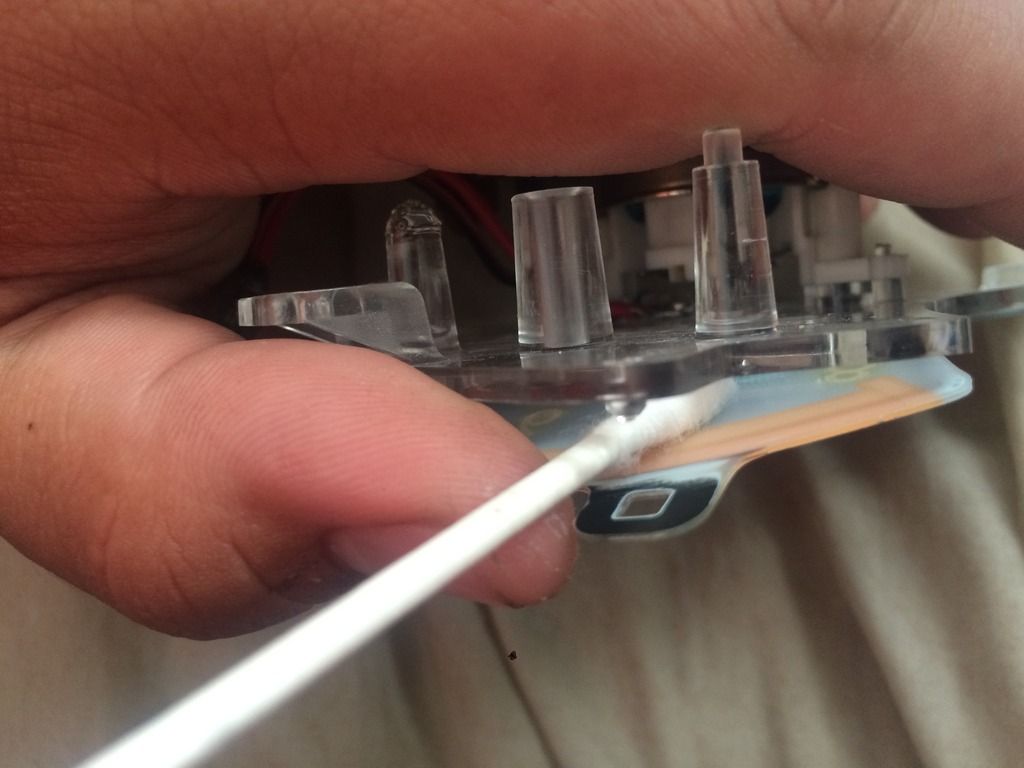 rub the acetone around on the areas you want to be "clear" rather than green tinted, it will take a few wipes to clean up the area to be "clear" I noticed spinning the q tip worked better than swabbing the area. When working on the area thats under where the needle rests, move it out of the way and lifting the gauge face will hold it in place 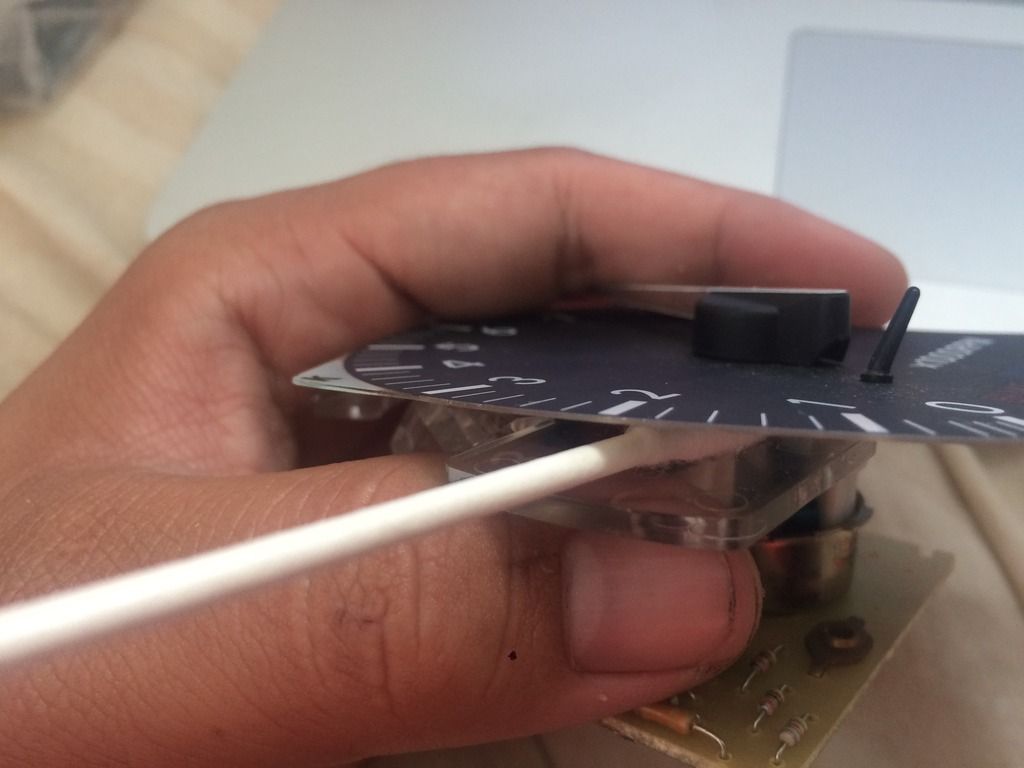 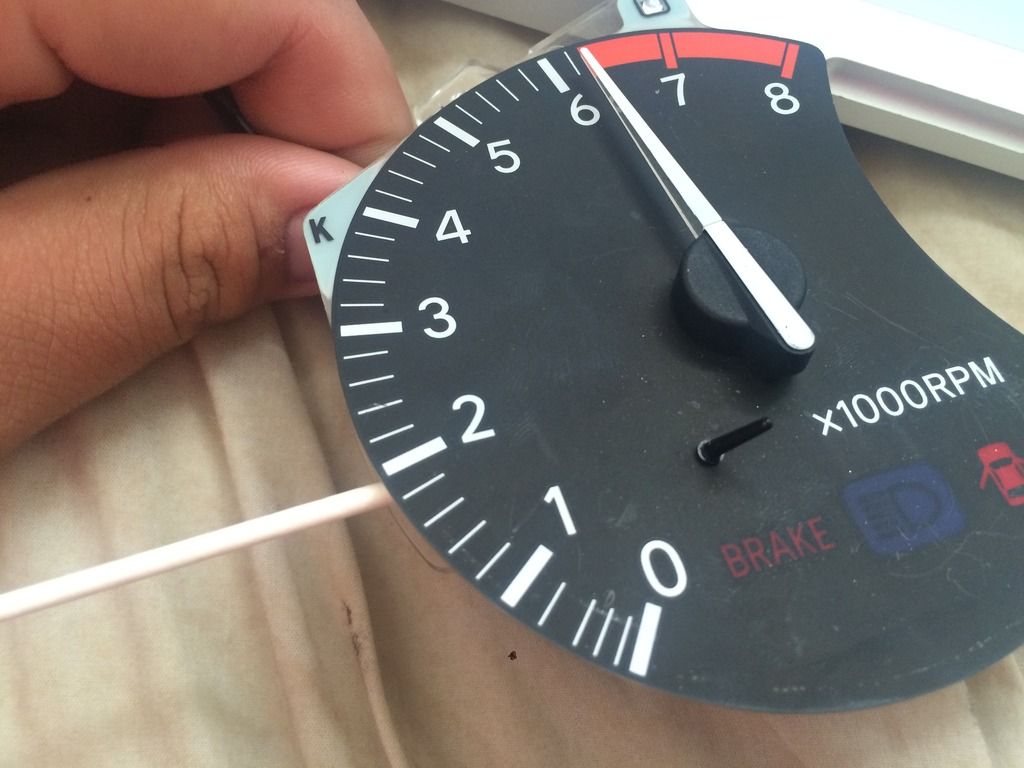 NOTE: If you're working on it and liquid starts building up on the front side (the black front) of the gauge face, don't be alarmed, just leave it for now. All it is, is the humidity in the air condensing on the surface due to the rapid cooling from evaporation that the acetone is providing to the back of the area you're working on. Feel free to wipe it off with a microfiber cloth/paper towel Enjoy your gauge faces! Any questions? Ask away Edit: Also for anyone wondering, those two red and black wires are running to LEDs that have been mounted under the needle so i can have a different need color from the rest of the gauges. The black dot in the lower or upper part of the pictures depending on orientation is from a speck of something IN my phones camera lens sorry! This post has been edited by Noahwhite2014: Apr 10, 2015 - 4:32 AM |
 Apr 5, 2015 - 3:02 PM Apr 5, 2015 - 3:02 PM
|
|
|
Enthusiast      Joined May 10, '10 From MA Currently Offline Reputation: 37 (100%) |
What green tint are you talking about? The gels over the bulbs are what creates a green tint. Put white LEDs in and its turns it white. Same with any other color.
|
 Apr 5, 2015 - 3:08 PM Apr 5, 2015 - 3:08 PM
|
|
 Enthusiast     Joined Apr 12, '13 From Bulgaria Currently Offline Reputation: 53 (100%) |
What green tint are you talking about? The gels over the bulbs are what creates a green tint. Put white LEDs in and its turns it white. Same with any other color. You are mistaken, the tint on the back needs to be removed, especially for white. -------------------- |
 Apr 5, 2015 - 3:22 PM Apr 5, 2015 - 3:22 PM
|
|
|
Enthusiast      Joined May 10, '10 From MA Currently Offline Reputation: 37 (100%) |
Really? I never knew there was a green tint on the back. Looks like I learned something today.
|
 Apr 5, 2015 - 3:25 PM Apr 5, 2015 - 3:25 PM
|
|
|
Enthusiast   Joined Jul 1, '14 From Hawaii Currently Offline Reputation: 3 (100%) |
What green tint are you talking about? The gels over the bulbs are what creates a green tint. Put white LEDs in and its turns it white. Same with any other color. You are mistaken, the tint on the back needs to be removed, especially for white. Yup! the only one you'll actually see a noticeable difference on is white, red, and yellow. especially with 5500-6000k LEDs it looks like an really light spring green color. BLEH! 4000-4500k and under it will almost APPEAR 5000-5500k but will not be very bright for your average LED |
 Apr 5, 2015 - 5:25 PM Apr 5, 2015 - 5:25 PM
|
|
 Enthusiast      Joined Dec 26, '09 From Albuquerque, NM Currently Offline Reputation: 19 (100%) |
You're awesome!! Great write-up - this should be stickied.
So if you leave the gauge faces on, no recalibration is needed and it's just plug and play back in? This post has been edited by HectortheRican: Apr 5, 2015 - 5:25 PM -------------------- taking too long to mod since '09
June '12 COTM '95 AT200 |
 Apr 5, 2015 - 6:42 PM Apr 5, 2015 - 6:42 PM
|
|
|
Enthusiast   Joined Jul 1, '14 From Hawaii Currently Offline Reputation: 3 (100%) |
You're awesome!! Great write-up - this should be stickied. So if you leave the gauge faces on, no recalibration is needed and it's just plug and play back in? Yup just screw the correct screws back in, no recalibration needed. If you fiddle with the needle a little too much it may end up being a little bit off (not even 1mph different lol), but it should revert back after sitting in its original spot again |
 Apr 10, 2015 - 1:09 AM Apr 10, 2015 - 1:09 AM
|
|
|
Enthusiast   Joined Mar 10, '11 From New Jersey Currently Offline Reputation: 1 (100%) |
Great write up, thanks !
-------------------- 94' Celica GT Manual |
 Jul 29, 2015 - 8:45 PM Jul 29, 2015 - 8:45 PM
|
|
|
Enthusiast    Joined Jan 25, '15 From United States Currently Offline Reputation: 4 (100%) |
Thank you kindly sir. I just installed 5600k leds and I was horrified from the results lol. I had purple leds in it previously but it just looked funky. I will be doing this tomorrow! The baby poop green gauge color isn't for me!
|
 Aug 3, 2015 - 4:50 PM Aug 3, 2015 - 4:50 PM
|
|
|
Enthusiast Joined Jul 29, '15 From Utah Currently Offline Reputation: 0 (0%) |
Is this the only Gen that uses the green behind the faces? I was just in there last night and put blue L.E.D's in. Will see how it looks.
|
  |
1 User(s) are reading this topic (1 Guests and 0 Anonymous Users)
0 Members:
| Lo-Fi Version | Time is now: December 1st, 2024 - 4:49 AM |


