  |
 Mar 14, 2010 - 1:27 AM Mar 14, 2010 - 1:27 AM
|
|
|
Enthusiast    Joined Aug 11, '09 From Buffalo, NY Currently Offline Reputation: 15 (100%) |
Excellent. Good to know, lol I guess I don't have to worry too much then.
--------------------  |
 Mar 16, 2010 - 9:18 AM Mar 16, 2010 - 9:18 AM
|
|
|
Enthusiast Joined Feb 1, '10 From Long Island Currently Offline Reputation: 7 (100%) |
[quote name='Espo' date='Mar 14, 2010 - 1:27 AM' post='840011']
Excellent. Good to know, lol I guess I don't have to worry too much then. [/quote/] Here's mine, I have to take a couple of pics at night though since they look awesome glowing.  
|
 Mar 17, 2010 - 3:15 PM Mar 17, 2010 - 3:15 PM
|
|
|
Enthusiast    Joined Aug 11, '09 From Buffalo, NY Currently Offline Reputation: 15 (100%) |
I'm doing this now, will show how to do this and keep your courtesy lights working - give me an hour or two.
Edit: Uploading and resizing now. Edit2: That video might take a tad...will post as soon as it's all said and done. This post has been edited by Espo: Mar 17, 2010 - 10:17 PM --------------------  |
 Mar 19, 2010 - 2:28 AM Mar 19, 2010 - 2:28 AM
|
|
|
Enthusiast    Joined Aug 11, '09 From Buffalo, NY Currently Offline Reputation: 15 (100%) |
Sorry for the delay, I went to bed while the video loaded up and then had to work today, so heere we go!
This will keep your courtesy lights working and have your door sills light up! 1. First, you'll need a set of these for this to work much more quickly than my route did. They need to be for 23+ gauge wire, although my connection was solid nonetheless...the female disconnects (pink things) were too large for the epicenter though. 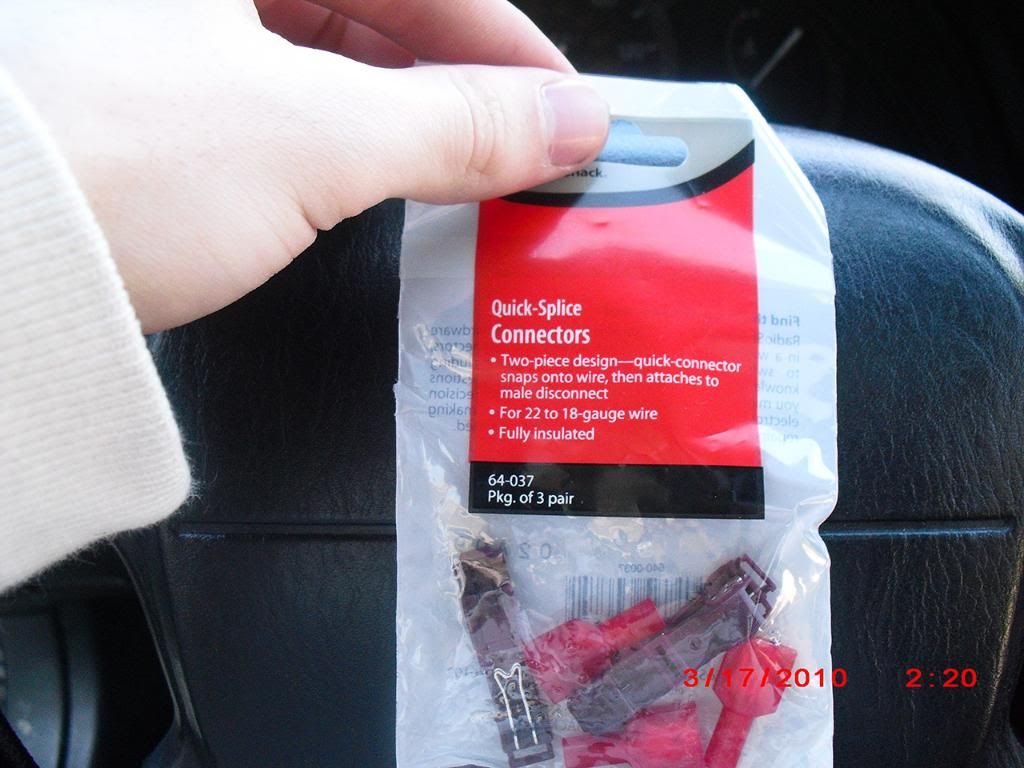 2. Pick your door panel to place the epicenter on. I chose passenger side because the epicenter was easier to hide. I started with my driver's side first and switched to the passenger side after weighing my options, so this pic is the driver's side, but crimp your splicer onto both wires. 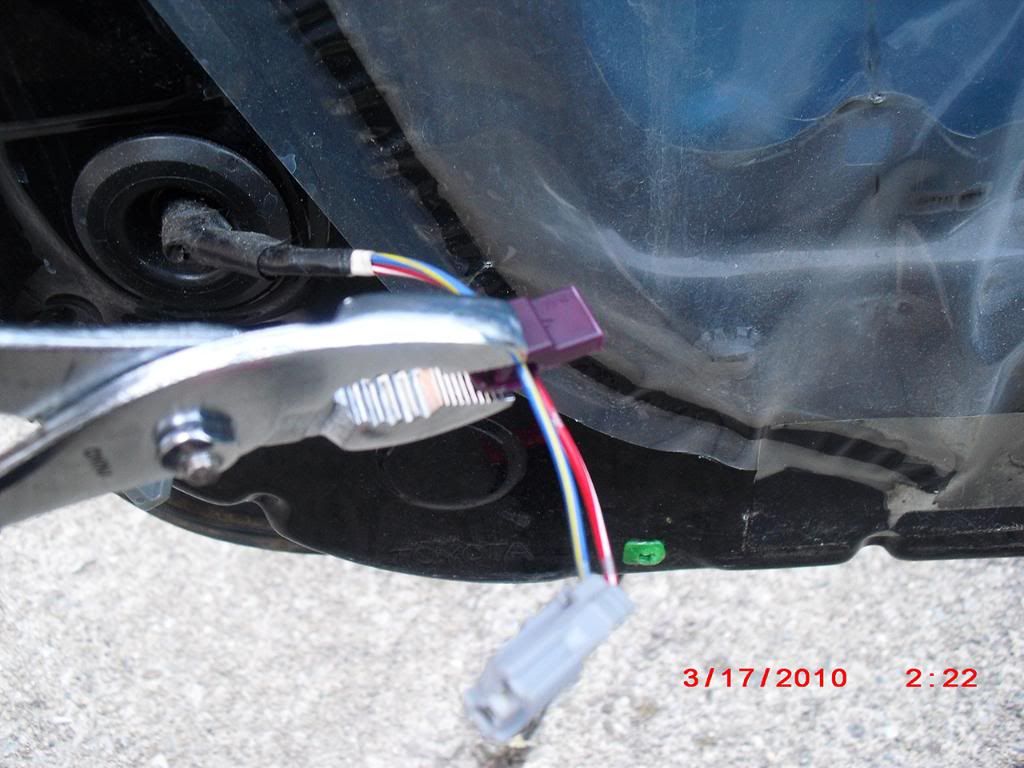 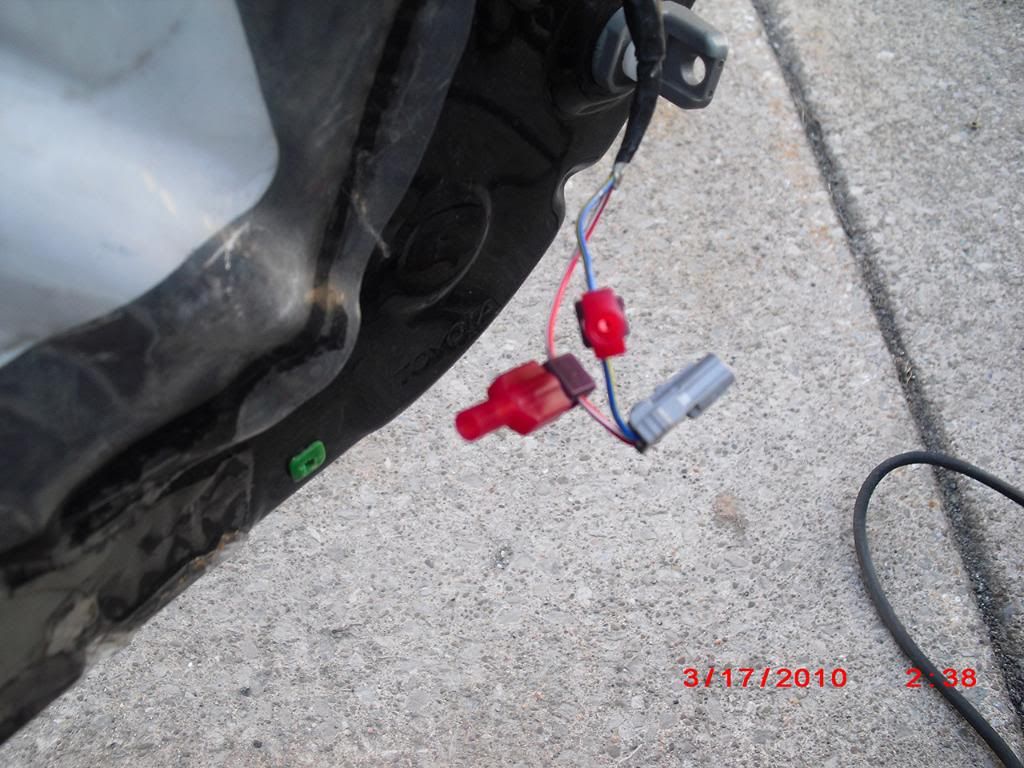 3. Now here's where my problem started. As mentioned, my female disconnects were too large for the epicenter wires - you can tell when the epicenter has a solid connection because it will make a high pitched whine. Said disconnects wouldn't hold the wires in place...so here's where things got complicated for me (and will for you too, if you can't find smaller gauge crimps than I did.) If you run into this problem, remove your crimps (break the plastic if you have to, you won't need them) and then VERY CAREFULLY bend the wire into a U shape where the two crimp marks are. Then, proceed to shave off the insulation with a sharp pair of scissors, again, VERY CAREFULLY, or else you'll cut the actual wires and won't have a working courtesy light. 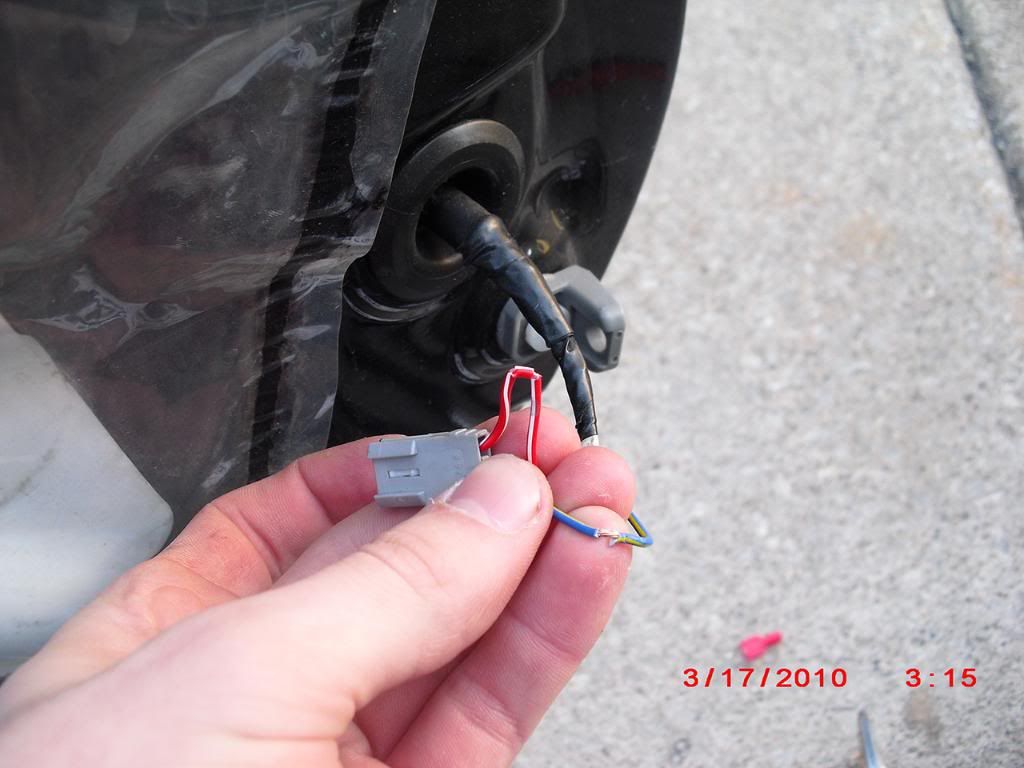 You should end up with something similar to this if you get the insulation off correctly (sorry for bad quality, dunno what happened on the shot. Enlarge it to full size to see.): 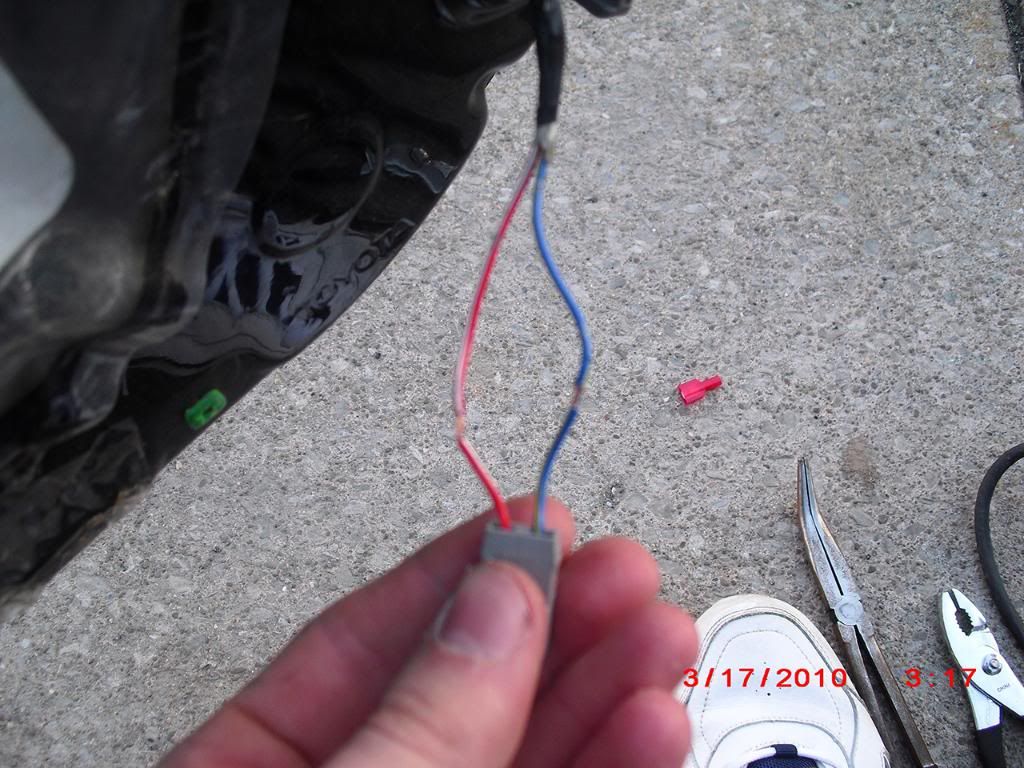 4. Take your white and white/red epicenter wires and join them to the stripped part of your wires any way you choose. I chose to solder mine. Always make sure you use electrical tape if you solder your joints too, to prevent short circuits. The epicenter wires are not polarized, so you can reverse them from my picture if you so chose. 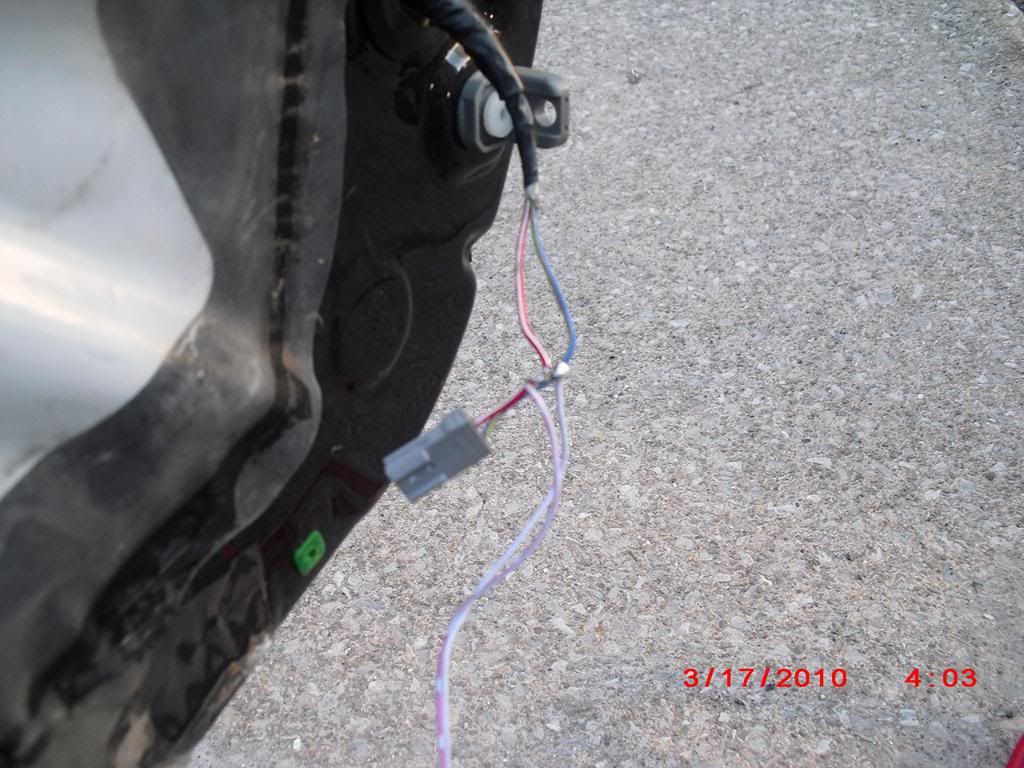 5. Next, remove your plastic door sill on the side you're working on and mount the electroluminescent one. Make sure you clean the door sill with a plastic cleaner and lint free cloth, or else you risk your door sills coming unmounted. Join your nearest door sill to your epicenter. Again, I chose to solder, you may do it differently. Heat shrink, cobbed with electrical tape, etc etc. 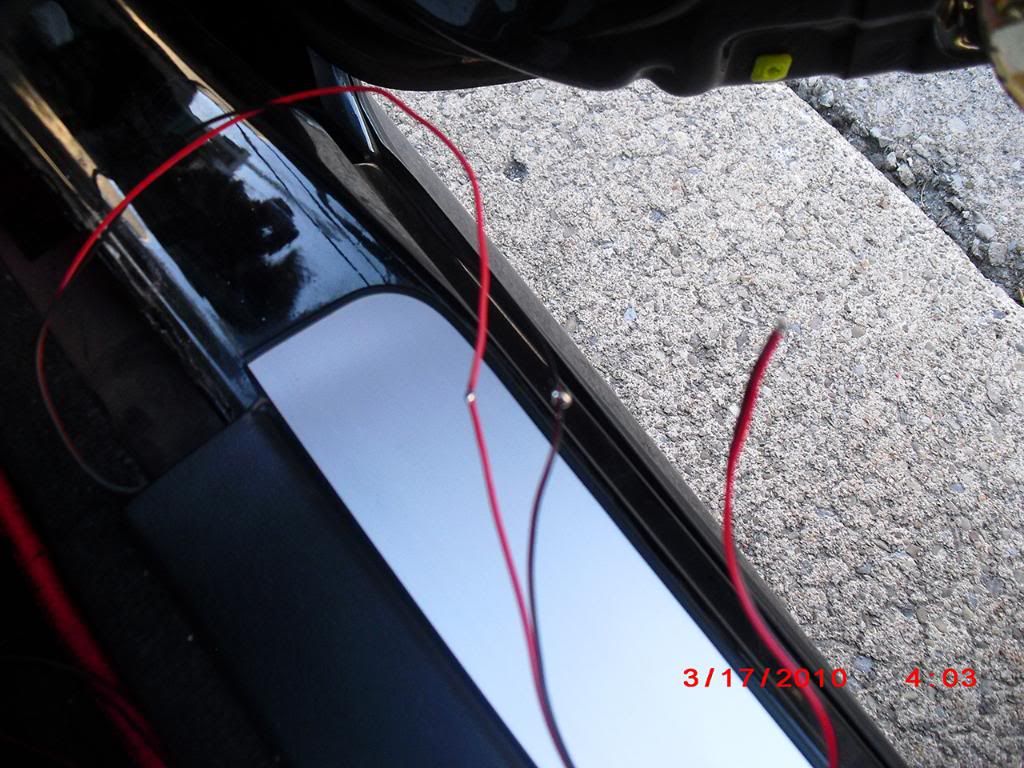 6. Untape your extension wires. Mount your far side door sill to the plastic the same way as before, then join your door sill to the extension wires, making sure to match colors, as these are polarized and will not work if reversed. Or, may turn on when your doors are closed and off when they're not, I don't know. I just know they're polarized. After you mount the door sill, keep the entire sill unclipped from the floor, as you'll need to hide your wires in the next step. 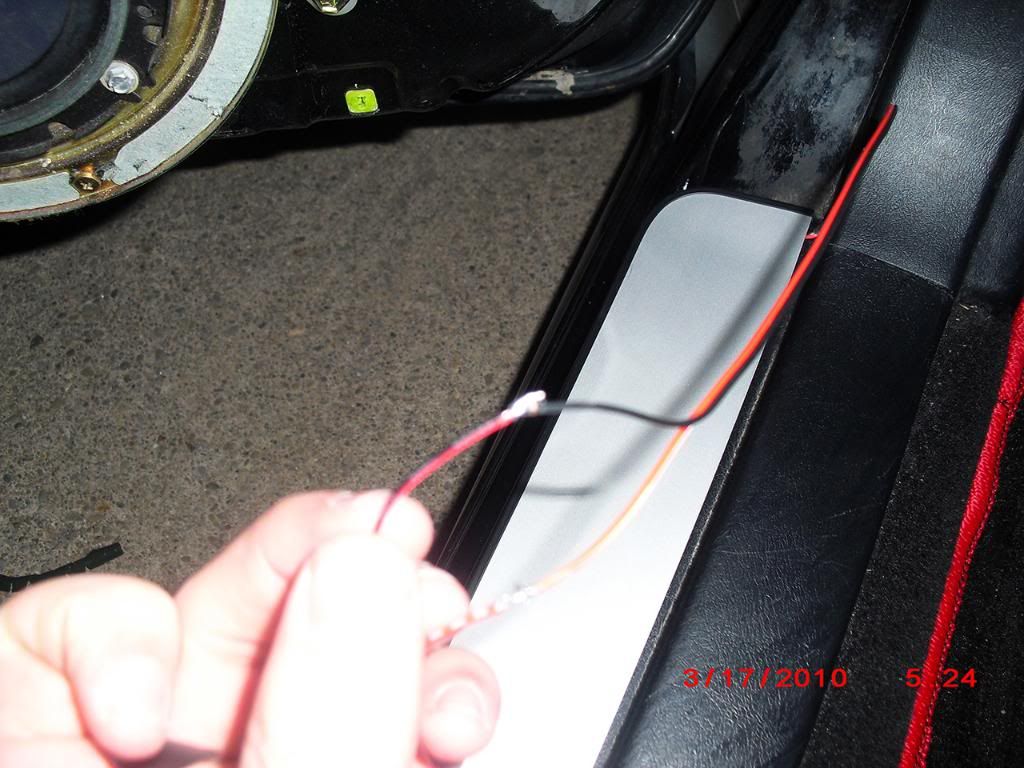 7. Run the extension wires under the carpeting. Since my far side is the driver's side, I needed to remove the plastic piece with a screw in it to get the carpet up, which is right next to the foot rest, which you will also need to remove if your far side is the driver's side. Run them around the center console (A couple zip ties tied together, with one tightened around the wire will make this infinitely easier than trying to ease it through the console while leaning over the shifter) and over to the epicenter. Then, join your wires to the epicenter. 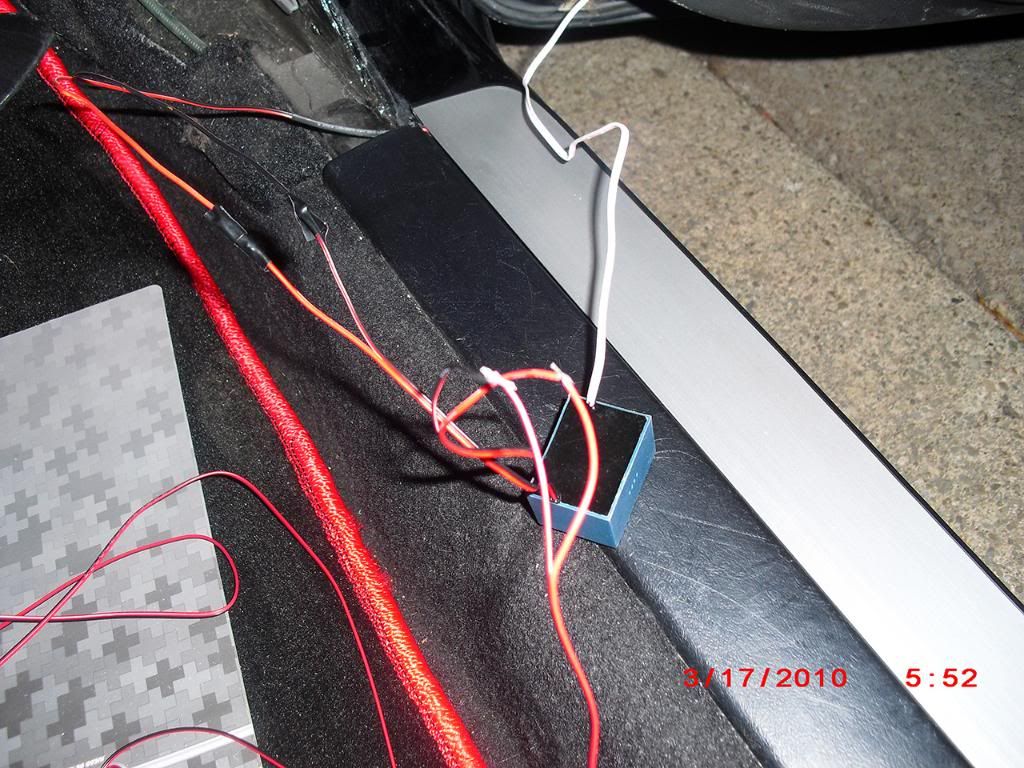 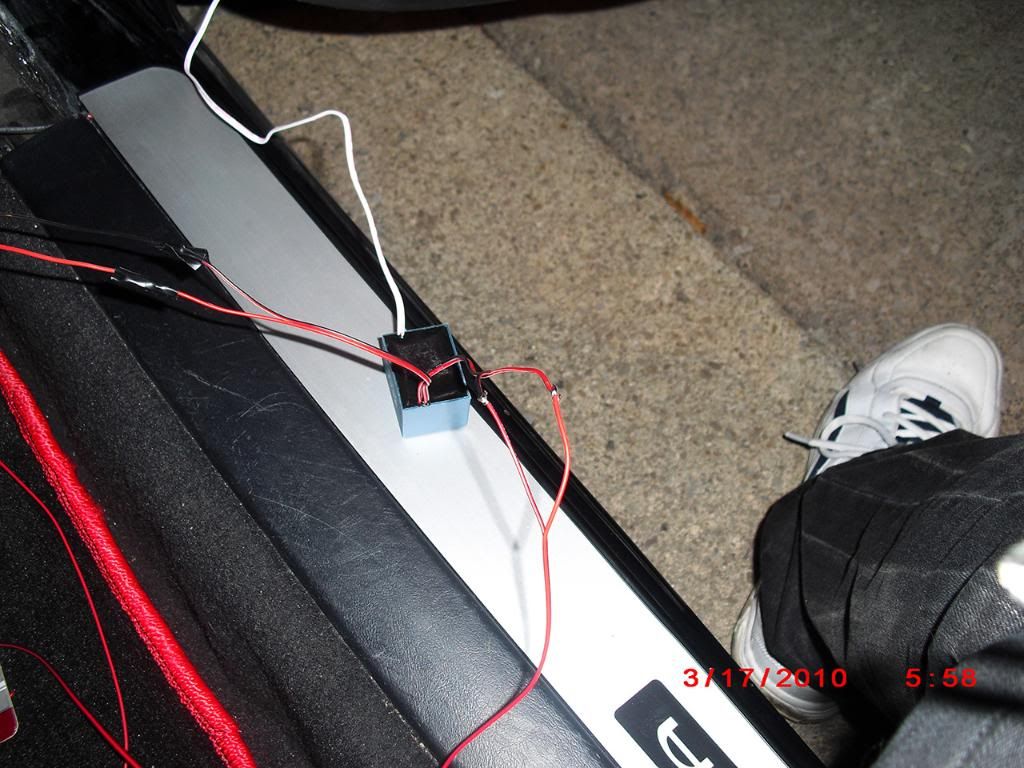 8. Replace your carpeting. I chose to hide the epicenter in the plastic on the far side of the footwell. Use the mounting tape provided to secure it in place. 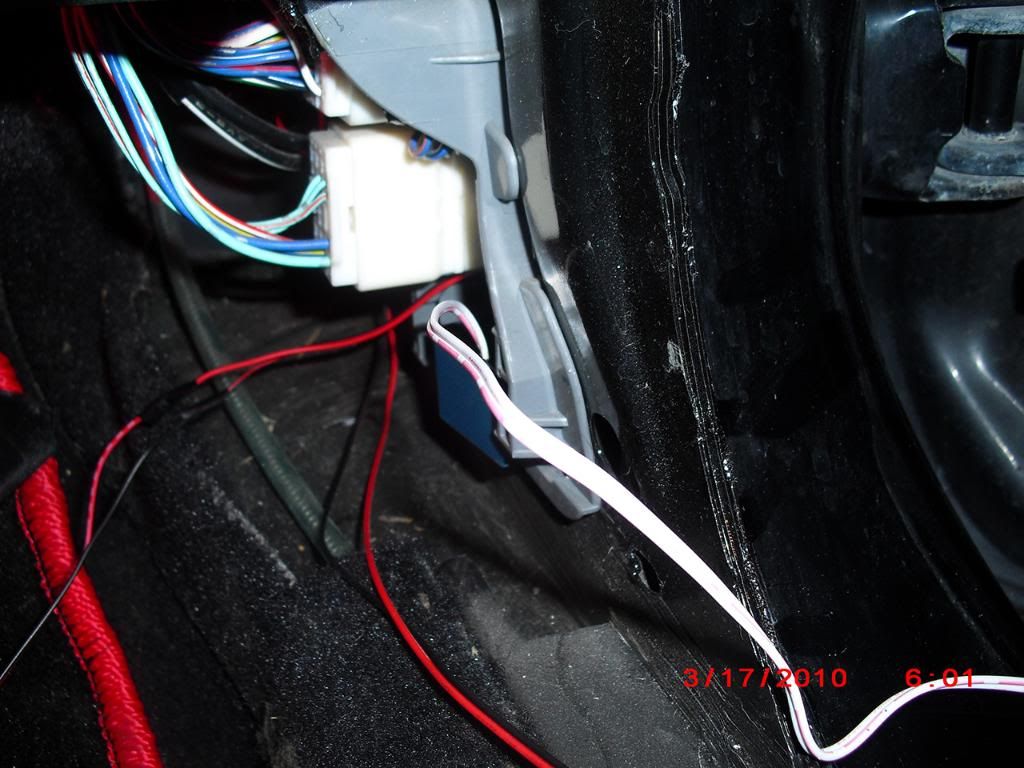 9. Replace your door card and your plastics, and you're done! Also, since my car is black and these will largely be visible at night, I wrapped the epicenter wire from the door sill to the passenger footwell in black tape to hide it better. I would have preferred to have run it through the door, but I couldn't get the seal undone on the inside of the door. 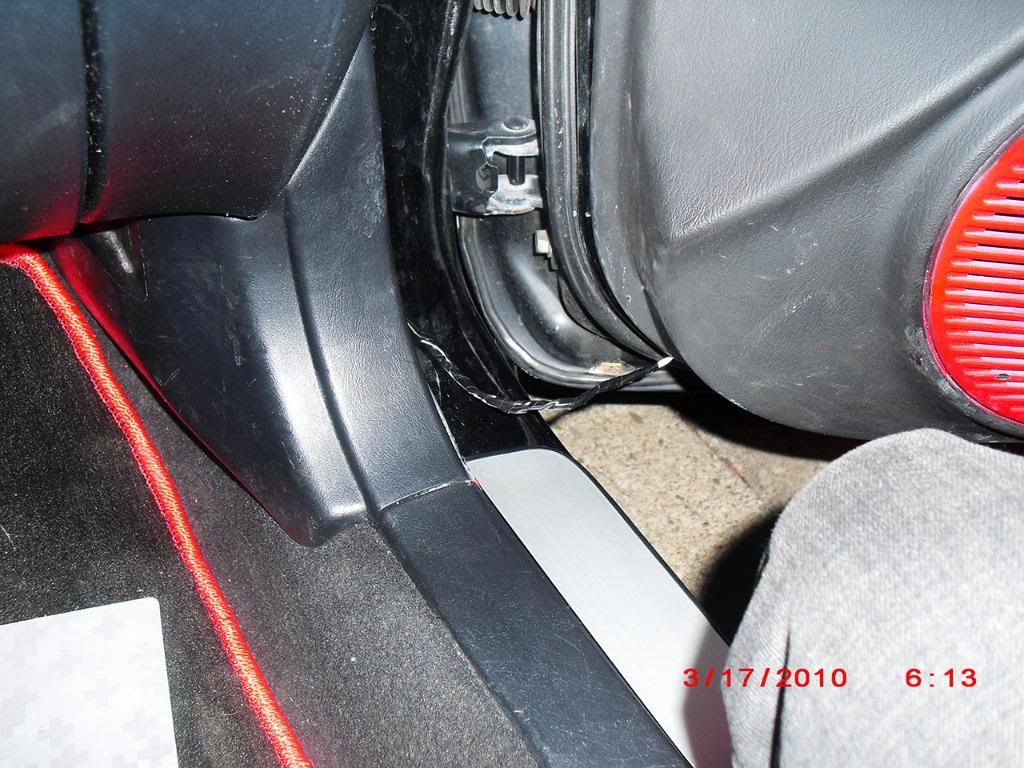 10. Final results, and video! Surprised my camera takes as good quality as it did haha 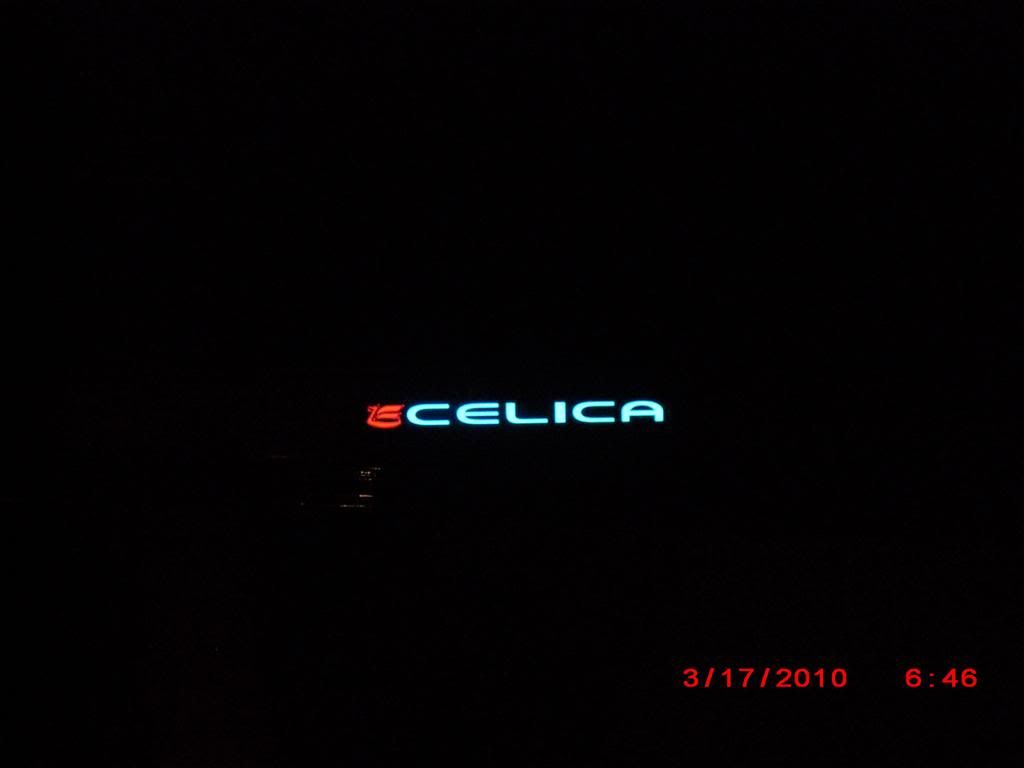 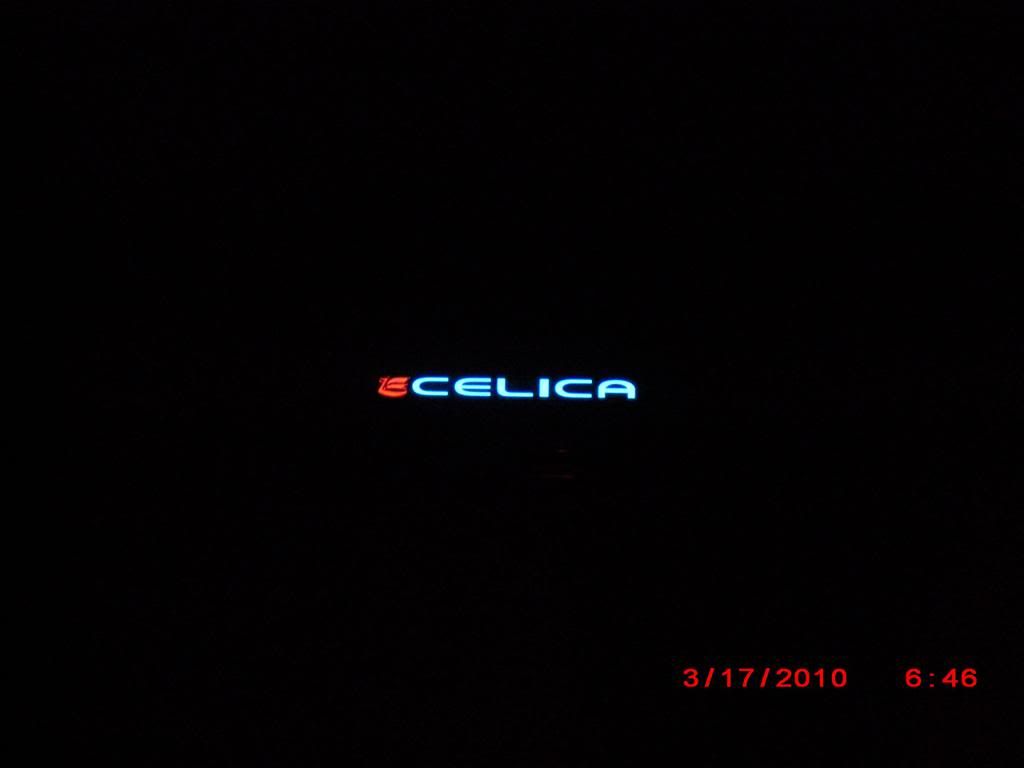 
This post has been edited by Espo: Mar 19, 2010 - 2:33 AM --------------------  |
 Mar 19, 2010 - 6:38 AM Mar 19, 2010 - 6:38 AM
|
|
|
Enthusiast Joined Feb 1, '10 From Long Island Currently Offline Reputation: 7 (100%) |
You didn't have to take off the door card, instead you could have connected the wires right next to where you mounted the epicenter. Less wires and less noticable. looks gr8 tho.
This post has been edited by dcwanabe: Mar 19, 2010 - 6:39 AM |
 Mar 19, 2010 - 12:22 PM Mar 19, 2010 - 12:22 PM
|
|
|
Enthusiast    Joined May 15, '09 From yonkers, NY Currently Offline Reputation: 8 (100%) |
yea were you see that plug in the second to last pic i wired them to that an i did use the quick spice connectors then every thing stays inside the car not in the door. but they look good.
-------------------- *Thing i want for my car(i wish i had money)*
-light blue tint (next step will do this right after i get my paint job) WTB Reasonably priced Projectors just Lows |
 Mar 19, 2010 - 12:35 PM Mar 19, 2010 - 12:35 PM
|
|
 Enthusiast      Joined May 25, '06 From Hong Kong Currently Offline Reputation: 256 (100%) |
Nice write up dude
-------------------- |
 Mar 19, 2010 - 11:26 PM Mar 19, 2010 - 11:26 PM
|
|
|
Enthusiast    Joined Aug 11, '09 From Buffalo, NY Currently Offline Reputation: 15 (100%) |
You didn't have to take off the door card, instead you could have connected the wires right next to where you mounted the epicenter. Less wires and less noticable. looks gr8 tho. Figures I would do it the hard way. Haha @Vincent: Thanks! --------------------  |
 Aug 21, 2011 - 1:36 PM Aug 21, 2011 - 1:36 PM
|
|
|
Enthusiast   Joined Mar 4, '10 From Bronx NY Currently Offline Reputation: 3 (100%) |
are these still being made?
-------------------- Always fast and going for the look......
 |
 Aug 21, 2011 - 6:35 PM Aug 21, 2011 - 6:35 PM
|
|
|
Enthusiast    Joined May 15, '09 From yonkers, NY Currently Offline Reputation: 8 (100%) |
are these still being made? looks like he still has some you can go to his site directly http://www.kamikaze.com.hk/product.php?id_product=82 or espo looks like he's parting his car and was selling his dont know if there still around tho -------------------- *Thing i want for my car(i wish i had money)*
-light blue tint (next step will do this right after i get my paint job) WTB Reasonably priced Projectors just Lows |
 Oct 3, 2018 - 2:22 PM Oct 3, 2018 - 2:22 PM
|
|
|
Enthusiast   Joined May 30, '16 From wild 100's, South Chicago Currently Offline Reputation: 3 (100%) |
AND ALMOST TEN YEARS AFTER, IM MAKING MY OWN STYLE OFF THIS .SINCE I HAVE THE TRD LOUMINISECE logos LAING AROUND.
|
  |
1 User(s) are reading this topic (1 Guests and 0 Anonymous Users)
0 Members:
| Lo-Fi Version | Time is now: November 28th, 2024 - 12:00 AM |


