  |
 Sep 17, 2012 - 4:47 AM Sep 17, 2012 - 4:47 AM
|
|
 Enthusiast  Joined Jul 5, '12 From Barcelona Currently Offline Reputation: 0 (0%) |
Looking good man! I'm thinking about painting the rims like you did. I wouldn't worry about the paint on the tire, I did that once and with a stiff brush it came right off. Right then, I'll be scrubbing the tyres next week! I may apply some product to make the tyres a bit blacker and shinier. More photos to follow. --------------------  |
 Sep 17, 2012 - 4:55 AM Sep 17, 2012 - 4:55 AM
|
|
 Enthusiast  Joined Jul 5, '12 From Barcelona Currently Offline Reputation: 0 (0%) |
Front wheel - before and after!
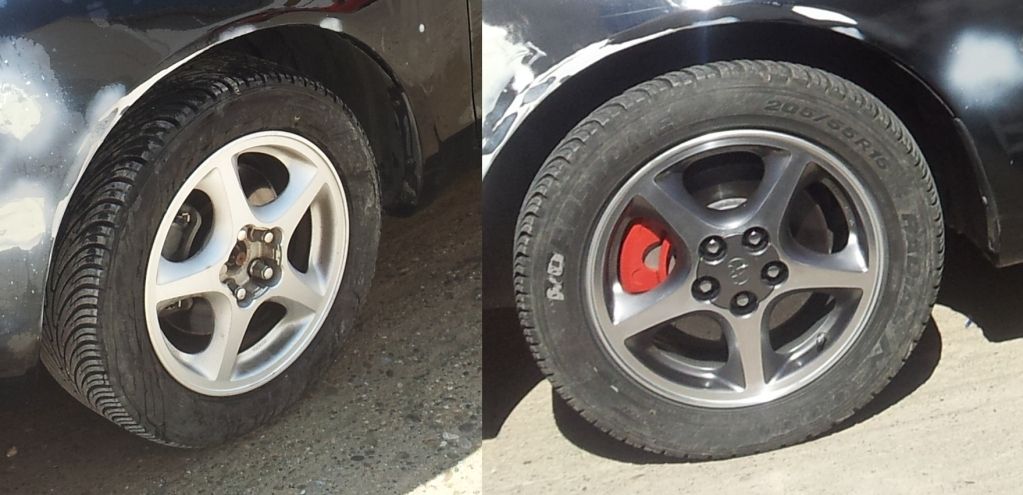
--------------------  |
 Sep 18, 2012 - 5:39 AM Sep 18, 2012 - 5:39 AM
|
|
 Enthusiast  Joined Apr 30, '12 From Wellington, NZ Currently Offline Reputation: 0 (0%) |
Looks excellent!
|
 Sep 29, 2012 - 1:18 PM Sep 29, 2012 - 1:18 PM
|
|
 Enthusiast  Joined Jul 5, '12 From Barcelona Currently Offline Reputation: 0 (0%) |
I finally got around to working on the front wing. It still needs a lot of work, but it is encouraging to see it nearly ready. 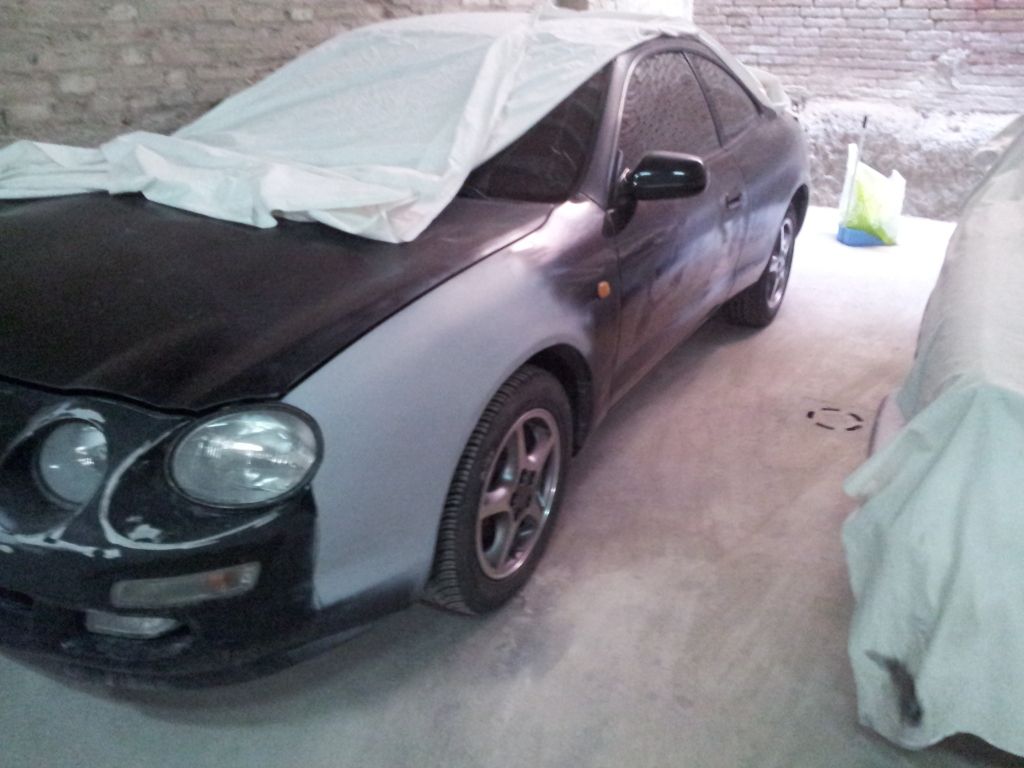 I took apart my console, took the cd player out etc 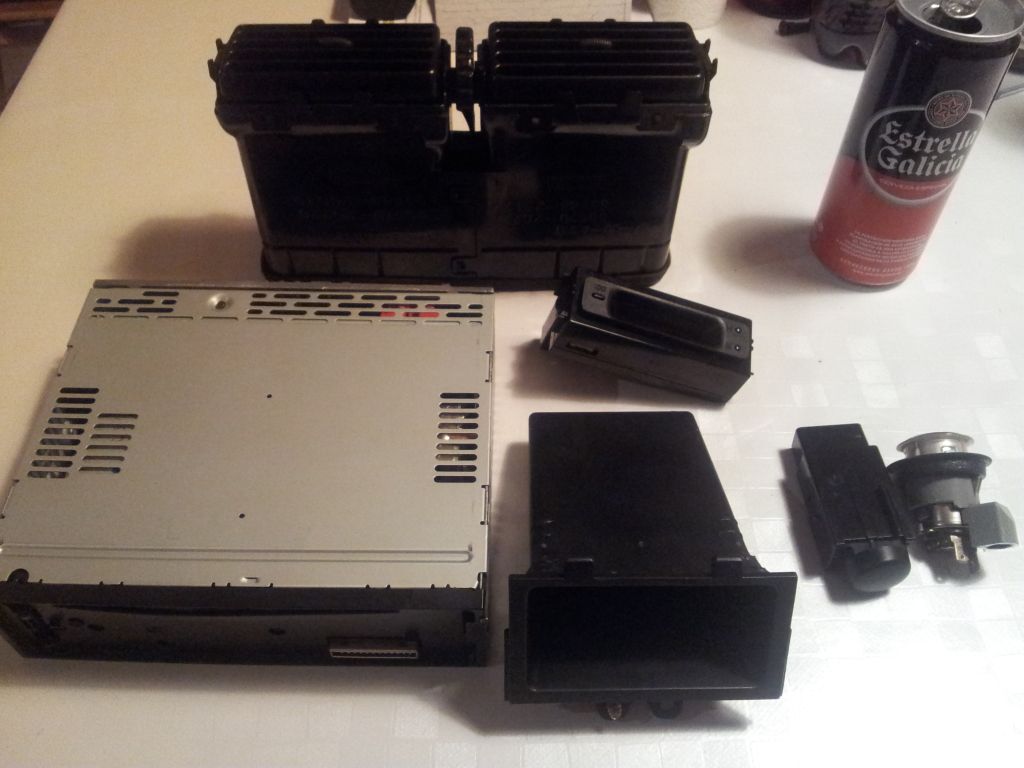 I sanded the pieces down to eliminate the cigarette melts, and filled the hole that had been made for the old alarm. A number of coats of paint and clearcoat and hey presto! Finished! The metallic grey was meant to be the the same as used on the wheels, but I ran out and had to use a darker colour. Actually I think it looks better! More subtle. What do you think? 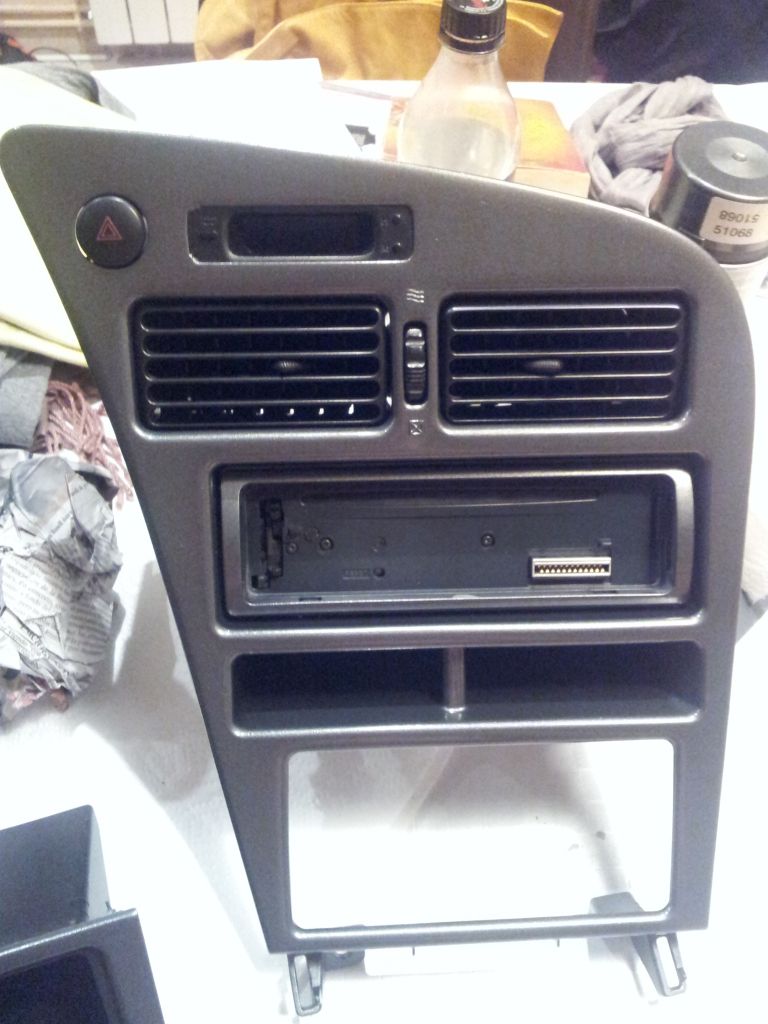 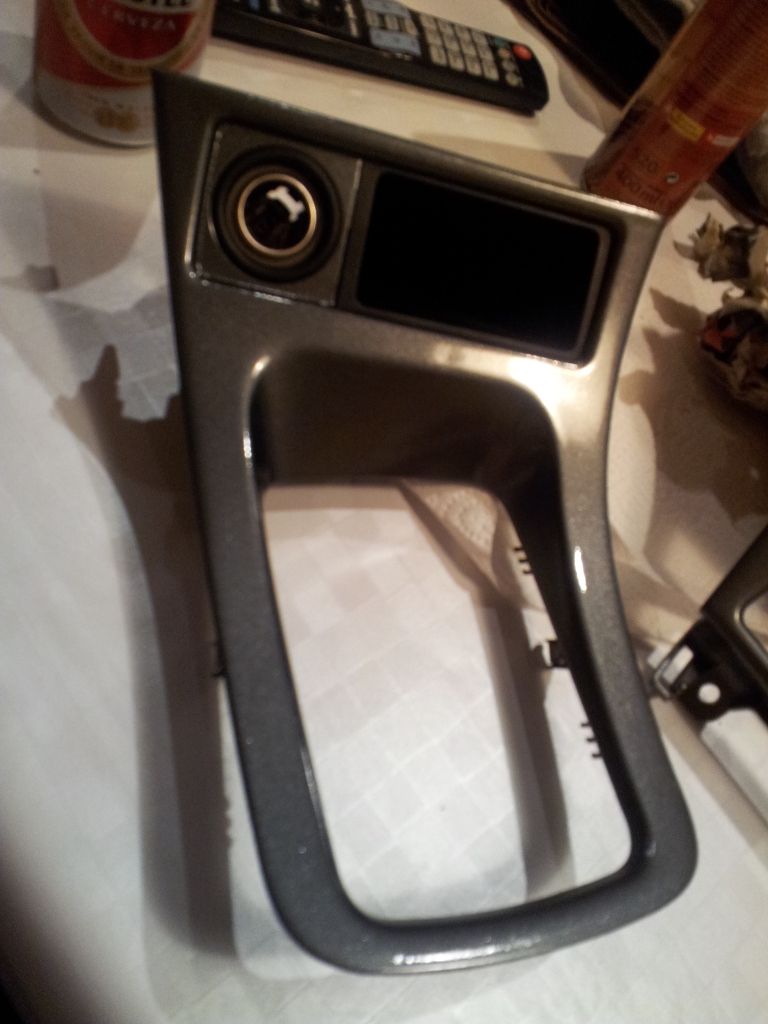 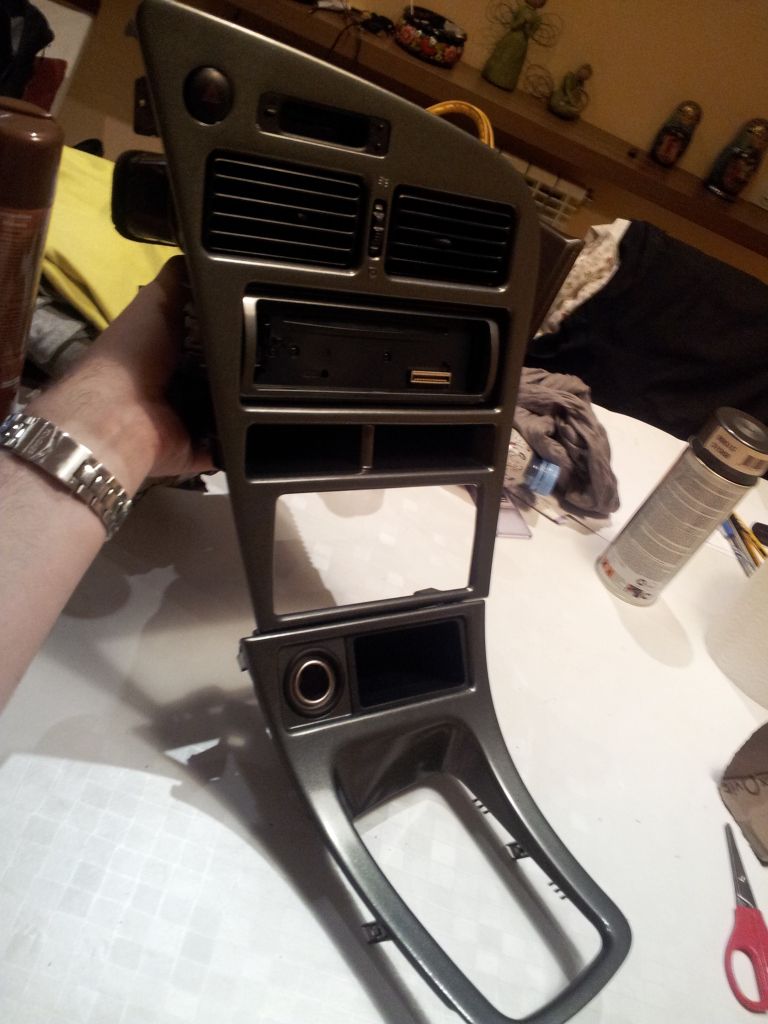 I even painted the thin rectangular cd player surround with the same paint. Hopefully I'll be able to refit these parts into the car in the next few weeks. --------------------  |
 Sep 29, 2012 - 1:27 PM Sep 29, 2012 - 1:27 PM
|
|
 Enthusiast  Joined Jul 5, '12 From Barcelona Currently Offline Reputation: 0 (0%) |
Looks excellent! Thanks Anoroc! I think it looks even better in the flesh. Shines and sparkles in the sun. I highly recommend doing it if you have time. --------------------  |
 Oct 6, 2012 - 6:42 PM Oct 6, 2012 - 6:42 PM
|
|
 Enthusiast      Joined Jul 12, '08 Currently Offline Reputation: 5 (100%) |
I've seen many, many horribly painted interiors. This is not one of them. Looks awesome and great job
--------------------  |
 Oct 9, 2012 - 3:07 AM Oct 9, 2012 - 3:07 AM
|
|
 Enthusiast  Joined Jul 5, '12 From Barcelona Currently Offline Reputation: 0 (0%) |
Thanks Enders!
Yeah, I'm going for a subtle look. The sort of thing you might look at and imagine Toyota sent the car out of the factory like that. There will be no bright red painted bits, nor shall I be painting the side air vents or door bits. (Finally, I decided to paint the drivers vent, like in the SSIII) I could be persuaded to paint the lower half of the interior that yellowy cream colour (like a Ferrari) if I had the money to get matching leather seats. But as I don't, I won't.- It's on the wish list. This post has been edited by Edser: May 18, 2015 - 7:46 PM --------------------  |
 Oct 9, 2012 - 7:14 AM Oct 9, 2012 - 7:14 AM
|
|
|
Enthusiast     Joined Mar 8, '09 From Westport, MA Currently Offline Reputation: 6 (100%) |
i really like how those wheels came out, i havent seen anyone polish the gt wheels yet nice job!
-------------------- st205 powered ss3 coupe
|
 Oct 10, 2012 - 10:42 AM Oct 10, 2012 - 10:42 AM
|
|
 Enthusiast  Joined Jul 5, '12 From Barcelona Currently Offline Reputation: 0 (0%) |
i really like how those wheels came out, i havent seen anyone polish the gt wheels yet nice job! Thanks Ted! Yeh I'm surprised that polishing them isn't done more often. I guess maybe it's because the finish is never going to be as shiney as the original finish. Also, the grained texture of the wheel needs to be sanded off to get rid of all the oxidation and stone chips and curbing, and well, it's a lot of hours... Approx. 4 each wheel for me. Taking into account labour and paints, it'd be cheaper to buy brand new 15s. I guess I'm poor now so my labour isn't worth anything. Also keeps a certain amount of originality to the Celica. I like that. This weekend is a long weekend, so I'm going to the car. I shall be installing the painted console. I'll take photos. Also plan to keep shaping that front wing till its right. Then I don't know what to do. This post has been edited by Edser: Mar 16, 2013 - 10:22 AM --------------------  |
 Oct 12, 2012 - 5:54 PM Oct 12, 2012 - 5:54 PM
|
|
 Enthusiast  Joined Jul 5, '12 From Barcelona Currently Offline Reputation: 0 (0%) |
So I fitted my center console this weekend. I think it looks pretty good, though I did notice a slight blemish where the alarm LED had been. But then I always notice the small details. I'll learn to live with it.
I think it looks quite like on the Japanese import beams celicas, but glossy. 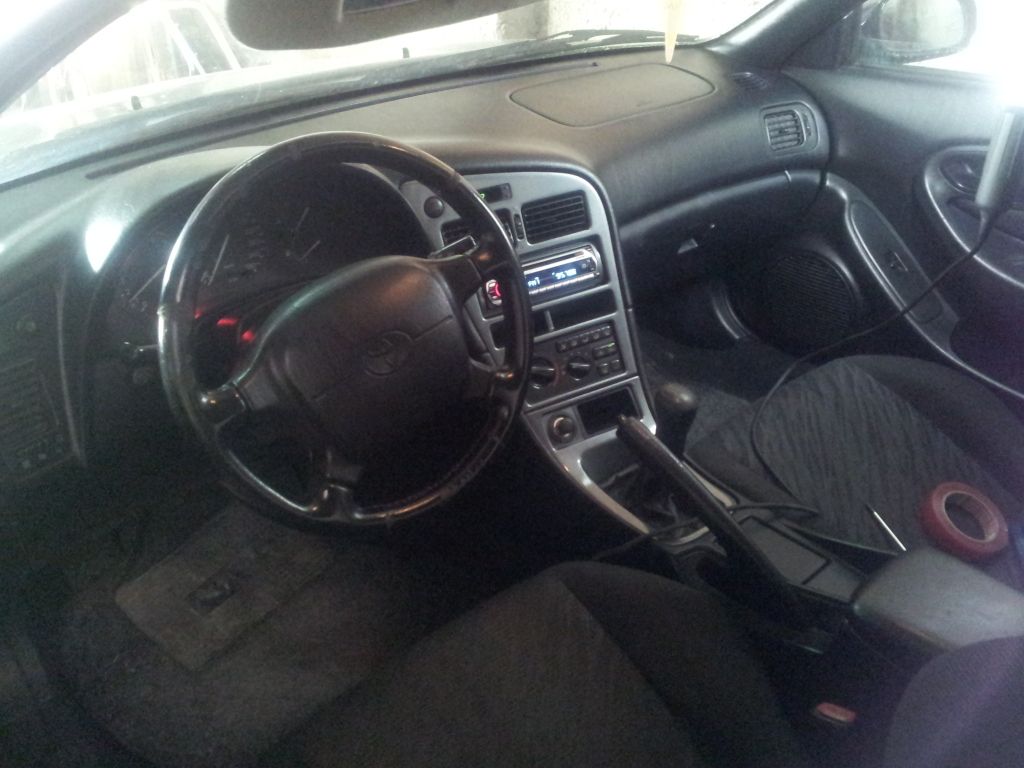 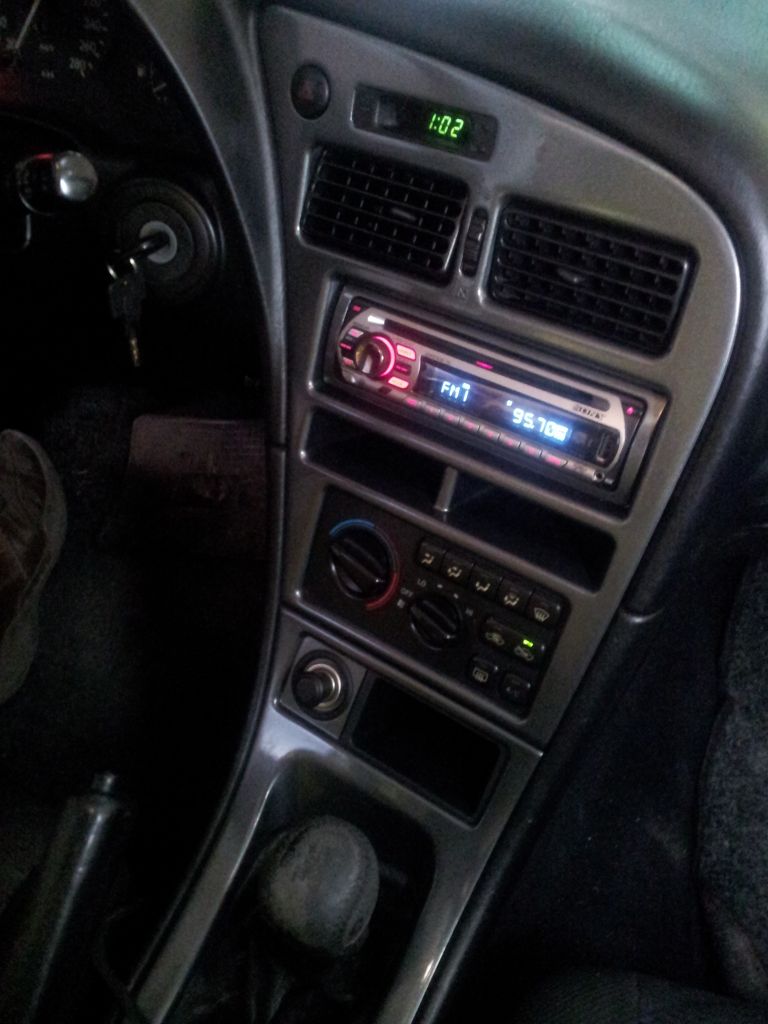 I was unsure what to do next, so I took the rear lights off. It was pretty easy. One of them has a bit of damage on the lower edge, and the others a bit grazed. I guess I can polish out the graze but I'll need to buy a second hand one to replace that damaged one. 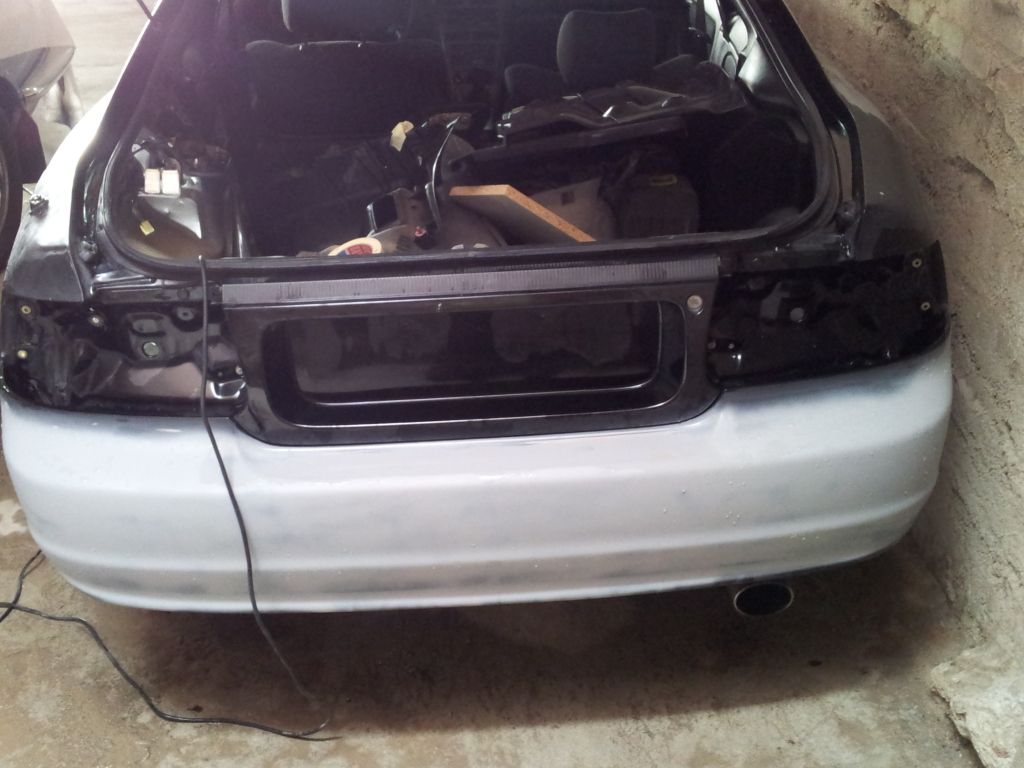 I took the front bumper of too. I kinda had to, for painting purposes, but also the grill on the front had fallen inside the bumper and the clips with the nuts (inside the bumper) for the number plate support weren't well attached, and one was about to fall off. Seems the bumper is damaged there, the ABS is split. I'll need to fix that. The foam internal of the bumper is good, no crushed or broken bits except a small split in the area of the indicator. 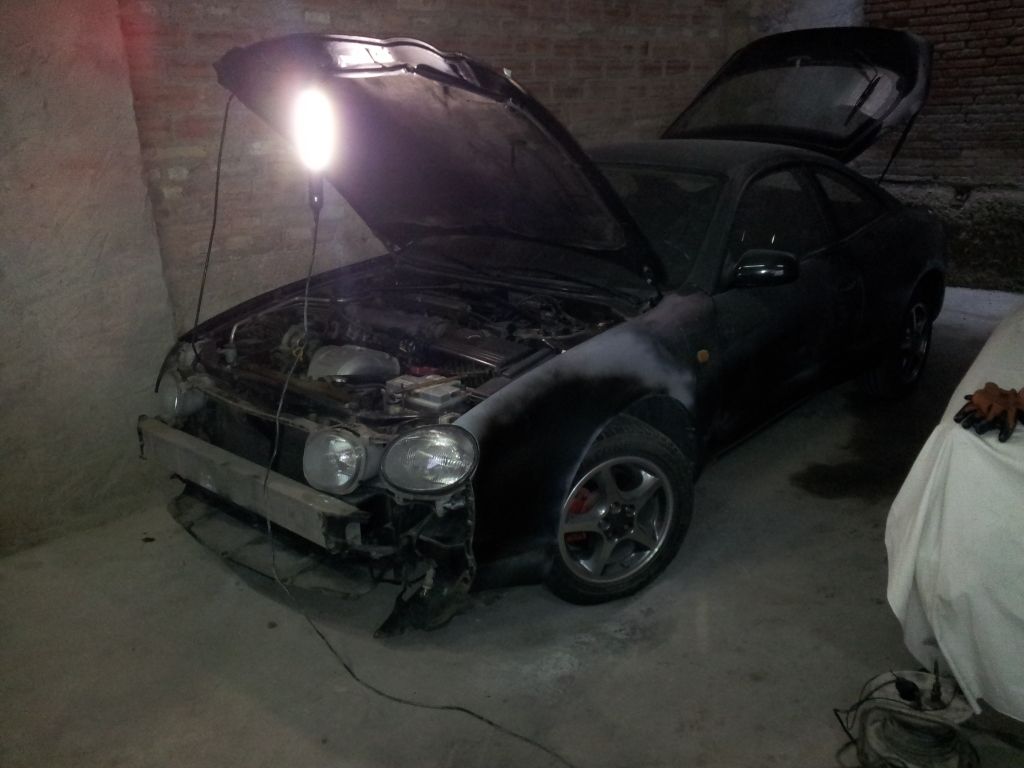 I took lots of bits home with me, the front splitters, the grill and the rear lights. I think I'll repair the splitters and paint them black. I may paint the grill in the dark metallic grey, as well. Watch this space. This post has been edited by Edser: Oct 14, 2012 - 1:49 PM --------------------  |
 Oct 14, 2012 - 8:23 PM Oct 14, 2012 - 8:23 PM
|
|
 Enthusiast  Joined Jul 5, '12 From Barcelona Currently Offline Reputation: 0 (0%) |
I fear it will be next year before I can paint her. But it'll be glorious!
--------------------  |
 Oct 31, 2012 - 4:05 PM Oct 31, 2012 - 4:05 PM
|
|
 Enthusiast  Joined Jul 5, '12 From Barcelona Currently Offline Reputation: 0 (0%) |
Right! I'm heading back to work on the car this weekend, but it will be a secondary thing, as I'm taking my Yamaha Thundercat's wheels with me. I'm gonna clean 'em sand 'em and paint 'em silver!
This post has been edited by Edser: Mar 16, 2013 - 10:25 AM --------------------  |
 Nov 6, 2012 - 5:15 PM Nov 6, 2012 - 5:15 PM
|
|
 Enthusiast  Joined Jul 5, '12 From Barcelona Currently Offline Reputation: 0 (0%) |
I painted my Thundercats wheels this weekend. I think it's a big improvement, looks so clean. Here's the before pic:
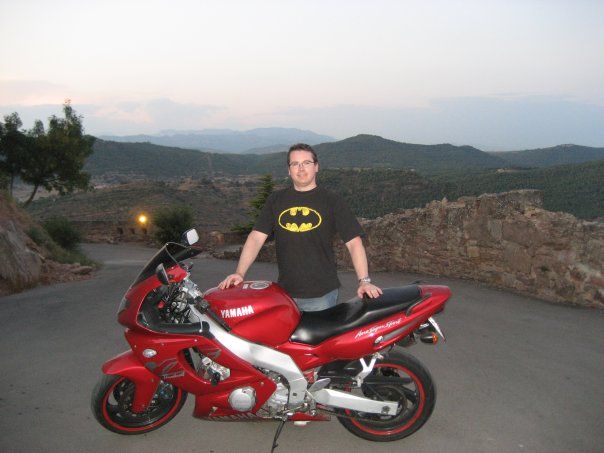 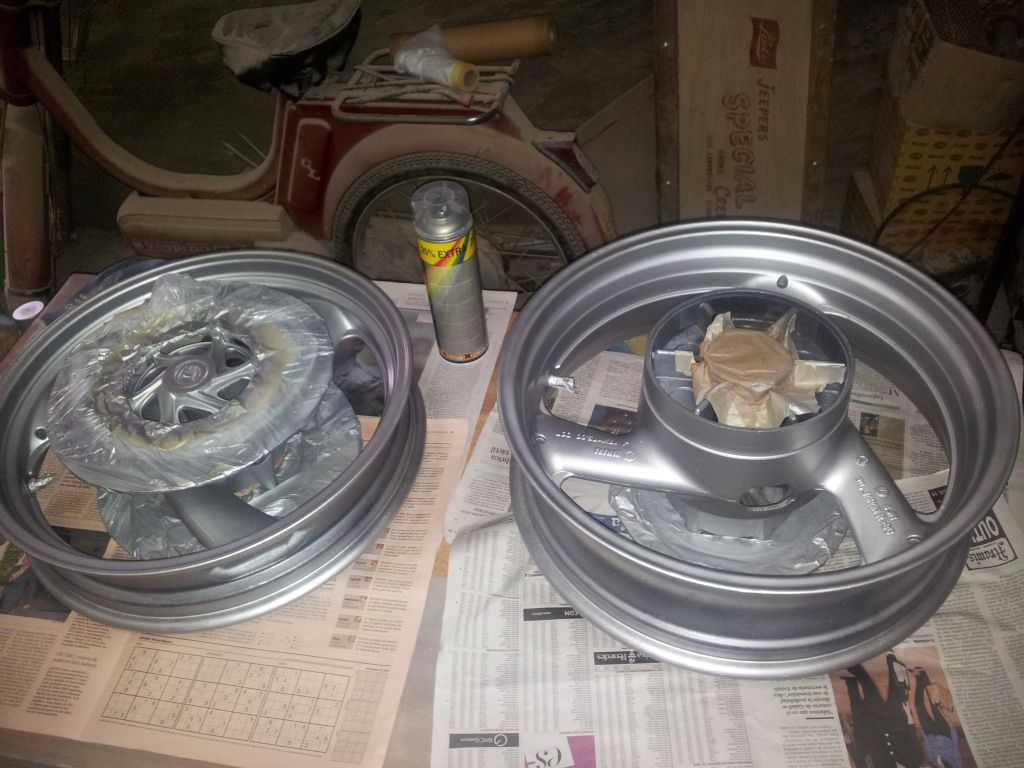 Here's the after pic: 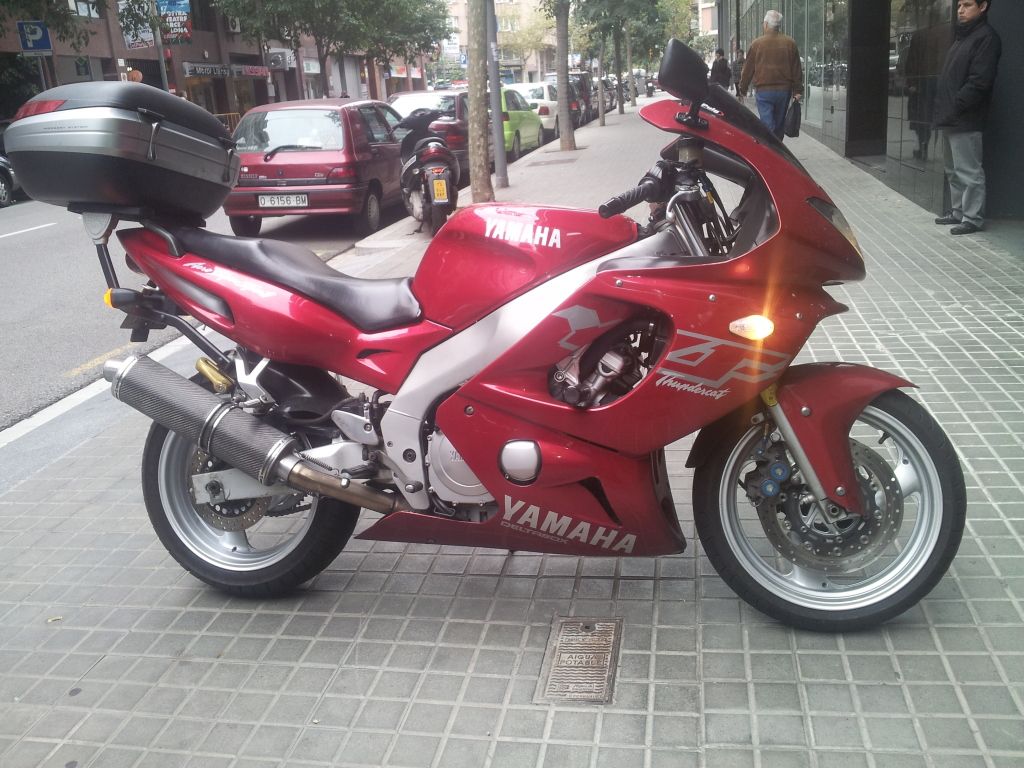 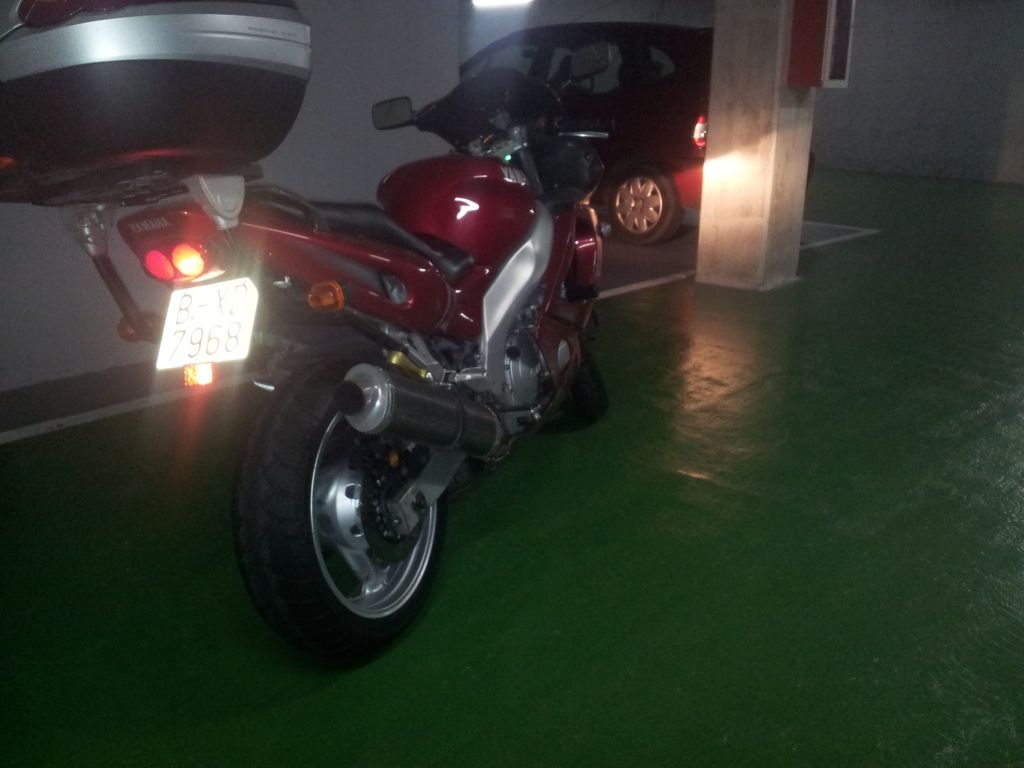 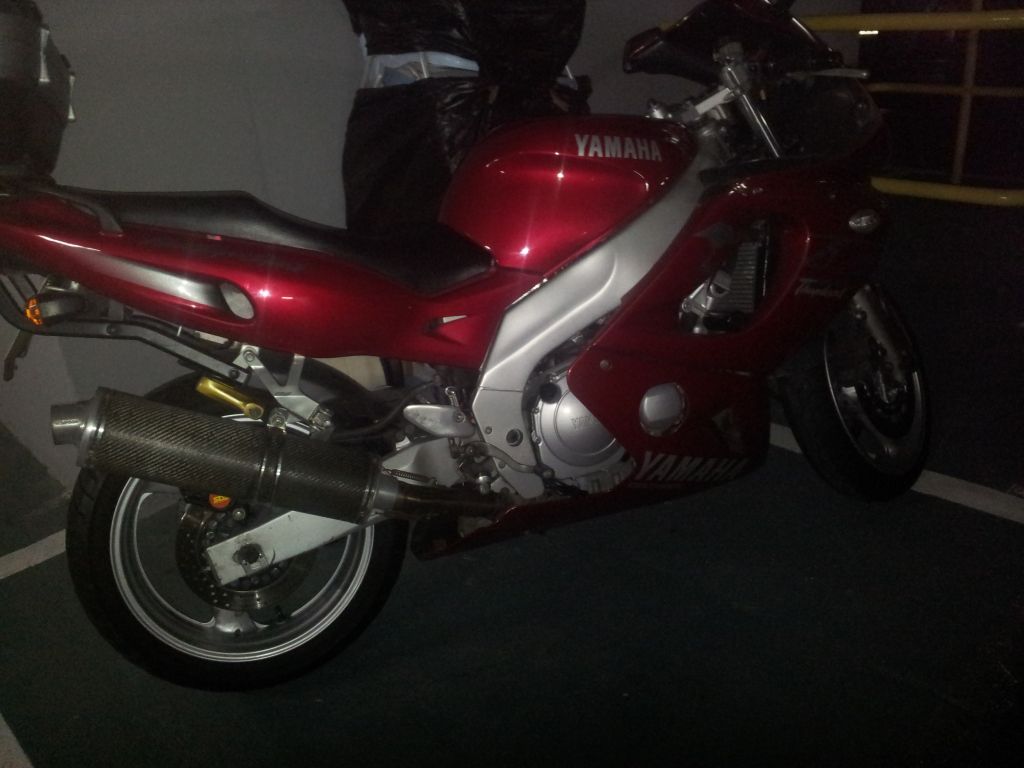
This post has been edited by Edser: Mar 16, 2013 - 10:27 AM --------------------  |
 Nov 27, 2012 - 5:52 PM Nov 27, 2012 - 5:52 PM
|
|
 Enthusiast  Joined Jul 5, '12 From Barcelona Currently Offline Reputation: 0 (0%) |
Since I have no money at the mo, I thought I'd get to work on my lights - see if I could make 'em look a bit better. This one is the rear right tail light. It seems to have had a close bump/scrape. It's all a bit broken. I pulled this broken bit out with tweezers.
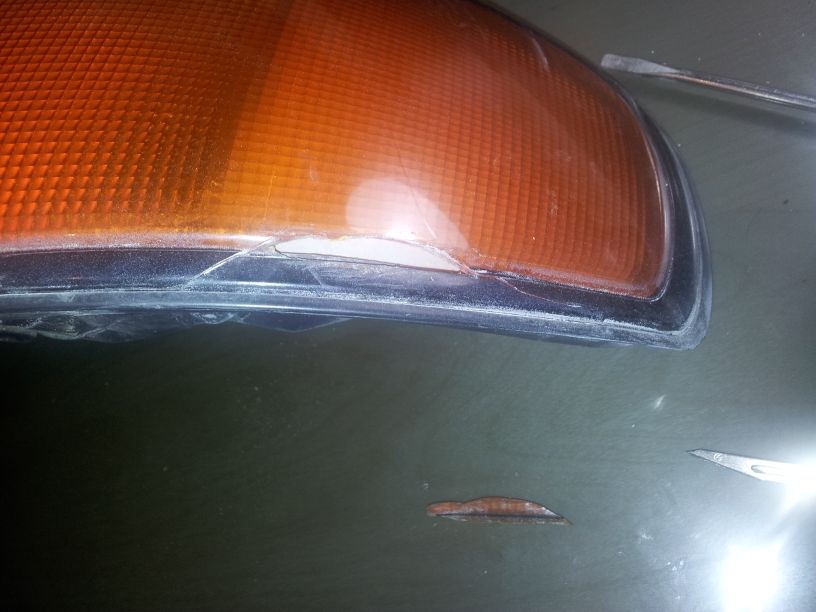 So I glued the piece back in with superglue... 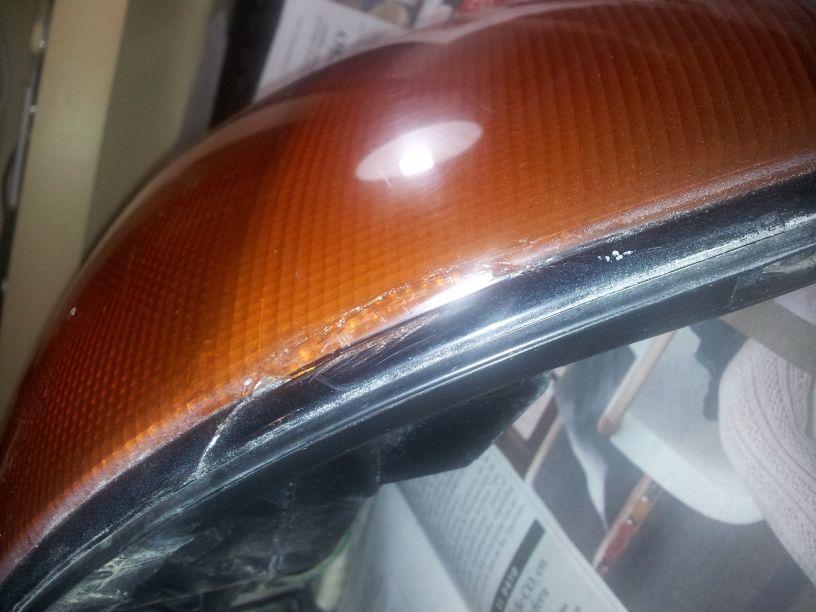 Bit of sanding... 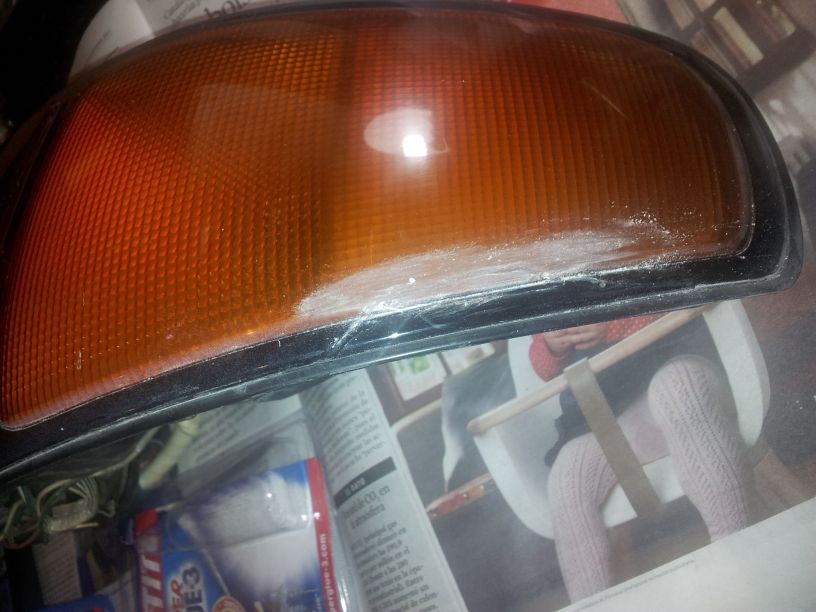 Then a bit of polishing... 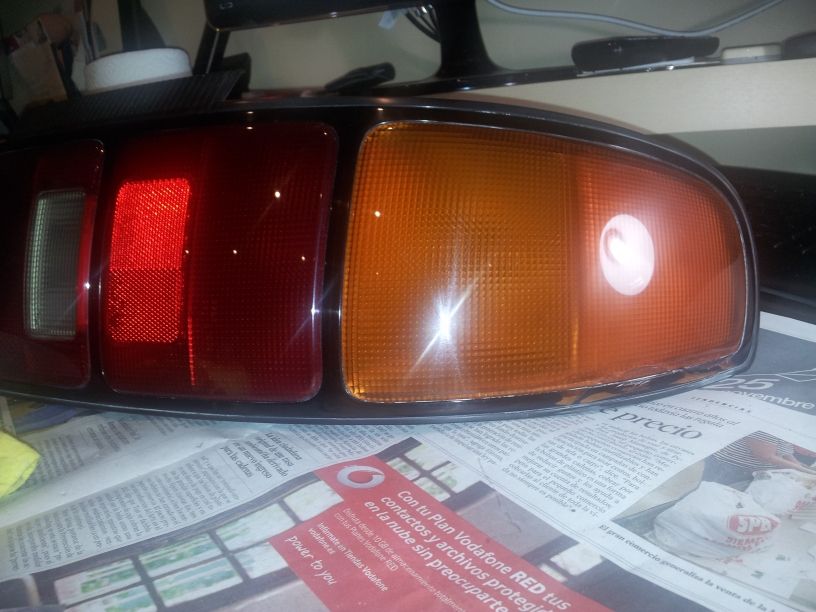 Bit of black paint... 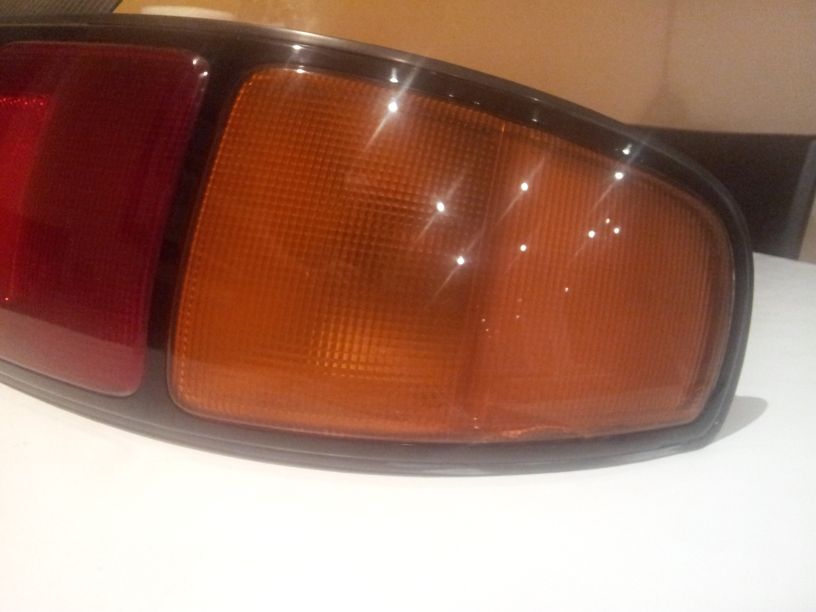 The crack is still visible, but its a huge improvement. Then I got to work on the scrape on the left tail light. This is the scrape: 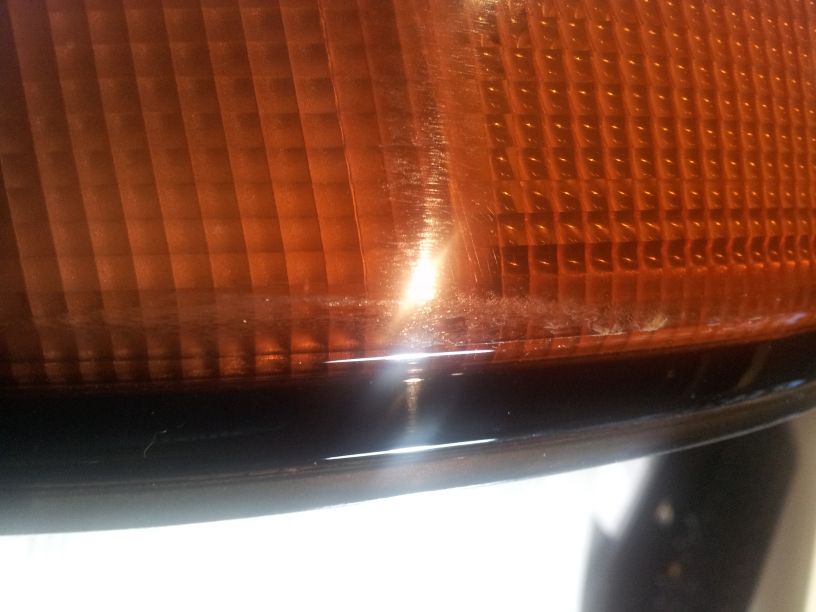 After some polishing: 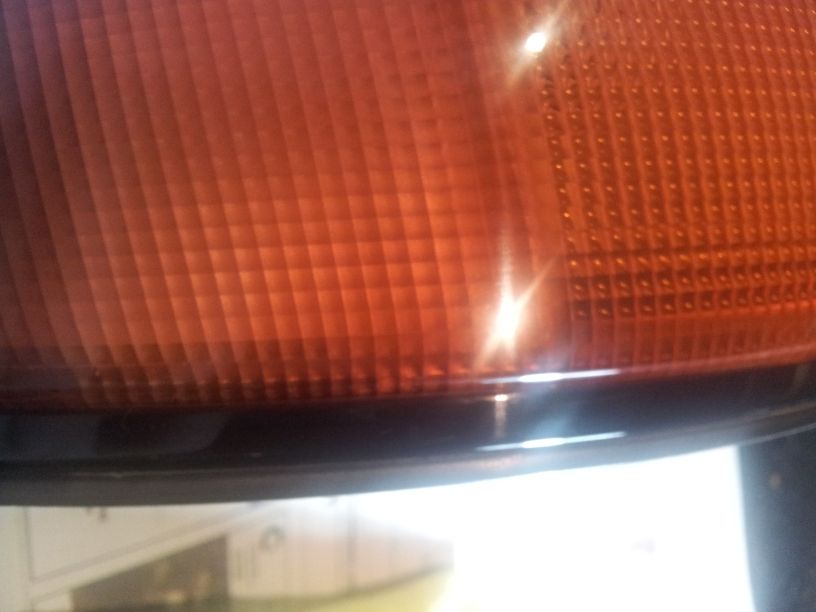 Voila!! Scrape gone! 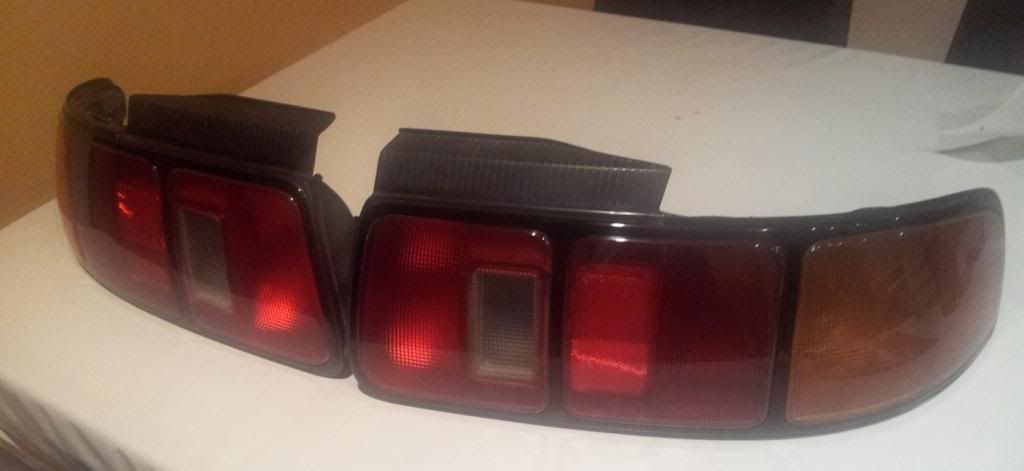 I also sanded off all the numbers and things on the red areas, and polished the whole surface until really shiney. Looks like new! This post has been edited by Edser: Nov 28, 2012 - 3:43 AM --------------------  |
 Nov 28, 2012 - 3:06 AM Nov 28, 2012 - 3:06 AM
|
|
 Enthusiast      Joined Jan 4, '12 From US Currently Offline Reputation: 6 (100%) |
Very good with paint and restoration I see... keep up the good work!
-------------------- 1993 Celica GT Coupe - sold
1994 Celica GT Liftback |
 Dec 1, 2012 - 11:38 AM Dec 1, 2012 - 11:38 AM
|
|
 Enthusiast  Joined Jul 5, '12 From Barcelona Currently Offline Reputation: 0 (0%) |
Cheers!
After the rears turned out so well, I got to work on the front indicators (turn signals). This is a pic of a polished one on top of a untreated one just off the car. 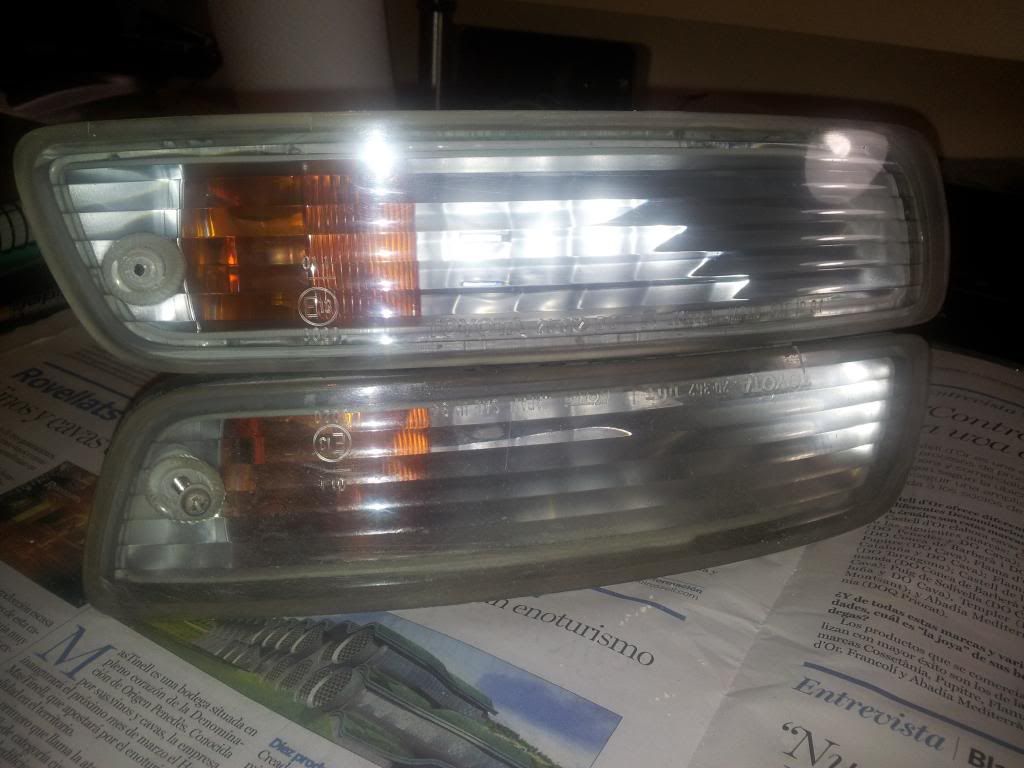 I sanded it back with some 400 grade then 600 and finally with some 800, then polishing with some random polish I found. Did the whole job while drinking a mix of red wine and Pepsi light while watching tv on my pc last Saturday night. 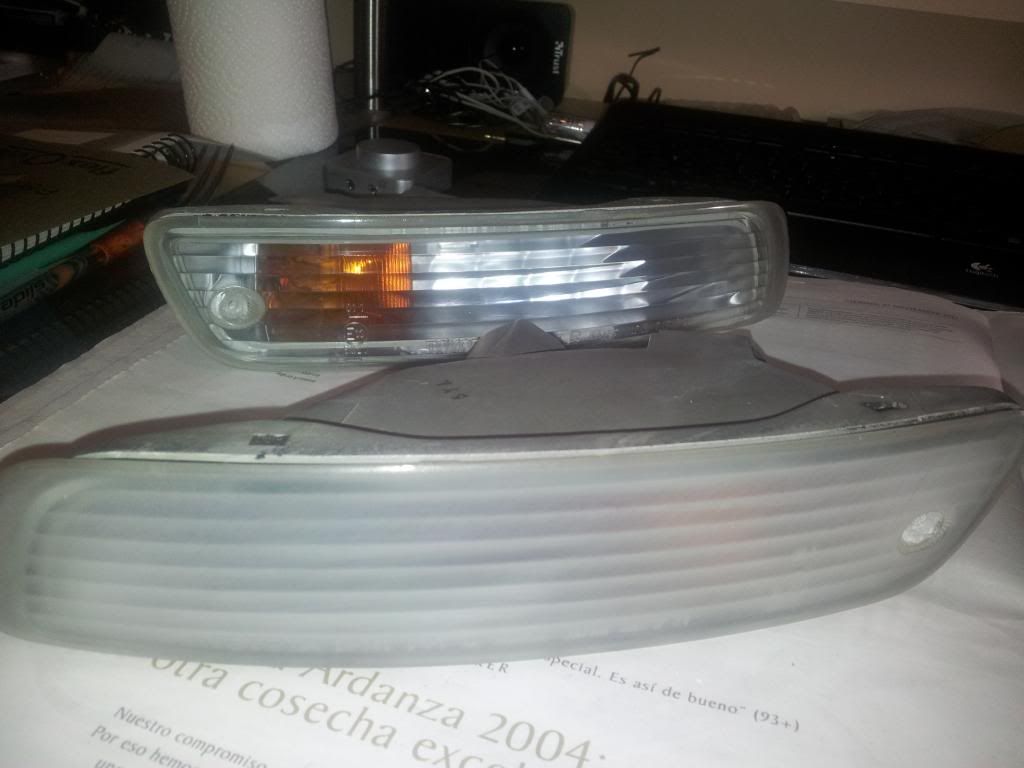 This is the end result: 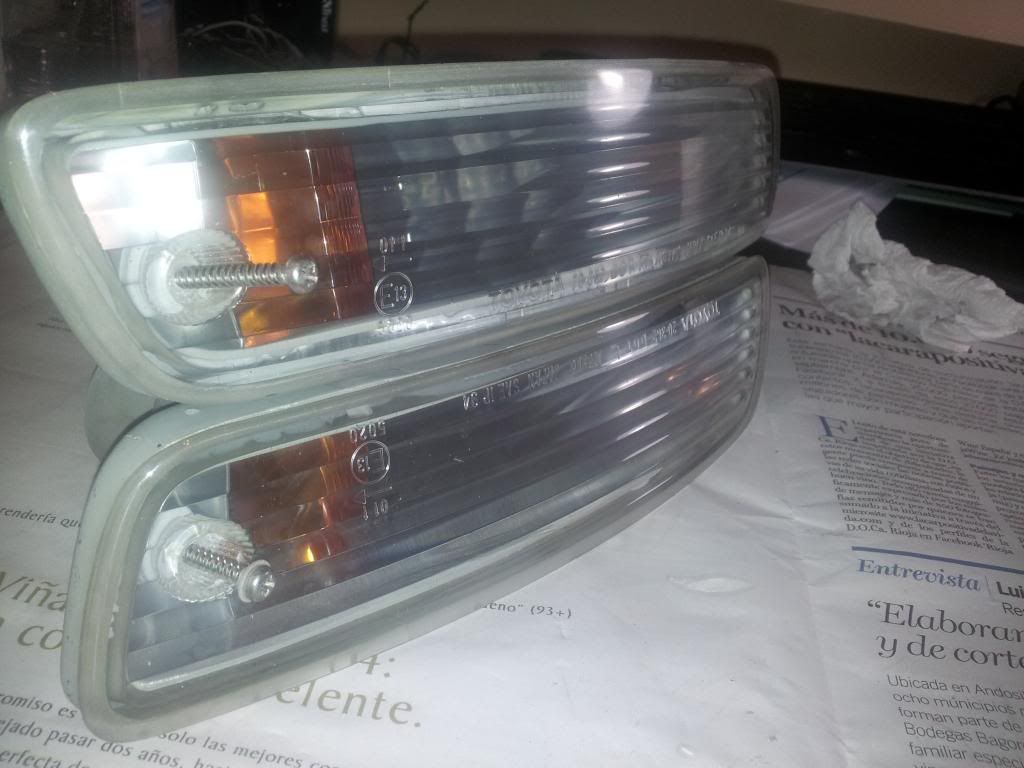 Its not bad I think, there was some very bad pitting (stone chips or really tough insects), and I couldn't smooth it all away without spending a long time sanding, and I was already quite drunk, so I'm pretty happy with the results, although not with the hangover. --------------------  |
 Dec 2, 2012 - 10:45 AM Dec 2, 2012 - 10:45 AM
|
|
 Enthusiast  Joined Jul 5, '12 From Barcelona Currently Offline Reputation: 0 (0%) |
I noticed that my reversing light looked sort of dirty, so I popped out the bulb to see, and low and behold I found this:
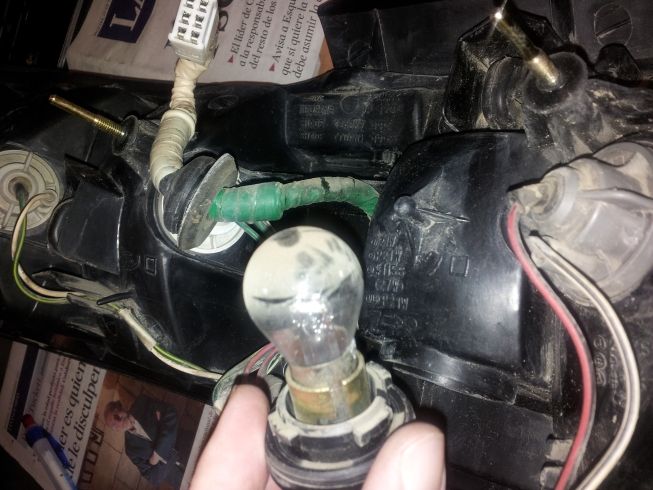 So cleaned the bulb and got to work cleaning the inside of the light with Q-tips and window cleaning liquid. 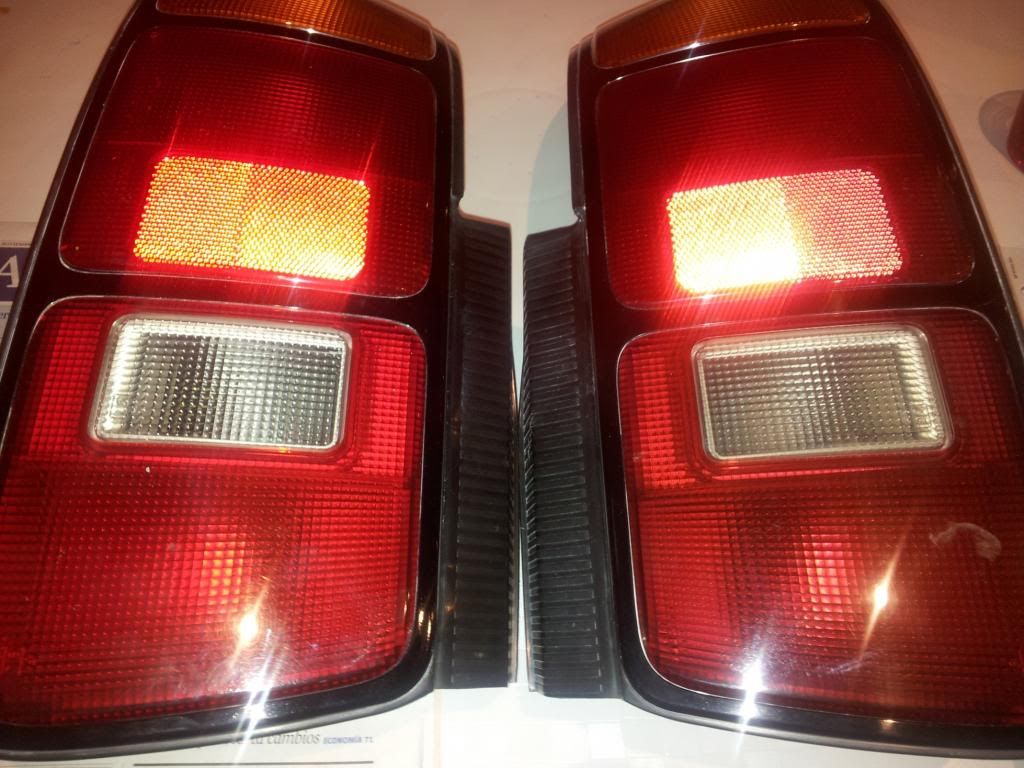 The one on the left has been cleaned. It really makes a big difference, tho you can't really tell in the photos. --------------------  |
 Mar 16, 2013 - 10:16 AM Mar 16, 2013 - 10:16 AM
|
|
 Enthusiast  Joined Jul 5, '12 From Barcelona Currently Offline Reputation: 0 (0%) |
Its been a long cold winter, and I finally got back to visit my car. There has been a lot of construction work going on in the garage where I keep it, everything's covered in a thick layer of dust. It is covered with an old bed sheet, but the dust gets in everywhere, all around the engine bay and on the wheels.
So I popped the lid and started scrubbing the engine bay. Can't really tell in the photo. 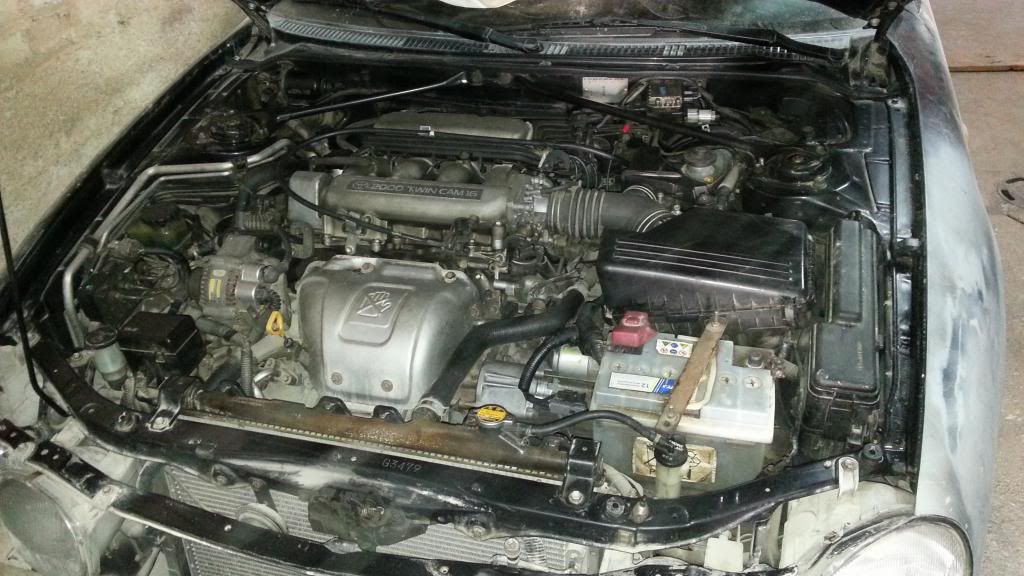 While I was there I uncovered the Datsun (yes it had a dust cover - not that you can tell - it was sooo dusty). It looks so good, such car-porn. It's just sick. So I stood there and looked at it for a while, in a kind of wierd pervy way. I took some photos for later. 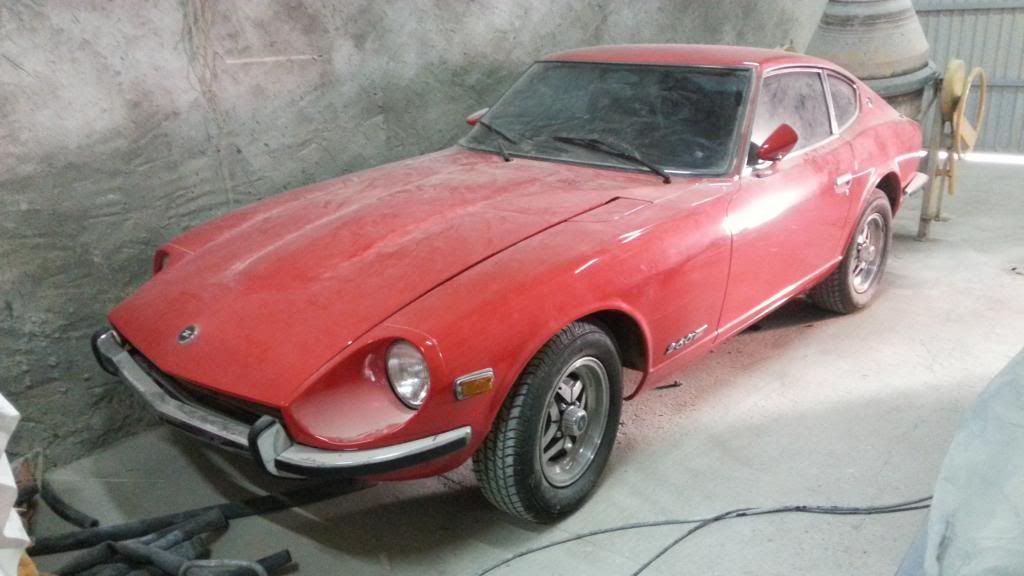 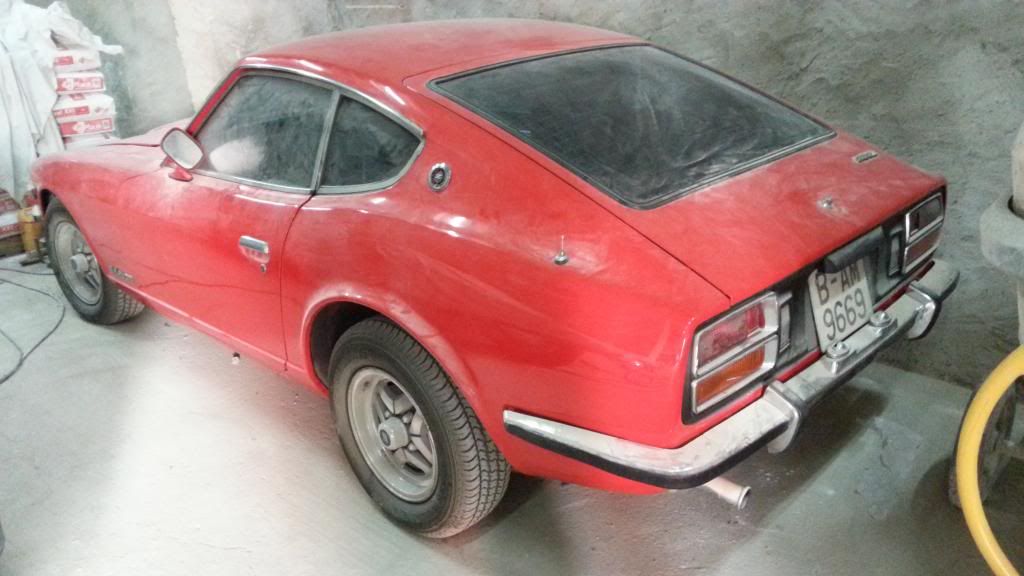 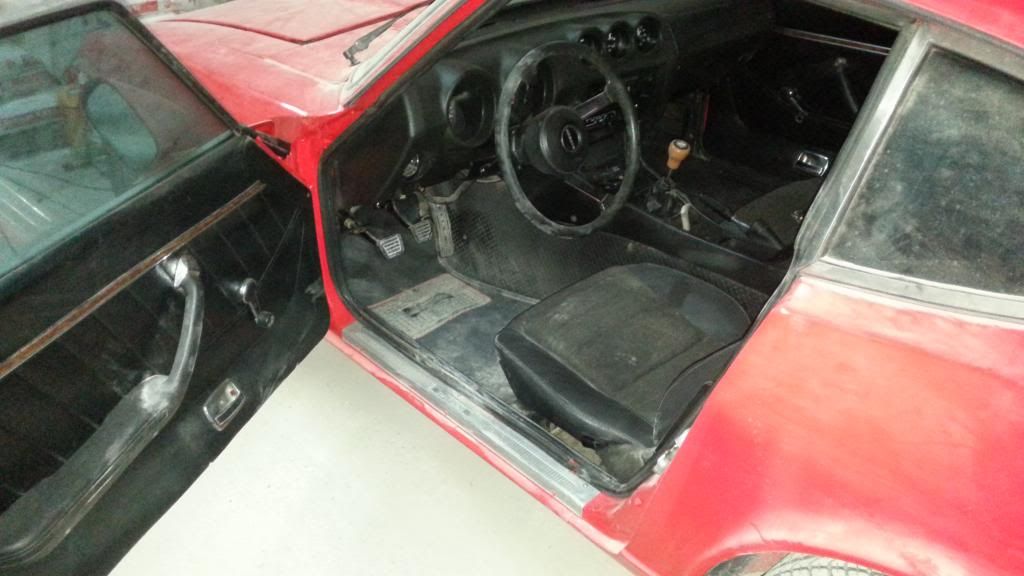 Later I also took out the Celicas interior plastic panels (they are just dumped in the boot) and cleaned their insides, as they were kinda brown and dusty. I'll be clipping those back in when the cars painted. Roll on summer! --------------------  |
 Sep 13, 2014 - 2:28 PM Sep 13, 2014 - 2:28 PM
|
|
 Enthusiast  Joined Jul 5, '12 From Barcelona Currently Offline Reputation: 0 (0%) |
It has been two years, and I have finally got around to getting some paint on the car. I was determined to paint it a get it on the road this summer as I finally got a job. Still, the job means I have very little free time so its going to be painted in my local paint shop at a cost of 1100 euros.
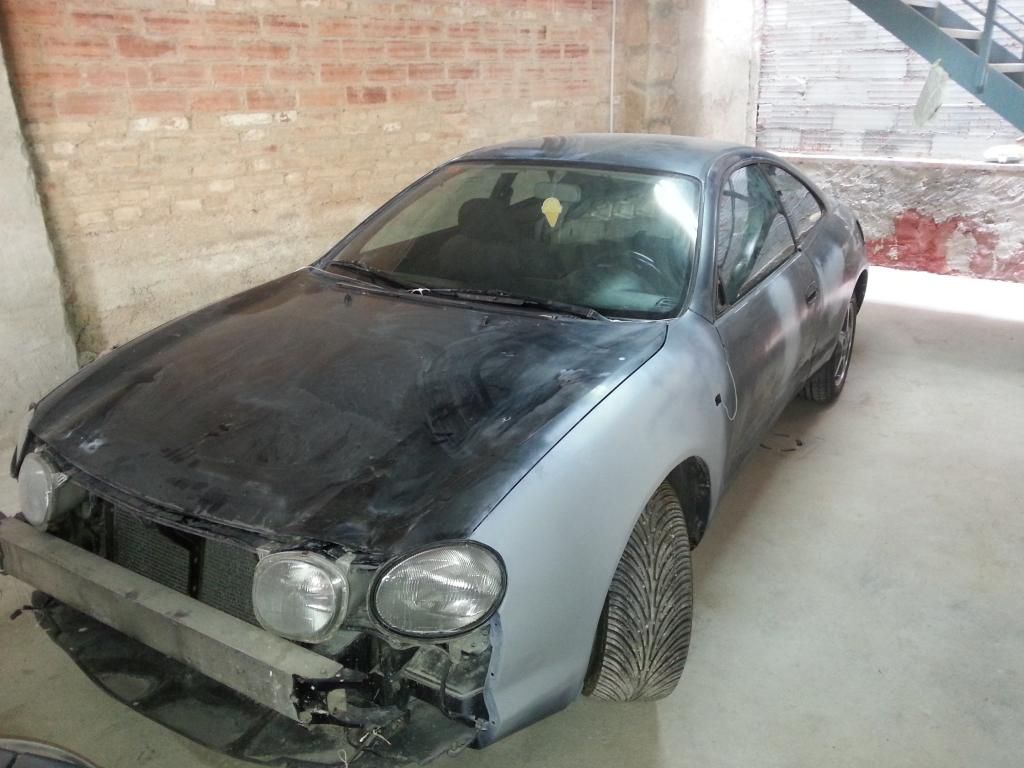 This is the car before being sent off for paint. I replaced the boot lid as there was rust around the window. I found another black Celica in a scrapyard 30 mins away and he sold me the whole lid with spoiler and badges and brake light complete for 60 euros. He even gave me the fuel filler flap for free when I asked. So nice. In the photo below you can see the old boot lid in the background. It was so easy to fit, plug and play, although it was quite heavy and my girlfriend and I struggled to line it up. Used a wooden board to prop it open while she held it steady, and I tightened the bolts. 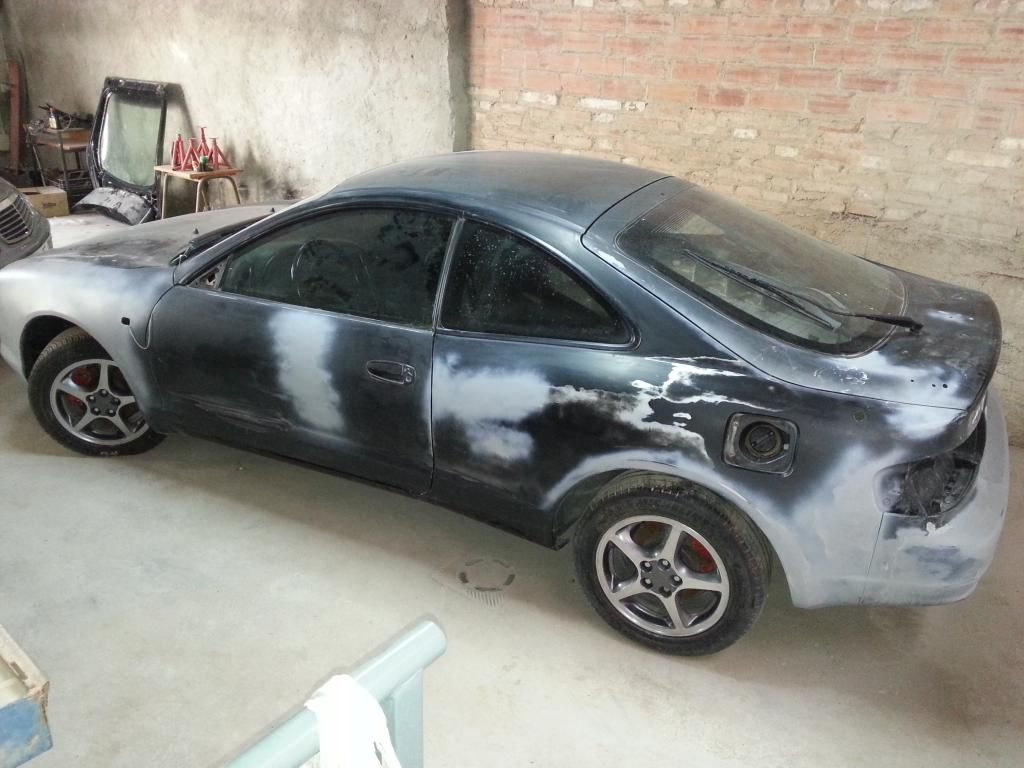 I finally pulled off the window trim and side repeaters. I have cleaned them up and they are waiting to be refitted. I won't get to see the new paint until nearly October as I am going on holidays. I can't wait! --------------------  |
 Oct 2, 2014 - 6:44 PM Oct 2, 2014 - 6:44 PM
|
|
 Enthusiast  Joined Jul 5, '12 From Barcelona Currently Offline Reputation: 0 (0%) |
Yippee! Car has been painted! I just went to see it and this is what I found:
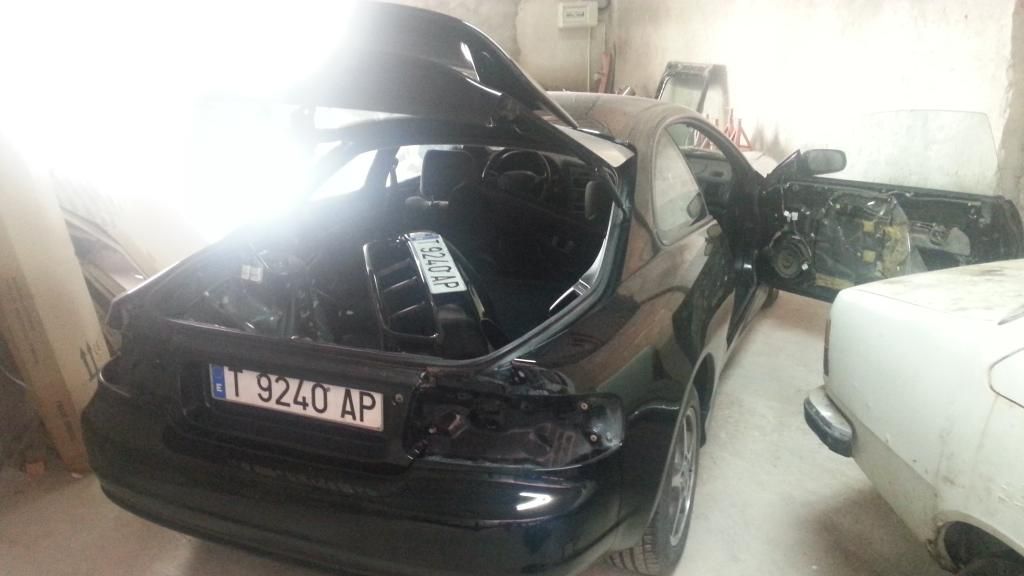 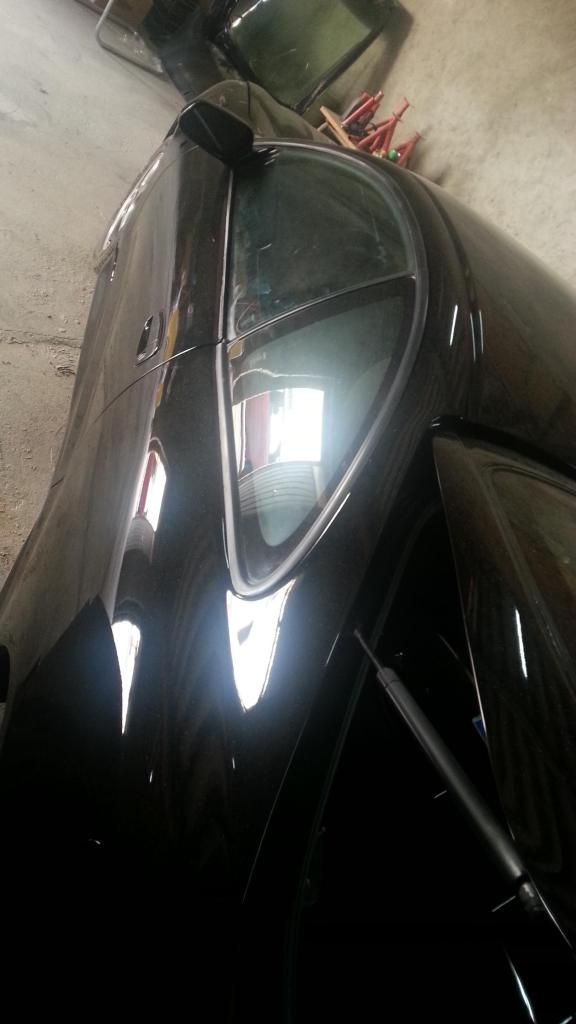 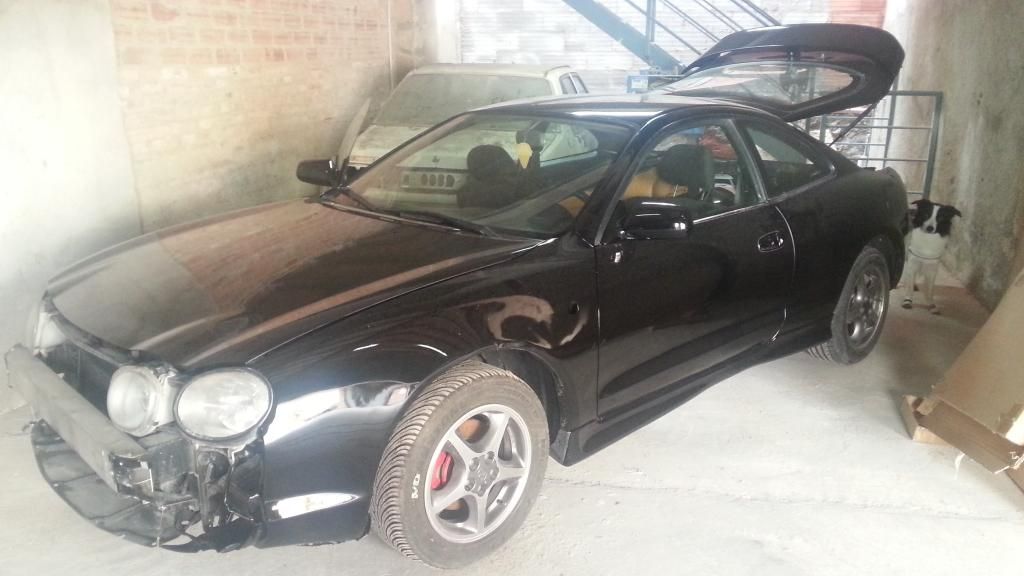 I left the car with all the parts to be painted in the boot. The painter didn't believe me. These Celicas are quite roomy you know? So I set to work on the back of the car for some quick results. Stuck the lights back on, the Toyota badge and the brake light. That's my dog in the background. 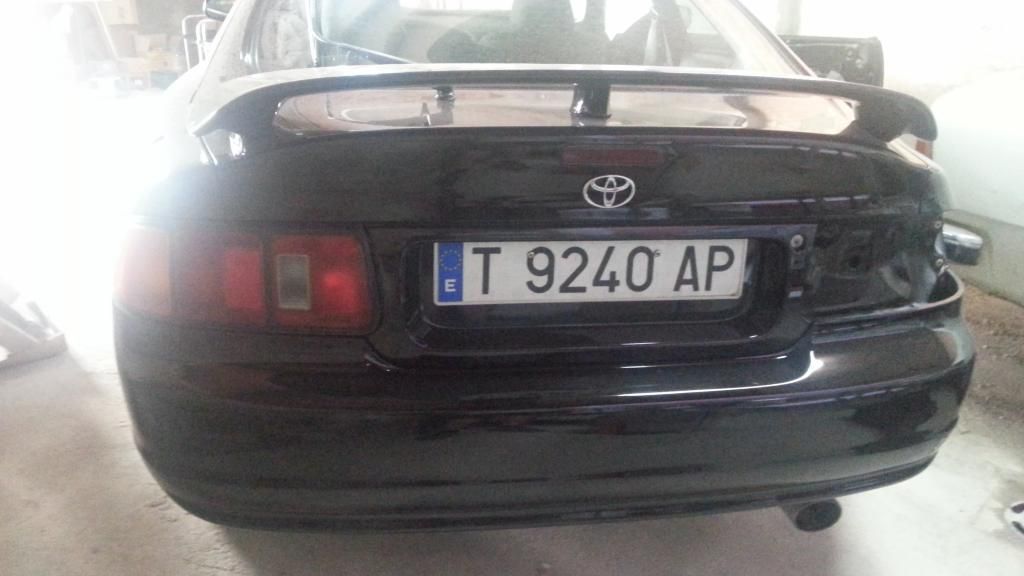 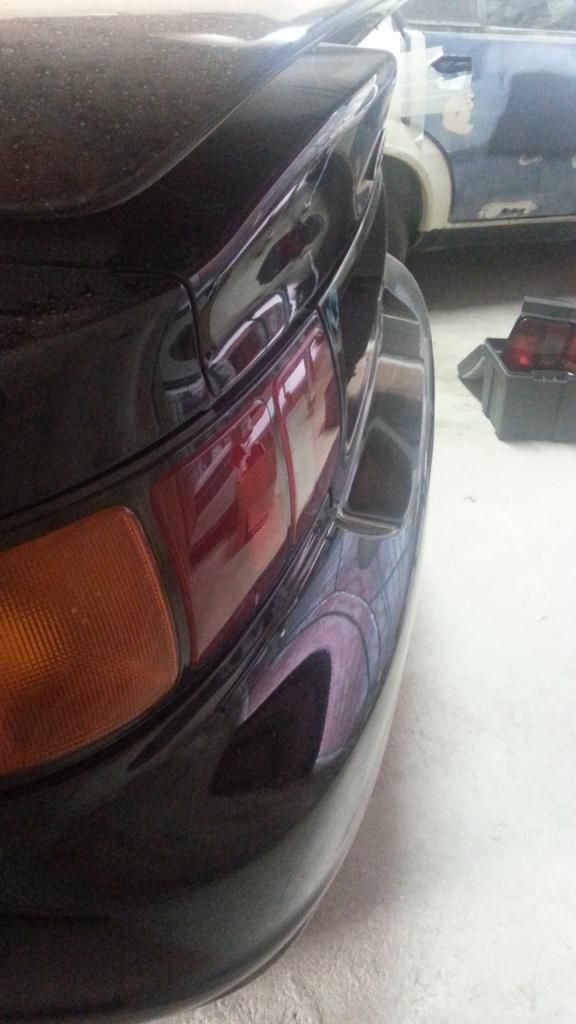 Then I got to work on the nightmare front end. A design horror for sure. Putting on those 3 side nuts of the bumper was an hour long challenge. 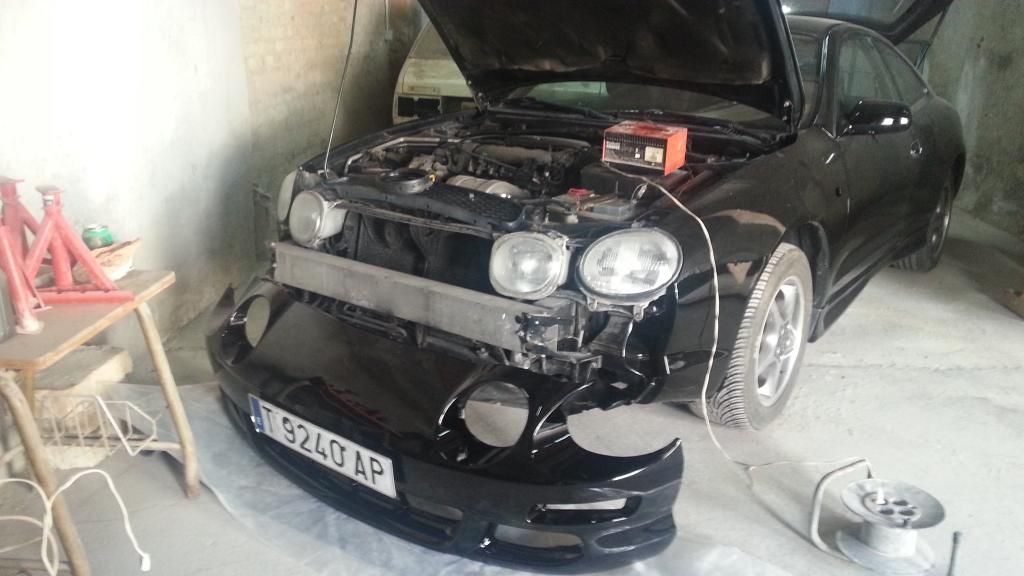 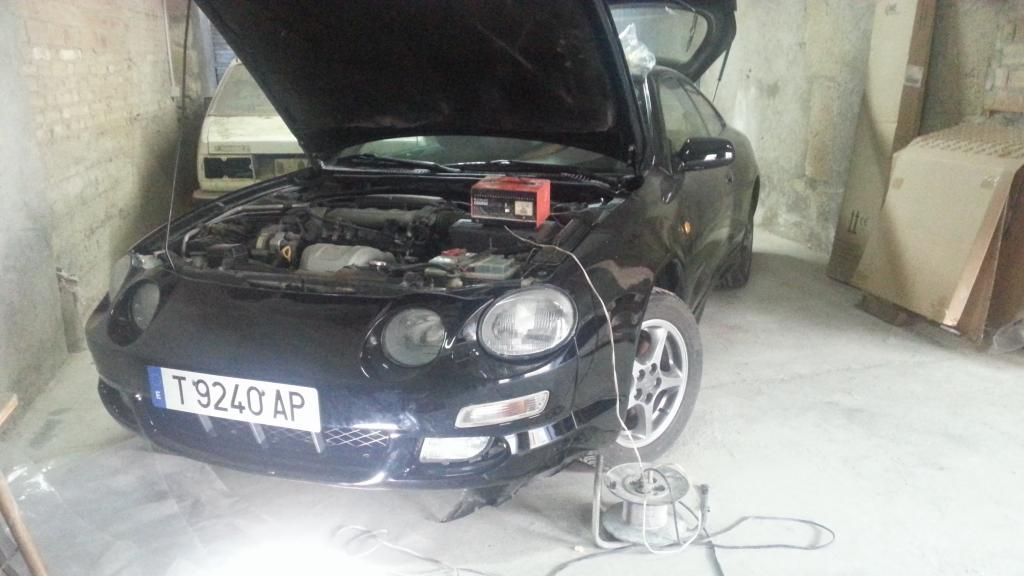 Finally, I screwed on the indicators, clicked in the side repeaters and attached the fog lights. 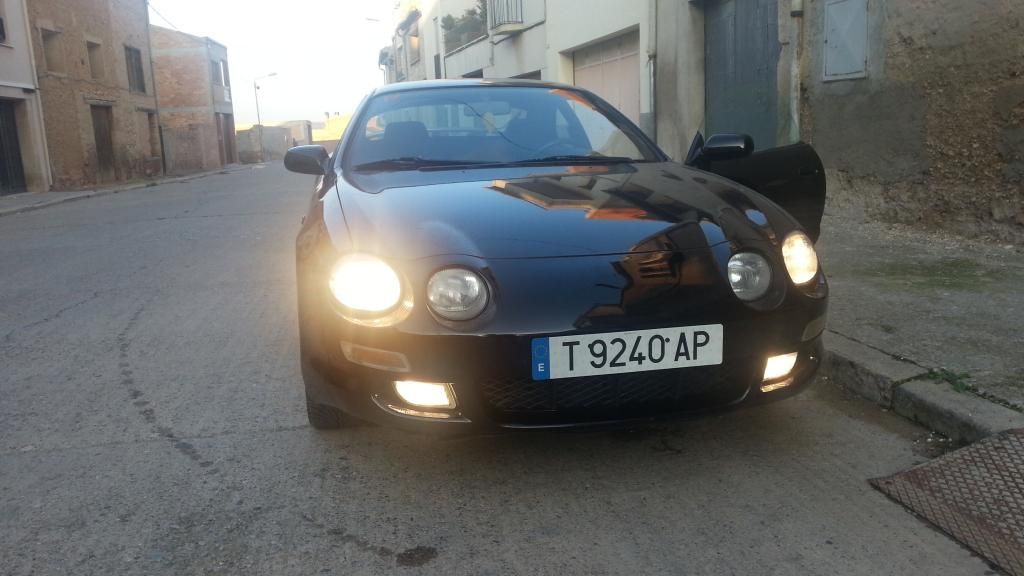 I also changed to numberplate for a cleaner plastic one. The ABS plates are something of a novelty in Spain, and have only fairly recently become legal. 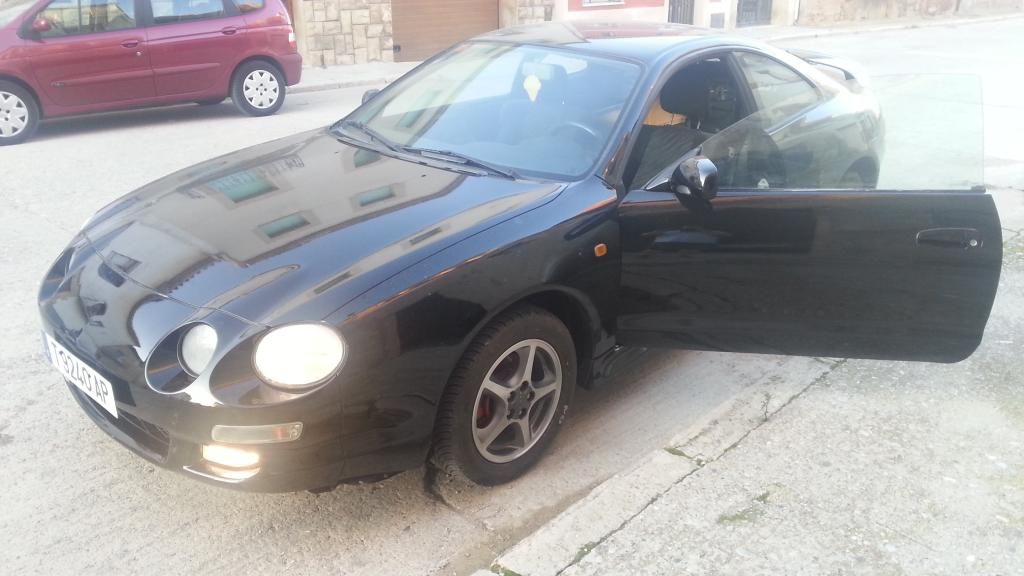 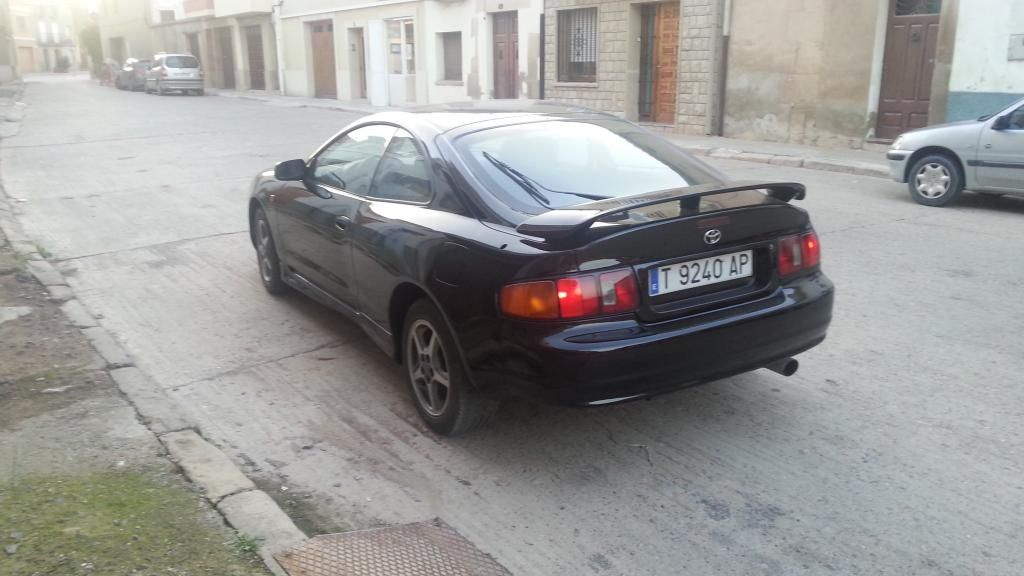 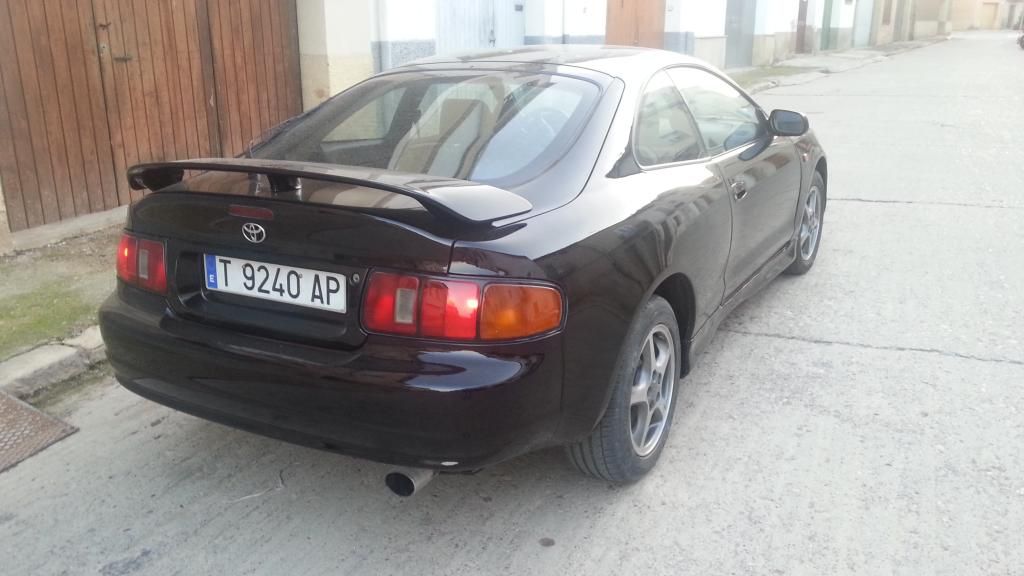 I still have lots to do. I need to screw all the under plastics together, and bolt on the freshly painted front splitters. Then attach the electric aerial, put all the interior plastics back into place and stick on the Celica and small Toyota badges. This post has been edited by Edser: Oct 18, 2014 - 1:27 PM --------------------  |
  |
5 User(s) are reading this topic (5 Guests and 0 Anonymous Users)
0 Members:
| Lo-Fi Version | Time is now: November 1st, 2024 - 1:01 PM |


