  |
 Apr 6, 2016 - 12:21 AM Apr 6, 2016 - 12:21 AM
|
|
|
Enthusiast   Joined Apr 7, '15 From New Mexico Currently Offline Reputation: 0 (0%) |
This is a cautionary tale to anyone who thinks they are going to slap a turbo on a high mileage engine and run low boost. DON’T DO IT! In December of 2014 despite all the posts that say, don’t boost your engine unless it is low mileage or rebuilt, I went for it. Is the 5sfe a great engine to boost, yes, but do it right. This post will tell the LONG, expensive, frustrating story to creating my 5sfte. The below write up is what happened.
Background It has been a long road for this 5sfte build. Here is the engine I started with: 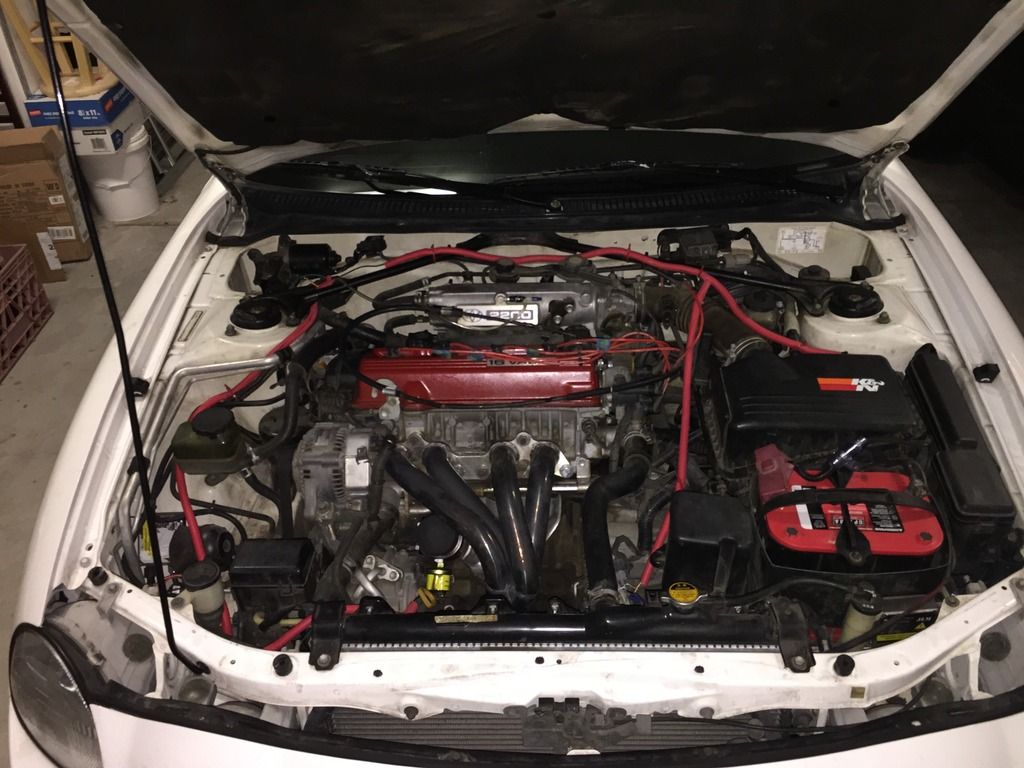 I saw what Supershannon77 did with an Ebay T3/4 turbo for her 6th gen Celica 5sfte and I tried to duplicate it (with a few upgrades). I bought an Ebay kit with the idea that I would need to modify or replace some of the parts that came in it but the bottom line was it would give me a turbo, intercooler, exhaust manifold, downpipe, and some miscellaneous needed parts. As I started the build I found the kit seriously lacking. The big one was the downpipe was for a CT26 turbo not a T3/4 so I had to order one. There was no oil return line and there was not enough intercooler piping. It took 3 months to resolve all the issues with the advertised “bolt-on” kit (there is no such thing as bolt on from Ebay), I ended up with the following build: 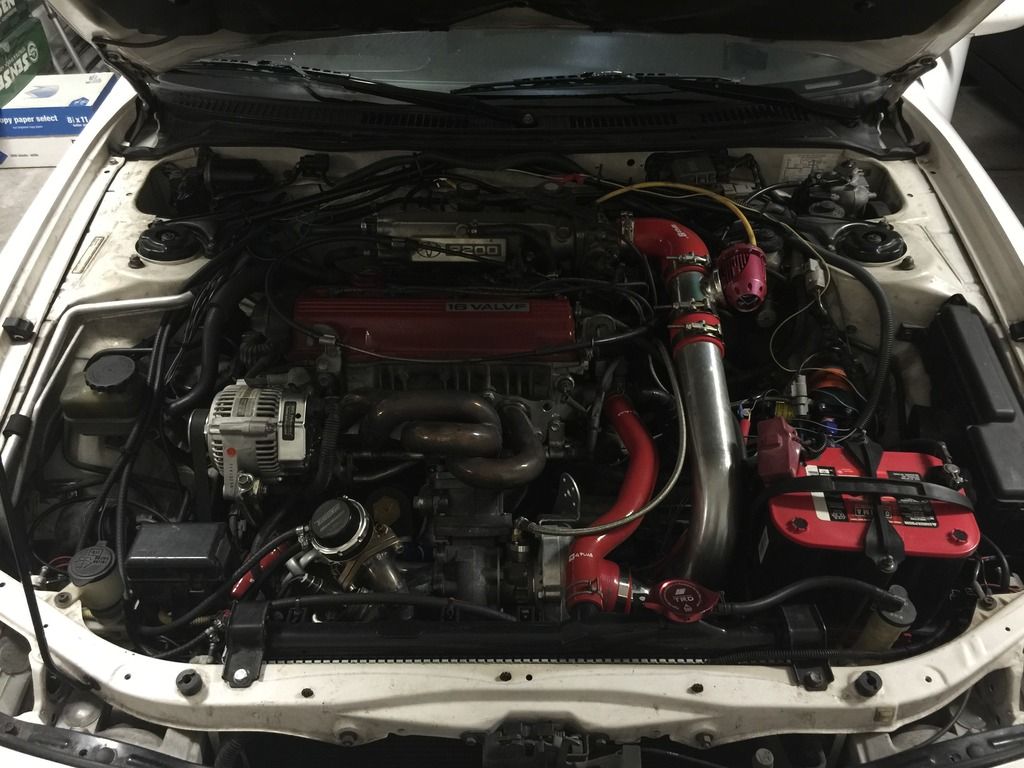 8 psi boost T3/T04E Turbo Turbosmart Wastegate 2.5 inch full exhaust Magnaflow Muffler and Catalytic Converter AEM FIC Piggyback SSQV Blow Off Valve 460cc RX-7 Injectors FMIC Walpro 255 Fuel Pump 3sgte 3 Bar MAP Sensor Custom downpipe from Demon Motorsports Ebay tubular exhaust manifold I started noticing when I would pop the hood after a drive that there was an extreme amount of heat coming out of the engine bay. I also saw that the under hood insulation was burning away. After doing some digging, I found that the tubular manifold I was using was giving off too much heat instead of shooting it down to the exhaust. I needed a 3sgte manifold. I went to the Toyota dealership and they told me that all their warehouses are out of stock and that the best bet was to find a used one. That led to one option, Ebay. After about a week of missing out on bids I finally scored a 3sgte manifold. It arrived and I was so excited, I ceramic coated it and put it on and the car was back! 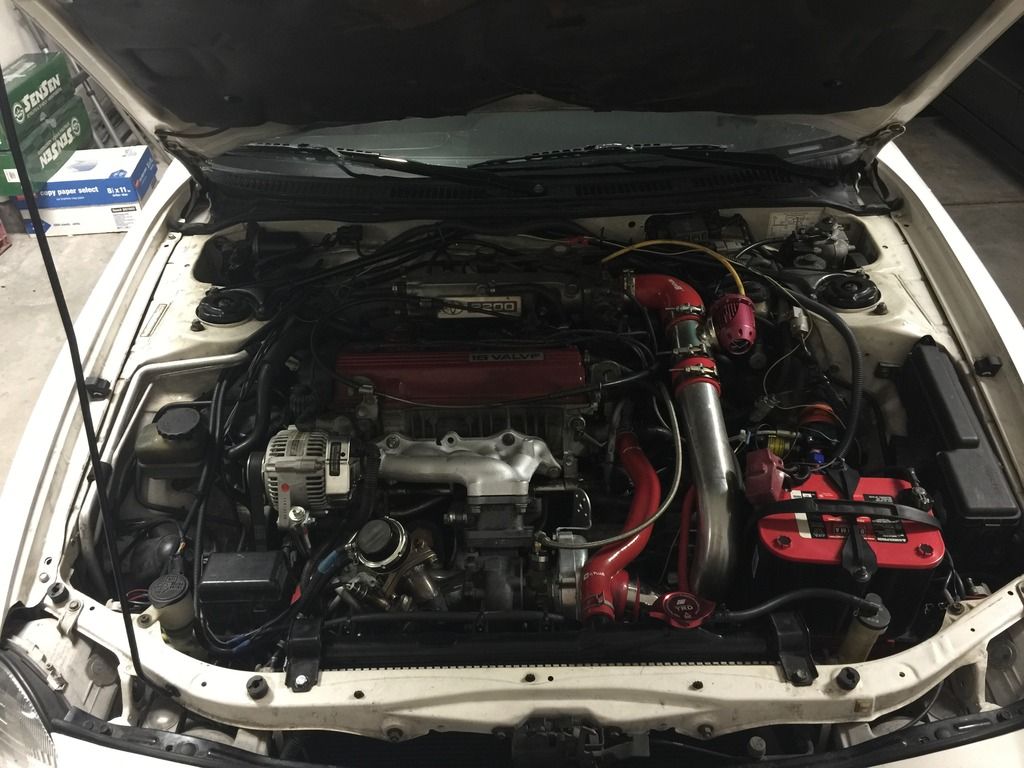 Then another problem reared its head, the clutch started slipping. I bought a SPEC stage 2 clutch, got it installed and the car ran like a champ. In the process of tuning the car, I sprung a fuel leak that lead to an engine fire. I think it the Walpro fuel pump put too much pressure on the original lines coming from the fuel filter and something popped. 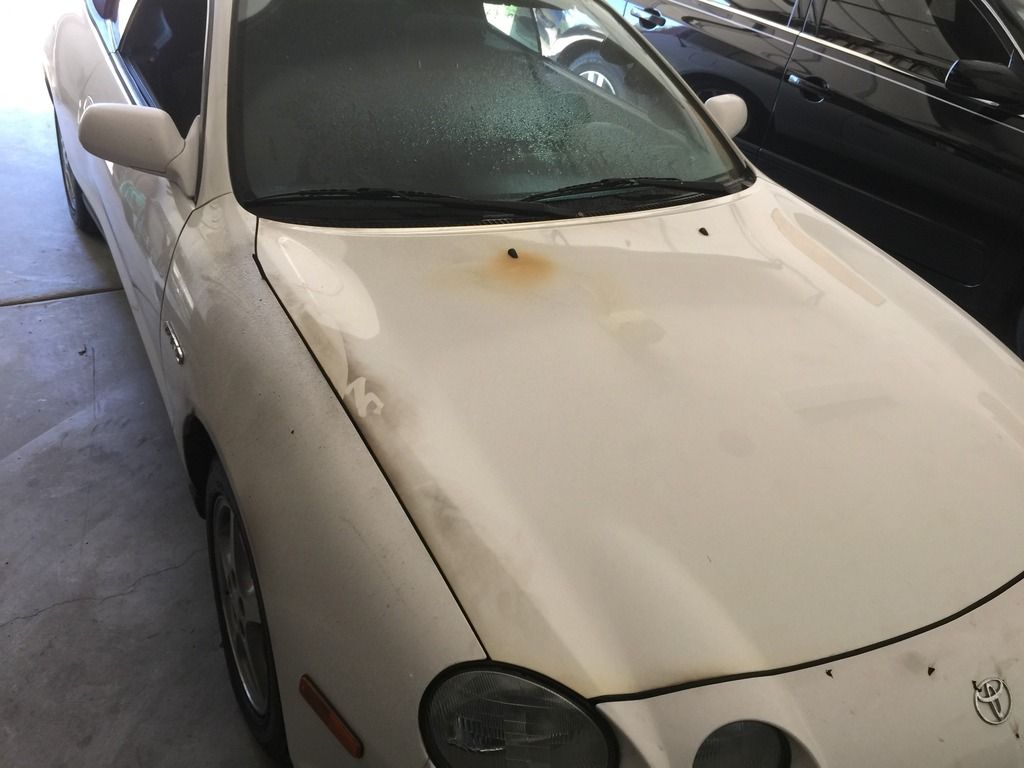 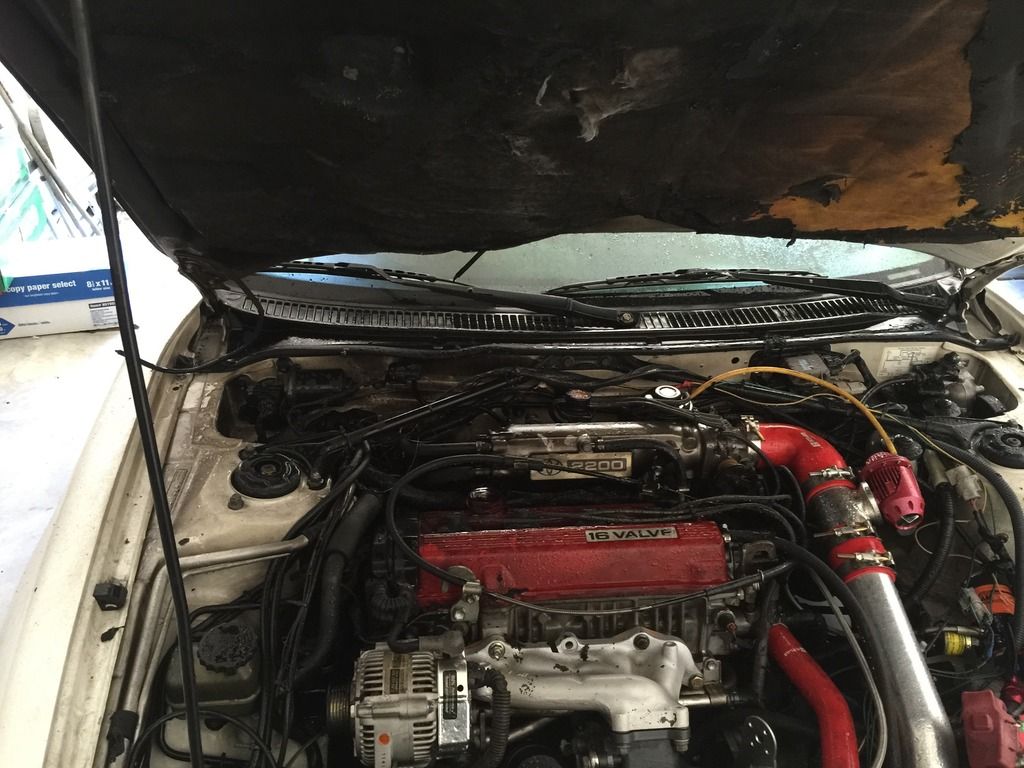 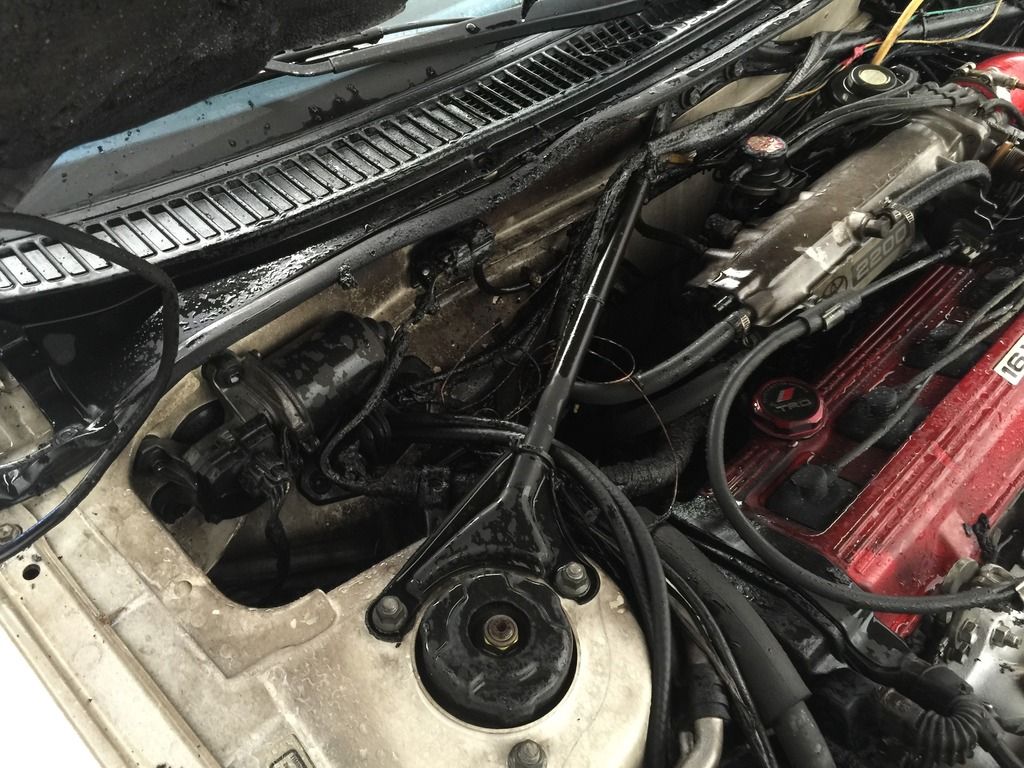 Now here I am, where I should have started. In hindsight I should have rebuilt the engine before going down the turbo route. My plan was to fix the fire damage and rebuild the engine to a 14-15 psi boost-able monster. My goal is 280-300 horsepower. Based on what I saw in Pressure2’s build, I can use stock pistons and rods but I will need a metal head gasket. I planned to swap the California cylinder head with a Federal head so the fuel injectors fit perfectly. |
 Apr 6, 2016 - 12:31 AM Apr 6, 2016 - 12:31 AM
|
|
|
Enthusiast   Joined Apr 7, '15 From New Mexico Currently Offline Reputation: 0 (0%) |
The Engine Pull
I found this great video series of someone pulling, rebuilding, and installing a 5sfe in a Camry. There are some minor differences from this video and my car (engine mounts and automatic vs manual transmission). This video was a really big help. The link is: www.youtube.com/watch?v=jBHJZ_x0neI Also, these 2 books will become your best friend: 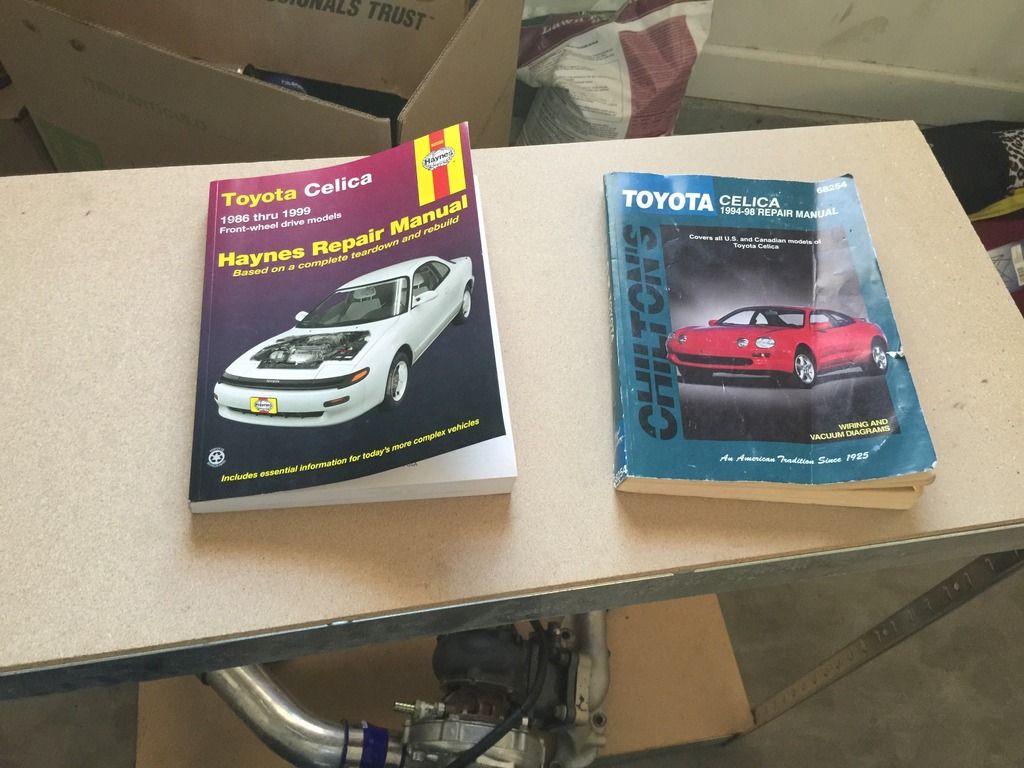 As I started removing parts from the car I found more fire damage than I expected. Nothing that cannot be fixed or replaced but it is still surprising. Initially I only thought I lost my 3 bar MAP sensor, vacuum lines, and some electrical wiring, but there was more than that. The damage included the power steering pump, distributor cap, passenger side axle, A/C trinary switch, EGR recirculation valve, and all the splashguards on that side of the car. Now starts the engine pull. I took out the exhaust, turbo, downpipe, intake, battery, and radiator. 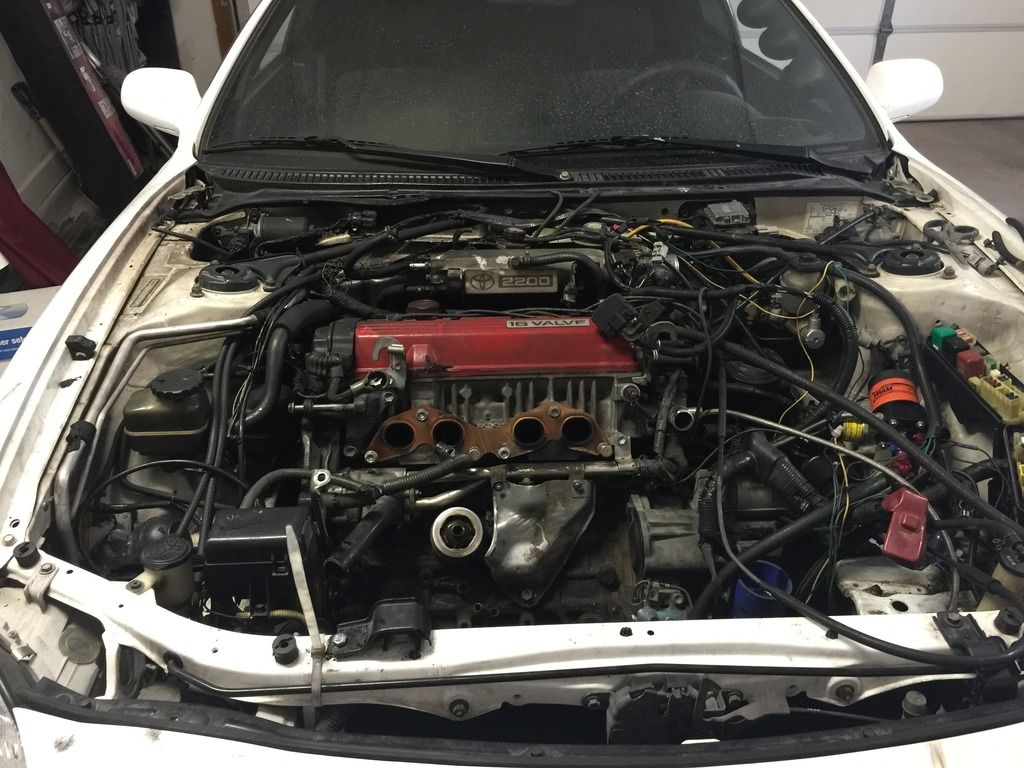 After that I disconnected the upper and lower heater hoses, then the motor mounts. Also, the A/C condenser and the power steering pump had to be disconnected. When disconnecting the A/C condenser I had to make sure I did not unplug any hoses. I hung it with the heavy duty ties on the front of the engine bay. Then the engine pull began. 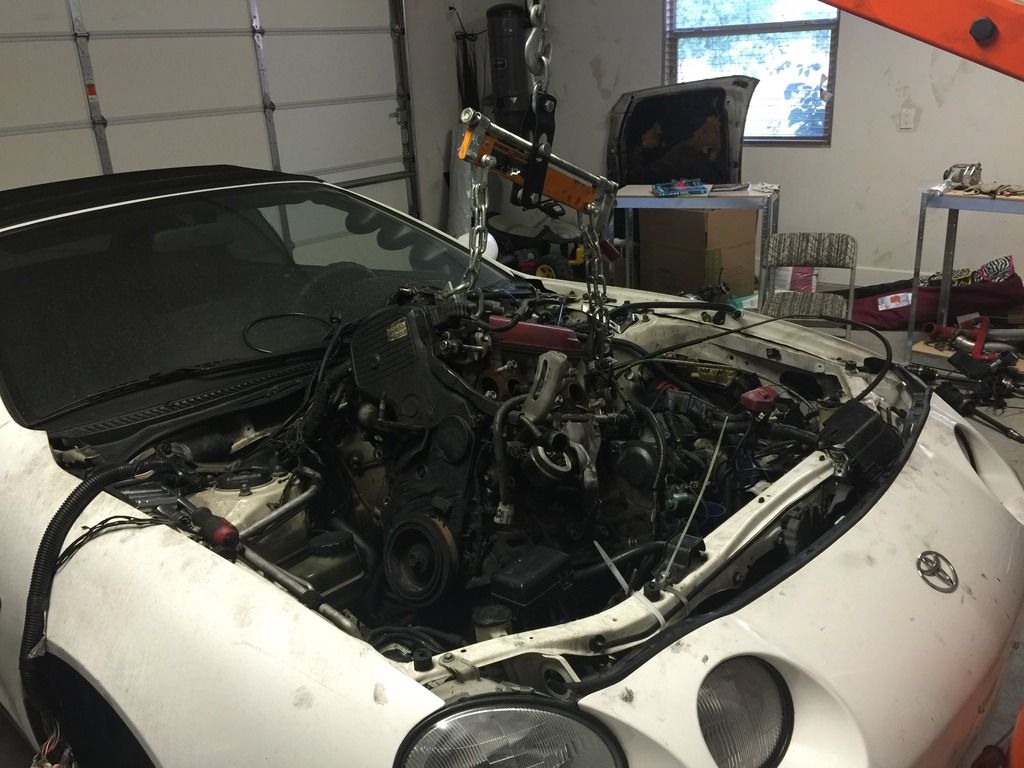 As I went through the process of pulling the motor I had to make sure that nothing else was connected as I pulled the motor. I ended up missing the fuel return line to the charcoal canister. This lead to me breaking the Bimetal BVSV Evaporative Vacuumm Valve luckily I found a used one for $20. Here is the empty engine bay. 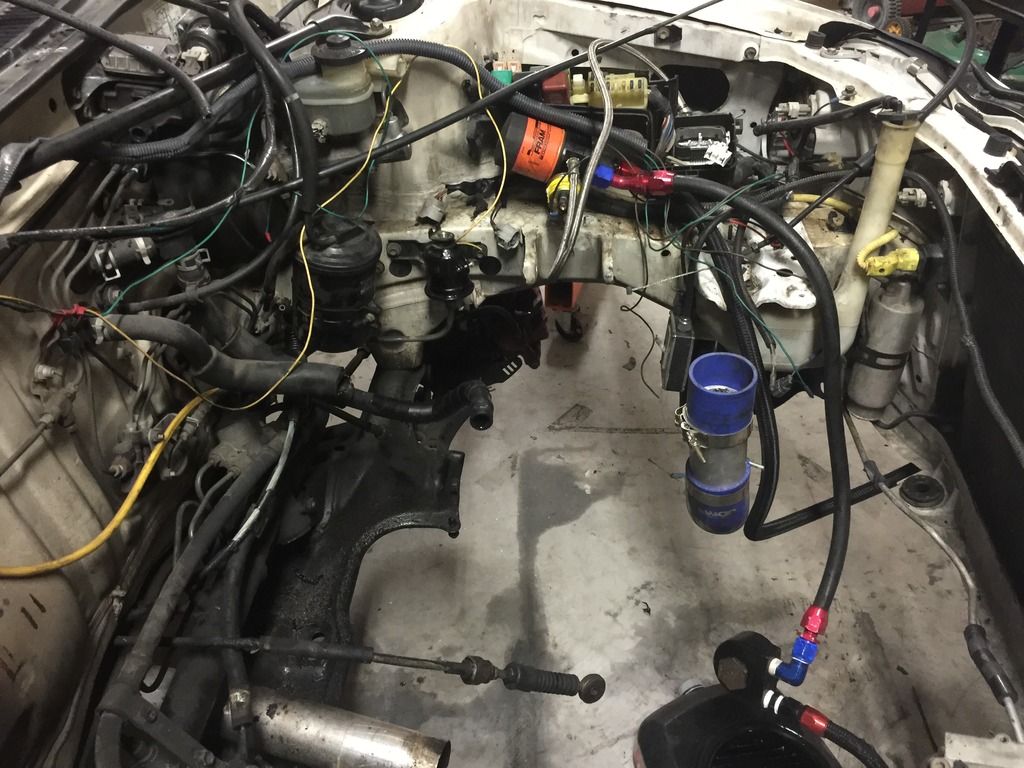 I could see all the fire damage. Damn, this is going to be some hard work!  Here is the engine out of the car. 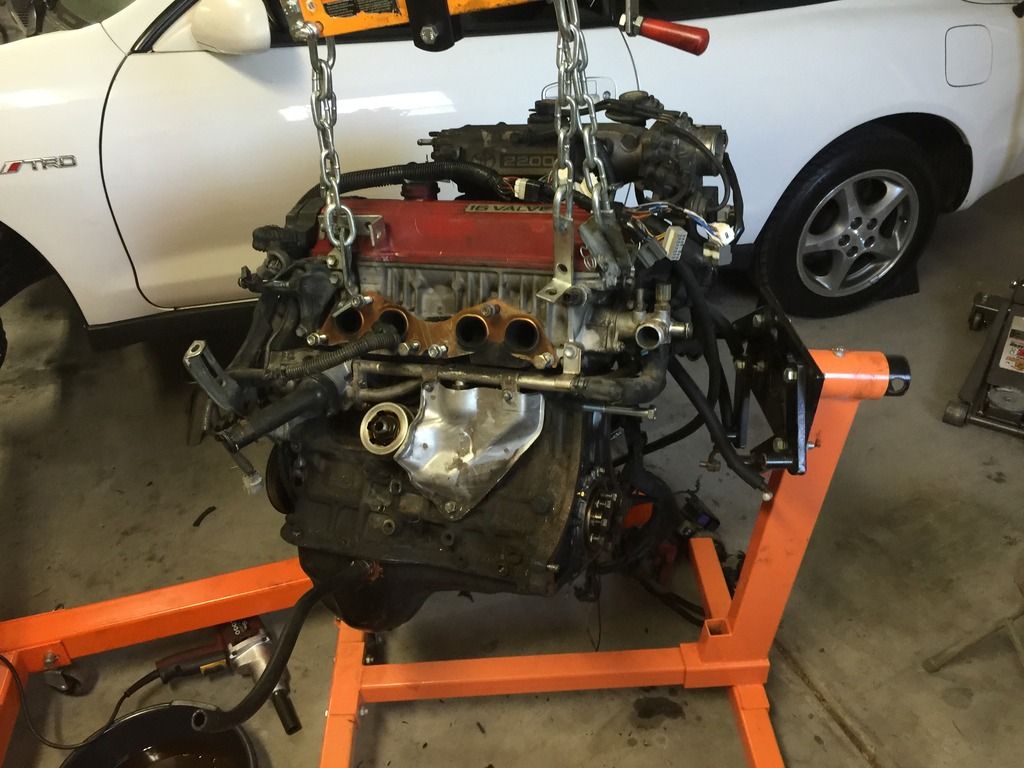 From the back. . . 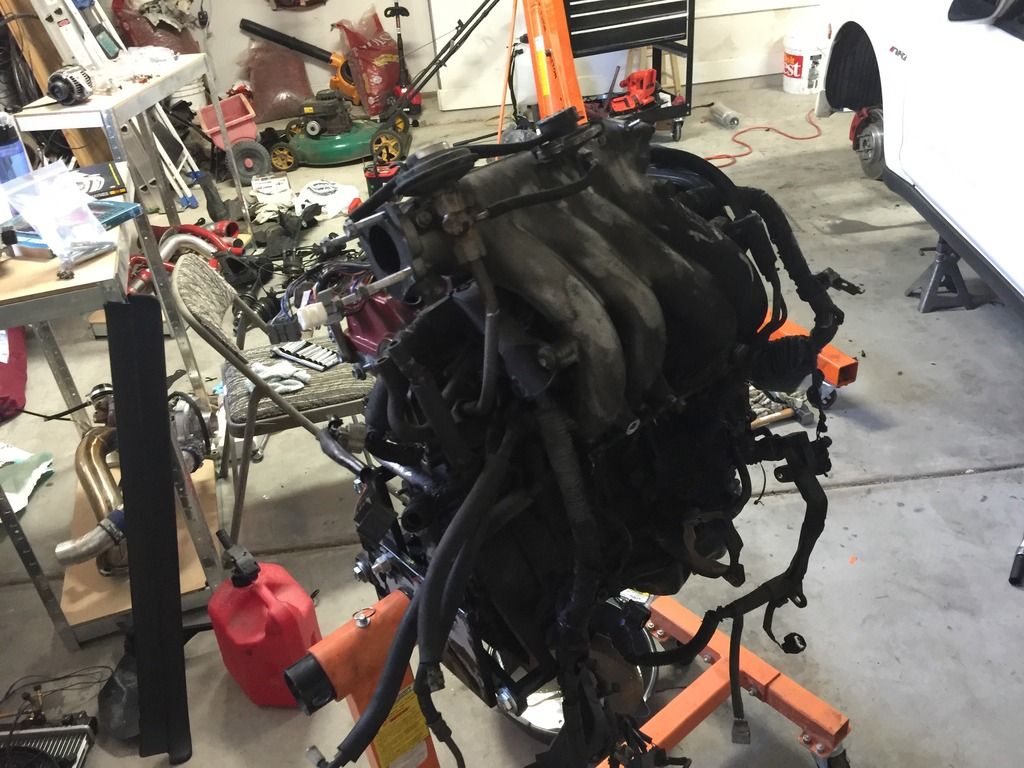 Looks like I will need a new upper and lower timing belt cover too. Here is a picture with the transmission off the car. It breaks my heart to see a brand new performance clutch on a burned up engine. 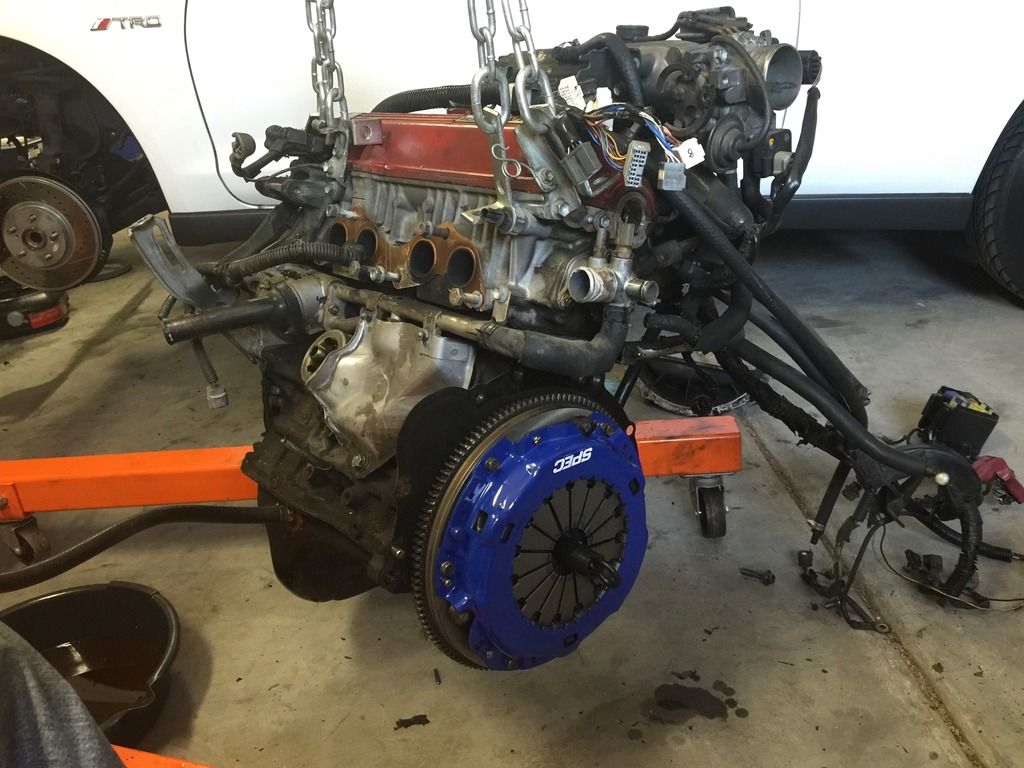
|
 Apr 6, 2016 - 12:38 AM Apr 6, 2016 - 12:38 AM
|
|
|
Enthusiast   Joined Apr 7, '15 From New Mexico Currently Offline Reputation: 0 (0%) |
Engine Breakdown
Now with the transmission and clutch off the engine, I could mount it to the engine stand. When you are talking off the clutch make sure you put it somewhere out of the way so that you don’t spill oil on it and ruin the friction surface. A friend pointed this out to me when he saw I had the clutch right near where I was working on the engine.  With the engine on the stand I could really see how bad of shape the engine was in from the fire. There were melted wires, vacuum tubing, timing covers, and seals. That is what I get for not listening to the forums about rebuilding the engine before turbo’ing it 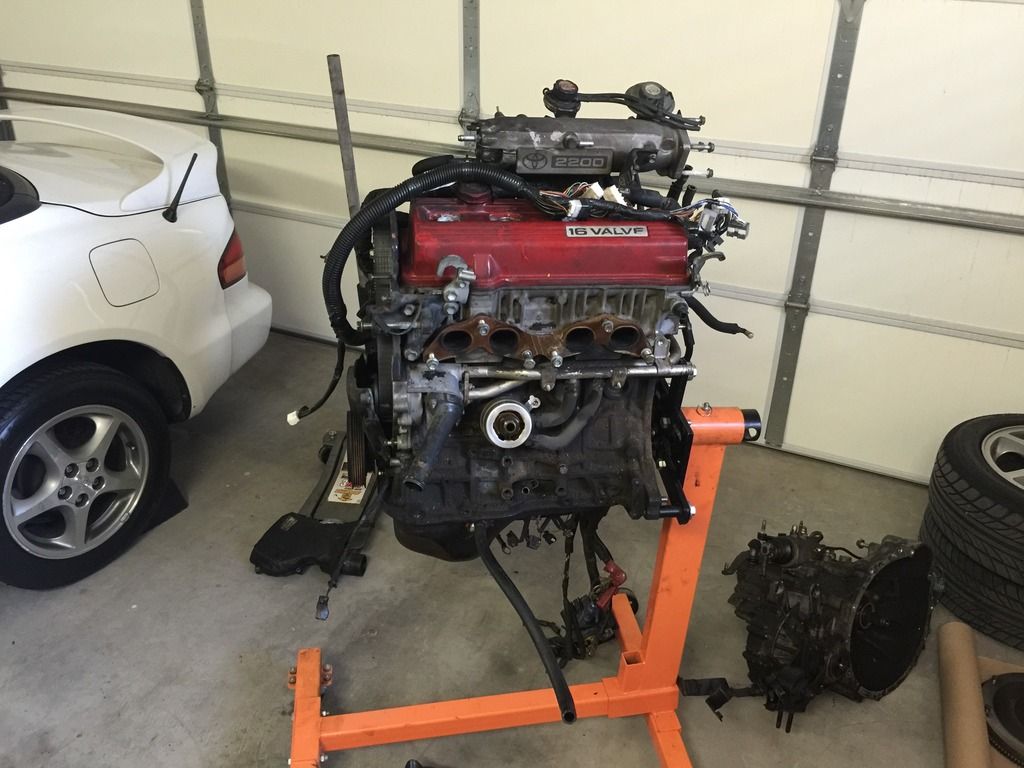 You can see here that the harmonic balancer is still on the crank. I was not able to get if off even after taking a cutter to it. I ended up leaving the crank in the block and letting the machine shop take care of it. Come to find out when the timing belt was changed before I owned he car, someone used red Loctite. 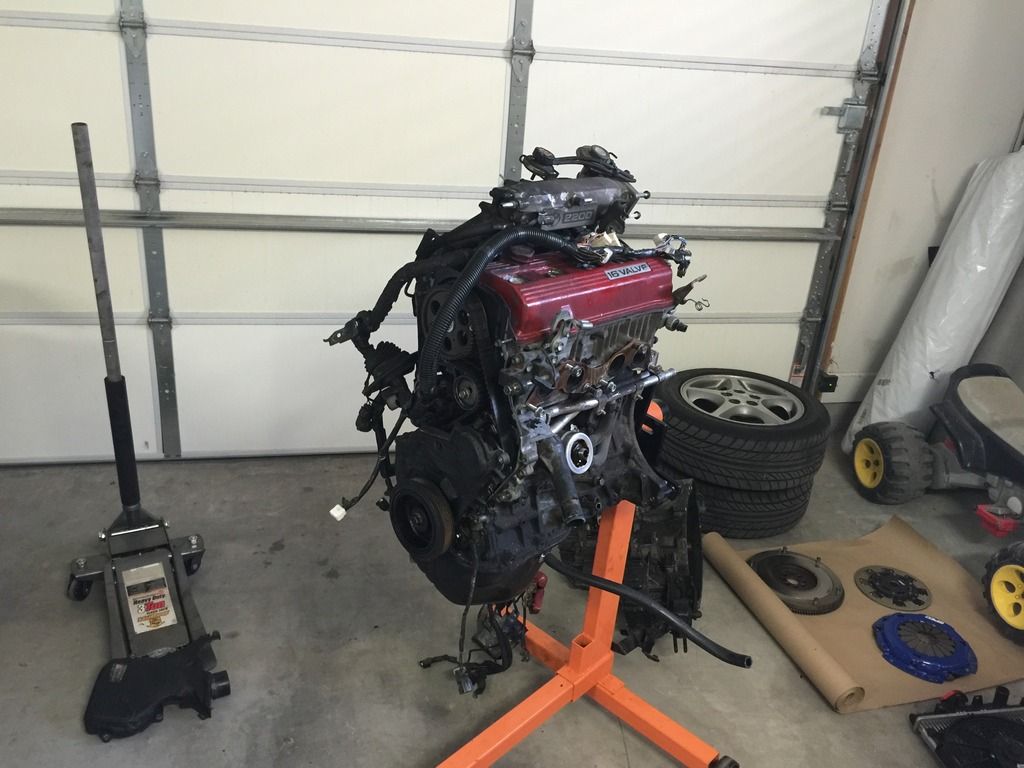 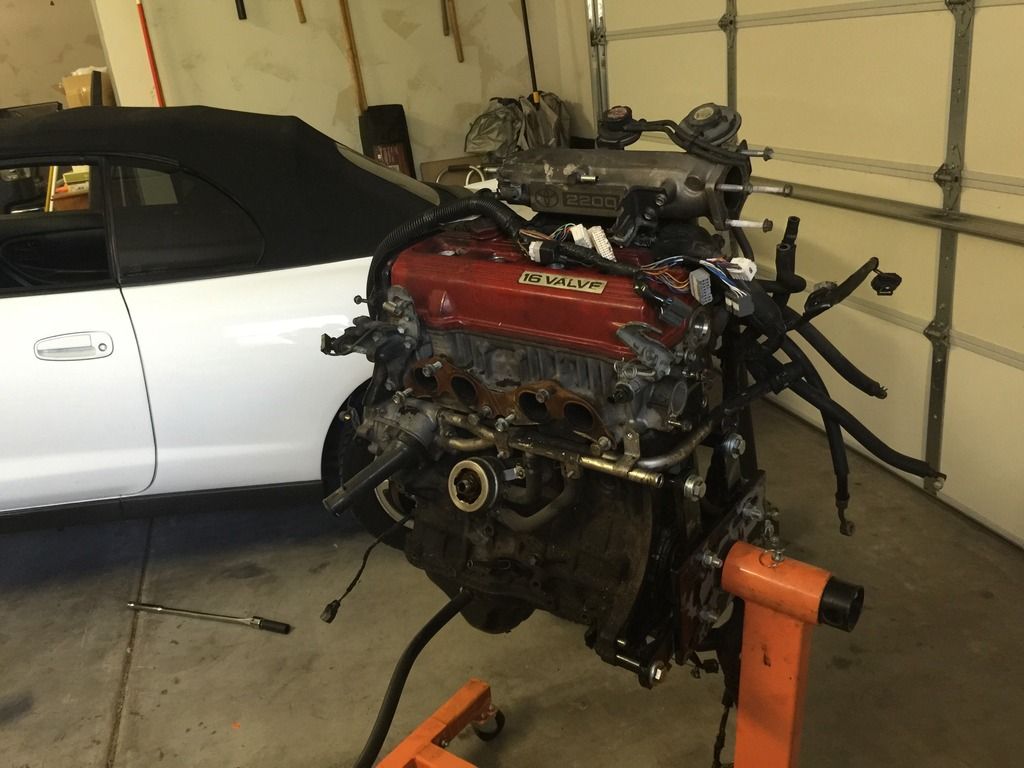 There is the culprit that caused the engine fire. The fuel injector made for a federal cylinder head did not seal with the California one on the engine. I hate Cali emissions even more than ever! 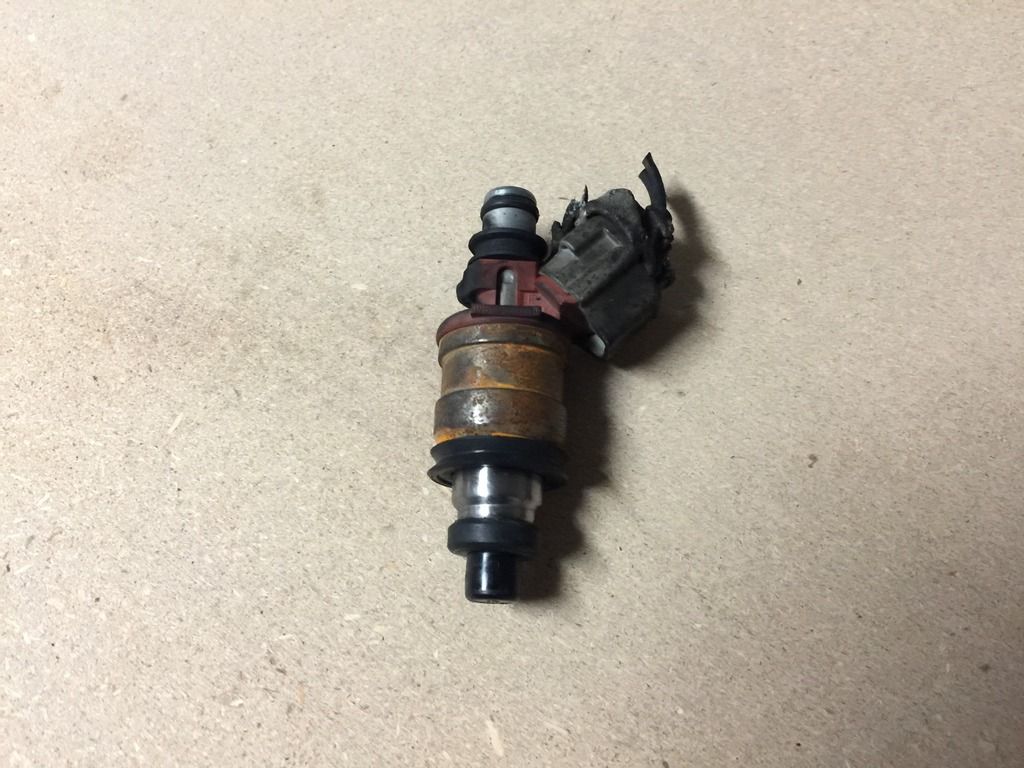 More pictures of the engine teardown. 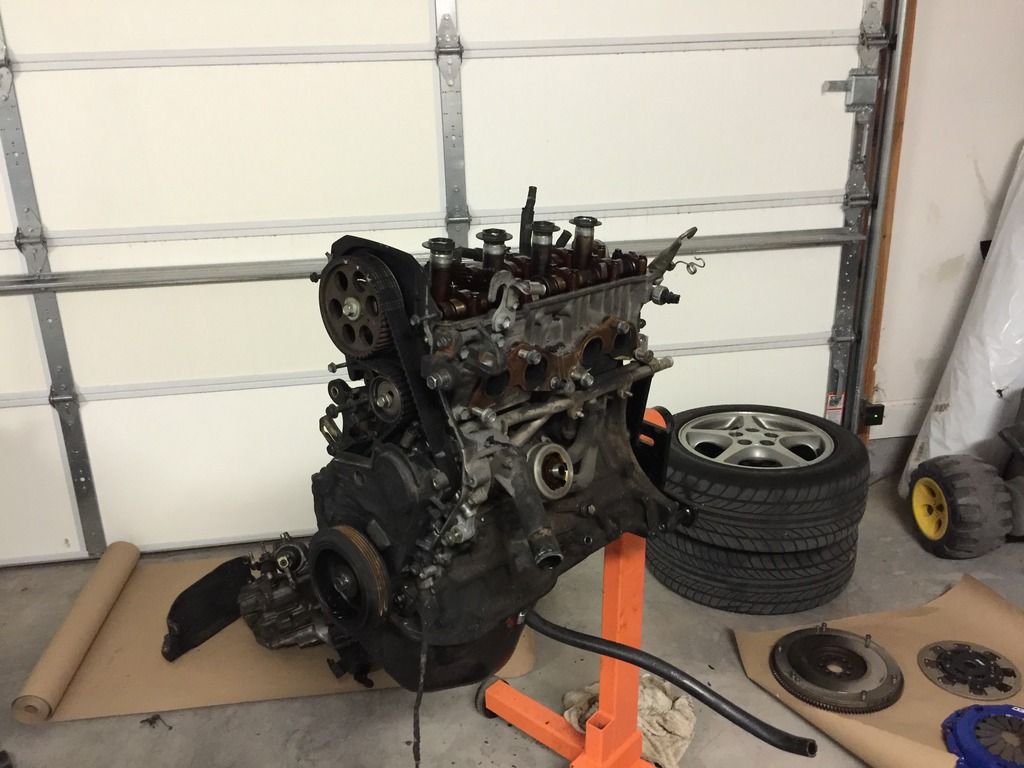 Here is the fuel rail. Besides some burn marks it is in good shape. I will still replace the pressure regulator just to be safe. 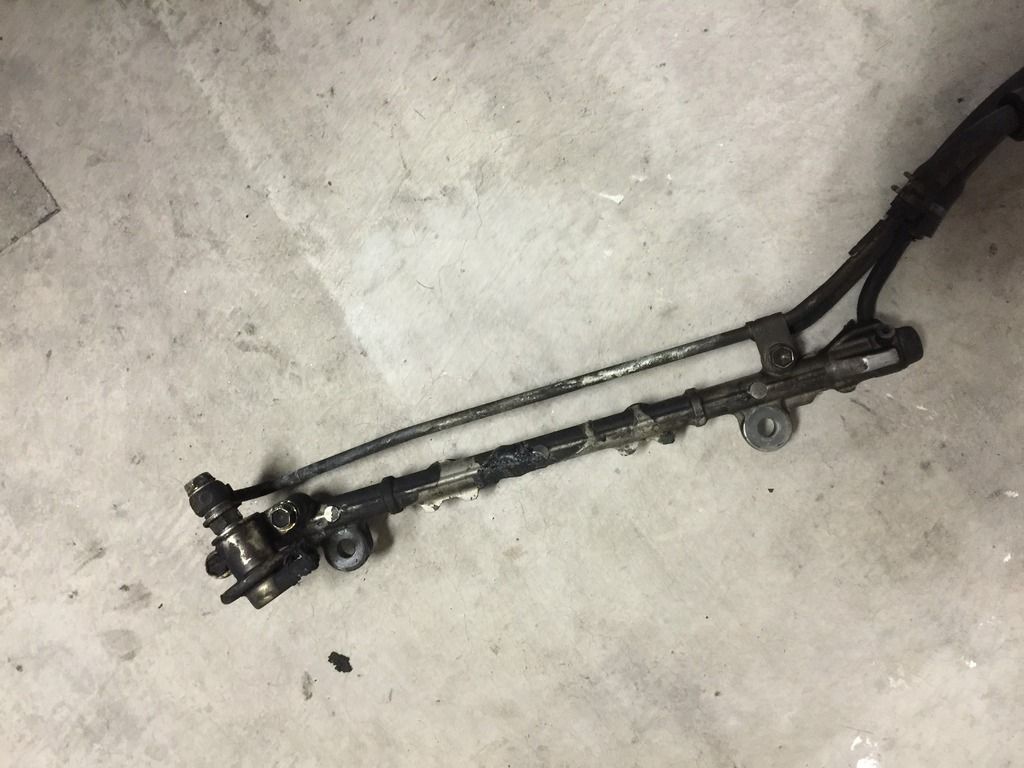 Here are the camshafts still on the head. 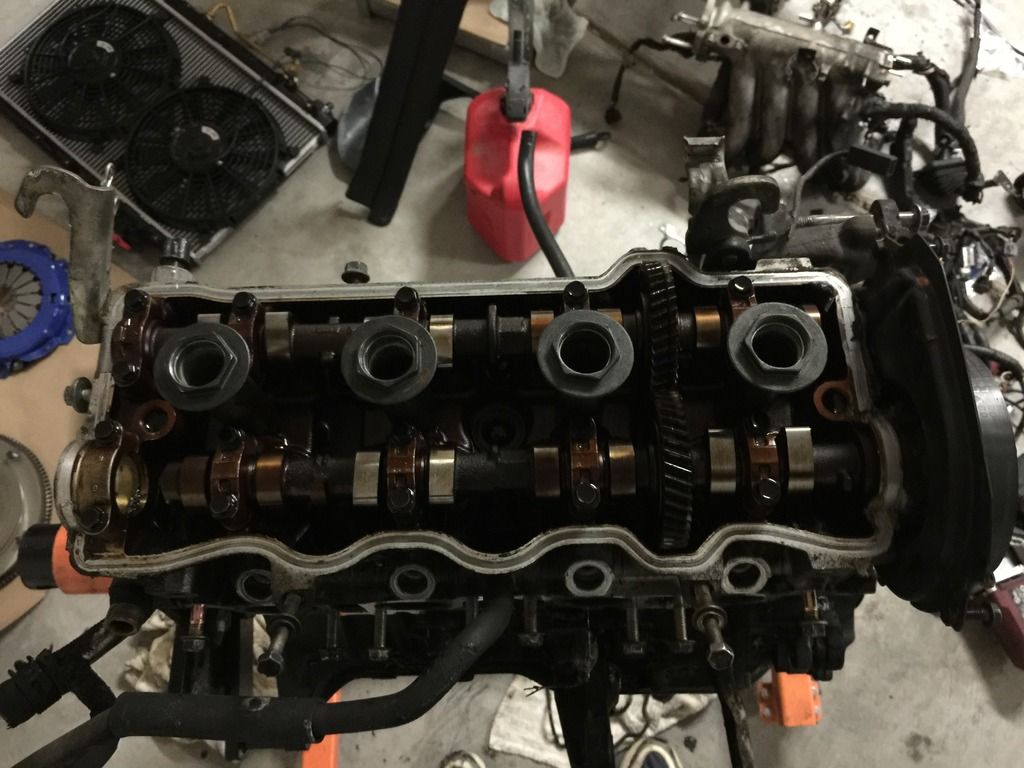 Cylinder head is off the block 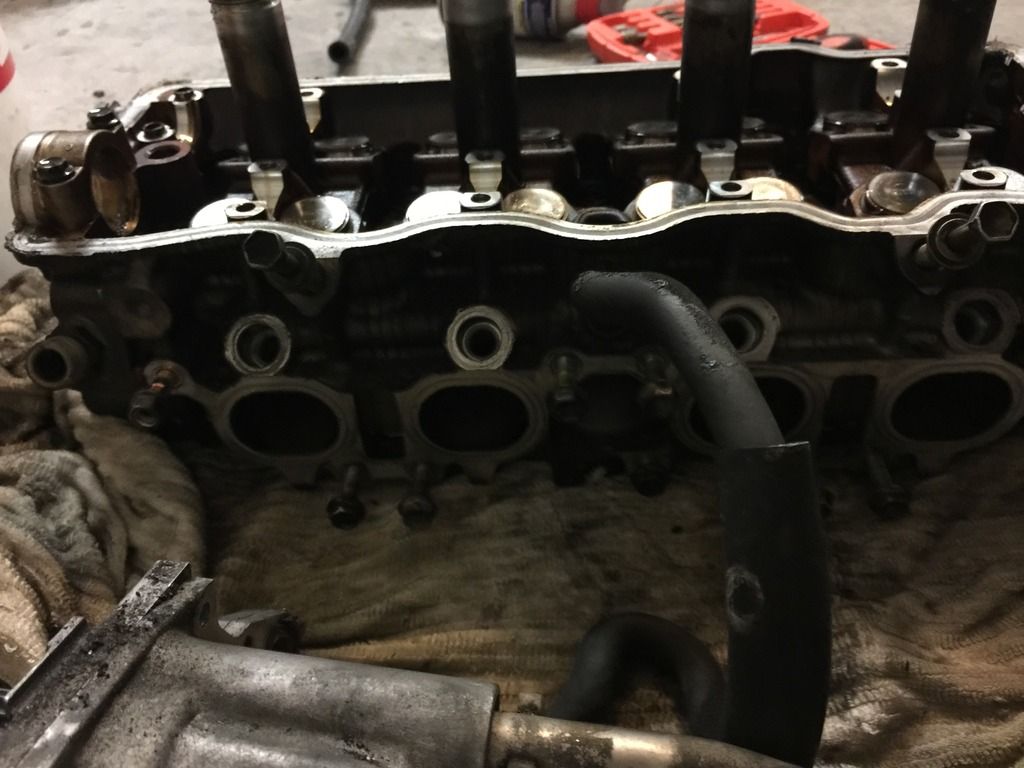 And the pistons and rods. 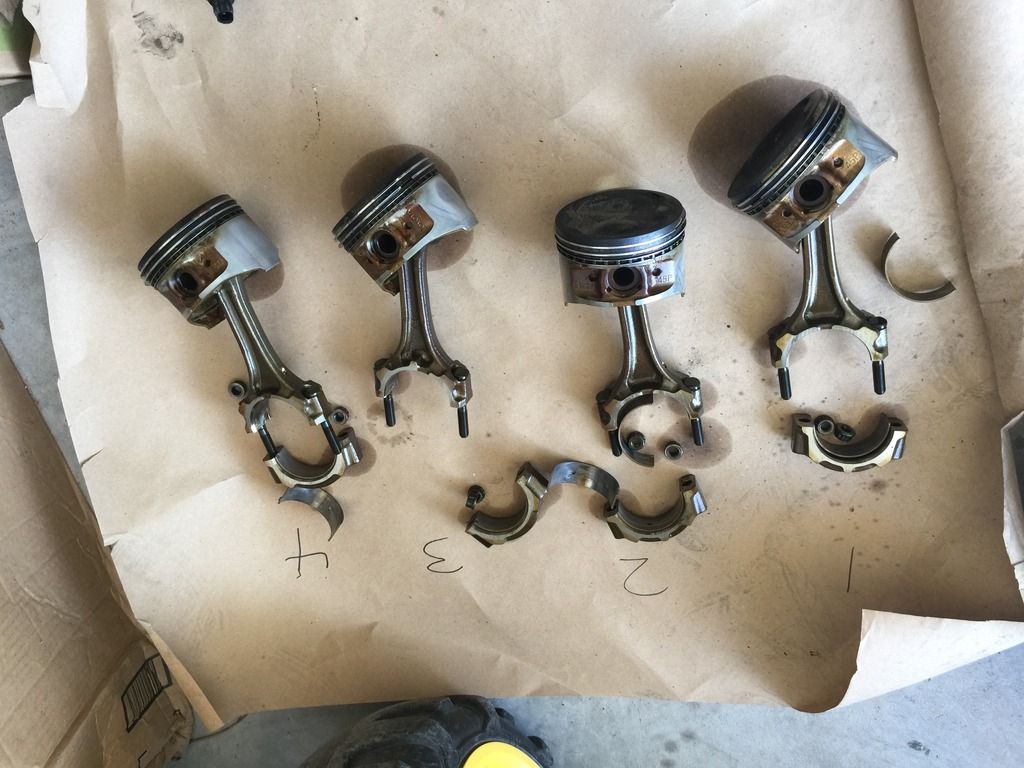
|
 Apr 6, 2016 - 12:45 AM Apr 6, 2016 - 12:45 AM
|
|
|
Enthusiast   Joined Apr 7, '15 From New Mexico Currently Offline Reputation: 0 (0%) |
Engine Build-Up
Once the engine was apart I took the block and crank to a machine shop. The engine had 132K on it and did not need to be bored. The block was honed and vatted. The crank was polished. Here they are: 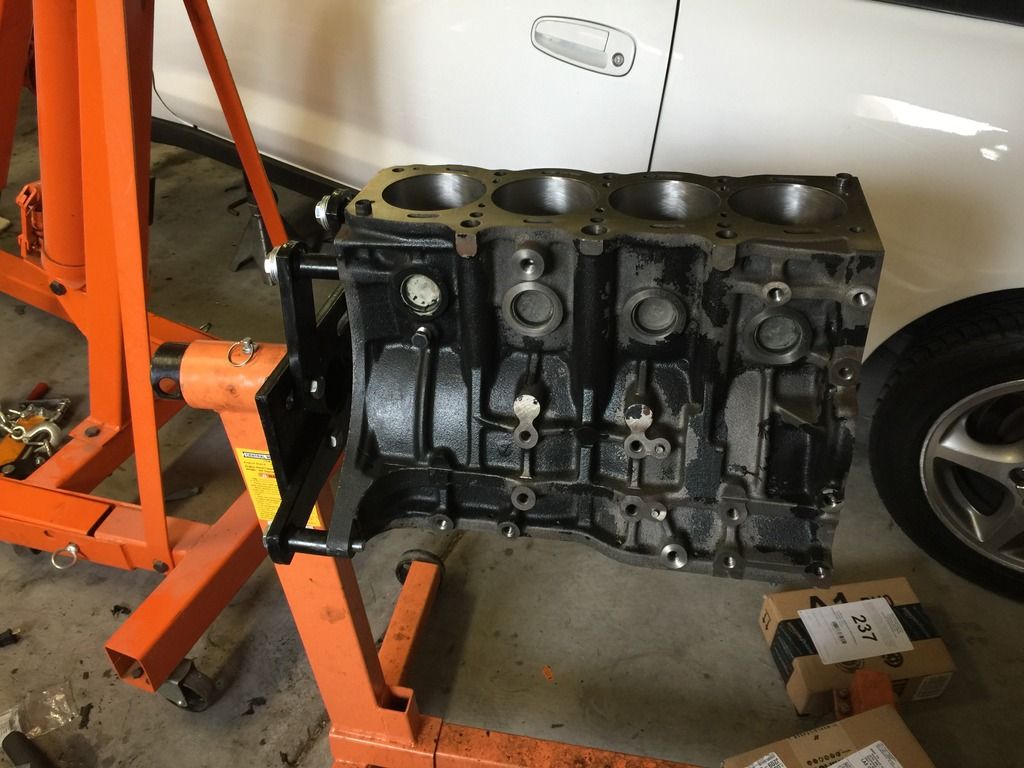 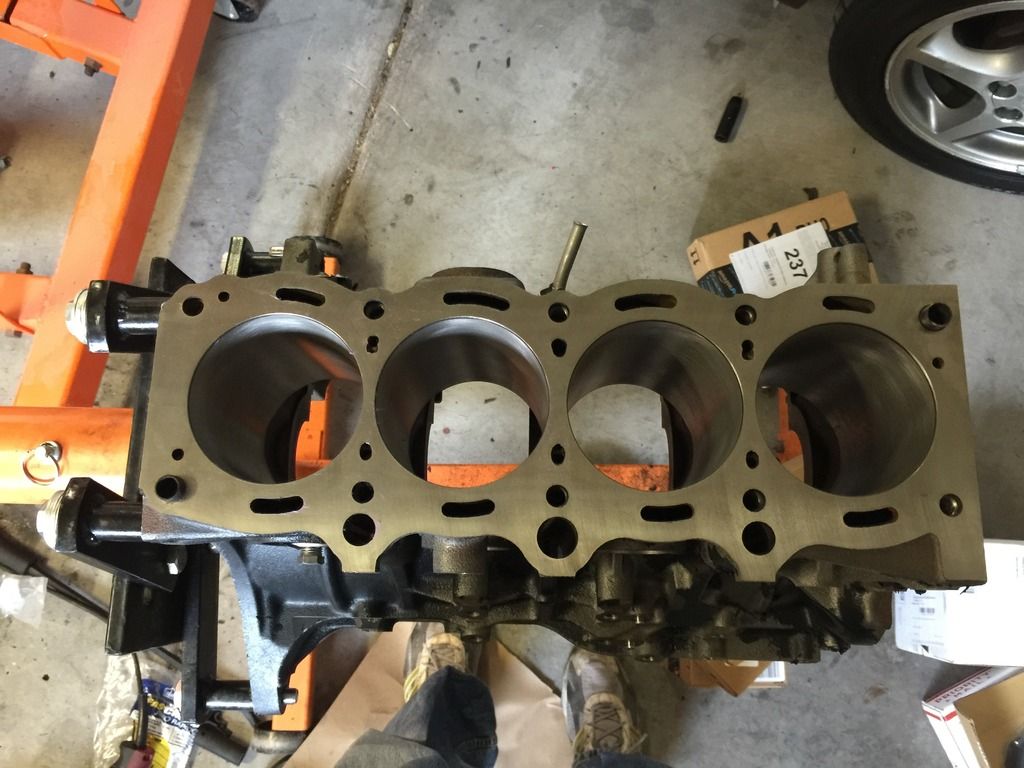 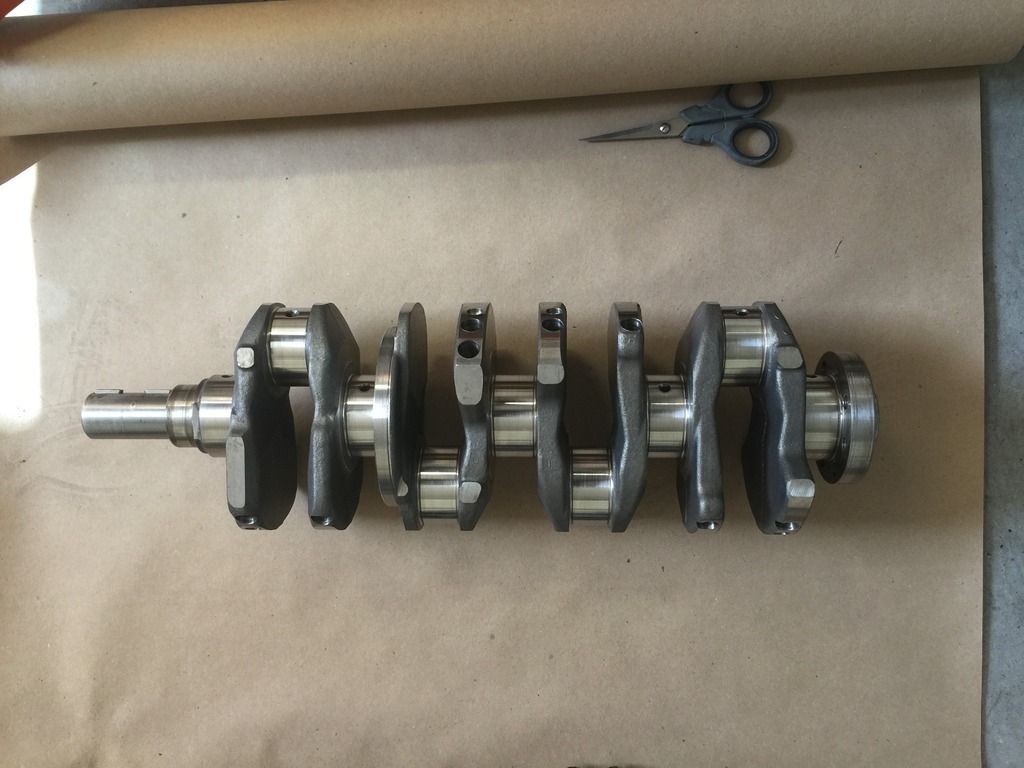 Also, I ordered a rebuilt federal cylinder head. The company was willing to take my old Cali head as a core. The California head has some differences from the Federal brother. 1. Different injector seats 2. Extra EGR port on the back Here is the old head next to the new one: 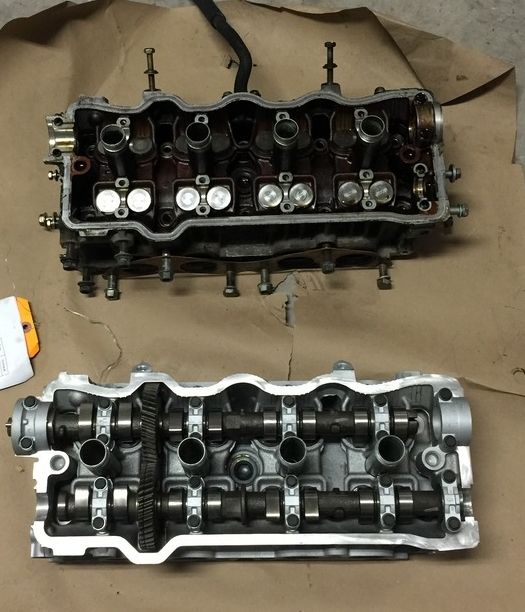 I decided to paint the block just to make it look cool. 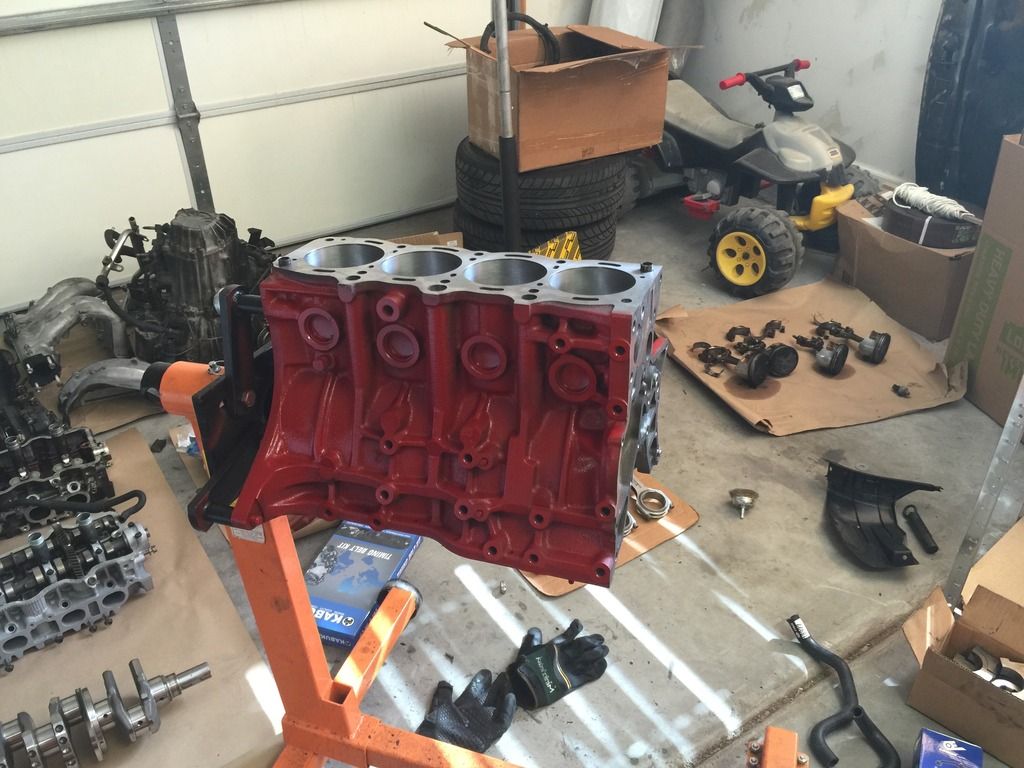 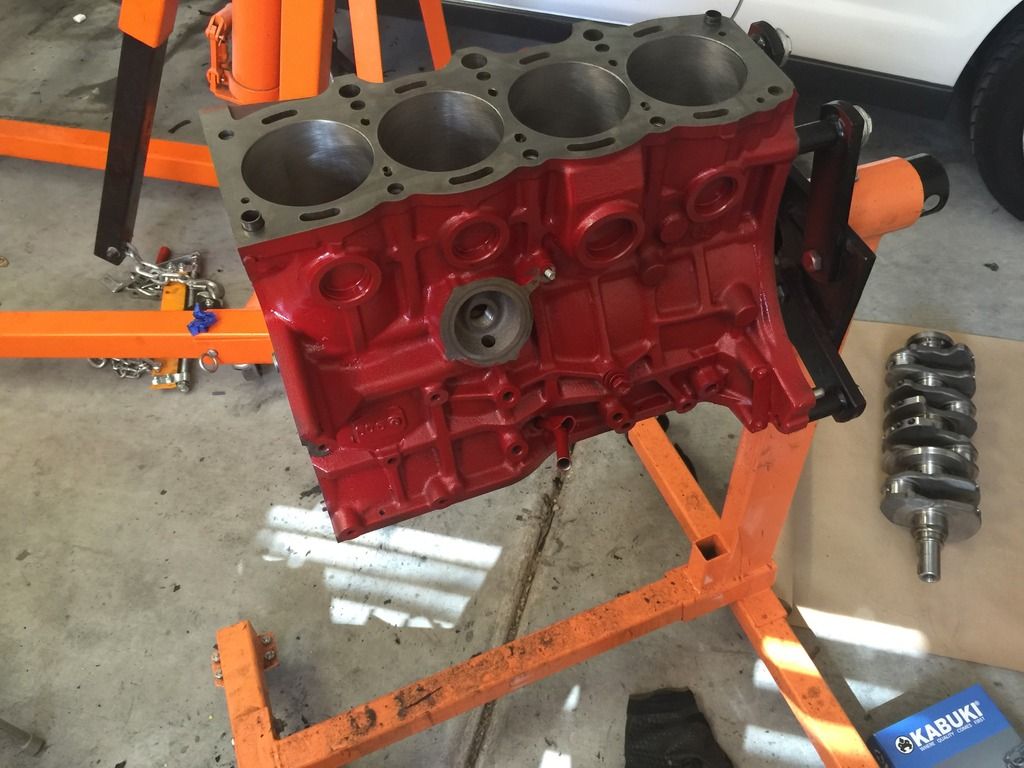 Now it was time to start putting this puppy back together but I was getting an itching feeling I was missing something so I started doing some more research. I was looking to any weak points or flaws with my build and I found one that bothered me. The rod bolts may not be strong enough to handle the power I was going to put them through so I decided to go with a forged rod. This would ensure that a bolt would not snap under boost. Also, I went with an aluminum allow piston for added strength. It could not beat a forged piston but the forged ones cost WAY too much money. You could see how much beefer the new piston and rod is compared to the older one. 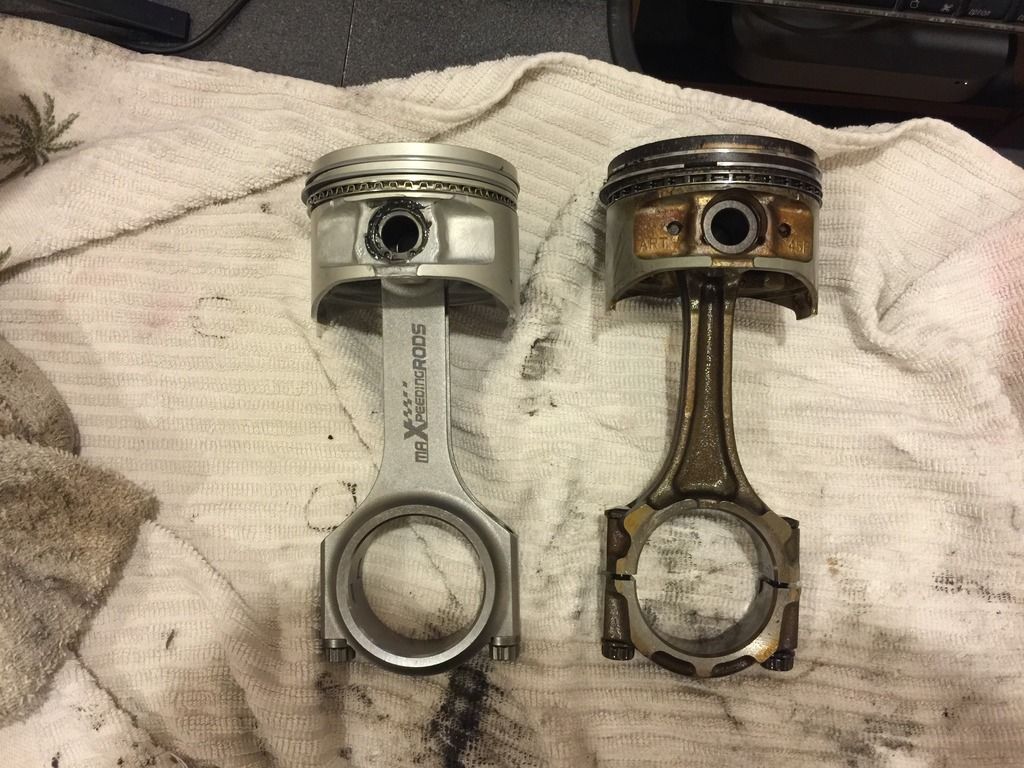 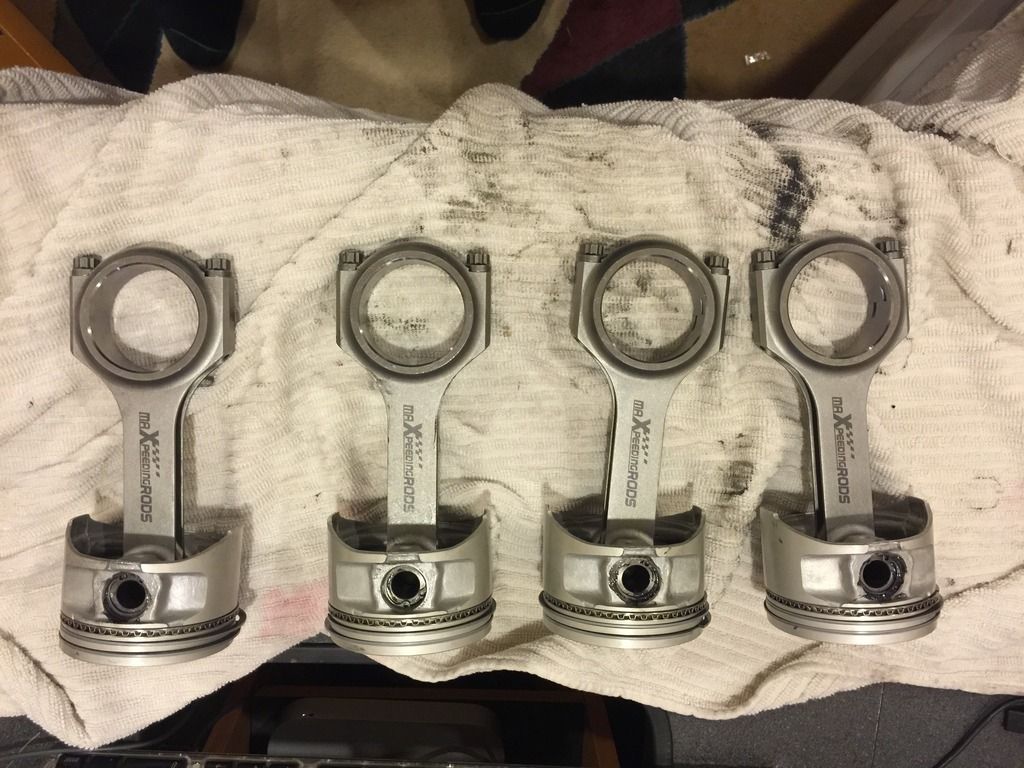 Block and head back together. 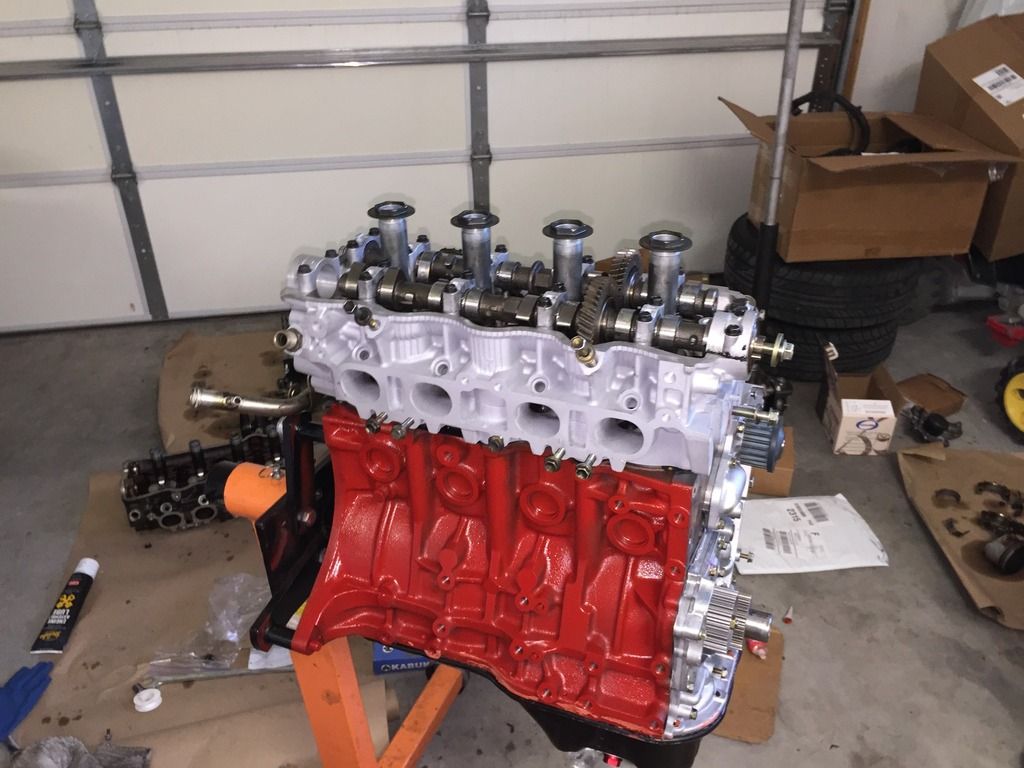 Timing belt. 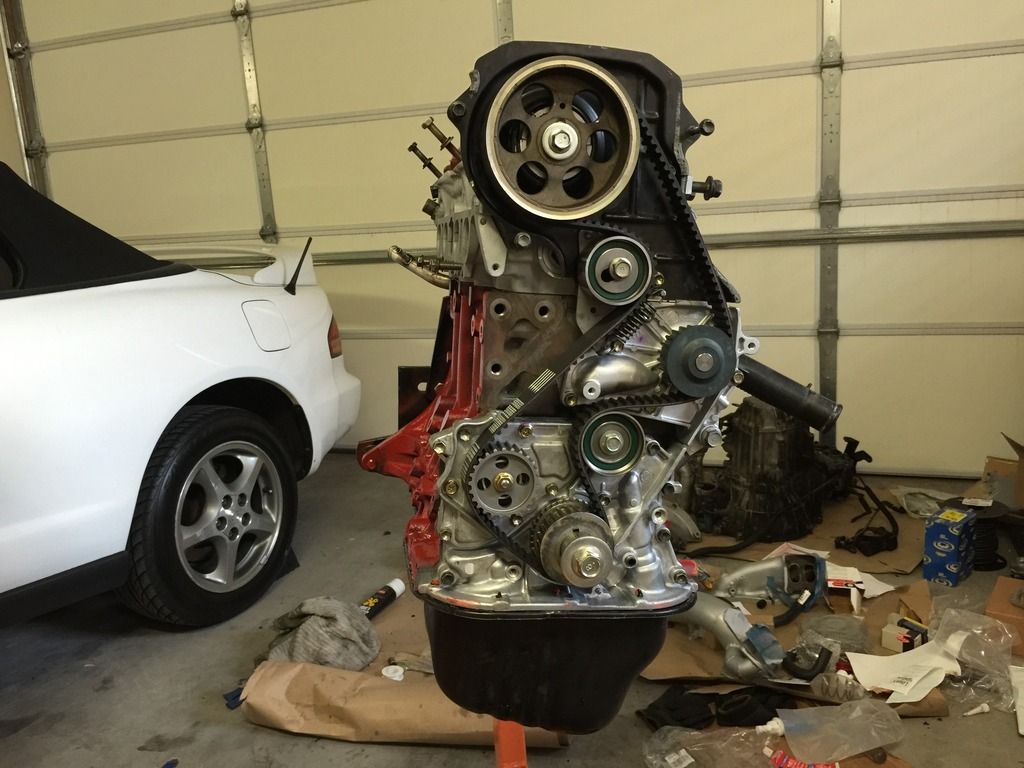 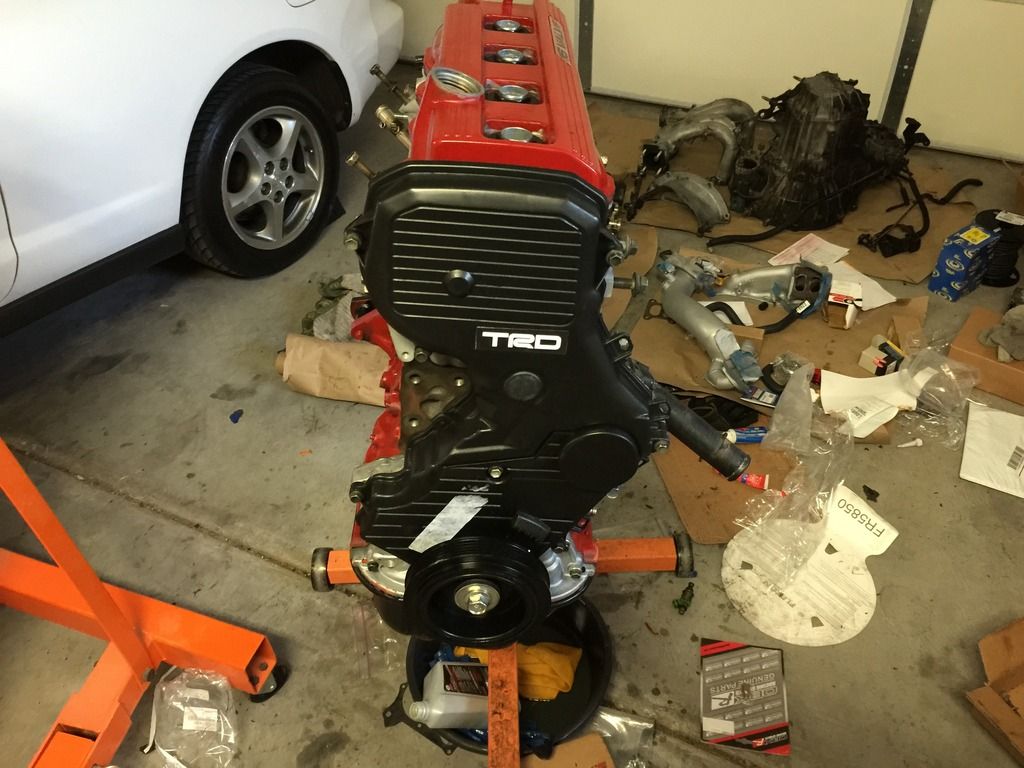 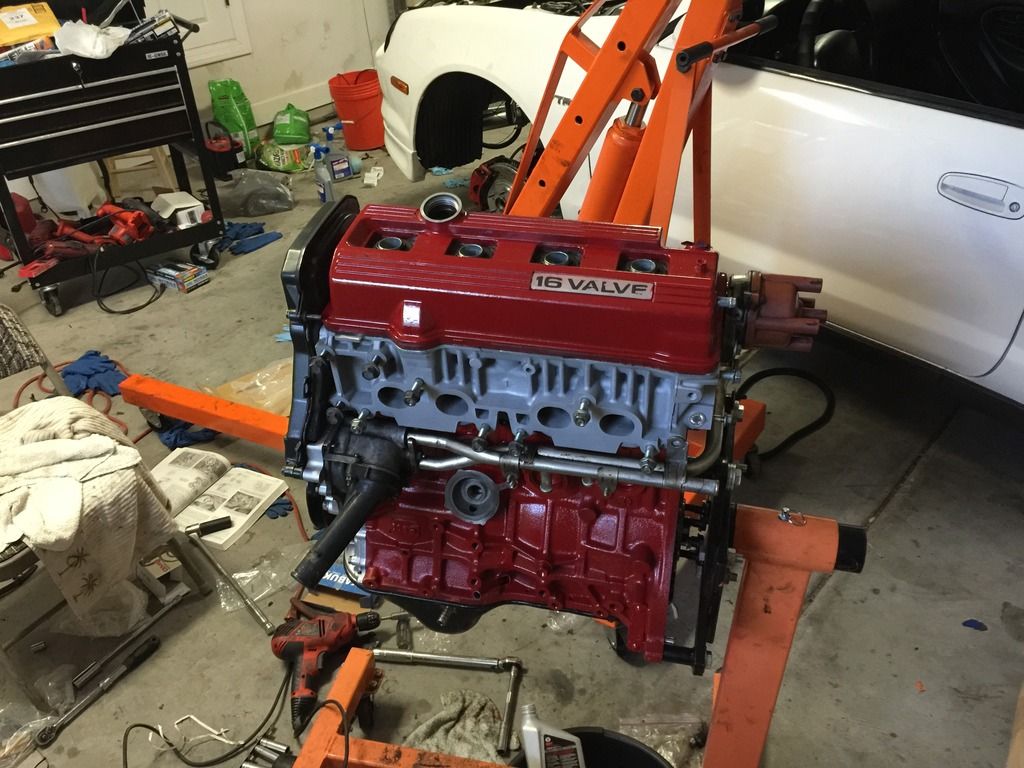 Before I put the fuel rail on I wanted to do a comparison of the fuel injectors. Here are RX-7 (red top), stock California (green middle), and stock federal (green bottom) injectors. You can see the difference between the California one compared to the other 2. Some people say the federal injector will fit in the California head, well not for me. 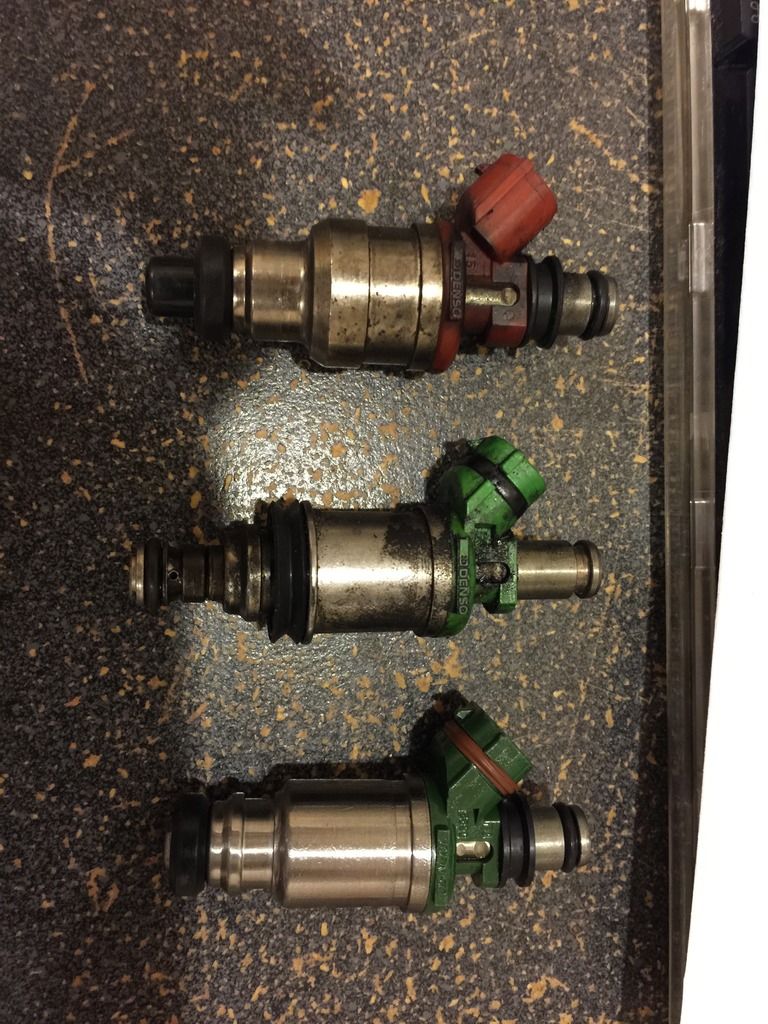 Here the engine back together. 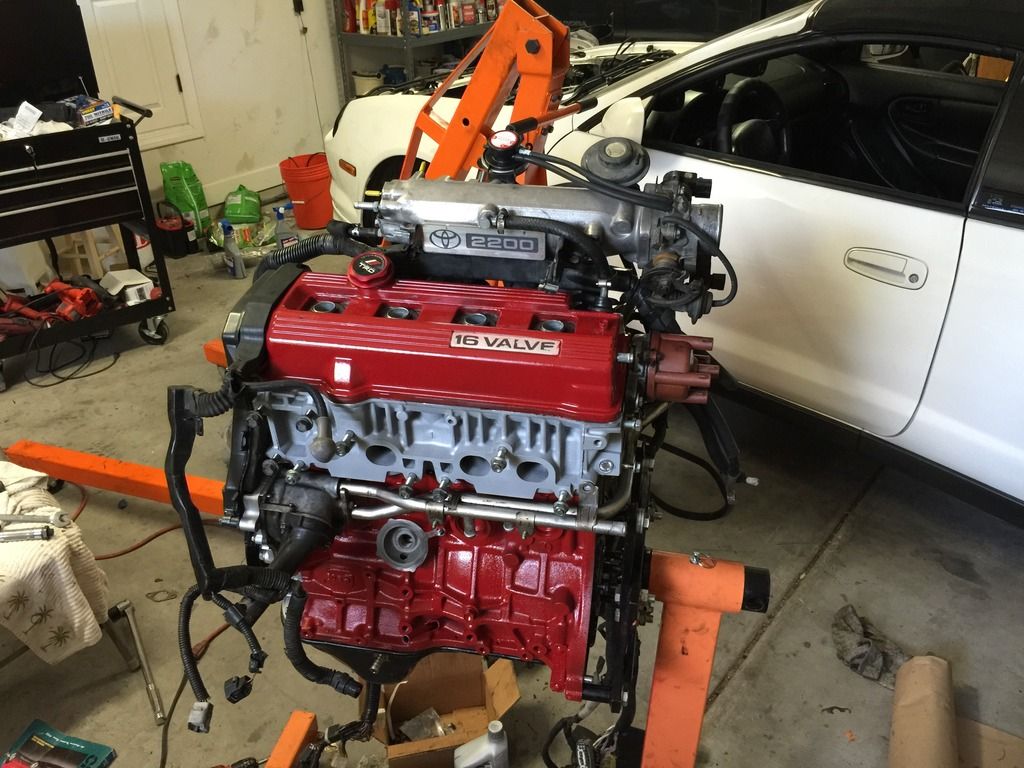
This post has been edited by HardHead93: Apr 6, 2016 - 12:52 AM |
 Apr 6, 2016 - 10:04 AM Apr 6, 2016 - 10:04 AM
|
|
|
Enthusiast      Joined Jun 18, '09 From Orlando Currently Offline Reputation: 8 (100%) |
Hopefully that's the end of your troubles, nice write-up.
-------------------- '97 ST \ Eibach \ KYB \ Kenwood \ Alpine \ Cusco \ OEM+ [sold 10/18]
'93 MX-5 LE |
 Apr 6, 2016 - 11:03 AM Apr 6, 2016 - 11:03 AM
|
|
|
Moderator      Joined Jun 29, '08 From Denver Currently Offline Reputation: 59 (100%) |
You put some work into this build. I like it!
-------------------- "Employ your time in improving yourself by other men's writings, so that you shall gain easily what others labored hard for." -Socrates. Even Socrates told us to use the search button!
 2006 Aston Martin V8 Vantage. 1998 Celica GT- BEAMS Swapped. 2022 4Runner TRD Off Road Prenium. 2021 GMC Sierra AT4. |
 Apr 6, 2016 - 11:27 AM Apr 6, 2016 - 11:27 AM
|
|
|
Enthusiast      Joined Mar 8, '12 From Hanford/Fresno, Ca Currently Offline Reputation: 20 (100%) |
Always nice to see a turbod 5sfe.
-------------------- |
 Apr 6, 2016 - 11:30 AM Apr 6, 2016 - 11:30 AM
|
|
|
Enthusiast      Joined Dec 8, '03 From Lancaster CA Currently Offline Reputation: 6 (100%) |
hopefully the FIC works for you. I had nothing but trouble with it on my car. I ended up putting in a V6
-------------------- 2001 Celica GT-S Turbo
1997 Supra TT 6speed 1997 Celica 3MZ/1MZ swap 1990 Celica All-Trac |
 Apr 6, 2016 - 7:41 PM Apr 6, 2016 - 7:41 PM
|
|
|
Enthusiast   Joined Apr 7, '15 From New Mexico Currently Offline Reputation: 0 (0%) |
hopefully the FIC works for you. I had nothing but trouble with it on my car. I ended up putting in a V6 The story is not over. I still have more to tell about this project and I will post it in the coming weeks. As far as the AEM FIC, it is doing ok. I have built a Megasquirt DIYPNP and plan to put it on. I have already tested it out and the engine starts with it but I am have idle problems. |
 Apr 10, 2016 - 12:49 PM Apr 10, 2016 - 12:49 PM
|
|
 Enthusiast      Joined Jul 12, '08 Currently Offline Reputation: 5 (100%) |
sorry to hear about the fire. That really sucks, but you're not letting that set back stop you, which is good.
I once accidentally set a suspension on fire. Good times --------------------  |
 Apr 10, 2016 - 8:26 PM Apr 10, 2016 - 8:26 PM
|
|
|
Enthusiast   Joined Apr 7, '15 From New Mexico Currently Offline Reputation: 0 (0%) |
Engine Build Up Part 2
Before I could put the engine in the car I had to repair all the damage the fire caused in the engine bay. This required me getting a new AC switch, replacing power steering hoses, dropping in a new rack-n-pinion, cleaning up the various burn marks, and replace the AC condensation hose. Next, with the engine back together I had to mate it with the transmission then put it back into the car. That task is easier said than done. 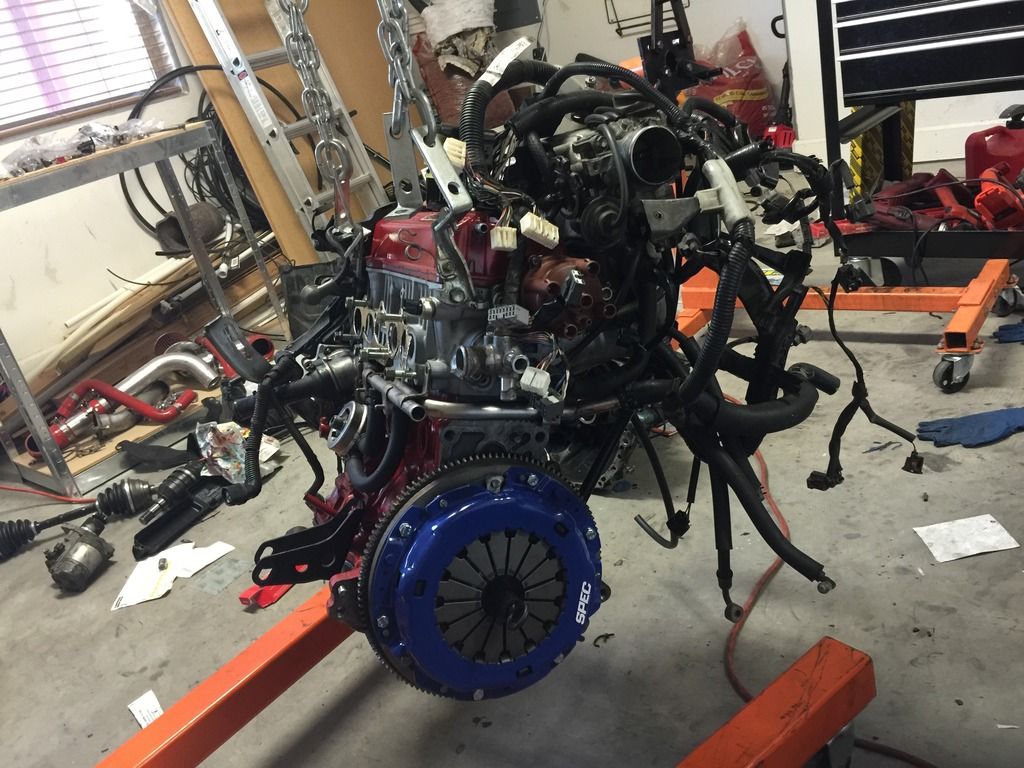 I spent a good 2 hours with the engine on the hoist and the transmission on a hydraulic jack while I tried to work them both together. After a lot of sweat, tears, and a smashed finger, I got the engine and the transmission back together. If you plan to do this, I suggest having a friend help you put the engine and the tranny together. One person can hold the engine steady while the other works the transmission into place. 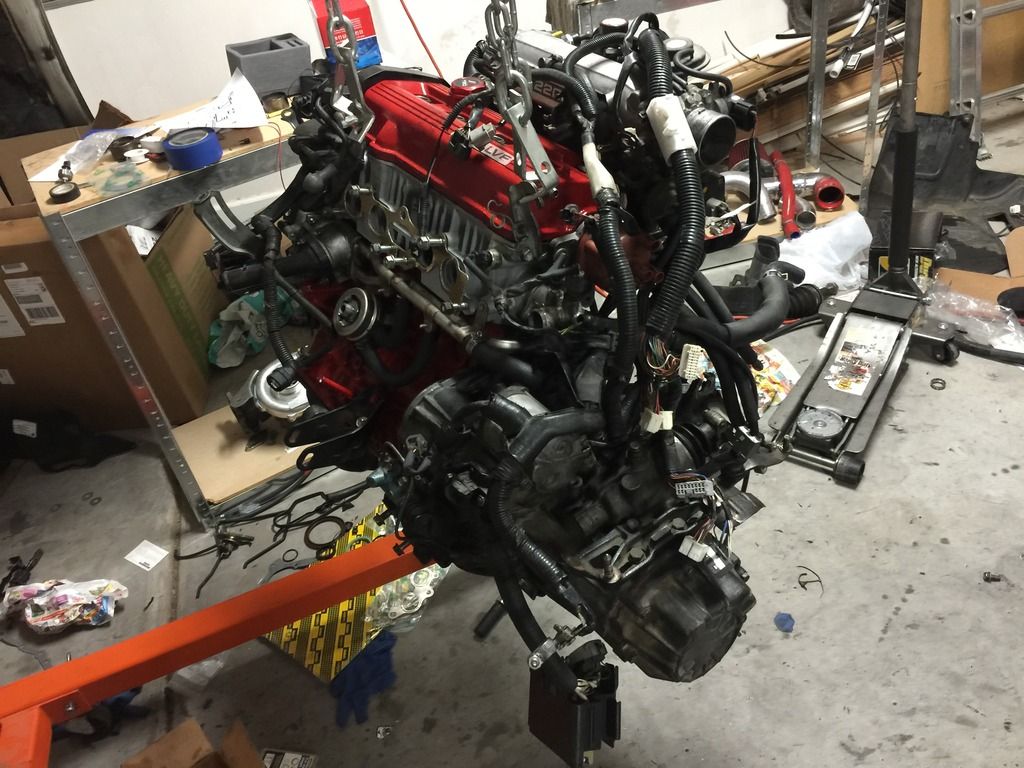 Now it was time to drop the engine back into the car. The hardest part was getting the front and rear motor mounts to line up one I got the engine in the car. But my baby was coming back together. 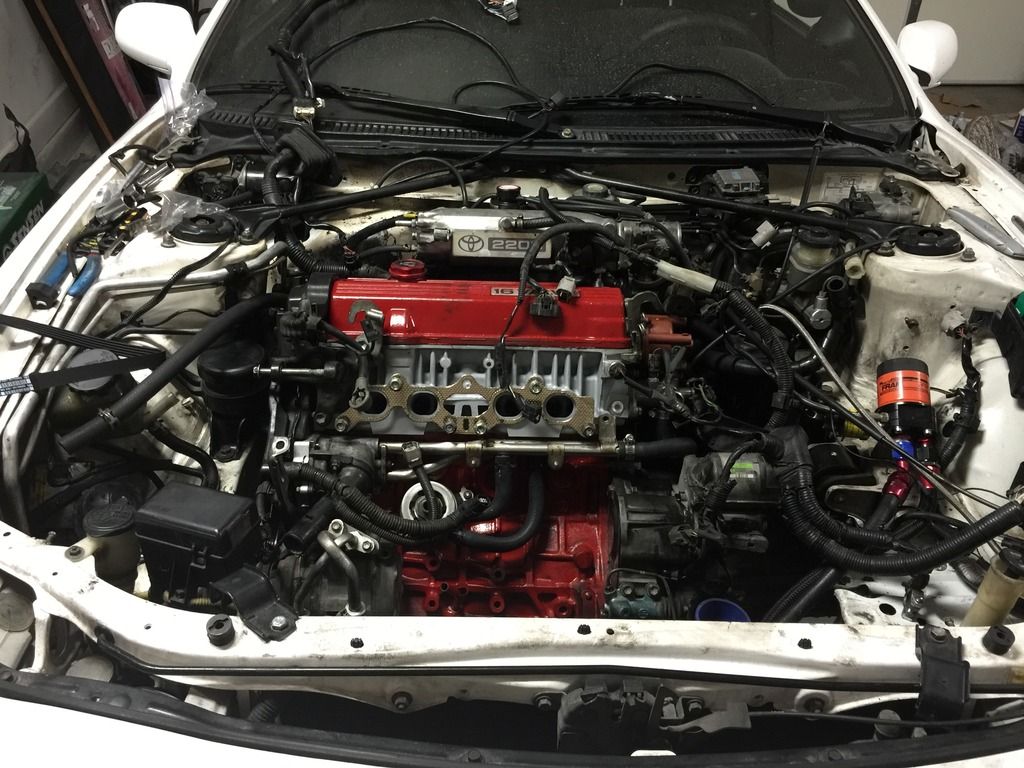 Next I started hooking up the new ECU wiring harness, drop the turbo back in, install the radiator, install the alternator, and fill up fluids. 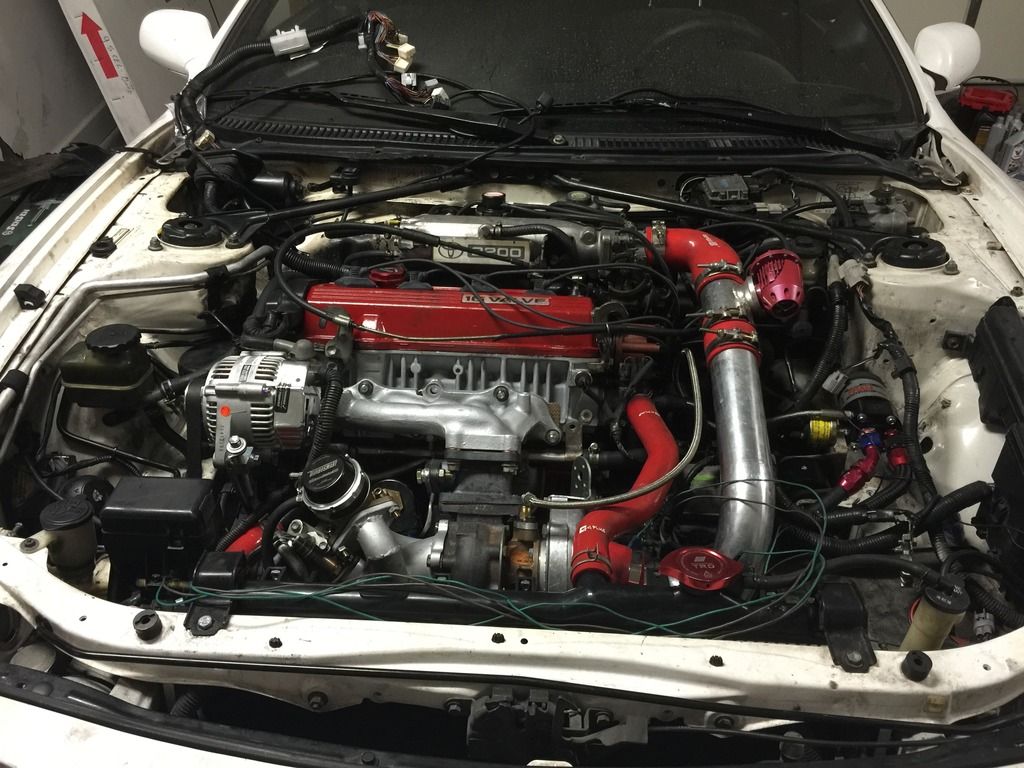 Then came the moment of truth. I turned the key and the engine turned over but would not start. I check all my connection but could find nothing wrong. Then I found a forum on 6gc.net talking about the distributor being off 180 degrees. I took the distributor off, turned it 180 put it back in and this beast came back to life. I thought I was in for fun times from then forward. Man I was wrong. |
 Apr 12, 2016 - 1:43 AM Apr 12, 2016 - 1:43 AM
|
|
|
Enthusiast      Joined Aug 2, '05 From Guam Currently Offline Reputation: 15 (100%) |
keep it going
-------------------- 94 Celica GT
|Toyota OEM Japan|Toyota Racing Development|Tom's|Competition Clutch|5Zigen|Apexi| |Laille/Beatrush|Magnecor|Denso|Royal Purple|Optima|PIAA|PW JDM|Megan Racing|Nitto| |Work|Greddy|Samco|Project Mu|H&R|Gates|Moog|Rota|Yokohama|Epman|1320|Upgr8 04 Celica GT |Toyota OEM Japan|Toyota Racing Development|Tein|BC Racing|Greddy| |
 Apr 13, 2016 - 9:42 PM Apr 13, 2016 - 9:42 PM
|
|
|
Enthusiast   Joined Apr 7, '15 From New Mexico Currently Offline Reputation: 0 (0%) |
Now that the engine is back in the car, there was one last piece of fire damage that needed to be fixed, the hood. I did a lot of shopping around and I wanted a hood with vents to reduce under hood temperatures. I decided to go with the VIS Carbon Fiber Hood - Zyclone style. When it came, unboxing it was exciting.
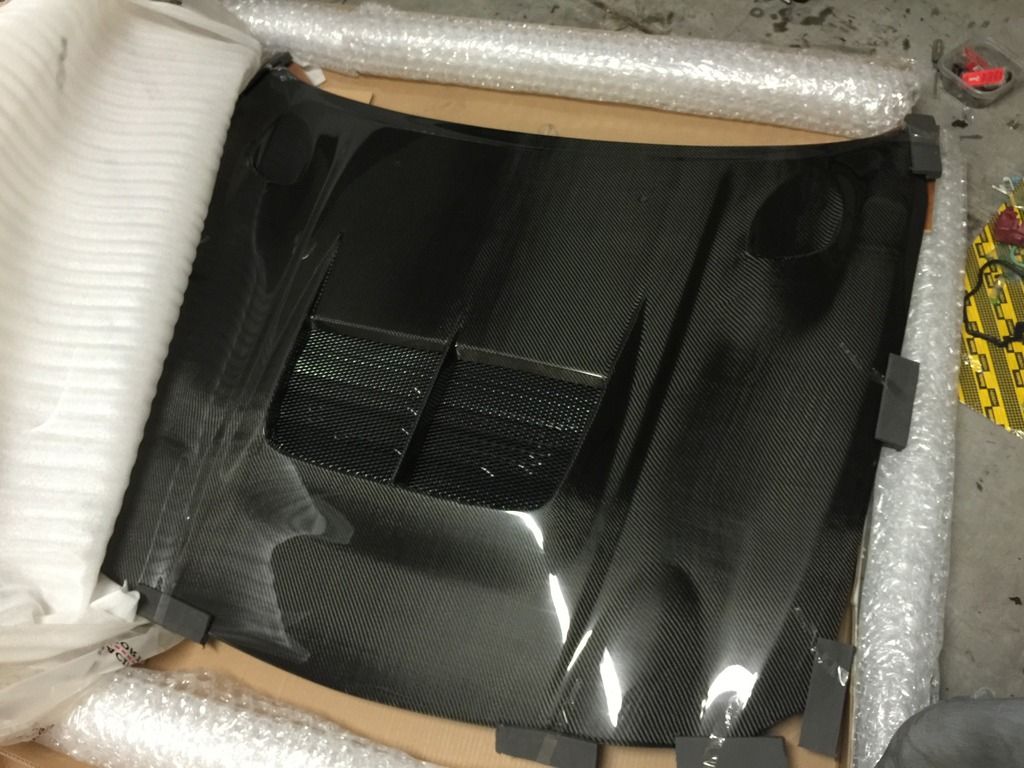 Then when I put in on it looked soooooooo nice! I also added insulation under the hood so that the clear coat would not be damaged. 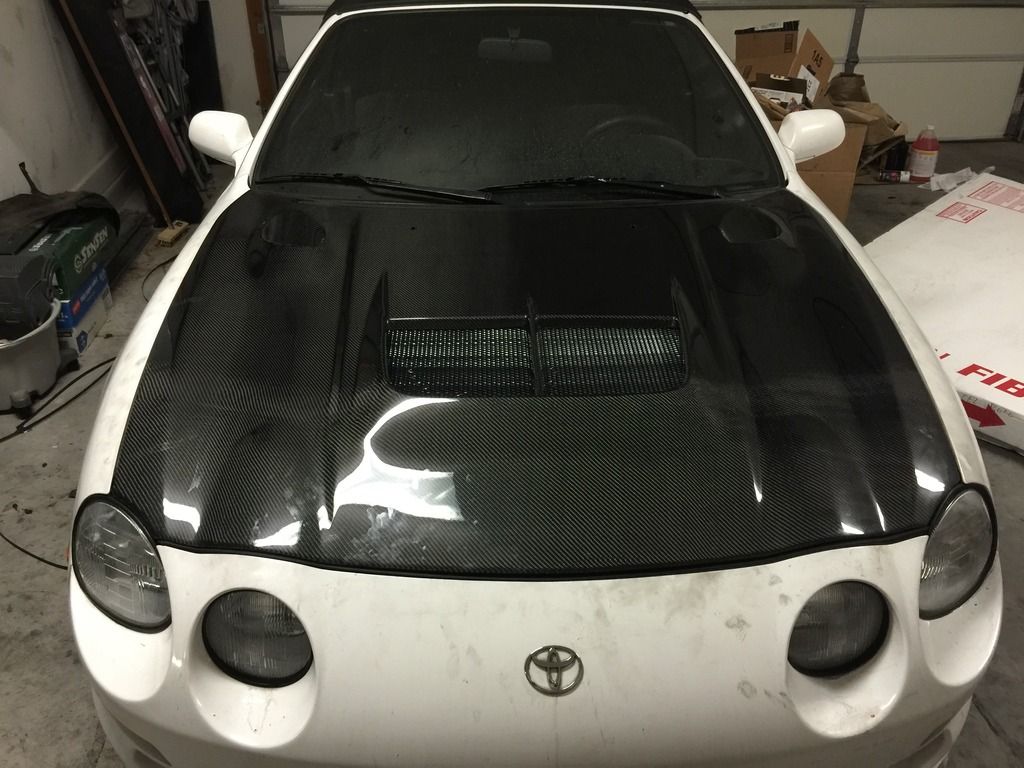 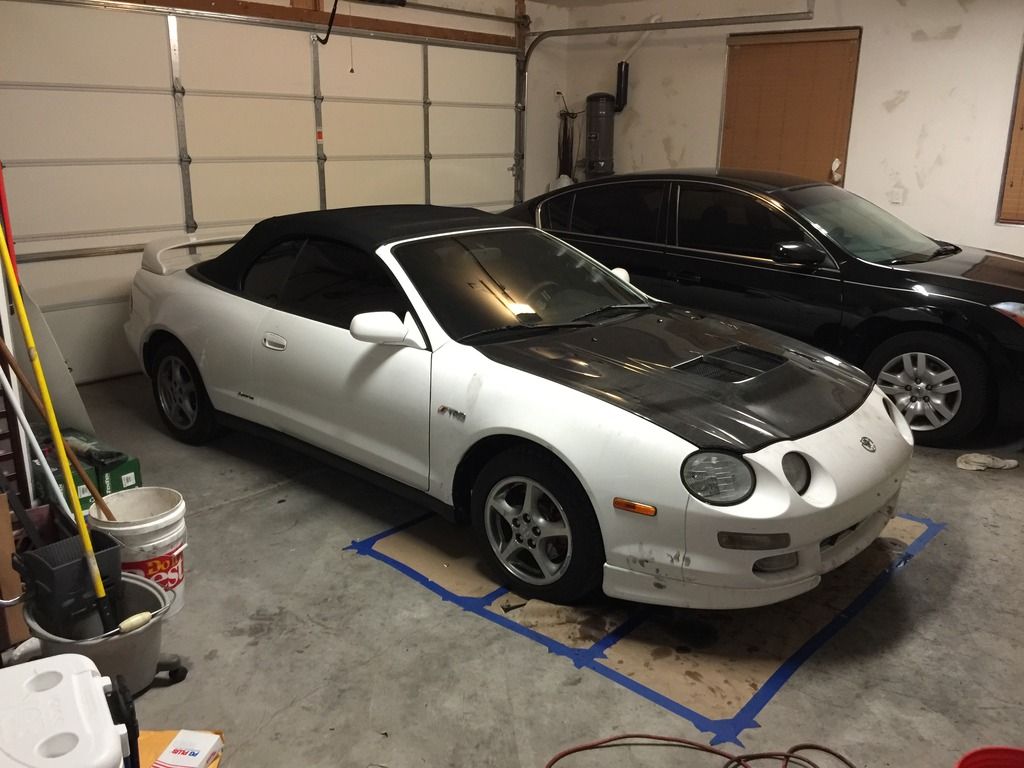 I was also getting high engine temps so I installed a bumper vent to get more flow to the radiator and oil cooler. I think the intercooler sitting in front of the radiator was blocking some of the air flow. Plus, these New Mexico summers are HOT. 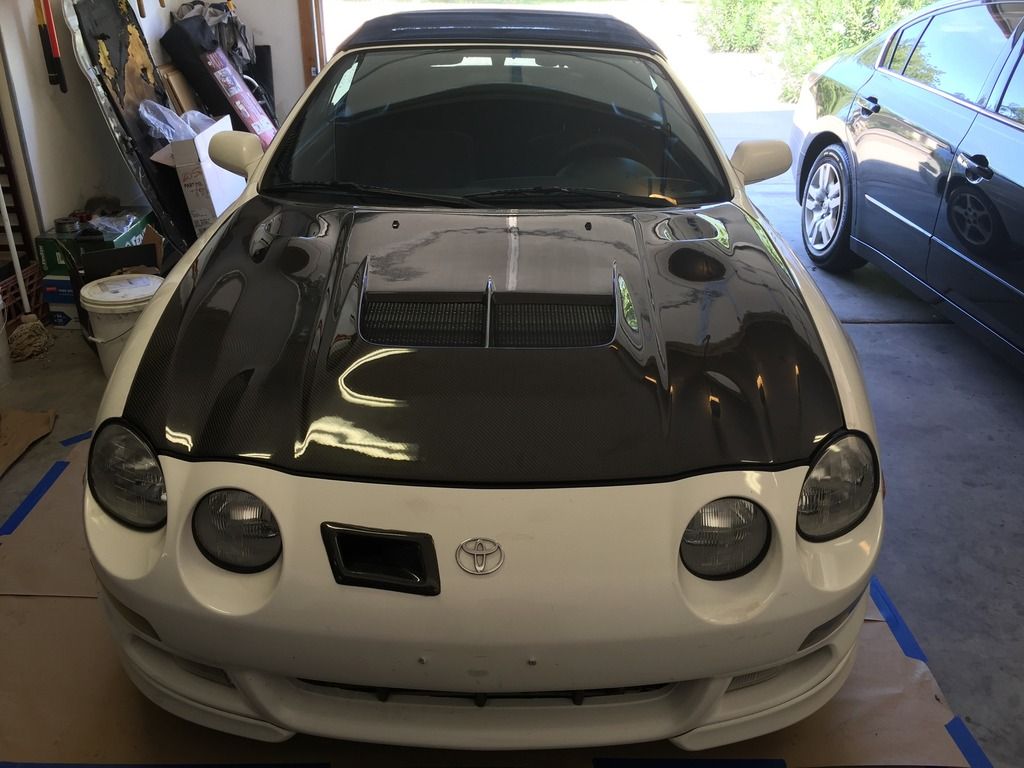 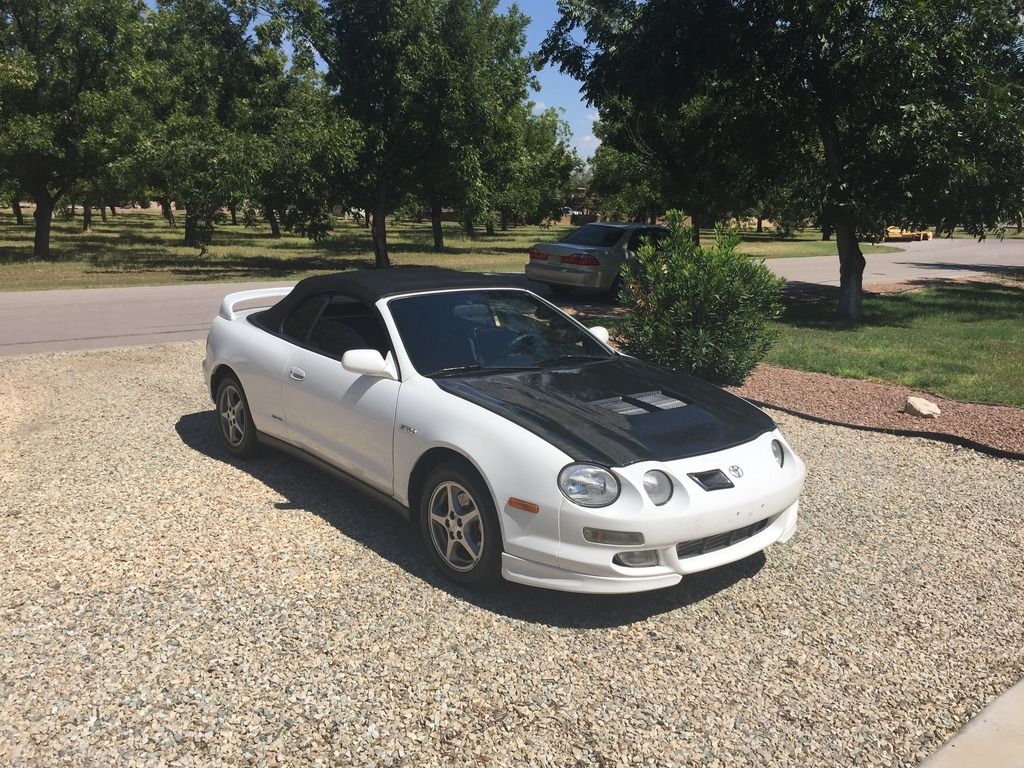
|
 Jun 9, 2016 - 12:20 AM Jun 9, 2016 - 12:20 AM
|
|
|
Enthusiast   Joined Apr 7, '15 From New Mexico Currently Offline Reputation: 0 (0%) |
So everyone sorry I have not posted any status on the car lately but I have some bad news. I was driving the car hard today and BAM, rod knock. This 5sfte setup is killing me! I need to change this thread to "5SFTE. . . DON'T DO IT!"
Before I get into that, let me pick up where I left off. After I got the hood on the car I finished the build. This was around September 2015. The build at the time was the following: 8 psi boost T3/T04E Turbo Turbosmart Wastegate 2.5 inch Magnaflow full exhaust AEM FIC Piggyback SSQV Blow Off Valve 460cc RX-7 Injectors FMIC Walpro 255 Fuel Pump MaXspeeding Forged Rods 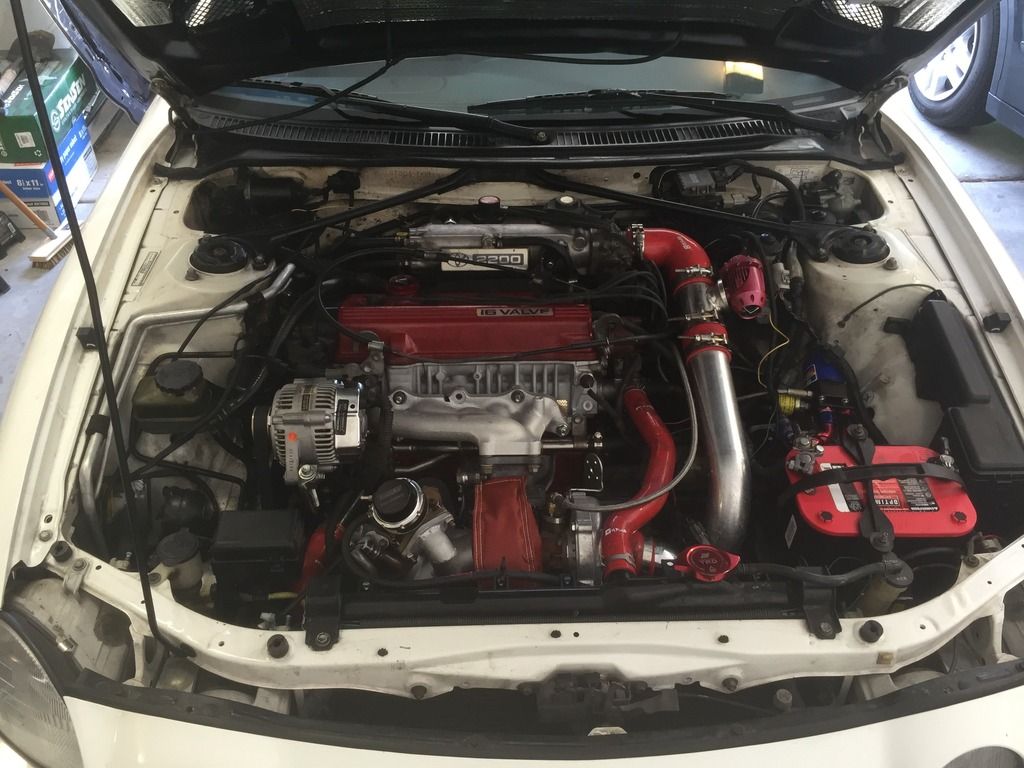 I fought and fought with this set up. The car drove great but boost would only kick in at high speed which basically meant I only got to feel that push when I got on the freeway. Plus I was continually having problems with the AEM FIC piggyback. The car would idle great, drive great on vacuum, but once I hit boost the car's A/F ratios would shoot to 10.0. This is when I thought it was time to take a new direction with this build. In comes the 16G CT26 turbo and the Megasquirt DIYPNP standalone. 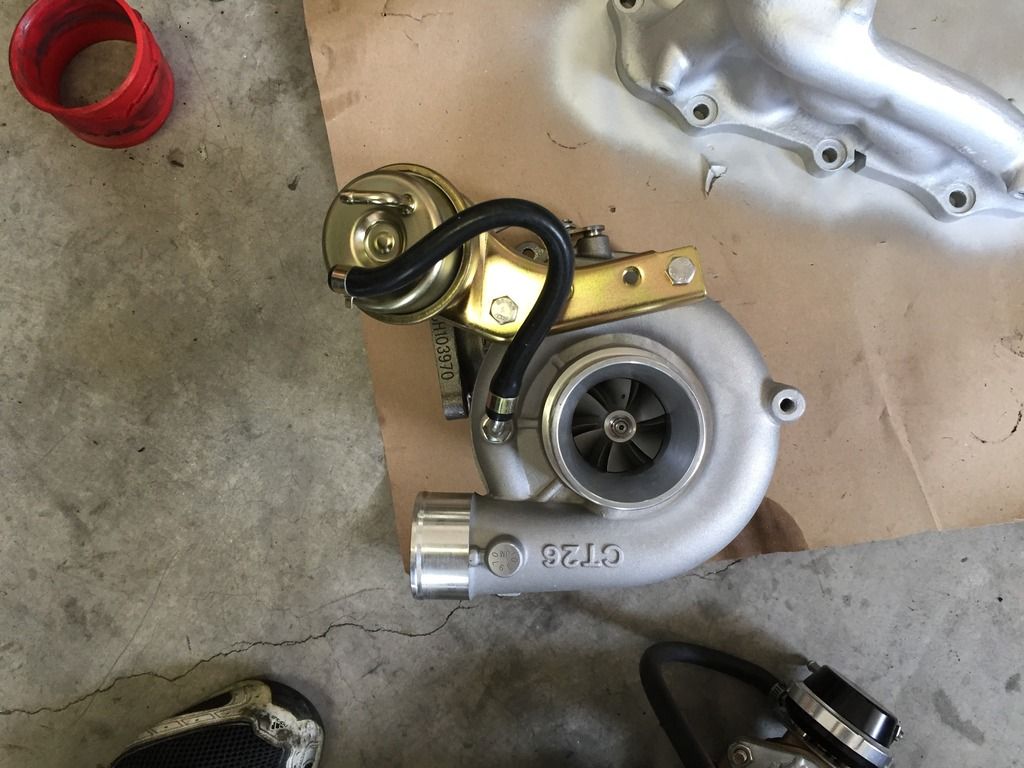 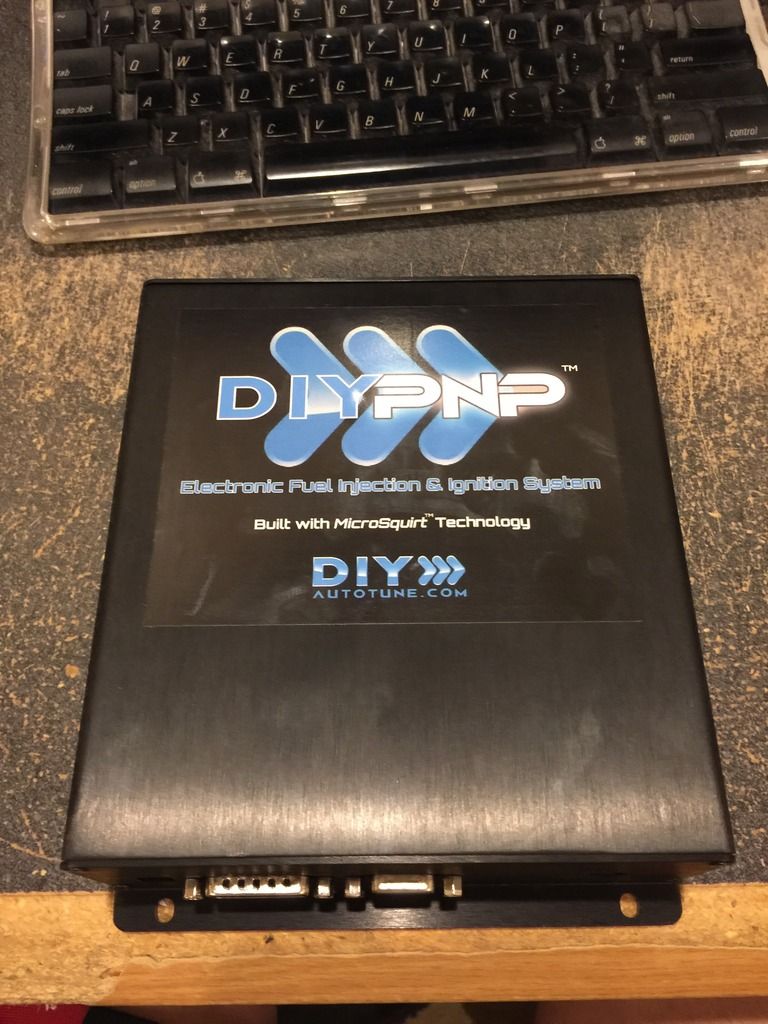 Around Dec 2015, I get the CT26 turbo installed and I start to have a serious oil leak plus high engine tens on boost. At this point I am ready to set the car back on fire. I go through and replace the head gasket and couple other seals but the car continues to leak. By Feb 2016 I am out of ideas so I take it to my mechanic. He spends about an hour with the car and runs dye through the engine. The results, every seal is leaking, wtf! At this point I am tired of working on this motor and I was happy to find a mechanic that would so he replaces all the seals. I drive the car home park it for the night, wake up in the morning, the engine is leaking AGAIN! I take it back to the mechanic multiple times before we finally figure out I have high crankcase pressures and it is blowing out my seals. He brings his "Turbo Guy" in to look and the car and points out the fact that I do not have any crankcase venting routed back to the intake. So I build a custom intake out of intercooler piping, move the battery to the trunk and the problem was fixed. Below, before custom built intake: 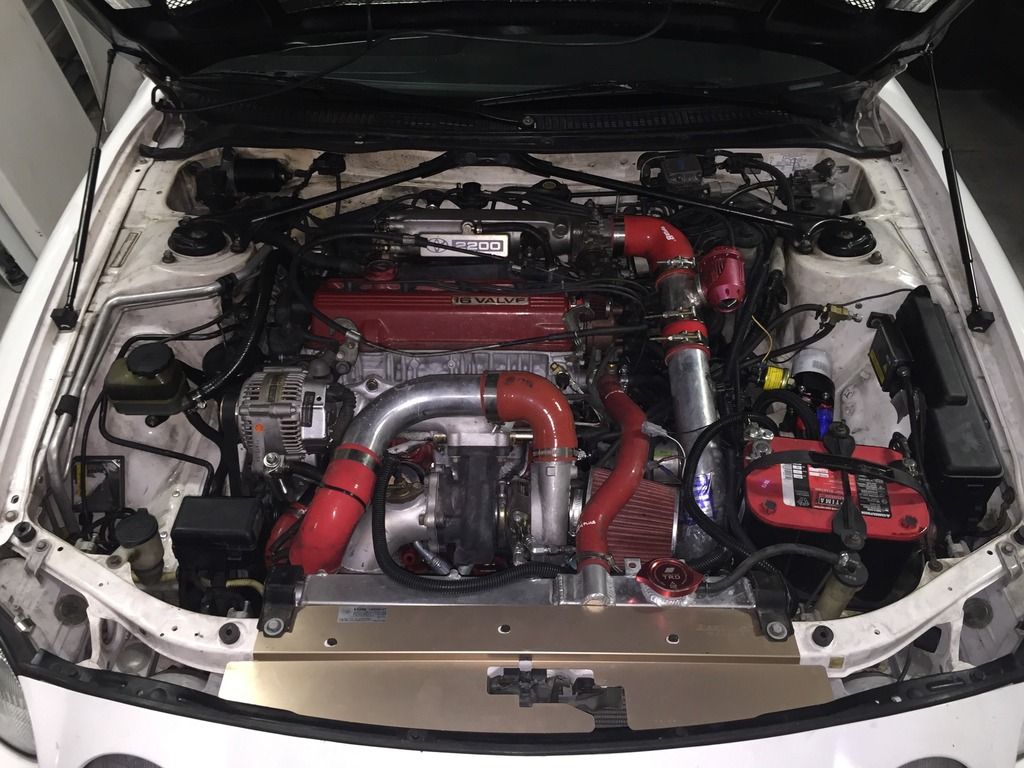 Below with custom built intake: 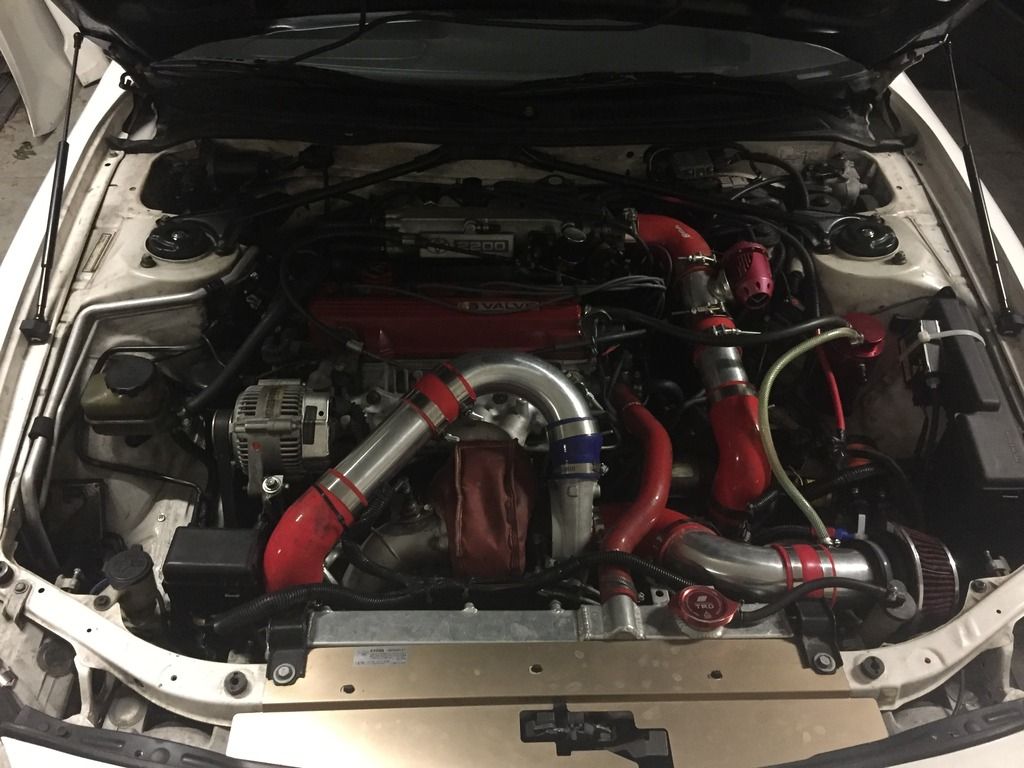 I take the car out to the track in May of 2016 to see how it will do only to find out I still have a lot of work. 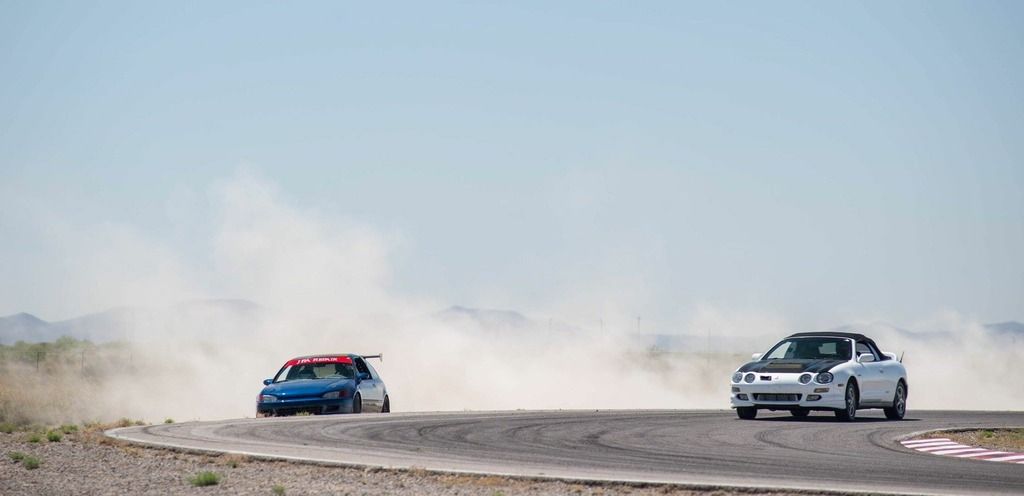 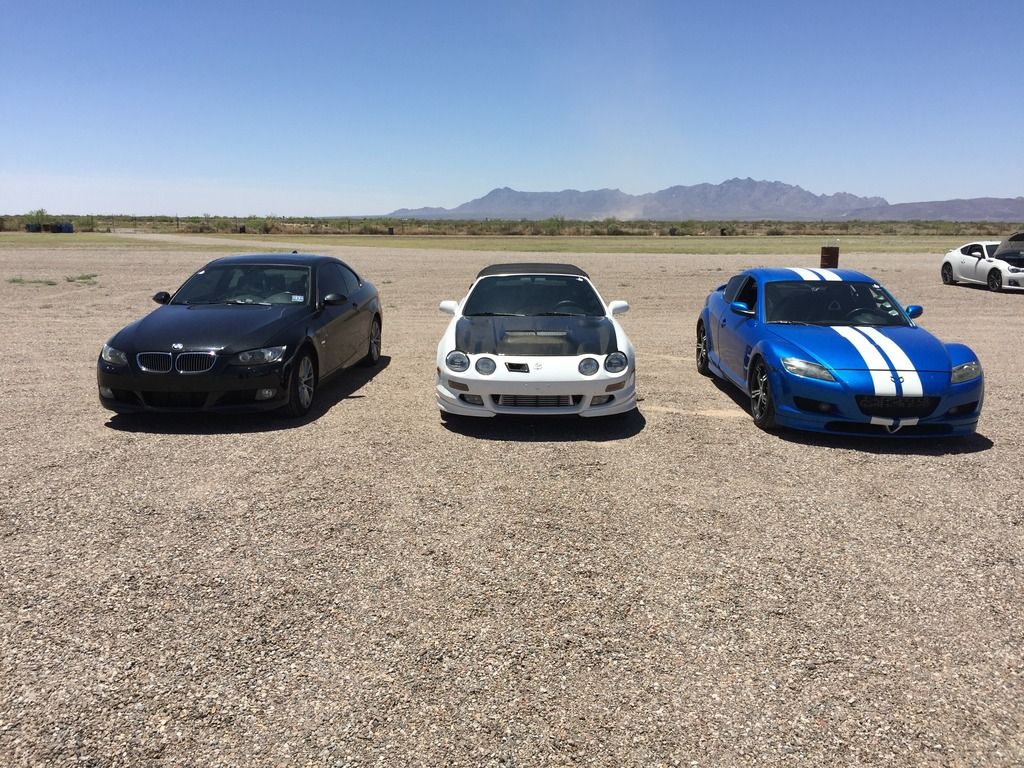 Mainly suspension and the standalone ECU. The suspension is original to the car and the AEM piggyback is not working out. So I put some new KYB Excel G struts with some ground control coilover springs. 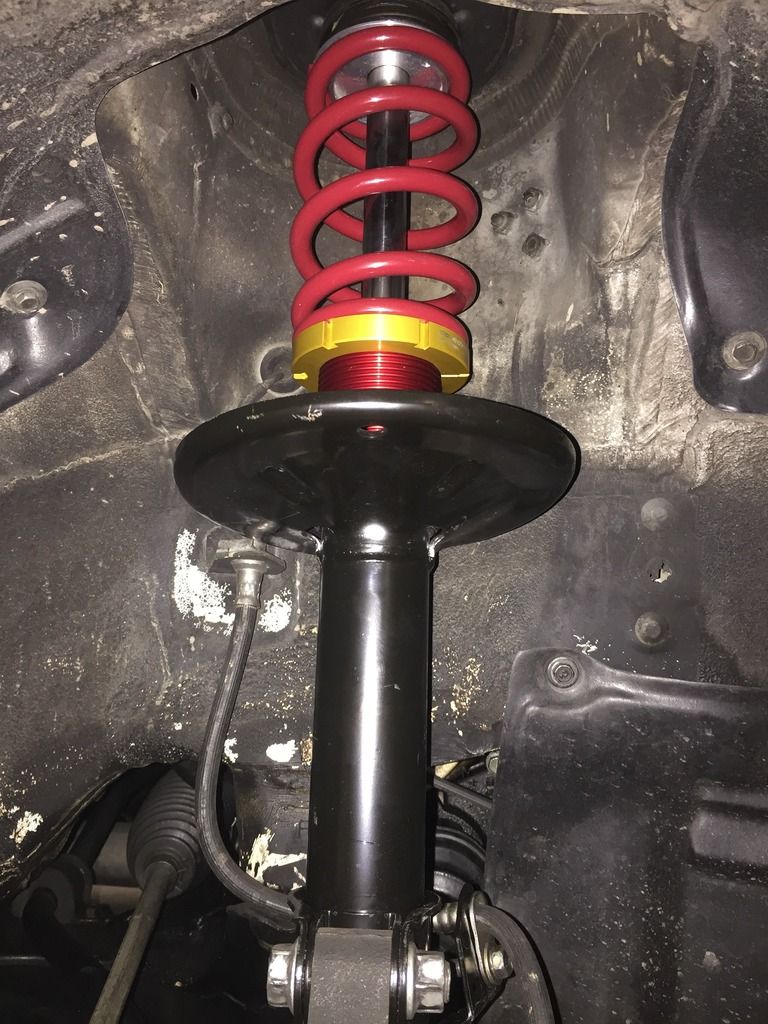 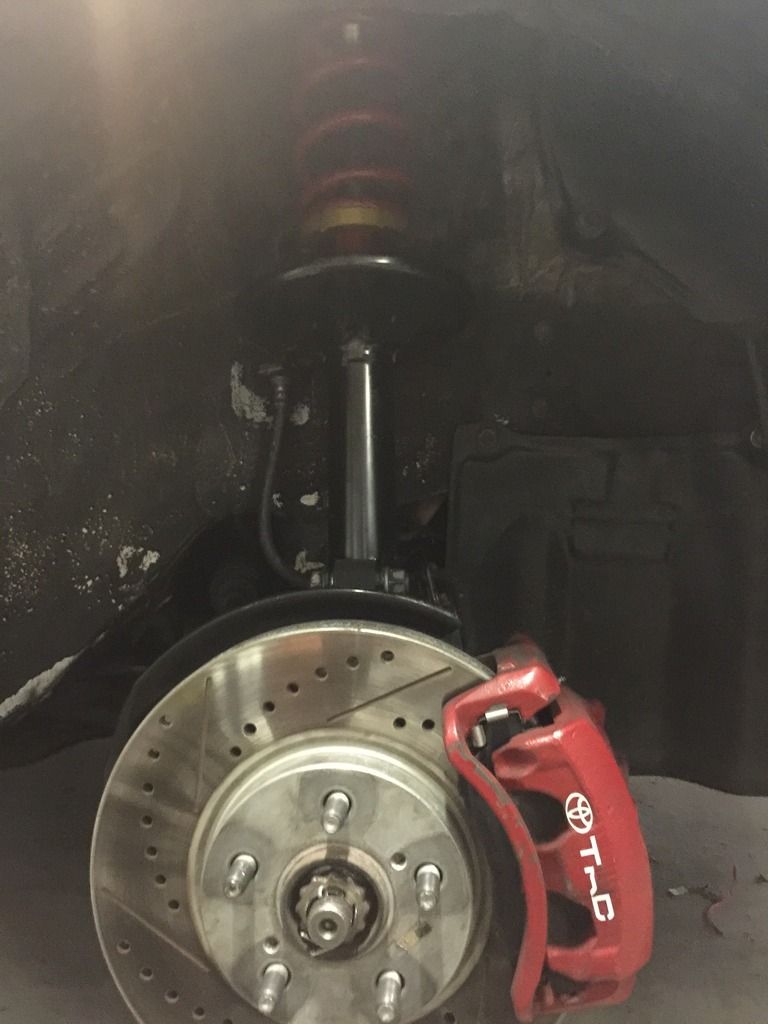 I get that all installed and start tuning the ECU using the autotune feature in TunerStudio. My set up is now the following: 12 psi boost 16G CT26 Turbo 2.5 inch Magnaflow full exhaust 76 pin DIYPNP Electronic Boost controller SSQV Blow Off Valve 460cc RX-7 Injectors FMIC Walpro 255 Fuel Pump MaXspeeding Forged Rods Ground Control Coilers with KYB struts TRD front lip (side skirts being modified to fit) Wings West Spoiler VIS Carbon Fiber Hood - Zyclone style 2 piston calipers from Toyota Avalon The car is running great then just this evening while driving the car BOOM, rod knock. DAMNIT! I love the look of this car and I love this car when it is running but this 5sfte turbo build has been nothing but a headache! I should be out eating Honda Civics and other ricers for breakfast not dealing with a temperamental car. I am at a crossroads right now. I have learned a lot about motors on this car and I feel I have the knowledge now to do a swap. I am stubborn, this car WILL run boosted. This is what I am thinking: 1. Get a 3rd gen 3sgte (Use the 3sgte ECU or my DIYPNP and swap in my 16G CT26) 2. Get a 4th gen 3sgte (Use the 3sgte ECU or my DIYPNP) 3. Do a 5sgte build (really not sure about this one seem like it could cost ALOT) Any advice would be greatly appreciated. This post has been edited by HardHead93: Jun 9, 2016 - 12:23 AM |
 Jun 9, 2016 - 9:00 PM Jun 9, 2016 - 9:00 PM
|
|
|
Enthusiast   Joined Apr 7, '15 From New Mexico Currently Offline Reputation: 0 (0%) |
I have taken some time to reflect on my rod knock issue. I think I have 2 really good choices moving forward.
1. Rebuild the current engine but go with low compression pistons, webcams, and a high flow oil pump. 2. Get a 4th gen 3sgte and do a swap since I already have a front mount intercooler set up on the car. Any suggestions? |
 Jun 9, 2016 - 11:45 PM Jun 9, 2016 - 11:45 PM
|
|
|
Enthusiast      Joined Mar 15, '07 From Tennessee Currently Offline Reputation: 52 (100%) |
if you like turbo, go with a 4th gen engine. Proven engines, and becoming popular
-------------------- Learned a lot in 10 years... I hardly log in anymore, last login Today Sept 6 2019, and I was forced just to clarify a post. LOL
If you PM me and I dont respond, dont fret or cry. Im alive, better post your questions in the thread below, maybe I log back in 2grfe Swapped... Why I chose the 2GR, before you ask read here... A great civilization is not conquered from without until it has destroyed itself from within. @llamaraxing in Instagram is the best way to find me. I hardly log here anymore. |
 Jun 10, 2016 - 9:31 PM Jun 10, 2016 - 9:31 PM
|
|
|
Enthusiast      Joined Dec 8, '03 From Lancaster CA Currently Offline Reputation: 6 (100%) |
there are several vacuum lines that need to be blocked off so that you dont pressurize the crankcase. I also had trouble with the FIC. my advise, get the 4th gen. the cost to rebuild the 5S will be just about the same.
-------------------- 2001 Celica GT-S Turbo
1997 Supra TT 6speed 1997 Celica 3MZ/1MZ swap 1990 Celica All-Trac |
 Jun 11, 2016 - 2:55 PM Jun 11, 2016 - 2:55 PM
|
|
 Enthusiast      Joined Dec 26, '09 From Albuquerque, NM Currently Offline Reputation: 19 (100%) |
Great read! Very unfortunate progress, but very exciting nonetheless. PM where in NM you are? I've never met anyone on here in 6 years that lives in NM!
-------------------- taking too long to mod since '09
June '12 COTM '95 AT200 |
 Aug 6, 2016 - 12:19 PM Aug 6, 2016 - 12:19 PM
|
|
|
Enthusiast   Joined Apr 7, '15 From New Mexico Currently Offline Reputation: 0 (0%) |
I told a friend at work, who used to be a full time mechanic, about the situation I had with my car and he advised be to tear down the engine and take a look at the internals before making my decision on what to do with the engine. I decided to do that so it would at least be a learning experience on my motor. When I took the motor apart it was exactly what I expected. The bearing on the #4 rod had completely melted away and by wiggling the #3 bearing I could tell it was next. It looks like this happened from oil starvation on the rod bearing during a hard pull and the bearing furthest from the oil pump went out first.
I went back and read MrTurrari's turbo 5sfe write up again at http://warp.scl.utah.edu/mr2/Turbo5sfe.html. Given, he is talking about a 5sfe in an MR2 but it is basically the same thing. I came across a key thing I missed in my build from MrTurrari's write up: "Oil Pump - Replace with a 98 5S-FE pump and shim the relief valve 1-1.5mm to get a higher pressure." I was running a stock 97 oil pump with no shim. The 98+ Camry/Solara oil pumps have a higher flow. I told my friend about what I found. He asked me what shape was the crank and the rod in. I inspected the crank with a micrometer and found no damage except some oil burn marks. I also inspected the rod (remember it is forged) and it was not warped or damaged in any way just some discoloration from heat. I am guessing there is so little damage because I cut the engine and called a tow truck the moment I knew something was off. He advised to replace all the bearings (rod and main) and he said it was up to me but the rod should still be usable. While I had the engine apart I decided to do some tranny work too. The tranny is original to the car which is now pushing 20 years old. I had the tranny cleaned, new seals, and inspected then put an LSD on the tranny. The shop that inspected the tranny said there was very little wear and all the gears worked perfectly. The LSD is on the left the old diff is on the right. 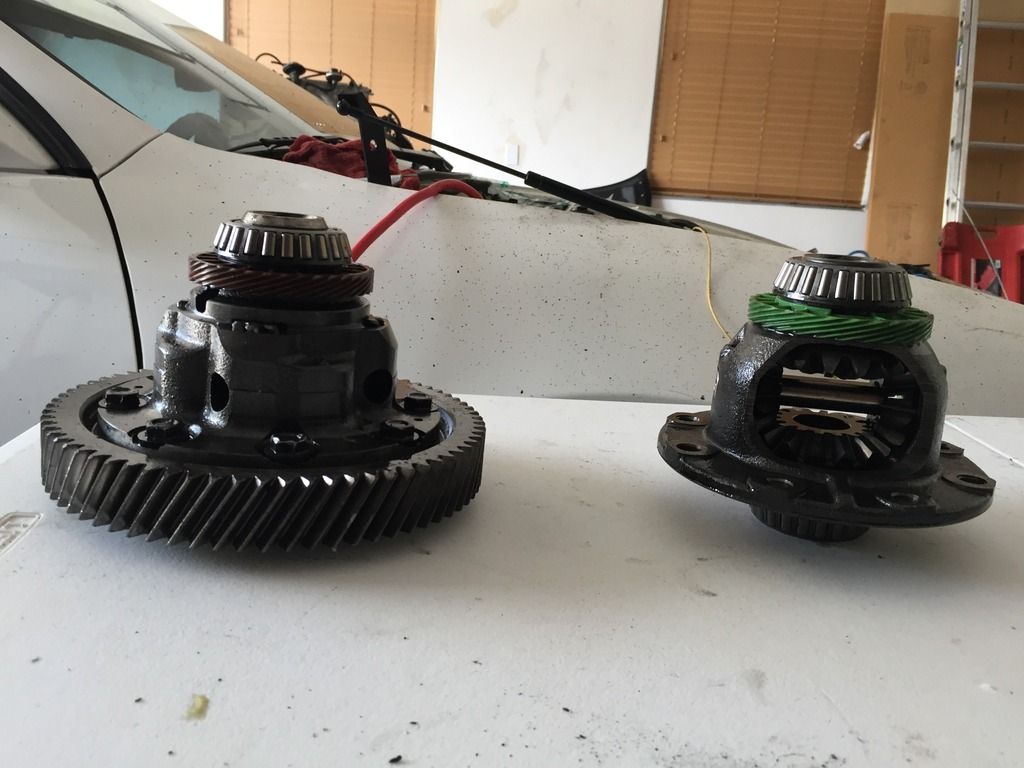 Here is the tranny all put back together and painted. It looks nice and pretty! 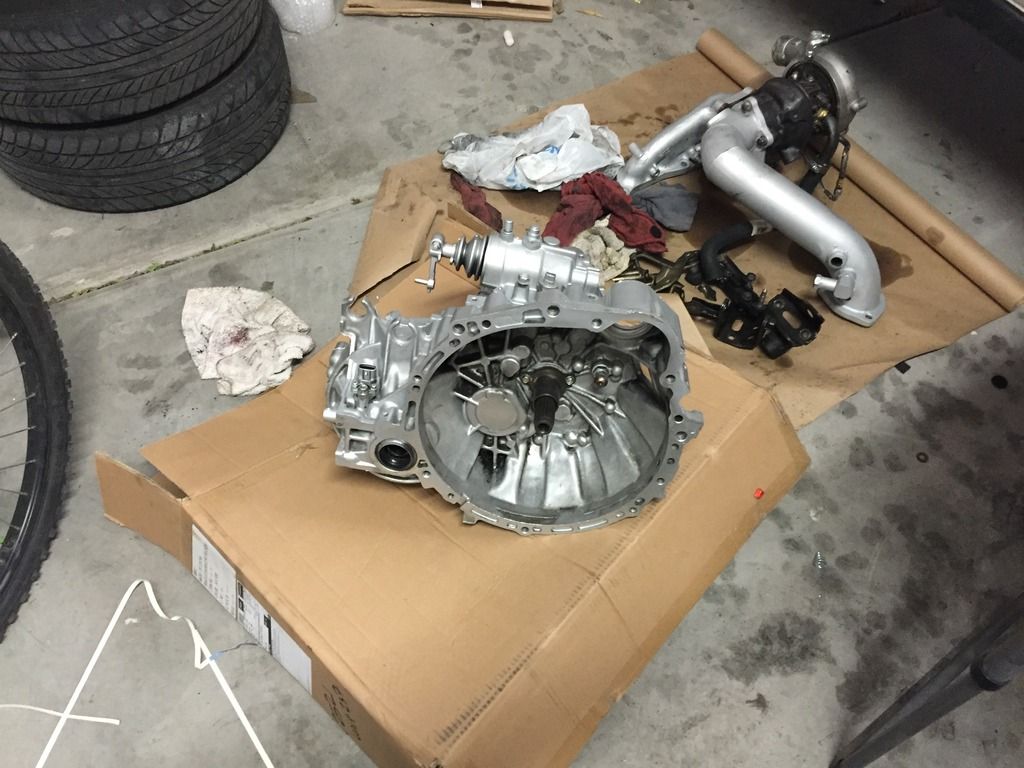 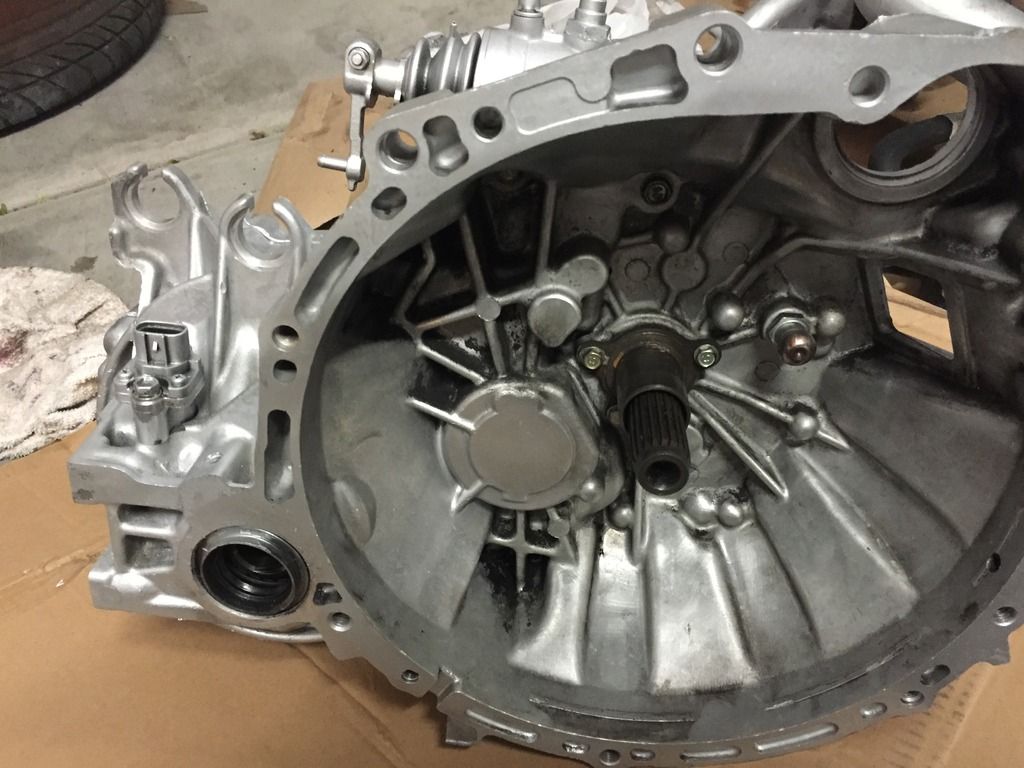 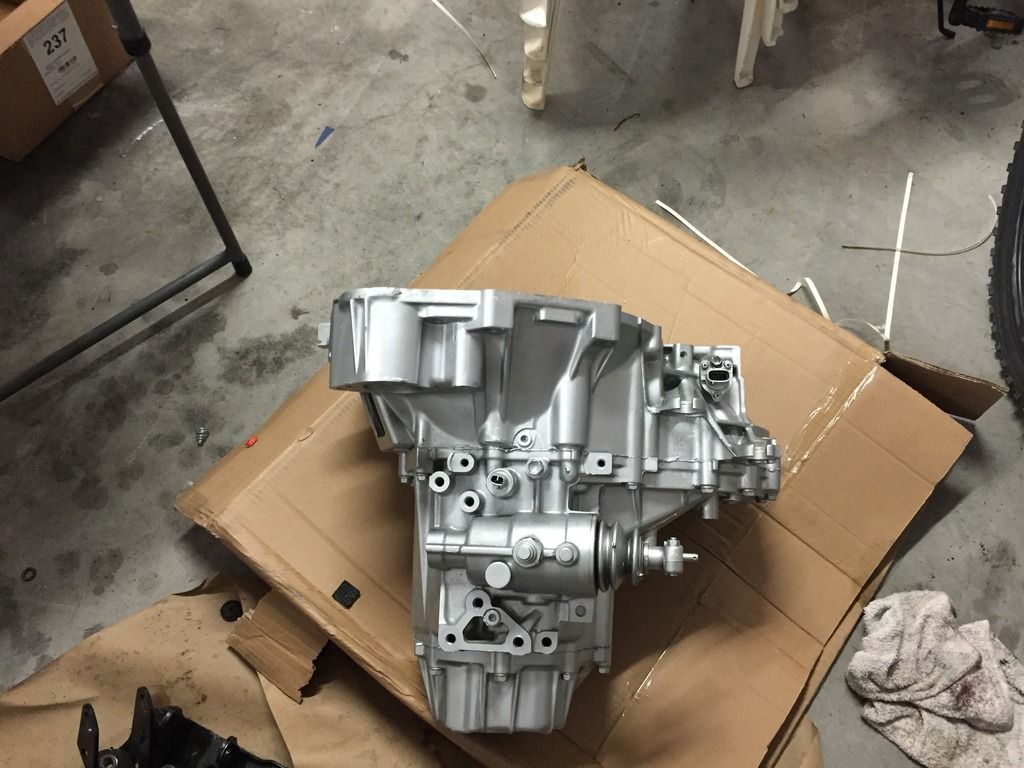 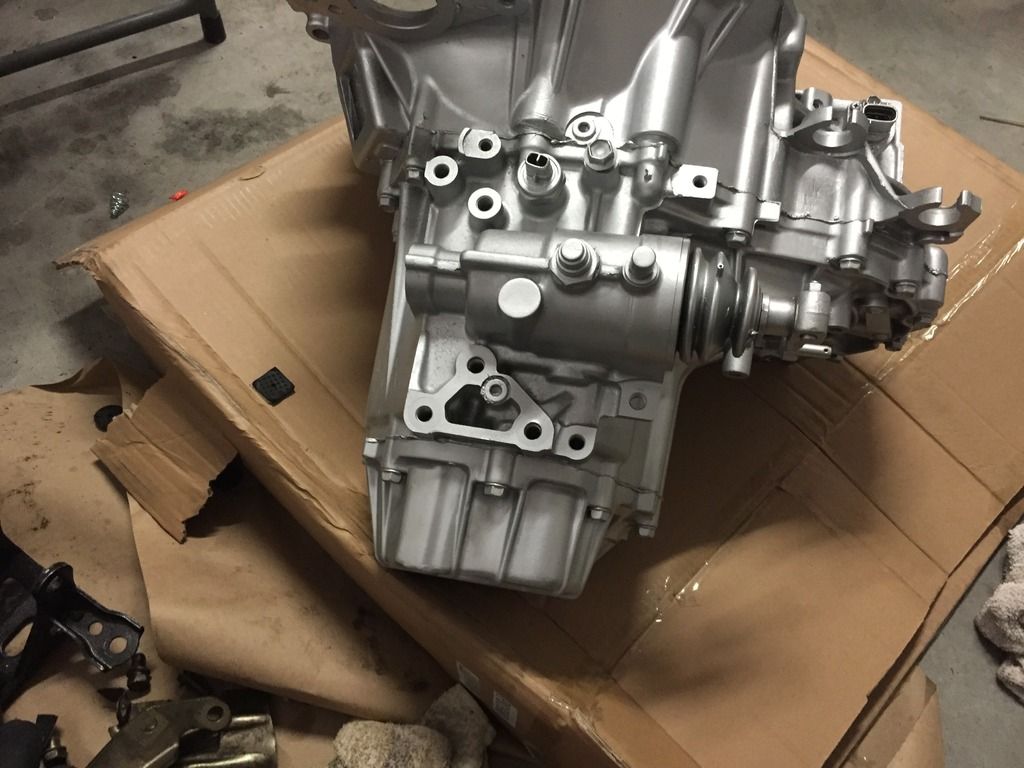 I know a lot of people were against me keeping the motor but I have put so much blood, sweat, and tears in to this engine build to stop right before the finish line. So instead of doing an engine swap, I bought new seals, new bearings, and a 98 Camry oil pump (shimmed the relief valve). I reassembled the engine and put it back into the car and it fired up and runs like a dream. Before at idle, full warmed up, the oil pressure was dropping to 8-9 psi at idle, now it holds steady at 20 psi. It was out about $200 in parts, excluding the tranny work that needed to be done no matter what I decided, and 2 weekends of wrench turning. Not bad. This post has been edited by HardHead93: Aug 7, 2016 - 8:52 PM |
 Aug 6, 2016 - 8:44 PM Aug 6, 2016 - 8:44 PM
|
|
|
Enthusiast      Joined Mar 8, '12 From Hanford/Fresno, Ca Currently Offline Reputation: 20 (100%) |
Nice to see you're giving the 5sfe another chance. My mr2 buddy just gave up on blowing up his couple of 5sfe so he went with a gen3 3sgte. Lol.
-------------------- |
  |
2 User(s) are reading this topic (2 Guests and 0 Anonymous Users)
0 Members:
| Lo-Fi Version | Time is now: November 18th, 2024 - 4:34 PM |


