  |
 Mar 14, 2007 - 12:05 PM Mar 14, 2007 - 12:05 PM
|
|
 Administrator      Joined Aug 23, '02 From Seattle, WA Currently Offline Reputation: 14 (100%) |
Thanks Romas...I'll look for that stuff today and see what I can find.
Also, I'm wondering if anyone knows what these lines in red are for. 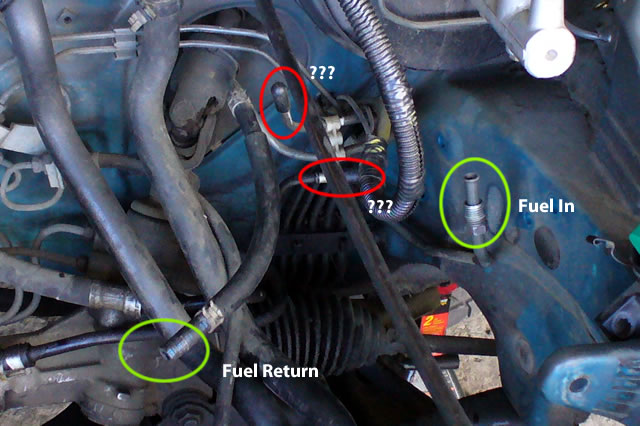 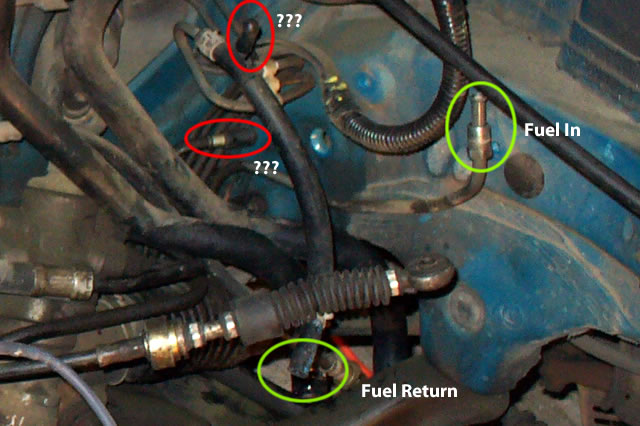
-------------------- New Toyota project coming soon...
|
 Mar 14, 2007 - 2:36 PM Mar 14, 2007 - 2:36 PM
|
|
 Enthusiast      Joined Oct 10, '03 From Wichita, KS Currently Offline Reputation: 5 (100%) |
I'm pretty sure those are the lines for the charcoal canister.
--------------------  Project ST204.5 99.88946% complete... |
 Mar 14, 2007 - 2:47 PM Mar 14, 2007 - 2:47 PM
|
|
|
Enthusiast      Joined May 22, '03 From NOVA Currently Offline Reputation: 16 (100%) |
this might help
  edit: looks like wannabe was right, charcoal canister This post has been edited by playr158: Mar 14, 2007 - 2:48 PM |
 Mar 15, 2007 - 2:28 AM Mar 15, 2007 - 2:28 AM
|
|
 Administrator      Joined Aug 23, '02 From Seattle, WA Currently Offline Reputation: 14 (100%) |
Thanks guys.
Today I got the holes filled and began doing some bodywork to flatten everything out. I couldn't find that two-part filler, plus I'm broke, so I just used my USC body filler. Sadly, my finger began separating from my fingernail after just half an hour of trying to sand out filler on some of the complex curves of the firewall, so I didn't get a lot done. Then I forgot the camera at home, so no pictures tonight, but I'll get some online hopefully this weekend. -------------------- New Toyota project coming soon...
|
 Mar 16, 2007 - 12:15 AM Mar 16, 2007 - 12:15 AM
|
|
 Administrator      Joined Aug 23, '02 From Seattle, WA Currently Offline Reputation: 14 (100%) |
Today was very productive...I got the engine bay all smoothed out, and did some work to the G20 to fix a bunch of stuff.
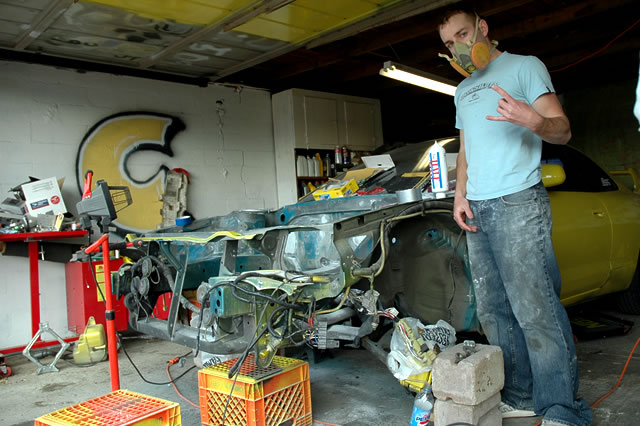 Gotta use protection...if you're ever doing bodywork, you need a good respirator. 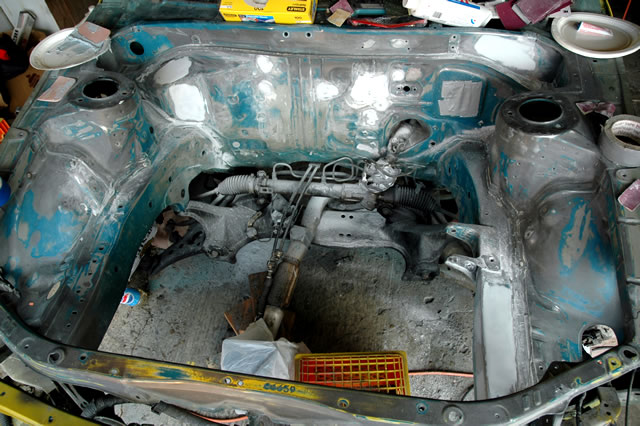 The whole bay, mostly smooth. 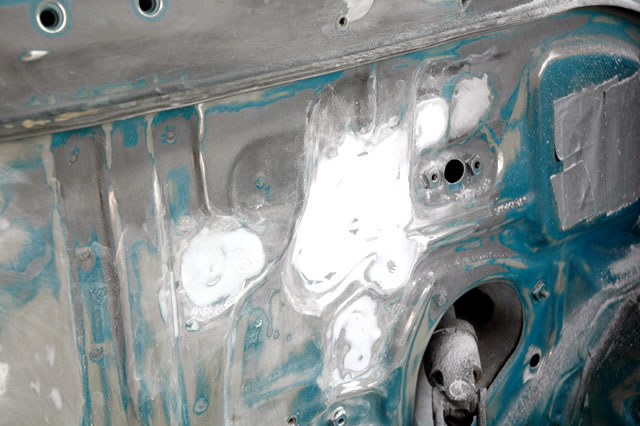 It may not look smooth, but it is...once it's all one color it'll look much better. 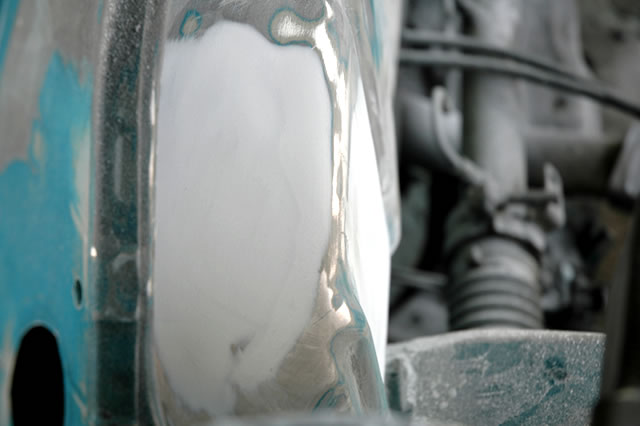 More of those filled holes...here you can kind of see that those filled areas are nice and smooth. 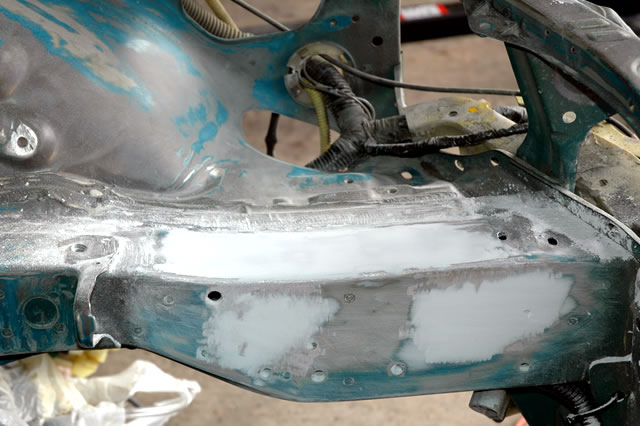 Where the battery once sat...now nice and smooth. 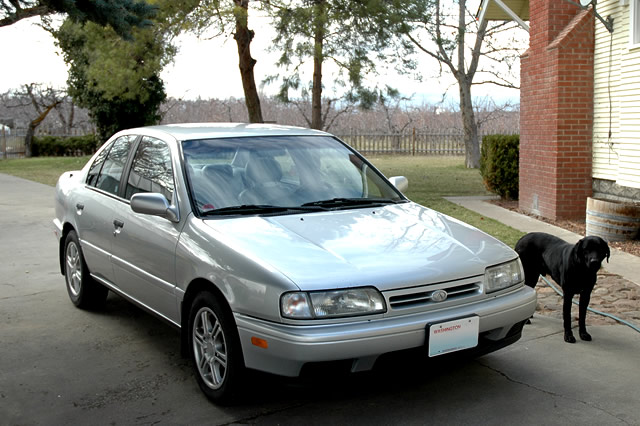 And to mix it up, a shot of the G20. I can't stand this car's stupid problems...you fix something, and it causes more things to go wrong. -------------------- New Toyota project coming soon...
|
 Mar 16, 2007 - 9:13 AM Mar 16, 2007 - 9:13 AM
|
|
 Enthusiast      Joined Feb 5, '05 From pineapple under the sea Currently Offline Reputation: 9 (100%) |
What happened to the B13?
-------------------- 1991 MR2 - T-tops - Crimson Red - Gen3 3SGTE - Lots of money
 I'm not really an asshole, but I play one on the internet. **** Photobucket |
 Mar 16, 2007 - 11:05 AM Mar 16, 2007 - 11:05 AM
|
|
 Administrator      Joined Aug 23, '02 From Seattle, WA Currently Offline Reputation: 14 (100%) |
QUOTE(95CelicaST @ Mar 16, 2007 - 6:13 AM) [snapback]536832[/snapback] What happened to the B13? I sold it to get a four door. Then I came across the G20, with the original owner and records for everything, for the same price I sold the SE-R for, so I jumped on that deal. -------------------- New Toyota project coming soon...
|
 Mar 16, 2007 - 1:58 PM Mar 16, 2007 - 1:58 PM
|
|
 Enthusiast      Joined Feb 5, '05 From pineapple under the sea Currently Offline Reputation: 9 (100%) |
Lucky. I always wanted a G20, but when I was searching for a car before I got the Celi I could only find Autos, and I didn't want to have to do an auto-manual conversion. Sorry it's giving you issues. No help from sr20forum?
-------------------- 1991 MR2 - T-tops - Crimson Red - Gen3 3SGTE - Lots of money
 I'm not really an asshole, but I play one on the internet. **** Photobucket |
 Mar 16, 2007 - 3:22 PM Mar 16, 2007 - 3:22 PM
|
|
 Enthusiast      Joined Oct 28, '02 From Europe, Lithuania Currently Offline Reputation: 8 (100%) |
Just another hint Chris - if you want to make sure everything is smooth and there are no sanding marks / dings / imperfections - use a Control layer
-------------------- Ex celica owner - just a guy from other side of the pond...
Full custom Projects from restoration to performance builds <<<<<< DCw / JDMart >>>>>>> |
 Mar 16, 2007 - 7:23 PM Mar 16, 2007 - 7:23 PM
|
|
|
Enthusiast      Joined Jun 23, '05 Currently Offline Reputation: 4 (100%) |
QUOTE(97lestyousay @ Mar 11, 2007 - 11:05 PM) [snapback]535432[/snapback] And to think I was freaking out after drilling a couple holes to fit skirts.hahaha You're a madman, I can't wait to see this thing finished.: ) qft. i know if my engine bay looked like that, i would be a little overwhelmed. good stuff chris, its going to look awesome --------------------  I think Bigfoot is blurry, that's the problem. It's not the photographer's fault. Bigfoot is blurry. And that's extra scary to me, because there's a large, out-of-focus monster roaming the countryside. |
 Mar 16, 2007 - 8:39 PM Mar 16, 2007 - 8:39 PM
|
|
|
Enthusiast      Joined Aug 30, '02 From San Juan, PR Currently Offline Reputation: 4 (100%) |
QUOTE(doGGy @ Mar 16, 2007 - 2:22 PM) [snapback]536924[/snapback] Just another hint Chris - if you want to make sure everything is smooth and there are no sanding marks / dings / imperfections - use a Control layer LOL I did that when I painted my motorcycle fairings and it works like a charm. The prep work was perfect, and so the paintjob. That is a great technique. It was my first time doing bodywork and painting and it came out perfect in every way. -------------------- |
 Mar 18, 2007 - 7:03 PM Mar 18, 2007 - 7:03 PM
|
|
 Administrator      Joined Aug 23, '02 From Seattle, WA Currently Offline Reputation: 14 (100%) |
Thanks for the tips guys.
I haven't been very productive the last few days...I've been at home, but I've just been going through some hard times and haven't had the motivation to put a lot of work into the car. But I did get some stuff done. I painted the block and installed the alternator and timing belt covers. I also cleaned the tranny off so it's clean. 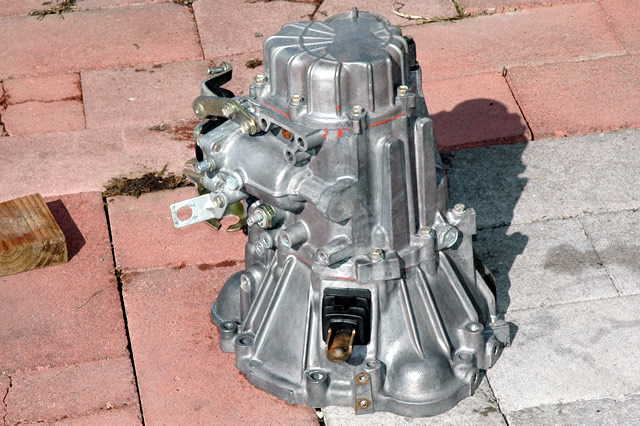 There's the tranny...nice and clean. 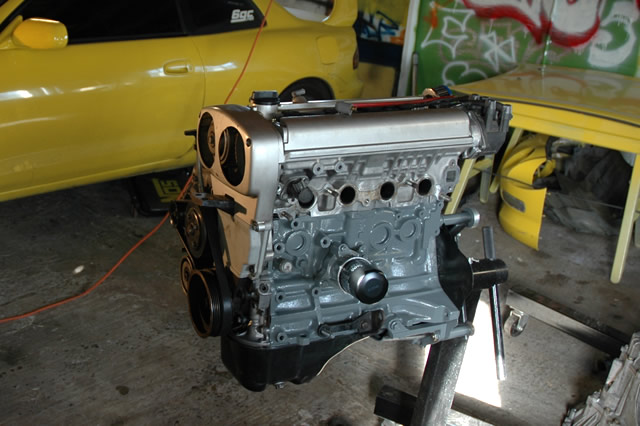 And the motor, all painted and kind of cleaned up. 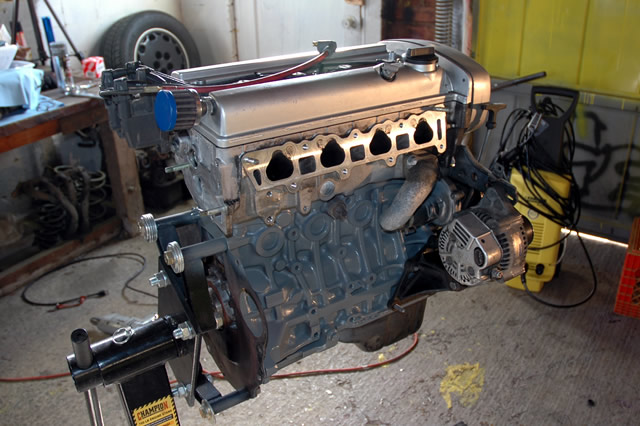 There's the backside of the motor...I didn't bother cleaning much of it up because it will never be seen once it's in the car. Tomorrow I get my wisdom teeth taken out, so I'll be out of commission for a few days. Hopefully soon I'll get the bay painted and continue working though. -------------------- New Toyota project coming soon...
|
 Mar 21, 2007 - 1:17 AM Mar 21, 2007 - 1:17 AM
|
|
 Administrator      Joined Aug 23, '02 From Seattle, WA Currently Offline Reputation: 14 (100%) |
Today was a very good day...I woke up at five with no pain from my wisdom teeth being pulled yesterday, so I headed to Yakima to get some work done.
I first fabricated a battery tray for the front of my car. It'll hold the battery in the area where the windshield washer fluid reservoir used to sit. I have no photos though, as I removed the battery and then proceeded to the John Deere dealer to get some paint for the bay. Once I was back, I finished up sanding the bay and masked off garage. 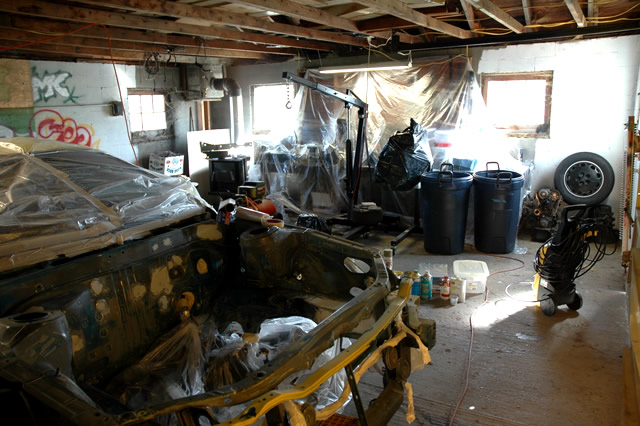 I didn't want yellow overspray on the workbench, motor, rest of the car, etc. Once masking was done, I wiped everything clean and shot some Duplicolor rattle can primer sealer. 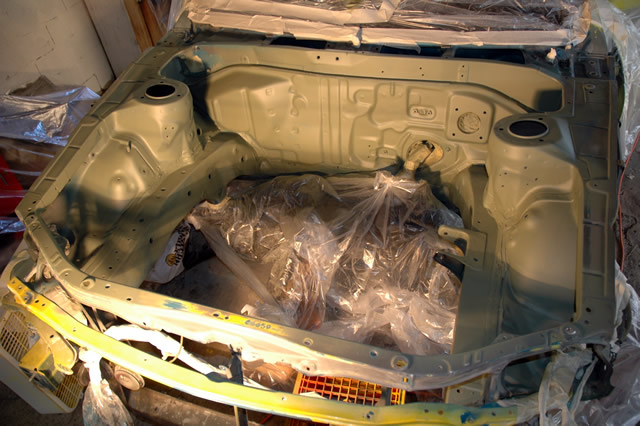 Looking much better in primer already. 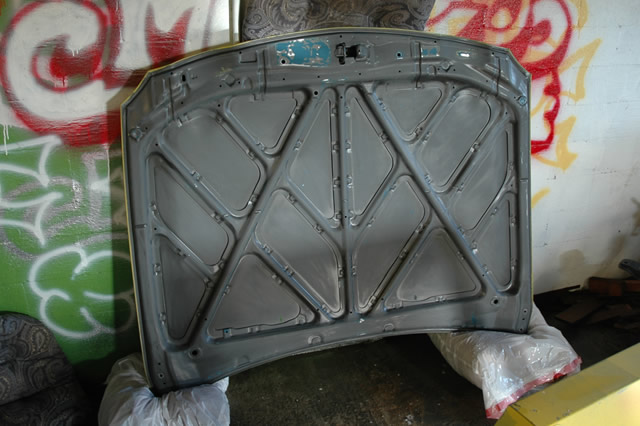 Not a fun job at all, but there it is all sanded down. Then it was time for paint. 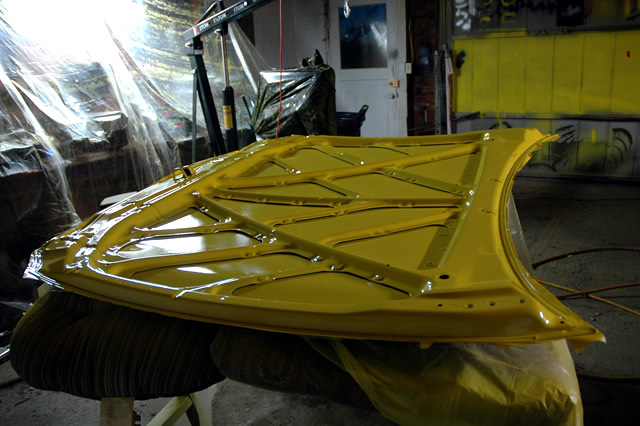 There's the hood, all painted. It needs some wetsanding and buffing, but otherwise looks good. 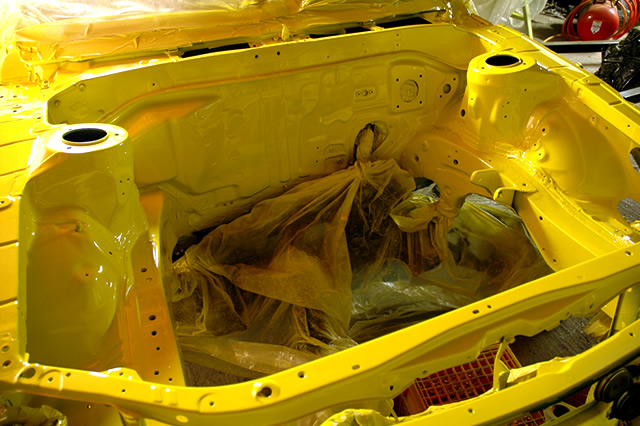 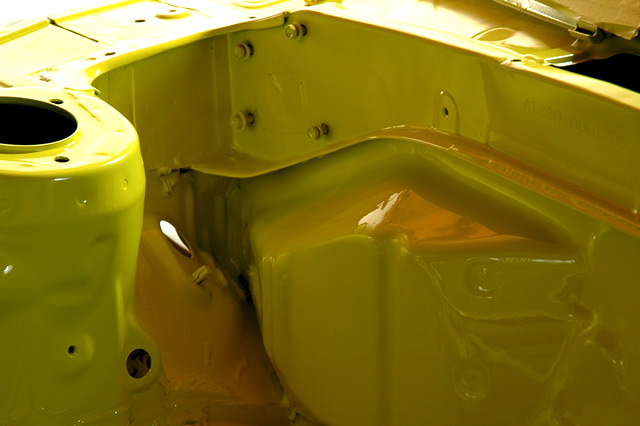 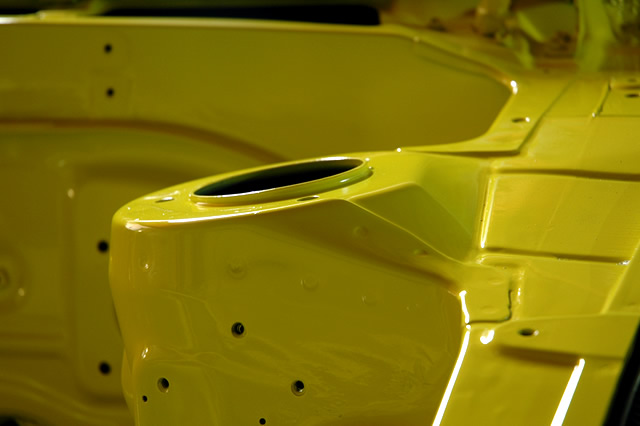 And there is the bay, all one color and looking good. I'm very happy with how the paint turned out. I'm going to let it all dry for a few days and then proceed to putting it back together. -------------------- New Toyota project coming soon...
|
 Mar 21, 2007 - 3:25 AM Mar 21, 2007 - 3:25 AM
|
|
|
Enthusiast      Joined Jun 23, '05 Currently Offline Reputation: 4 (100%) |
wow youve been keeping busy, that looks much better than before. but i still think thats a lot of yellow
--------------------  I think Bigfoot is blurry, that's the problem. It's not the photographer's fault. Bigfoot is blurry. And that's extra scary to me, because there's a large, out-of-focus monster roaming the countryside. |
 Mar 21, 2007 - 11:20 AM Mar 21, 2007 - 11:20 AM
|
|
 Administrator      Joined Aug 23, '02 From Seattle, WA Currently Offline Reputation: 14 (100%) |
Thanks...I agree that it's a lot of yellow, but I think it'll look good once it's done.
I've got a couple questions. 1. Can I mount my brake booster upside down? I like the placement of the brake booster line fitting more when it's inverted. 2. For my brake booster line, can I run a soft line all the way to the intake manifold? I don't want to run the hard line across the firewall. -------------------- New Toyota project coming soon...
|
 Mar 21, 2007 - 11:33 AM Mar 21, 2007 - 11:33 AM
|
|
 Enthusiast      Joined Nov 12, '02 From Webster Ma. Currently Offline Reputation: 1 (100%) |
Coomer that is amazing looking! big round of applause for tackling that, looks superb!
-------------------- |
 Mar 21, 2007 - 1:02 PM Mar 21, 2007 - 1:02 PM
|
|
|
Enthusiast      Joined May 22, '03 From NOVA Currently Offline Reputation: 16 (100%) |
soft line should be fine its just vaccum line... as for upside down hrmm i'm not sure..
what are you using/how are you painting btw? |
 Mar 21, 2007 - 1:28 PM Mar 21, 2007 - 1:28 PM
|
|
 Administrator      Joined Aug 23, '02 From Seattle, WA Currently Offline Reputation: 14 (100%) |
QUOTE(x_itchy_b_x @ Mar 21, 2007 - 8:33 AM) [snapback]538350[/snapback] Coomer that is amazing looking! big round of applause for tackling that, looks superb! Thanks...too bad it won't be fast like your build though. QUOTE(playr158 @ Mar 21, 2007 - 10:02 AM) [snapback]538377[/snapback] soft line should be fine its just vaccum line... as for upside down hrmm i'm not sure.. what are you using/how are you painting btw? I'm using the John Deere paint again. 10 parts paint to 1.5 parts thinner, and 10 parts paint to 1 part synthetic enamel hardener. I painted using my eBay special HVLP gravity feed spray gun. -------------------- New Toyota project coming soon...
|
 Mar 21, 2007 - 1:31 PM Mar 21, 2007 - 1:31 PM
|
|
|
Enthusiast      Joined May 22, '03 From NOVA Currently Offline Reputation: 16 (100%) |
ok, i need to eventually do what your doing and don't really understand
very inspirational you are |
 Mar 21, 2007 - 1:33 PM Mar 21, 2007 - 1:33 PM
|
|
 Enthusiast      Joined Oct 28, '02 From Europe, Lithuania Currently Offline Reputation: 8 (100%) |
QUOTE(Coomer @ Mar 21, 2007 - 9:20 AM) [snapback]538346[/snapback] Thanks...I agree that it's a lot of yellow, but I think it'll look good once it's done. I've got a couple questions. 1. Can I mount my brake booster upside down? I like the placement of the brake booster line fitting more when it's inverted. 2. For my brake booster line, can I run a soft line all the way to the intake manifold? I don't want to run the hard line across the firewall. 1. No. 2. Yes - get the hidrolic line witch can hold good pressure - and you will be set -------------------- Ex celica owner - just a guy from other side of the pond...
Full custom Projects from restoration to performance builds <<<<<< DCw / JDMart >>>>>>> |
  |
1 User(s) are reading this topic (1 Guests and 0 Anonymous Users)
0 Members:
| Lo-Fi Version | Time is now: November 24th, 2024 - 4:58 AM |


