  |

 Jan 26, 2009 - 10:34 PM Jan 26, 2009 - 10:34 PM
|
 
|
|
Enthusiast  Joined Mar 31, '04 From Summerville, SC Currently Offline Reputation: 5 (100%) |
The Phoenix Tuning Intercooler kit for the 3SGTE Swap into the 6th gen Celica is now available. This kit is designed for the 4th gen 3SGTE, a kit for the 2nd gen 3SGTE can be easily made for the same price with some changes to the last cold pipe.
The kit is $1195 shipped anywhere in the US. It includes: GARRETT core high-density intercooler, with brackets for 6th gen Celica and hardware Tig-welded, polished aluminum piping designed specifically for the 6th gen swap 4-ply silicone couplings at all connections, including two hump-hose couplings to reduce strain on the piping Stainless T-bolt clamps BOV flange of your choice welded on  (Pic shown with Phoenix Tuning CAI, not included) 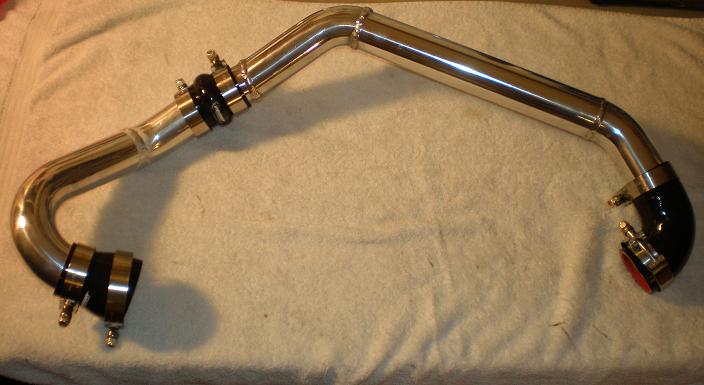  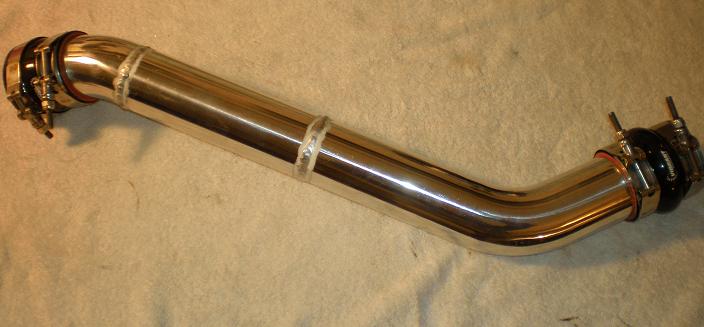  Close-up of tig-welding:  Installed:   (Original kit shown. Latest revision allows for factory fog-lights). Installation 1. Remove the stock intercooler and couplings. 2. I prefer to start by mounting the intercooler itself. You will find it easier to do this by removing the front bumper cover. Then, position the intercooler directly in the middle of the bumper support, positioning the brackets as shown.  3. A hole will need to be drilled into the top of the bumper, and an access hole will need to be drilled in the front of the bumper to use the included hardware. Tighten the intercooler brackets down.  4. To connect the #2 hot pipe, a 3" hold will need to be drilled in the thin sheet-metal between the radiator and the bumper support as shown here. Using a 3" hold saw, use the factory hole shown to center the bit. Before cutting the hole, be certain to un-attach the wiring on the backside of this sheet metal. Also, it's a good idea to put something between the backside of the sheet metal and the a/c lines that are nearby, to prevent you from nicking the a/c line should you suddenly break through with the hold saw.   5. Then connect the #2 hot pipe. Put the two t-bolt clamps in place for the coupling from the pipe to the intercooler, but do not tighten them.  6. Install the 2" hump hose connecting the #2 and #1 hot pipes, and install the #1 hot pipe from the turbo to the #2 hot pipe. Put all of the clamps into place, but do not tighten them yet. 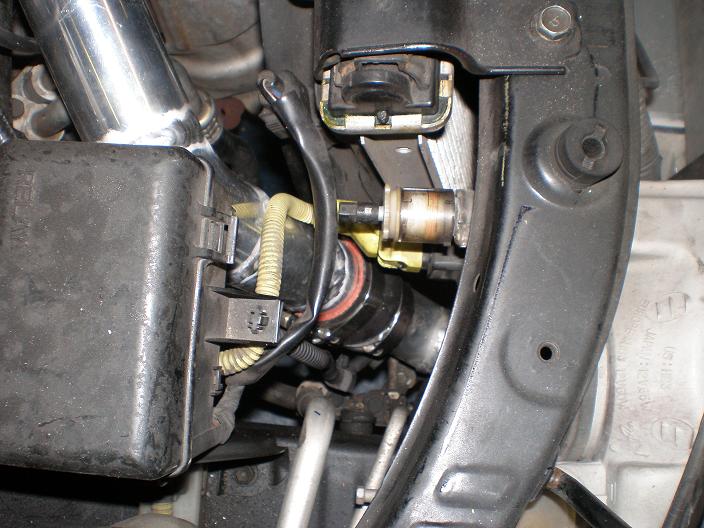  Try to make sure that the piping is not making contact with any parts of the body or engine. Once all of the piping, couplings, and clamps on the hot side have been installed and positioned to your liking, you may tighten down all of the t-bolt clamps. 7. Install the #1 cold pipe. Again, put the clamps into place but do not tighten them all of the way yet. 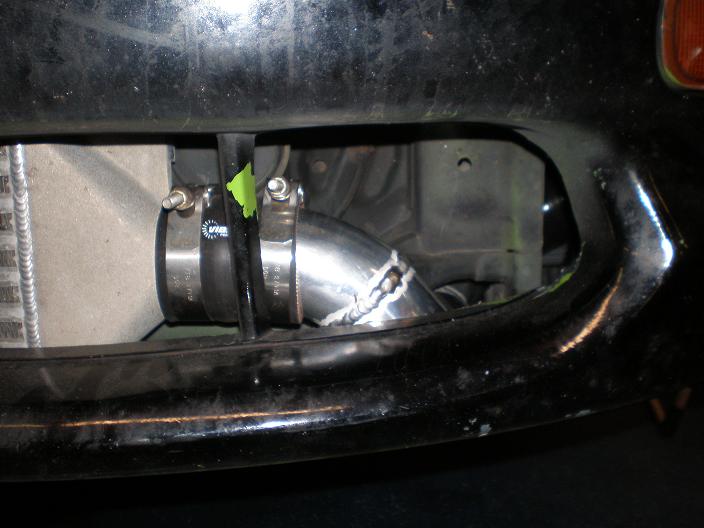 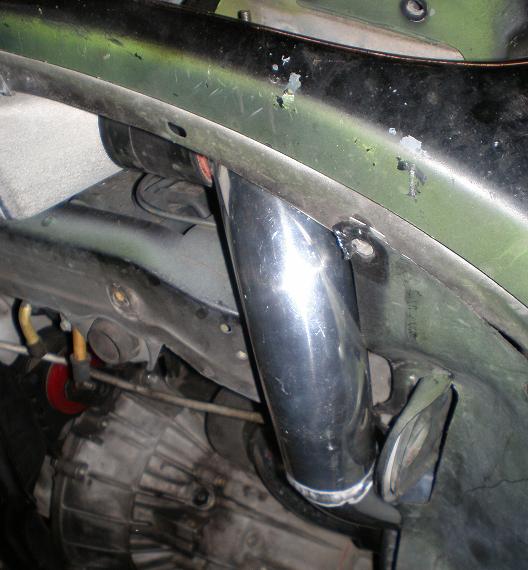 8. Install the #2 cold pipe, which goes under the engine bay fusebox. To do this, you will have to first remove the THREE 10mm bolts holding the fusebox to the chassis, and move the fusebox to the side. Also, if your factory air box silencer has not been removed, this will have to be done at this time. Connect the #2 cold pipe to the #1 cold pipe using the 90-degree coupling (for version WITH fog lights). 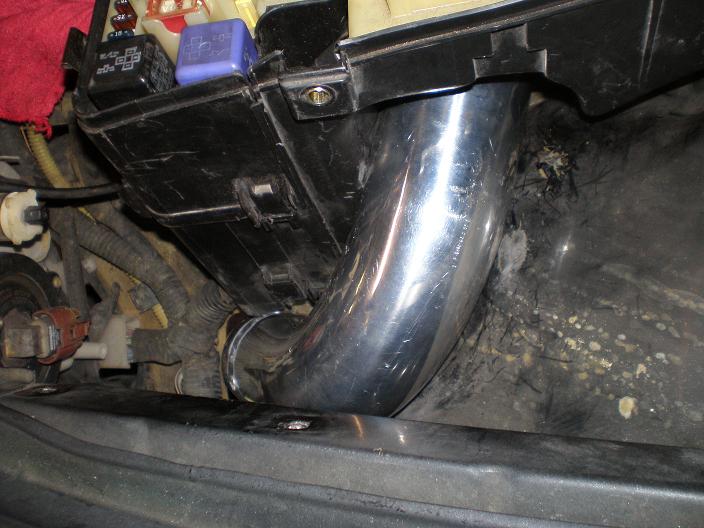 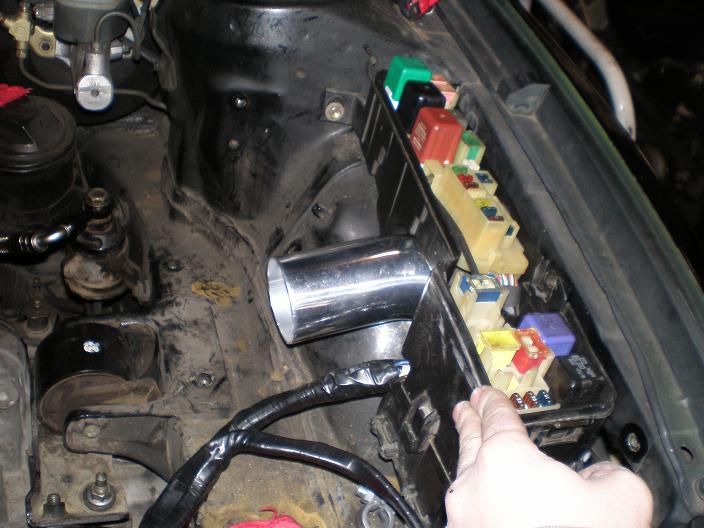 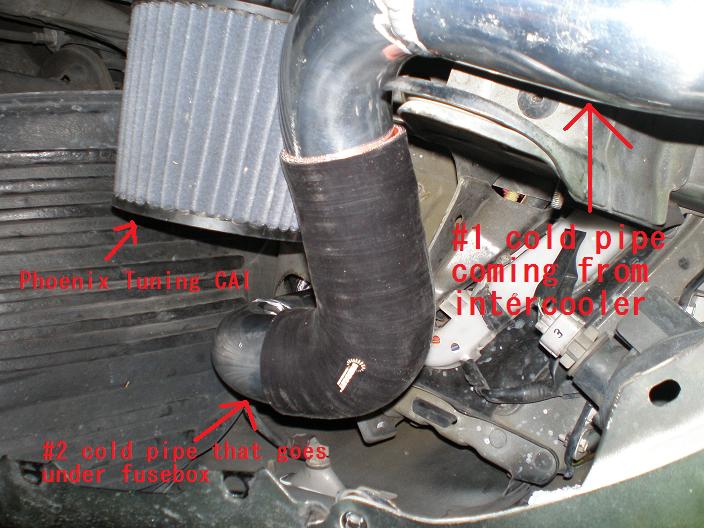 Bolt the fusebox back into place. 9. Install the final piece, the #3 cold pipe:   Once all the piping, couplings, and clamps are installed, double-check the positioning of all of the pipes to avoid contact with the frame or other parts. Once you are satisfied, tighten down all of the t-bolt clamps. Also install the BOV. Double-check all of the connections to be sure they are secure. Then enjoy! Questions or comments, post at http://www.phoenixtuning.com/forum/viewtop...?f=17&t=124 or email me at drtweak@phoenixtuning.com Or post right here!  -Doc -------------------- -Dr Tweak, 6GC's resident engine swap wiring expert extraordinaire Click here to see my swaps drtweak@phoenixtuning.com |

|
1 User(s) are reading this topic (1 Guests and 0 Anonymous Users)
0 Members:
| Lo-Fi Version | Time is now: February 21st, 2025 - 4:30 PM |