  |
 Feb 27, 2016 - 7:49 PM Feb 27, 2016 - 7:49 PM
|
|
|
Enthusiast  Joined Sep 1, '13 From somerset ohio Currently Offline Reputation: 7 (100%) |
ok a few things you need
Drill screwdriver a good blade time a basic set of sockets and ratchet I also recommend wearing gloves for some parts of this job . Also #1 I recommend getting at least 25 ft. of zero gauge wire do your research and decide what wire is best for you! 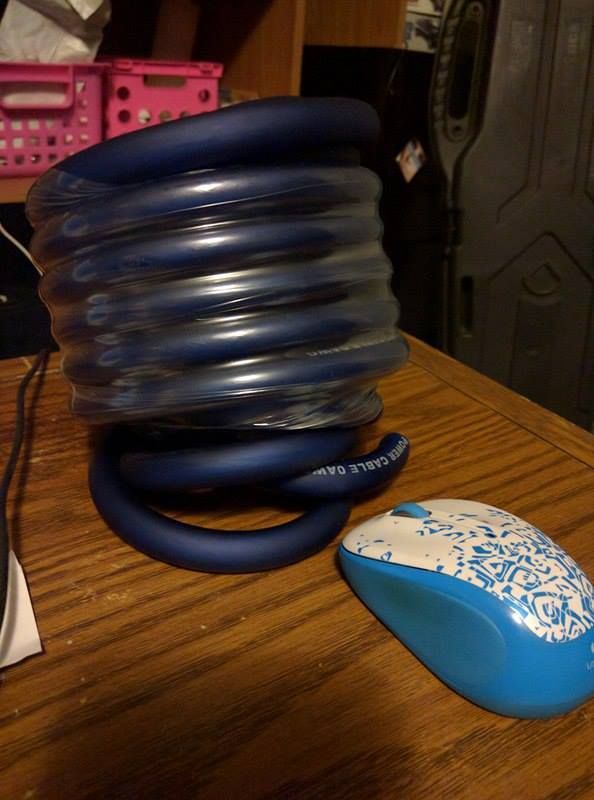 #2 A battery box which can be bought at auto zone for around 11 or you can find them on ebay 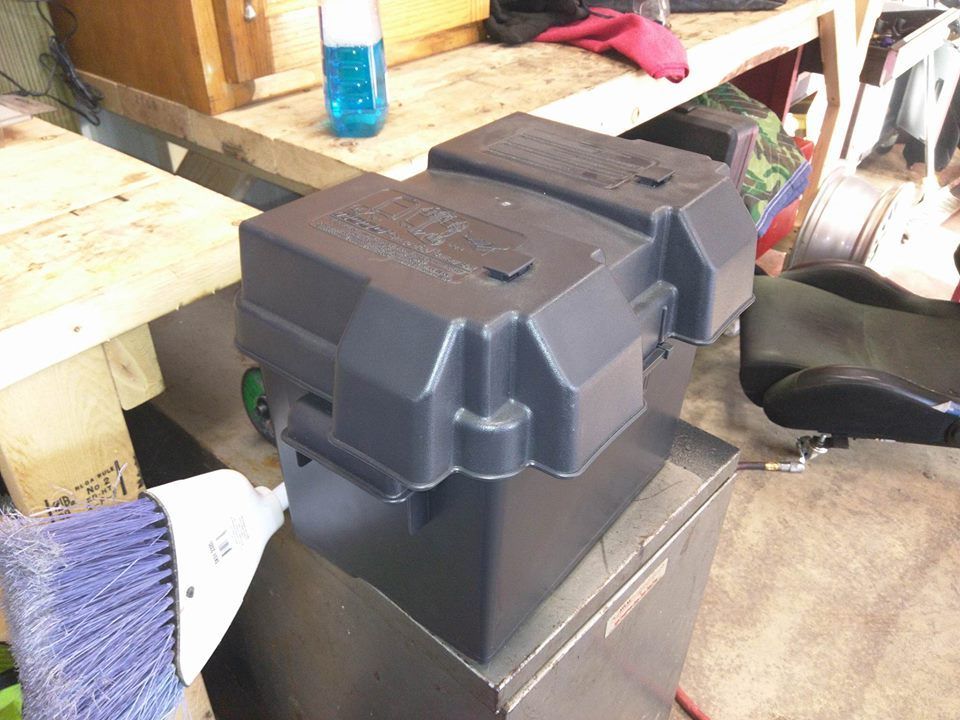 #3 2x battery post terminals #4 2 copper lugs (they come in 2 packs) 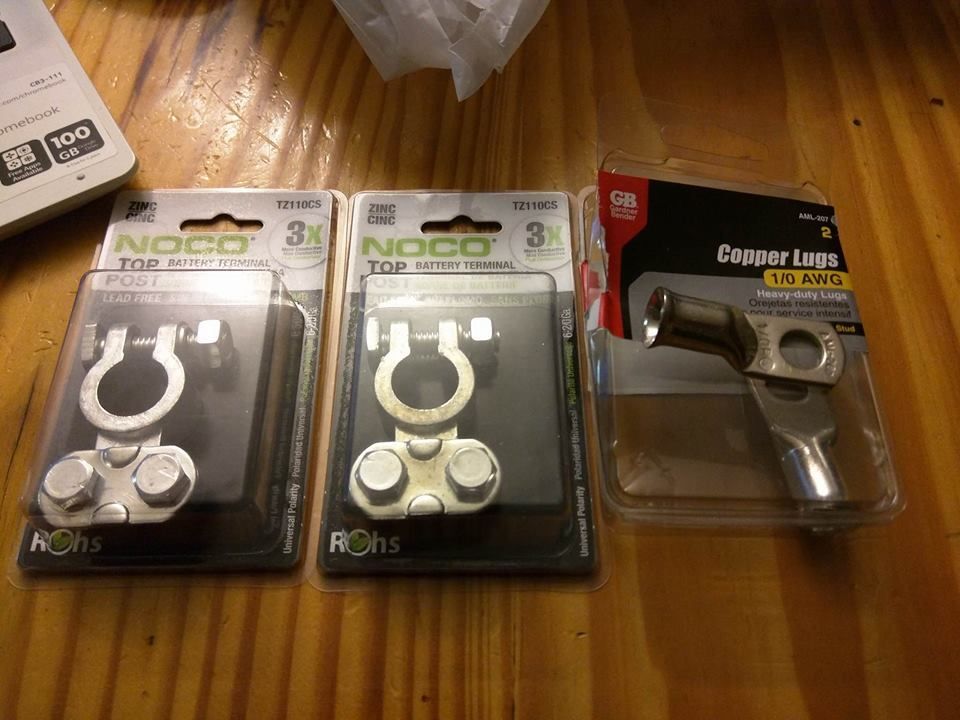 #5 piece of heat shrink that will fit the 0 gauge wire 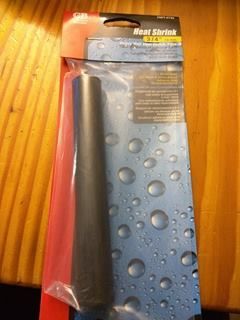 1st step unhook your battery 2nd step is remove your wheel drivers front 3rd step remove your fender liner you should see an airbag loom and a black loom running through there. 4th step remove the door sill, rear seats, and drivers side kick panel I also found it much easier to remove the drivers seat. Removing the rear side seat plastic may or may not be necessary. My car is a coupe so a few things are a little different. Now near where your air box enters the frame rail and runs down to the front bumper there is a plug. This is where you will want to start running your wire. Make sure you leave enough in the bay to work with. 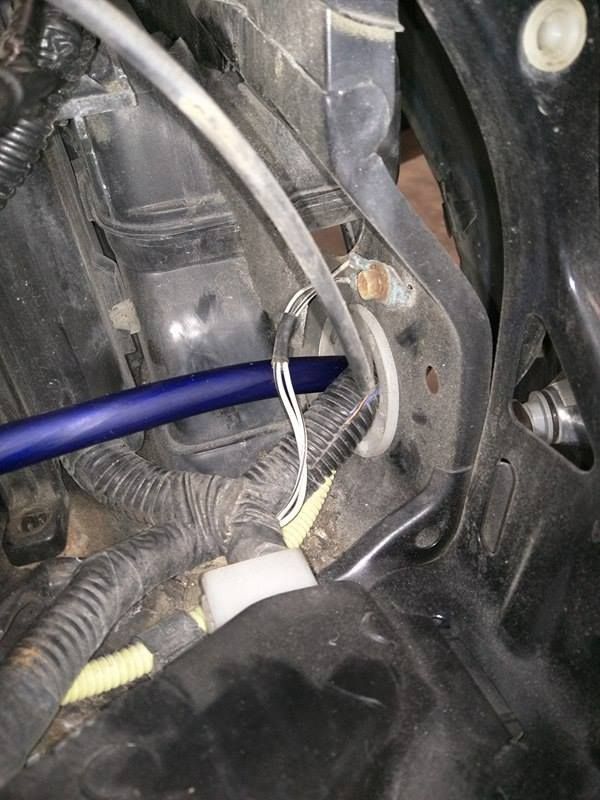 Now start running the wire around the top were the air back an large black loom run i used zip ties to hold it to those. 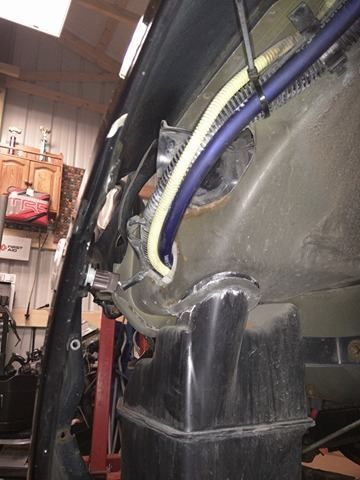 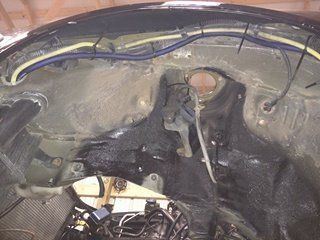 Once you get to the door side of the fender you will see 2 body plugs with in one there is the airbag loom and the other the large black loom i used the airbag loom plug to run mine. Cut the smallest hole possible to run your zero gauge wire through. Yes you will have to run the whole 25 ft of wire through it so be careful. 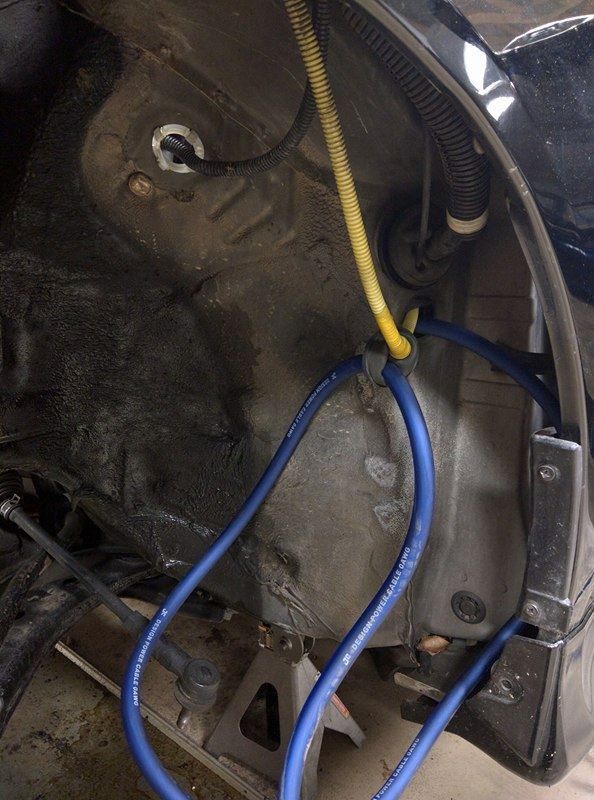 After you get it through the body plug start feeding it into the body. You will see it comes out behind the fuse panel near where your left foot usually rests. bring it all the way through and pop your body plug back in. 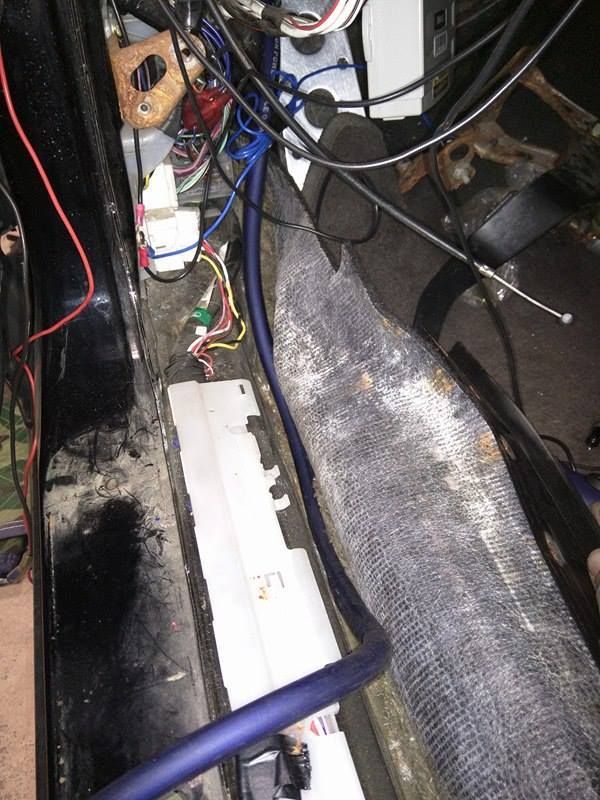 Most of the rest is tucking the wire away neatly under the carpet. In my picture you will see i ran it through where your trunk and fuel door handles are. DONT do that lol unless you don't want to be able to put your plastic piece back on. go over that hump lol. 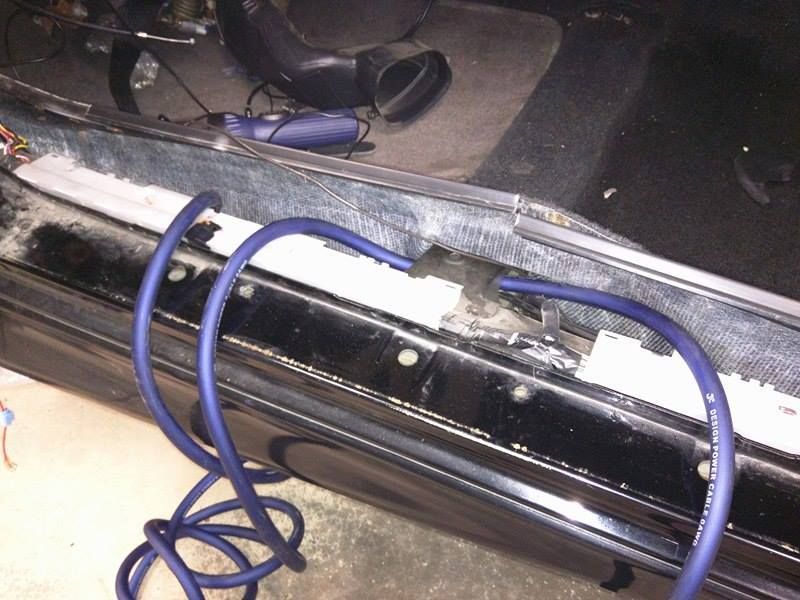 Here are some more pictures of the almost finished product. I was advised to install a breaker which i plan to do. when i do i will post pics of that as well. 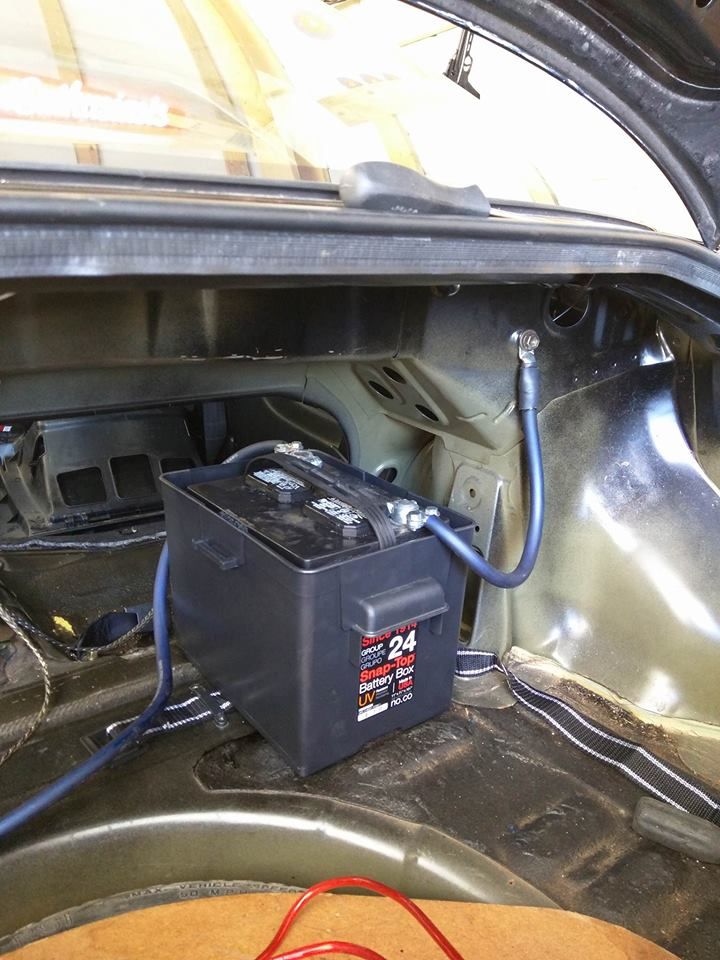 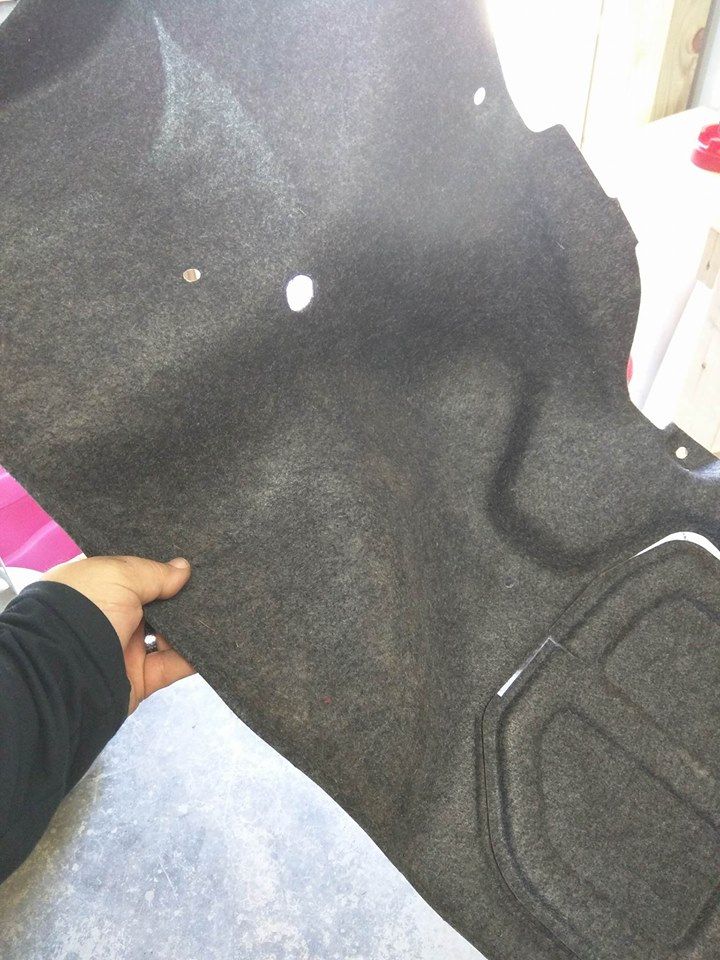 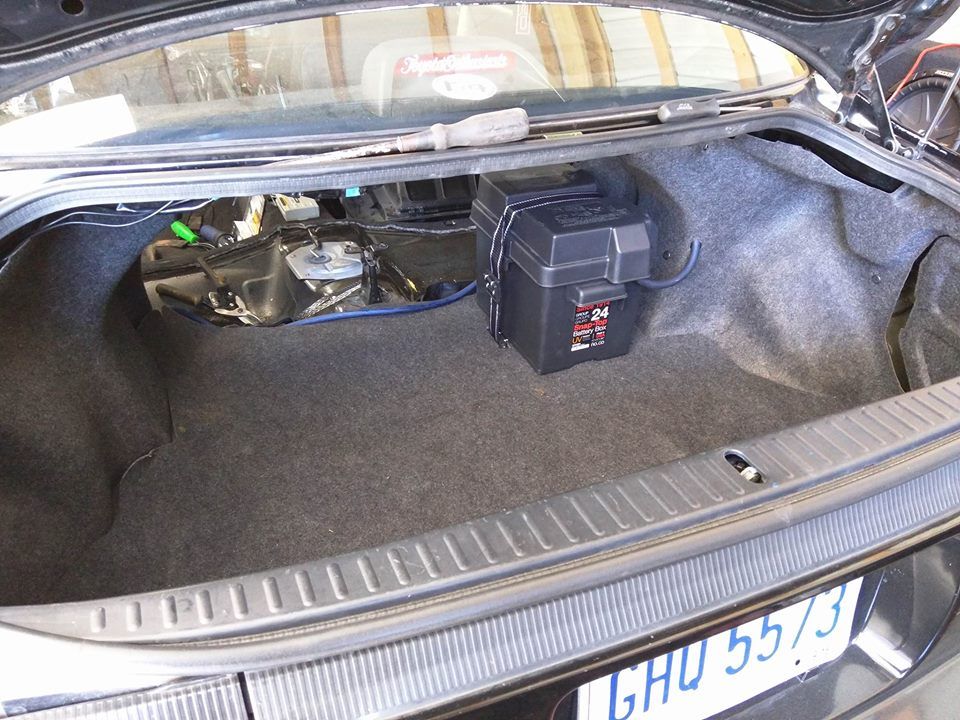 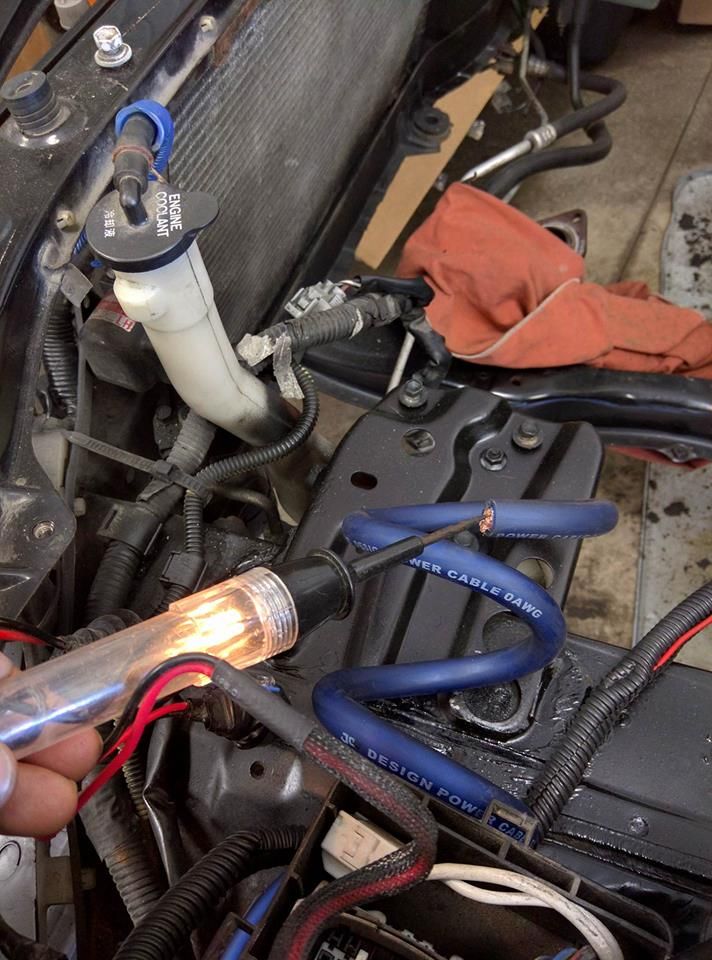 Ill have more pictures to upload of this project tomorrow. Although all that is left is running the wire back to where you install your battery box to the new terminal you have purchased for the positive side. Then run your ground terminal to a either pre existing bolt or make yourself a new hole and bolt it up! This post has been edited by a2daj1: Feb 29, 2016 - 6:43 PM -------------------- Dude I almost had you !!
 LOVE TOYOTAS?!? Join us over at FB https://www.facebook.com/groups/421380017992349/ CLICK THE LINK To join: TOYOTA ENTHUSIASTS - FB's fastest growing group for drama-free Toyota fans! |
 Feb 27, 2016 - 9:23 PM Feb 27, 2016 - 9:23 PM
|
|
 Enthusiast      Joined Dec 22, '06 From Columbia, MD Currently Offline Reputation: 13 (100%) |
I had planned on making one of these how-two's since I am doing a relocation as well, but mine is a fairly different situation, ill cover that in my build thread
Are you using a circuit breaker in the relocation? This post has been edited by Tigawoods: Feb 27, 2016 - 9:23 PM --------------------  1995 GT::::Diffusing the Situation エキサイティングカーレーシングチーム! march 2010 COTM : 6GC feature 2014 : january 2015-2016-2018 COTM |
 Feb 27, 2016 - 9:48 PM Feb 27, 2016 - 9:48 PM
|
|
|
Enthusiast    Joined Jan 25, '15 From United States Currently Offline Reputation: 4 (100%) |
Make sure you use sealant in that body plug. Once cut water actually gets inside there and gets inside and makes driver side floor wet. I ran my amp wire thru there and my floor kept getting wet.. So I resealed the plug and I never had an issue since. I didn't cut the plug to bad either just a small cut to squeeze 0 gauge wire. I used silicone sealant it's water proof. I'd also recommend using 100% copper vs cca. The 20$ for 25 foot is definitely cca. Cca doesn't carry current as well as copper. I think it's 67% efficient as copper I could be off by a few % but not to much. Cca also corrodes rather quickly. Best wiring in my opinion is NVX its silver tinned copper. Silver is the best current producer it's 6% better than copper. I used NVX with my amp wiring kit but if I where to relocate my battery I would definitely use it or at least pure copper.
This post has been edited by Jmk91: Feb 27, 2016 - 9:55 PM |
 Feb 27, 2016 - 9:56 PM Feb 27, 2016 - 9:56 PM
|
|
|
Enthusiast  Joined Sep 1, '13 From somerset ohio Currently Offline Reputation: 7 (100%) |
I had planned on making one of these how-two's since I am doing a relocation as well, but mine is a fairly different situation, ill cover that in my build thread Are you using a circuit breaker in the relocation? No i wasnt planning on it. Should I? Make sure you use sealant in that body plug. Once cut water actually gets inside there and gets inside and makes driver side floor wet. I ran my amp wire thru there and my floor kept getting wet.. So I resealed the plug and I never had an issue since. I didn't cut the plug to bad either just a small cut to squeeze 0 gauge wire. I used silicone sealant it's water proof. I'd also recommend using 100% copper vs cca. The 20$ for 25 foot is definitely cca. Cca doesn't carry current as well as copper. I think it's 67% efficient as copper I could be off by a few % but not to much. Cca also corrodes rather quickly. Best wiring in my opinion is NVX its silver tinned copper. Silver is the best current producer it's 6% better than copper. I used NVX with my amp wiring kit but if I where to relocate my battery I would definitely use it or at least pure copper. gotcha ill get on that sealant -------------------- Dude I almost had you !!
 LOVE TOYOTAS?!? Join us over at FB https://www.facebook.com/groups/421380017992349/ CLICK THE LINK To join: TOYOTA ENTHUSIASTS - FB's fastest growing group for drama-free Toyota fans! |
 Feb 27, 2016 - 10:51 PM Feb 27, 2016 - 10:51 PM
|
|
 Enthusiast      Joined Dec 22, '06 From Columbia, MD Currently Offline Reputation: 13 (100%) |
for safety reasons I would strongly suggest it.
The wire you got has a fairly thin jacket. If it were to wear at some place and short to the chassis that could cause some trouble. 150 Amp circuit breaker is what I am going to be using, should be sufficient, all itd would do in the case of a short is pop and you reset it (after figuring out what made it short of course) Yeah I am also a little curious of that wire you got now that Jmk91 brought it up. Im spending $45 for 15ft of 1/0 wire and thats still the cheaper of the two options I had. They dont show many details of the actual wire material on the ebay page But, try it out and see, it could work --------------------  1995 GT::::Diffusing the Situation エキサイティングカーレーシングチーム! march 2010 COTM : 6GC feature 2014 : january 2015-2016-2018 COTM |
 Feb 28, 2016 - 10:40 AM Feb 28, 2016 - 10:40 AM
|
|
|
Enthusiast  Joined Sep 1, '13 From somerset ohio Currently Offline Reputation: 7 (100%) |
for safety reasons I would strongly suggest it. The wire you got has a fairly thin jacket. If it were to wear at some place and short to the chassis that could cause some trouble. 150 Amp circuit breaker is what I am going to be using, should be sufficient, all itd would do in the case of a short is pop and you reset it (after figuring out what made it short of course) Yeah I am also a little curious of that wire you got now that Jmk91 brought it up. Im spending $45 for 15ft of 1/0 wire and thats still the cheaper of the two options I had. They dont show many details of the actual wire material on the ebay page But, try it out and see, it could work OK sounds like a plan Stan I'll look into that breaker. As for the wire we will see what happens I was told it works fine but we shall see. for safety reasons I would strongly suggest it. The wire you got has a fairly thin jacket. If it were to wear at some place and short to the chassis that could cause some trouble. 150 Amp circuit breaker is what I am going to be using, should be sufficient, all itd would do in the case of a short is pop and you reset it (after figuring out what made it short of course) Yeah I am also a little curious of that wire you got now that Jmk91 brought it up. Im spending $45 for 15ft of 1/0 wire and thats still the cheaper of the two options I had. They dont show many details of the actual wire material on the ebay page But, try it out and see, it could work Thanks tiga -------------------- Dude I almost had you !!
 LOVE TOYOTAS?!? Join us over at FB https://www.facebook.com/groups/421380017992349/ CLICK THE LINK To join: TOYOTA ENTHUSIASTS - FB's fastest growing group for drama-free Toyota fans! |
 Feb 28, 2016 - 11:25 AM Feb 28, 2016 - 11:25 AM
|
|
 Enthusiast     Joined Aug 11, '08 From London Currently Offline Reputation: 7 (100%) |
|
 Feb 28, 2016 - 11:52 PM Feb 28, 2016 - 11:52 PM
|
|
|
Enthusiast      Joined Mar 11, '06 From Way South Chicago Currently Offline Reputation: 0 (0%) |
You MUST have a fuse or breaker on the cabling, imagine if someone hit the front fender of your car and the cable was grounded. How fast would that cable over heat and start your car on fire somewhere? Pretty damn fast. Now imagine if you had been hurt in the crash or the door was jammed shut, now you're trapped in your burning car. Not good.
BTW that 0GA cable you got for $20 on ebay is what's know as copper clad aluminum, it's got about 25% less current carrying capability than copper of the same gauge. Welding cable is easy to buy by the foot, has a tough outer jacket, and is fine stranded copper made to move and flex repeatedly without breaking. It's really easy to work with too! https://www.youtube.com/watch?v=UVnPPdztIAI Some demo of CCA vs Copper. This post has been edited by Bitter: Feb 29, 2016 - 12:08 AM -------------------- |
 Feb 29, 2016 - 5:42 PM Feb 29, 2016 - 5:42 PM
|
|
|
Enthusiast  Joined Sep 1, '13 From somerset ohio Currently Offline Reputation: 7 (100%) |
I did the same mod last month except I went through the bulk head with the other cables not via the wing. 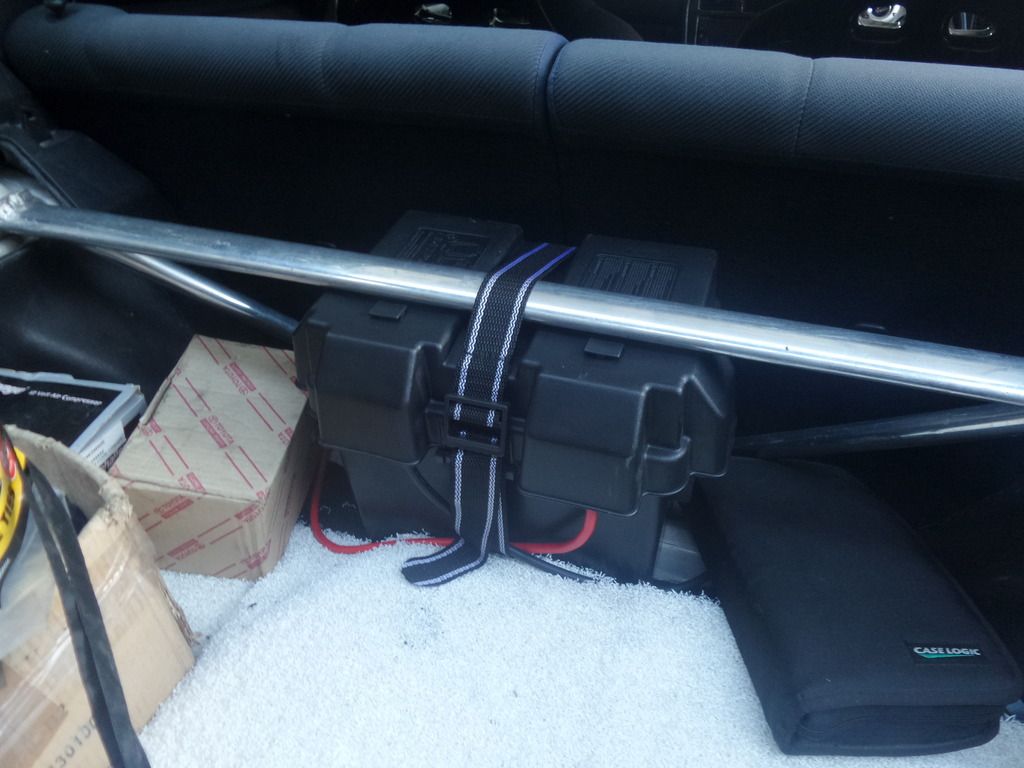 Im using a 100amp push switch fuse. Very nice that looks awesome, great work You MUST have a fuse or breaker on the cabling, imagine if someone hit the front fender of your car and the cable was grounded. How fast would that cable over heat and start your car on fire somewhere? Pretty damn fast. Now imagine if you had been hurt in the crash or the door was jammed shut, now you're trapped in your burning car. Not good. BTW that 0GA cable you got for $20 on ebay is what's know as copper clad aluminum, it's got about 25% less current carrying capability than copper of the same gauge. Welding cable is easy to buy by the foot, has a tough outer jacket, and is fine stranded copper made to move and flex repeatedly without breaking. It's really easy to work with too! https://www.youtube.com/watch?v=UVnPPdztIAI Some demo of CCA vs Copper. do you have a recommendation for where to but a breaker for zero gauge wire , is that something i can get at the parts dtore i have zero issue with installing one. You make perfect sense. -------------------- Dude I almost had you !!
 LOVE TOYOTAS?!? Join us over at FB https://www.facebook.com/groups/421380017992349/ CLICK THE LINK To join: TOYOTA ENTHUSIASTS - FB's fastest growing group for drama-free Toyota fans! |
 Feb 29, 2016 - 8:36 PM Feb 29, 2016 - 8:36 PM
|
|
 Enthusiast      Joined Dec 22, '06 From Columbia, MD Currently Offline Reputation: 13 (100%) |
Google: 150amp bussmann circuit breaker
for the ground to chassis I would recommend sanding/grinding off the paint/primer a bit around the bolt hole to get a REALLY good ground connection from the lug to the chassis. This post has been edited by Tigawoods: Feb 29, 2016 - 8:41 PM --------------------  1995 GT::::Diffusing the Situation エキサイティングカーレーシングチーム! march 2010 COTM : 6GC feature 2014 : january 2015-2016-2018 COTM |
 Feb 29, 2016 - 11:19 PM Feb 29, 2016 - 11:19 PM
|
|
|
Enthusiast      Joined Mar 11, '06 From Way South Chicago Currently Offline Reputation: 0 (0%) |
http://www.amazon.com/gp/product/B003NYHCQ...EMF80CEB95K3622
Remember to either tin the cable ends or use a compression sleeve to terminate the cable in a set screw type connection, if you do neither then you just smash a very small amount of cable temporarily and it will come loose or make poor contact and overheat. ALSO AND I SEE THIS ALL THE TIME SO IT'S IN BOLD. THE FUSE/CIRCUIT BREAKER ONLY PROTECTS THE WIRE AFTER IT. ANY WIRE BETWEEN THE BATTERY POSITIVE AND FUSE IS NOT PROTECTED, FUSES NEED TO BE AS CLOSE TO POSITIVE AS POSSIBLE. A fuse at the end does not protect the whole wire. This is why the circuit breaker/fuse panel in your house is right where the main power comes in before it's distributed out. -------------------- |
 Mar 1, 2016 - 7:54 AM Mar 1, 2016 - 7:54 AM
|
|
|
Enthusiast  Joined Sep 1, '13 From somerset ohio Currently Offline Reputation: 7 (100%) |
Google: 150amp bussmann circuit breaker for the ground to chassis I would recommend sanding/grinding off the paint/primer a bit around the bolt hole to get a REALLY good ground connection from the lug to the chassis. yep sounds like a good idea. http://www.amazon.com/gp/product/B003NYHCQ...EMF80CEB95K3622 Remember to either tin the cable ends or use a compression sleeve to terminate the cable in a set screw type connection, if you do neither then you just smash a very small amount of cable temporarily and it will come loose or make poor contact and overheat. ALSO AND I SEE THIS ALL THE TIME SO IT'S IN BOLD. THE FUSE/CIRCUIT BREAKER ONLY PROTECTS THE WIRE AFTER IT. ANY WIRE BETWEEN THE BATTERY POSITIVE AND FUSE IS NOT PROTECTED, FUSES NEED TO BE AS CLOSE TO POSITIVE AS POSSIBLE. A fuse at the end does not protect the whole wire. This is why the circuit breaker/fuse panel in your house is right where the main power comes in before it's distributed out. Thanks for the link ill get right on that. From what i understand it needs to be close to the positive battery terminal. thanks for the link -------------------- Dude I almost had you !!
 LOVE TOYOTAS?!? Join us over at FB https://www.facebook.com/groups/421380017992349/ CLICK THE LINK To join: TOYOTA ENTHUSIASTS - FB's fastest growing group for drama-free Toyota fans! |
  |
1 User(s) are reading this topic (1 Guests and 0 Anonymous Users)
0 Members:
| Lo-Fi Version | Time is now: November 26th, 2024 - 8:12 PM |


