  |

 Feb 22, 2010 - 2:21 AM Feb 22, 2010 - 2:21 AM
|
 
|
|
Enthusiast  Joined Mar 20, '07 From Bakersfield, CA Currently Offline Reputation: 10 (100%) |
QUOTE (rave2n @ Feb 21, 2010 - 11:46 AM)  QUOTE (Random_Stranger @ Feb 21, 2010 - 2:33 PM) knowing is half the battle (G.I.JoOoOoooooE! LOL Who remembers that slogan in mid commercial break as a kid?) Ty sir, I still have to shine up the clearcoat a little more with some rubbing compound, few rough spots, but you can't even notice it, just something that annoys me =P. Most the rash sands out, but for the sake of not having hills and dips on the lip, that aquameld did the trick on the deep ones. http://video.google.com/videoplay?docid=-2...49915141809363#  YOU DO Remember the commercials! That was funny! YOU DO Remember the commercials! That was funny!
This post has been edited by Random_Stranger: Feb 22, 2010 - 2:21 AM -------------------- 91 MR2 Turbo SW20, 92 MR2 Turbo SW20, 95 Celica GT ST204
 |

|
Feb 22, 2010 - 7:18 AM
|
|
|
Enthusiast Joined Sep 23, '08 From Hawaii Currently Offline Reputation: 10 (100%) |
has anyone painted the stock rims another color other than the factory silver or flat black. like maybe a white or bronze? id be interested to see how that look. awesome job btw.
|
|
Feb 22, 2010 - 8:32 AM
|
|
|
Enthusiast Joined May 29, '09 From Gainesville, FL Currently Offline Reputation: 17 (100%) |
QUOTE (CelicaST_CALI @ Feb 21, 2010 - 10:30 PM) What kind of paint did u use?? Some stuff at a local store, believe it was Dupi-color High Performane Wheel Paint, something like that, at work at the moment so not positive. 2 cans of Metallic Silver, 1 Can of Metallic Black, and 2 cans of clear. |
|
Feb 23, 2010 - 5:26 PM
|
|
|
Enthusiast Joined May 29, '09 From Gainesville, FL Currently Offline Reputation: 17 (100%) |
Can someone do me a hug favor, and measure the length of the just the mag on the lugnut.
Long story short, went to a shop to get tires put on. They put the tires on, and sell me some mag lugs, 3 hours later (not getting into why it took so long) they say i'm good to go. I drive back to work, car is making noises that are quite familiar, like the wheel wasn't firm on the hub. So I take it back, they test drive it, screw around..for another 2 hours, then they come to conclusion that the mags are to long that they sold me. They won't return the money for them, because they were used on my vehicle. This all being while my car is on a lift, with all four taken off, and not a set a lugs to get me home. I sit around for another 2 hours, they get another shop to deliver some acorn lugs, which don't even fully thread on the stud. All this because they wouldn't let me drive away, putting washers in place to make the mag shorter and the wheel firm to the hub, saying its a hazard to drive with washers spacing the mag...(yea they are retarded)..so instead they make me purchase another set of lugs, that are only half threaded...yea thats real safe... So in end, I just need to know how much to space, or grind down the mag....so I can just end this headache, and never return to Tire Kingdom agian... Then I can finally conclude this thread, and post the final pic...btw..they make the car look like a whole nother beast..i'm quite surprised at it, and its a good motivator to get the rest done! This post has been edited by rave2n: Feb 23, 2010 - 5:28 PM |
|
Feb 24, 2010 - 9:49 AM
|
|
|
Enthusiast Joined May 29, '09 From Gainesville, FL Currently Offline Reputation: 17 (100%) |
Final Pic!
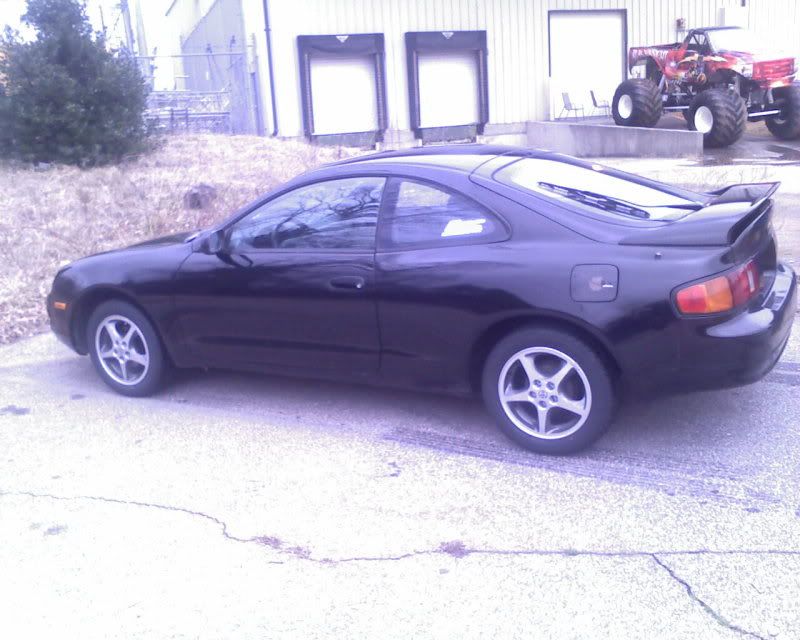 I think shes looking 50 times better =) By request, here is the process I used. Supplies: 2 X RustOleum 11 oz. Metallic Silver High Performance Wheel Paint 1 X RustOleum 11 oz. Metallic Black High Performance Wheel Paint 2 X RustOleum 11 oz. Clearcoat High Performance Wheel Paint 2 X RustOleum 11 oz. Bare Metal Primer 1 X Tal-Strip Paint Remover 2 X 5 pk 180 Grit sand paper 2 x 5 pk 220 Grit sand paper 1 X 5 pk 800 Grit sand paper 1 X Painters tape - 1/2 inch. 1 X Razor Blade & Pencil 1 X Small Paint brush & cup 1 X Aquameld Fiberglass putty, or Aluminum Putty 1 X Rubbing Compound Optional: Black & Decker Mouse Palm Sander (Highly Recommend, unless you have the forearms of a gorilla) Optional: Notecards (This is for if you want to do it with the tire on) 400 X Patience Begin with Tal-Strip, saturate all rims. Wait 1 hour, rinse off. Some spots may require using a plastic scrapper, or you can just sand it off. Once rims have dried off, you can begin sanding. Start with 180 grit. Sand it down to a smooth surface. The lip will require a bit more sanding, if some road rash is to deep and sanding it down will create a dip on the lip, simply mix up the fiberglass puty and fill the gash. Wait 45 mins, return with 180 grit over the fiberglass puty and sand to a smooth surface. After all 4 have been sanded smooth with 180, whip out the 220 and do a general sanding of the whole face of the rim to create a nice smooth surface for the primer. Clean rims throughly - Anything left behind will show. It must be spotless, use water and wait for it to dry if you have to, or dry with a microfiber cloth so a normal one doesn't leave cloth shavings behind. Apply 1 light coat of primer - Wait 10 mins, apply a solid wet coat of primer - Repeat 1 more time, total of 1 light, 2 solid primer coats. Wait 2 hours for primer to dry throughly, and sand down the whole face of the rim with 800 grit paper to make the primer nice and smooth for paint to be applied. Clean off dust, I suggest using a air compressor and blowing it all off, or you can just wipe it off throughly with a cloth, do not use water unless you want to wait for the primer to dry agian. After Primer is nice and smooth, and clean. Begin to apply the Silver paint, same process as priming. 1 Coat light, 10 mins, 2 coats heavy. 10 mins in between. The silver will be nice and tacky after 2 hours, and you can begin to apply the painters tape, be very careful because your fingernails or any amount of to much pressure will make a dent in that fresh paint. You can wait a day or two if you to do the next step, for the paint to cure more, but thats up to you. Take the painters tape and follow all the curves of the silver area outside of spot. I simply apply tape, followed the lines with a pencil, and cut it with a razor. This process is very time consuming, I believe it took me 1 and half hours per rim to tape up. You want to make sure you tape matches along these lines, or a visible corrupted line will show when the black is applied. Once done taping all face of the rim, you can then apply the black Black simply is 2 coats 10 mins in between. Wait 1 hour, this is very important, no more then 1 hour, or the black will begin to cure and when you remove the tape it will take black with it. Once all tape has been removed, you can then apply your clear coat. I applied 3 coats 10 mins in between once agian. This will provide a nice shine and protection for the paint. It won't be completely smooth, thats where you bring in the rubbing compound and rub like hell til its nice and smooth on the clear. Painting the center caps is real simple. Same process as stated above. The toyota symbol must be painted by hand using a small brush and paint in a cup. I just used the spray black, and applied it..( Well i didn't, my wonderful lady did, I made an attempt and my hand just wasn't steady enough, and I figured hell, ladies apply finger nail polish, this is quite similiar. and she did a damn good job) Thats about it, it all really comes down to how much time you want to put into it. The more you put in the better the outcome. I made the mistake of taking them to get tires put on only 36 hours after the paint was applied, so when they balanced the tires, the weights pulled some paint and clear off. No biggie, just sand it down and respray, I would recommend waiting atleast a week before putting tires on, so the paint is nice and solid. Hope this helps! This post has been edited by rave2n: Feb 24, 2010 - 11:07 AM |
|
Feb 24, 2010 - 12:33 PM
|
|
|
Enthusiast Joined Oct 10, '06 From Greensburg,PA Currently Offline Reputation: 27 (94%) |
wow those look familiar
 good work! good work!   
-------------------- Breaking Axles...
|
|
Feb 24, 2010 - 1:18 PM
|
|
|
Enthusiast Joined May 29, '09 From Gainesville, FL Currently Offline Reputation: 17 (100%) |
Hah, almost identical. Yours look great too.
I did go through tons of options besides the stocks, but to me, they just look perfect with it, and just require some work to make'em even better. |
|
1 User(s) are reading this topic (1 Guests and 0 Anonymous Users)
0 Members:
| Lo-Fi Version | Time is now: June 13th, 2026 - 3:13 AM |