  |
 May 20, 2012 - 7:36 PM May 20, 2012 - 7:36 PM
|
|
|
Enthusiast      Joined Aug 2, '05 From Guam Currently Offline Reputation: 15 (100%) |
INNER/OUTER TIE ROD REMOVAL/REPLACE
TOOLS NEEDED: -Jack - to jack up car -Jack Stands - to hold up car -Ratchet/Long Ratchet or Breaker Bar and correct socket for Wheel Lugnuts and Outer Tie Rod Castlenut. -Hammer - to hammer -Puller - for outer tie rod, if hammering the side knuckle does not work. -WD40 or PBBLaster whatever - To loosen stuff -Adjustable Wrench - To remove lock nut -Screwdriver - to remove clamps or to straighten out lockwasher for removal. -Pliers and/or Channel locks - to remove cotter pin and rack boot clamps, also used it to flatten lock washer -Inner Tie Rod Tool - to remove and install inner tie rods -Torque Wrench - to torque to spec -Inner or Outer Tie Rod Parts (Whichever you are changing, in my case I purchased both MOOG Inner and Outer Tie Rods, this model does not require grease fittings) -lithium multigrease for the pivot ball inner tie rod - for extra greasing -I think thats all i remembered that I used 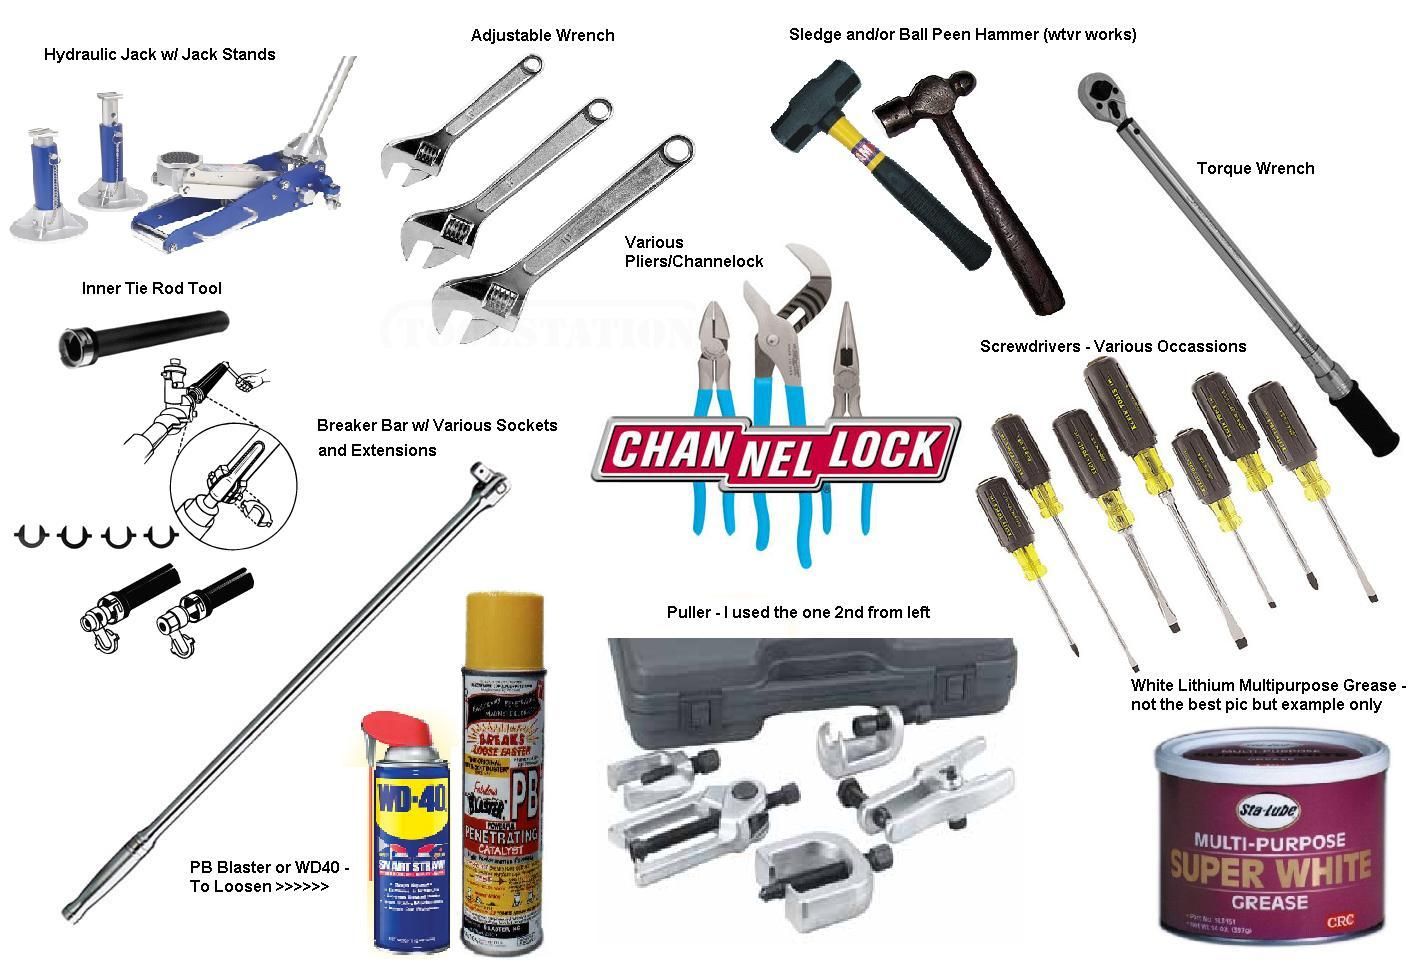 MOOG Parts I Bought: 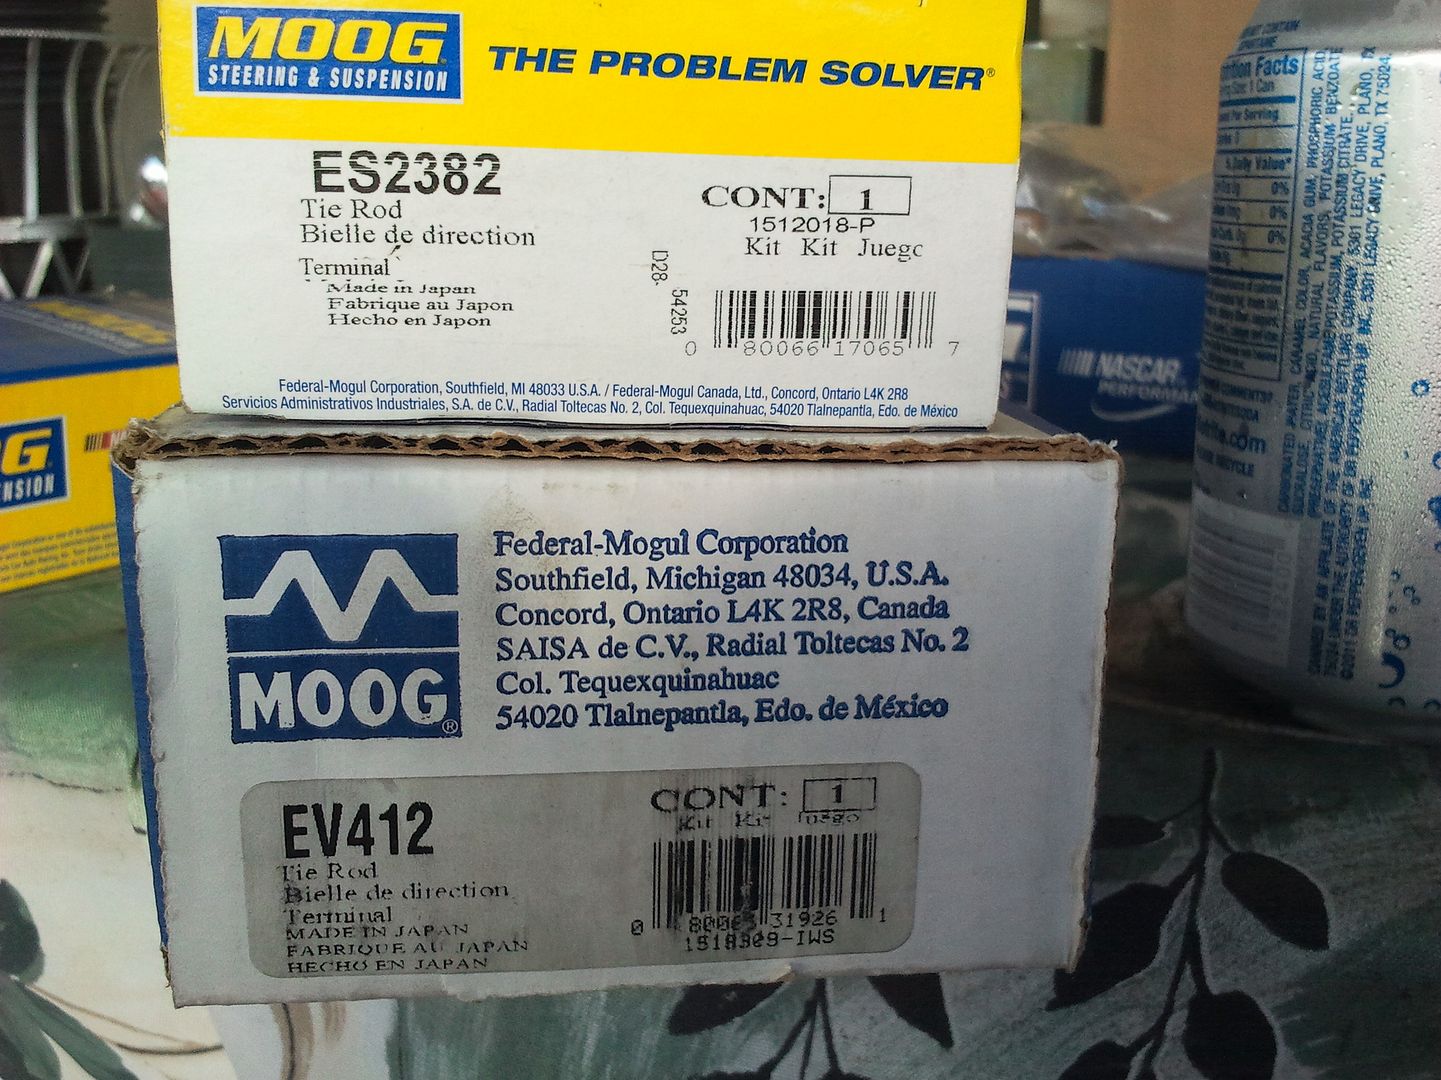 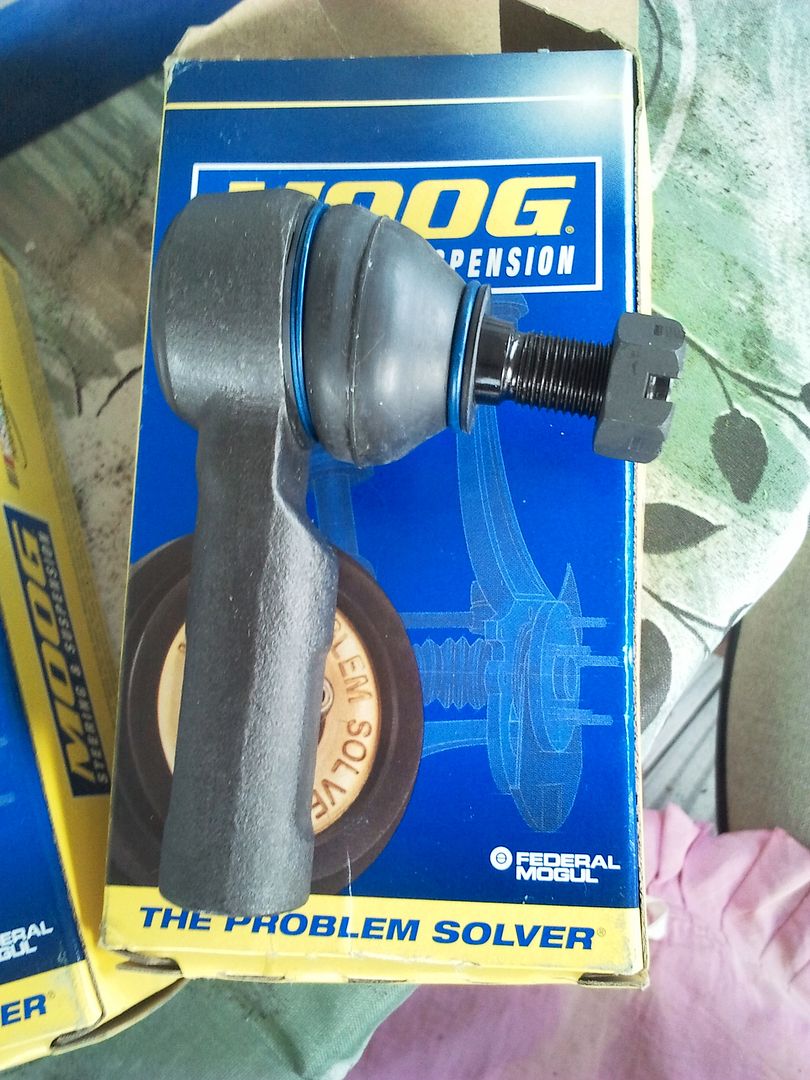 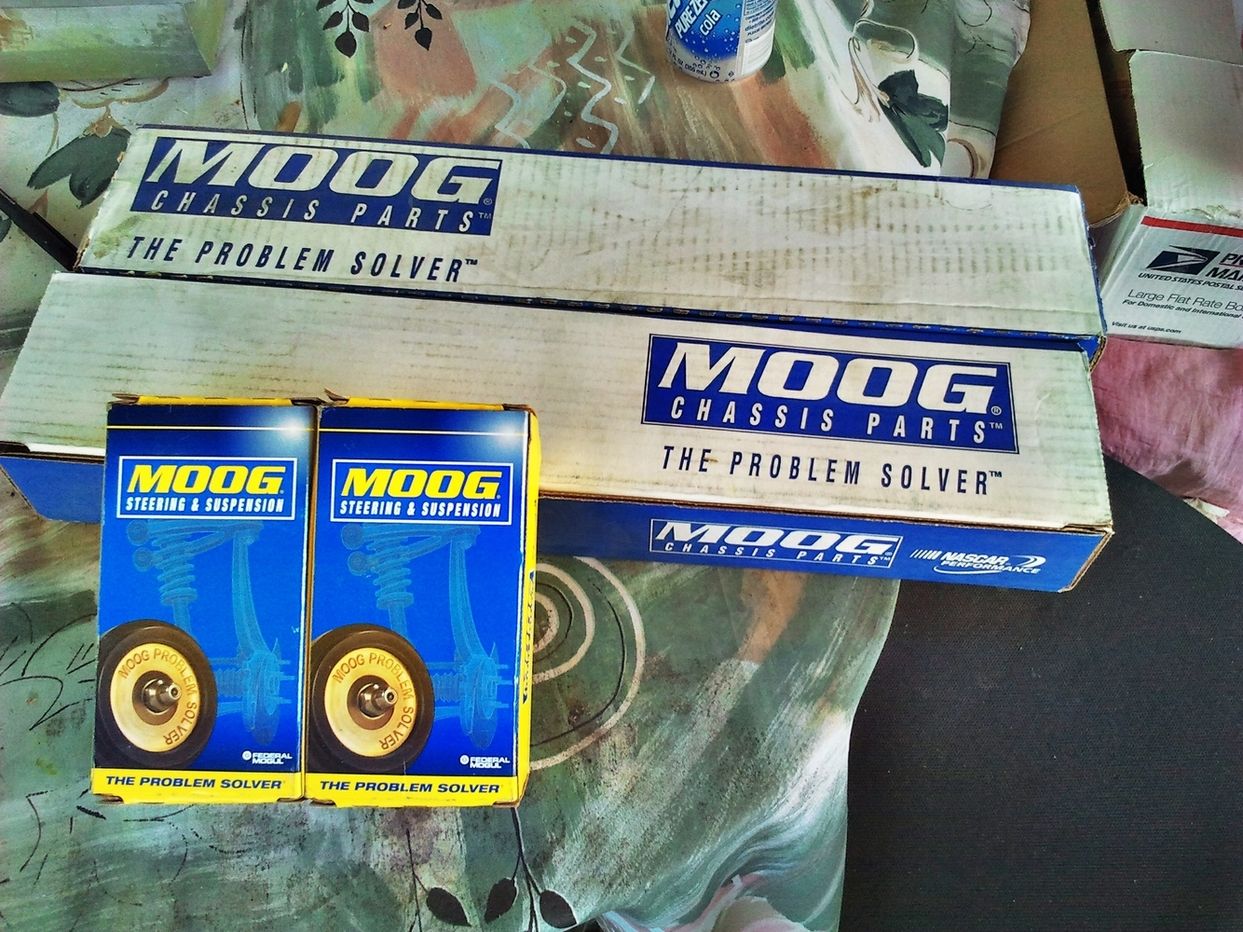 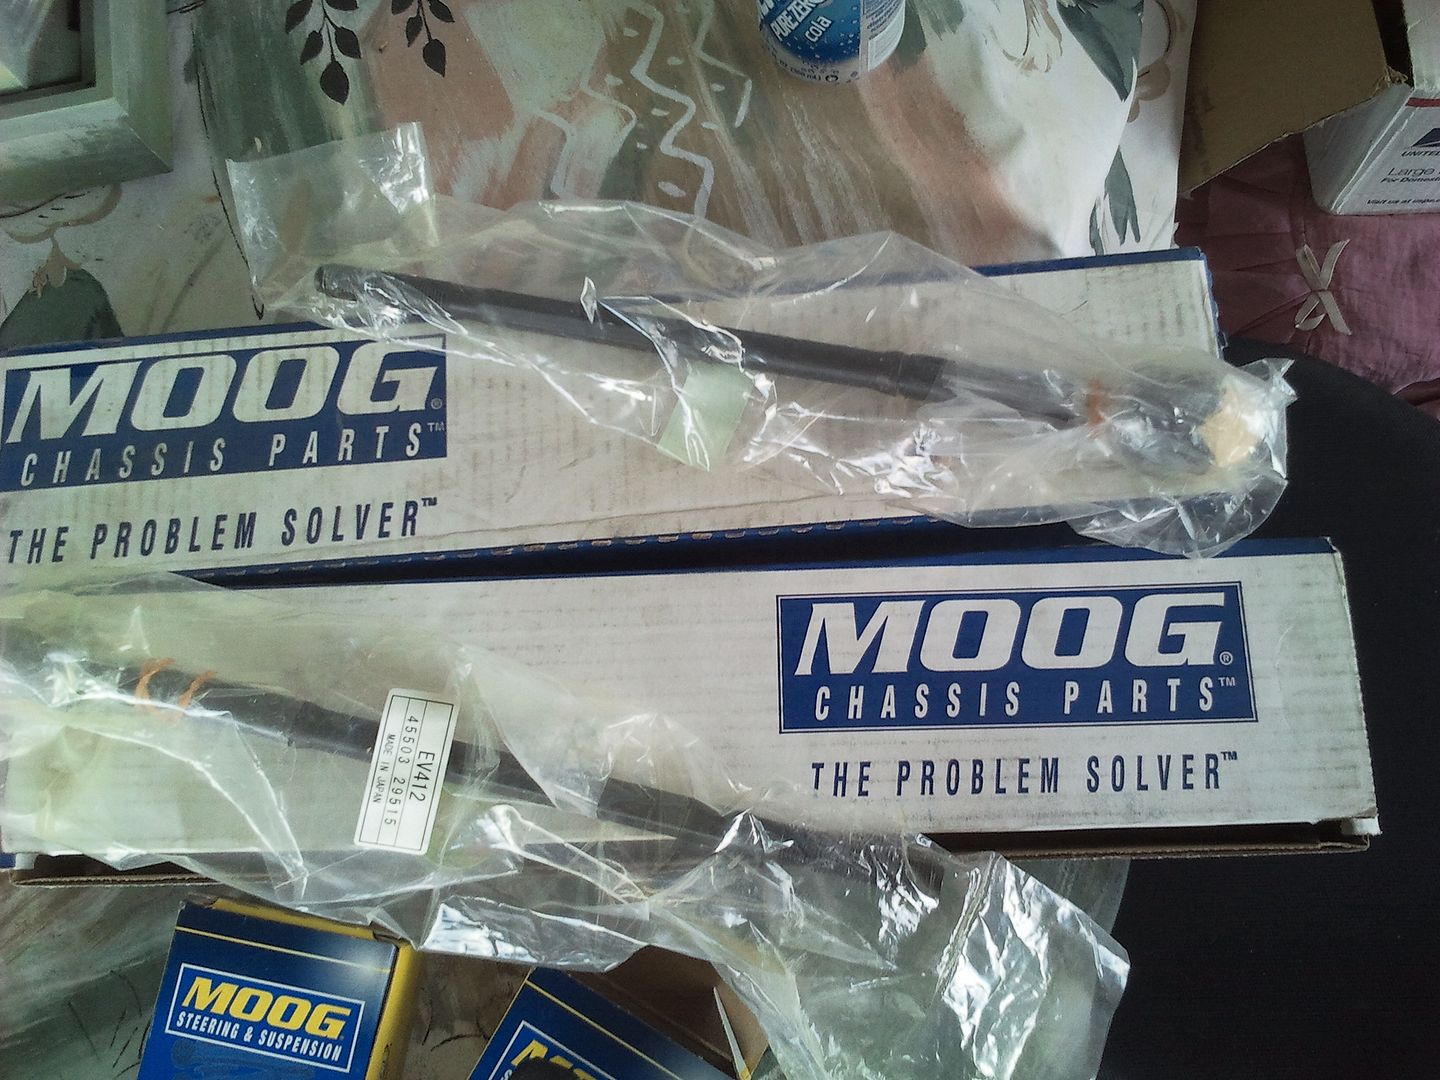 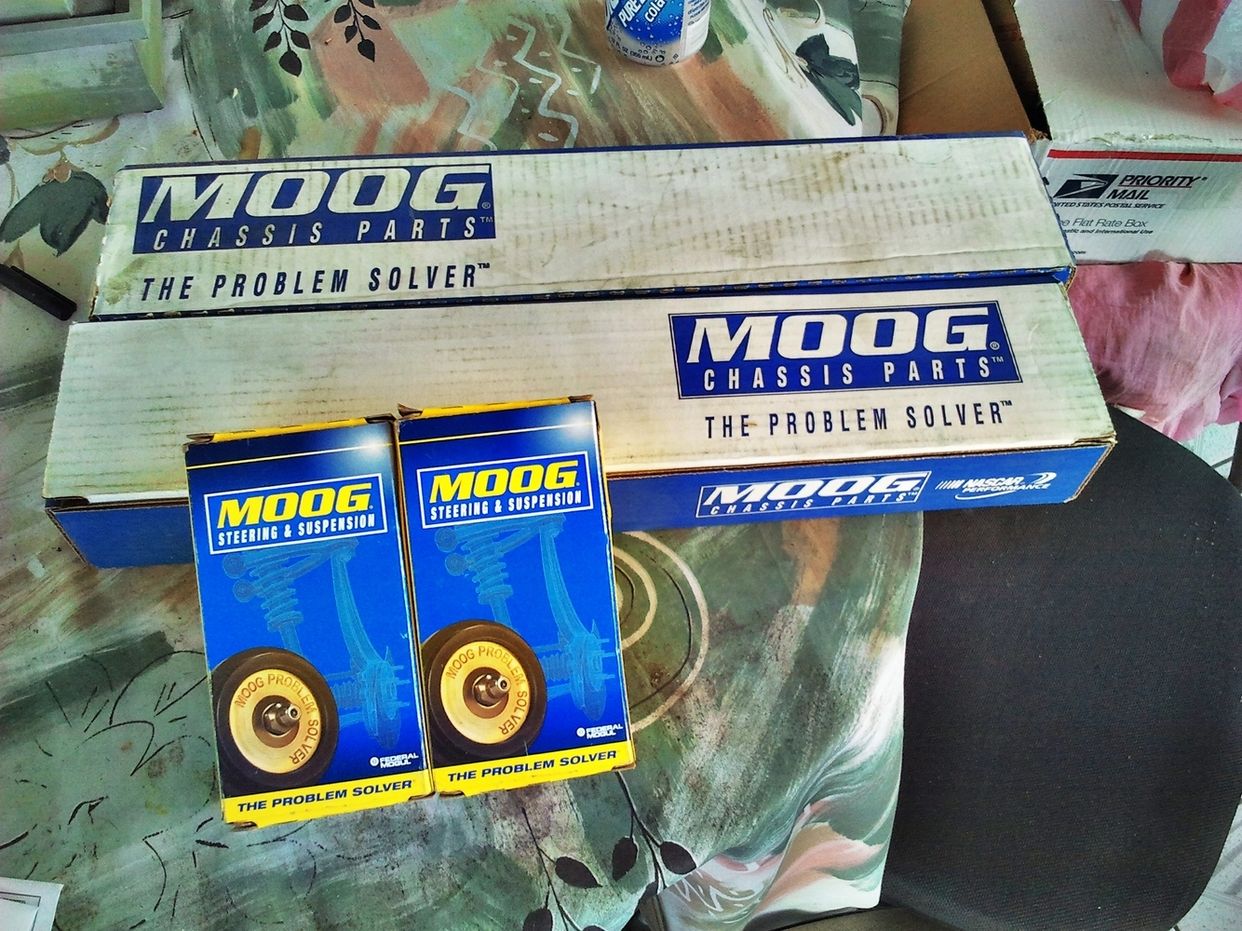 Reference Videos - Pretty Much Exactly Like Our Celicas: Inner Tie Rod Example Video Outer Tie Rod Example Video STEPS: (Random Actual Pics, Or Concept/Example Illustrations:) This is for Remove/Install of Inner/Outer Tie Rods while the Steering Rack is still on the vehicle. 1. Secure vehicle so that it does not roll 2. Jack Up Car 3. Put on Jack Stands 4. Take Off Wheel 5. You can move steering Wheel to the correct side to let it come out more to your side to make it easier to work on. 6. I'd probably take off the lock nut by this time because its still bolted on, you can remove this with an adjustable wrench, sometimes you have to hit your wrench with a hammer to get it loose or spray oil on it. NOTE: You just have to get a bit loose so you still know where the position is. PB Blaster works well. 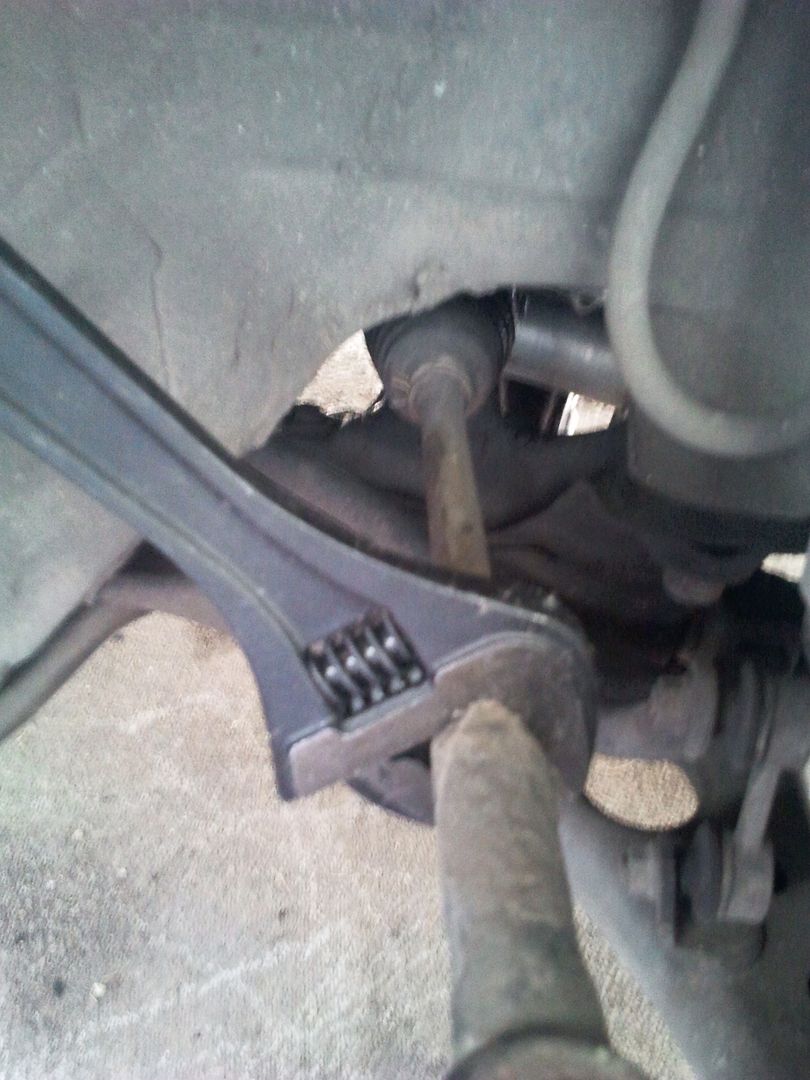 7. Take Off CotterPin from Outer Tie Rod and then, 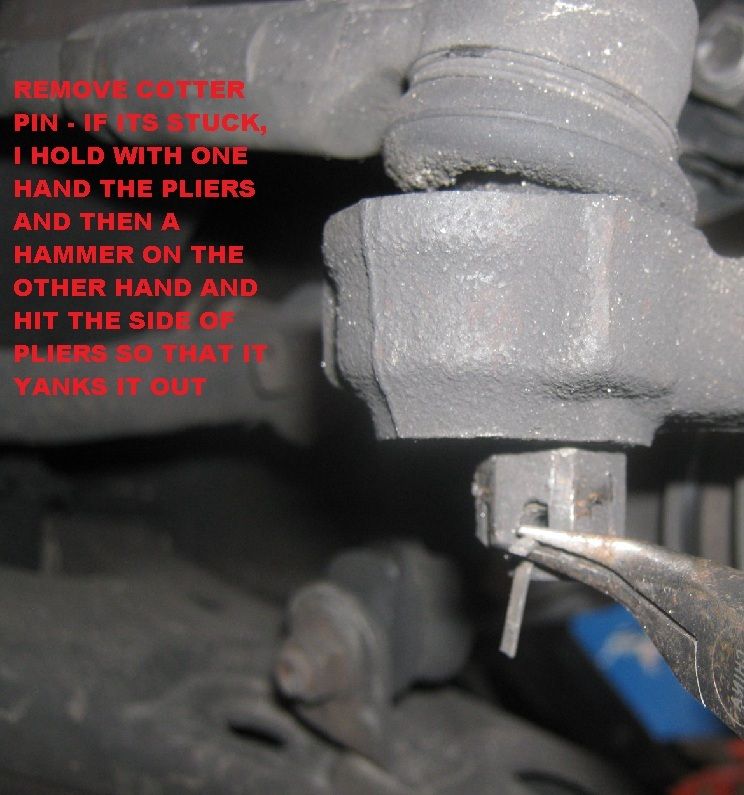 8. Take Off Castlenut from Outer Tie Rod (I think it was a 17mm or 19mm) 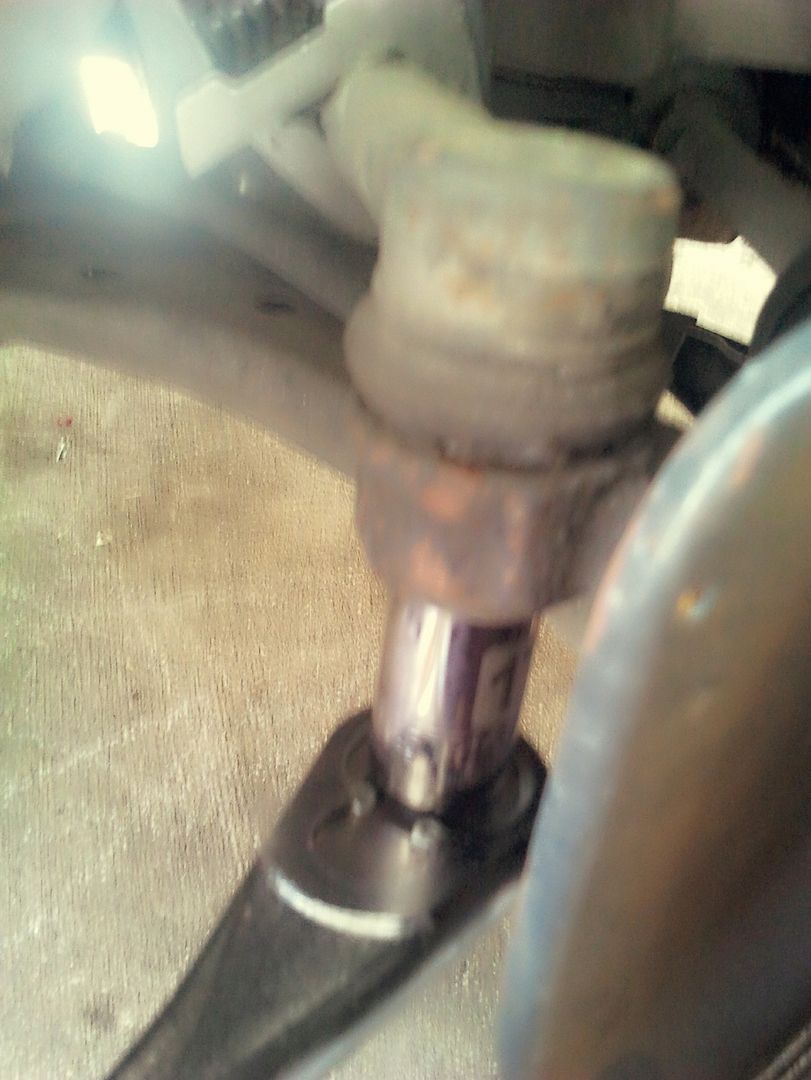 9. You can hit the side of the knuckle with a hammer to let loose the outer tie rod, if it doesn't work, use a puller. 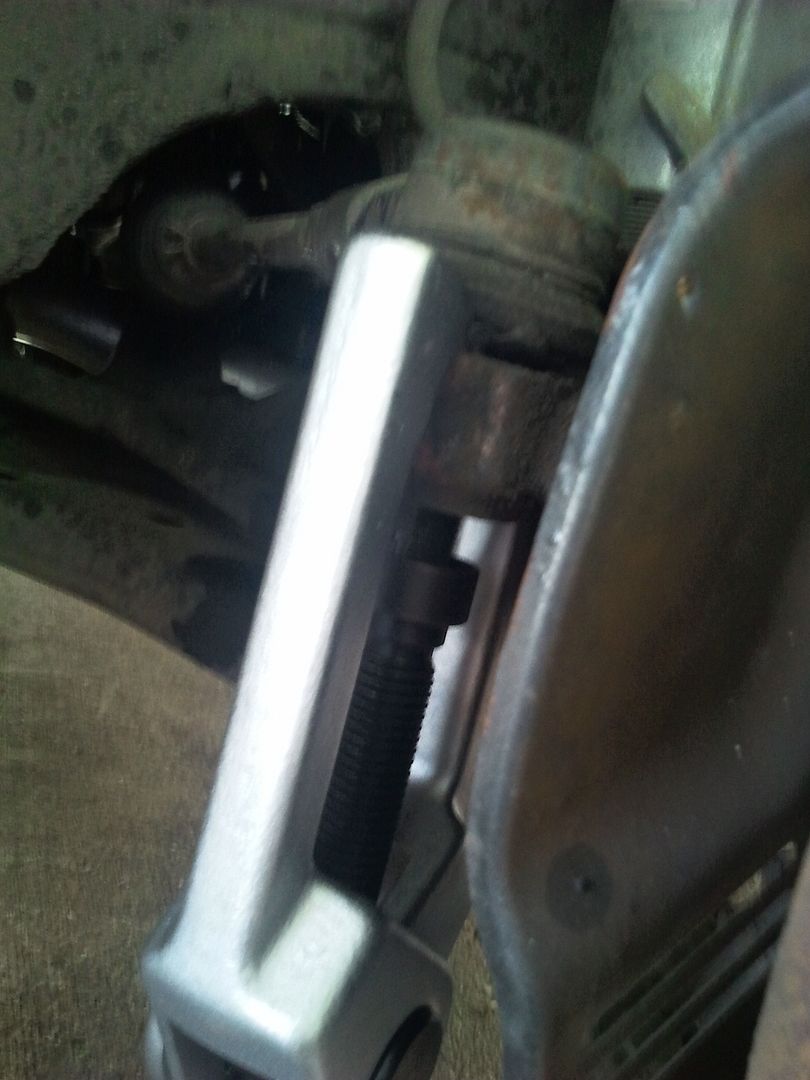 10. Don't hit the outer tie rod ball joint stud, you might damage it if you plan to reuse and if you are planning to just change the inner tie rod. NOTE: Picklefork will damage the boot so I go against this unless you don't need the old outer tie rod. 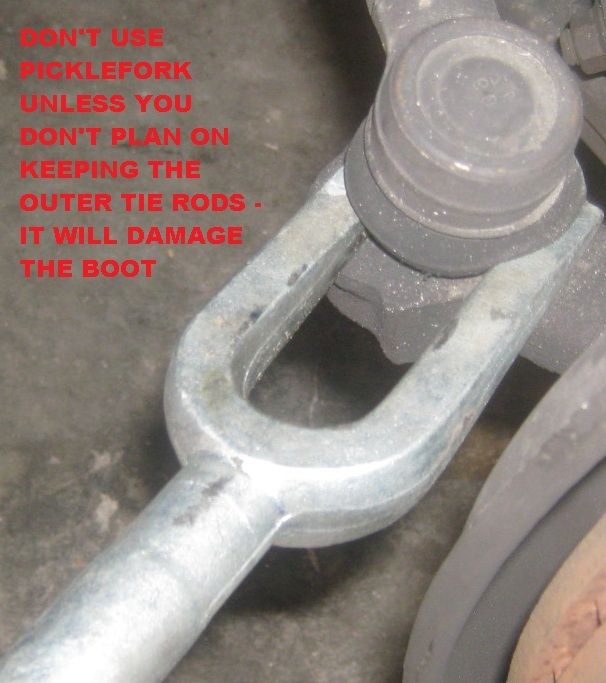 11. Once the outer tie rod is off either mark, measure the distance of the current position of the outer tie rod. 12. Common technique IF the original and new tie rods are same length is note the positions before spinning the tie rod off, count how many times it takes to back it off to remove, you can do the same to install (i counted by noticing the position of the stud north or south when I took it off and remembering that when I install back). Sometimes tie rod replacements are not the same length or specs. (this will make it easier to get it close to put it back on to almost the same position and makes it easier for the alignment shop). 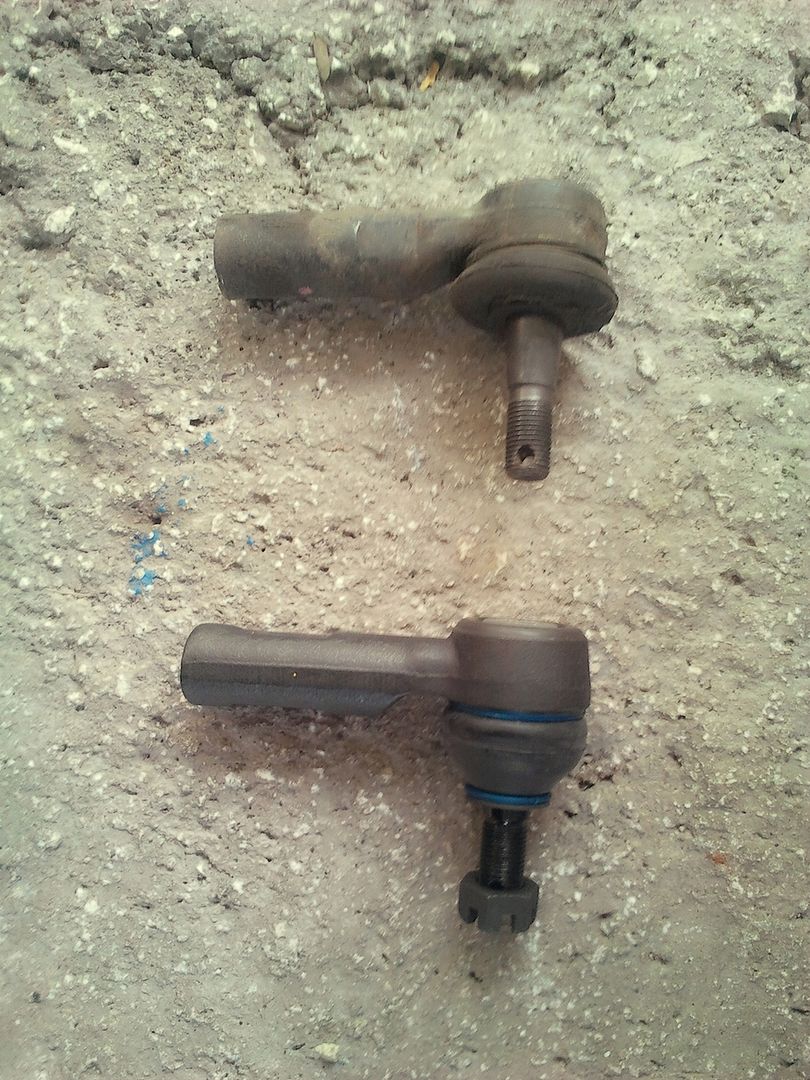 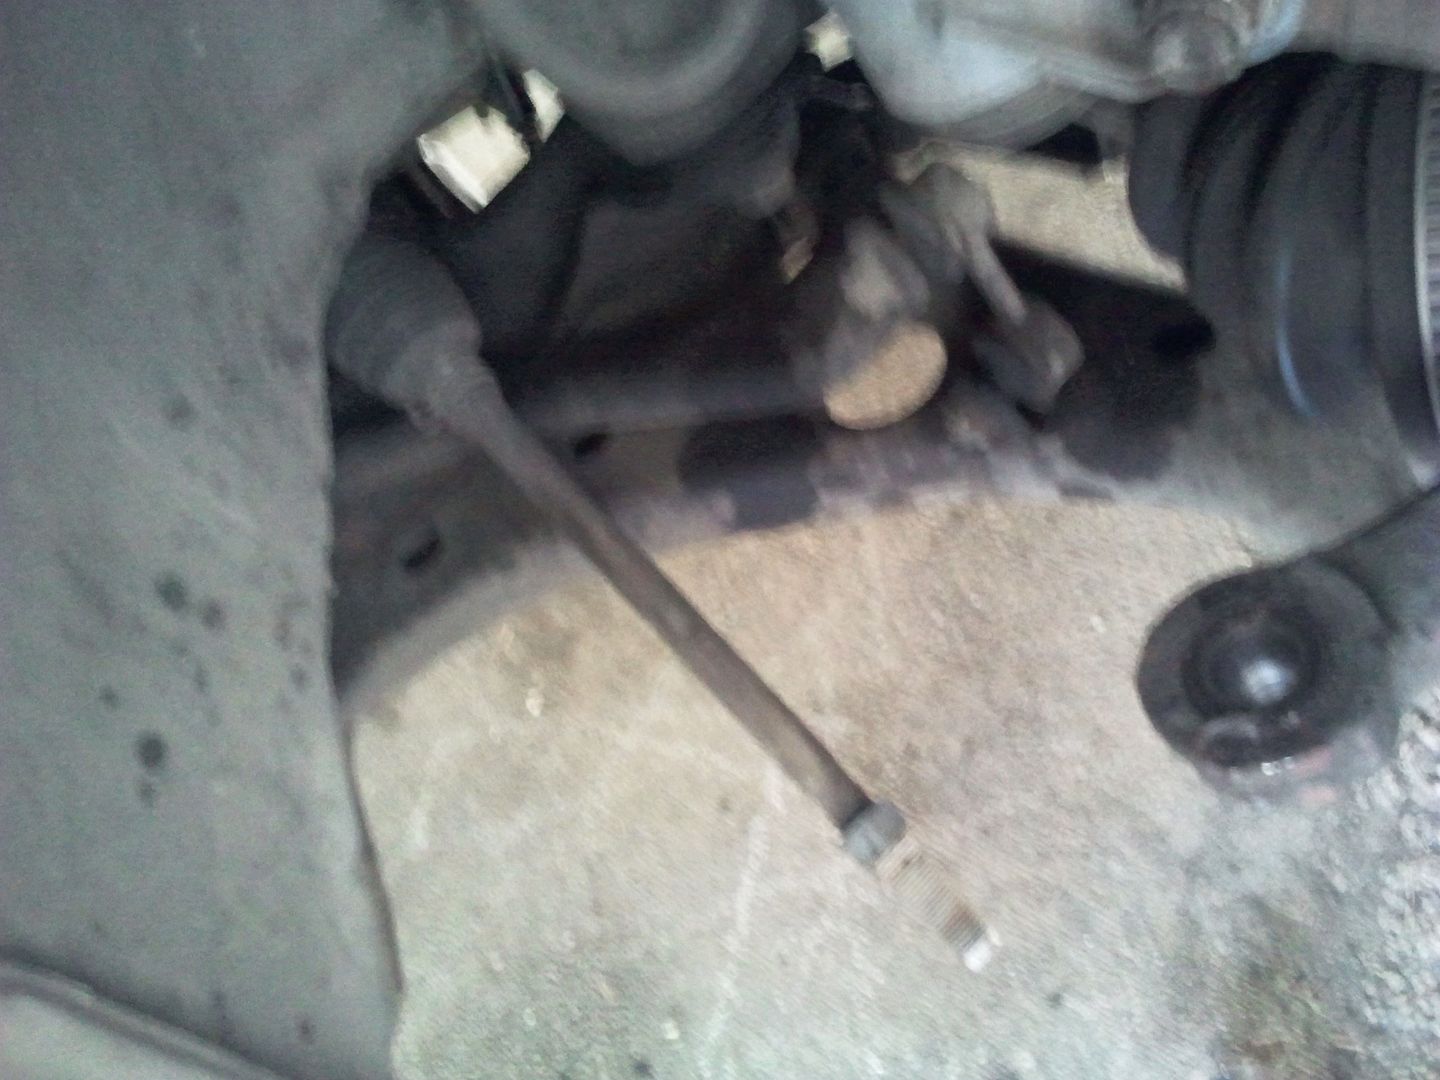 13. Once you are confident and decided how to mark your the position for reinstalling it back. Take off the locknut, (because you already marked, measured, or counted), remove the steering rack boot, there are different types of clamps, common sense how to remove them. 14. You can now pull the boot off - be careful. 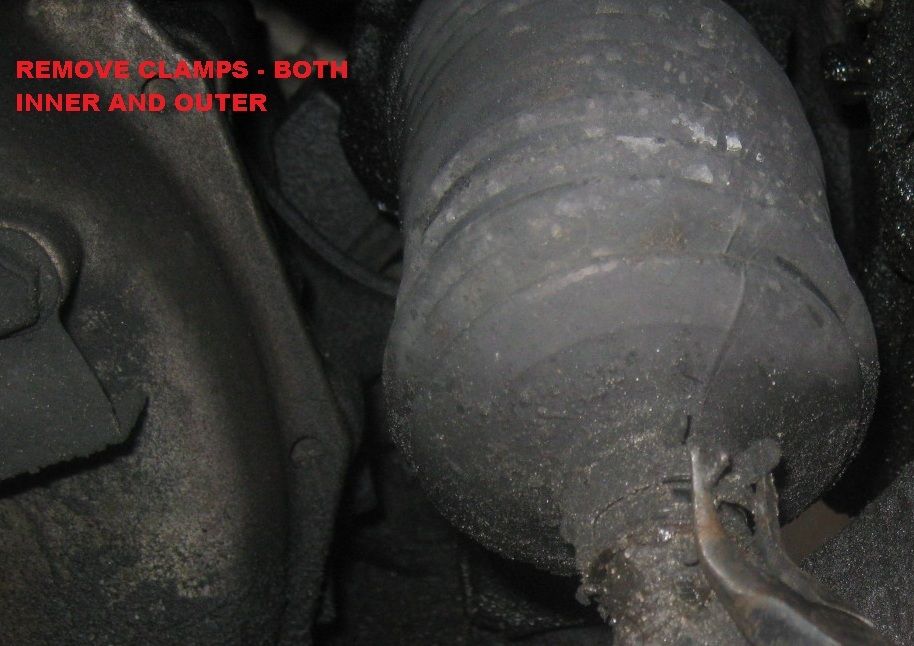 15. Here you will see the inner tie rod by itself. There is this lock washer You need to get this washer flattened against the rod flats back to , hit it with anything, I used a screwdriver whatever I could get in there to make it flat. This will make the inner tie rod removable. 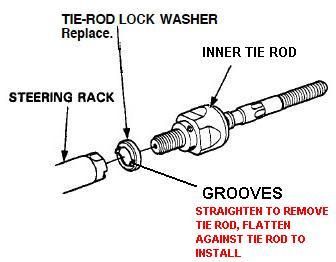 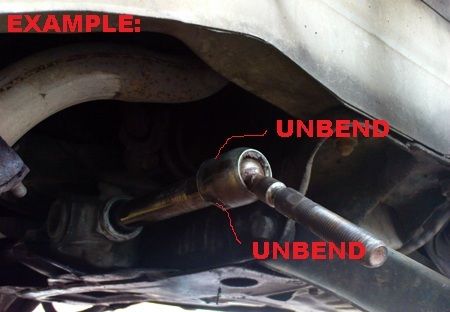  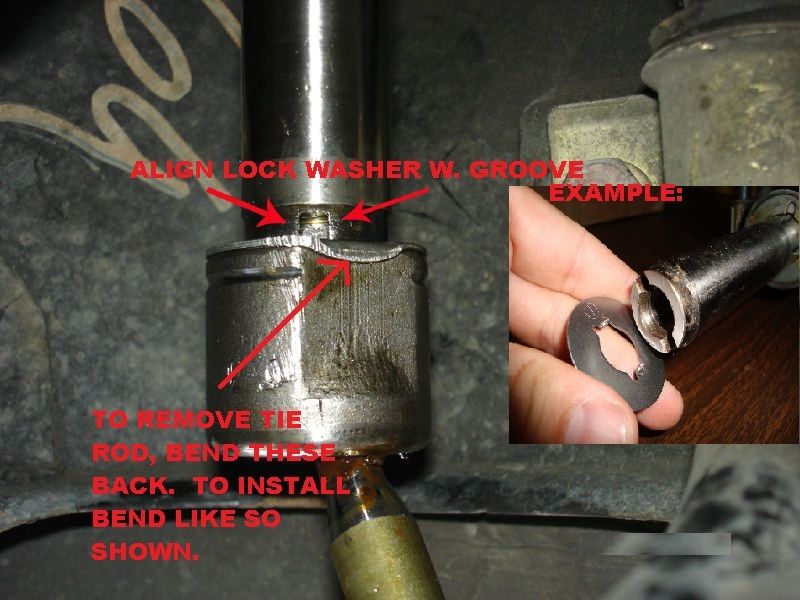 16. Now, that the washer is flattened back to normal, you take your inner tie rod tool and line it up correctly to the 2 flats on the tie rod. use a 1/2 ratchet to loosen it. I found that if you can't get the washer bent back, you can force it loose by turning left with the inner tie rod tool and the 1/2, eventually that washer will give in. **There are different Inner Tie Rod Tools: a. I've used the Napa/KD Tools one where it is a flat on one side, and the other side is a bolt, which you can adjust and tighten to basically make the other flat side. Kinda universal but not the easiest or most reassuring tool because of aligning it was the most inconvenient part. b. There is the changeable crows foot adapters one which I find more commonly and preferredly used. There are different sizes some sets more complete than others. c. There is a universal type which have good and bad reviews because of the fitment. d. There are the hex type tools that are for tie rods that do not have 2 flats. < not relative to us. 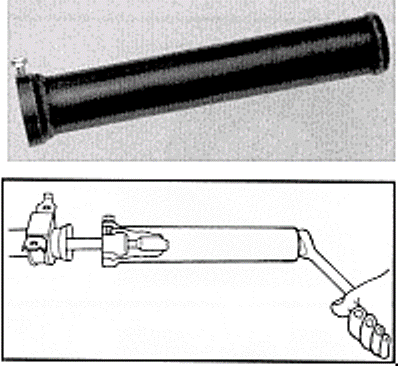 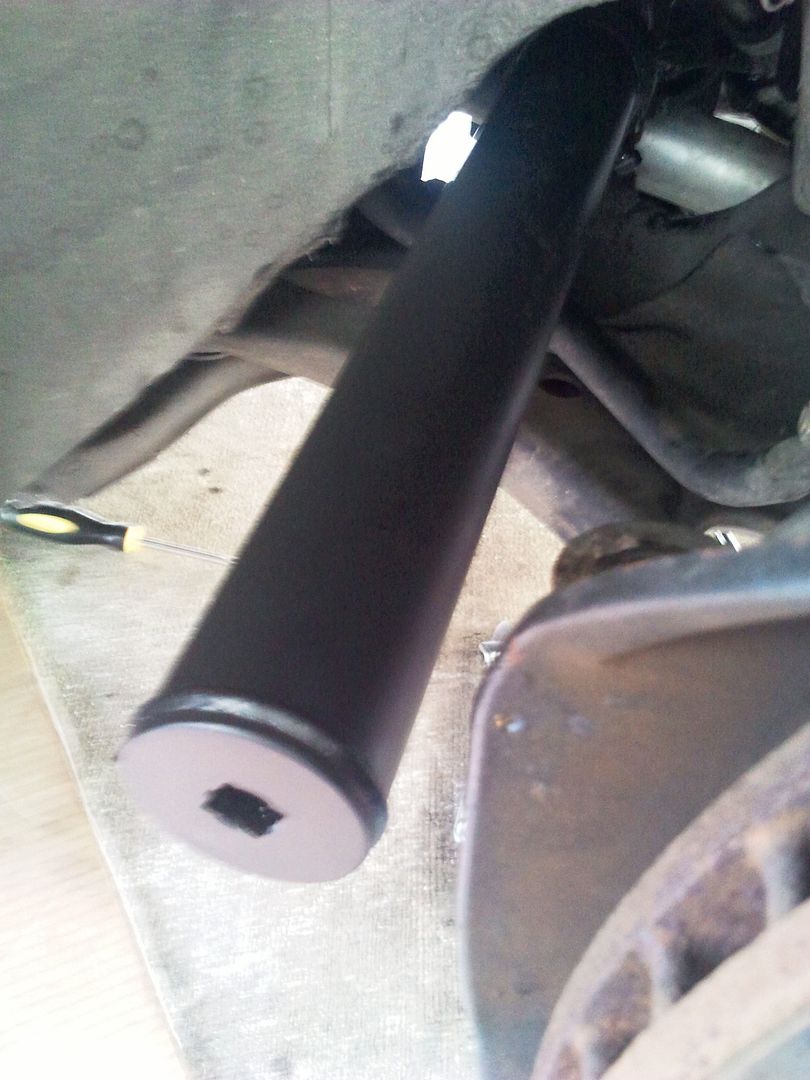 17. Once it loosened and off, you can now take off the inner tie rod and locking washer. Reinstallation: Review Torque Specs - Personally don't like those numbers, dont sound tight enough, but the dealer should know better than me yea? 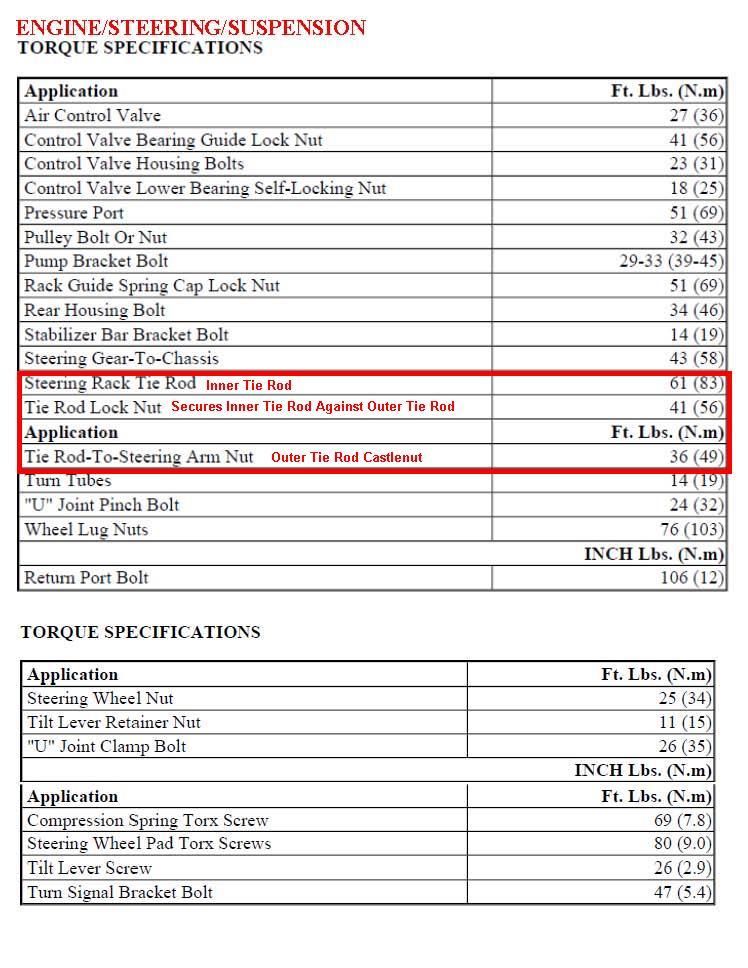 NOTE: Some people like to use blue loctite on the inner tie rod threads - its your choice but not mandatory. 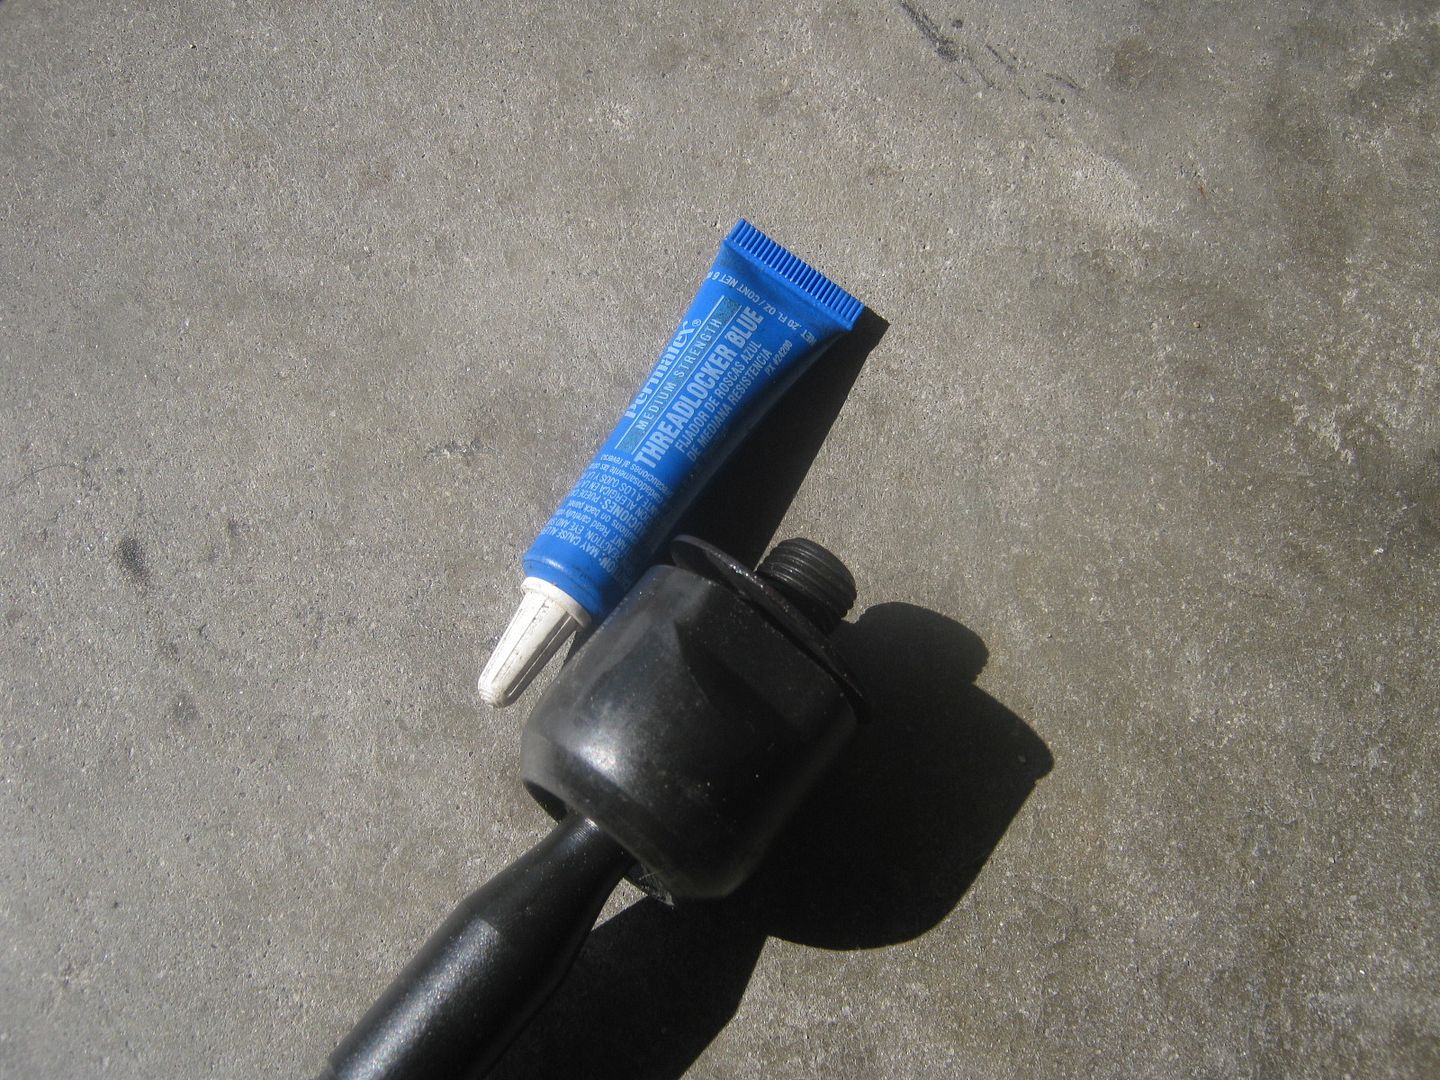 1. Put on the locking washer first, you'll notice it lines up to the grooves on the rack. Make sure it stays in this position while you hold it with one hand and the other hand screws back in the new inner tie rod.  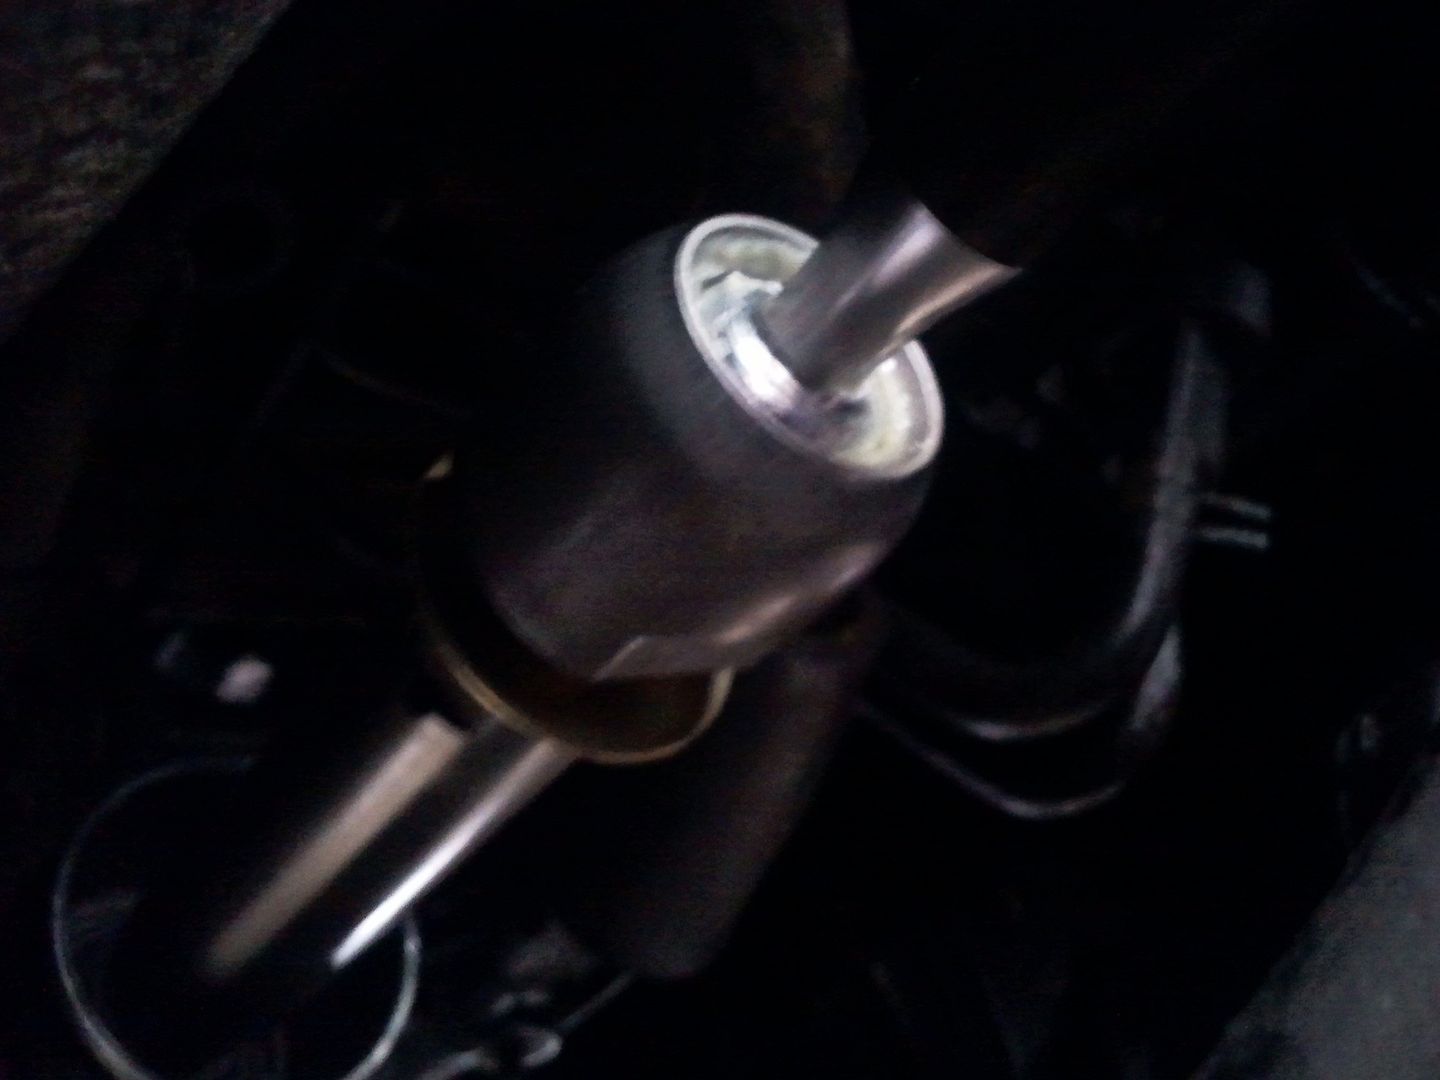 2. At this point use the inner tie rod tool to tighten it to OEM spec (61 ft lbs)  3. Smash the locking washer against the tie rod flats again (Tight fit). I used pliers/channel lock to bite and smash it flat. **Make sure you also grease inner tie rod pivot ball joint. Use Lithium Multi-purpose grease. I've seen semi gold clear ones from grease gun cartridges and also the nice white colored ones which i found were used already in the MOOG ones, might as well grease it up more.  4. Reinstall Rack Boot, you can also use Zip Ties, if the old clamps are damaged. 5. Put back on the outer tie rod locking nut. Install it all the way back to give the outer tie rod some room. 6. Spin on the new Outer tie rod, what I did was count how many spins i took to remove it, so thats how much i put it back. since the old and new parts were exactly the same in length. 7. Tighten the lock nut back against the outer tie rod, OEM Spec of torque was 41 ft lbs, but I dont have anything to torque with this kind of nut, just get it tight enough. 8. Install outer tie rod back onto knuckle -Put on castlenut, torque to OEM spec 36 ft lbs -Put on Cotter Pin and bend. 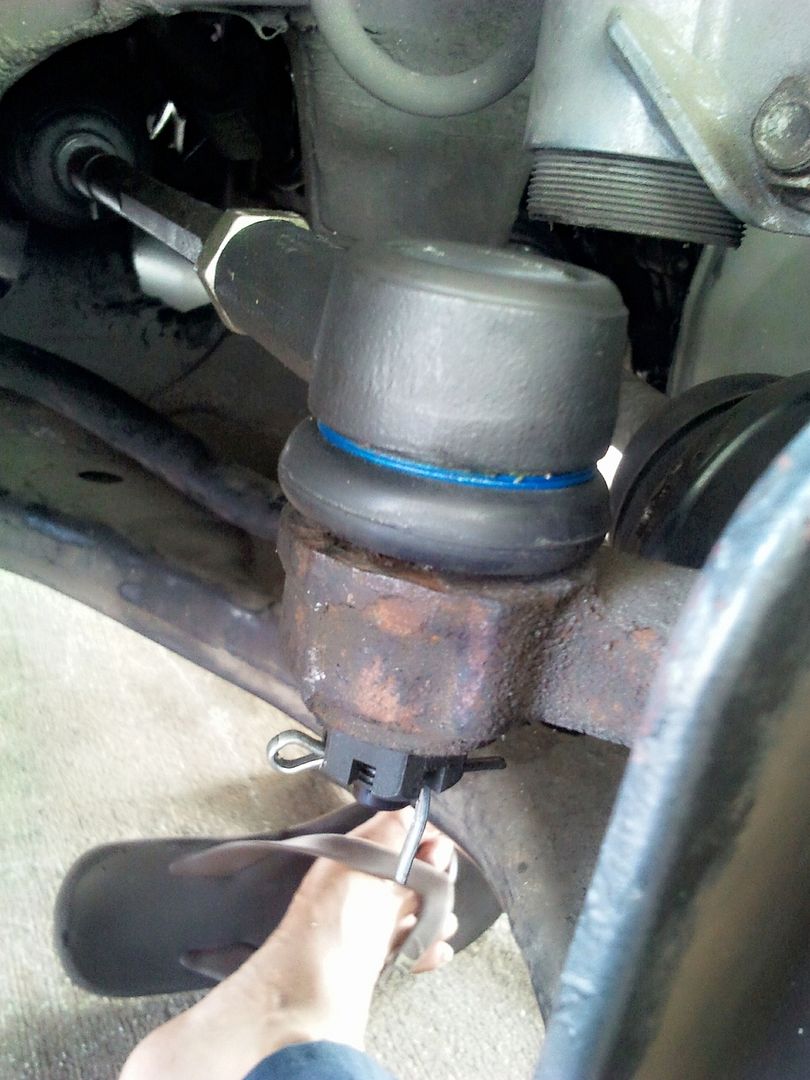 9. Thats it, put back the tire. 10. Mission Completed. Your Car should now look like Boss Status like my 2 Cars below, LOL. Conclusion: Steering Wheel and Feel, tightened up a bit (no loose sounds), so thats what you should notice besides prolly your alignment is F'ED up if you screwed up in that part to count/mark HAHA. I'm not sure if I missed an important step or could've done something better, thats where your feedback comes in. Thats why DIY write ups are tough. Especially when you are trying to get the installation done while taking pics. Just a side note: I've done removal and replace of tie rods just using a pipe wrench in the past, LOL, Ghettofabulous. INNER/OUTER TIE ROD WRITE-UP BY: 
This post has been edited by trdproven: Jun 20, 2012 - 12:20 AM -------------------- 94 Celica GT
|Toyota OEM Japan|Toyota Racing Development|Tom's|Competition Clutch|5Zigen|Apexi| |Laille/Beatrush|Magnecor|Denso|Royal Purple|Optima|PIAA|PW JDM|Megan Racing|Nitto| |Work|Greddy|Samco|Project Mu|H&R|Gates|Moog|Rota|Yokohama|Epman|1320|Upgr8 04 Celica GT |Toyota OEM Japan|Toyota Racing Development|Tein|BC Racing|Greddy| |
 May 23, 2012 - 5:05 PM May 23, 2012 - 5:05 PM
|
|
|
Enthusiast      Joined Aug 2, '05 From Guam Currently Offline Reputation: 15 (100%) |
its weird, theres really no thread on this forum on tie rod replacements. Do folks on here make a shop do it or no one plans to do it on their own?
-------------------- 94 Celica GT
|Toyota OEM Japan|Toyota Racing Development|Tom's|Competition Clutch|5Zigen|Apexi| |Laille/Beatrush|Magnecor|Denso|Royal Purple|Optima|PIAA|PW JDM|Megan Racing|Nitto| |Work|Greddy|Samco|Project Mu|H&R|Gates|Moog|Rota|Yokohama|Epman|1320|Upgr8 04 Celica GT |Toyota OEM Japan|Toyota Racing Development|Tein|BC Racing|Greddy| |
 May 24, 2012 - 12:06 AM May 24, 2012 - 12:06 AM
|
|
 Enthusiast      Joined Apr 18, '05 From Calgary Currently Offline Reputation: 20 (100%) |
i remember reading up a outer tie rod removal, but not an inner tie rod one.
i did mine myself both outers and inners last year.. it sucks that it's more difficult with FWD since the steering rack is between the engine and firewall where it's really cramped. -------------------- -------------------------------------------------------------------------------- -------------------------------------------------------------------------------- |
 May 24, 2012 - 3:40 PM May 24, 2012 - 3:40 PM
|
|
|
Enthusiast      Joined Aug 2, '05 From Guam Currently Offline Reputation: 15 (100%) |
yea its hard to get the lock washers flat if its between the firewall. u gotta use pliers or a channel lock. well as long as its torqued correctly and the washer is as flat as possible, should be good. Some like to use Blue Loctite, but thats your call. first time changing inners for me. thats why not the best step by step pics. Outer tie rods are pancake. Im surprised the torque setting for outer tie rod is 36ft-lbs only. the jam nut is even tighter for torque spec.
This post has been edited by trdproven: May 24, 2012 - 8:06 PM -------------------- 94 Celica GT
|Toyota OEM Japan|Toyota Racing Development|Tom's|Competition Clutch|5Zigen|Apexi| |Laille/Beatrush|Magnecor|Denso|Royal Purple|Optima|PIAA|PW JDM|Megan Racing|Nitto| |Work|Greddy|Samco|Project Mu|H&R|Gates|Moog|Rota|Yokohama|Epman|1320|Upgr8 04 Celica GT |Toyota OEM Japan|Toyota Racing Development|Tein|BC Racing|Greddy| |
 May 24, 2012 - 3:51 PM May 24, 2012 - 3:51 PM
|
|
|
Enthusiast      Joined Jan 20, '09 From Winnipeg Currently Offline Reputation: 5 (100%) |
Vote for sticky.
-------------------- -Protection mode, For when your amp tries to blow its load. 1995 Toyota Celica GTS - Daily Driver 1999 Chevy Cavalier - Winter Beater 1994 Honda Civic CX Hatchback - Dead My Celica! |
 May 24, 2012 - 4:48 PM May 24, 2012 - 4:48 PM
|
|
|
Moderator      Joined Jun 29, '08 From Denver Currently Offline Reputation: 59 (100%) |
Vote for sticky. X2. I was looking for a how-to a while back but we didn't have one. -------------------- "Employ your time in improving yourself by other men's writings, so that you shall gain easily what others labored hard for." -Socrates. Even Socrates told us to use the search button!
 2006 Aston Martin V8 Vantage. 1998 Celica GT- BEAMS Swapped. 2022 4Runner TRD Off Road Prenium. 2021 GMC Sierra AT4. |
 May 25, 2012 - 2:24 AM May 25, 2012 - 2:24 AM
|
|
 Enthusiast   Joined May 9, '09 From Brisbane, Australia Currently Offline Reputation: 0 (0%) |
X2. I was looking for a how-to a while back but we didn't have one. Same here. I ended up just working it out for myself. I considered doing a write-up at the time, but trdproven has done a great job with this one. Well done mate! -------------------- |
 May 25, 2012 - 3:28 AM May 25, 2012 - 3:28 AM
|
|
 Moderator      Joined Nov 5, '07 From New Zealand Currently Offline Reputation: 3 (100%) |
checked the stickies?
it was added the same day as it was posted -------------------- |
 May 25, 2012 - 9:42 AM May 25, 2012 - 9:42 AM
|
|
|
Enthusiast      Joined Jan 20, '09 From Winnipeg Currently Offline Reputation: 5 (100%) |
Woops my bad haha
-------------------- -Protection mode, For when your amp tries to blow its load. 1995 Toyota Celica GTS - Daily Driver 1999 Chevy Cavalier - Winter Beater 1994 Honda Civic CX Hatchback - Dead My Celica! |
 May 25, 2012 - 3:23 PM May 25, 2012 - 3:23 PM
|
|
|
Enthusiast     Joined Apr 11, '09 Currently Offline Reputation: 11 (100%) |
dont forget to get your car aligned after you change this!! ha ha
|
 May 25, 2012 - 4:08 PM May 25, 2012 - 4:08 PM
|
|
|
Enthusiast      Joined Aug 2, '05 From Guam Currently Offline Reputation: 15 (100%) |
Yupp, its in step 12, where it says to count or mark so that you can get it close as possible for the alignment shop.
This post has been edited by trdproven: May 25, 2012 - 4:14 PM -------------------- 94 Celica GT
|Toyota OEM Japan|Toyota Racing Development|Tom's|Competition Clutch|5Zigen|Apexi| |Laille/Beatrush|Magnecor|Denso|Royal Purple|Optima|PIAA|PW JDM|Megan Racing|Nitto| |Work|Greddy|Samco|Project Mu|H&R|Gates|Moog|Rota|Yokohama|Epman|1320|Upgr8 04 Celica GT |Toyota OEM Japan|Toyota Racing Development|Tein|BC Racing|Greddy| |
 Jun 18, 2012 - 12:35 AM Jun 18, 2012 - 12:35 AM
|
|
|
Enthusiast      Joined Apr 24, '08 From Orange County, CA Currently Offline Reputation: 33 (100%) |
how do you know if your inner tie rods need replacing??? also I made the mistake on a friends car. i tried hammering the tie rod out from the bottom without he nut on and damage the threading on the end tie rods. I already knew I was supposed to use a Now I cant get the nut back on any suggestions???
-------------------- Group buy to replicate Narrow E series transaxle parts
http://www.6gc.net/forums/index.php?showto...p;#entry1107514 |
 Jun 18, 2012 - 12:37 AM Jun 18, 2012 - 12:37 AM
|
|
|
Enthusiast      Joined Apr 24, '08 From Orange County, CA Currently Offline Reputation: 33 (100%) |
how do you know if your inner tie rods need replacing??? also I made the mistake on a friends car. i tried hammering the tie rod out from the bottom without he nut on and damage the threading on the end tie rods. I already knew I was supposed to use a Now I cant get the nut back on any suggestions???
-------------------- Group buy to replicate Narrow E series transaxle parts
http://www.6gc.net/forums/index.php?showto...p;#entry1107514 |
 Jun 18, 2012 - 10:05 AM Jun 18, 2012 - 10:05 AM
|
|
|
Enthusiast      Joined Aug 31, '02 From Philadelphia, PA Currently Offline Reputation: 8 (100%) |
Thanks for posting this! I'll be using this tutorial to replace the tie rods on my girlfriends corolla at some point. Very informative and seems like an easy job!
-------------------- 15PSI - 30MPG - Megasquirt Tuned
|
 Jun 18, 2012 - 6:26 PM Jun 18, 2012 - 6:26 PM
|
|
|
Enthusiast      Joined Aug 2, '05 From Guam Currently Offline Reputation: 15 (100%) |
yea pretty much exactly the same thing for a corolla.
-------------------- 94 Celica GT
|Toyota OEM Japan|Toyota Racing Development|Tom's|Competition Clutch|5Zigen|Apexi| |Laille/Beatrush|Magnecor|Denso|Royal Purple|Optima|PIAA|PW JDM|Megan Racing|Nitto| |Work|Greddy|Samco|Project Mu|H&R|Gates|Moog|Rota|Yokohama|Epman|1320|Upgr8 04 Celica GT |Toyota OEM Japan|Toyota Racing Development|Tein|BC Racing|Greddy| |
 Jun 18, 2012 - 10:46 PM Jun 18, 2012 - 10:46 PM
|
|
 Enthusiast      Joined Apr 18, '05 From Calgary Currently Offline Reputation: 20 (100%) |
the inner tie rods need to be replaced if the inner (ball) joints on the inner tie rods have play. otherwise, i don't see the need of ever replacing it. i did mine just because i bought the outer and inner tie rods together as a set from another member.
This post has been edited by azian_advanced: Jun 18, 2012 - 10:52 PM -------------------- -------------------------------------------------------------------------------- -------------------------------------------------------------------------------- |
 Jun 18, 2012 - 10:52 PM Jun 18, 2012 - 10:52 PM
|
|
|
Enthusiast      Joined Aug 31, '02 From Philadelphia, PA Currently Offline Reputation: 8 (100%) |
the inner tie rods need to be replaced if the inner (ball) joints has play. otherwise, i don't see the need of ever replacing it. i did mine just because i bought the outer and inner tie rods together as a set from another member. How do you know if the play is caused by the inner of outer rod? I'm guessing all of the pay happens by the inner rod, right? So how would you know the outer one needs replacing? On the Corolla, it has enough pay to move the wheel side to side. -------------------- 15PSI - 30MPG - Megasquirt Tuned
|
 Jun 19, 2012 - 12:31 AM Jun 19, 2012 - 12:31 AM
|
|
|
Enthusiast      Joined Aug 2, '05 From Guam Currently Offline Reputation: 15 (100%) |
By moving your wheel left to right while jacked up will tell you if a tie rod is bad. to determine which is bad, i remove the wheel, to test the inner i grab that piece near the ball and shake the f out of it, if it has play, its the inner. for outer tie rod, same thing, sometimes the outer you cannot even tell if its bad until removed, which you would be doing anyway if you are changing the inner. you can try to grab it and see if it also can flex around. if its really bad it would be very obvious that the stud is moving around.
its really up to you if you want to change both per side or just the one thats bad vs the effort to do it again. i guess but its even better to change all 4 which is ideal so that everythings new, but thats more of a budget thing. This post has been edited by trdproven: Jun 19, 2012 - 12:50 AM -------------------- 94 Celica GT
|Toyota OEM Japan|Toyota Racing Development|Tom's|Competition Clutch|5Zigen|Apexi| |Laille/Beatrush|Magnecor|Denso|Royal Purple|Optima|PIAA|PW JDM|Megan Racing|Nitto| |Work|Greddy|Samco|Project Mu|H&R|Gates|Moog|Rota|Yokohama|Epman|1320|Upgr8 04 Celica GT |Toyota OEM Japan|Toyota Racing Development|Tein|BC Racing|Greddy| |
 Jun 19, 2012 - 12:48 AM Jun 19, 2012 - 12:48 AM
|
|
|
Enthusiast      Joined Aug 2, '05 From Guam Currently Offline Reputation: 15 (100%) |
how do you know if your inner tie rods need replacing??? also I made the mistake on a friends car. i tried hammering the tie rod out from the bottom without he nut on and damage the threading on the end tie rods. I already knew I was supposed to use a Now I cant get the nut back on any suggestions??? yupp thats why you need to hit the side of the knuckle with a hammer or use a puller or the fork (if you don't need the outer one anymore). the reason why you don't use a hammer on the stud is specifically so the threads dont get damaged. Also its sometims pretty tuff to hit it at the stud for it to pop off because they are like stuck in a certain position. i know there are re-threader tools but not sure how well or if its even worth it. my friend did the same thing but instead of hammering the threads he cross threaded it with the wrong castle nut, i told my buddy just to get new outer tie rods since they are cheap and steering is pretty important. This post has been edited by trdproven: Jun 19, 2012 - 12:50 AM -------------------- 94 Celica GT
|Toyota OEM Japan|Toyota Racing Development|Tom's|Competition Clutch|5Zigen|Apexi| |Laille/Beatrush|Magnecor|Denso|Royal Purple|Optima|PIAA|PW JDM|Megan Racing|Nitto| |Work|Greddy|Samco|Project Mu|H&R|Gates|Moog|Rota|Yokohama|Epman|1320|Upgr8 04 Celica GT |Toyota OEM Japan|Toyota Racing Development|Tein|BC Racing|Greddy| |
  |
1 User(s) are reading this topic (1 Guests and 0 Anonymous Users)
0 Members:
| Lo-Fi Version | Time is now: December 3rd, 2024 - 2:58 PM |


