  |
 Apr 5, 2017 - 9:41 AM Apr 5, 2017 - 9:41 AM
|
|
|
Enthusiast Joined Mar 28, '17 From Albany, OR USA Currently Offline Reputation: 0 (0%) |
I spent months researching and looking for rear spats for my convertible. When it comes to body kits, especially mods for the rear of the vehicle, we've all been told that we are simply out of luck or hey, the Curren spats will fit! Have you bought parts from Japan? I have, it's risky, it's expensive and if you don't know exactly what you are looking for you may wind up with something that still does not fit. I decided to wait no longer! My car is going to paint pretty soon and I needed a solution quick. In the course of my life I had never used fiberglass or bondo but it always seemed like it would be fun, I decided to try it. So, I bought a set of TRD replica rear spats and extended them to fit, this is how I did it.
First, I cut them in half (have a little faith). The cut doesn't have to be perfect because the middle is going to be filled in anyway. Then I secured both pieces to the bumper being very careful to line them up perfectly. The rear piece by the tire will secure with 2 factory screws for the mud guard. Make sure you take the mud guard off before you start!!! Slide the front piece around the bend in the bumper until you find the perfect location (no gaps). There is a hole on the bottom, fasten to the bumper using a self tapping screw. It was very helpful having a second person help with the next step. I then used a hot glue gun and secured the two pieces together with some small, flat pieces of wood. Use a long, flat edge to make sure they are not dipping in the middle otherwise you'll have a lot of filling to do. Happened on one of mine. 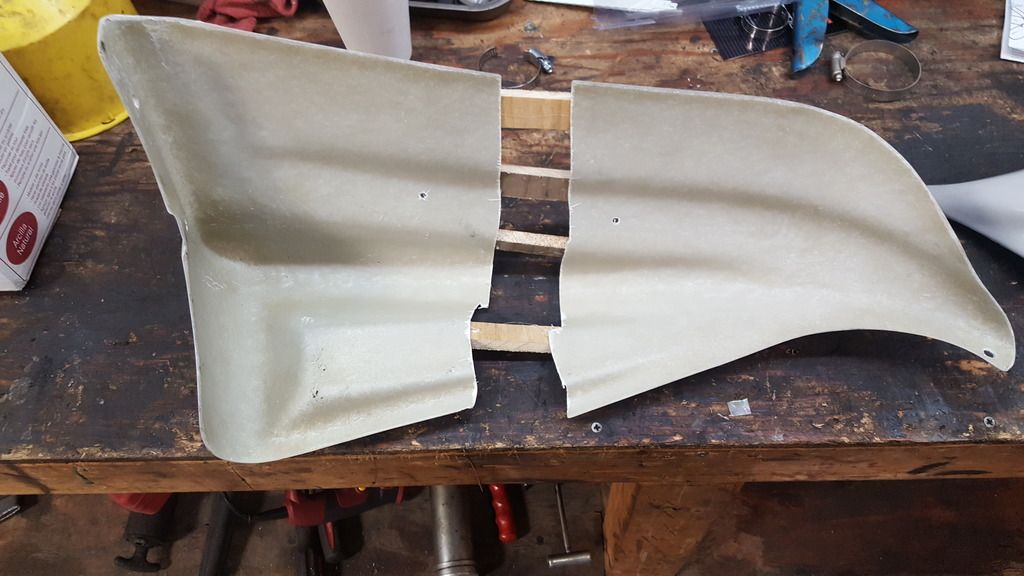 I know, some of you math nerds are doing the geometry in your head, I know, in the end it will not line up perfectly, your right but close enough. I elected to have the bottom (under the car) be off just a bit. The important thing is to make sure the lines on the face of the spat line up perfectly. 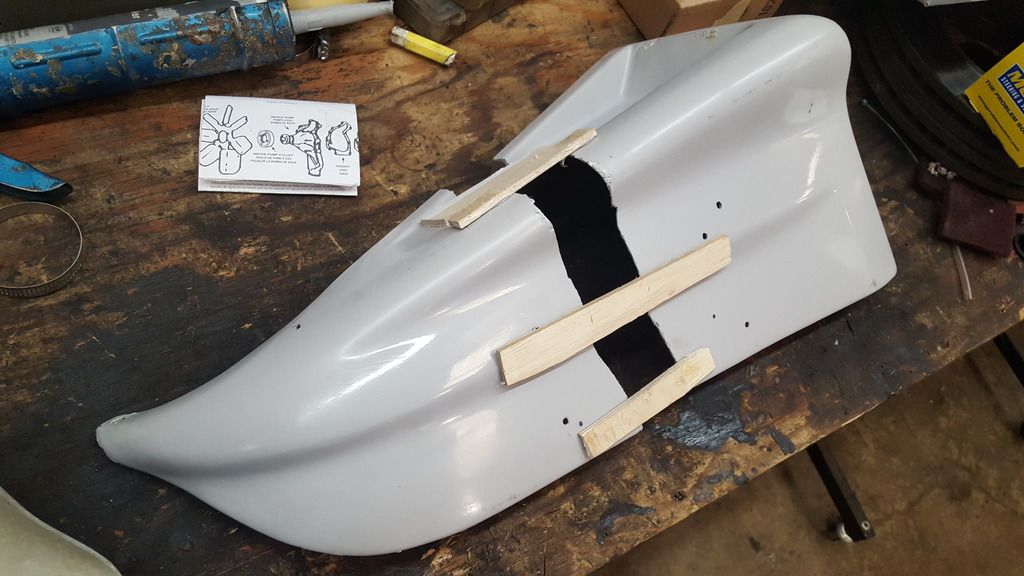 After I had both sides complete I used clay and tin foil to build a base behind the gap. Once complete you will lay about 5 layers of fiberglass overlapping each edge by about 6 inches. Let it cure for about 36 hours. 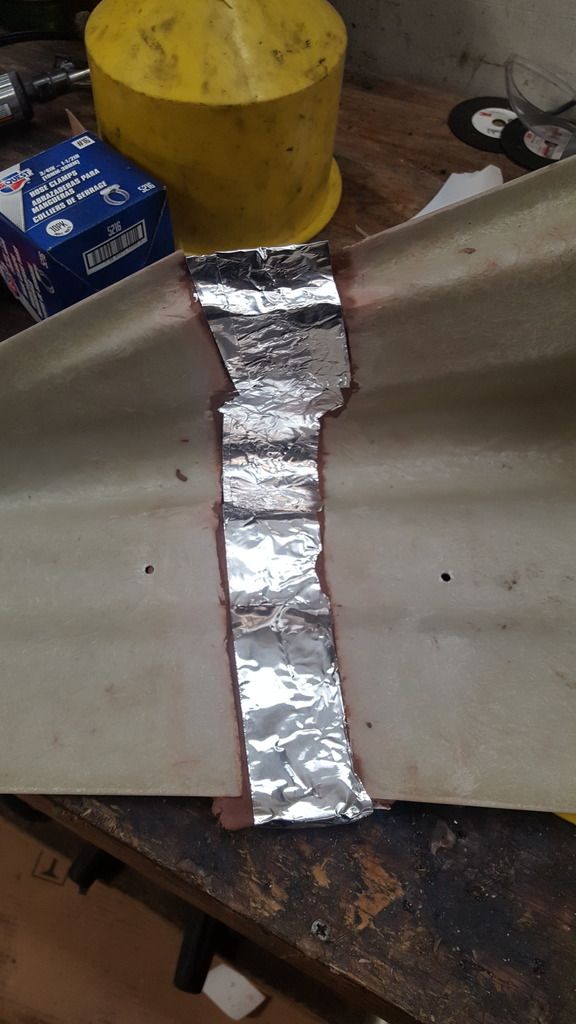 Remove the mold and clean the surfaces thoroughly. 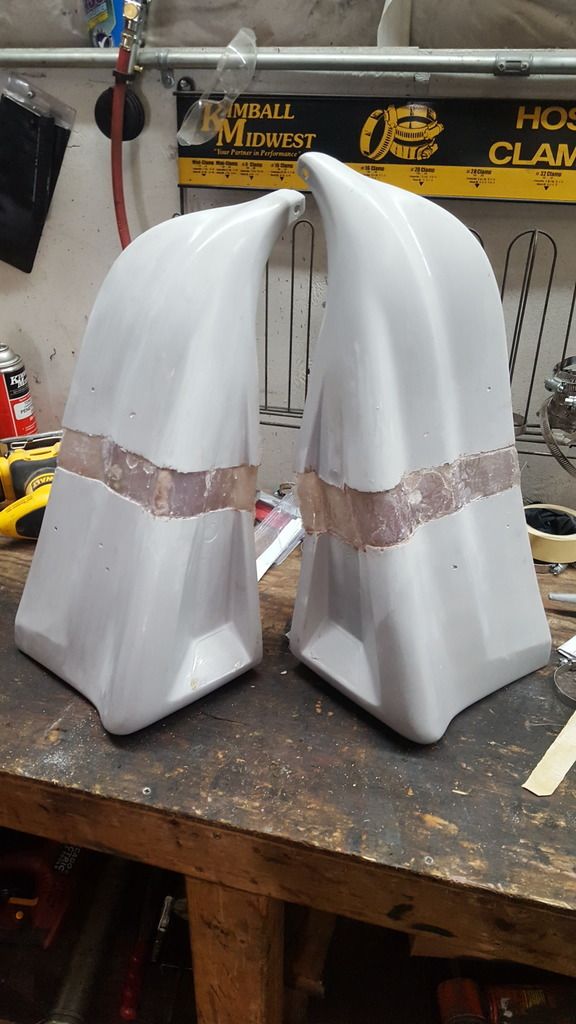 After drying, fill in the gaps with bondo. I Used a long, flat yet pliable edge to pull the bondo while making contact with the edges of the mold. This will help maintain the shape from end to end. 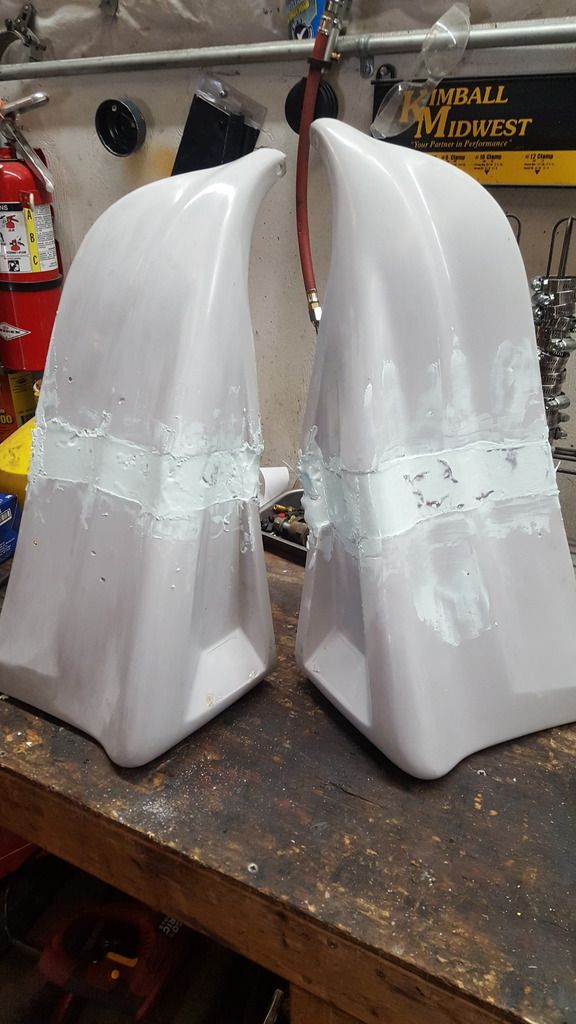 After the bondo has setup (about 10 min) begin sanding with a long block sander with 120 grit sand paper. This will sand down very quickly and will reveal any low spots that need to be filled. Keep adding and sanding bondo until all the low spots are filled. 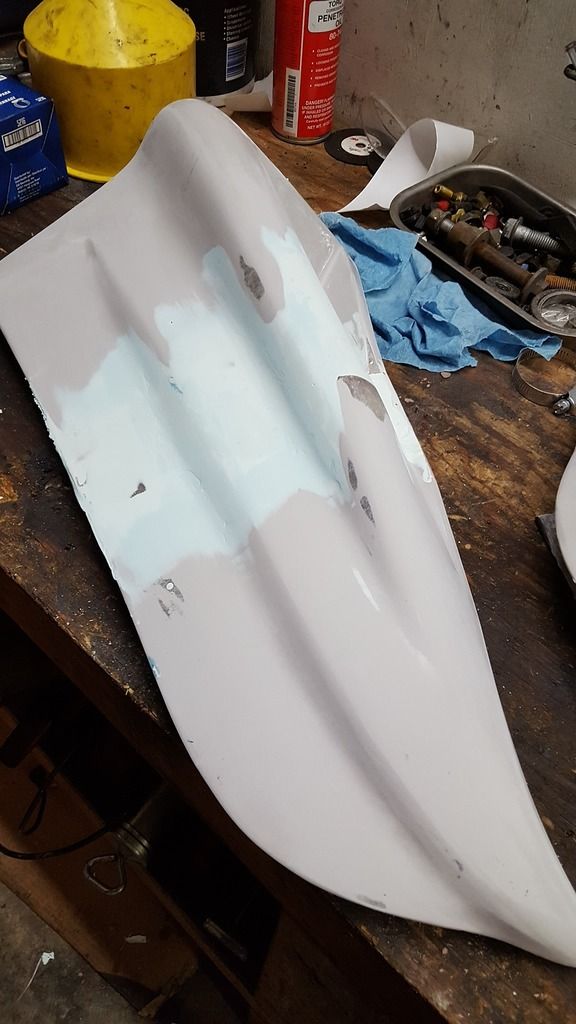 I used a clay mold to shape the edge and get it straight. I Pressed a pry-bar into the clay to form the edge then I back filled with bondo then sanded This made the line nice and straight, compare both pictures. 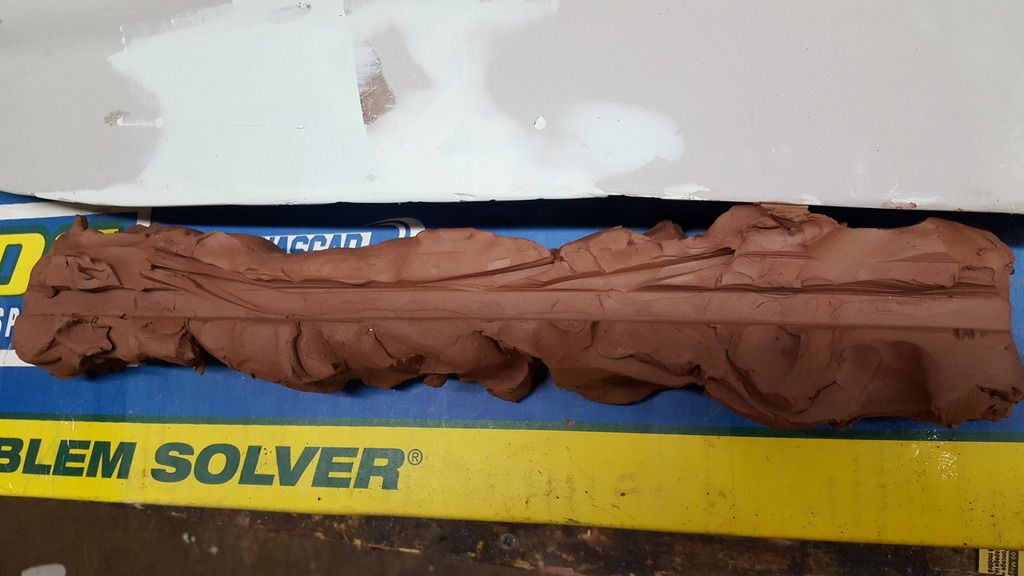 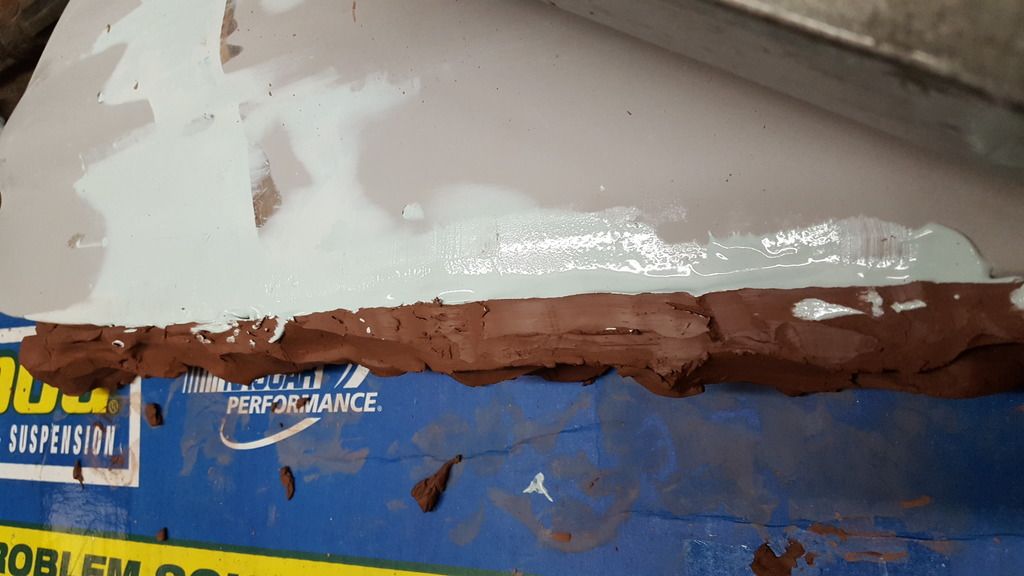 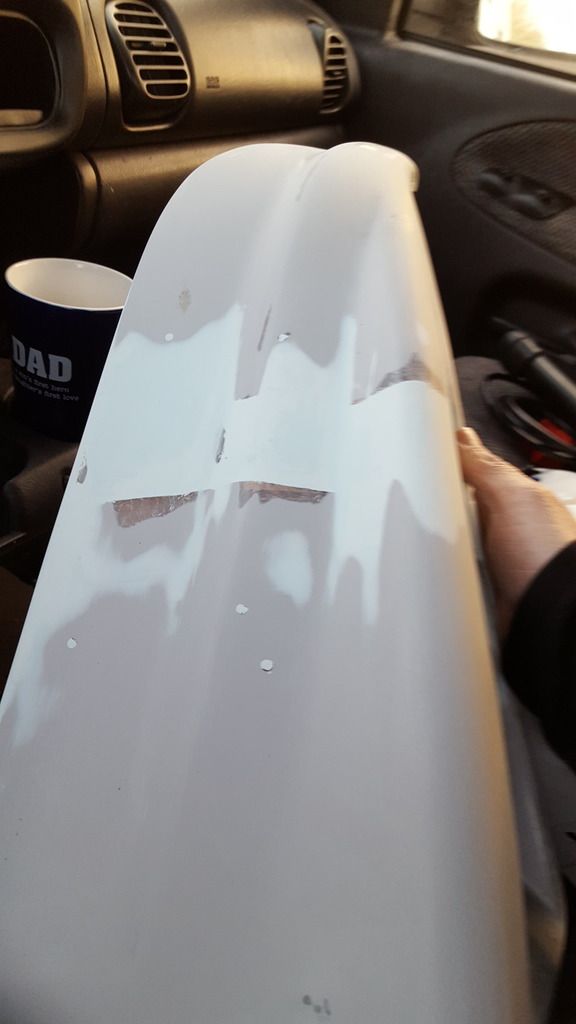 Sand with 320 then 400 then 600 then 800 until smooth. This was my first attempt at fiberglassing, if I can do it you can too. If anybody out there has been following this project I have a quick update, I finished the rear spats, they are painted and installed. I think they turned out pretty good! 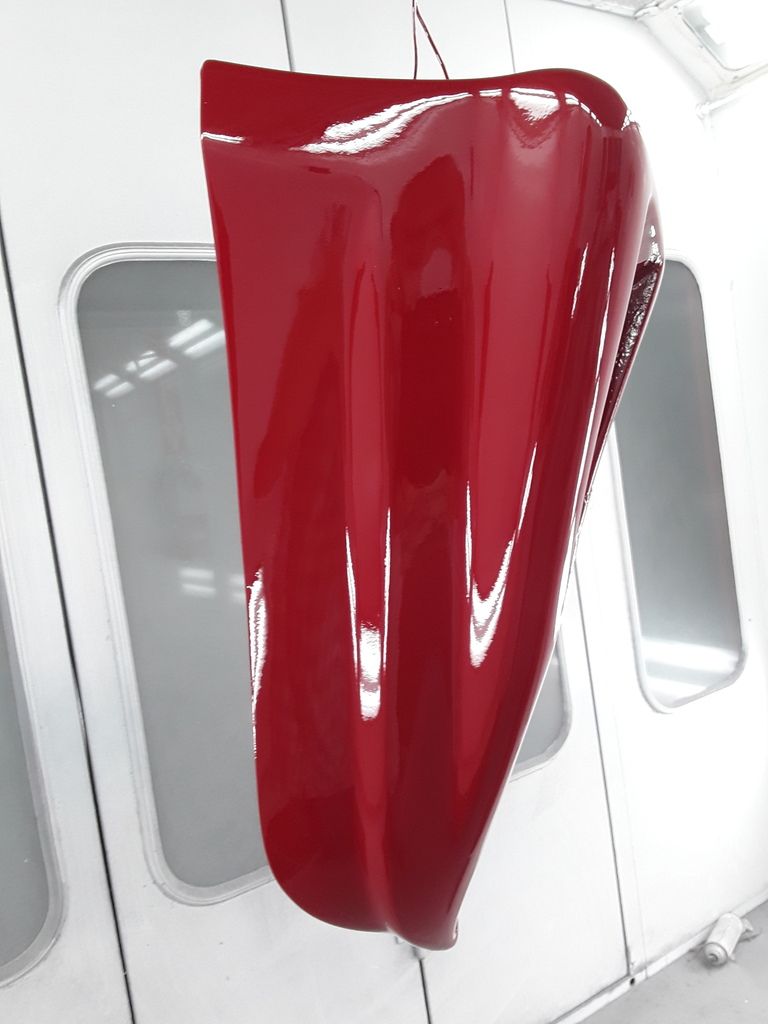 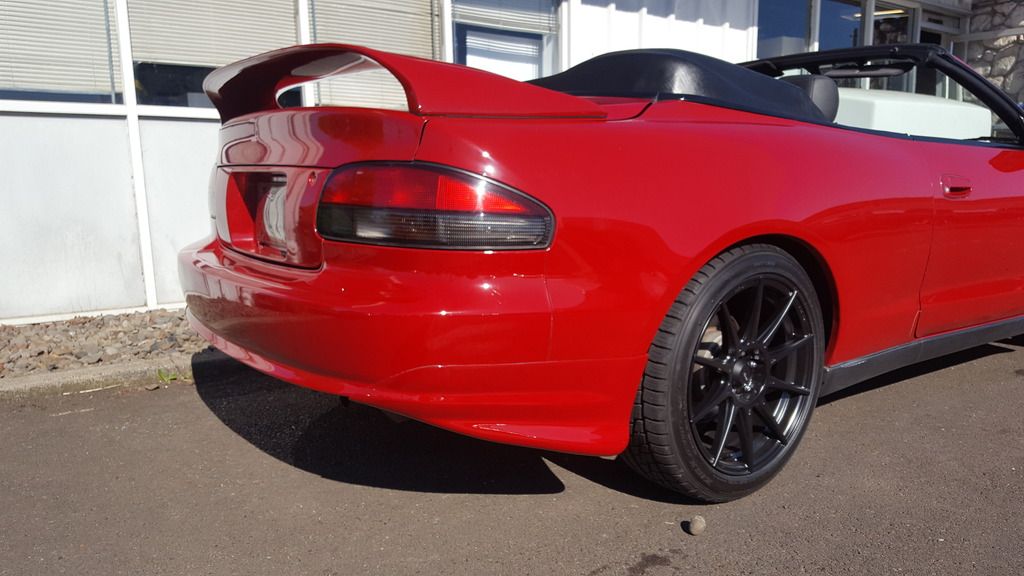 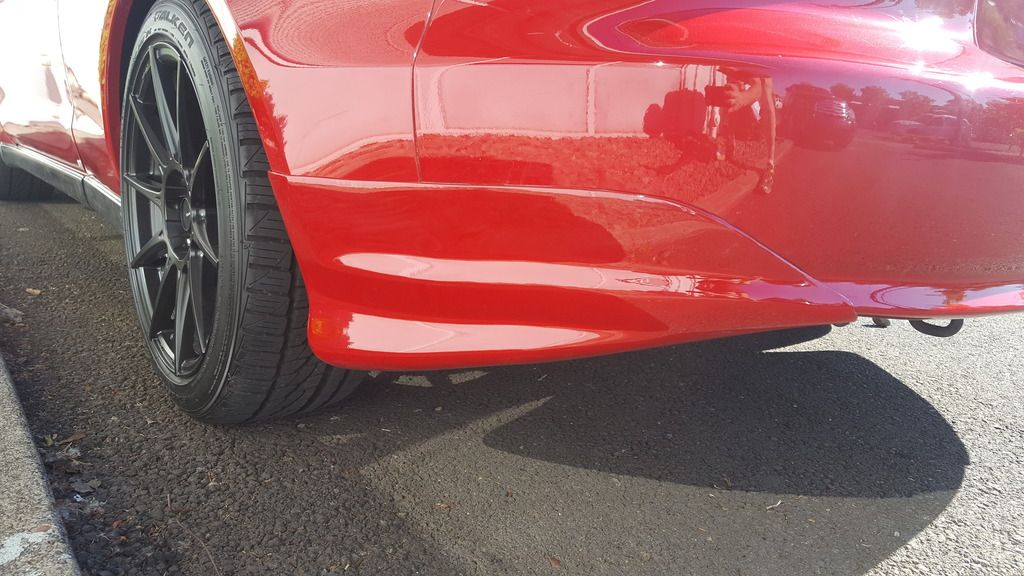
This post has been edited by CelicaRelica: May 23, 2017 - 11:57 AM |
 Apr 11, 2017 - 9:19 AM Apr 11, 2017 - 9:19 AM
|
|
|
Enthusiast      Joined Mar 15, '07 From Tennessee Currently Offline Reputation: 52 (100%) |
Remove convertible from the header. Youll get more responses. People here avoid convertible topics. As far as options. Every now ans then you can find rear splitters. You have to be lucky. Good work.
-------------------- Learned a lot in 10 years... I hardly log in anymore, last login Today Sept 6 2019, and I was forced just to clarify a post. LOL
If you PM me and I dont respond, dont fret or cry. Im alive, better post your questions in the thread below, maybe I log back in 2grfe Swapped... Why I chose the 2GR, before you ask read here... A great civilization is not conquered from without until it has destroyed itself from within. @llamaraxing in Instagram is the best way to find me. I hardly log here anymore. |
 Apr 12, 2017 - 8:46 AM Apr 12, 2017 - 8:46 AM
|
|
|
Enthusiast      Joined Jan 20, '09 From Winnipeg Currently Offline Reputation: 5 (100%) |
Nice work! keep this updated as you get them painted and installed.
This should be added to the stickies -------------------- -Protection mode, For when your amp tries to blow its load. 1995 Toyota Celica GTS - Daily Driver 1999 Chevy Cavalier - Winter Beater 1994 Honda Civic CX Hatchback - Dead My Celica! |
 Apr 16, 2017 - 4:42 PM Apr 16, 2017 - 4:42 PM
|
|
|
Enthusiast Joined Mar 28, '17 From Albany, OR USA Currently Offline Reputation: 0 (0%) |
Thanks for the tip! I will definately post follow up pictures after they are painted and installed. I have a few items going on the car, it's gonna look really different. Saying this because it will be a bit before pics will be available. Stay tuned.
|
 Feb 25, 2018 - 8:25 PM Feb 25, 2018 - 8:25 PM
|
|
 Enthusiast     Joined Nov 27, '02 From Derry,NH USA Currently Offline Reputation: 9 (100%) |
Thanks for the tip! I will definately post follow up pictures after they are painted and installed. I have a few items going on the car, it's gonna look really different. Saying this because it will be a bit before pics will be available. Stay tuned. Are you from Albany,NY?? --------------------  |
 Mar 3, 2018 - 2:33 AM Mar 3, 2018 - 2:33 AM
|
|
|
Enthusiast      Joined Aug 2, '05 From Guam Currently Offline Reputation: 15 (100%) |
wish i could see how it looks like one day
-------------------- 94 Celica GT
|Toyota OEM Japan|Toyota Racing Development|Tom's|Competition Clutch|5Zigen|Apexi| |Laille/Beatrush|Magnecor|Denso|Royal Purple|Optima|PIAA|PW JDM|Megan Racing|Nitto| |Work|Greddy|Samco|Project Mu|H&R|Gates|Moog|Rota|Yokohama|Epman|1320|Upgr8 04 Celica GT |Toyota OEM Japan|Toyota Racing Development|Tein|BC Racing|Greddy| |
  |
1 User(s) are reading this topic (1 Guests and 0 Anonymous Users)
0 Members:
| Lo-Fi Version | Time is now: November 22nd, 2024 - 3:19 PM |


