  |

 Dec 23, 2013 - 2:02 PM Dec 23, 2013 - 2:02 PM
|
 
|
|
Moderator  Joined Jun 29, '08 From Denver Currently Offline Reputation: 59 (100%) |
Brief Summary:
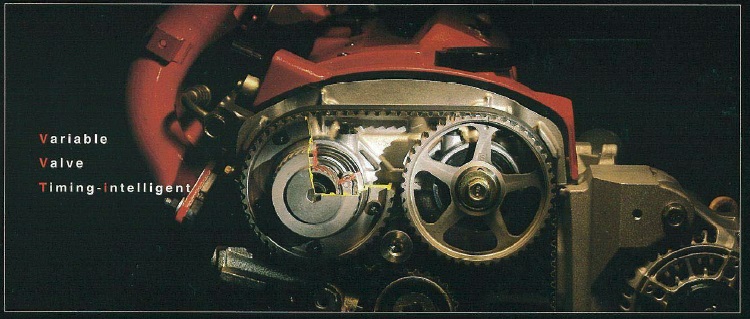
The 3S-GE BEAMS Redtop is the fourth generation 3S-GE designed by Toyota and built by Yamaha. It was produced between 1997 and 1999 and was offered in the ST202 Celica SS-II, SS-II Convertible and SS-III, and SW20 MR2 G and G Limited. BEAMS is an acronym that stands for Breakthrough Engine with Advanced Mechanism System. It was Toyotas first engine to feature Variable Valve Timing with Intelligence (VVT-i), which constantly adjusts valve timing as opposed to the older VVT system featured on the 4A-GE engines which was a simple on/off system. In addition to VVT-I, the BEAMS had a compression ration of 11.0:1, giving it a maximum horsepower rating of 197 @ 7,000 RPM and max torque of 152 lb ft @ 6,000 RPM. Some BEAMS engine came equipped with the S54-06D transmission with an OEM Helical limited slip differential. There were two other variants of the BEAMS engine available, the Greytop BEAMS which was rated at 187 bhp and was available in the RAV4 and Caldina. The Blacktop BEAMS had an increased compression ratio of 11.5:1 and dual VVT-i, raising power output to 207 bhp. http://www.beams-redtop.com/ How VVT-I Works: Variable Valve Timing with Intelligence seems like an overwhelmingly complicated system, but truthfully isnt that complicated. As many of you know, a standard engine uses a camshaft to open and close the valves at a set time and for a set duration. VVT-i uses a few components to be able to open the valves earlier and keep them open longer. Basically, the ECU uses input from various sensors to determine engine speed and load. Based on this information, the ECU sends a signal to an Oil Control Valve (OCV, commonly referred to as a VVT sensor) in the head, which then directs oil pressure to a pulley on the camshaft, which will either advance or retard the camshaft. Again, it sounds complicated, but it truly isnt. Its just a series of simple mechanical components.  This is nothing more than a VERY brief description of VVT-i. If you are interested in reading more, please click here. How to diagnose/troubleshoot VVT-i: Turnip was kind enough to provide these three PDFs about how VVT-i works, and how to properly diagnose and troubleshoot your VVT-i. https://drive.google.com/file/d/0BwFhCeAkWB...dit?usp=sharing https://drive.google.com/file/d/0BwFhCeAkWB...dit?usp=sharing https://drive.google.com/file/d/0BwFhCeAkWB...dit?usp=sharing It is very, very important that when diagnosing your VVT-i that you DO NOT take the cam controller apart. Toyota lists this as a non-serviceable item, meaning if its faulty, it must be replaced and not repaired. If it is taken apart, it will be very very difficult to reassemble, and it isnt a job for a backyard mechanic. I had a spare Redtop at one point and I decided to take one apart to see what the fuss is all about. 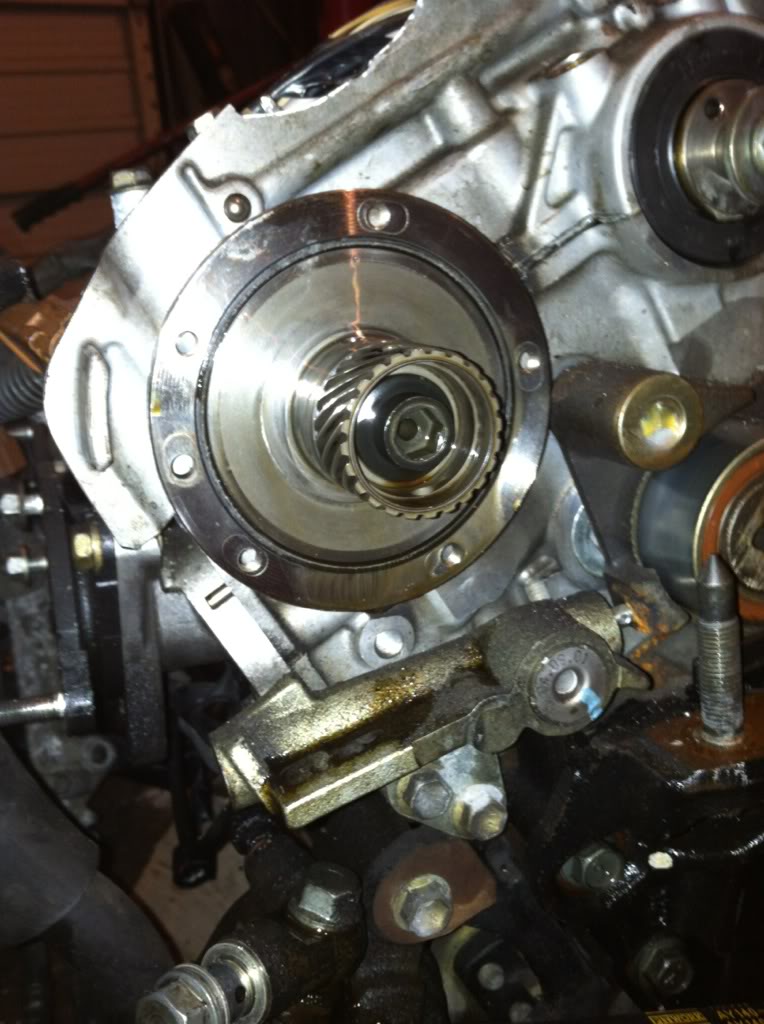 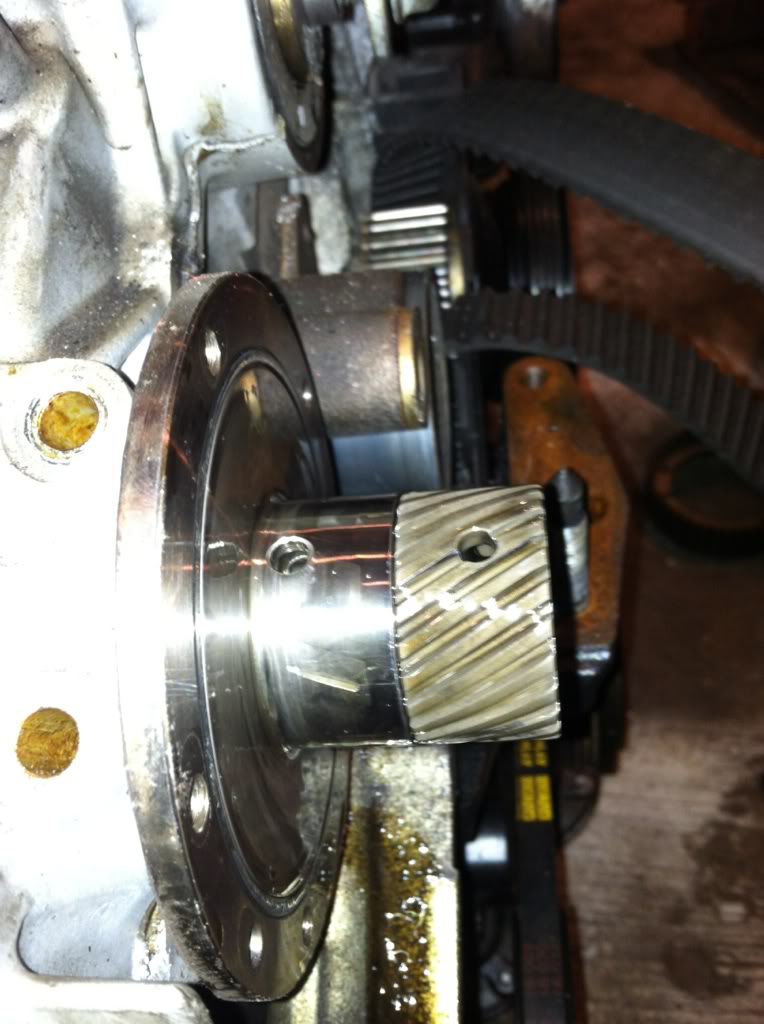 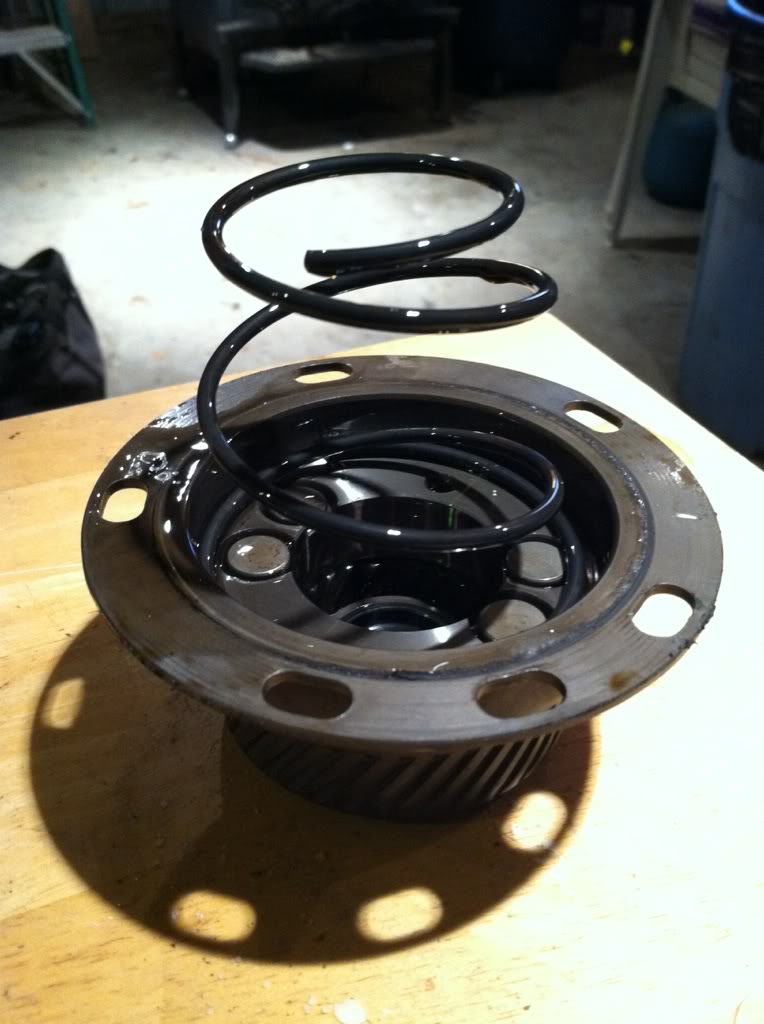 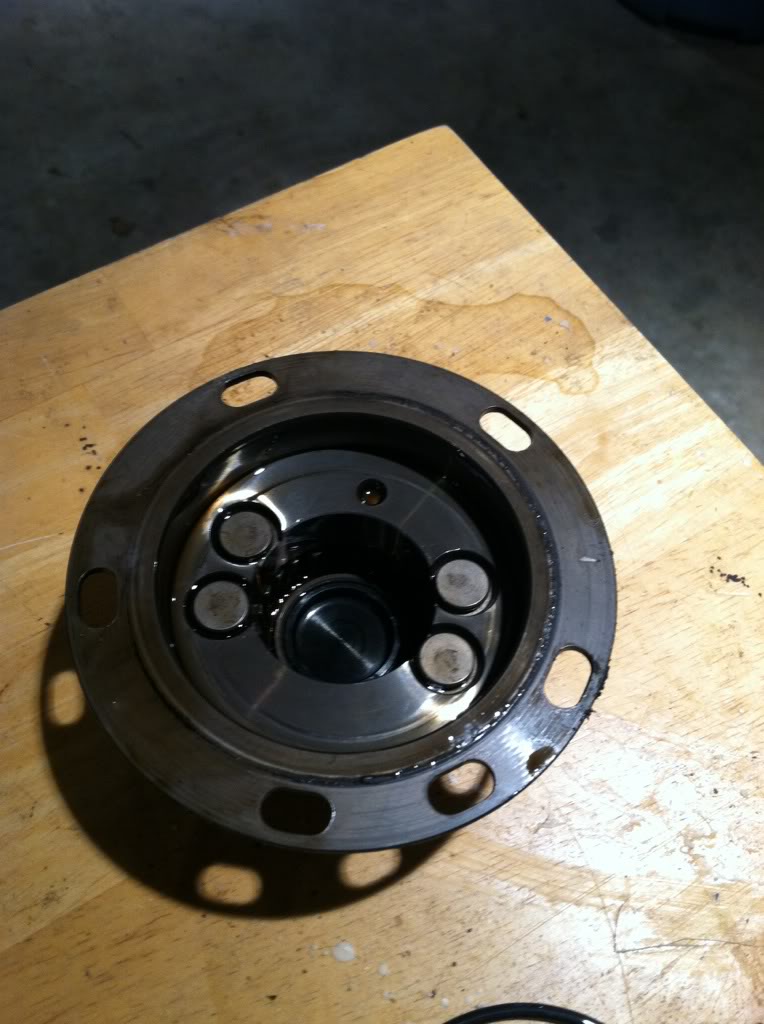 Although it looks simple, there was no chance of me ever putting it back together correctly after that. Common issues: The BEAMS, like any other Toyota engine, is perfectly reliable and requires only basic maintenance. However, it does have its quirks. Idle Speed Control Valve: Located in the bottom of the throttle body, the ISCV tends to collect a lot of dirt. The BEAMS is designed to idle at 750 RPM, and is controlled by the ISCV. When it gets dirty, the BEAMS will not idle properly, pulse on startup, and wont run 100% at any RPM. This problem can be cured by taking the throttle body apart to remove the ISCV and cleaning with throttle body cleaner, lubricating with a little white lithium grease, and reassembling. If this doesnt work, then its time for a new ISCV. See this thread for more information concerning ISCV replacement. Timing belt: The timing belt itself doesnt have any issues. However, the BEAMS is an interference engine, meaning if the timing belt breaks the pistons will slap the valves. Its very important to replace your timing belt and check it regularly. Its better to replace a timing belt every 90,000 miles or less than replace bent valves. Valve cover gasket: Out of the three BEAMS engines I have owned, all three have had oil in the spark plug tubes when I got them. Its a quick and easy fix, just replace the valve cover gasket and spark plug tube seals. Problem solved. MAF sensor: The MAF sensor is no different than any other MAF, but the BEAMS ECU treats it differently. The BEAMS ECU is incredibly finicky when it comes to the MAF and it has very tight tolerances. The BEAMS ECU relies very heavily on the MAF to determine the air/fuel ratio, and it was designed to work with the stock intake. If the MAF begins to malfunction, the ECU will trim fuel, causing your engine to run improperly. Unfortunately, this means that the ECU cannot cope with any other intake besides the stock intake. This will throw the MAF readings off, meaning you will not get proper air/fuel ratios and therefore cutting power, often significantly. The best alternative to the stock intake is the SARD Sports EX Plus intake, available from rhdjapan.com, but there have been several dyno charts showing gains by replacing an aftermarket intake with the OEM intake. You can buy just the Redtop intake lid, which has the MAF housing built in, and it will fit right on top of your stock intake box, giving you a full OEM BEAMS intake. Fuel filter: The stock BEAMS fuel filter sits farther away from the frame than the GT fuel filter. This means that the BEAMS fuel hose will not reach a 5S-FE fuel filter and bracket. The ST uses a similar bracket as the BEAMS, putting the fuel filter a little farther out, but the bracket is too big to clamp around the GT fuel filter. What I did is use a GT fuel filter and bracket with a longer bolt and held the bracket in place between the head of the bolt and an extra nut. S54 Limited Slip Differential: The BEAMS came bolted to an S54 transmission, meaning that axles from a USDM Celica GT will work perfectly. Some BEAMS were lucky enough to get the S54-06D transmission which has an OEM helical LSD. To check to see if you have limited slip, pop the axles out and look through the transmission. If you see a bar, that means that your S54 has an open differential. If you cant see through the transmission, that means you are lucky enough to have the limited slip. The first picture is my S54 with an open diff, the second picture is my S54 with LSD. 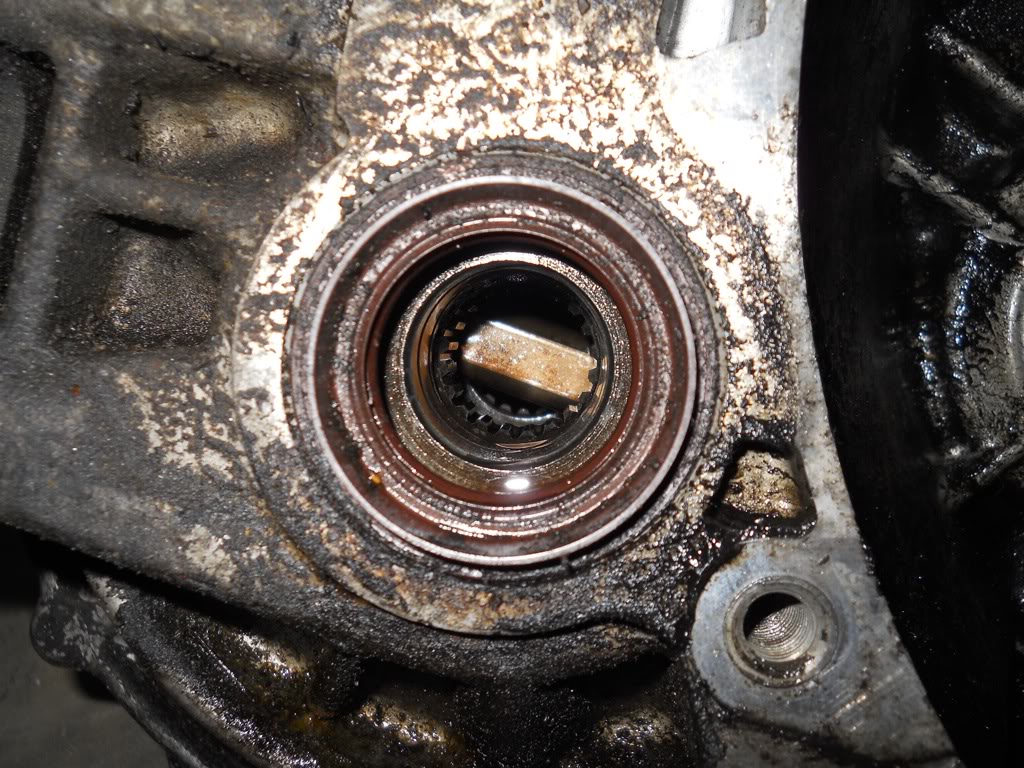 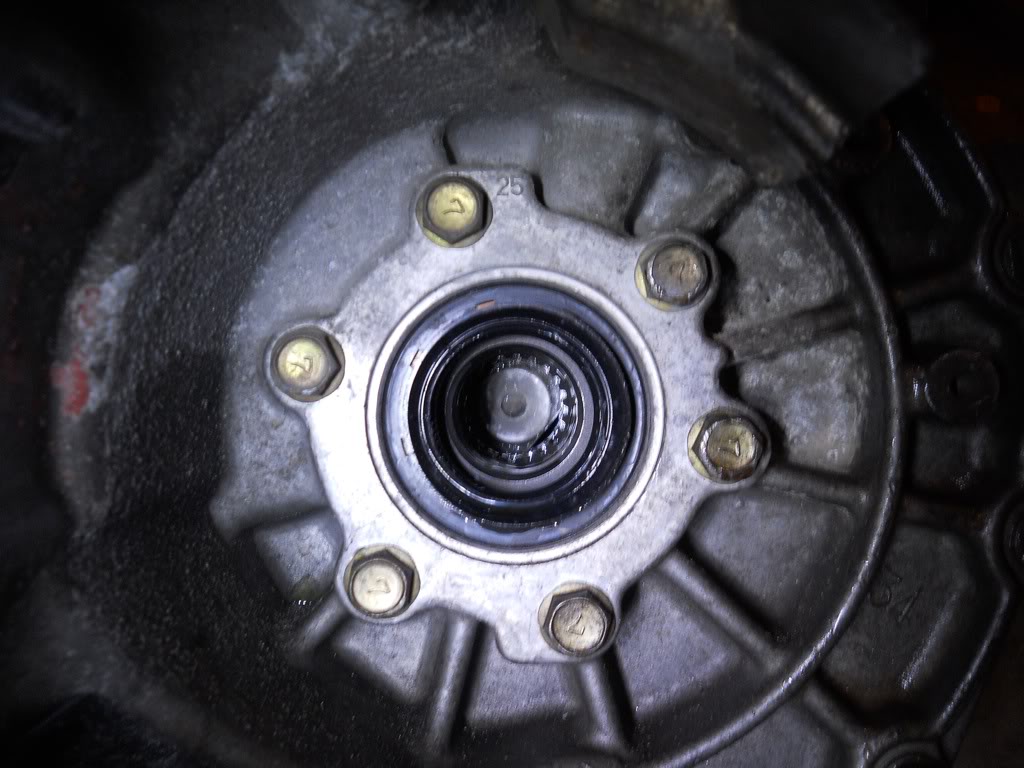
-------------------- "Employ your time in improving yourself by other men's writings, so that you shall gain easily what others labored hard for." -Socrates. Even Socrates told us to use the search button!
 2006 Aston Martin V8 Vantage. 1998 Celica GT- BEAMS Swapped. 2022 4Runner TRD Off Road Prenium. 2021 GMC Sierra AT4. |

|
Dec 23, 2013 - 2:07 PM
|
|
|
Moderator Joined Jun 29, '08 From Denver Currently Offline Reputation: 59 (100%) |
Part Numbers:
Please note: Anything marked with an asterisk is not readily available in the United States. However, certain dealerships such as Lithia Toyota can order them for you. They usually take around 6 weeks to come in. Spark plugs- Denso PK20R11/PK20R8 or NGK BKR6EP11/BKR6EP8 Coil packs- 90919-02227* MAF sensor- 22204-22010 (Same as a 1997 Avalon) Clutch disc- 31250-20331 (Same as a USDM 1999 Celica GT) Pressure plate- 31210-44010* Throwout bearing: 31230-32060 (Same as any USDM Celica GT) Timing belt- 13568-80015* Thermostat- 90916-03100 (Same as 2007 Toyota 4Runner) Throttle position sensor- 89452-02020 (Same as a 2008 Corolla) Water pump- 16100-79226* O2 Sensor- 89465-20620* (Any 4 wire Denso sensor will work but will need wiring work) Valve cover gasket- 11213-88560 and 11214-88560 for the spark plug tube seals. (http://www.kbox.ca/catalog/index.php?cPath=39_112 ) Engine Gasket Kit - 04111-74710* Oil filter- 90915-10001 (Same as the 5S-FE uses) ISCV- 22270-74370* (Please read below) Throttle body gasket- 22271 88560* Oil control valve- 15330-74020* Intake lid- 17705-74490* The ISCV cannot be readily ordered in the United States, although I’m sure Lithia Toyota can order it for you. However, Batman722 and hurley97 have successfully used the ISCV from a 2000-2005 Toyota Echo on their BEAMS, and rdyzz has successfully used the ISCV from a 2001 Honda Civic with a 1.7 liter engine- click here for more information. In my case, I was/am running a flywheel from a 3S-GTE instead of the stock BEAMS flywheel. This means instead of running the pressure plate listed above, I had to use the pressure plate from an ST185, part number 31250-20031. For reference of other parts, feel free to check this thread. http://www.mr2.com/forums/threads/26405-Be...ber-Master-List And be sure to bookmark ToyoDIY, as it will become your best friend regardless of which engine you choose to swap into your car. http://www.toyodiy.com/ Wiring: To see what changes need to be made to the BEAMS wiring, follow this link. 3S-GE BEAMS Redtop wiring into a USDM AT200/ST204 What you need before you get started with the swap: It has often been discussed and generally agreed that the BEAMS Redtop is the easiest swap into an ST204 Celica. Wiring is a matter of a few simple connections and the engine drops in and bolts in using your existing motor mounts. However, before you get started with the swap, you’ll want to make sure that you are completely prepared. Even the best laid plans often go awry, so it’s better to be overprepared. At the very least, you’ll need: -A 3S-GE Redtop -A complete, uncut wiring harness -An ECU -Fluids (Oil, filter, Toyota red coolant [skip the green stuff- that will cause corrosion,] 75W-90 gear oil [Myself and many others choose to add Pennzoil Syncromesh- our transmissions love the stuff,] automatic transmission fluid to refill your power steering, and brake fluid for if you choose to disconnect your clutch lines during the swap.) Of course, that is only what is 100% necessary. There are a few additional goodies that will make your swap go a little easier and make you happier than an “incomplete” swap. -OEM intake -OEM B pipe -LSD transmission -OEM gauge cluster -New axles- Not necessary, but now is an easy time to replace them. -New motor mounts- The Celica went out of production in 1999- meaning, your motor mounts are 15+ years old if they haven’t been replaced by now. -Polyurethane motor mount inserts- Not necessary by any means, but they will help keep your engine from shifting around as much. For $55 from http://home.comcast.net/~kirkosaurus2/MR2_...ne_inserts.html , they’re a small expense in the grand scheme. -Timing belt, water pump, belt tensioner, gaskets and seals- Not necessary but again, the newest BEAMS engine is 15 years old and is an interference engine. Low mileage or not, these parts are much easier to replace before the engine is in the car and will need to be replaced anyway- its much smarter to replace them now for peace of mind and to prevent any bent valves in the future. -Spark plugs- Why not? They’re cheap and easy to replace. -Fuel filter One of the advantages of a BEAMS is that it uses a coil on plug setup as opposed to the distributor that the 5S-FE uses. Unfortunately, the tachometer gets a signal from the distributor, so the tach will not work if you simply plug your BEAMS in. The COP’s send a 5v signal to the tach where the distributor sends a 12v signal. Your options are pretty limited here. You can either buy a BEAMS tachometer, or you can buy a tach signal adapter such as the Dakota Digital SGI-8 or the MSD 8913. The Dakota Digital unit is known for a twitchy tach needle and the MSD has a buzzing noise. I personally didn’t want a white tach face from the BEAMS with a black speedometer so I went with the Dakota Digital tach adapter and I put up with the occasional needle twitch. Now that you’ve gotten all of that out of the way, it’s time to get your engine ready for the swap. Replace all of the gaskets and seals, timing belt, etc. and then tackle the wiring. Now that your BEAMS is prepped, it’s time to pull that old engine out. Smaay has recently made a great writeup for how to pull your engine. http://www.6gc.net/forums/index.php?showtopic=91360 Okay, so your old engine is pulled, you’ve prepped your BEAMS, you’ve dropped it in your engine bay, plugged it in, topped off the fluids, so now it’s time to crank the key. The total cost for everything should be between $2,000-$3,500, depending on how elaborate you get, which parts you choose to buy and which items you skip, etc. -------------------- "Employ your time in improving yourself by other men's writings, so that you shall gain easily what others labored hard for." -Socrates. Even Socrates told us to use the search button!
2006 Aston Martin V8 Vantage. 1998 Celica GT- BEAMS Swapped. 2022 4Runner TRD Off Road Prenium. 2021 GMC Sierra AT4. |
|
Dec 23, 2013 - 2:13 PM
|
|
|
Moderator Joined Jun 29, '08 From Denver Currently Offline Reputation: 59 (100%) |
Pulling codes:
We’ve all run into problems at some point. Pulling codes from the BEAMS is a simple process. In 1996, Toyota implemented OBDII into USDM cars. However, OBD is an American feature, not present in overseas vehicles. JDM cars have their own version of OBD that cannot be read by any USDM scanner, thus installing a BEAMS means you can kiss your OBDII goodbye. However, you can pull codes from the BEAMS in a similar manner to OBDI. To pull codes from your BEAMS, you need to go for a short drive or let the engine idle until it has reached operating temperature. Turn the engine off but leave the key in the ON position. Open the Diagnostics box under the hood. You’ll see a pin labeled ”TC.” Simply take a paperclip or a short piece of wire and ground the TC port. Then step inside the car and count the number of times that the check engine light flashes. It will flash a series of flashes with short and long pauses. For instance, two flashes short pause five flashes is a code 25. Then it may give a long pause, three flashes, short pause, two flashes. That means code 32. To reference what codes you have, follow this link. http://www.mr2.com/forums/threads/67398-To...28all-models%29 Thanks to the work of ricochet1490, we can now get our OBDII ports working on our BEAMS. To find out more, read here. http://www.6gc.net/forums/index.php?showtopic=89746&hl= For additional reading, feel free to read through the following threads. Njccmd2002- I Swapped 3s-ge Redtop Into 97 Limited Edition Vert turnip- Swap: 3sge Beams into 94GT hurley97 and Batman722- New Addition to Our Family richee3- Richee3's Progress Thread As always, I will continue to update this thread. If I've missed any details or need to elaborate on anything, please PM a mod and we'll get it added in. -------------------- "Employ your time in improving yourself by other men's writings, so that you shall gain easily what others labored hard for." -Socrates. Even Socrates told us to use the search button!
2006 Aston Martin V8 Vantage. 1998 Celica GT- BEAMS Swapped. 2022 4Runner TRD Off Road Prenium. 2021 GMC Sierra AT4. |
|
Dec 23, 2013 - 7:00 PM
|
|
 Moderator Joined Nov 5, '07 From New Zealand Currently Offline Reputation: 3 (100%) |
BEAMS cross section:
 Engine info: Power 200ps/197BHP/147KW @ 7,000rpm Engine. Works out roughly to 158ps/156WHP/116KW @ 7,000rpm Wheels Torque 21kg-m/152ft.lb./206Nm @ 6000rpm Engine displacement: 1998cc Compression ratio: 11:1 Bore & Stroke: 86 x 86mm Camshaft duration (IN/EX) - 256°/244° (advertised duration) (Unknown) @ 1mm lift / (Unknown) @ 0.050in. lift Camshaft lift: (IN/EX) - 10.5mm/9.2mm Valve diameter: (IN/EX) - 34.5mm/29.5mm Throttle body diameter: 65mm Injector size: - 340cc (from the book, flow testing: 315cc) Rod pin diameter: 22mm Rod big end bore: 51mm Rod big end width: 21mm Buckets/lifters: 31mm Shim underbucket system Notes: VVTI on intake only Dynograph:  VVTi operation points: (Note disregarded the Blacktop BEAMS exhaust switching points as these are not used with the redtop BEAMS.) 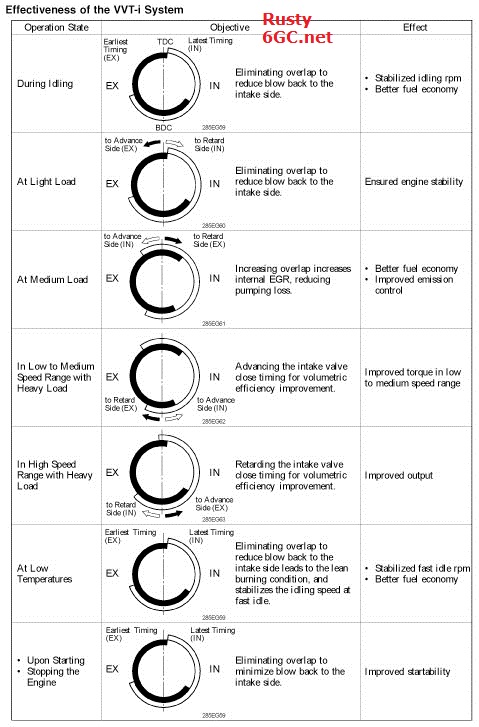 ECU Pinouts: 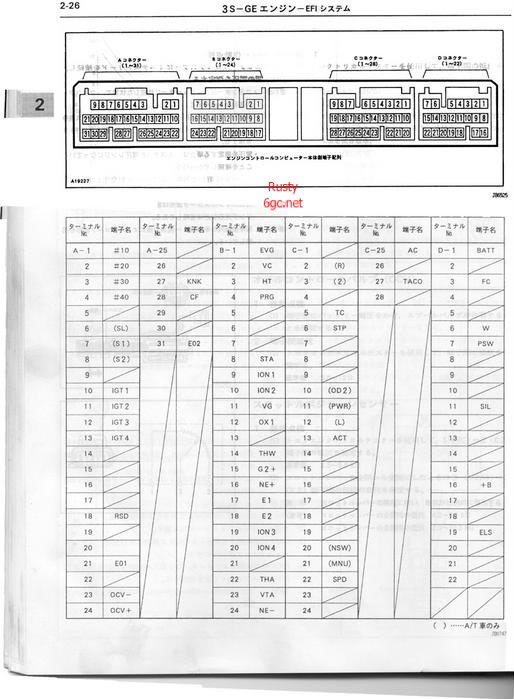 Additonal photos:  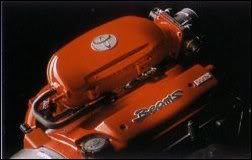 
-------------------- |
|
1 User(s) are reading this topic (1 Guests and 0 Anonymous Users)
0 Members:
| Lo-Fi Version | Time is now: February 21st, 2025 - 1:56 PM |