  |
 Jul 13, 2009 - 1:10 AM Jul 13, 2009 - 1:10 AM
|
|
 Enthusiast    Joined May 29, '09 From Lake Ariel, PA Currently Offline Reputation: 4 (100%) |
Hey guys this a guide i made on how to change you're own fuel filter in a 6 generation Celica GT.
I am in no way responsible for anything that may happen to you're car during this process, but if you follow my directions and warnings you should be good. Tools/Parts Needed: Phillips Screw Driver Flat Head Screw Driver A Vice Grip or a 14mm wrench A Crescent Wrench that will fit within the work space. Socket Wrench with an extension Goggles New Fuel Filter with 2 washers(washers should come with it) First Step: Make sure the fuel filter looks like the one in your car it's located right behind the stock air intake box. 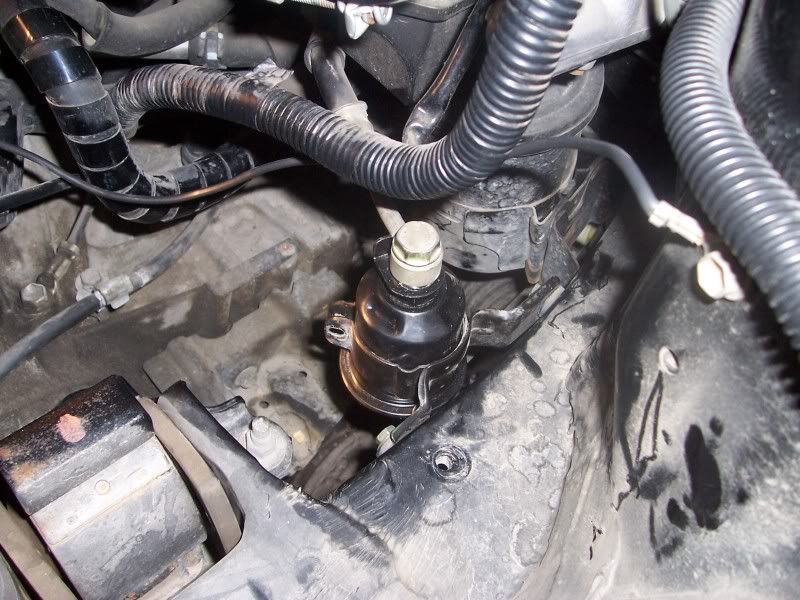 To make enough room in order to get down to the fuel filter the stock air box(Assuming you have the stock intake in you're car and not aftermarket). Begin by removing the clips on all sides of the box(There should be 4) 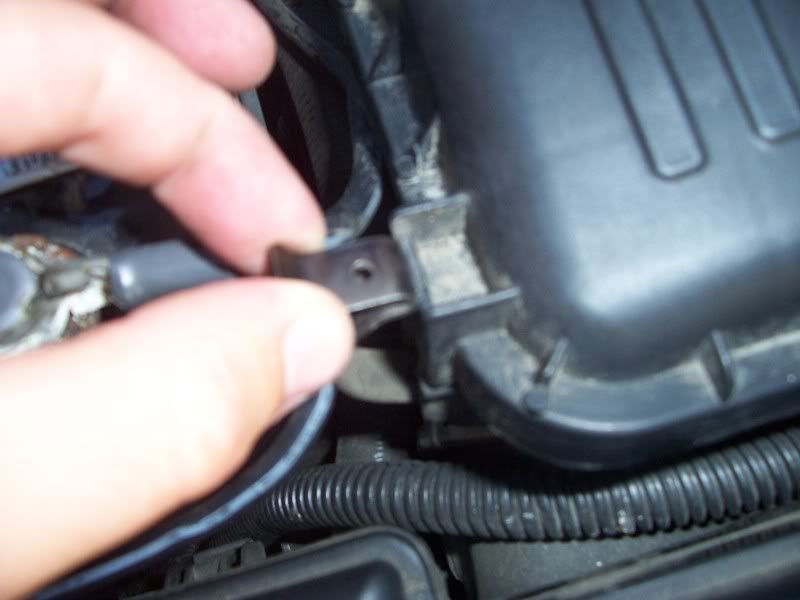 Remove the O2 sensor in the back of the box, it should just pull right out 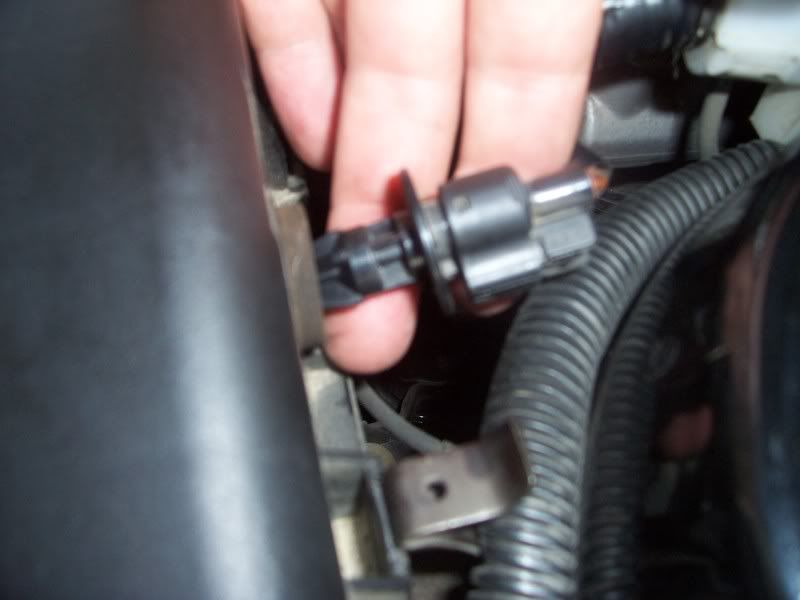 Loosen the clamp holding on the top of the air intake using a screw driver to loosen the bolt and then remove the top portion of the box along with the filter. 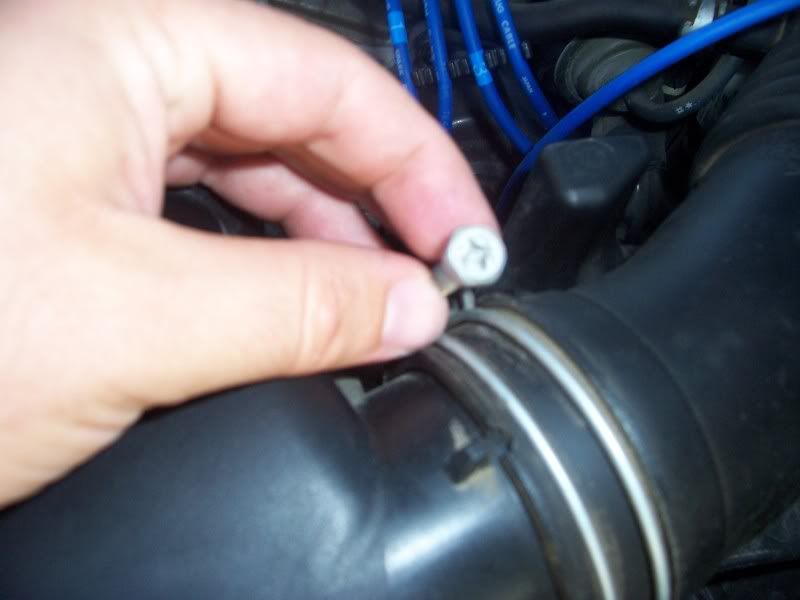 Next there will be 3 screws holding down the bottom portion of the intake box, this is where you need the extension on the socket wrench. 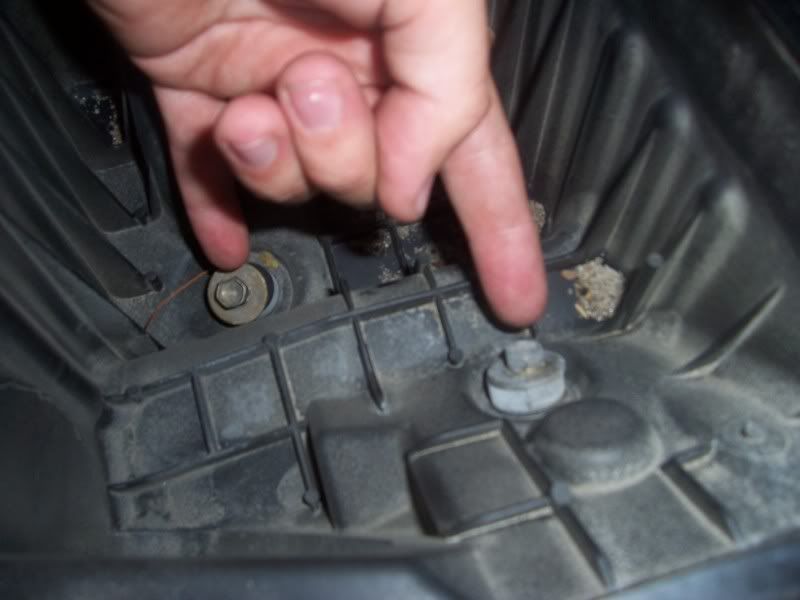 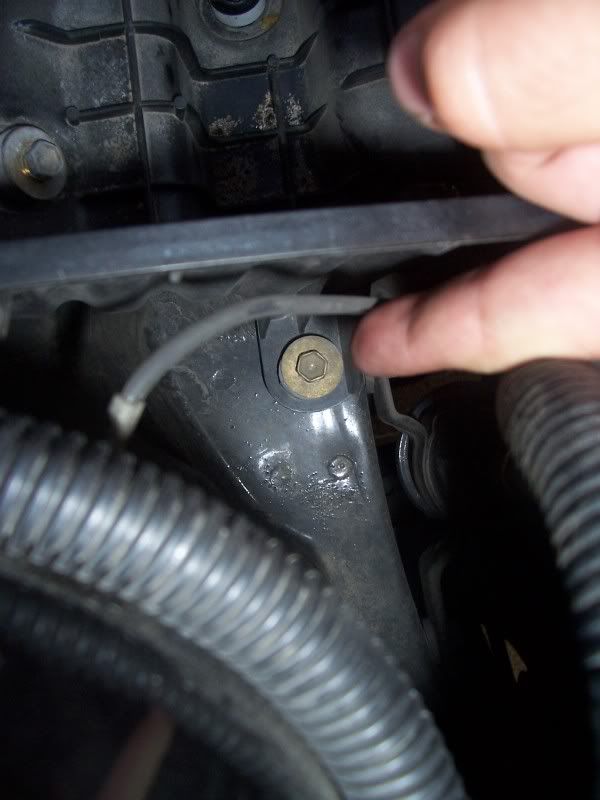 Then there will be two clamps around the wiring that sits around your box, all you need to do is pry it open with a flat head, they should just pop off and the bottom portion of the intake box should just come right out. Now you should have a clear view of the fuel filter, before continuing make sure you're car is off and cooled down. Next I would suggest putting some cardboard underneath where the fuel filter sits on the ground so you don't get it on the floor but its you're choice. Once your car is cooled throw on some goggles and you can proceed to slowly remove the top fixture on the fuel filter, don't be afraid quite a bit of fuel will come out but its just releasing the pressure that's built up in the fuel lines, make sure its the top not the bottom the top will release the pressure easier, it may spray up(that's why you're wearing goggles). 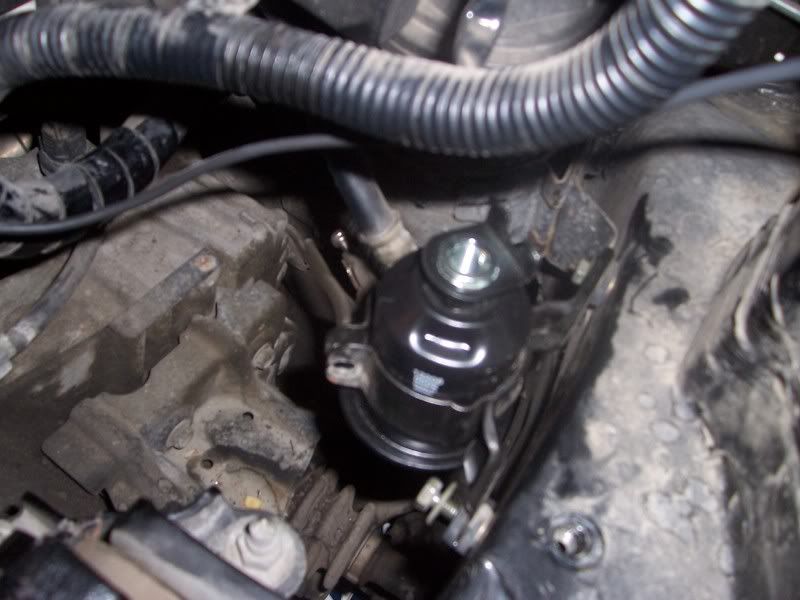 Next is the hardest and trickiest part of the whole ordeal, you have to remove the fuel filter from the bottom of the fuel line but you can't exactly see what you are doing. I took a picture of what it looks like. 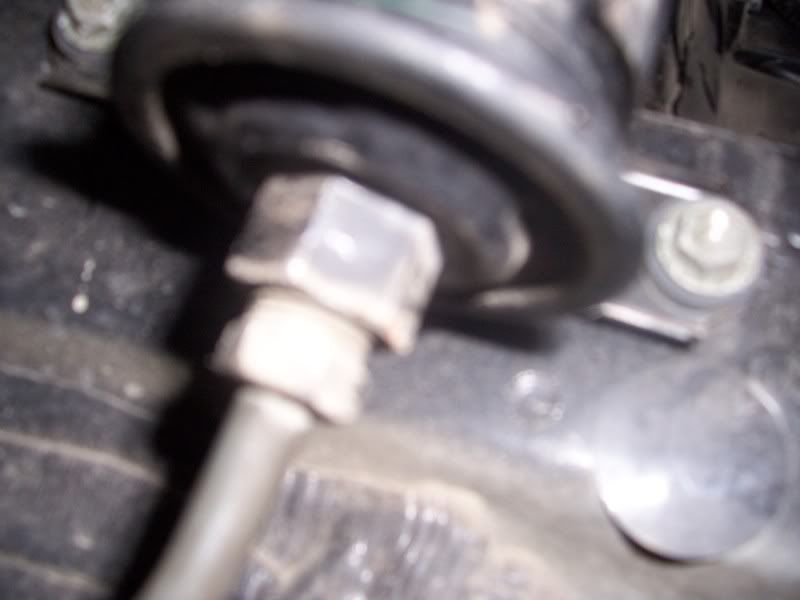 I put a vice on the bottom nut like so and just let it rest on the inner fender wall( I took this picture after i removed the fuel filter to show you where it should properly be fixed to) 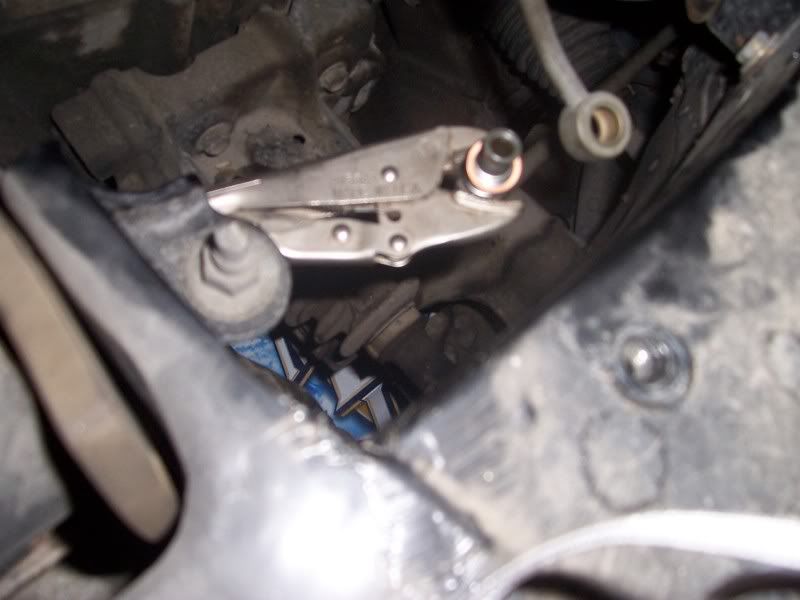 Use the Crescent Wrench and proceed to turn the fuel filters lower nut(above where the vice/14mm wrench is) counter clockwise. (Be very careful not to tweak the bottom fuel line too much when trying to remove the filter because you can crack the fuel line if you do.) Once the old filter is off screw in the new one. Place the new washers on the top and bottom of the upper fuel line taken out of the top of the filter and screw it back in. Start your car and make sure it isn't leaking anywhere (It'll take a second to start again since your line is depressurized.) If there are no leaks just install things in backwards order of how I told you to take them out. Congratulations on your first fuel filter install and enjoy the better gas mileage. You're engine will be thanking you too. --------------------  Representing the Convertible Crew since 2008 |
 Jul 13, 2009 - 7:54 AM Jul 13, 2009 - 7:54 AM
|
|
|
Moderator      Joined Oct 1, '02 From fall river, ma Currently Offline Reputation: 13 (100%) |
just FYI, you should always use a good quality flare nut wrench on that bottom nut.
 also, before you do anything you should relieve the pressure in the fuel tank by removing your gas cap. -------------------- Former Team 5SFTE pro member ;)
 13.6@108MPH, 5SFTE Powered |
 Jul 13, 2009 - 5:15 PM Jul 13, 2009 - 5:15 PM
|
|
|
Enthusiast     Joined Jan 25, '06 From MN Currently Offline Reputation: 19 (100%) |
Your suppose to prime the new filter when installed all you do is just press on the gas pedal a couple of times before starting the car and yeah I agree with presure flare nut wrench is a must with a vice grip you just end up stripping the lower nut. And make sure to properly torq the top bolt to the right specs I believe is 22lbs for most of them.
-------------------- "To Protect And To Serve The Wealthy" -POLICE
|
 Jul 13, 2009 - 11:13 PM Jul 13, 2009 - 11:13 PM
|
|
|
Enthusiast      Joined Apr 18, '05 From Lincoln, Ar Currently Offline Reputation: 7 (100%) |
Nice writeup!
|
 Feb 21, 2011 - 1:04 AM Feb 21, 2011 - 1:04 AM
|
|
|
Enthusiast      Joined Apr 24, '08 From Orange County, CA Currently Offline Reputation: 33 (100%) |
this is near impossible to remove on a 1995 5sfe camry without removing the canister that's sitting next to it. I tried using a 19mm wrench and used all my strength with both hands while turning the wrench clockwise but only heard a few cracks and the nut didn't loosen up at all
-------------------- Group buy to replicate Narrow E series transaxle parts
http://www.6gc.net/forums/index.php?showto...p;#entry1107514 |
 Feb 21, 2011 - 1:39 AM Feb 21, 2011 - 1:39 AM
|
|
|
Enthusiast      Joined Feb 24, '07 From Oahu, Hawaii Currently Offline Reputation: 23 (100%) |
another tip!! take out the fuel pump fuse and start the car, the car should cutoff when all the fuel is gone.
-------------------- I don't normally drive fast, but when I do its on a curvy section of this island
 |
 Feb 21, 2011 - 2:39 AM Feb 21, 2011 - 2:39 AM
|
|
|
Enthusiast      Joined Apr 24, '08 From Orange County, CA Currently Offline Reputation: 33 (100%) |
another tip!! take out the fuel pump fuse and start the car, the car should cutoff when all the fuel is gone. what, but that doesn't help me!!! thats only so that you don't drip any fuel onto the ground and in the engine bay, which is something I didnt know thanks This post has been edited by BonzaiCelica: Feb 21, 2011 - 2:40 AM -------------------- Group buy to replicate Narrow E series transaxle parts
http://www.6gc.net/forums/index.php?showto...p;#entry1107514 |
 Feb 21, 2011 - 10:42 AM Feb 21, 2011 - 10:42 AM
|
|
|
Moderator      Joined Oct 1, '02 From fall river, ma Currently Offline Reputation: 13 (100%) |
17mm wrench on the bottom of the fuel filter, and a high quality 14mm flare wrench, or crows foot, and PB blaster.
-------------------- Former Team 5SFTE pro member ;)
 13.6@108MPH, 5SFTE Powered |
 Feb 21, 2011 - 11:00 AM Feb 21, 2011 - 11:00 AM
|
|
|
Enthusiast      Joined May 29, '09 From Gainesville, FL Currently Offline Reputation: 17 (100%) |
Watch that bango fitting on the top of the filter as well.
Can be a pain, and if you crank on it incorrectly with plans on reusing the filter. You'll bend the piss out of the top of it. |
 Feb 21, 2011 - 1:46 PM Feb 21, 2011 - 1:46 PM
|
|
|
Enthusiast      Joined Dec 8, '03 From Lancaster CA Currently Offline Reputation: 6 (100%) |
thats not an O2 sensor in the airbox, its the air intake temp sensor.
and pumping the gas does NOT prime the fuel filter. this is electronically controlled fuel injection. all you have to do is cycle the key a few times. -------------------- 2001 Celica GT-S Turbo
1997 Supra TT 6speed 1997 Celica 3MZ/1MZ swap 1990 Celica All-Trac |
 Feb 21, 2011 - 2:33 PM Feb 21, 2011 - 2:33 PM
|
|
|
Enthusiast      Joined Apr 24, '08 From Orange County, CA Currently Offline Reputation: 33 (100%) |
17mm wrench on the bottom of the fuel filter, and a high quality 14mm flare wrench, or crows foot, and PB blaster. oh **** really then how is it that I was able to fit a 19mm on the bottom. so it requires to different sizes ok I'll try that. -------------------- Group buy to replicate Narrow E series transaxle parts
http://www.6gc.net/forums/index.php?showto...p;#entry1107514 |
 Feb 21, 2011 - 3:35 PM Feb 21, 2011 - 3:35 PM
|
|
|
Enthusiast      Joined May 10, '10 From MA Currently Offline Reputation: 37 (100%) |
17mm wrench on the bottom of the fuel filter, and a high quality 14mm flare wrench, or crows foot, and PB blaster. oh **** really then how is it that I was able to fit a 19mm on the bottom. so it requires to different sizes ok I'll try that. 19mm > 17mm, that's whyy This post has been edited by mkernz22: Feb 21, 2011 - 3:35 PM |
 Feb 21, 2011 - 5:39 PM Feb 21, 2011 - 5:39 PM
|
|
|
Moderator      Joined Oct 1, '02 From fall river, ma Currently Offline Reputation: 13 (100%) |
17mm wrench on the bottom of the fuel filter, and a high quality 14mm flare wrench, or crows foot, and PB blaster. oh **** really then how is it that I was able to fit a 19mm on the bottom. so it requires to different sizes ok I'll try that. well, sorry, it very well could be a 19mm...im not perfect, never claimed to be, jerkoff. -------------------- Former Team 5SFTE pro member ;)
 13.6@108MPH, 5SFTE Powered |
 Feb 21, 2011 - 8:01 PM Feb 21, 2011 - 8:01 PM
|
|
|
Enthusiast      Joined Apr 24, '08 From Orange County, CA Currently Offline Reputation: 33 (100%) |
haha I just re read what I posted and it did sound as if I was being a dick about which I wasn't. And yea its a 19mm and a 14mm thanks Manny.
-------------------- Group buy to replicate Narrow E series transaxle parts
http://www.6gc.net/forums/index.php?showto...p;#entry1107514 |
 Feb 22, 2011 - 11:13 PM Feb 22, 2011 - 11:13 PM
|
|
 Enthusiast    Joined May 29, '09 From Lake Ariel, PA Currently Offline Reputation: 4 (100%) |
wow its alive haha, wtf so any write up i do is gonna take over a year to get any attention?
--------------------  Representing the Convertible Crew since 2008 |
 Feb 22, 2011 - 11:17 PM Feb 22, 2011 - 11:17 PM
|
|
|
Enthusiast      Joined Apr 24, '08 From Orange County, CA Currently Offline Reputation: 33 (100%) |
wow its alive haha, wtf so any write up i do is gonna take over a year to get any attention? haha ya I needed it badly. Just a question is this stickied, I think not! Rusty oh Rusty where are you -------------------- Group buy to replicate Narrow E series transaxle parts
http://www.6gc.net/forums/index.php?showto...p;#entry1107514 |
 Feb 22, 2011 - 11:39 PM Feb 22, 2011 - 11:39 PM
|
|
|
Enthusiast      Joined Feb 24, '07 From Oahu, Hawaii Currently Offline Reputation: 23 (100%) |
well i used 2 good open wrenches.........but i did punch i think it was the trans or the frame.
-------------------- I don't normally drive fast, but when I do its on a curvy section of this island
 |
 Jul 28, 2011 - 7:33 PM Jul 28, 2011 - 7:33 PM
|
|
|
Enthusiast      Joined Jan 20, '09 From Winnipeg Currently Offline Reputation: 5 (100%) |
DOn't mean to bring this up from the dead, but what is a flare nut wrench? And is it absolutely needed?
Also, sticky? -------------------- -Protection mode, For when your amp tries to blow its load. 1995 Toyota Celica GTS - Daily Driver 1999 Chevy Cavalier - Winter Beater 1994 Honda Civic CX Hatchback - Dead My Celica! |
 Jul 28, 2011 - 7:44 PM Jul 28, 2011 - 7:44 PM
|
|
|
Enthusiast      Joined Jan 17, '08 From JB MDL, NJ Currently Offline Reputation: 30 (100%) |
 aka Line Wrench...and yeah, if you dont want to strip out anything. This post has been edited by Spider77: Jul 28, 2011 - 7:45 PM |
 Jul 28, 2011 - 7:51 PM Jul 28, 2011 - 7:51 PM
|
|
|
Enthusiast      Joined Jan 20, '09 From Winnipeg Currently Offline Reputation: 5 (100%) |
Wouldn't an open ended wrench do the same thing?
I don't understand how that would prevent stripping a nut -------------------- -Protection mode, For when your amp tries to blow its load. 1995 Toyota Celica GTS - Daily Driver 1999 Chevy Cavalier - Winter Beater 1994 Honda Civic CX Hatchback - Dead My Celica! |
  |
1 User(s) are reading this topic (1 Guests and 0 Anonymous Users)
0 Members:
| Lo-Fi Version | Time is now: November 25th, 2024 - 6:47 PM |


