Installing a Rear Sway Bar
| Author: | purplegt4 |
| Approximate Time: | 1 Hour |
| Required Tools: | 14mm wrench Ratchet 12mm and 14mm sockets 5mm allen wrench |
 Installing an aftermarket rear sway bar can make a huge difference in handling ability. This article details exactly how to go about installing an aftermarket rear sway bar on your Celica.
The first step is to break loose your lugnuts, jack up the rear of your Celica and secure it with jackstands, and then remove the rear wheels. You'll be underneath the car, so make sure that the car is stable and well-supported by jackstands.
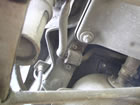
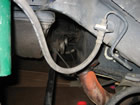
Now you need to remove the sway bar from the end link, which is the part connecting the sway bar to the strut assembly. You need to remove the lower end link bolt, not the upper one. First, spray the end link liberally with your choice of penetrating lubricant such as PB Blaster and let it sit and work its magic for a few minutes. You'll also need to clean out the allen head bolt with something like a wire brush so that the allen wrench can get into the bolt.
Then break loose the 14mm nut with a socket or a wrench. Loosen this nut until the inner allen head bolt moves with the nut. At this point, loosening the nut alone does nothing; The allen head bolt inside needs to be held stationary while the nut is spun. This is done by putting a 14mm wrench around the nut (use the enclosed side of the wrench, not the open end) and then inserting a 5mm allen wrench into the allen head bolt. Hold the bolt still with the allen wrench and then loosen the 14mm nut with the wrench and the nut should loosen up and come off, at which point the sway bar disconnects from the end link. Be gentle, as stripping the allen wrench bolts will require cutting off the old end links and buying new end links at around fifty dollars per side.
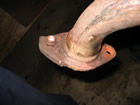
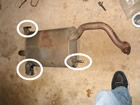
Once the sway bar is disconnected from the strut assembly, you've made it through the most problematic part of the installation. The next step is to remove or at least loosen your rear-most exhaust section. This will vary based on your exhaust system, but the hangers are easy to remove, and the bolts holding the exhaust piping together will most likely need some penetrating lubricant to loosen up. Some people remove the exhaust completely, while others remove two hangers and the piping flange and just rotate the exhaust out of the way.
Once the exhaust is out of the way, the fuel tank needs to be loosened up. Put a jack and wood block underneath the fuel tank, and then unbolt the two 14mm rear-most bolts to the fuel tank straps. Once this is done, drop the fuel tank about three inches or so with the jack.
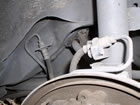
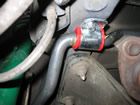
 Once the fuel tank is lowered, you need to remove the C-shaped brackets that hold the sway bar and bushings to the frame of the car. These are held in place by two 12mm bolts per side.
Once everything is disconnected and removed, the bar will wiggle free and come out. Once the stock bar is out, put your aftermarket sway bar in place. Lube up the bushings that came with your sway bar and attach the sway bar back to the frame of the car with the C-shaped brackets. Then attach the sway bar to the end links. The holes closer to the end of the bar can be used if you want more oversteer, but if you don't want as much oversteer, use the inside holes that are closer to the middle of the bar. Tighten the C-shaped brackets that hold the bushings in to 14 ft. lbs. (19 n.m) and the end link nuts to 47 ft. lbs. (64 n.m)
Once the sway bar is bolted in, the fuel tank and exhaust can be bolted back on. Double check that everything is tightened and back together, then put the wheels on, lower the car, and go enjoy your new sway bar!
More Photos


